

Wine racks America Waterfall Wine Cellar Kit Assembly Manual
Waterfall Wine Cellar Kit
Assembly GUIDE
Page 1
Questions?
888.373.6057
or visit
wineracksamerica.com
tools for assembly
Required
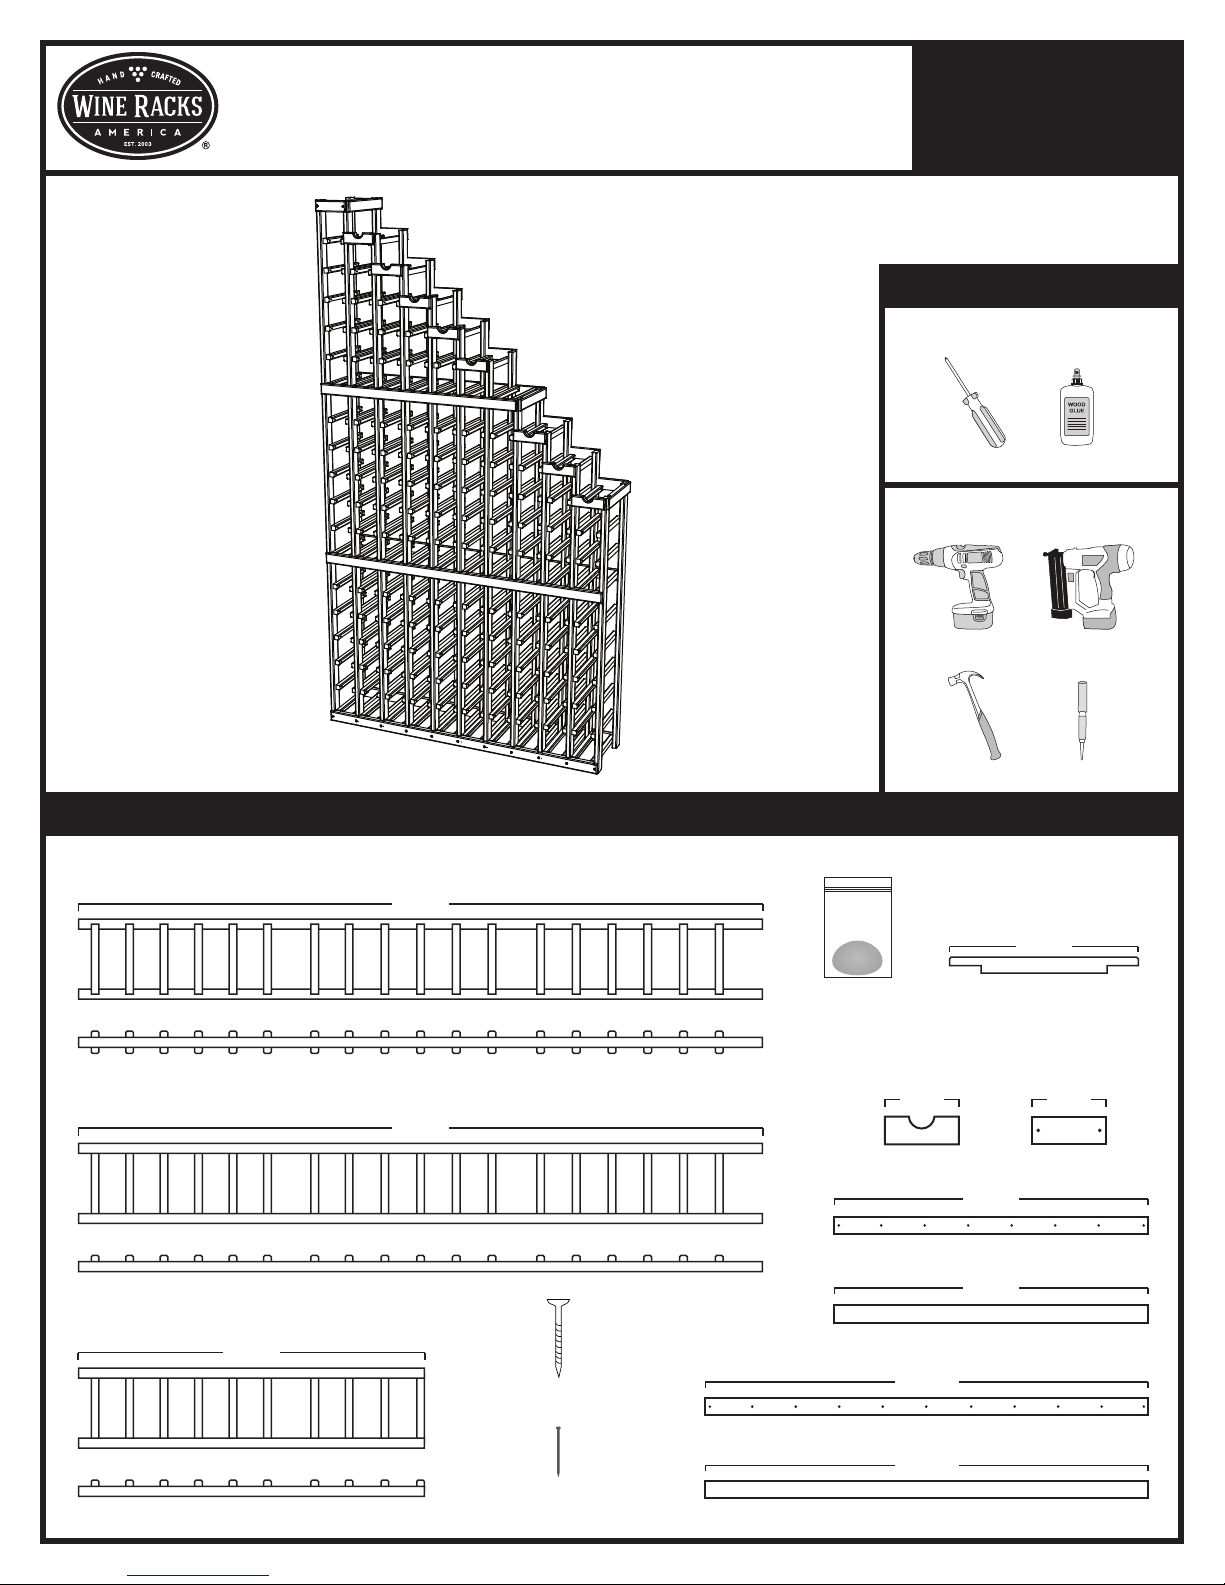
SINGLE DEEP PACKAGE CONTENTS
MIDDLE LADDER ASSEMBLIES (*VARIOUS LENGTHS) x 9
77 1/8"
SIDE VIEW
SMALL BAG OF
WOOD PUTTY
Screwdriver
Wood Glue
Suggested
Cordless Drill Finish Nailer
+
Hammer
HORIZONTAL TRIM PIECE x 3
Nail Setter
9 9/16"
LONG LADDER ASSEMBLY (END PIECE) x 1
77 1/8"
SIDE VIEW
SHORT LADDER ASSEMBLY (END PIECE) x 1
39 3/4"
SIDE VIEW
WOOD SCREWS
FINISH NAILS
1 COLUMN CONNECTOR
SCALLOPED x 8 STANDARD x 10
4 5/8" 4 5/8"
STANDARD 7 COLUMN CONNECTOR x 1
29 3/4"
SCREWLESS 7 COLUMN CONNECTOR x 1
29 3/4"
STANDARD 10 COLUMN CONNECTOR x 3
42 5/16"
SCREWLESS 10 COLUMN CONNECTOR x 1
42 5/16"
Waterfall Wine Cellar Kit
Assembly GUIDE
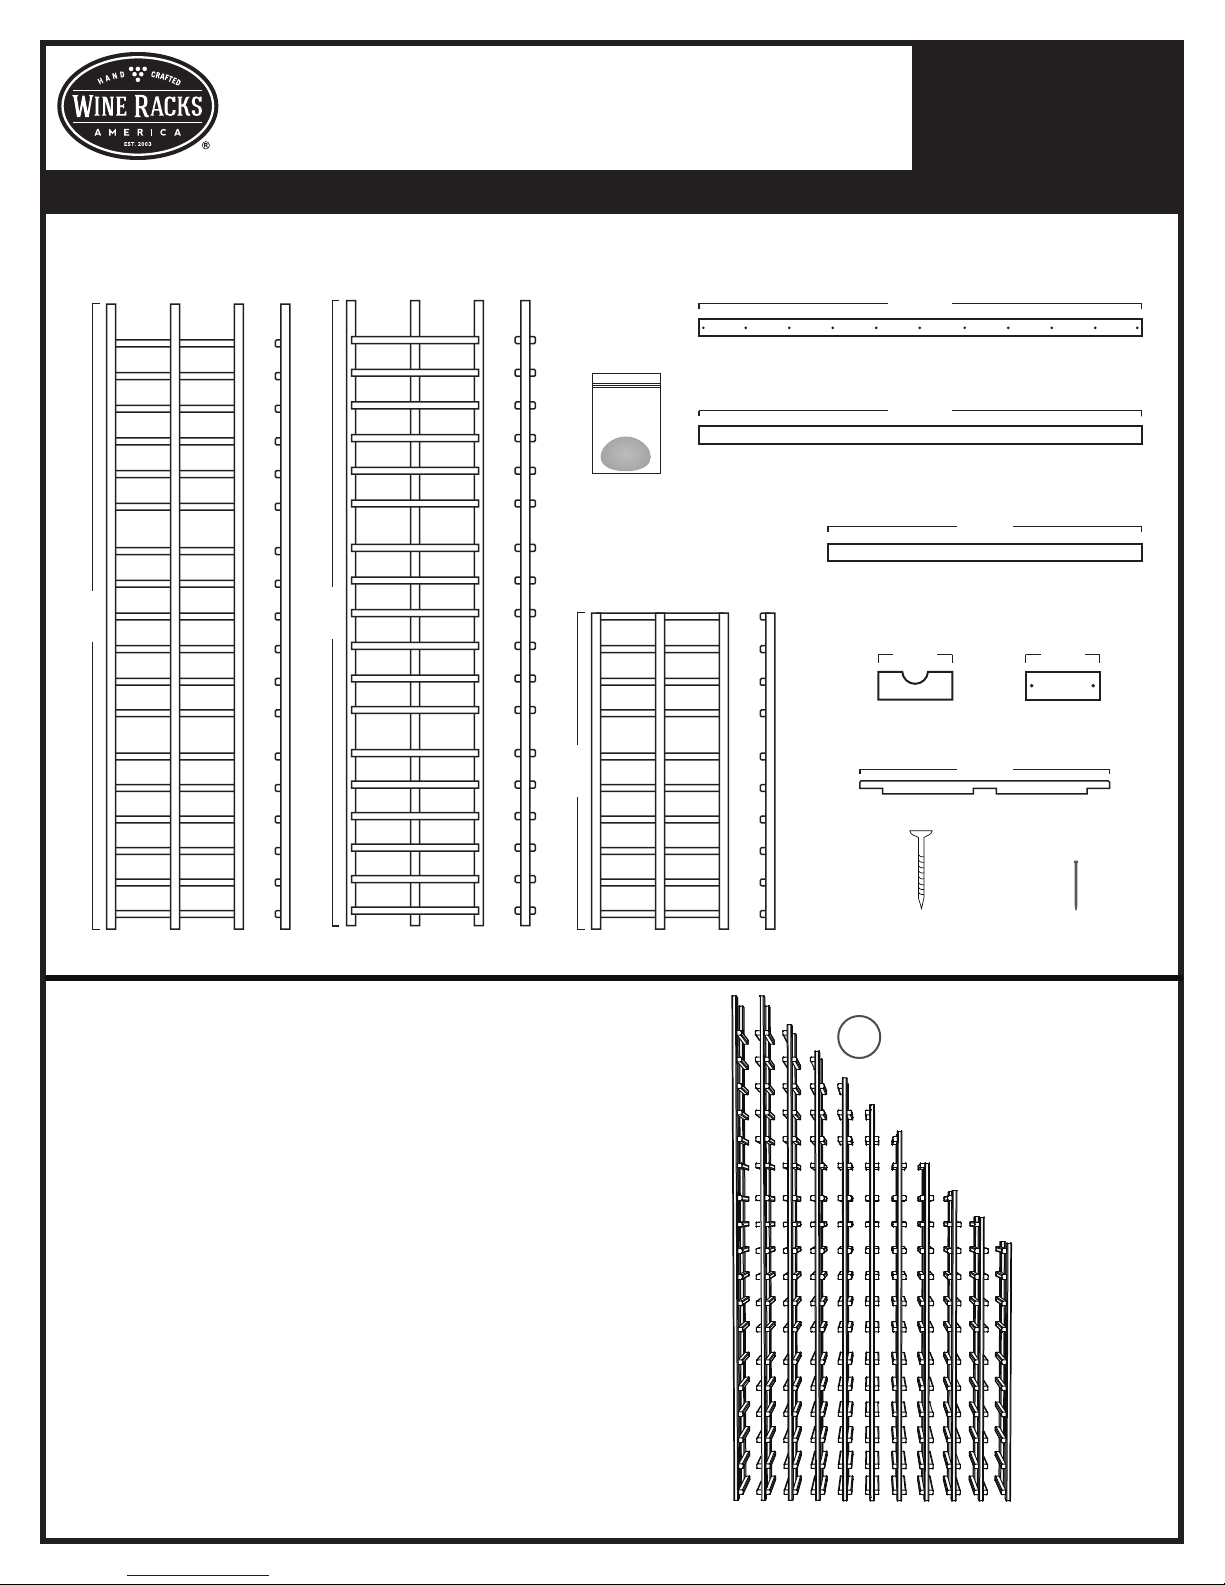
DOUBLE DEEP PACKAGE CONTENTS
Page 2
Questions?
888.373.6057
or visit
wineracksamerica.com
LONG LADDER ASSEMBLY
(END PIECE) x 1
77 1/8"
SIDE VIEW
MIDDLE LADDER ASSEMBLIES
(*VARIOUS LENGTHS) x 9
77 1/8"
SIDE VIEW
SMALL BAG OF
WOOD PUTTY
SHORT LADDER ASSEMBLY
(END PIECE) x 1
39 3/4"
SIDE VIEW
STANDARD 10 COLUMN CONNECTOR x 2
42 5/16"
SCREWLESS 10 COLUMN CONNECTOR x 2
42 5/16"
SCREWLESS 7 COLUMN CONNECTOR x 2
29 3/4"
1 COLUMN CONNECTOR
SCALLOPED x 16 STANDARD x 2
4 5/8" 4 5/8"
HORIZONTAL TRIM PIECE x 3
22 1/4"
1. Find an open, flat area in which to work. Carefully
remove all components from the box and remove
banding with a utility knife. Check the parts list to
verify package contents
2. Arrange the ladders on the floor to form the
"stair step" design pictured. This will be the
back of your rack.
The back of your rack will
depend on which direction you would like the
waterfall rack to descend. For example figure
1 shows the waterfall rack descending from
right to left.
Arrange the long end ladder so that the large
gap on the end of the ladder becomes the top
of the stair steps. This is the top of your rack.
* If you are assembling the Double Deep Waterfall
Rack please skip step 3 and use steps 4-6 for
assembling the front and back of your rack.
1 1/4" WOOD SCREWS FINISH NAILS
BEGIN WITH BACK
1
OF RACK
 Loading...