

Wine racks America Split wine cellar kits Assembly Manual

Split wine cellar kits
Assembly GUIDE
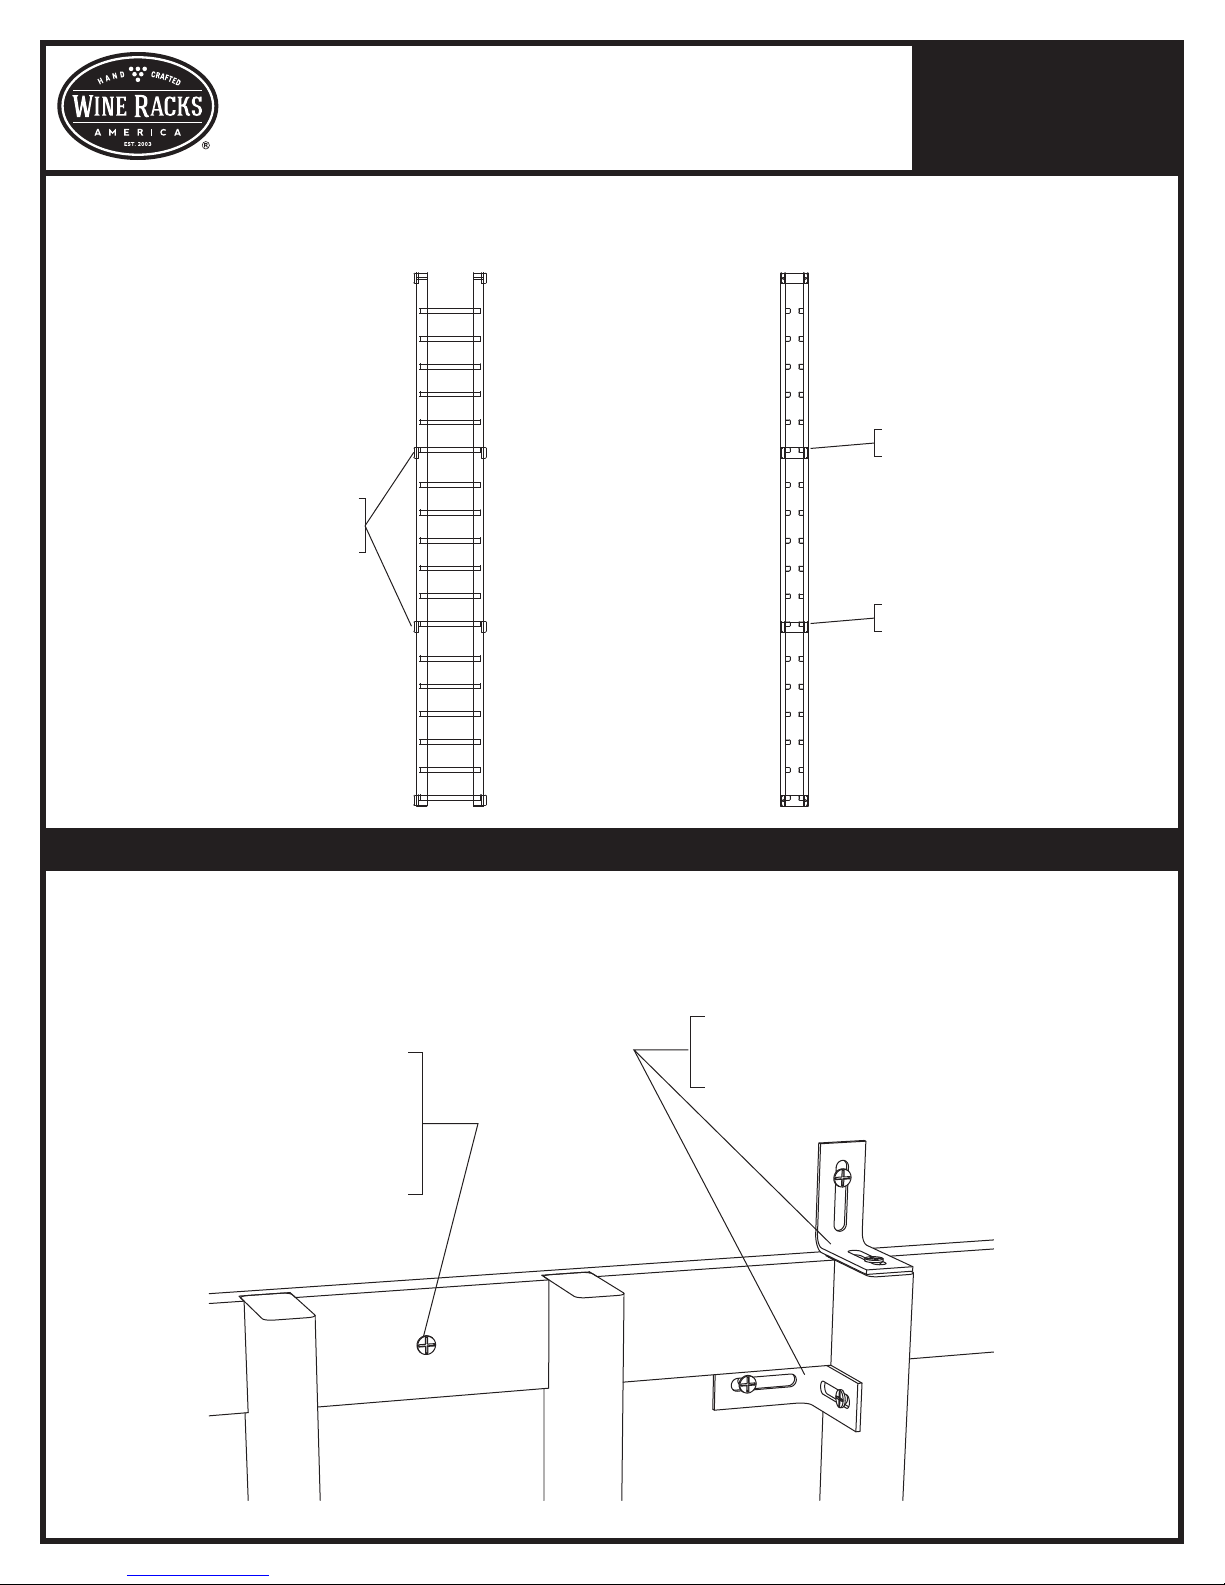
Standard Spacer Bar
888.373.6057
Page 1
End Ladder
Standard Spacer Bar
Align to the top of 13 bottle
support from the bottom
wineracksamerica.com
Questions?
or visit
Screwless Spacer Bar
Align to the top of 7 bottle
support from the bottom
Connector Alignment
Package Contents tools for assembly
*Please verify that you have the correct number of parts before proceeding.
Depending on the model you purchased, your bundle should contain the following:
Cordless Drill Utility Knife
END STANDARD SCREWLESS 1" FINISH
LADDERS SPACER BARS SPACER BARS SCREWS NAILS
2 6 2 12 4
Wood Glue
Finish Nailer
*Fill the nail holes using the wood putty provided. Simply push the putty into each hole using
your thumb and wipe excess putty off the surface using a damp cloth.
Hammer
Nail Setter
Questions?
Split wine cellar kits
Assembly GUIDE
Page 2
888.373.6057
or visit
wineracksamerica.com
* Minimize the risk of splitting your ladders by drilling a 1/16" pilot hole before driving the wood screws.
For best results, drive the screw most of the way in with your drill, then finish tightening by hand.
51 3/4" From
the bottom
The top of the spacer
bars align with the top
of the bottle supports
26 5/8" From
the bottom
ATTACHING YOUR RACK TO THE WALL
Depending on how many bottles you store, your wine cellar rack could weigh as much as 540 lbs.
To avoid tipping attach your racking to the wall using one of the following methods.
1. Use "L" brackets (located at any hardware store).
1. Put the rack in the desired location.
2. Shim the front of the rack so it is
parallel with the wall behind it.
3. Locate a wall stud behind the rack.
4. Drive a 2 1/2" wood screw through a
back spacer bar to attach to the stud.
2. Attach to both the rack and the wall in any out of
the way spot.
 Loading...