

Wine racks America Scalloped Wine Rack Assembly Manual
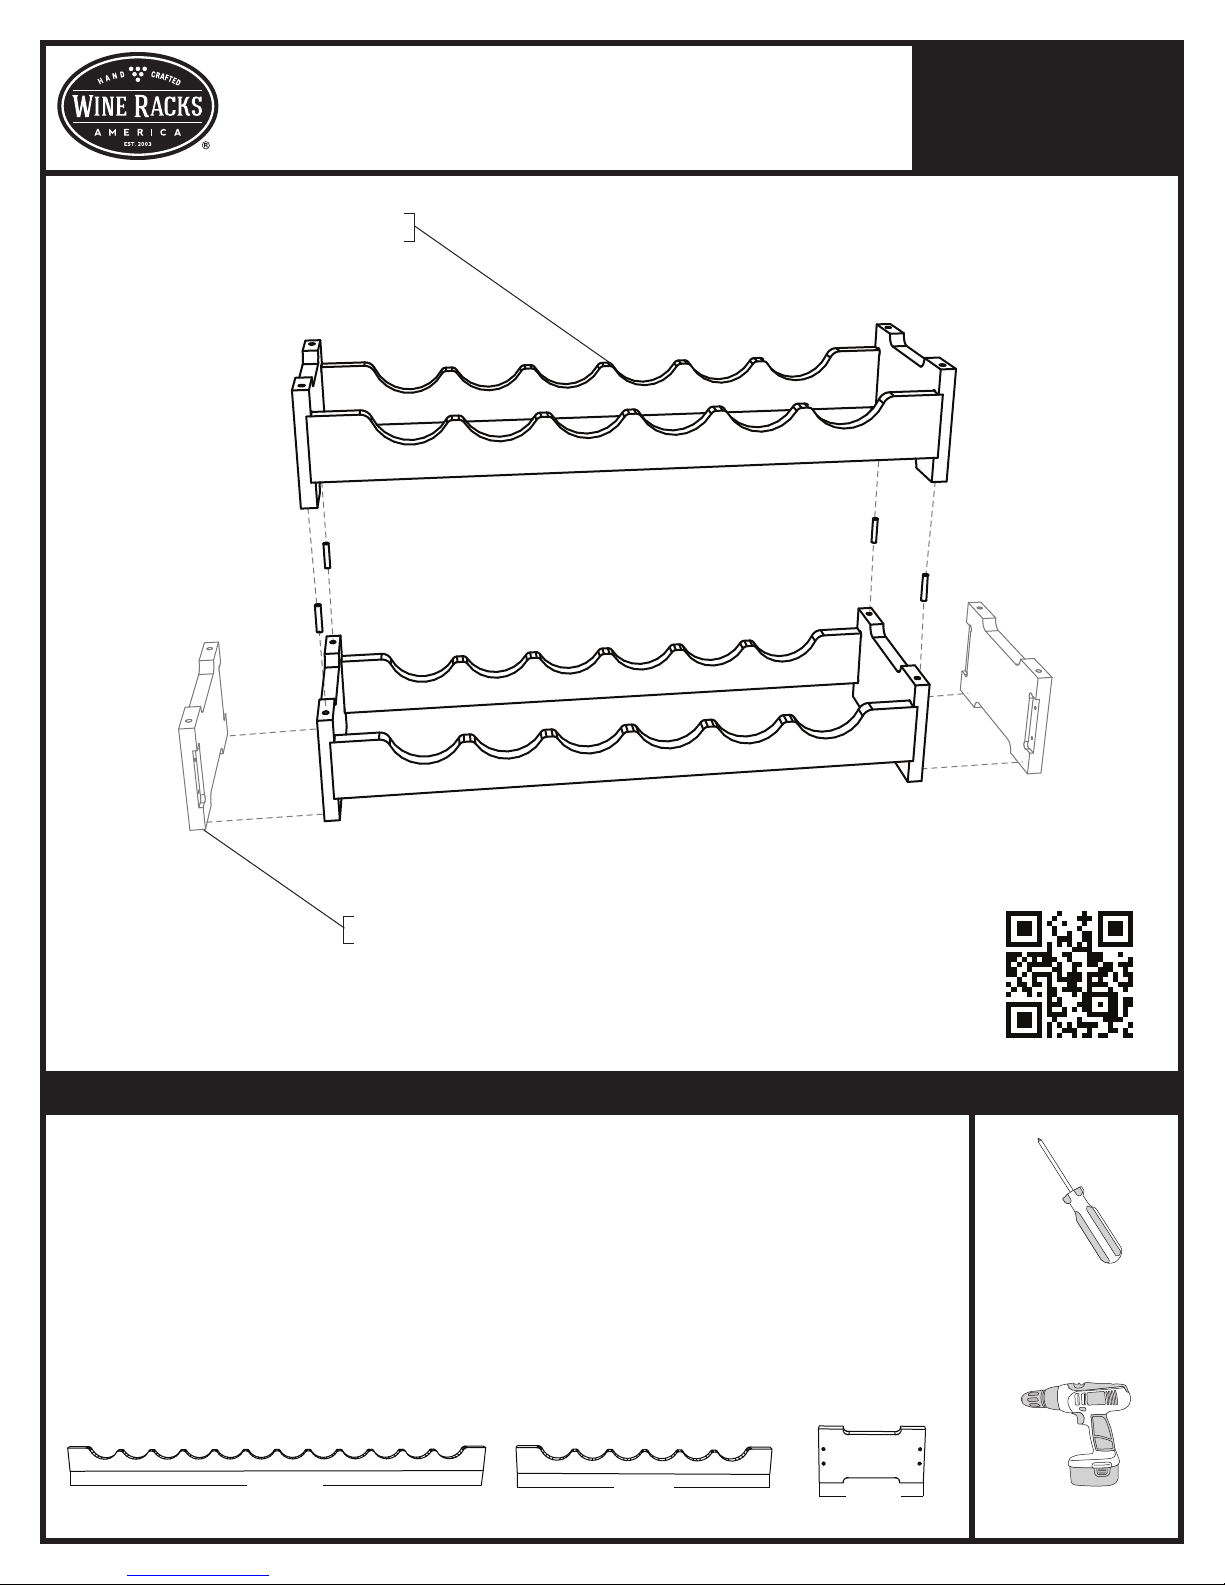
Scalloped Wine Rack
Assembly GUIDE
Scalloped Leg
Page 1
Questions?
888.373.6057
or visit
wineracksamerica.com
Foot Piece
Package Contents
*Please verify that you have the correct number of parts before proceeding.
Depending on the model you purchased, your bundle should contain the following:
RACK
1 row
2 rows
3 rows
4 rows
SCALLOPED
LEG
2
4
6
8
Scalloped Leg
FOOT
PIECE
2
4
6
8
WOOD
SCREWS
8
16
24
32
Mini Scalloped Leg
WOOD
DOWELS
4
4
8
12
Foot Piece
SCAN FOR
ASSEMBLY VIDEO
tools for assembly
Screwdriver
or
49 3/4"
27 1/4"
9 1/4"
Cordless Drill
Questions?
Scalloped Wine Rack
Assembly GUIDE
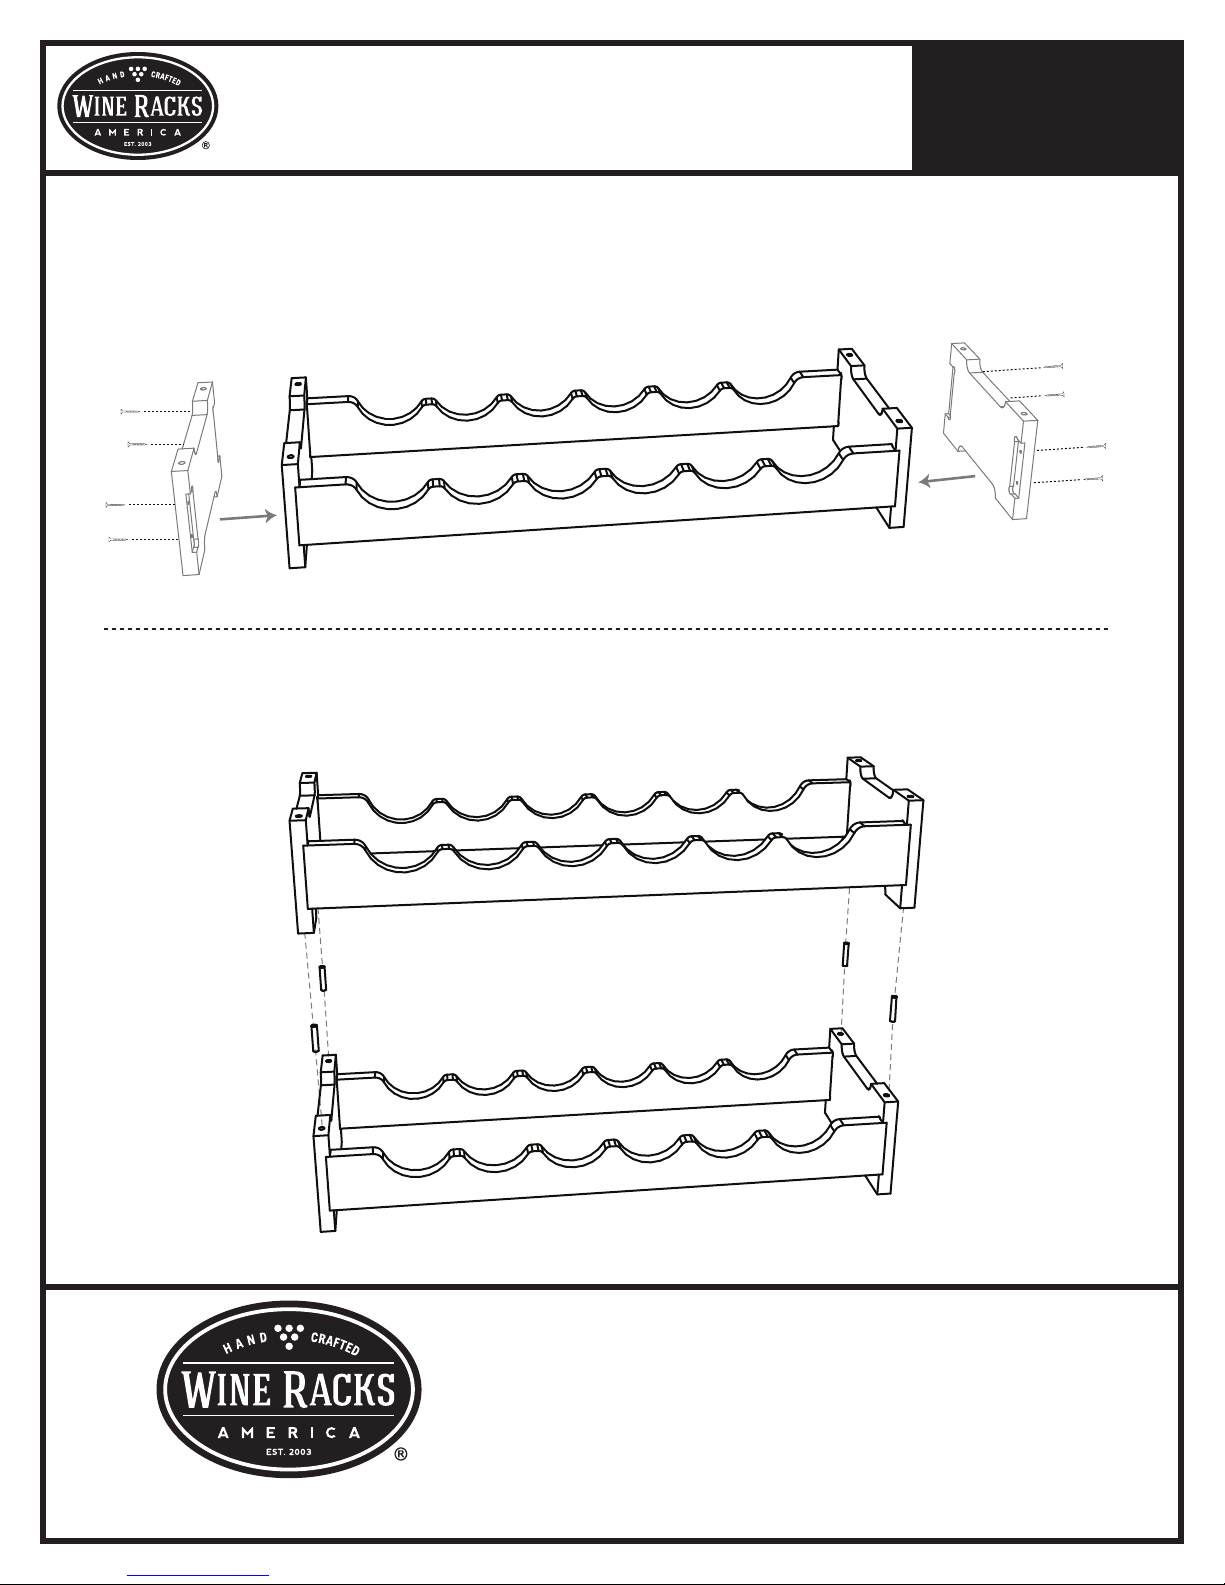
1. Find an open, flat area in which to work. Carefully remove all components from the box and remove banding
with a utility knife. Check the parts list to verify package contents.
Insert a scalloped leg into one of the notched slots on the foot piece. Use provided screws to attach each scalloped
2.
leg to a foot piece using the pre-drilled holes. Make sure the front of the scalloped leg is flush with the end of the
foot piece.
Page 2
888.373.6057
or visit
wineracksamerica.com
3. If you purchased more than one scalloped rack, attach each rack using the provided wood dowels. Simply push
the dowels into each notch on the top of your rack. Then, line up the holes on the upper rack and carefully
press into place. Repeat this step for all remaining scalloped shelves.
WINERACKSAMERICA.COM
Once again, thank you for your business. Remember, customer
service is available to answer any questions Monday-Friday
7:00 am - 5:00 pm MST. Please feel free to contact us for any
wine storage needs.
360 North 700 West Suite F • North Salt Lake, UT 84054
(toll free) 888-373-6057
(fax) 801-936-0534
 Loading...