

Wine racks America Magnum Aisle Rack Assembly Manual
Magnum Aisle Rack
Assembly GUIDE
Screwless Connector
Standard Connector
Standard Base
Connector
End Ladder (right)
Middle Ladder
Page 1
Questions?
888.373.6057
or visit
wineracksamerica.com
End Ladder (left)
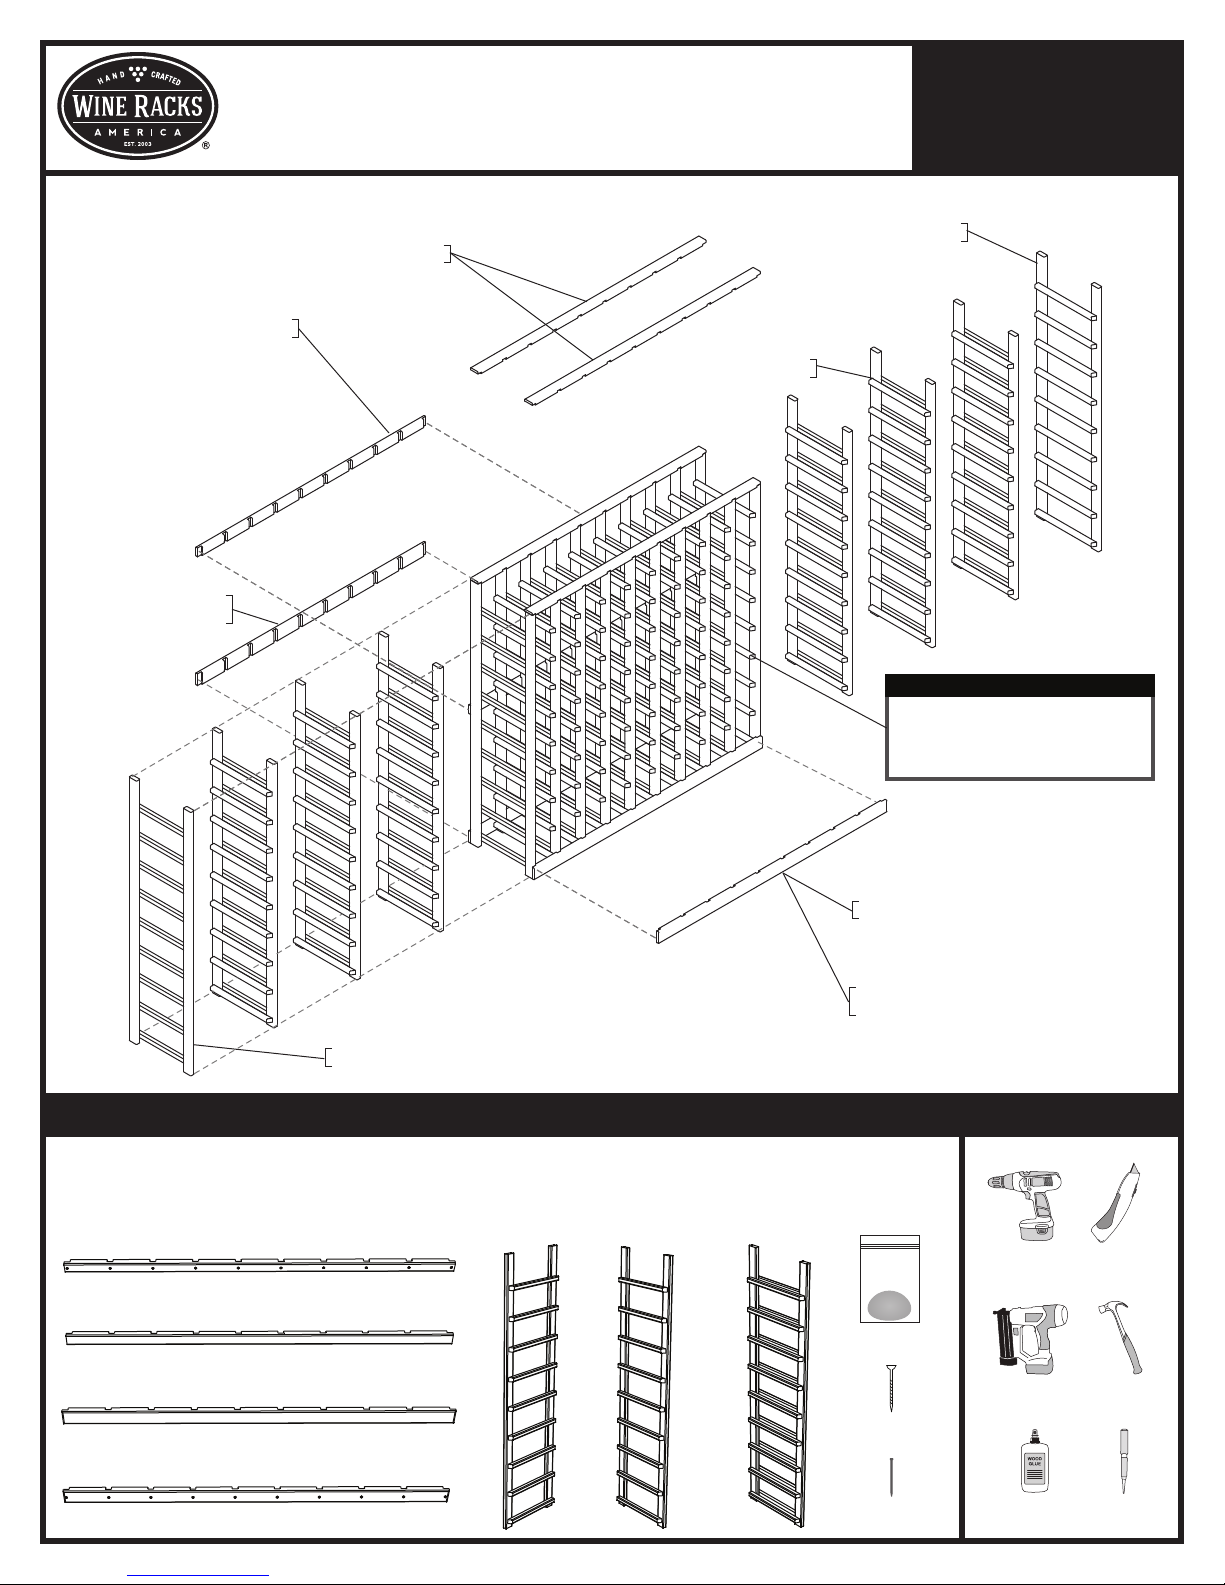
Package Contents tools for assembly
*Please verify that you have the correct number of parts before proceeding.
Depending on the model you purchased, your bundle should contain the following:
STANDARD CONNECTOR (X1)
END LADDER
LEFT (X1)
END LADDER
RIGHT (X1)
MIDDLE LADDER
IMPORTANT!
Make sure the slanted
bottle supports are
facing the front of the rack
Screwless Base Connector
Base Connectors are
2” in height.
(X8)
Cordless Drill Utility Knife
SCREWLESS CONNECTOR (X2)
SCREWLESS BASE CONNECTOR (X1)
STANDARD BASE CONNECTOR (X1)
WOOD PUTTY
WOOD SCREWS
FINISH NAILS
Finish Nailer
Wood Glue
Hammer
Nail Setter
Questions?
Magnum Aisle Rack
Assembly GUIDE
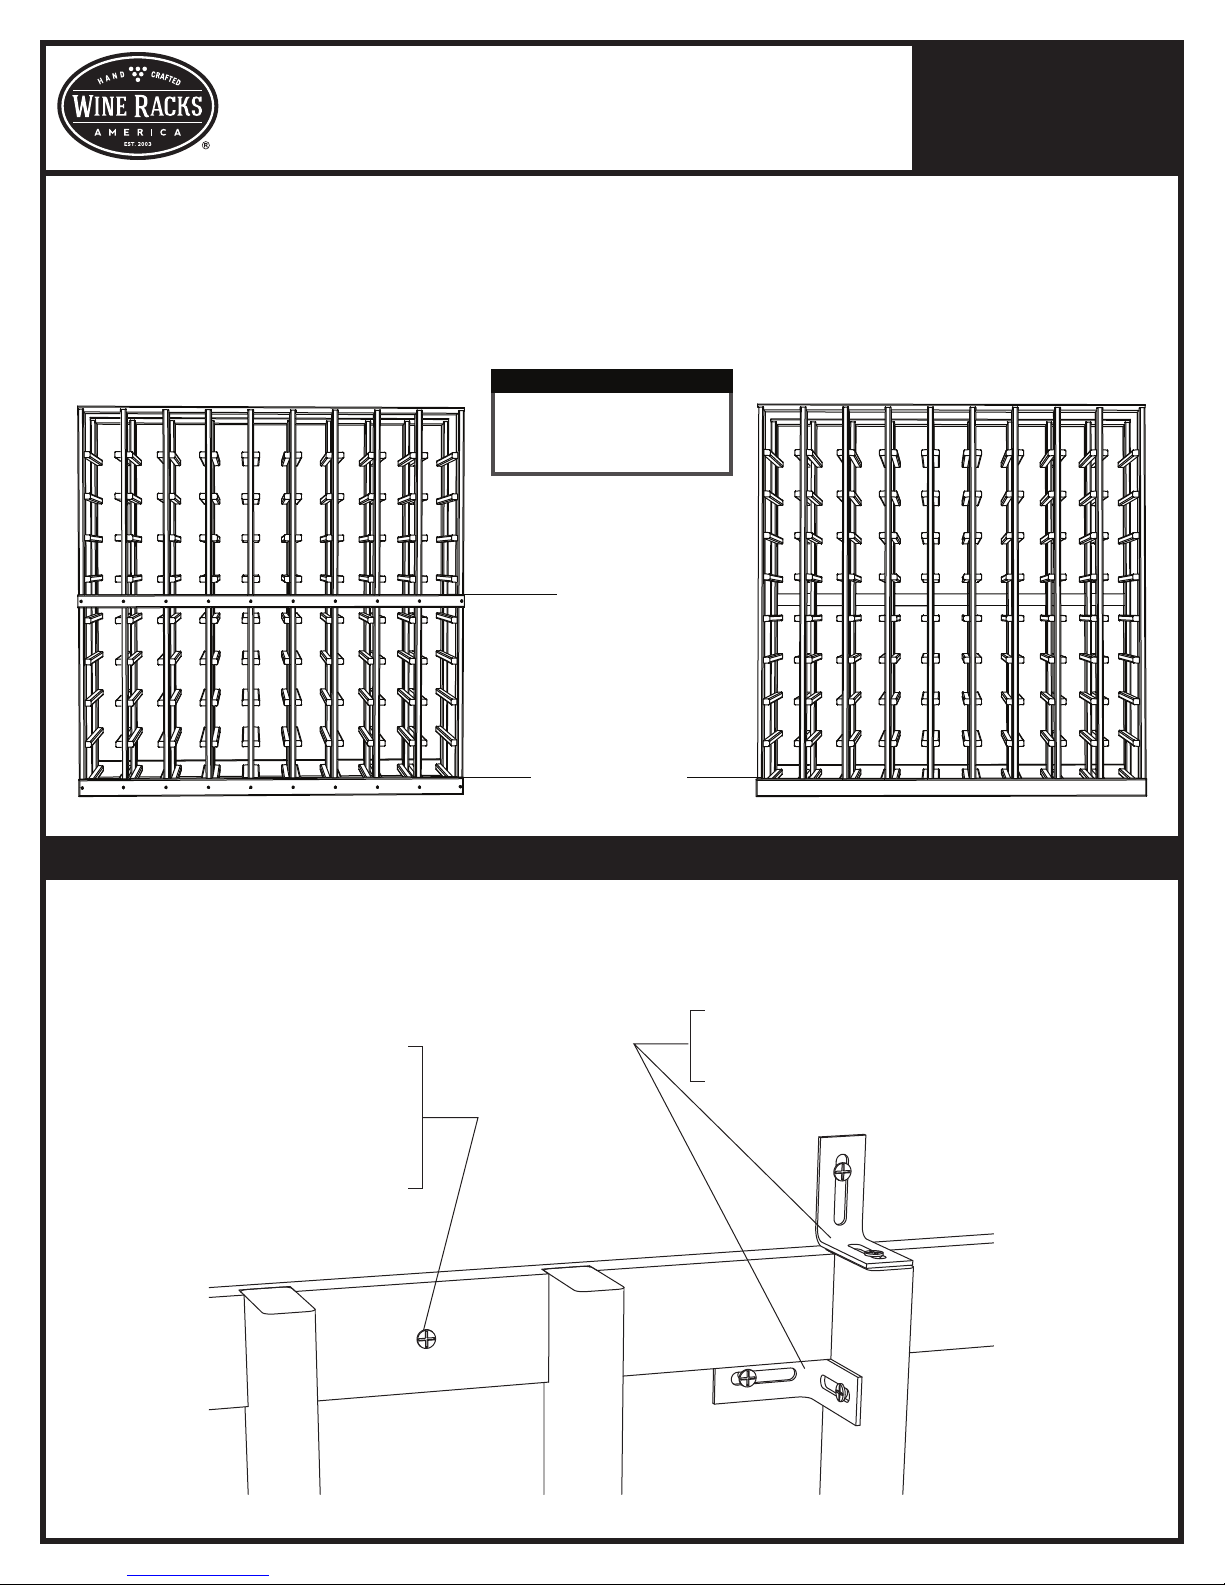
Step 1: Place parts on a flat surface. Make sure the slanted bottle supports are all facing towards the front of the rack.
Begin by attaching the back connectors to the ladders with a cordless drill.
Step 2: Flip rack over. Use brad nailer or provided finish nails to attach front and top connectors to the ladders.
Use wood glue for added support.
Page 2
888.373.6057
or visit
wineracksamerica.com
BACK
IMPORTANT!
Measurements are from
the bottom of the rack to
the top of the connector
23 9/16"
Base connectors
are 2" tall
ATTACHING YOUR RACK TO THE WALL
ATTACHING YOUR RACK TO THE WALL
FRONT
Depending on how many bottles you store, your wine cellar rack could weigh as much as 540 lbs.
To avoid tipping attach your racking to the wall using one of the following methods.
1. Put the rack in the desired location.
2. Shim the front of the rack so it is
parallel with the wall behind it.
3. Locate a wall stud behind the rack.
4. Drive a 2 1/2" wood screw through a
back spacer bar to attach to the stud.
1. Use "L" brackets (located at any hardware store).
2. Attach to both the rack and the wall in any out of
the way spot.
 Loading...