

Wine racks America Base Horizontal Display Assembly Manual
Base Horizontal Display
Assembly GUIDE
Page 1
Questions?
888.373.6057
or visit
wineracksamerica.com
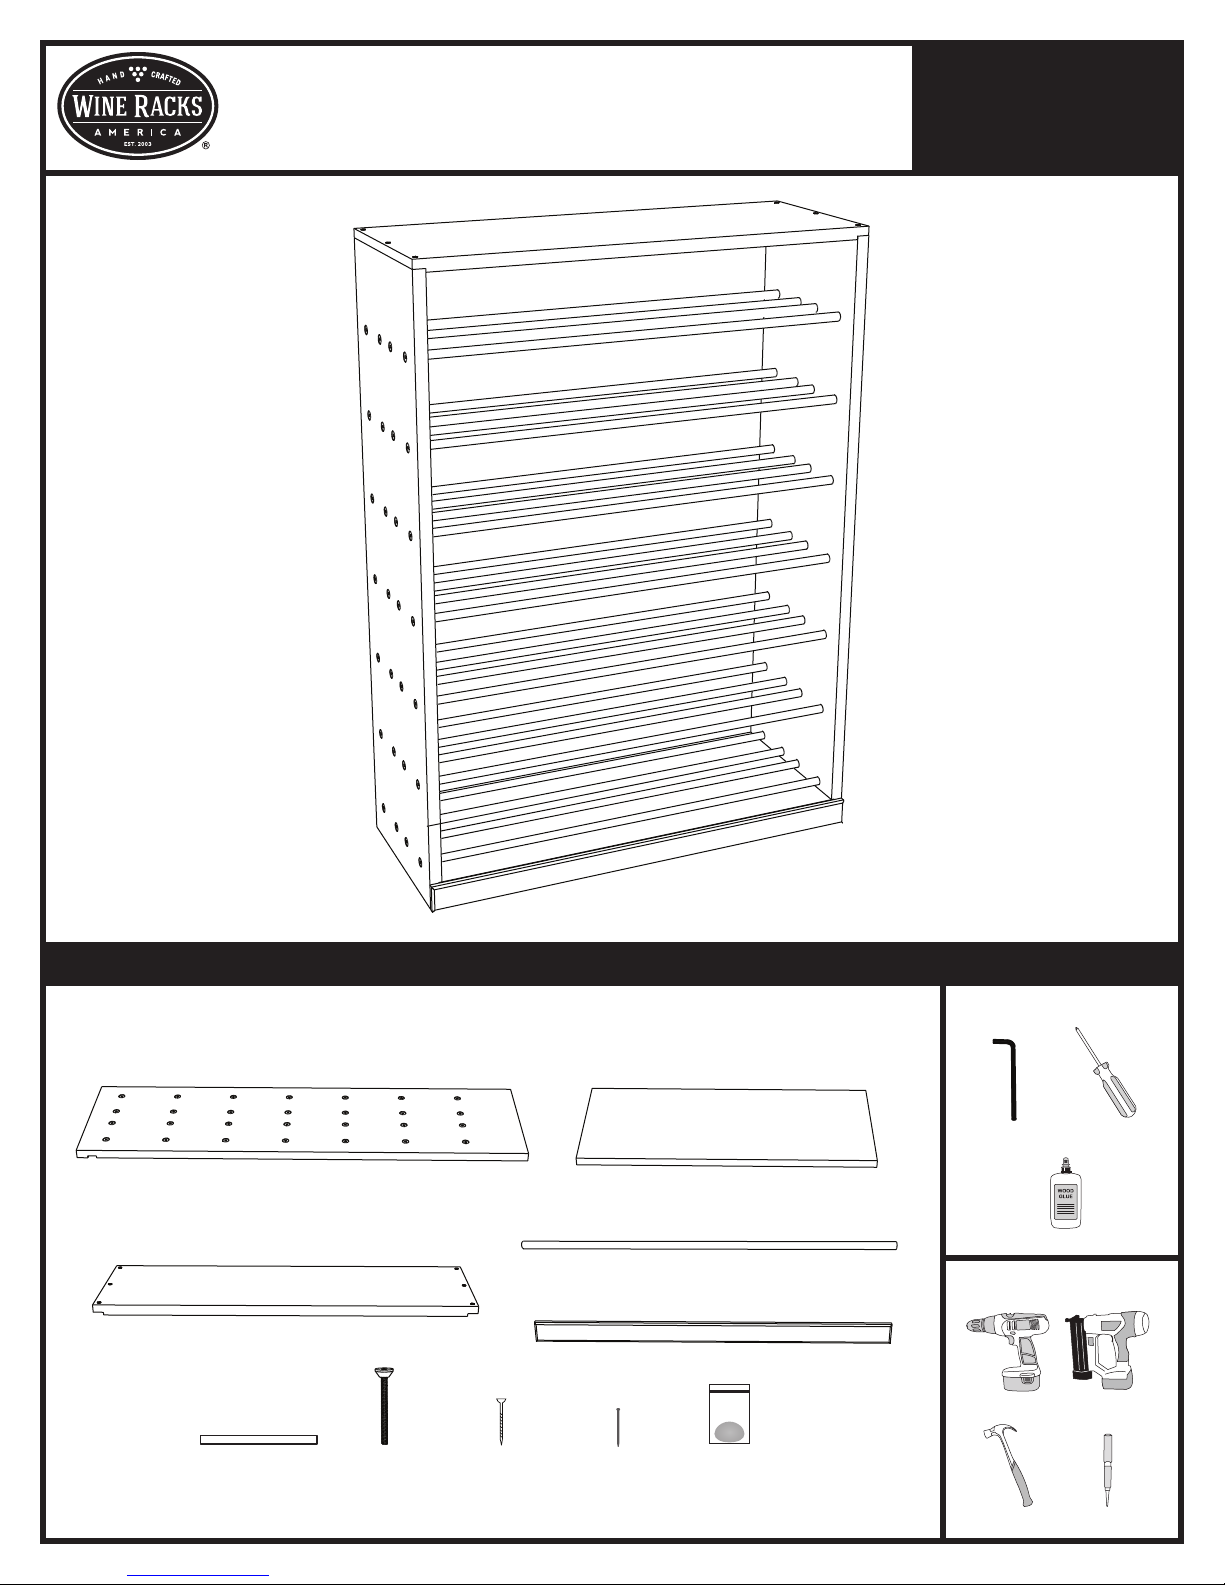
Package Contents tools for assembly
*Please verify that you have the correct number of parts before proceeding.
Depending on the model you purchased, your bundle should contain the following:
SIDE PANEL (x2)
TOP PANEL (x1)
WOOD SHIM
*Follow the same assembly procedure for all Base Label Out Display models
RAIL SCREWS
WOOD SCREWS FINISH NAILS
BOTTOM PANEL (x1)
METAL RODS (x28)
TRIM PIECE (x1)
WOOD PUTTY
Required
Wood Glue
Suggested
Cordless Drill
Hammer
ScrewdriverAllen Wrench
Finish Nailer
Nail Setter
Questions?
Base Horizontal Display
Assembly GUIDE
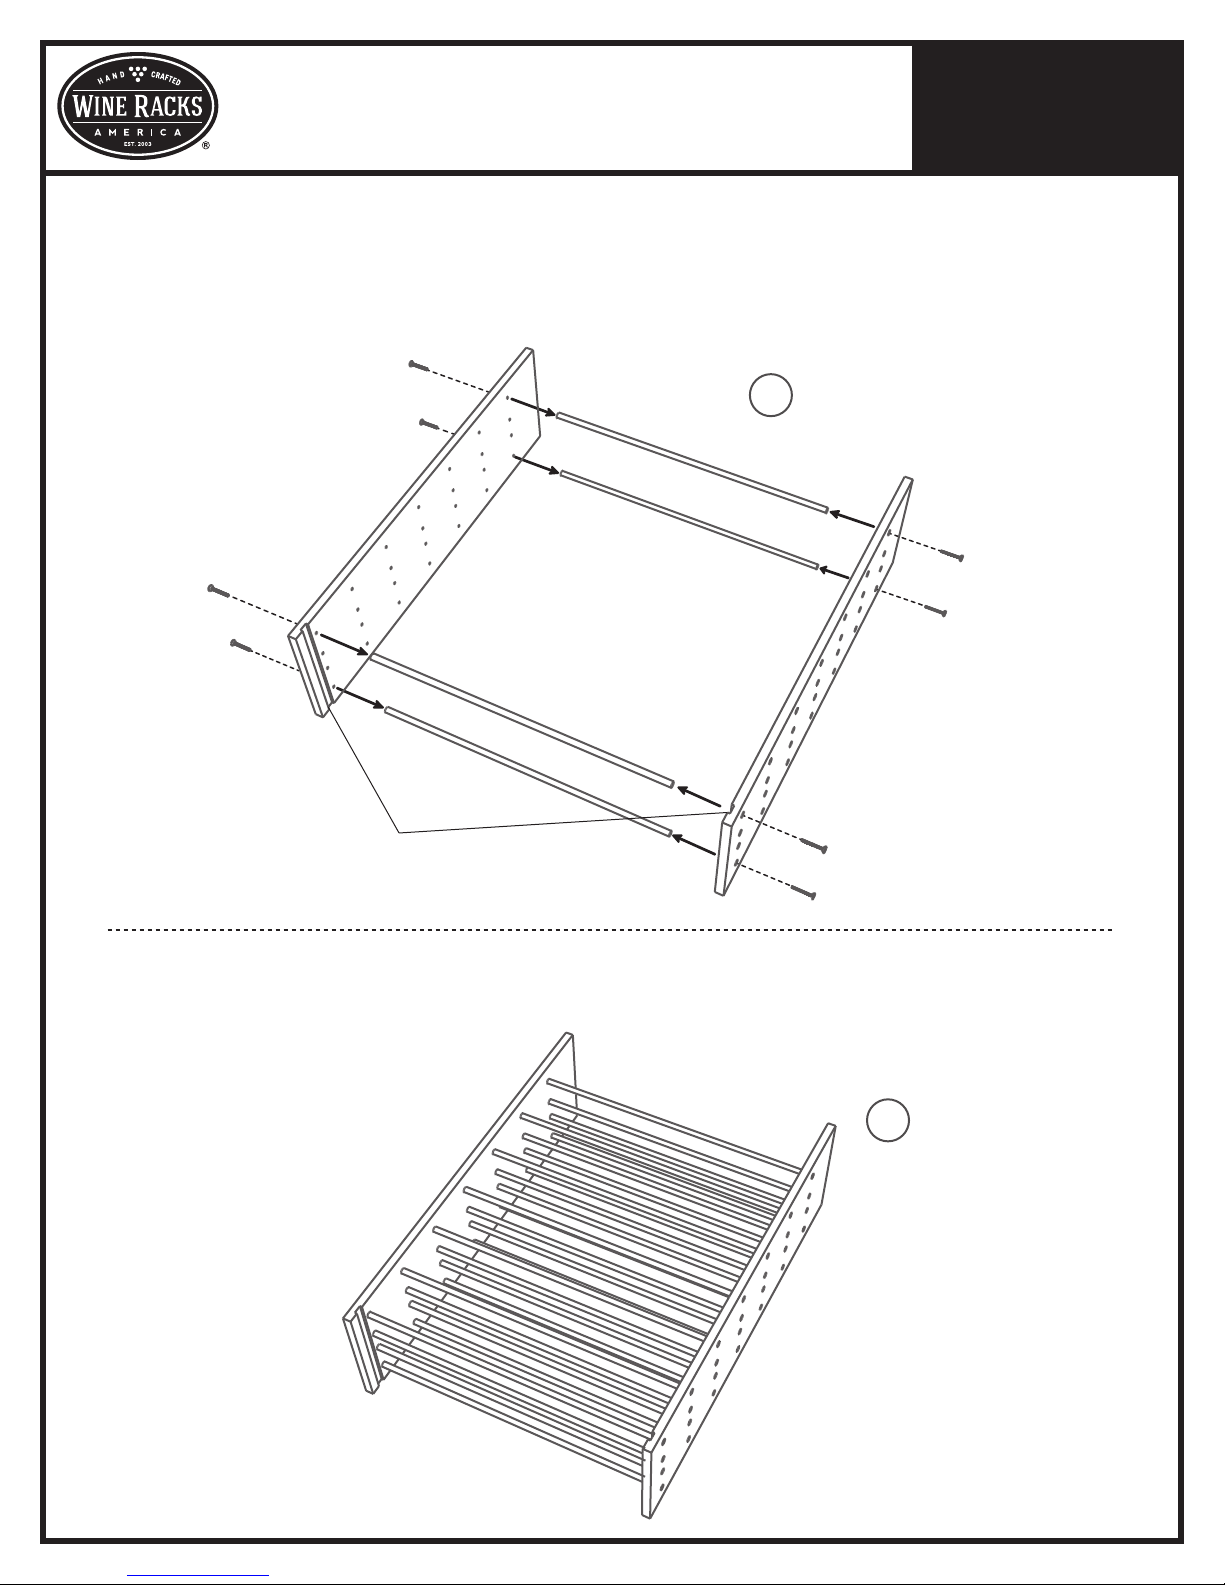
1. Find an open, flat area in which to work. Carefully remove all components from the box and remove any packaging
materials. Check the parts list to verify package contents.
2.
Begin by attaching 4 metal rods into the pre-drilled holes on the four corners of each side piece. Using an allen wrench
or drill, carefully attach each metal screw to the 4 metal rods. Do not tighten until ALL metail rods have been
attached. Be sure that the notches on the side panels are both facing inwards and at the bottom. (figure 1)
1
Page 2
START WITH
4 CORNERS
888.373.6057
or visit
wineracksamerica.com
Notches
3. Attach the remaining metal rods to the side panels using the provided metal screws. (figure 2)
Do not tighten screws until ALL rods have been attached. After are attached, carefully tighten each metal screw
all the way. *Do not overtighten.
ATTACH REMAINING
2
METAL RODS
 Loading...