


Wine Guardian
®
Through-the-Wall Cooling System
“Quick Start” Installation Guide
This document is a pictorial guide on installing the Wine Guardian Through-the-Wall cooling system. It is not
intended to replace the detailed instructions found in the Installation, Operation and Maintenance manual,
which includes important safety messages all Wine Guardian installers and owners should carefully follow for
safe and optimal performance of the system
Refer to the Installation, Operation and Maintenance manual for instructions related to duct collars and duct
collar kits, optional remote interface control and remote sensors.
For more information about your Wine Guardian
Through the Wall cooling system, visit
www.wineguardian.com/distributors
or call +1 315 452 7400.
Wine Guardian Through-the-Wall System (U.S. Pat. No. D634,760S)
Manufacturer reserves the right to make changes to this document
without prior notice at its sole discretion.
Wine Guardian is a registered trademark of Air Innovations.
Rev. 02-13
1. Prepare the wall
A. Find wall stud locations on
desired wall and mark
edges of the studs.
B. Locate unit height where
controls can be reached.
2. Mark desired location
A. Mark hole locations for
the installation sleeve.
Both sides of the wall
should be marked for a hole
14½”W x 16¼”H.
(36.8 by 41.3cm)
5. Fasten sleeve to wall
A. Insert wood screw into lower pre-drilled
hole either side of sleeve. Tighten until
snug.
B. Insert screw into upper pre-drilled hole on
side of sleeve, continue to middle set of
holes. Tighten until snug.
C. Repeat process with all screws until snug
and heads are flush with the inside of the
sleeve.
6. Slide unit through installation
sleeve
A. Slide the cooling system
through the installation sleeve.
Insert the end of the unit that does not
have the power cord attached to it into
the sleeve. Then slide the unit into the
sleeve until desired depth. Make sure
9. Turn unit on
A. At the system’s control panel
press the ON/OFF button to
turn the system ON. Factory
preset temperature is set to 55ºF
(13°C). The display will flash be tween AUTO MODE and TIME
DELAY TEMP/HUMIDITY read ing and HI TEMP. until a 5-minute
delay has been achieved. After the
time delay the system will turn on
and start to deliver cool air. The dis play will continue to flash AUTO
MODE and HI TEMP. FAULT until
the temperature in the wine room
drops below the high temperature
alarm setpoint of 65°F (18°C). Once
the temperature drops below 65°F
(18°C) the display will indicate
AUTO MODE and the actual
temperature and humidity.
power cord is kept clear of the sleeve.
3. Cut hole in wall
A. Cut hole 14½”W x
16¼”H (inside of stud
to inside of stud).
(36.8 by 41.3cm)
7. Seal the joints
A. Seal joint between cooling
system and installation sleeve with
latex-type sealant. To create
an airtight installation and pre vent horizontal movement of
the system.
B. Install self-adhesive insulation
strips to the flange area of the
installation sleeve to create
an adequate thermal block.
4. Insert installation sleeve
A. Slide the installation sleeve
into opening so that flange
area is flush with finished
surface of wall.
8. Plug in unit
A. Plug unit into dedicated power
outlet.
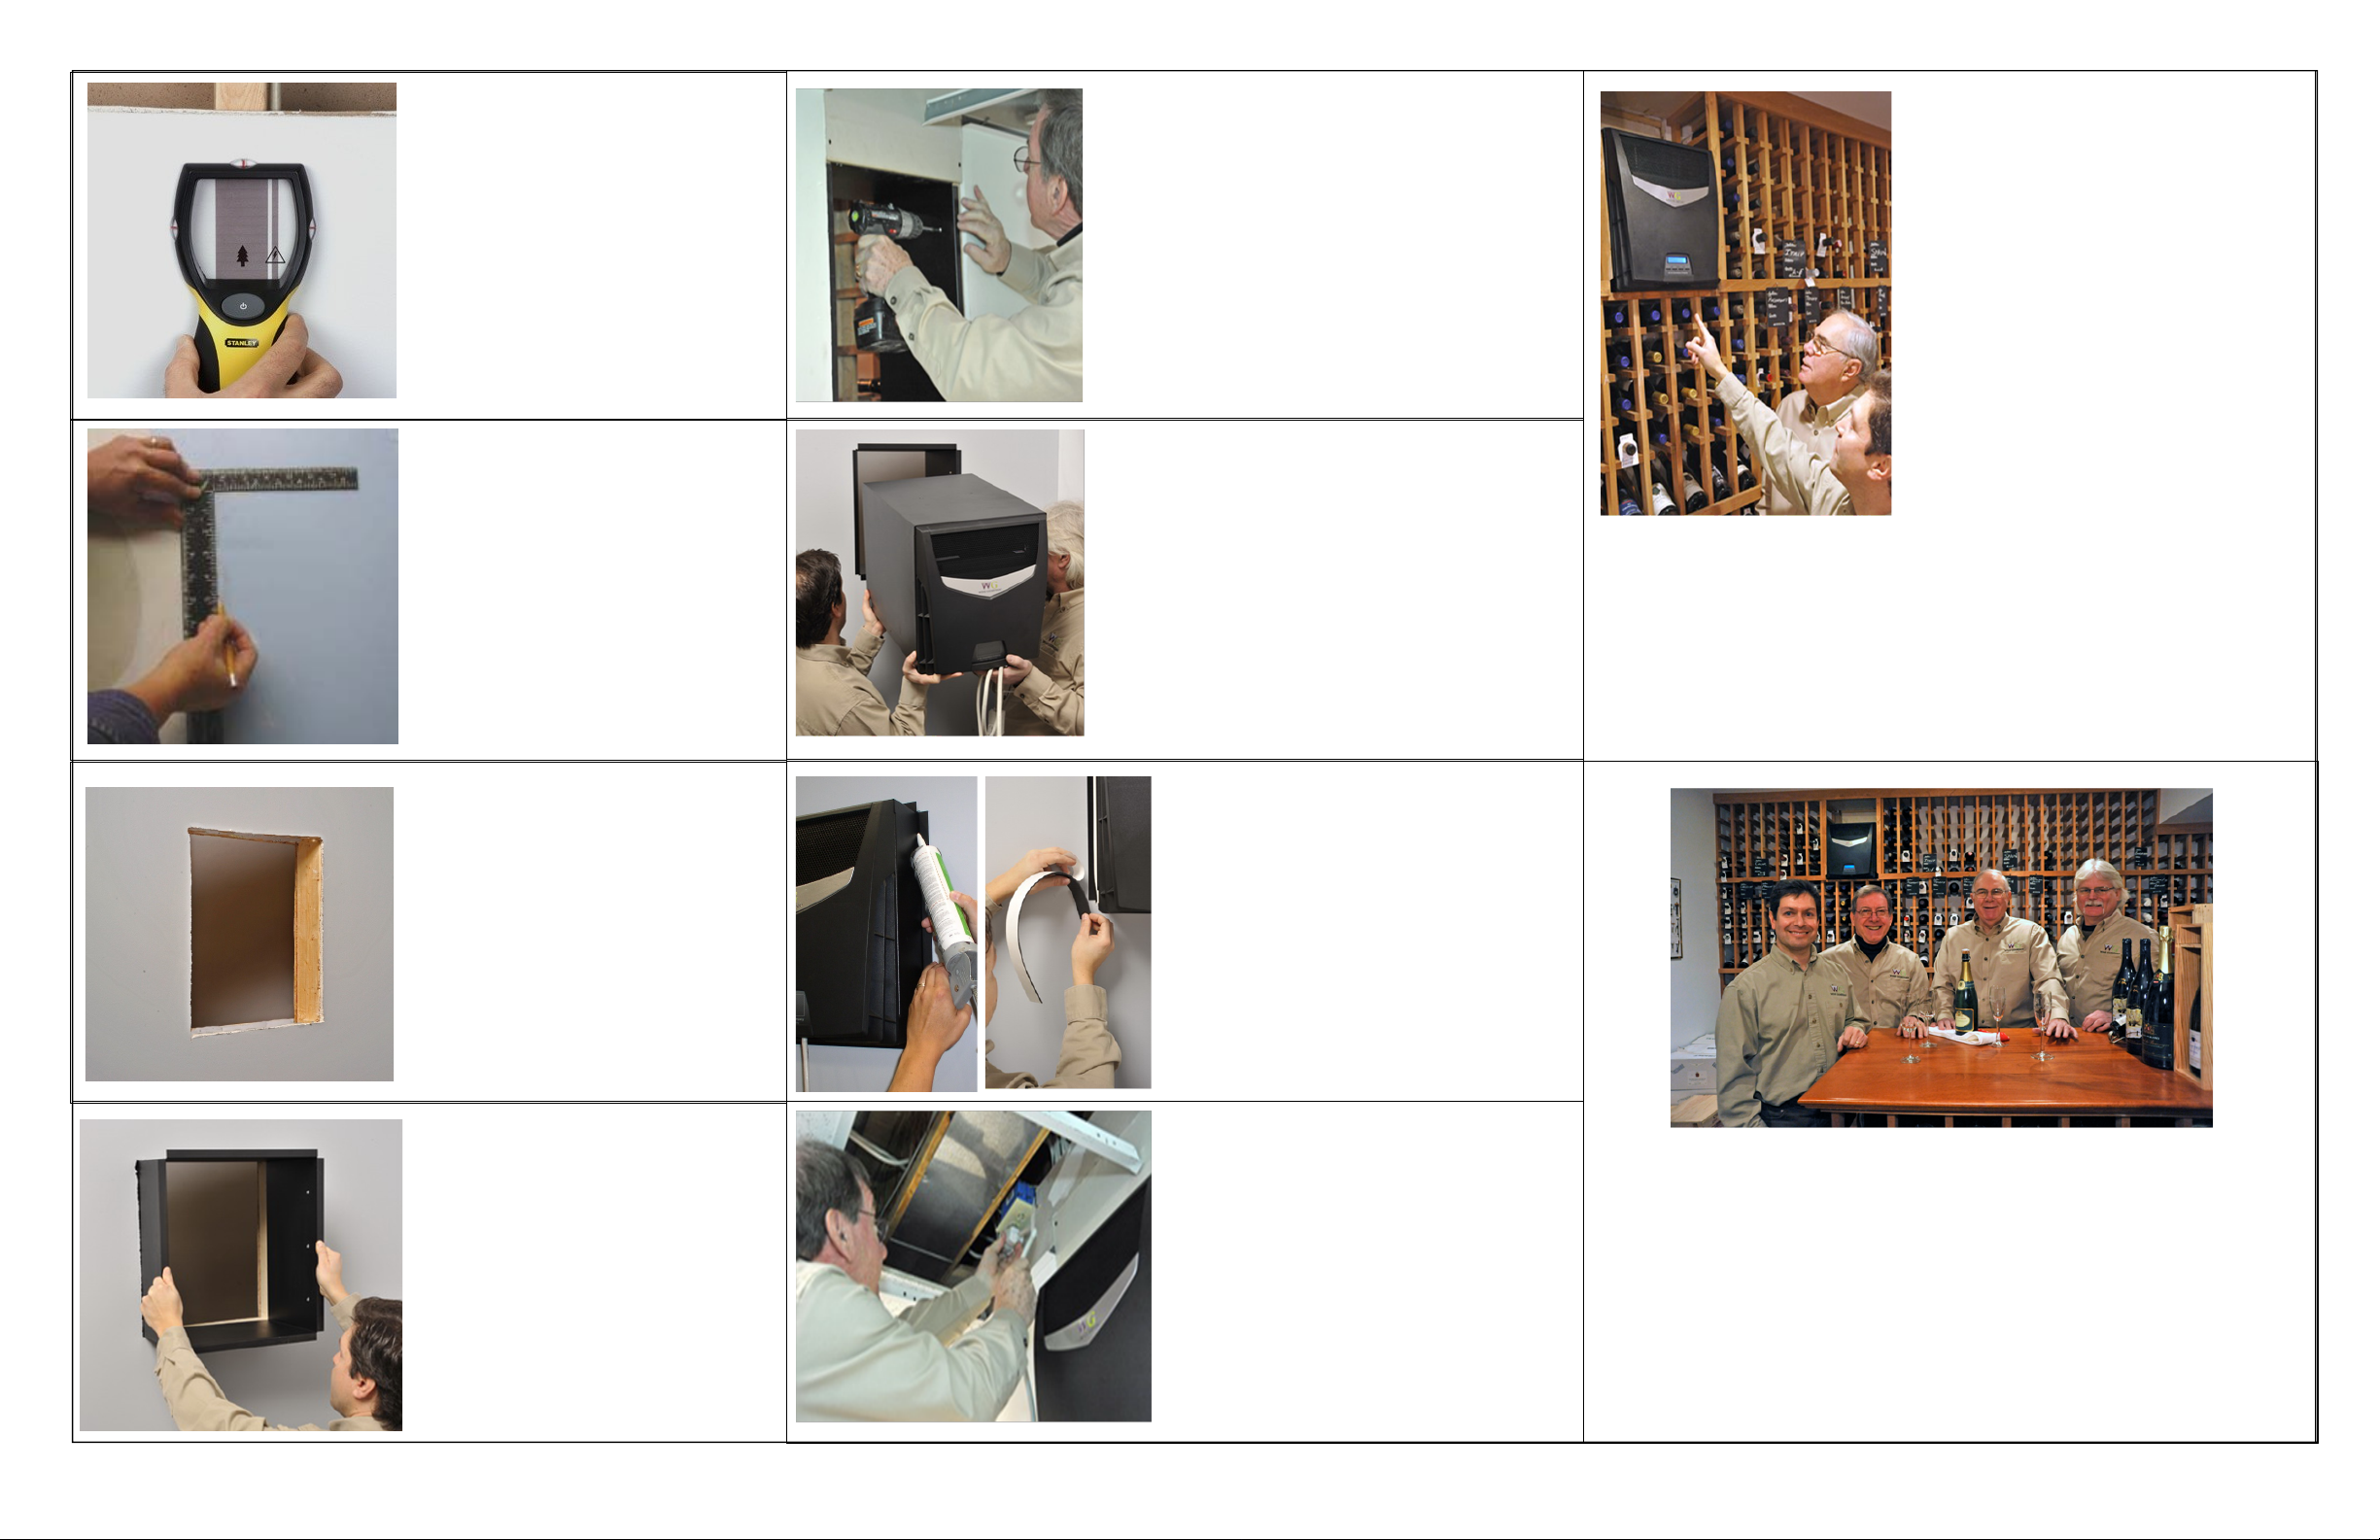
Cheers!
Enjoy your newly installed
Wine Guardian Through-the-Wall system.
B. Ensure installation
sleeve is level and square.
Shim bottom and sides as
needed.
 Loading...