

Fig. A Fig. B.
Fig. C. Fig. D.
Fig. E. Fig. F.
Fig. G
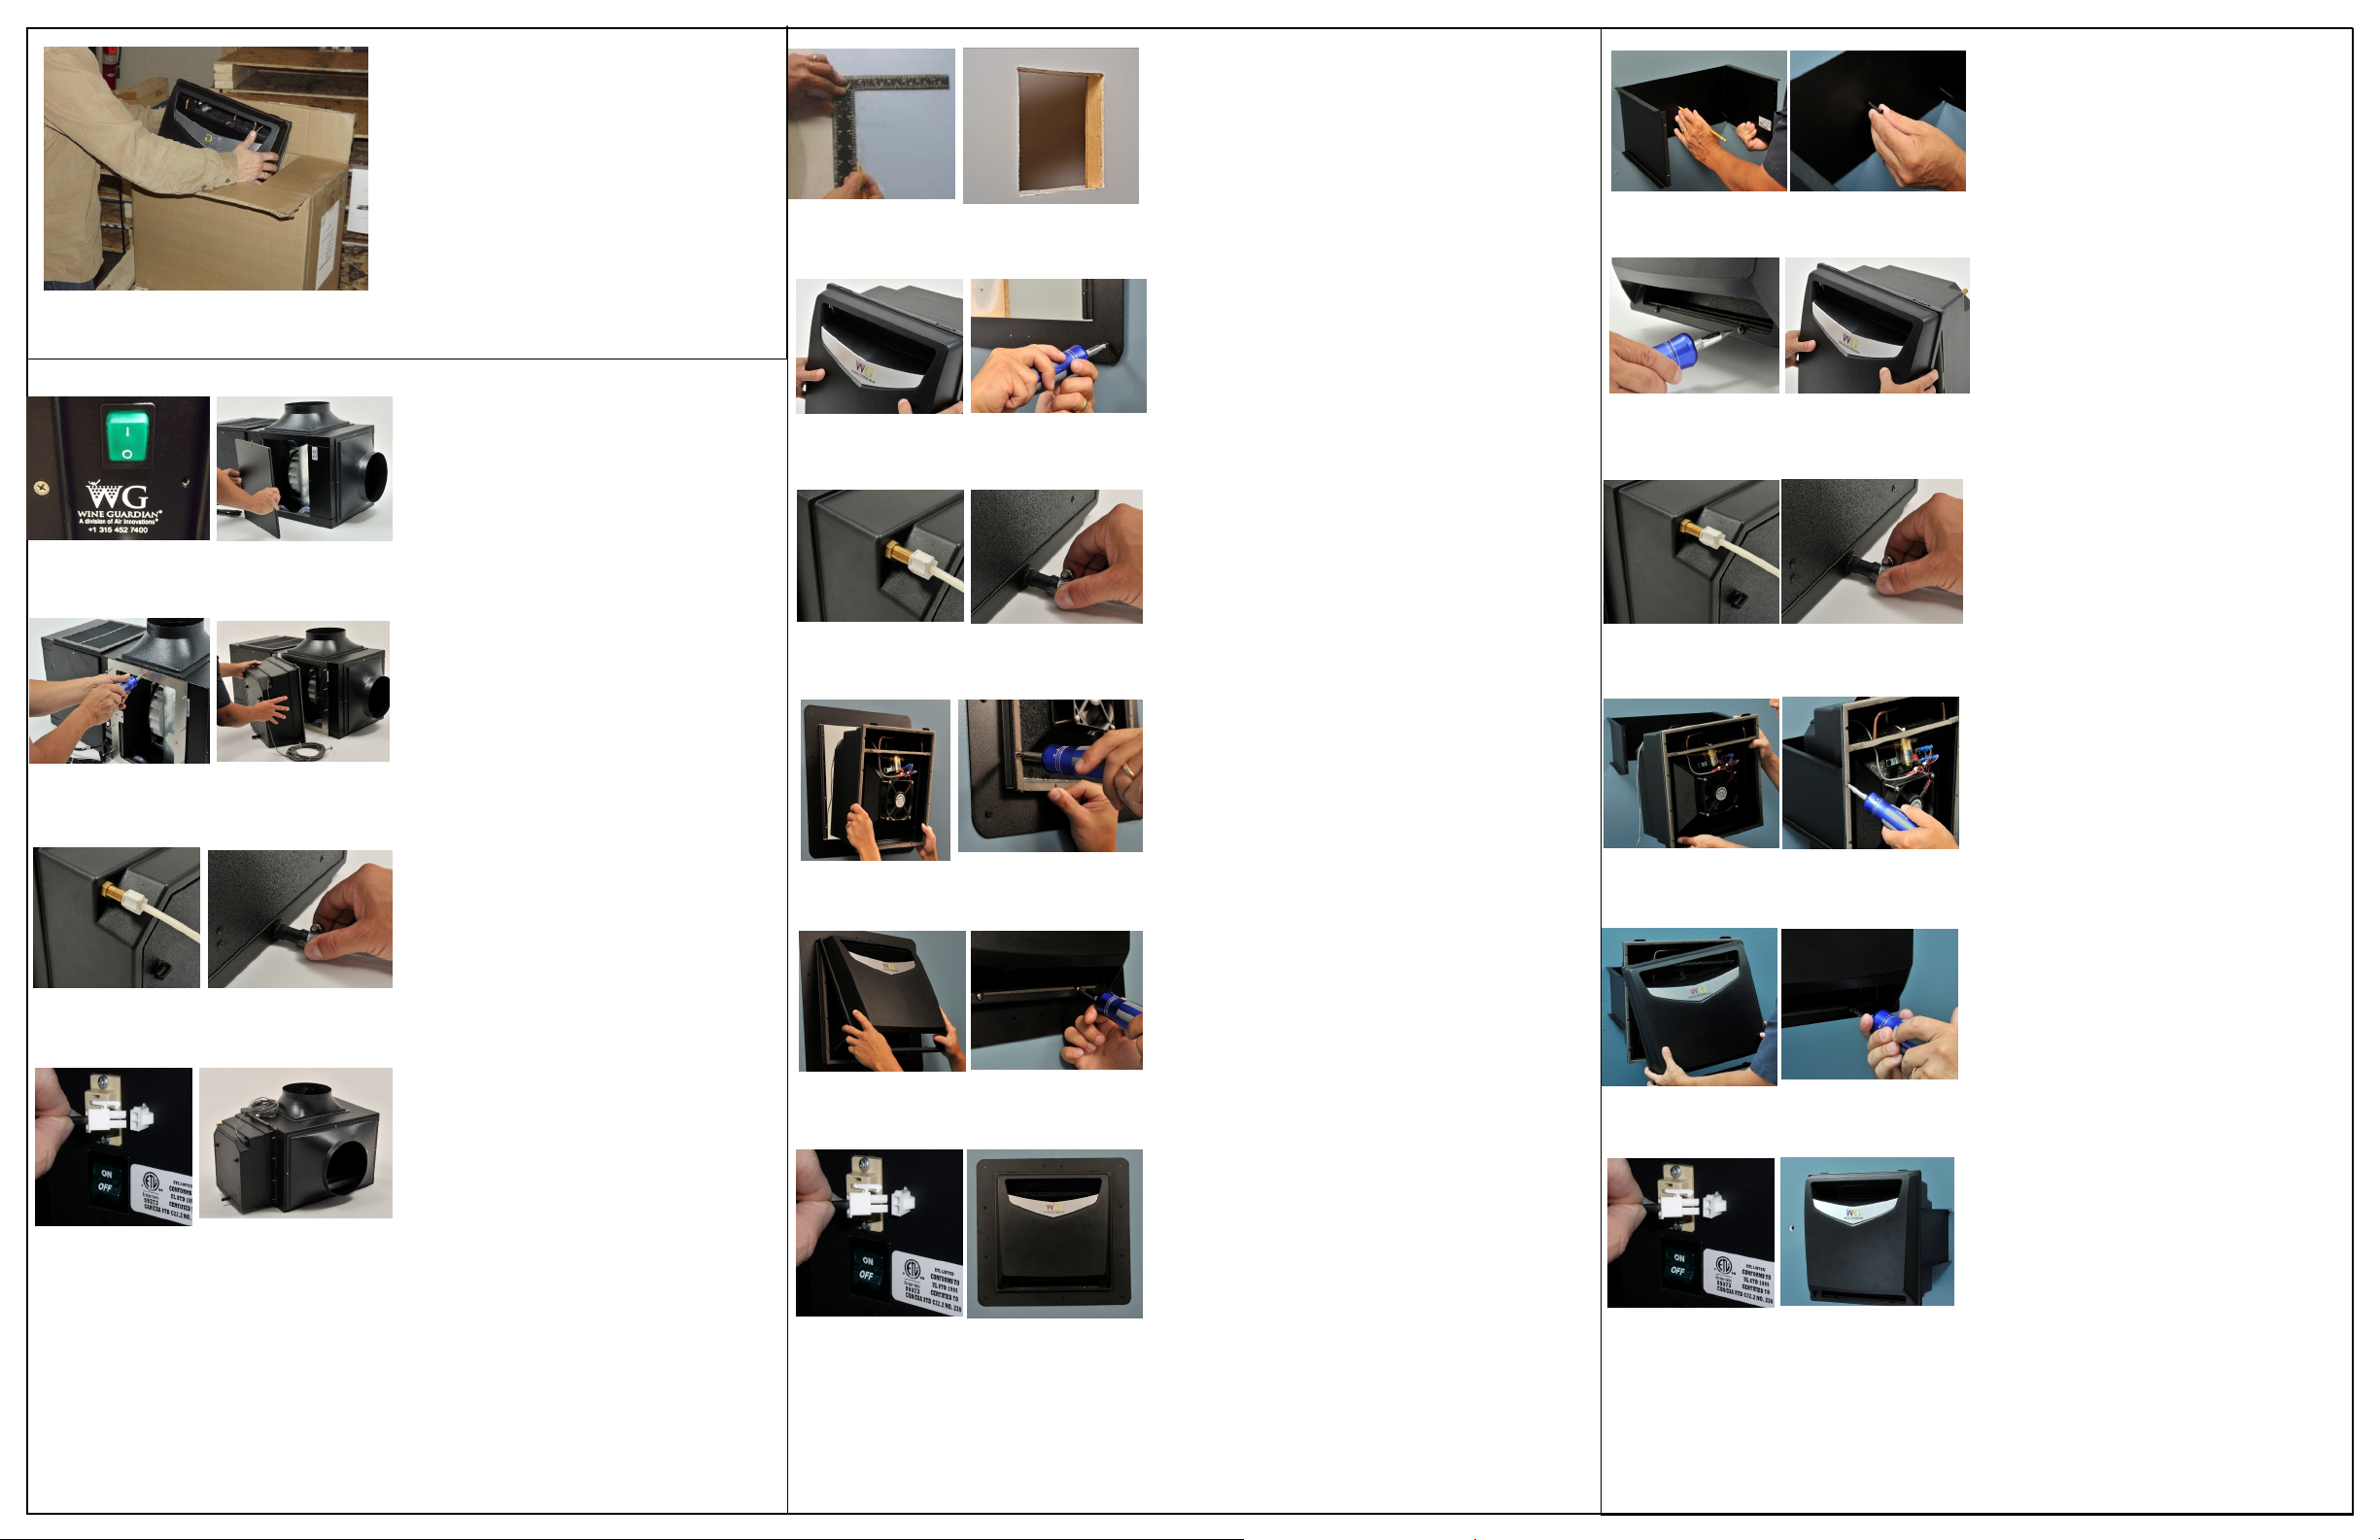
1. Unpack the unit
A. Remove unit from box. Check for
any signs of concealed damage. Be
sure all optional brackets have been
included. Contact Wine Guardian
immediately if components are
missing or unit has been damaged
in shipping.
2. Installing Integrated humidifier
A. Turn the Wine Guardian ON/OFF
switch to the OFF position. (Fig. A)
B. Remove side access cover at the
evaporator section of unit (section
with supply and return ductwork to
wine room). (Fig. B)
C. Remove the humidifier adapter
plate from the humidifier box and
secure it to the side access opening
using the eight (8) machine screws
provided with the humidifier kit.
(Fig, C)
D. Slide the humidifier onto the studs
located on the adapter plate and secure using the eight (8) nuts provided with humidifier kit. (Fig. D)
E. Attach 1/4” (0.6cm) water supply
line at top of humidifier. (Fig. E)
F. Attach 1/2” (1.3cm) drain line at
bottom of humidifier. (Fig. F)
G. Plug in power/control wire to Wine
Guardian unit as shown at main
control panel. (Fig. G)
H. Proceed to Step 6 Controller Set up.
Fig. A Fig. B
Fig. C Fig. D
Fig. E. Fig. F
Fig. G Fig. H
Fig. I Fig. J
Fig. K
3. Install Freestanding humidifier—
Through-the-wall or within racking
A. Mark the opening for a 16” x 14.5”
clearance. (Fig. A)
B. Cut opening in wall or provide suffi-
cient opening within racking system to
accommodate the humidifier. (Fig. B)
C. Remove the humidifier front cover plate
by removing two screws located at the
base of the cover plate and sliding the
cover up and off of the two plastic tabs
at the top of the unit. (Fig. C)
D. Secure the through wall bracket to the
perimeter of the opening at the predrilled locations on the adapter using
the screws supplied with the kit. (Fig.
D)
E. Attach 1/4” (0.6cm) water line at top of
humidifier. (Fig. E)
F. Attach 1/2” (1.3cm) drain line at bottom
of humidifier. Note: Water supply line
and drain line should be routed
through the back side of the opening
or behind the racking prior to humidifier install. Attach to humidifier
prior to step G below. (Fig. F)
G. Slide the humidifier through the bracket
and attach at the side mounting locations. (Fig. G, H)
H. Re-install the humidifier front cover
plate by sliding the cover over the two
top plastic tabs and securing at the bottom of the humidifier with two screws.
(Fig. I, J)
I. Plug in power/control wire to Wine
Guardian unit as shown at main control
panel. (Fig. K)
J. Proceed to Step 6—controller set up.
Fig. A Fig. B
Fig. C Fig. D
Fig. E Fig. F
Fig. G Fig. H
Fig. I Fig. J
Fig. K
4. Install Freestanding
Humidifier—Surface Mount
A. Determine mounting location for
the humidifier within the wine cellar ensuring the location has sufficient access for water supply line,
drain line, power cord and service.
(Fig. A)
B. Place the mounting bracket at the
desired location and mark the
holes required to mount the
bracket to the wall. (Fig. A)
C. Attach bracket to wall using
screws provided within humidifier.
Note: Wall anchors may be required depending on wall construction and stud placement.
(Fig. B)
D. Remove the humidifier front cover
plate by removing two screws located at the base of the cover plate
and sliding the cover up and off of
the two plastic tabs at the top of
the unit. (Fig. C,D)
E. Attach 1/4 (0.6cm) water line at
top of humidifier. (Fig. E)
F. Attach 1/2” (1.3cm) drain line at
bottom of humidifier. Note: Wa-
ter supply line and drain line
should be routed at the back side
of the unit between the mounting
bracket and humidifier chassis.
Attach to humidifier prior to
step Step G below.
G. Slide the humidifier through the
bracket and attach at the side mounting locations. (Fig. G,H)
H. Re-install the humidifier front cover
plate by sliding the cover over the
two top plastic tabs and securing at
the bottom of the humidifier with two
screws. (Fig. I, J)
I. Plug in power/control wire to Wine
Guardian unit as shown at main control panel. (Fig. K)
J. Proceed to Step 6 - Controller set-up.
5. Installing Freestanding Humidi-
Photos to come
Fig. A
Fig. B
Fig. A (TTW) Fig. B (Ducted)
Fig. C (TTW) Fig D (Ducted)
Fig. E (TTW) Fig. F (Ducted)
Fig. G (TTW) Fig. H (Ducted)
fier—with power cord and humidistat
A. Follow Step 3 (TTW or within
racking) or Step 4 (surface mount),
A-H.
B. Plug power adapter into 120 volt/1
phase/60 hertz receptacle. (Fig. A)
C. Mount independent humidistat
within wine room mid-point on
wall or racking in an area that has
sufficient access. (Fig. B)
D. Refer to Humidistat Operations
Manual for additional information
E. Installation is complete.
6. Controller set-up instructions
A Locate the Wine Guardian remote
interface controller within the wine
cellar or proceed to the Wine Guardian Through-the-Wall (TTW) main
control panel. (Fig. A & Fig. B)
B Press the mode button and hold it
down for five (5) seconds. The screen
will advance to the set up menu and
“1 F” or “Setting # 1” will appear on
the screen. (Fig. C & Fig. D)
C Continue to press the mode button to
advance to setup screen “6 0” or
“Setting # 6”. (Fig. E & F)
D Press the up arrow to advance this
setting to either “1” for Integrated
Humidifier (mounted at Wine Guard-
ian or “2” for Freestanding Humidi-
fier Unit. (Fig. G & H)
E Controller setup is complete.
Wine Guardian® Humidifier
“Quick Start” Installation Guide
This document is a pictorial guide on installing the Wine Guardian humidifier system. It is not intended to replace the detailed instructions
found in the WG Humidifier Installation, Operation and Maintenance
(IOM) manual, which includes important safety messages all WG installers and owners should carefully follow for safe and optimal performance of the system.
Refer to the IOM manual for installation instructions related to duct collars and duct collar kits, optional remote interface control and remote
sensors.
Air intake
Air outlet
Access cover
attachment screws
Adapter plate
Humidifier
housing
Humidifier pad
Access cover
Drain connection
Front of Unit—Freestanding
Back of Unit—Integrated
Power/control
cable
Through Wall Mount
Wall mount
bracket
Front access
cover
Mounting bracket
®
Wine Guardian
Humidifier
Integrated and Freestanding
Quick Start
Installation Guide
Visit www.wineguardian.com/distributors
Or call 800-825-3268 or 315-452-7400
 Loading...