

Wind & Weather ID3591 User Manual

and Weather Monitor
User Manual
ID3591

INTRODUCTION
Thank you for selecting the ID3591 Wind & Weather
Projection Clock and Weather Monitor. This device in-
cludes precise time keeping, weather forecast, alarm, and
temperature monitoring features that you can use from
the comfort of your home.
In this package you will fi nd:
• Main unit (receiver)
• Three remote sensors (transmitters) ID3591A
• AC/DC Adapter
• User manual
Please keep this manual handy as you use your new
weather instrument. It contains practical step-by step
instructions, as well as technical specifi cations and pre-
cautions you should know.
PRODUCT OVERVIEW
MAIN UNIT
Features:
• Light Sensor detects low light conditions and lights up
the LCD display
• Multi-channel capability to monitor temperature in up
to three remote locations in addition to base unit
• Barometric pressure with three trend indicators: Rising,
Steady, Falling
• Weather forecast in fi ve large graphic icons: Sunny,
Partly Cloudy, Cloudy, Light Rain, Heavy Rain
• Current time and remote temperature from one sensor
projected onto wall or ceiling in bright red digits
• Precise time and date are set via RF signal from the U.S.
Atomic Clock in Colorado
• Projected image rotation, fl ip, and focus control
• Calendar displays date with month and day in English,
Spanish, or French
• Dual crescendo alarm with snooze
• Programmable pre-alarm activates Weekday and Single
alarms earlier if temperatures fall below freezing to give
you extra time in the morning
• LCD with blue backlight for convenient night-time
viewing
• AC/DC adapter included for continuous projection
3
2
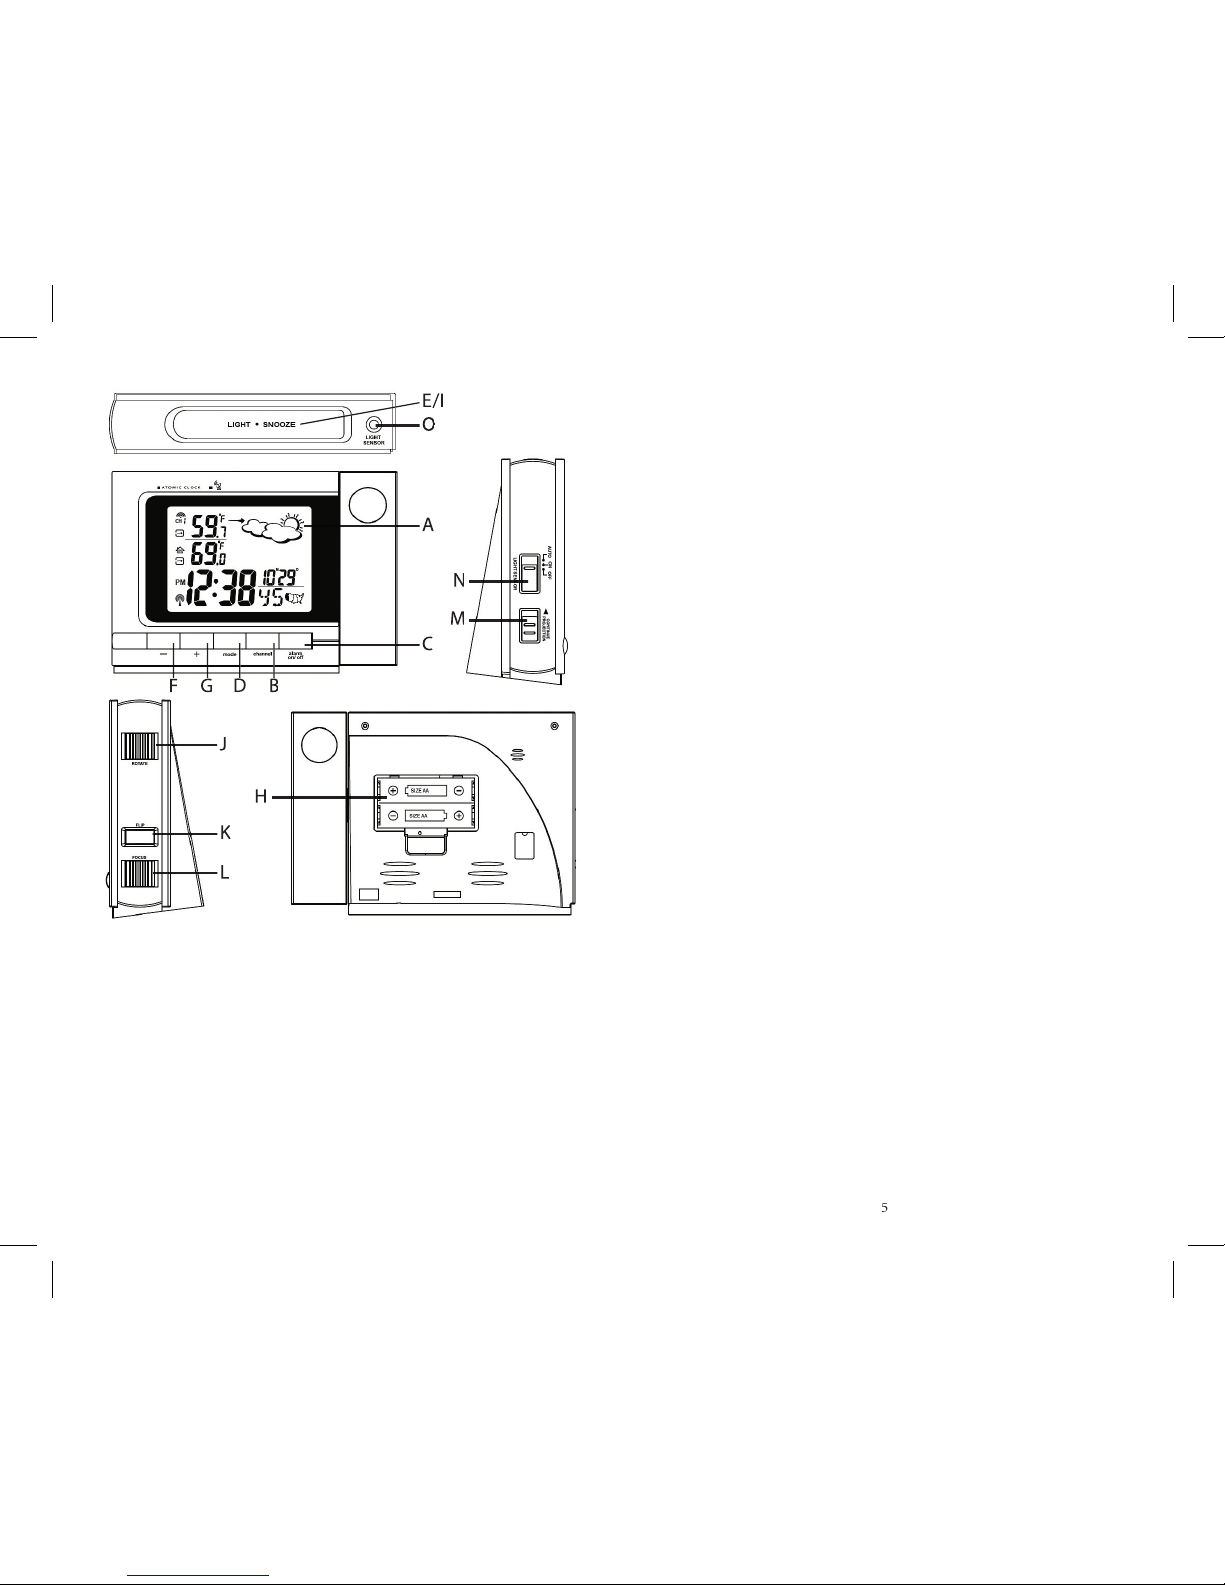
A. LCD DISPLAY
Allows easy reading of indoor/outdoor temperature,
weather conditions, calendar, and time
B. CHANNEL SELECTOR
Selects different remote sensor readings
C. ALARM ON/OFF BUTTON
• Switches between the calendar display and three dif-
ferent alarm modes
• Sets the weekday alarm, single alarm or pre-alarm
D. MODE BUTTON
• Toggles between the clock modes–the time with the
seconds and the time with the day of week
• Sets the clock manually
E. LIGHT/SNOOZE BUTTON
Activates the snooze feature, backlight, and projection
F. DOWN ( – ) BUTTON
Decreases the setting
G. UP ( + ) BUTTON
Increases the setting
H. BATTERY COMPARTMENT
Holds two AA batteries
I. [LIGHT/SNOOZE]
Activates the projection for 5 seconds
J. [ROTATE]
Rotates the projection image
K. [FLIP]
Flips the projected image 180°
L. [FOCUS]
Adjusts the sharpness of the projected image
M. [CONTINUOUS PROJECTION]
Sets a continuous time and temperature projection
N. [LIGHT SENSOR] SWITCH
When AC adapter is connected, position the light sensor
switch to:
• “AUTO” to activate an auto backlight
• “ON” to set continuous LCD backlight
• “OFF” to deactivate LCD backlight
The built-in light sensor detects the environmental light
conditions. If the light conditions are lower than 100
LUX, the LCD lights up automatically.
4
5
J
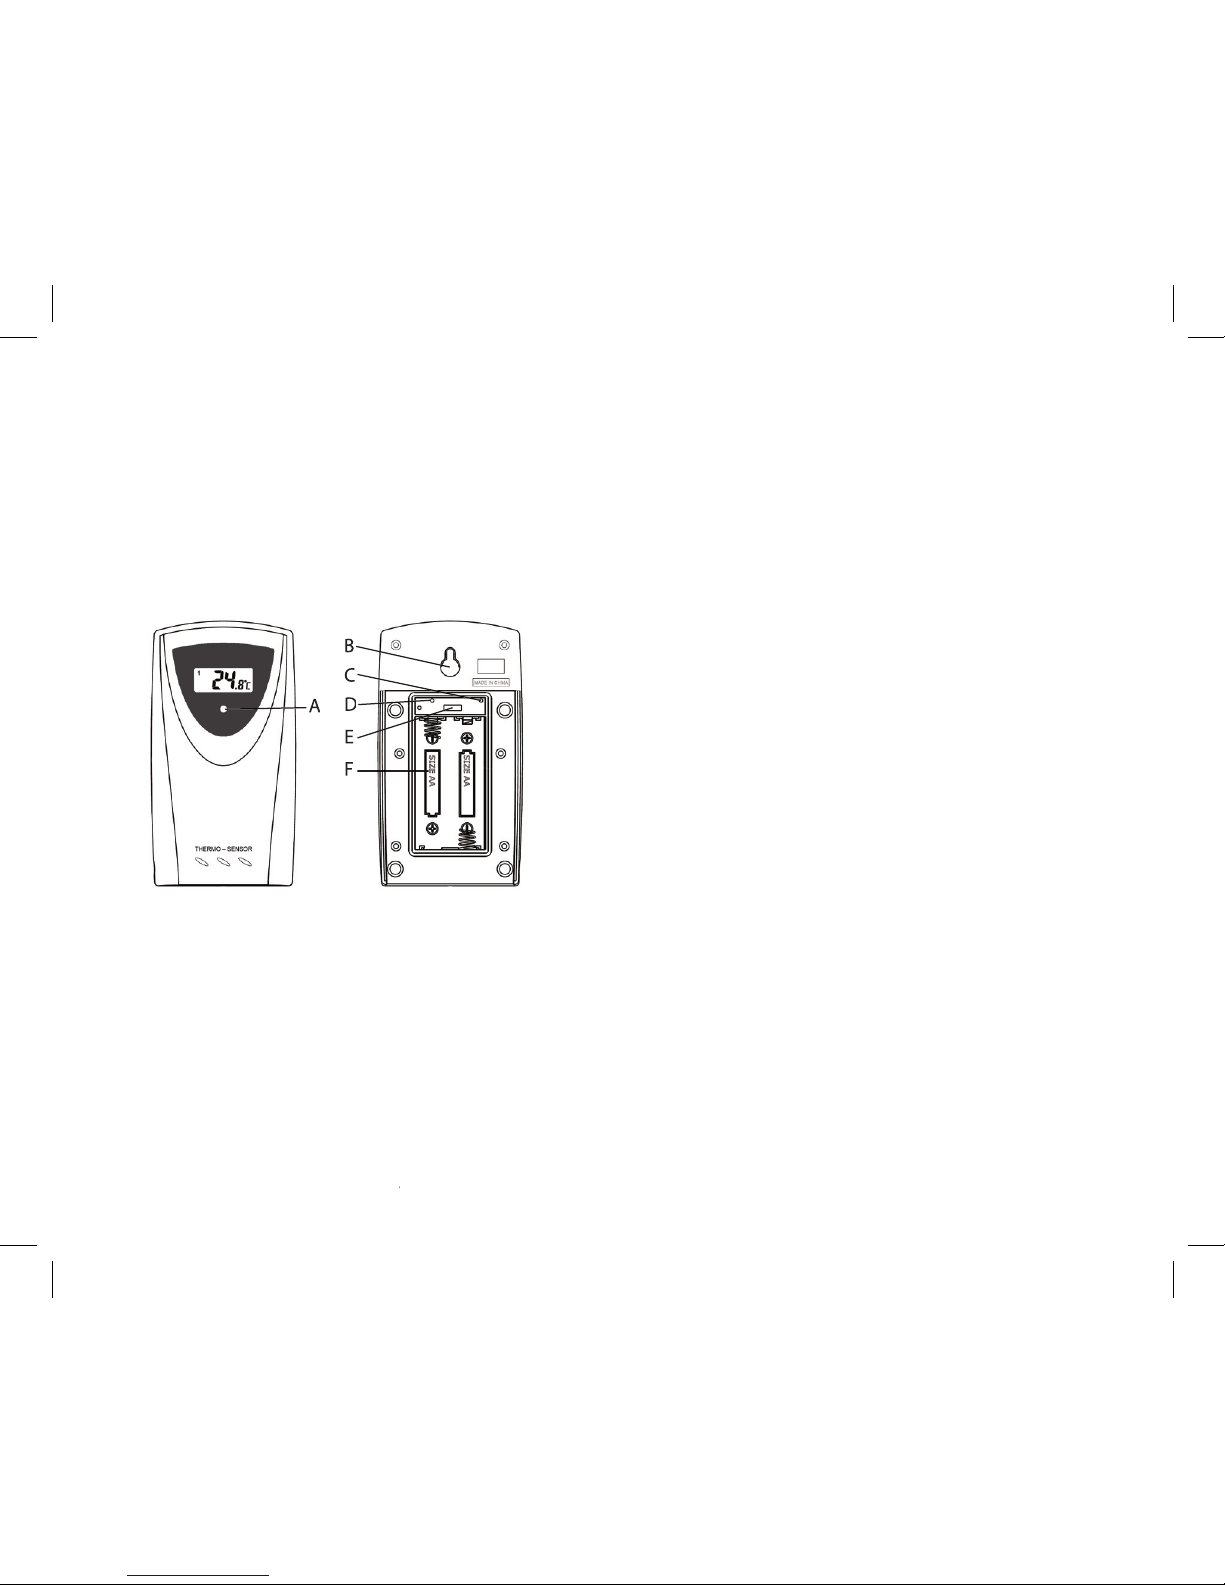
A. LED INDICATOR
• Flashes once when the remote sensor transmits a
• Flashes twice when battery power is low
Allows the remote sensor to be hung on a wall
installing batteries
NOTE: When the temperature
falls below freezing, the batteries in outdoor remote
NOTE:
 Loading...