

Page 1
manual
CARGO
Page 2

Page 3

Windtech
w w w . w i n d t e c h . e s
3
C A R G O
flight manual
Page 4

4
> index
> congratulations ––––––––––––––––––––––––––––––– 5
> warning & liability ––––––––––––––––––––––––––––– 6
> philosophy of design ––––––––––––––––––––––––––– 6
> construction & materials ––––––––––––––––––––––– 7
> certification –––––––––––––––––––––––––––––––––– 8
> performance –––––––––––––––––––––––––––––––––– 8
> flight ––––––––––––––––––––––––––––––––––––––– 8
-- launch ––––––––––––––––––––––––––––––––––––– 9
> thermal flying ––––––––––––––––––––––––––––––– 10
> flying in turbulence ––––––––––––––––––––––––––– 10
-- asymmetric tuck ––––––––––––––––––––––––––––– 10
-- frontal tuck ––––––––––––––––––––––––––––––––– 11
-- asymmetric stall (spin) –––––––––––––––––––––––––– 11
-- landing –––––––––––––––––––––––––––––––––––– 11
> weather to fly ––––––––––––––––––––––––––––––– 12
> rapid descent techniques –––––––––––––––––––––– 12
-- big ears ––––––––––––––––––––––––––––––––––– 13
-- spiral drive ––––––––––––––––––––––––––––––––– 13
-- b stall ––––––––––––––––––––––––––––––––––––– 13
> maintenance –––––––––––––––––––––––––––––––– 14
> warranty ––––––––––––––––––––––––––––––––––– 14
> technical specifications–––––––––––––––––––––––––25
> line measurements ––––––––––––––––––––– 27-18-19
> flight log ––––––––––––––––––––––––––––––––––– 22
Page 5
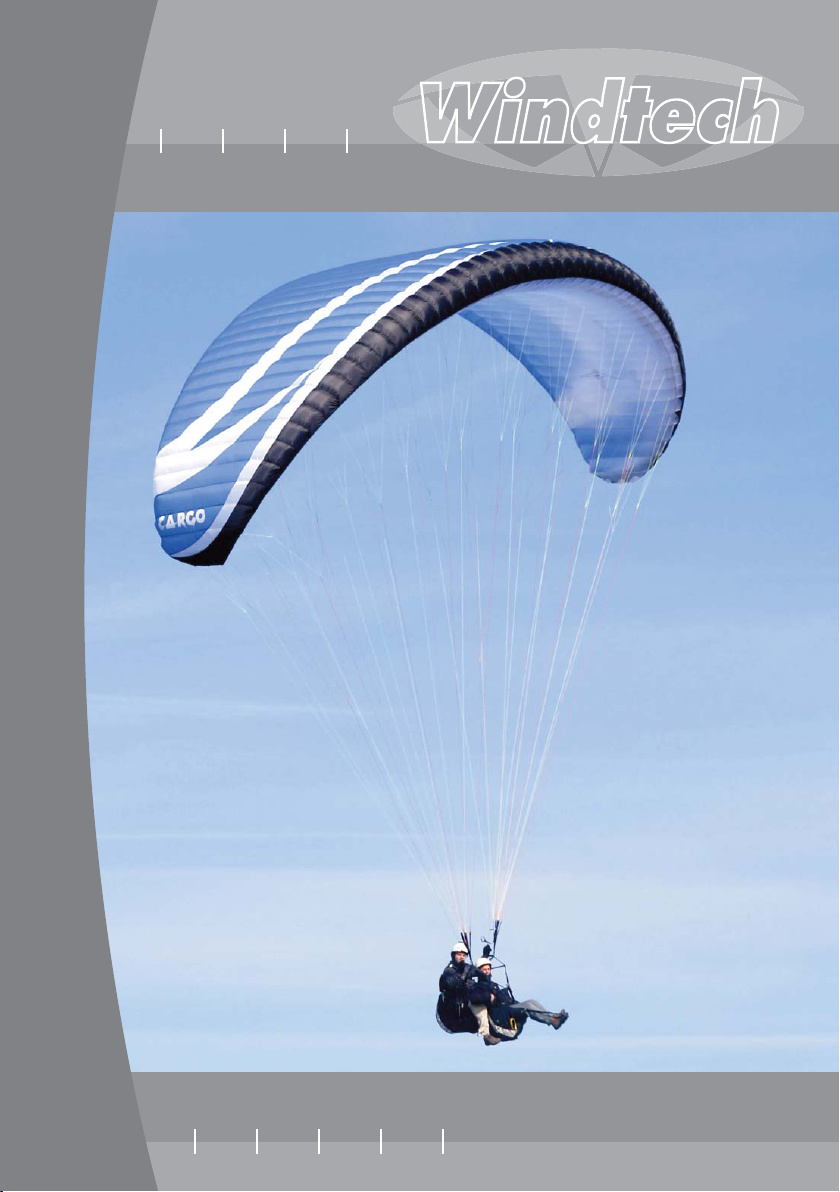
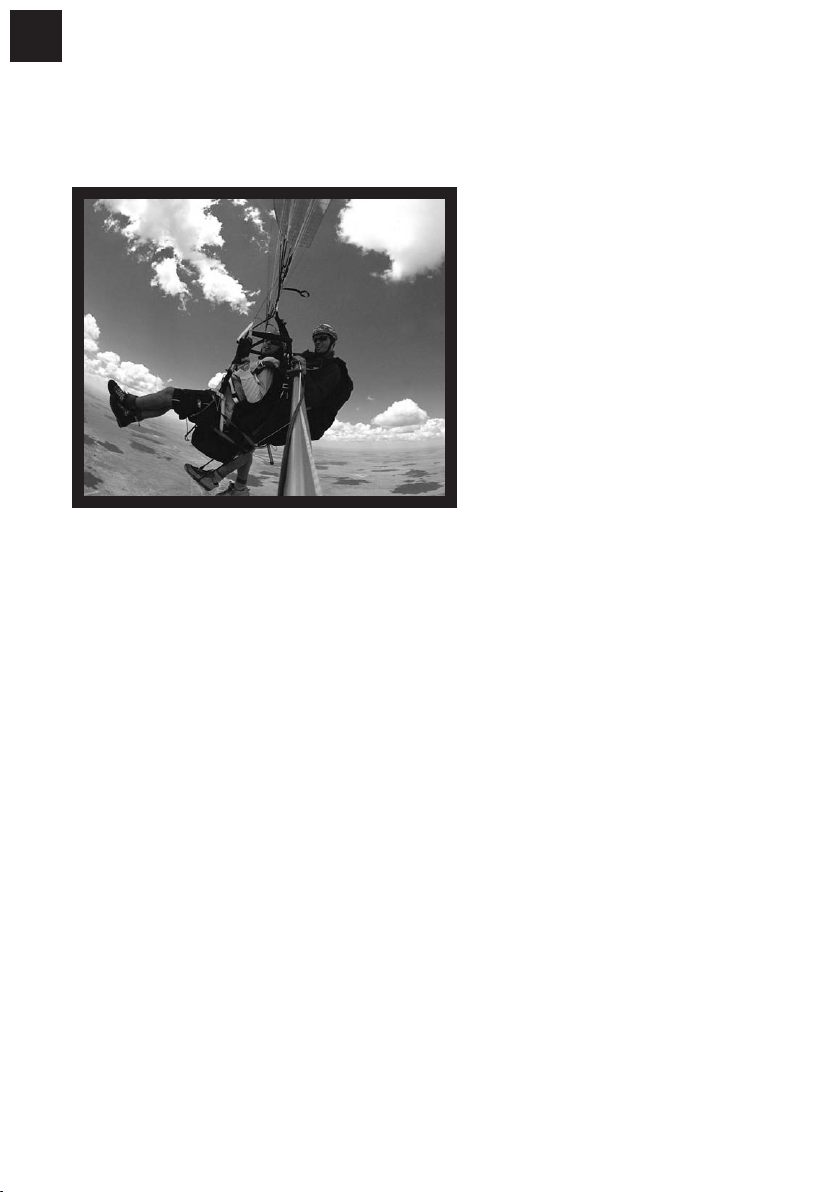
> congratulations
Congratulations on the purchase of your new CARGO.
The CARGO is a tandem wing that has been conceived and designed for both professional and recreational pilots, suitable of all kinds of flying styles, from a gentle glide
down, to the most ambitious cross country flights. With easy launch characteristics,
manoeuvrability and turn ability akin to a solo glider, and superb performance, the
cargo makes it possible to core the smallest of thermals and climb even in the weakest lift.
We strongly recommend that before you even unfold the CARGO you carefully read this
manual in order to be aware of any limitations, as well as differnces in performance, takeoff and flight characteristics, landing procedures, emergency situations and maintenance.
We always appreciate your feedback, so please send us your comments, positive or negative, regarding to the Windtech line.
You are the best feedback and support for future products, and please remember that we
are always happy to give you any help & advice.
Best winds
>Windtech team
5
Page 6
6
> warning & liability
This manual has been created to give the pilot help and hints for the correct operation of
this wing. By no means is this a substitute of a training course, or appropriate experience
gained with years and hours of airtime, nor is this manual intended to give pilots knowledge regarding flight safety.
Windtech assumes that the purchasing pilot has the appropriate pilot's licence, has
taken a training course, tandem insurance and has the ability and enough experience to
safely fly the CARGO.
This manual cannot be used for operational purposes. The flight log & registration card
must be filled and stamped by the dealer & returned to
claim on the guarantee.
The use of this paraglider is entirely at the user's own risk. As with any adventure sport
paragliding is a high risk activity-especially without taking the appropriate precautionstherefore it must be absolutely understood that
any responsibility for accidents, losses, injuries, direct or indirect damage following the
use or misuse of this product.
Windtech & the dealer do not accept
Windtech in order to make a
> philosophy of design
When Windtech decided to make a tandem paraglider, we first established the main criteria that we felt would be the most important to make the perfect tandem wing. The
wing had to be, above all, easy to inflate and launch in all conditions, with excellent handling, high glide performance, and that it would convert energy extremely well to give an
effective flare, for softer landings.
For this we designed a paraglider with 51 cells of variable widths, not all of which have
line attachment points due to the advanced structural relationship of lines/diagonals. In
this way we have considerably reduced parasitic drag produced by the lines whilst at the
same time endowing the interior of the wing with a higher internal pressure and creat-
Page 7
ing calculated zones of greater longitudinal tension, very important for increasing resistance to tucks (above all frontal collapses).
The cargo’s new profile gives highly elevated security and performance, as well as a
turning ability that is surprisingly efficient.
It has double profiles in the leading edge, therefore it is safier, specially when trims open
and also has more performance at high speed.
The end result is a tandem that inflates quickly and easily during launch and is exceptionally stable and solid during the take-off run, giving great protection against having
to abort launches and compromising the safety of yourself and your passenger.
During launch the cargo gives an exceptional degree of control, allowing the pilot to
easily make precise corrections during the take-off run. Once airborne, the cargo’s
superb feedback and responsive handling allows one to make the most of even the smallest thermals.
When the time comes to land, the exquisite handling characteristics and precision of the
cargo serve as another great guarantee of safety since you can first of all guide yourself more precisely into exactly the spot you wanted to land in, confident that in the final
moment, when you want to flare, you will be able to take advantage of the wings superb
energy conversion, landing both you and your passenger easy and safety each time.
> construction and
materials
Our primary concern is always keeping
to the highest quality standards of
materials and construction, to impress
the pilots and so guarantee our future.
For this reason, we never cut any corners when it comes to building in quality.
7
-- cloth
The upper and lower panels are made
with 45 gr. Porcher Marine Skytex
nylon. The ribs are made with stronger
nylon of to prevent aerofoil deformation, even after several years of intensive use. Rib (cell wall) reinforcements
are made of Dacron 310 &180 gr. Line
attachment points are made of polyester.
--lines
The lines are of the highest quality and varying diameters, depending on which area of
the glider they are in, but always of a diameter greater than a solo glider, capable of withstanding a force up to eight times the maximum load. The inner core is super aramid and
the outer sheath polyester to protect against general wear and tear and UV.
Page 8
8
> certification
The cargo is certified It is certified EN with A in all maneuvers but a B in the asymmetrical collapse maneuver.
> performance
Fly a cargo in the correct size for
you. Remember that if you fly outside
of the weight range that the glider
has been designed for, this could
adversely affect the handling, stability and performance of the glider,
and means that the glider is effectively no longer certified.
If your flying weight is below the
stated minimum, the speed range
will diminish and inflation problems
may appear. Also the handling will
degrade in turbulent conditions, and
it will sustain collapses more easily.
If your flying weight is above the stipulated weight range, this will result in a higher minimum speed and faster landing speed and the stall speed of the glider will also be higher. If the glider suffers a collapse, or leaves normal flight configuration, the resulting
behaviour will be more rapid and violent. As well as this, your sink rate will be higher and
you will find it harder to stay up in light lift.
The cargo has medium brake resistance (adhering to weight range). The stall is found
at 95% of the brake travel and, to force the glider into an in flight full stall (not recommended on any kind of paraglider), requires almost all the weight of the pilot on the
brakes.
The best glide on the cargo, not taking into consideration any horizontal or vertical
movements of the air, is obtained simply by flying at the glider’s trim speed. That is to say,
by having the trimmers in standard position and flying with no brake or speed system
applied.
> flight
Before flying any paraglider, the pilot has to be sure that they are flying a glider that is
suitable for their level of piloting, evaluating objectively and carefully their true capabilities.
In the case of tandem flying, this is even more important, as one is carrying a passenger
and the price of any error will not only be paid for by the pilot.
Each and every glider has a meticulous checklist passed though our strict quality control
in the factory. This includes line measurement, ground inflation and flight testing.
Contact your distributor for more information about this, and if your glider has not been
pre-inflated ask them to do so for you. Every glider should be test flown before it is sold.
Note that each glider has a unique sticker attached to the centre cell with the serial num-
Page 9

ber, type of glider, size and weight range, month and year of fabrication.
We recommend that you inspect the risers, check that the maillons have been correctly
installed and tightened, and make sure that the lines are not tangled.
As for the brakes, there should be around 10cm of excess line above the knot, during
flight at trim speed and trims closed, the length of both lines should symmetric, and the
movement through the pulleys smooth and easy.
We recommend that your first flight on your new glider be on a gentle slope in calm conditions before making any further higher flights, just to check the glider and for you to
get used to flying it.
We also recommended that you use a harness that has an ABS cross strap system and
that maximum width possible for the chest strap is 38 cm between karabiners.
For you own safety, we strongly recommend the use of back protection, helmet and
Windtech WindSOS reserve.
-- launch
The cargo is extremely easy and
efficient to launch.
If you have never flown a tandem
before, we strongly advise that you
take a course in tandem flying, with a
qualified and experienced tandem
pilot, before you start flying with
other passengers, as you are directly
responsible for the safety of your passenger.
The best thing is to make your first
flights with large and forgiving takeoffs and landing areas, in optimal
weather conditions and a passenger
who is also a pilot and so will be more
able to collaborate with you during
manoeuvres. In this way, you will
adapt rapidly to the great qualities of
the cargo, without having to preoc-
cupy yourself with too many new
things at once, and so you will be enjoying great flights whilst minimizing the risk to
yourself and your passenger.
It is very important to explain clearly the whole launch process to your passenger, point
by point, and allowing for any eventualities, so that they know exactly what to do. As well
as making the launch process easier for you, this will install confidence in them in your
ability.
Before you take off, lay out the cargo in a slight arc. Always do all of your pre-flight
checks (lines, maillons, risers, harness buckles, etc). Carefully observe all of the details
that relevant to your launch (tension in the lines, windsock, obstacles, etc).
Without wind it it recommended to release 3 or 4 cm of trim.
9
Page 10

10
You mustn't start the run either too slowly, or too fast, but you must always make the
run decisively and assuredly to ensure that the wing carries the weight of you and your
passenger. When the cargo comes up above your head, give a gentle check on the
brakes to stabilize the wing and establish a perfect tension across the glider and lines
ready for the take-off run.
-- thermal flying
The best and most interesting flights, even better
when made with company, are those flying in thermic conditions, and all pilots want to experiment
and experience the wonder of flying in thermals.
The cargo is blessed with superb handling and
manoeuvrability, which means that you don't need
a lot of brake to turn it, and by using the outside
brake to control the airspeed of the outer wing,
you can flatten the turn and climb exceptionally
well and efficiently.
When working the thermal lift we must close the
trim (this is all maillons at equal level.
Thermic flying conditions can make flying much
more challenging and difficult. Only the most
experienced pilots should fly in strong thermic
conditions. There is always a degree of associated
turbulence in thermic conditions, and when the pilot encounters turbulence they must fly
"actively", with precise brake input and weight-shift, ideally with collaboration from the
passenger as well by shifting the weight from one side to the other one.
In the case of extreme turbulence, so long as you haven't got big-ears in, as a rough guide
fly very actively with around 30 per cent brake.
> flying in turbulence
-- asymmetrical tuck / collapse
An asymmetric tuck / collapse is when part (one side) of the wing (say 20% or anything
up to 90% of the span) tucks or collapses, usually induced by turbulence but sometimes
also though poor pilot control in turns and wingovers.
The cargo is tested and certified to automatically recover without correction by the
pilot with a maximum direction change of 90 degrees of turn, but with the correct input
the pilot can minimise any turning, and height loss, and help the glider recover more
quickly.
There are 3 basic steps to follow immediately if you have a collapse:
1: Weight shift to the flying side of your glider (away from the collapsed side). This helps
stop the rotation & increases pressure in the wing in the inflated side.
2: If needed apply the correct amount of brake to the open (flying) side to slow any rotation (spiral) induced by the collapse. Be very careful not to use too much brake as it’s
possible to stall the flying side of the glider, and enter further unstable situations which
Page 11

may be harder to recover from than the collapse itself.
3: Once the glider has straightened out, or the spiral has slowed, smoothly pull down the
brake on the collapsed side, with a long stroke/pump, & the deflated side of the glider
should re-inflate. As the glider re-opens release the brake immediately but progressivel
after a small surge forward.
-- gront / symmetrical tuck collapse
A front tuck / collapse is a symmetric tuck of the leading edge of the wing, starting from
the centre of the canopy to the wing tip. This can be either a tucking of just the central
part of the leading edge of the glider, which can sometimes cause a front 'horseshoe' or
'rosette-ing' of the glider, or even a complete 'front tuck' of the whole canopy in extreme
situations.
When flying, a front tuck may occur either when leaving a strong thermal, or more often
while using the speed system in turbulent air, or even sometimes whilst flying into the
wake turbulence down-wind of another glider.
Remember, the pilot can learn to help stop collapses by flying 'actively', but if a front tuck
does occur it will easily clear itself. Re-inflating the wing can be helped by correct pilot
input and, once the glider is overhead, symmetrically applying 40 % of both brakes &
then releasing immediately will get pressure back in to the glider and speed up the recovery. Do not brake when the glider is behind you, as this can stall the wing, but wait for
the glider to come forwards above your head, then brake.
-- asymmetric stall (spin)
This is a very difficult situation for the pilot to provoke with the cargo, given its excellent feedback and very low stall speed, you have to really abuse the controls a lot to manage it.
Even so, a spin can be induced if, for example, the pilot is turning very slowly and tightly in a thermal (near the stall point), and wants to tighten the turn further, for whatever
reason. If the pilot brakes too much on the inside brake, stalling the wing on that side,
the wing may then go into a spin.
Beware in turbulent air, as it is easier to stall, or spin, the wing due to the already a turbulent airflow.
If a spin is entered, return to normal flight by raising both hands to return air speed to
the stalled side of the wing. Be careful, as this may cause the wing to surge and dive forwards as it tries to regain airspeed. This dive can be more or less violent, depending on
various factors. The pilot should check this dive, using up to 60% brakes, which must then
be released as soon as the dive is stopped.
11
-- landing
You must always plan your landing with the trims locked, therefore the final glide will be
at a slower speed.
You need to pay particular attention with your first landings, above all, if they are your
first tandem flights or your are used to the glide angle of your old glider, as the cargo’s
excellent performance might surprise you.
Page 12

12
On final approach the pilot should have hands up (keeping a feel of the wing and flying
actively in case of unexpected turbulence) to let the glider build up speed. This extra
speed will meant that the glider has more energy to convert when you flare, and so leading to a softer landing.
In light or nil winds the pilot
will need a committed symmetric flare at around 1
meter above the ground.
In stronger winds less of a
flare is needed.
The flight is not finished, and
the pilot and passanger ares
never fully safe, until the
glider is safely controlled on
the ground.
Avoid letting the glider land
on the leading edge. If the
glider lands with force on the
leading edge it is possible to
burst the inner cells and
walls of the wing and you
should carefully examine the
wing for any damage to the seams of the ribs to the cells. The best solution to put down
the canopy when landing it is to gently put it down in one side. This way we will reduce
80% of the wind force and the safety will be increased.
> weather to fly
If in doubt about the weather and flying conditions, do not launch! Before going flying
you should check the weather forecast & always ask more experienced pilots about the
conditions expected for the day. Never fly if there weather conditions are unsuitable,
especially with any of the following present or even threatening: Strong wind; Rain;
Thunderstorms; Cumuli nimbus; or Cumulus congestus. If you are already in the air then
get down safely before it's too late! Always be aware of the weather changing & if in
doubt land as quickly as is safely possible.
Even though the cargo It is certified EN this is not a guarantee against flying in turbulent air. Remember that even an airline jet can crash due to rotors and bad weather!
> rapid descent techniques
It is likely that on occasion the paraglider pilot may find themselves in a situation where
they need to get down quickly, perhaps so that they can get out of danger and land safely. Because of this it is recommended that all pilots should learn about the various emergency descent techniques that are possible on a paraglider. For information, we shall
cover the basic techniques here.
More radical’s manoeuvres such as full stall, asymmetrical stall or flat spin are not
described in our manual. In order to learn more about and practice these manoeuvres you
Page 13

should do a special safety (SIV) course over water with an expert instructor. There should
be a dedicated rescue boat standing by, and all safety precautions taken.
-- big ears
Big-ears is a simple descent technique & can sometimes be very useful for top landing,
keeping out of cloud, and in an emergency if you are over-shooting your landing area.
To induce big-ears on the cargo, keep the brakes in your hands and reach up to hold
the top of the special split-A risers (in red). Pull the lines out and down, one at a time, to
collapse the tips of the wing (10 – 30% each side, depending on how much line you pull).
Make sure that you have the correct lines, that you do the correct action, and that you
don't pull too much brake whilst pulling in the big ears. Also make sure you are looking
where you are going whilst you are doing this.
Once holding in the big-ears, you will not be able to steer with the controls (brakes). You
can steer the glider using weight shift, and with tandem the passenger can assist you to
do this effectively.
Generally avoid using big-ears near the ground (below 200ft AGL), as the extra disturbance to the airflow over the wing that big-ears creates can make any paraglider more
prone to deep stalling, especially in the turbulence and wind shear normally near the
ground.
To exit big-ears, simply let go of the big-ear riser and wait for the wing tips to re-inflate
themselves. If they do not inflate themselves then pump the brakes, one at a time, to help
them re-inflate.
-- spiral dive
The Spiral dive is obtained by maintaining a tight 360 degree turn. Gradually the turn will
accelerate, especially by pulling more on the inside brake and weight shifting harder into
the turn, and so you will enter a spiral dive.
Be careful not to pull the brake too hard, too quickly, especially on entry, as it is possible
to spin the glider in this way.
Very agressive spiral dives can cause eyesight and equilibrium problems, extremely dangerous, especially near the ground.
Recovery from a spiral dive, this should be done gently and progressively. The inner brake
must be progressively and slowly released, until the canopy assumes normal flight, and
angle of bank, again. A good "rule of thumb" is to use the same number of 360-degree
turns as you did on entry on exit to give a safe and progressive pullout. Be careful not to
come out of a hard spiral dive too quickly, as the resulting climb-out can be extreme. If
the glider dives hard after a hasty exit from a tight spiral dive, it may be necessary to
damp the dive, with the brakes.
13
-- b-line stall
The cargo comes equipped with a special riser system to facilitate entering a b-line
stall, with handles similar to those of the brakes. If one pulls these the cargo will enter
the b-line stall and come straight down, drifting with the wind.
One can control the rate of descent by pulling more or less on the b-line handles, obtaining decent rates of between 5 and 11 m/s. To exit from this configuration, SYMETRICAL-
Page 14

14
LY raise both b-line handles AT THE SAME TIME, letting go of the risers for the last 10cm.
The cargo will regain flight spontaneously, with a small dive.
> maintenance
Store the paraglider in a dry space away from chemical agents, UV light and high temperature. If the canopy has been packed wet it is necessary to reopen it and let it dry
before packing away for a sustained period. Keep the canopy and lines clean, as dirt may
penetrate into the fibres and damage them.
Clean the paraglider only with fresh water and a soft sponge. If the glider comes into
contact with salt water, wash the glider as soon as possible with fresh water & then dry
completely. Avoid contact with chemical agents like oil, petrol, solvent and similar, which
can damage the fabric and its surface covering.
We strongly recommend you to have a full inspection of the paraglider by
the distributor at least once a year. Besides this you should check periodically the lines,
cloth and stitching. Check the lines for fraying, or the stitching coming undone, and
measure them to check for any shrinking.
Small tears in the sail can be repaired by using adhesive spinnaker cloth repair patches,
which we supply with every new glider. Big tears and repairs affecting sewing or structural parts of the paraglider must be carried out only by the manufacturer or authorised
service centres.
> warranty
This glider carries a two-years guarantee from defects due to materials and manufacturing.
In the case of materials becoming defective during the period of the guarantee
Windtech will replace them. Before any warrantee replacement can be made the pur-
chaser will have to send the product to Windtech for their inspection. If a product is
deemed to be defective by Windtech, the warranty covers the repair or replacement of
the defective product only. Windtech will not be responsible for any costs, losses or
damages incurred as a result of loss of this product. Windtech is not responsible for
mailing costs or material costs used other than what is found to be defective.
We exclude from the guarantee any damage caused by wear and tear in use, any misuse
outside of the limits stipulated in this manual, damage due to excessive sun exposure,
damage caused by improper handling & damage caused by anything other than defects
in material & workmanship.
Windtech or
Page 15

CARGO
| technical specifications |
15
Size
2
Area (m
Projected area (m
Span (m)
Project. span (m)
Aspect ratio
Project. aspect ratio.
Max .chord (m)
Min. chord (m)
Nº cells
Line lenght (m)
Weight in fly
Weight w.motor (kg)
)
2
)
(kg)
36
35,12
33,84
13,53
10,8
5,2
3,8
3,23
0,4
51
8,3
115-195
115-240
39
39,13
35,72
14,28
11,4
5,2
3,8
3,41
0,42
51
8,64
125-215
125-250
43
43,66
37,61
115,03
12,01
5,2
3,8
3,59
0,45
51
9,05
140-240
140-260
Certification EN
Lo ad te st
EN
EN
Page 16

16
Page 17

190,5
182
186
182
186
182
186
73,5
73,5
112,5
612
611
629,5
190,5
182
186
190
182
604,5
182
185
606
623,5
166
154,5
156,5
165,5
156,5
156
622
167,5
154,5
635,5
171,5
154,5
48
171,5
169,5
169
142
88
119
99
91,5
91
80
76
69
62,5
57,5
50
191
164
227,5
186
83,5
605,5
599,5
84
43,5
43
360+20
83
73,5
82
82,5
108
117
73,5
73,5
73,5
81,5
117
108
81,5
110
81
96,5
98,5
97,5
48
48
46
45,5
45,5
601
608
71,5
72,5
67
164
164
164
69,5
69
106,5
82
80
191
227,5
76
173
168,5
75,5
71
74
227,5
606
1
2
3
4
5
6
7
8
9
10
11
12
13
14
15
16
17
18
19
20
21
22
23
24
25
190,5
190,5
190
166
154,5
154,5
154,5
154,5
154,5
154,5
614,5
610,5
591,5
590,5
227,5
C A R G O 3 6
17
Page 18

18
199
190
194,5
199
190
194,5
199
190
194,5
77,5
77,5
119
639
638
657
199
190
194,5
198,5
190
631,5
190
193,5
632,5
651
173,5
161,5
163,5
649
173
163,5
173,5
163
649,5
175
161,5
663,5
179
161,5
50,5
179
177
176
148
124,5
103,5
95,5
95
83,5
79,5
72
65
60
52,5
199,5
171
237,5
194,5
87
91,5
632
626
644,5
87,5
45,5
45
378+20
88
77,5
87
87,5
114
123,5
198,5
77,5
77,5
77,5
86
123,5
114
86
116,5
85,5
161,5
161,5
161,5
161,5
100,5
161,5
161,5
102
,5
101,5
50,5
50,5
48
47,5
47,5
624,5
623
627,5
634,5
74,5
75,5
70
171
171
171
72,5
72
111
85,5
83,5
199,5
237,5
79,5
180,5
176
80
74
77,5
237,5
632,5
1
2
3
4
5
6
7
8
9
10
11
12
13
14
15
16
17
18
19
20
21
22
23
24
25
C A R G O 3 9
Page 19

209,5
200
204,5
209,5
200
204,5
209,5
200
204,5
81,5
81,5
125
672,5
671,5
691,5
209,5
200
204,5
209
200
664,5
200
203,5
666
685
182,5
170
172
683
182
172
182,5
171,5
683,5
184
170
698,5
188,5
170
53
188,5
186,5
185,5
156
131
109
100,5
100
88
83,5
76
68,5
63
55
210
180
250
204,5
91,5
96,5
665,5
659
678,5
92
48
47,5
400+20
92,5
81,5
91,5
92
120
130
209
81,5
81,5
81,5
90,5
130
120
90,5
122,5
90
170
170
170
170
106
170
170
108
107
53
53
50,5
50
50
657,5
656
660,5
668
78,5
79,5
73,5
180
180
180
76,5
76
117
90
88
210
250
83,5
190
185
84
78
81,5
250
666
1
2
3
4
5
6
7
8
9
10
11
12
13
14
15
16
17
18
19
20
21
22
23
24
25
C A R G O 4 3
19
Page 20

20
B
A
C
D
Á
A
Á
B
C
D
Page 21

21
Page 22

22
C A R G O
| flight log |
ssiizzee
ddaattee ssiittee dduurr aattiioonn fflliigghhtt ddeett aaiillss
Page 23

Page 24

CARGO
| francisco rodríguez · 7 | 33201 g i j ó n | spain | p.o. box · 269 33280 |
| p# · +34 985 357 696 | fax · +34 985 340 778 |
| email · info@windtech.es | web · www.windtech.es |
POWERED BY WINDTECH
 Loading...