

Page 1
®
TWO-SIDED
LAMPPOST CLOCK
93225
ASSEMBLY & OPERATING INSTRUCTIONS
Due to continuing improvements, actual product may differ slightly from the product described herein.
3491 Mission Oaks Blvd., Camarillo, CA 93011
Visit our Web Site at www.harborfreight.com
Copyright© 2005 by Harbor Freight Tools®. All rights reserved. No portion of this manual or
any artwork contained herein may be reproduced in any shape or form without the
express written consent of Harbor Freight Tools.
For technical questions and replacement parts please call 1-800-444-3353.
Page 2
THANK YOU for choosing a HARBOR FREIGHT TOOLS product. For future reference, please
complete the owner’s record below:
Model______________ Serial No._____________ Purchase Date_______________
SAVE THE RECEIPT, WARRANTY AND THESE INSTRUCTIONS. It is important that you read the
entire manual to become familiar with the unit BEFORE you begin assembly.
Technical Specifications
Materials: Cast steel, metal, aluminum and iron
Overall Height: 86”
Clock Face: 11-3/4” diameter
Clock Face Housing Assy.: 15” Diameter x 6” W x 23” H
Clock Numbers: Roman numerals
Base Dimensions: 13-1/2” Diameter x 2-1/2” H
Batteries: (2) “AA” cell batteries (not included)
Weight: 42.2 lb.
Safety Warnings and Precautions
WARNING: When using product, basic safety precautions should always be followed to
reduce the risk of personal injury and damage to equipment.
Read all instructions before using this product!
1. Keep work area clean. Cluttered areas invite injuries.
2. Observe work area conditions. Keep work area well lighted.
3. Use the right product for the job. There are certain applications for which the Lamppost
Clock was designed. Do not modify the Clock and do not use the Clock for a purpose for
which it was not intended.
4. Check for damaged parts. Before using any product, any part that appears damaged
should be carefully checked to determine that it will operate properly and perform its
intended function. Check for any broken or damaged parts and any other conditions that may
affect its operation. Replace or repair damaged or worn parts immediately.
5. Replacement parts and accessories. When servicing, use only identical replacement
parts. Use of any other parts will void the warranty.
6. Do not set up this product if under the influence of alcohol or drugs. Read warning
labels on prescriptions to determine if your judgment or reflexes are impaired while taking
drugs. If there is any doubt, do not operate the product.
7. Do not allow children to play with or hang on the Lamppost Clock. Because of its
intricate parts, the Clock can be damaged by improper use.
8. Because of the weight of the Lamppost Clock, it is recommended that assembly be
done by two adults and that all lifting and moving of the Clock be done by two people.
Warning: The warnings, cautions, and instructions discussed in this instruction manual cannot
cover all possible conditions and situations that may occur. It must be understood by
the operator that common sense and caution are factors which cannot be built into
this product, but must be supplied by the operator.
SKU 93225 For technical questions please call 1-800-444-3353. Page 2
Page 3
Unpacking
When unpacking your Lamppost Clock, check to make sure that all the parts listed in the parts list
located on page five are included. If any parts are missing or broken, please call
HARBOR FREIGHT TOOLS at 1-800-444-3353.
Assembly
Your Lamppost Clock will require complete assembly. It is important that you read the entire manual
to become familiar with the product BEFORE you assemble and use the Clock. Before assembling
the Clock, be sure that you have all parts described in the Parts List located on page five of this
manual. Refer to the Parts and Assembly diagram for each of the following steps.
Because of the weight of the Lamppost Clock, it is recommended that assembly be done by
two adults and that all lifting and moving of the Clock be done by two people.
1. Thread the Stand (3) onto the Base (2). Set the Bottom Post (4) down onto the Stand (3)
and thread into place.
2. Set Collar (5) onto the Bottom Post (4). Set the Upper Post (6) down through the Collar (5)
and thread it into the Bottom Post (4).
3. There is a small Hex Nut which fits into the hole in the Collar (5). Insert the Hex Nut and use
the Hex Wrench (9) to tighten it into place. This will secure the Collar (5) to both the Bottom
Post (4) and Upper Post (6).
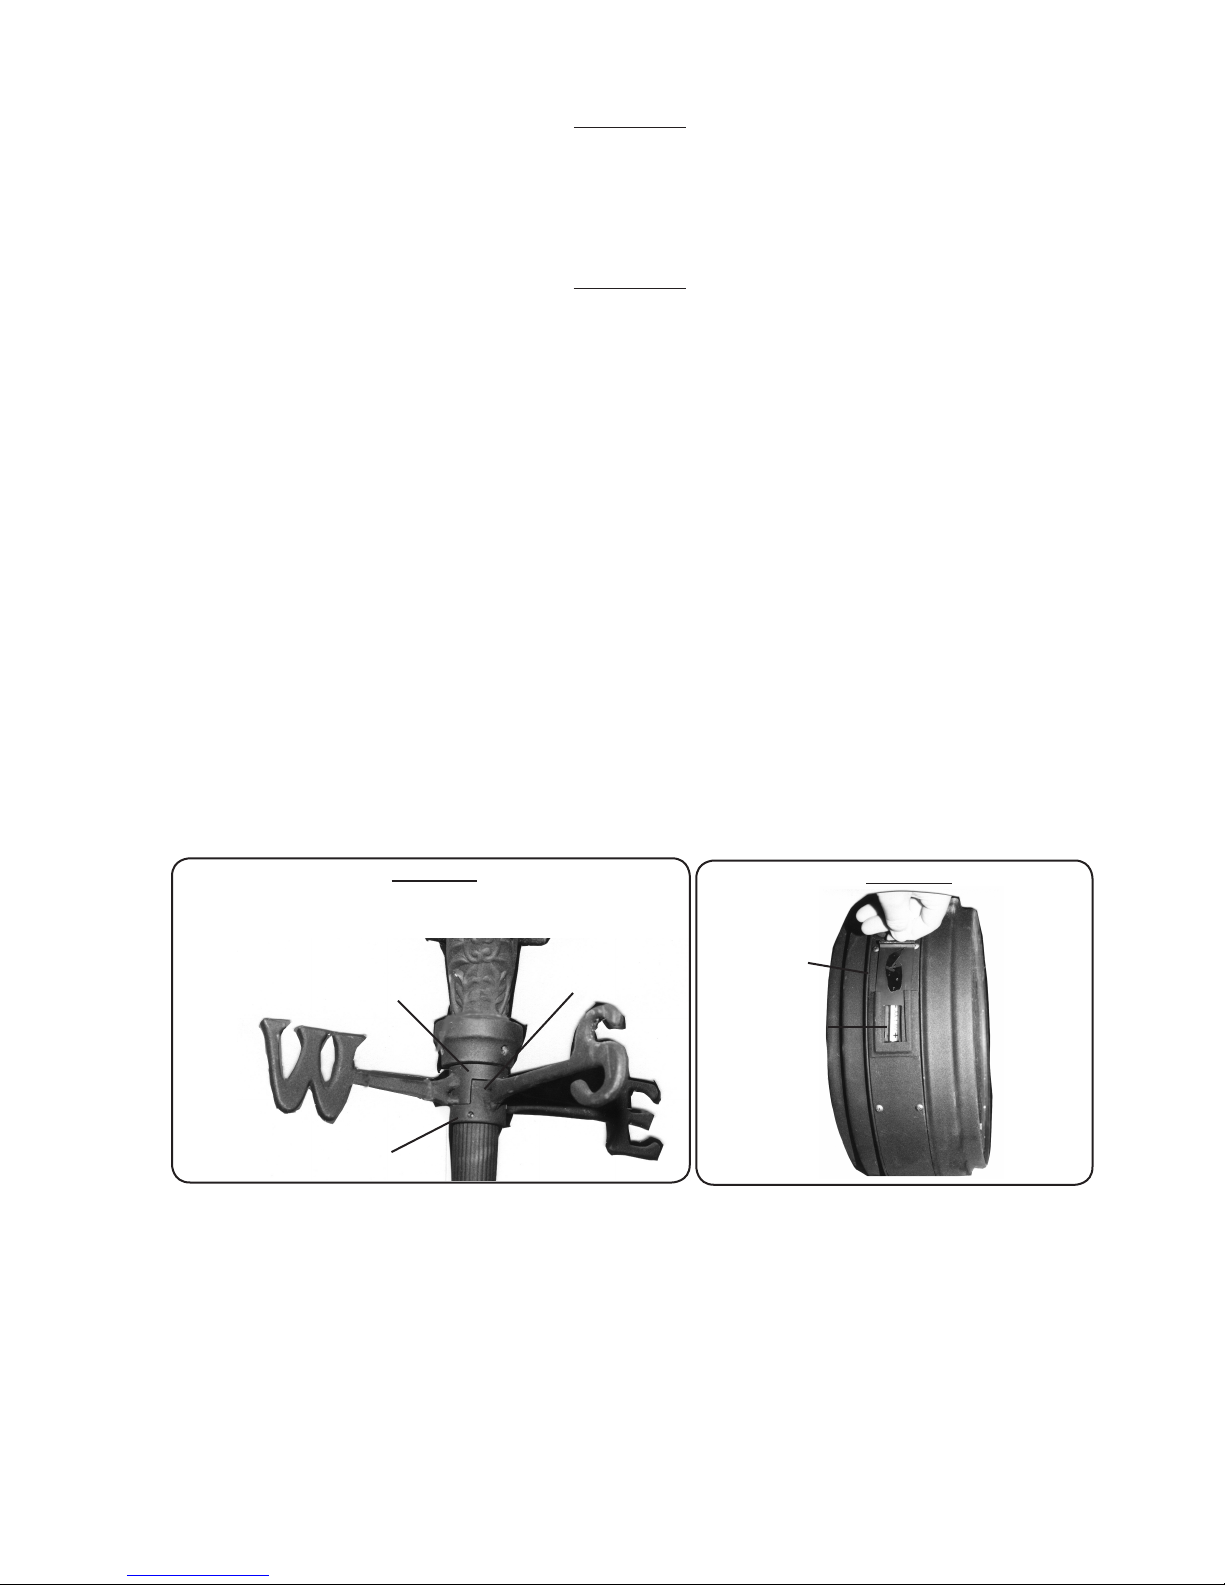
4. Set the North-South Collar (7) down onto the Upper Post (6) as in Figure 1. Using the
Hex Wrench (9), insert the Hex Nut and thread it into place on the North-South Collar.
East-West Collar (8)
Figure 1
North-South
Collar (7)
battery cover
battery
compartment
Figure 2
+
-
Hex Nut
5. Set the East-West Collar (8) down onto the North-South Collar so that the two fit together
- see Figure 1.
6. Set Clock (10) down onto the Upper Post (6). The Clock (10) will sit on the Upper Post (6)
via a large collar with three hex nuts. Use the Hex Wrench (9) to thread all three hex nuts
into the large collar on the Clock (10). Make certain that all three hex nuts are fully tightened
into place to secure the Clock (10) into place.
7. If directional accuracy is desired, use a compass to orient the Lamppost Clock before setting
the Clock into its location. Using a compass will ensure that all directions, north, south, east
and west point to their true position.
SKU 93225 For technical questions please call 1-800-444-3353. Page 3
Page 4
8. The Lamppost Clock may be set into the ground with stakes, but for stability it is
recommended that the Clock be mounted to a cement surface. If you have not mounted a
product like this into concrete before, it is recommended that a qualified technician install
and cement the Base of the Clock into place. Warning: Because of the weight of the
Clock it is not recommended to insert Stakes (1) into a ground surface such as dirt or
grass; the product will not be stable. High winds and extreme weather conditions may
result in the Lamppost Clock becoming unstable. CAUTION: Under these conditions the
Lamppost Clock may tip over resulting in personal injury and /or property damage.
9. Insert the Stakes (1) into the Base (2); thread them in from the bottom.
Figure 3
Key (11)
Inserting the Batteries
Slide out each battery cover located on the side of the Clock (10) - see Figure 2. Insert one
type “AA” battery into each battery compartment so that the polarity matches that marked
inside the battery compartment, positive (+) and negative (-)-see Figure 2. Once the battery
is in place, slide the battery cover back into place.
Setting the Clock Time
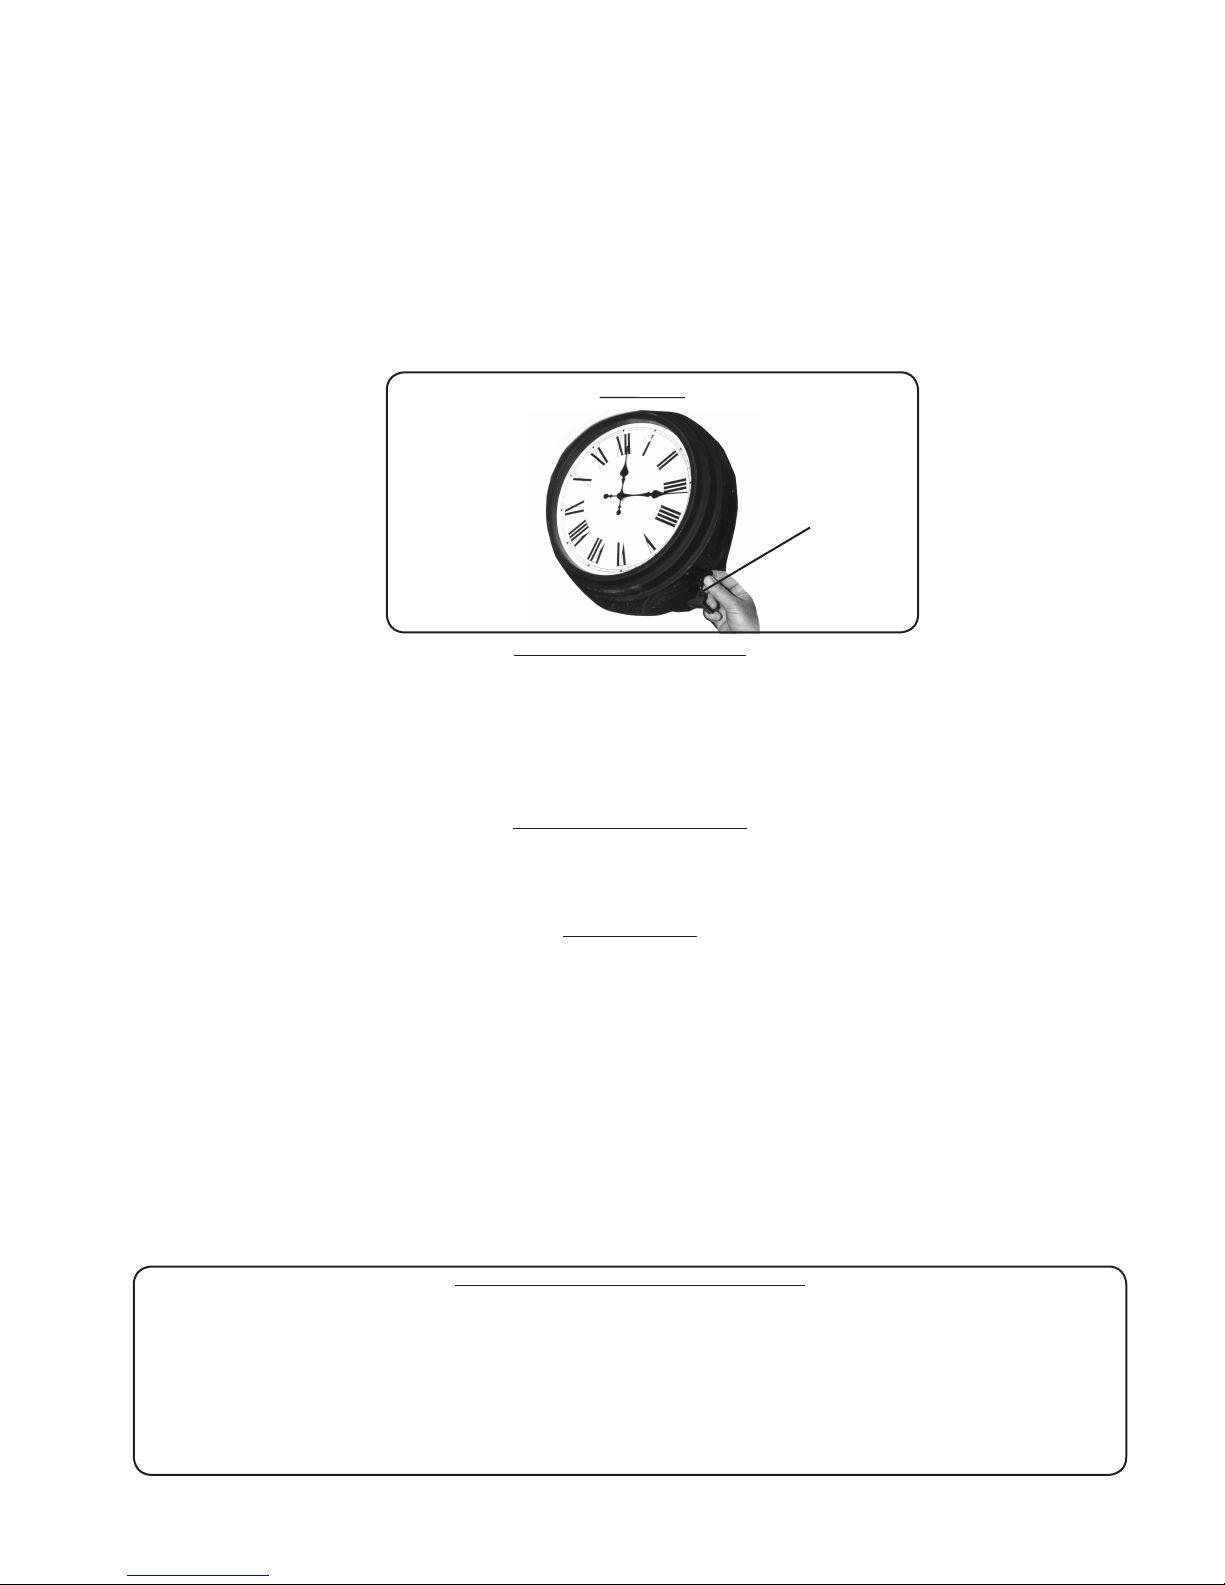
Locate the Key (11) and place it on the knob located on the side of the Clock (10) - see
Figure 3. Continue to turn clockwise until the Clock indicates the correct time.
Maintenance
1. After assembling, and at reasonable intervals, check to make certain that all bolts are in
place and fully tightened.
2. Check and replace batteries periodically. Make certain compartment doors are closed
securely to protect batteries from weather and moisture.
3. Keep the Clock and glass clean using mild antibacterial soap. With a soft towel, use a mild
glass cleaner to clean the face of the Clock (10).
4. Store Keys (11) in a safe, clean and secure location free from moisture. Keep out of the
reach of children.
PLEASE READ THE FOLLOWING CAREFULLY
THE MANUFACTURER AND/OR DISTRIBUTOR HAS PROVIDED THE PARTS DIAGRAM IN THIS MANUAL AS A REFERENCE TOOL
ONLY. NEITHER THE MANUFACTURER NOR DISTRIBUTOR MAKES ANY REPRESENTATION OR WARRANTY OF ANY KIND TO
THE BUYER THAT HE OR SHE IS QUALIFIED TO MAKE ANY REPAIRS TO THE PRODUCT OR THAT HE OR SHE IS QUALIFIED TO
REPLACE ANY PARTS OF THE PRODUCT. IN FACT, THE MANUFACTURER AND/OR DISTRIBUTOR EXPRESSLY STATES THAT ALL
REPAIRS AND PARTS REPLACEMENTS SHOULD BE UNDERTAKEN BY CERTIFIED AND LICENSED TECHNICIANS AND NOT BY THE
BUYER. THE BUYER ASSUMES ALL RISK AND LIABILITY ARISING OUT OF HIS OR HER REPAIRS TO THE ORIGINAL PRODUCT
OR REPLACEMENT PARTS THERETO, OR ARISING OUT OF HIS OR HER INSTALLATION OF REPLACEMENT PARTS THERETO.
SKU 93225 For technical questions please call 1-800-444-3353. Page 4
Page 5
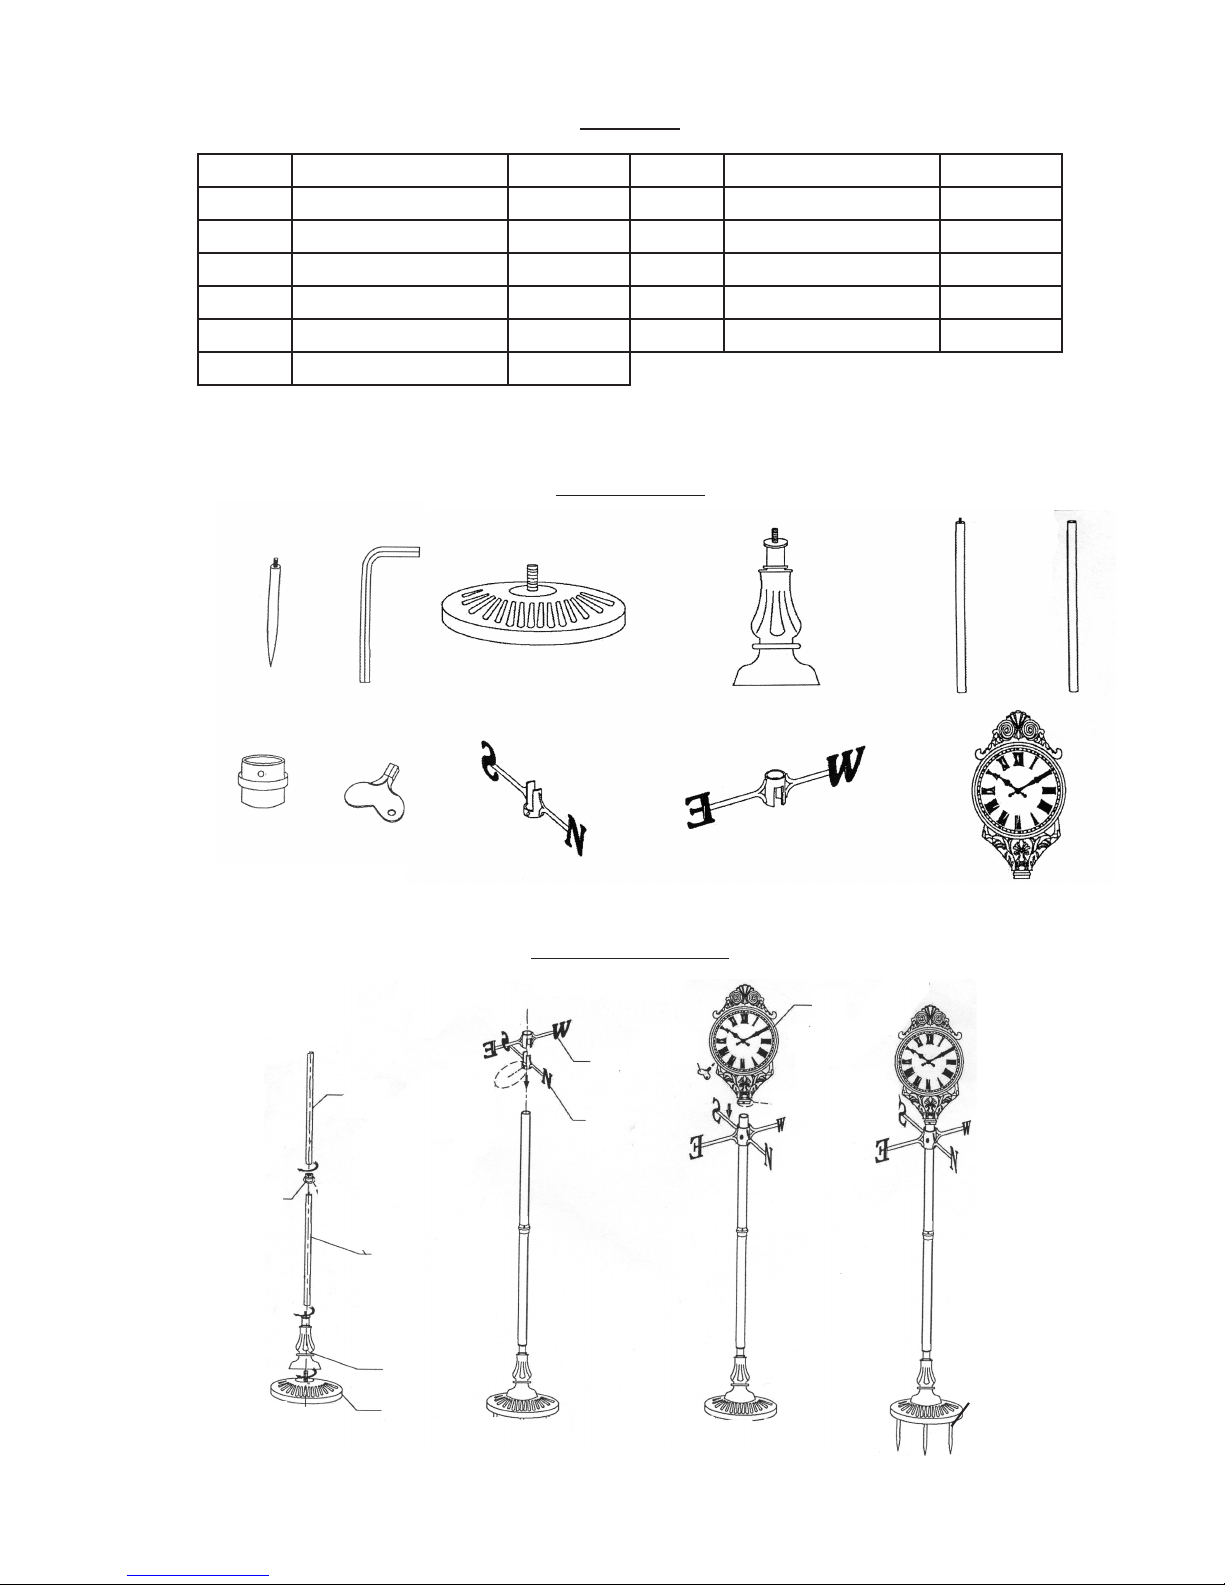
Parts List
Part # Description Quantity Part # Description Quantity
1 Stake 3 7 North-South Collar 1
2 Base 1 8 East-West Collar 1
3 Stand 1 9 Hex Wrench 2
4 Bottom Post 1 10 Clock 1
5 Collar 1 11 Key 2
6 Upper Post 1
Parts Diagram
1
9
3
4
2
10
5
11
7
8
Note: Some parts are listed and shown for illustration purposes only and are not available
individually as replacement parts.
Assembly Diagram
10
8
6
7
6
5
4
3
2
Steps 1 & 2
SKU 93225 For technical questions please call 1-800-444-3353. Page 5
Steps 3,4 & 5
Step 6
1
Step 7
REV 05/06
 Loading...