

Page 1
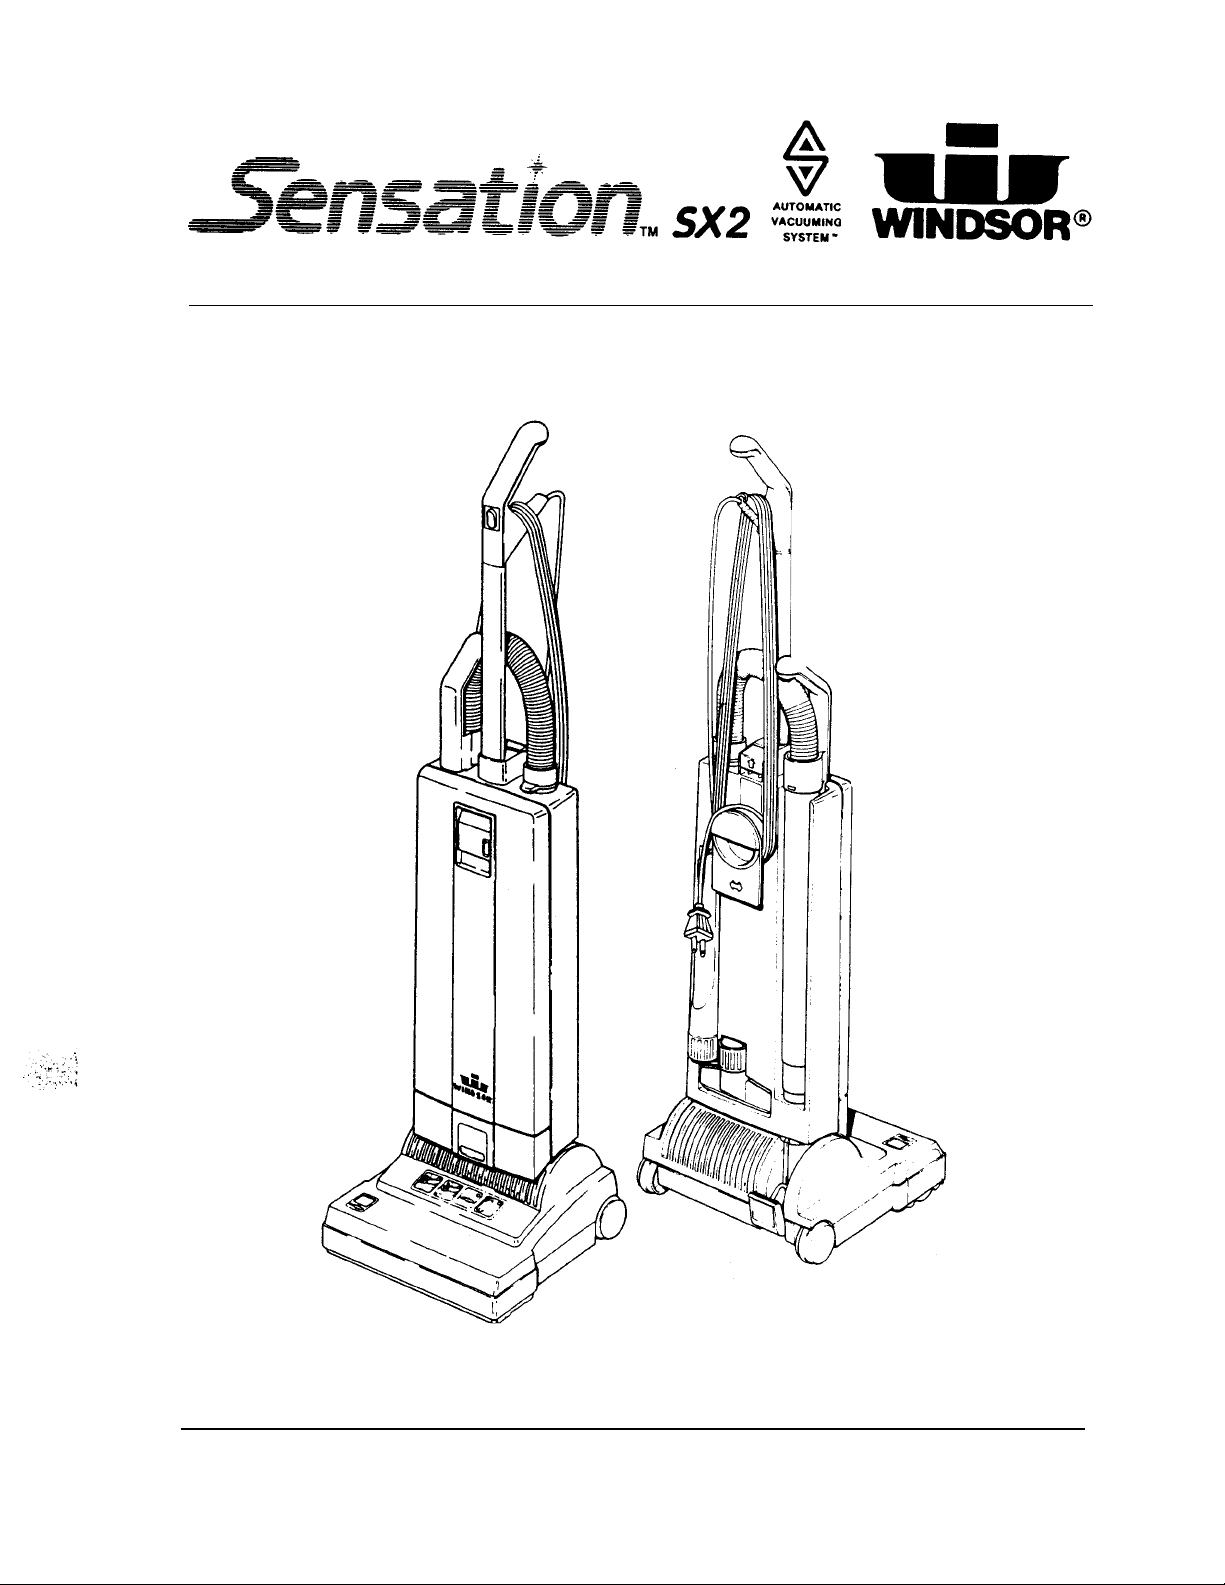
Household Products
\
For
For warranty purposes please retain a copy
Para poder utilizar la garantia, por favor guarde una copia del recibo original de compra.
Household
of
your original purchase receipt.
Use
Only
Page 2

IMPORTANT SAF€TY INSTRUCTIONS
When using an electrical appliance, basic precautions must always be followed,
including the following
READ ALL
WARNING:
Do
not leave appliance when plugged in. Unplug from outlet when not in use and before servicing.
2.
Do
not use outdoors or on wet surfaces.
Do
not use near small children.
3.
by or near children.
4.
Use only as described in this manual. Use only manufacturer's recommended attachments.
5.
Do
not use with damaged cord or plug. If appliance is not working as it should, has been dropped,
damaged, left outdoors, or dropped into water, return it
Do
not pull or carry by cord, use cord as a handle, close a door on cord, or pull cord around sharp edges or
6.
comers.
Do
not unplug by pulling on cord.
7.
8.
Do
not handle plug or appliance with wet hands.
9.
Do
not put any object into openings.
and anything that may reduce air flow.
INSTRUCTIONS BEFORE USING THIS MACHINE
T
O
reduce the risk
Do
not allow to be used as a toy. Close attention is necessary when used
Do
not run appliance over cord. Keep cord away from heated surfaces.
To
unplug, grasp the plug, not the cord.
Do
not use with any opening blocked; keep free of dust, lint, hair,
fire, electric shock, or injury:
to
a service center.
10. Keep hair, loose clothing, fingers, and all parts of body away from openings and moving parts.
place fingers or other body parts under vacuum unless unplugged.
Do
11.
12.
13. Turn
14.
15.
be present.
16. Machines can cause a fire when operated near flammable vapors or materials.
machine near flammable fluids, dust or vapors.
17. Maintenance and repairs must be done by qualified personnel.
18. Use only identical replacement parts. See instructions for Servicing of Appliances.
19.
20.
turned on.
not pick up anything that is burning or smoking, such as cigarettes, matches, or hot ashes
Do
not use without dust bag and/or filters in place.
off
all controls before unplugging.
Use extra care when cleaning on stairs.
Do
not use to pick up flammable or combustible liquids such as gasoline or use in areas where they may
Do
not opera& this
Do
not use machine as a step.
If
used on plush carpet or carpet with thick padding, do not leave machine in one place with machine
Do
not
SAVE THESE INSTRUCTIONS
Page 3
PARA
SU
SEGURIDAD
Durante la utilizacion de un dispositivo electrico hay que tener en cuenta una
serie de
ES IMPORTANTE QUE LEA ESTAS INSTRUCCIONES ANTES DE
COMENZAR
USAR
ADVERTENCIA:
1.
No
deje nunca el aparato conectado a la red. Despues de
desconecte el aparato de la torna de corriente.
2.
No
usar nunca el aparato al aire libre, ni sobre superficies hurnedas.
3.
No
utilice la aspiradora cuando
que prestar especial atencion
4.
Utilzar el aparato solo corno se describe en este manual. Ernplear exclusivarnente
recornendados por el fabricante.
5.
No
poner en marcha el aparato con un cable electrico deteriorado. Si el aparato no funciona corno deberia, si
se ha caido,
6.
No
tire del aparato ni
puerta con el cable
encirna del cable. Mantenga el cable sirnpre
7.
No
desconecte el enchufe de la red tirando del cable. Para desconectar
del cable.
lo
transporte utilizando el cable electrico; no use el cable a rnodo de asa, ni cierre una
Para reducir el riesgo de incendios, descargas
electricas
el
cable en torno a aristas vivas o esquinas.
o
lesiones:
y
antes de cualquier revision o reparacion,
No
perrnita que se utilice el aparato corno un juguete. Hay
accesorios
o
No
pase con el aparato por
el
aparato hay que tirar del enchufe, no
A
8.
No
rnaneje el enchufe ni el aparato con las rnanos hurnedas.
9.
No
introduzca ningun objeto en las aberturas del aparato.
las aberturas; evite la
aire.
10. Mantenga su
piezas en rnovirniento.
desenchufada.
11.
No
utilice
el
calientes.
12.
No
utilizar nunca el aspirador sin la bolsa
13. Desconecte todos
14. Tenga especial cuidado
15.
No
utilice el aspirador para recoger liquidos inflarnables
aspirador en
16.
inflarnables.
17.
18. Se
de Aparatos.
19.
rnotores ekctricos pueden originar incendios a1 operar en
No
El
matenirniento y la reparacion
No
usar la aspiradora a rnodo de escalera de mano.
No
coloque 10s dedos ni otras partes del cuerpo debajo de la aspiradora a menos que este
aspirador para recoger cuerpos en llamas o hurneantes, tales corno cigarrillos, cerillas o cenizas
maneje la aspiradora cerca de liquidos, polvos
interruptores antes de desenchufar el aspirador.
dedos y todas las partes de su cuerpo alejadas de las aberturas
la aspiradora esta reservado a personal debidamente cualificado.
No
utilice
el
aparato rnientras esta bloqueaoa una de
o
cualquier objeto que pueda inhibir la circulacion del
o
tales
corno gasolina, ni rnaneje el
tipo.
cercanias de vapores o rnateriales
o
y
20.
Si utiliza la aspiradora en alfornbras de felpa o de acolchado espeso, no deje la rnaquina en funcionarniento
en un lugar fijo.
CONSERVE
ESTAS
INSTRUCCIONES
A
Page 4
LIMITED WARRANTY WINDSOR
WINDSOR warrants to the original pruchaserhser that this product, including belts, is unconditionally
guaranteed free from defects in workmanship and materials under normal household use and service for a
period of three years. WINDSOR will, at its option, repair or replace without charge, except for trans
portations costs, parts that fail under normal use and service when operated and maintained in accor
dance with the Instructions Manual. This warranty does not apply to normal wear or to items whose life is
dependent on their use and care.
This warranty is in lieu of all other warranties, expressed or implied, and releases WINDSOR from all other
obligations and liabilities. All implied warranties including warranties of merchantability and fitness for a
particular use are limited to the period of this written warranty. It is applicable only in North America,
and is extended only to the original
for repairs performed by persons other than those specifically authorized by WINDSOR. This warranty
does not apply to damage from transportation, alterations by unauthorized persons, misuse or abuse of the
equipment, consequential damages or losses of income due to malfunctioning of the product. For any
question about your product, contact Windsor’s Technical Service Department at 800
303
-
762-1 800.
WINDSOR garntiza al comprador/usuario original que este producto, incluyendo las bandas, esta garanti-
zado incondicionalmente por tres atios contra defectos de fabricacion y materiales bajo us0 y servicio
normal
transporte, aquellas piezas que fallaran bajo
de acuerdo con el manual de instrucciones. Esta garantia no se aplica
aquellas piezas cuya vida
Esta garantia se expide en lugar de todas las otras garantias, expresas
cualquier otra
comercializacibn
Se aplica exclusivamente en America del Norte y se extiende solamente
producto. WINDSOR no sera responsable de costos de reparaciones llevadas a
aquel que WINDSOR haya autorizado especificamente para el efecto. Esta garantia no se aplica a datios
durante el transporte, cambios efectuados por personas no autorizadas, maltrato
datios consecuentes
cualquier pregunta
-
456-3352
o
idoneidad para un us0 en particular est6n limitadas al period0 de esta garantia escrita.
o
o
responsabilidad. Todas las garantias implicitas, incluyendo garantias de
o
perdida de ingresos debido a fallas en el funcionamiento del producto. Sie tiene
-
762-1 800.
o
o
implicitas y libera a WINDSOR de
o
-
456-3352 or
gastos de
normal ni a
abuso del equipo,
-
-
Page 5

Important Safeguards
Accidents due to misuse can only be prevented by those using the machine.
precautions should be observed, including the following:
Read and follow all safety instructions.
This vacuum cleaner is designed to be safe when used to perform cleaning functions. Should damage occur to
electrical or mechanical parts, cleaner should be repaired by
using in order
A
damaged power cord could cause electrical shock and/or fire.
following precautions:
Your vacuum cleaner creates suction and contains a revolving brush.
moving parts, vacuum cleaner brush should not be placed against, or in close proximity of loose clothing, jewelry,
hair or body surfaces while cleaner is connected to electrical outlet. Cleaner should not be used to vacuum
clothing while it is being worn. Keep children away from machine when in operation or plugged in.
to
avoid further damage to machine or physical injury to user.
Do
not run cleaner over power cord.
Avoid closing doors on power cord, pulling it around sharp edges, or placing sharp
upon it.
Wind cord no tighter than is necessary to retain it on the cord hooks.
When disconnecting power cord from electrical outlet, grasp the plug. Pulling it out by the cord itself
can damage cord insulation and internal connections to plug.
WARNING: ELECTRIC SHOCK
OUTDOORS
To
guard against injury, basic safety
COULD
OR
ON WET SURFACES
To
minimize this possibility observe the
To
avoid bodily injury from suction or
OCCUR
-
edged objects
IF
USED
I
If
used on plush carpet or carpet with thick padding, turn
accessory tools, keep floor brush off carpet by keeping handle in locked position and lowering handle with one
hand to raise brush
Always plug your cleaner into a standard wall outlet. Use of extension cord or light socket with inadequate
carrying capacity could result in electric shock or fire hazard.
Disconnect cleaner from electrical outlet before servicing, such as changing bags or belts. You could receive
bodily injury from moving parts
electrical outlet before detaching powerhead.
Do
not use your vacuum cleaner in areas where flammable and/or explosive vapor or dust is present to avoid
possibility of fire or explosion. Some cleaning fluids can produce such vapors. Areas on which cleaning fluids
have been used should be completely dry and thoroughly aired before being vacuumed.
off
floor. Operate accessories with other hand.
of
machine should switch accidentally be turned on. Disconnect cleaner from
off
unit when handle is in upright position. When using
.
To
avoid fire hazard, do not pick up matches, fireplace ashes, or smoking material with cleaner.
Keep your work area
substances) and avoid tripping accidents.
Use care when operating the cleaner on irregular surfaces such as stairs.
injury and/or mechanical damage. Proper storage
also prevent accidents caused by tripping over cleaner.
Store you vacuum indoors in a cool, dry area not exposed to the weather to avoid electrical shock and/or cleaner
damage.
Exercise strict supervision to prevent injury when using vacuum cleaner near children or when child is allowed to
operate vacuum cleaner.
and unattended.
well
lighted to avoid picking up harmful materials (such as liquids, sharp objects, or burning
A
falling cleaner could cause bodily
of
machine in an out-of-the-way area immediately after use will
Do
not allow children to play with vacuum cleaner and never leave cleaner plugged in
Page 6

Precauciones
Los
accidentes por us0 inapropiado
prevenirse de
importantes
sdlo
Y
seguridad.
Esta aspiradora se ha diseiiado para ser segura cuando se utiliza para efectuar las funciones de limpieza. En
por
maquina
Un cable electrico
minimizar esta posibilidad:
Su aspiradora crea succidn y contiene un cepillo giratorio. Para evitar lesiones corporales por la succidn
debido a las piezas mdviles, el cepillo de la aspiradora no debera colocarse sobre, ni cerca de, prendas de
vestir holgadas, joyeria,
aspiradora no debera usarse para aspirar prendas de vestir en uso. Mantenga a
aspiradora cuando esta
Si utiliza la aspiradoras en alfombras de felpa
de mando
mando con una
o alguna estacidn de servicio competente antes de usar a fin de evitar daiio adicional a la
o
lesidn corporal al usuario.
No
Evite cerrar puertas sobre el cable, halarlo sobre bordes agudos
sobre
No
desconectar
y las conexiones
el
cable electrico, tomelo de la clavija. Si hala
el
cable electrico.
lo
necesario para que permanezca en
o
supetficies del cuerpo mientras este conectada a una toma electrica. La
o
de alcolchado espeso, desconecte la unidad cuando la palanca
SE UTlLlZA AL AlRE LlBRE
UN CHOQUE ELECTRIC0
o
o
colocar objetos con bordes agudos
el
cable en
la
accesorios con la otra mano.
si,
podria daiiar el aislamiento
0
ganchos para ese efecto.
o
y
bajando la planca de
Siempre conecte la aspiradora en una torna de corriente de pared
o
electrico
Desconecte la maquina antes de darle servicio, corno por ejemplo, para cambiar las bolsas
piezas mdviles.
Desconecte la
encuentren, presentes vapores
explosidn. Algunos liquidos para limpieza pueden producir dicho tip0 de vapores. Las areas donde se han
utilizado liquidos para limpieza
Para revitar el peligro de incendio, no aspire
Mantenga su Area de trabajo bien iluminada para evitar aspirar materiales
objetos agudos,
Use cautela
tropiezos sobre la
de usarse.
Guarde su aspiradora en el interior en una
choque electrico o
La supervisidn debera ser extremadamente estricta para evitar daiios cuando la aspiradora se utilice en la
presencia de
nunca la deje conectada y desatendida.
peligro de incendio.
o
sustancias en combustibn) y evitar accidentes por tropiezos.
No
utilice su aspiradora en Areas donde se
o
polvos inflamables o explosivos para evitar la posiblidad de un incendio
o
daiios mecAnicos. Tambien se evitardn accidentes causados por
No
permita que
El
o
las bandas. En
caerse una
elementos para evitar
niiios jueguen con la aspiradora y
o
o
GUARDE
ESTAS
Page 7

1
10
11
12
13
14
15
16
Handle grip
2
3
Handle assembly
4
Retaining ring
Cover release
5
6
Dust bag housing
7
Cover
Housing release
8
9
10
Cable
Telescopic handle grip
11
12
Hose
Carrying handle
13
14
Cable hook
Attachment tube
15
Crevice nozzle
16
17
Upholstery nozzle
18
Foot Dedal
1
Manija
lnterruptor de
2
Ensamblaje de la manija
3
Anillo de
4
5
Compartimiento de la bolsa para polvo
6
Cubierta
7
8
Cabeza
9
10
Cable
Mango del
11
12
Manguera
13
Asa para transportar
14
Gancho del cable
15
Tubo
Boquilla para ranuras
16
17
Boquilla para tapiceria
Pedal de encendido
18
\
8
3
20
Picture 1 Figura
11
12
1
21
Preparation
Place the brush/suction head on a flat surface
with the neck (20) and the support lever (21)
upright. Hold the dust bag housing vertically
and place over neck and support lever. Push
firmly down
snaps closed.
Lift the catch (22) then slot the handle
assembly into the top
(6)
and push firmly down.
When the handle has been pushed down as
far as it will go press catch (22) down. If the
handle is not pushed fully down the machine
will not work.
Insert attachment tube (23) into the channel at
the back
grip (11) on the holder (24).
Open retaining ring (4) by pushing round a
quarter
connecting tube (26) ensuring that it is
pushed fully in. Return retaining ring to
closed position.
Insert crevice nozzle and upholstery nozzle
into the recesses in the back of the machine.
so
that the housing release (8)
of
the dust bag housing
of
the machine. Locate the handle
of
a turn. Insert hose end into
Coloque la cabeza cepilladora/aspiradora
sobre una superficie plana con el cuello (20)
y la palanca de apoyo (21) en
Sostenga el cornpartimiento de la bolsa para
polvo en
cuello y la palanca de apoyo. Presione
firmemente hacia abajo hasta que cierre el
pestillo del compartimiento (8).
ensamblaje de la manija en la parte superior
del compartimiento para la bolsa para polvo
(6)
y presione firmemente hacia abajo.
Una vez que la manija
tope, presione el pestillo (22) hacia abajo. La
insertada por completo.
lntroduzca el tubo para accesorios (23) en la
ranura de la parte posterior de la
Ubique la manija
Abra el anillo de
cuarto de vuelta. lntroduzca el extremo de la
manguera en el
asegurandose de insertarlo completamente.
Gire el anillo de
opuesta para cerrarlo.
Coloque la boquilla para ranuras y la boquilla
para tapiceria en la canal posterior de la
(11)
en el portador (24).
.
9
Picture
2 . Figura
2
Switch position
0
I
=
OFF-Position
=
ON-Position
Page 8

Functions of the display:
Green light (a)
Green light (b)
Red light
Red light
Red light
Red light
Red light
:
Brush lowers
:
Brush raises
:
Continuous-change brush
roller
:
Flashing and motor
Brush jammed-clear
:
Flashing and motor on
(when machine is upright
position)-Take care: Brush
in contact with carpet.
:
Continuous-change paper
bag or clear blockage
:
Flashing - motor switched
(d)
off
due to full paper bag or
blockage.
Funciones de Despliegue:
Luz verde (a)
Luz roja (c)
Luz roja
Luz roja (c)
Luz roja (d)
Luz roja
:
Cepillo desciende
:
Cepillo asciende
:
Continuo - Cambiar rodillo
de cepillo
:
lntermitente y motor apagado
-
Cepillo atrancado - claro
:
lntermitente y motor encen-
dido (Cuando maquina esta
en
cuidado: Cepillo en contact0
con la alfombra
:
permanente-cambiar la
bolsa de
:
intermitente-motor apagado
debido a bolsa
bloqueo
-
tener
o
desbloquear
On hard floors the adjustment wheel
moves upwards into the machine
brush becomes flush with the floor.
Therefore, the WINDSOR
also be used to vacuum hard floors.
On carpeted floors the adjustment wheel
moves downwards out of the machine so that
the brush rises. The adjustment wheel
rises and lowers to adjust the brush to the
optimal setting. This combines effective, gentle
brushing with a smooth easy action.
When the machine is switched on in the up
right position the brush automatically rises
from the carpet. To release the machine from
the upright position, press down the foot pedal
(18).
The brush will automatically lower. The
handle can be lowered to an intermediate stop
position in order to lift up the brush head.
lower the handle to a horizontal position, the
foot pedal must be pressed a second time. The
stop position can be closed
the swivel neck (19)
from vertical to horizontal in one movement.
To vacuum in corners etc., take hold of the
telescopic handle grip,
machine and stretch out the hose. After use
insert the telescopic attachment tube into the
back of the machine. Raise the handle
machine and the hose will automatically
retract. To use the hose without the tube as
shown in the right hand picture, the hose will
pull out of the tube while the tube is fitted to
the machine. Alternatively, press the release
catch
(27)
or carpet with thick padding, turn
when handle is in upright position. When using
accessory tools, keep floor brush
by keeping handle in locked position and
lowering handle with one hand to raise brush
off
on picture
floor. Operate accessories with other hand.
so
that the handle will go
lift
2.
If used on plush carpet
so
that the
"
SENSATION" can
(41)
(41)
off
by a slider on
it away from the
of
off
unit
off
carpet
To
the
En
pisos duros, la rueda de ajuste
se mueve hacia arriba en la maquina a fin
de que el cepillo llegue hasta el piso. Por
duros.
pisos alfombrados la rueda de ajuste
En
(41) se mueve hacia abajo en la maquina de
La rueda de ajuste
proporcionar la
cepillo. Asi se obtiene una
efectiva de cepillado suave con una
-
Cuando la maquina se enciende en la
mango a una
levantar la unidad del cepillo. Para bajar el
mango hasta una
presionar por segunda vez el pedal. Se puede
una corredera situada en la parte posterior del
pasa directamente de la
Para aspirar en rincones, retire el tubo
rior de la maquina. Levante la manija de la
maquina para que la manguera vuelva a
la manguera sin el tubo, como se muestra en
la figura de la derecha, simplemente hale la
manguera. Alternativamente, presione y
el pestillo
aspiradora an
chado espeso, desconecte la unidad cuando
la palanca de mando
Cuando
alfombra, manteniendo la palanca de mando
en la
mando con una
para el piso. Maneje
otra mano.
(27)
(41)
en la figura
"
SENSATION
sube y baja a fin de
Es
posible bajar el
movimiento.
2.
Si utiliza la
accesorios con la
(41)
lo
"
elevado.
-
To vacuum under beds etc., the WINDSOR
"
SENSATION" can be fitted with an additional
straight tube and the floor
will then perform as a cylinder vacuum.
run
Never
suction head.
Always carry
over the cable with the
the
machine over steps and
brush/
sills.
Para aspirar en las
otro tubo rigido y la
cilindrica.
Nunca pase
de
Siernpre cargue la maquina para pasar por
escalones o urnbrales.
"
SENSATION". La
el
cable con la cabeza
Page 9

TROUBLE
SHOOTING
GUIDE
Problem
Does Not Turn On.
Bag
Full
Shuts
Brush Light On and Shuts
Up and Down Lights Flicker
Does Not Pick Up
Front Bag Door Won’t Close Fully
Hose Doesn’t Retract After Using
Wand
Light On
Off.
Machine
Off
So
I
u
t
i
o
n
Handle not fully connected. Release handle catch, push handle down, close
1.
handle catch.
2.
Not plugged into good outlet. Use another outlet.
3.
Cable worn. Replace.
Bag full. Replace bag.
2.
Clog in neck. Unplug machine and open the access door under the machine
and cleanout. If needed, remove the upper
button at the lower front of the upper
3.
Clog in hose. Clean
4.
Clog in entrance to bag. Remove house and front bag cover, cleanout.
5.
Microfilter dirty. Replace.
Brush worn. Replace.
2.
Brush jammed. Turn
Operating on uneven floor. Ignore.
1.
Wand not correctly inserted. Reinsert wand making sure bottom end of wand
is in the lower hole.
2.
Front cover not closed. See below.
1.
Handle
handle locked forward and upright.
2.
Bag not inserted properly. Reinsert bag until latched in front door holder.
3.
Micro filter not properly inserted. Lift lever and insert filter with vertical plastic
ridge on filter facing you.
Wand not properly inserted. Reinsert making sure top of handle of wand is
pointing back and wand is fully down.
not
in fully upright position when bag inserted. Reinsert bag with
out
hose (see instructions), do not rip hose.
off
and clear jam or debris on brush.
off.
GUIA PARA LOCALIZACION
Problema
La aspiradora no se enciende.
La aspiradora se apaga.
La
del cepillo se enciende y
se apaga.
Las
hacia abajo.
No recoge la suciedad.
esta encendida.
DE
1.
La palanca de mando no esta conectada en su totalidad. Libere el reten,
2.
La aspiradora no esta enchufada a un tomacorriente en buen estado. Utilice
otro tomacorriente.
3.
El
cable esta gastado. CBmbielo.
1.
La bolsa esta Ilena. Cambie la bolsa.
2.
debajo de la aspiradora y limpie completamente.
cubierta superior de la aspiradora pulsando el
frente delantero inferior de la cubierta superior de la aspiradora y
Limpie el cuello.
3.
4.
de la bolsa, elimine la suciedad.
5.
El
microfiltro esta sucio. CBmbielo.
1.
El
cepillo esta gastado. Cambielo.
2.
El
cepillo esta atascado. Apague la aspiradora y corrija el atascamiento
elimine la suciedad del cepillo.
Ud esta utilizando la aspiradora sobre un piso que no es parejo. Ignore
anterior.
1.
La varilla de succidn no esta insertada correctamente. Vuelva a insertar la
varilla asegurando que el extremo inferior de la
2.
La tapa delantera no estd cerrada. Lea las instrucciones detalladas a
Si
fuera necesario, retire la
o
lo
La puerta delantera de la bolsa
no se cierra totalmente.
La manguera no se retrae
de usar la varilla de succibn.
La palanca de mando no estB completamente en la posici6n vertical cuando
se introduce la bolsa. Vuelva a colocar la bolsa con la palanca trabada hacia
2.
La bolsa no esta insertada correctamente. Vuelva a colocar la bolsa hasta
que se trabe en el sujetador de la puerta delantera.
3.
El microfiltro no estA insertado correctamente. Levante la barra e inserte el
filtro con el saliente vertical de
La varilla de succi6n no estB insertada correctamente. Vuelva a insertar la
varilla de
de la varilla de
y
la varilla este totalmente hacia abajo.
Page 10

Maintenance
CAUTION - Always unplug machine at mains
outlet
before
dismantling any
If
red light (d) shows, change paper filter bag.
To do this first pull cover release
forward and lift the cover from the dust bag
housing. Slide the dust bag sealing plate (28)
from the holder (29). Slide the sealing plate
(28) of a new bag into the holder and push
firmly in. Insert cover into dust bag housing,
push it forward then lock it in place by pushing
down the cover release
The micro hygiene filter (30) needs to be
changed when it becomes clogged with dust
or after approximately 20 paper bags have
been used. To change the hygiene filter first
remove the cover then slide the filter out at the
bottom. To replace lift the lever and slide the
new filter in.
(5).
part
of
(5)
machine.
picture
Ma nten m ien to
antes de desarmar walqier
1
bolsa de papel. Para hacerlo, primero hale el
pestillo de la cubierta
adelante y levante la cubierta
cornpartimiento de la bolsa para polvo. Retire
la placa selladora (28) de la bolsa para polvo
placa selladora (28) de la bolsa nueva en el
portador y
la cubierta
para polvo empujandola hacia adelante y
persionando el pestillo de la cubierta
hacia abajo.
El
micro filtro higienico debe cambiarse
cuando
20 bolsas de papel. Para cambiar el filtro,
primero quite la cubierta y despues retlrelo de
la parte inferior. Para reponerlo, levante la
palanca e introduzca el nuevo filtro.
Siempre
de
roja (d), cambie la
(5)
(figura
1)
la
la
misma.
hacia
(5)
34
After 20 paper bags have been used also
change the exhaust filter (32). To remove the
exhaust filter push the catch (33) backward
and remove the filter cover (34) and filter.
Insert the new filter and replace the filter cover.
To change the brush roller (35) push the
button
the brush clockwise aquarterof a turn and pull
the brush roller
into the brush housing and turn it until it
locates into position. Push the button (36) and
press the side plate (37) back into place.
Underneath the machine is an inspection door
to
press down the catch on the door. The stain
less steel bottom plate (42) can be removed to
clean out the brush roller housing by
unscrewing the holding screws.
Blockages in the neck (20
checked by first lifting
by pressing
pedal, lower the neck and check into the tube
next
to
out.
the pedal.
Slide the new brush roller
-
picture 2) can be
off
the dust bag housing
Despues de haber usado 20 bolsas de papel,
aire (32). Para retirarlo, empuje el pestillo (33)
hacia
filtro. lntroduzca el nuevo filtro y coloque la
Para cambiar el cepillo de rodillo
presione el bot6n (38), retire la placa lateral
el cepillo halando hacia afuera. Deslice el
cepillo de rodillo nuevo en el cornpartimiento
para el cepillo y girelo hasta que quede fijo en
la placa lateral (37) en
Debajo de la maquina existe una ventanilla de
Para abrir la ventanilla, presione la orejilla
hacia abajo. La placa metalica del fondo se
puede retirar destornillando
del cepillo de rodillo.
Se pueden revisar las obstrucciones
cuello de la manguera (20-figura
levantando la caja de la boka de basura y
presionando la parte que captura la basura
Luego suelte el pedal, baje el cuello y
revise dentro del tubo junto
tornillos de
2),
primero
39
Blockages in the hose can cleared by taking
the hose
wrong way round in the connecting tube (26),
holding it upright with one hand blocking the
top and switching on the machine.
necessary quickly lift your hand on and
end of the hose.)
The guarantee may be invalidated if parts
not approved by WINDSOR.
brush roller, etc. are fitted!
off
the machine and replacing it the
(If
eg.
bags, filters,
off
the
Si
la manguera esta bloqueada se puede
desbloquear
de
superior con una mano y encienda la maquina
(si es necesario, quite y ponga la mano
La garantia perdera
etc., no ha sido aprobada por WINDSOR.
validez si alguna
Page 11

1
1
2
Attachments
1 Upholstery Nozzle
2 Crevice
Optional Attachments
1 Extension Hose
2 Straight Tube
3
Dusting Brush
4 Upholstery Nozzle, special
5
Wall- and Floor Brush
Service Parts
1
Paper Bag
2 Micro
-
Hygiene-Filter
3 Exhaust Filter
4 Brush Roller
Accesorios
1
Boquilla para tapiceria
2 Boquilla para grietas
Accesorios opcionales
1
Manguera flexible
2 Tubo rigido
3 Cepillo para sacudir
4 Boquilla para tapiceria, especial
Cepillo para paredes y piso
1 Bolsa de papel
2 Micro filtro higienico
3 Filtro de salida de aire
4 Cepillo de rodillo
WARNING!
if used outdoors or on wet surfaces!
Technical Details
Vacuum motor
Water lift
Air
flow
Dust bag capacity
Working width
Brush drive
Brush speed
Floor adjustment
................
Cable
Weight
Radio
........
.............
.
.............
.....
.........
...........
..........
......
...............
......
Datos tecnico
Motor de aspiraci6n.
Capacidad bolsa del
polvo
................
Ancho
Motor del cepillo
Velocidad del cepillo
Cable
................
.............
Peso
U.S.
Patents:
...
5,056,175
4,955,106
5,028,245
...
.....
..........
....
......
...
........
..
....
.....
Electric shock could occur
Wiring
850 Watt
1750
mm
42
5.3 liters
308
tooth belt
2700 rpm
automatically sensor
advised
12.2 m (40')
7,2 kg (15,8 Ibs)
EN 55014 Verf. 242/91
850 vatios
1750
(69 pulgadas)
42
308
(12 pulgadas)
cinta dentada
2700 rpm
sensor
7,2 kg (15,8 libras)
EN 55014 Verf. 242191
(69")
(44 CFM)
(12")
US
(40 pies)
....
.........
Household Products Division
1351 West Stanford Ave.
Englewood, Colorado 80110 USA
(1) 800
(1) 303
FAX:
INDUSTRIES. INC.
-
444-7654
-
762-1800
(1) 303-762-0817
i
061
95-1
 Loading...