

WindRider 17 Owner's Manual
OWNER’S MANUAL
3761 Old Glenola Road ■ Trinity, NC 27370 ■ 1-800-311-7245 ■ www.windrider.com

WindRider 17 Trimaran
Thank you for choosing a WindRider 17 Trimaran and becoming part of the WindRider family.
This owner’s manual will help you learn more about your WindRider craft and will help you get
started in its safe operation. We encourage you to become thoroughly familiar with your WindRider 17
Trimaran before you go sailing. Located at the end of this manual, you will find a glossary of terms
that you may find helpful to reference while reading through the instructions and guidelines.
Please be sure to complete your warranty registration card and return it within 90 days of
purchase to activate your warranty. Returning this card will also allow us to keep you informed of
updates and sailing activities with other WindRider owners.
Your local dealer will be glad to provide additional information about your new boat, and you will
also find a wealth of information from other WindRider owners in the discussion forum at
www.windrider.com
Enjoy your boat and welcome aboard!
.
An Introduction to Thermal Plastics
Your WindRider 17 Trimaran’s (WR17) hulls are molded of polyethylene, a thermal plastic. This
material allows us to build hulls that are lightweight, strong, resilient, durable, and low cost.
The process used to build these hulls is called “rotational molding.” Polyethylene powder is
placed in a heated mold. The polyethylene liquefies, and the mold is rocked and rotated to distribute
the plastic. Once this cycle is complete, the mold is separated and the hull removed.
Because polyethylene is a thermal plastic and is altered by heat and pressure, it is important that
you take a few simple precautions to ensure that your boat’s hulls maintain their appearance and
proper shape. Occasionally, dents (or “wows”) can occur in the hulls of your WR17. To correct this,
place the affected hull in direct sunlight for a day and then allow it to cool. The plastic’s memory
should return the hull to its original shape.
If this does not correct the problem, hold a hair dryer a few inches from the hull (preferably on the
inside) and warm the affected area. Be careful not to melt the hull. Once the area is warm, place a
weight inside the hull, on top of the dented area, and allow it to cool.
Any trailer used to transport your WR17 should support the craft by the trailer tabs (or main
crossbeams), like the WR 17 trailer available from your dealer. With the boat suspended from these
tabs, it is best if the bottom of the keel also makes light contact with the trailer to share the weight.
This keeps most of the pressure off the polyethylene hulls while transporting. If your WR17 is stored
off its trailer on land for long periods of time, the boat it best supported as done on the trailer, rather
than resting only on the plastic main hull. This can be done with a pair of rails that mimic those on the
trailer.
Clean the polyethylene hulls periodically. The surface of a polyethylene boat contains tiny pores
that can trap dirt and road tar. Use Simple Green™ and a pressure washer to remove this grime.
Apply a UV Protectant like 303™ periodically to your boat and its interior to protect it from harmful UV
rays.

Caring for your WindRider 17 Trimaran
The WR17 is designed to be a durable, long lasting boat, but it will require maintenance to assure
performance and longevity.
Rinse
• Thoroughly rinse the entire WindRider 17 Trimaran after each sailing trip to prevent
accumulation of salt, mud and sand in working parts and to maintain the boat’s
appearance.
• Pay special attention to all metal parts that will corrode if they remain salty.
• Rinse moving parts to assure their action remains smooth.
Sail Care
• Store sails dry and free of salt and dirt.
• Roll sails to prevent creasing the Dacron. If rolled with the battens in the sails, care
should be taken to assure that each batten remains parallel to the roll.
• To ease raising the mainsail, the luff rope may be lubricated with a dry sail lubricant such
as McLube Sailkote.
Sealants
• Inspection ports are installed with sealant at the factory. Should these fittings ever need
to be replaced or simply resealed, use an adhesive called “Marine GOOP” available at
most home maintenance stores.
• The mast is a sealed section, meaning the halyards do not penetrate the mast to allow
water inflow in the unlikely event of a capsize. Sailors who choose to “push the limits”
may prefer to further seal the mast like many aggressive small boat sailors do. This can
be done by rubbing silicone caulk over and around all rivets, screws and fittings on the
mast annually, to assure their seals remain sound. This will provide an extended period
of time to right the boat in the unlikely event of a capsize.

WindRider 17 Trimaran Assembly – Getting Started
Your WindRider 17 Trimaran is very easy to assemble and disassemble, particularly when sitting
on the WindRider 17 Trimaran trailer. With a little practice, assembly takes only 15 minutes for one
person to accomplish. As you read through the following instructions, refer to the glossary at the end
of this manual to help you understand some of the terms and concepts.
Be sure to have the following uninstalled components on hand before starting:
1. Main hull
• sails(s)
• boom
• mast step assembly
• mainsheet
• mainsheet cleat
• cheek block
• shrouds and shroud bridles
• forestay, or jib with forestay sewn in
2. Starboard outrigger
3. Port outrigger
4. Mast
5. Front beam
6. Rear Beam w/ jib sheet cleat base on either side
Boom Shrouds Shroud Bridle Beams
Lines
Small Parts Hatches
Large Parts

WindRider 17 Trimaran Assembly
(NOTE: The first several steps are generally completed by the dealer before delivery. Skip
forward as necessary.)
WARNING!
Make sure there are no electrical power lines overhead or between you and the
launch site before raising the mast.
Mount rear beam loosely to main hull (“rear” identified by 2” square jib brackets welded to top of
inner beam) using ¼ -20 truss head screws provided with fender washers and nuts. DO NOT tighten
nuts yet and do not remove aka lock pins from beam assembly.
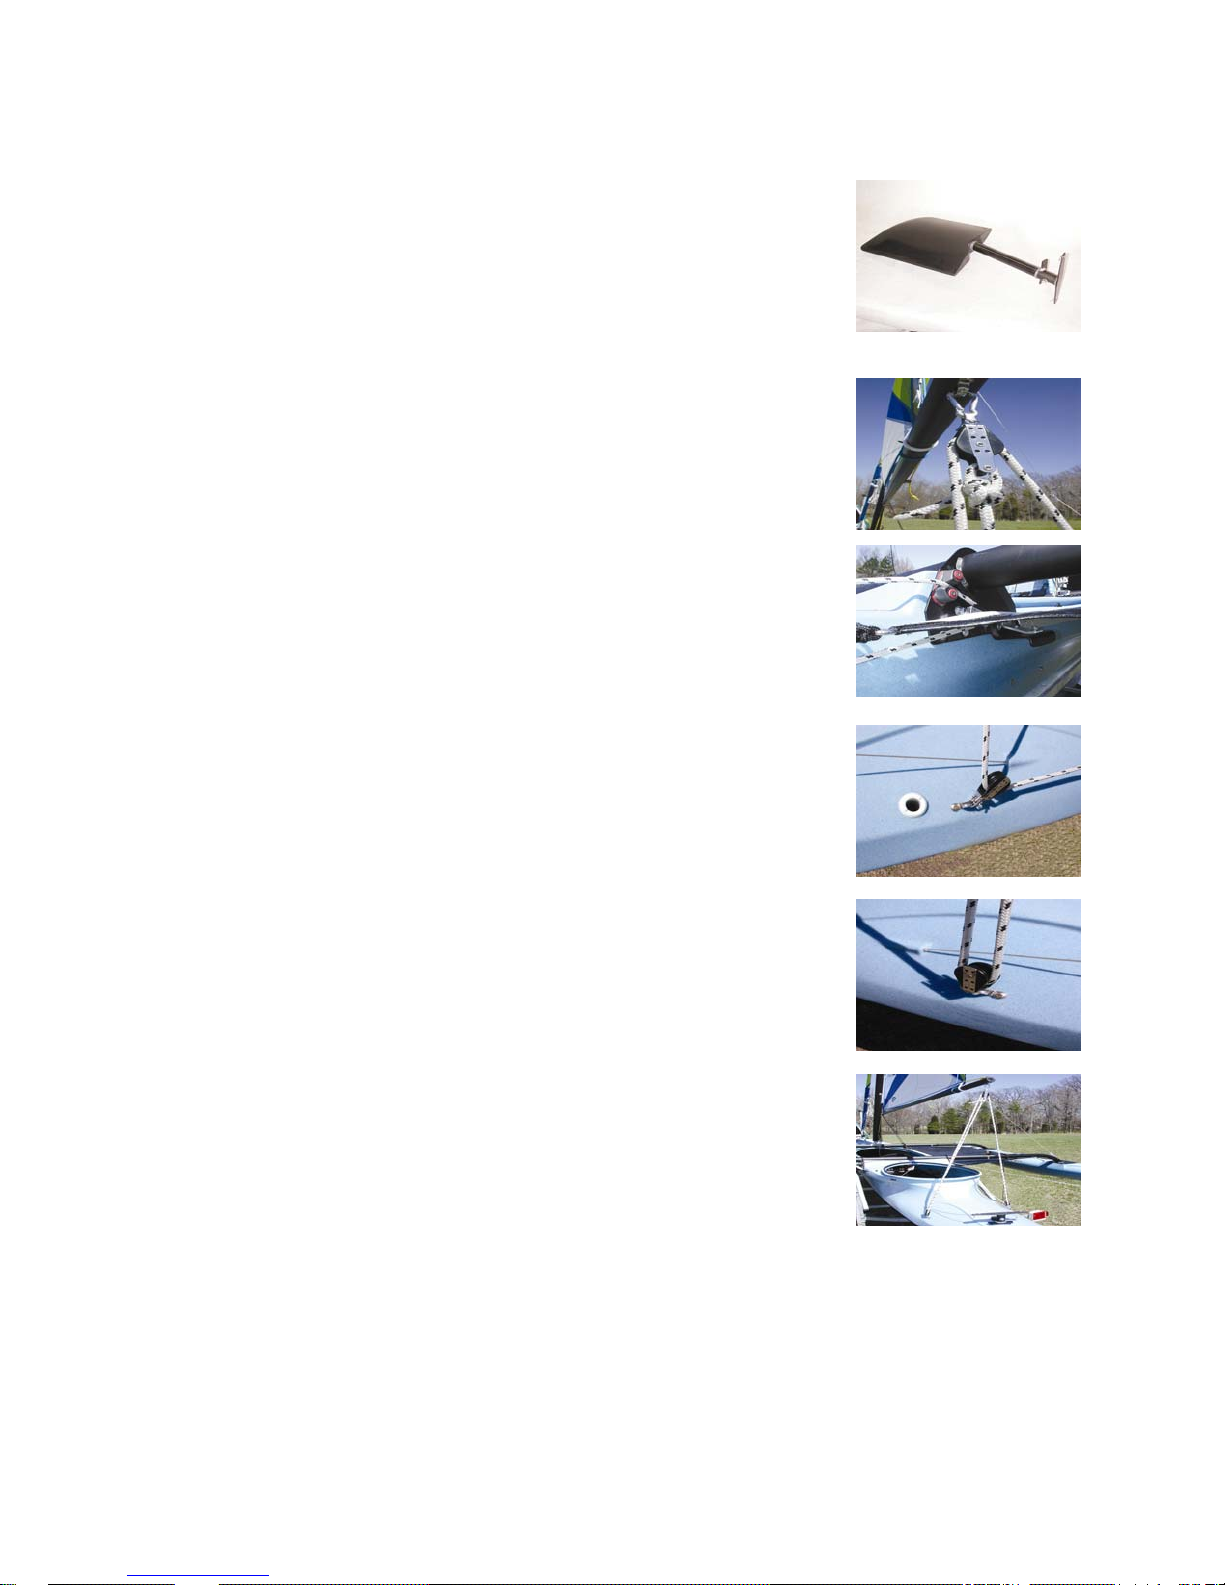
Mount mainsheet cleat and cheek block loosely to starboard rear
beam plate as seen in photo at right. Do not tighten yet. (For boats with
jib, mount small aluminum clam cleat for furling line in similar location on
the port side using holes and fasters provided.)
Mount front beam assembly, again leaving nuts hand tight.
Mount mast step assembly over center portion of front beam. Front
bolts will pass through foredeck support tube and 4” rear screw will use a
red cover above deck and fender washer below deck. Tighten as much as
needed to keep flat top of mast step casting horizontal.
Mount starboard outrigger
1. Remove hex head bolts from outrigger, noting location of chain plates (forward outboard
hole on rear beam, aft outboard hole on front beam). Leave flathead screws in place to
hold backing plates.
2. Use blocks or horses to support the hull while you line it up with beam ends.
3. Test fit bolts on both beams, with chain plates in place on proper bolts.
4. Loosen bolts from rear beam and lower outrigger enough to make a ring of clear silicone
caulk around each bolt hole in the outrigger, before loosely reattaching with bolts.
Repeat on front beam.
Mount port outrigger by repeating process used on starboard side.
Tighten all 16 beam end outrigger bolts on starboard and port side, keeping front chain plates
angled approximately 20 degrees inboard of straight aft and back chain plates angled 20 degrees
inboard of straight ahead.
Tighten midbeam bolts inserted earlier, which fasten mid beam and harken gear to the main
hull. Tighten snugly, but there is no need to pull plastic hull out to make complete contact with
mounting plate.
Remove aka lock pins and slide outriggers out. It is best if outriggers are slid completely out at
this point to assure there is no construction debris within the tube and to lubricate the tubes with a dry
lube such as McLube Sailkote™. This will assure smooth sliding. Put beams back together and pin
with aka locks in extended position.
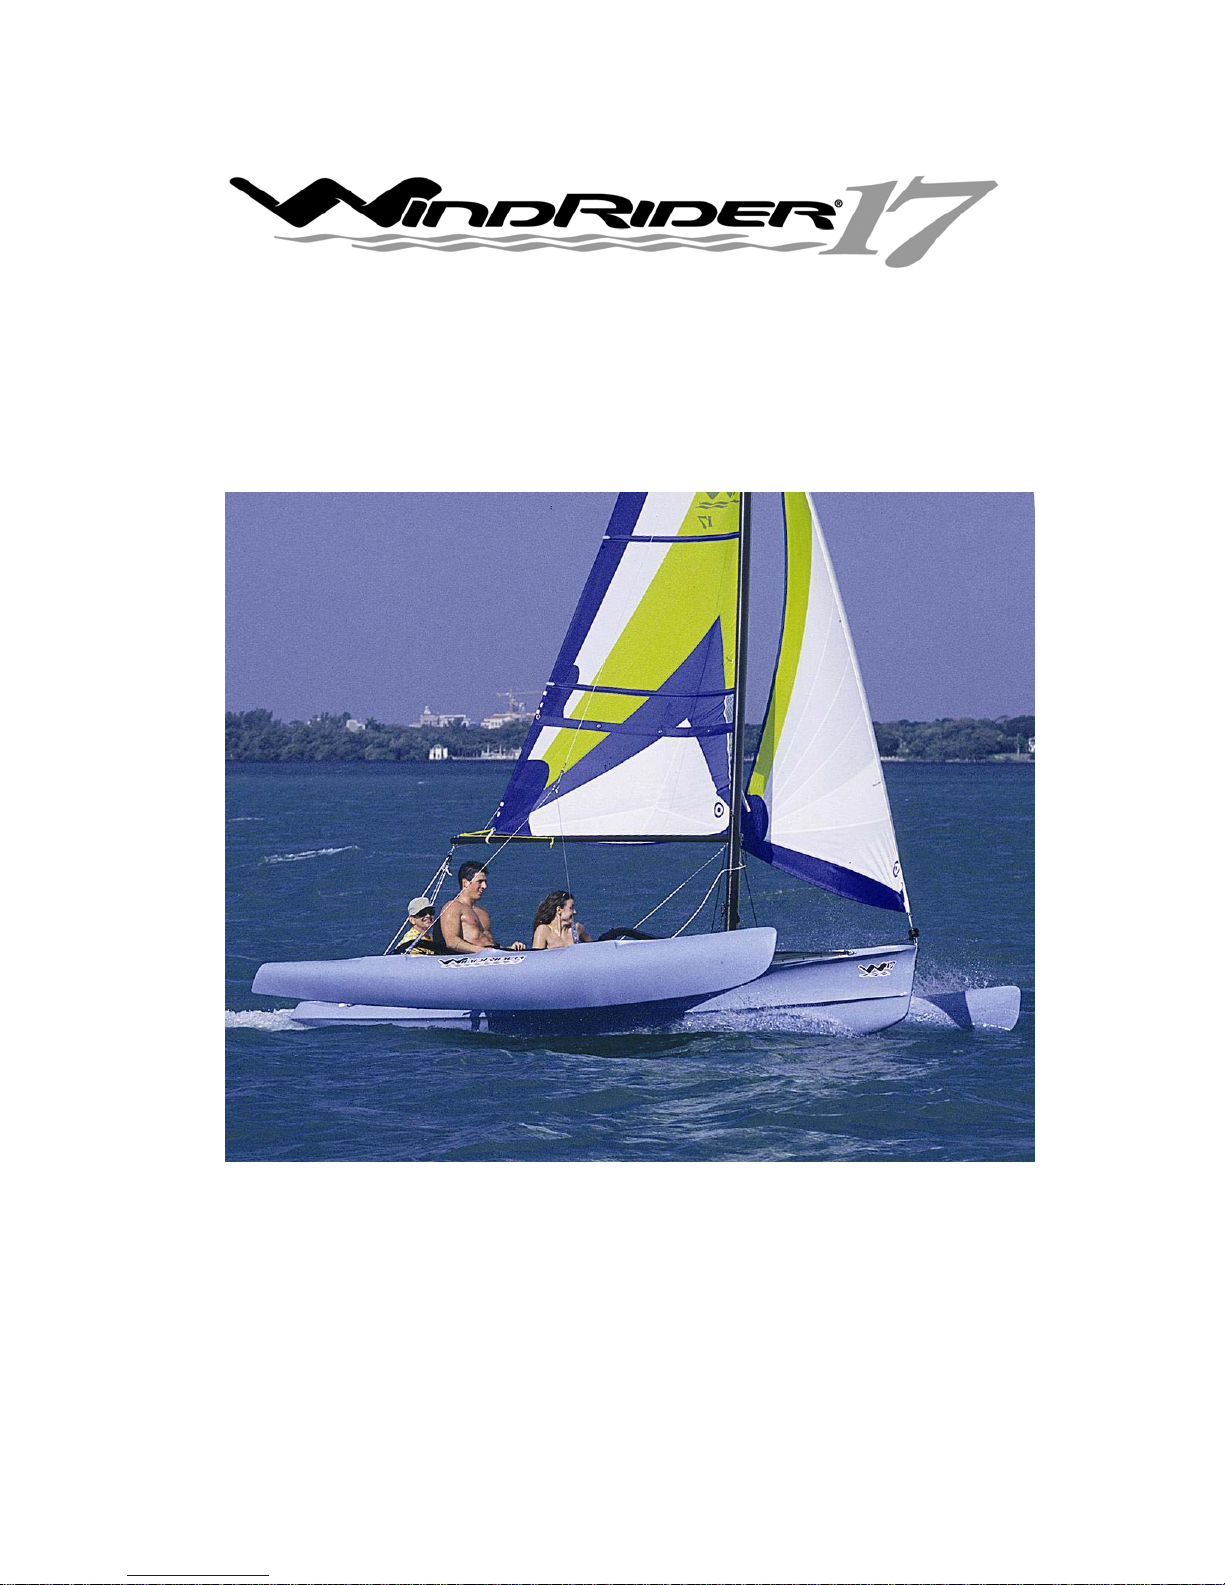
Install rudder by first sliding 3/8” long bushing and then 10.75” long
bearing tube over shaft. Slide shaft in from under boat. Now slip 1/8” thick
bushing washer over shaft and rudder head onto shaft. Rudder head
should have the front angling downward.
Routing the mainsheet
Clip the single block with becket (shown on the boom in this photo) to
the back of the rear cockpit rim, with the block hanging aft. Uncoil the
mainsheet (3/8" white line with black flecks, 33' long) and stand on the
starboard side of the rear cockpit to begin routing the sheet.
Pass the end of the sheet down past the cam cleat found on the beam
gusset and into the cheek block.
From this cheek block run the line aft and through the single
block on the starboard side of the rear deck.
Now run the line through the large sheave in the single block with
becket clipped to the cockpit rim and down into the front of the single
block mounted on the port side of the rear deck.
Finally, tie the end of the line to the becket using a bowline. A figure
eight "stopper" now should be tied in the end of the line that exits the cam
cleat. Once the sail is raised and the mainsheet is clipped to the boom,
the sheet will appear as shown at right.
Attach shroud bridles (2 short wires attached to 1.25” stainless ring) to chain plates using
shackle on rear chain plate, and the clip through the forward chain plate. (Clips should be removed
from forward chain plates to loosen the rigging while stepping the mast.) Always slide the plastic
tubing down over the shackle or clip and chain plate to assure they do not topple over on the lee side
of the boat. If the clip is not contained within the plastic tube, it may be side-loaded and bend.
Mount shrouds to mast using large 5/16” hounds shackle provided. Run shrouds to shroud
bridles and attach top hole of stay adjuster.
 Loading...