

Page 1
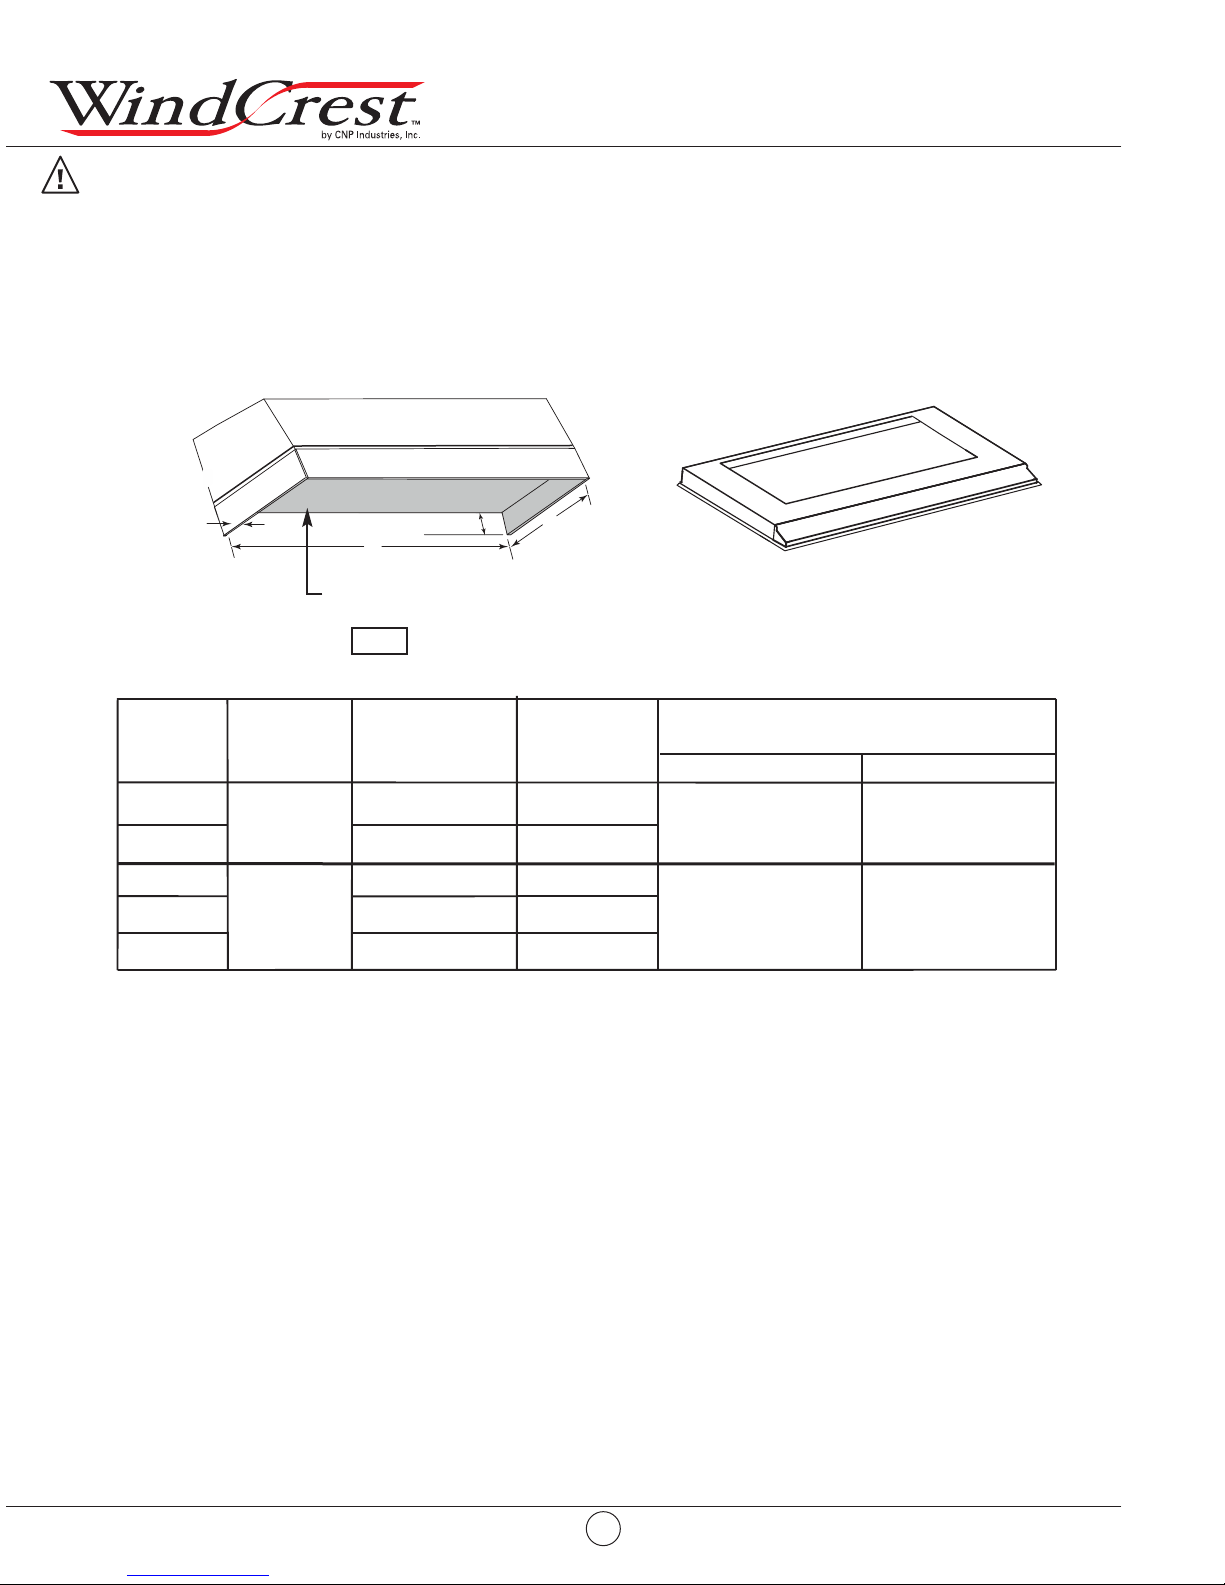
UL29xxS and UL38xxS Liners
WARNING:
When building a custom hood for a liner, always follow all applicable construction codes and standards.
See the illustrations and table below to locate your liner choice and use corresponding custom hood
base dimensions. For the liner installation, only the bottom of the custom hood is needed. Do not
finalize the entire custom hood yet, because an opening is needed for the insert.
Recommended
thickness:
3/4''
2 1/16''
A
Plywood base thickness: 3/4”
FIG 1
B
Liner
Model
Insert
Model
Custom Hood
Exterior Width
*Inside
Width (A)
*Inside Depth (B)
Without Backboard **With Backboard
UL2936S
UL2942S
UL3848S
UL3854S
UL3860S
*Dimension does not include 3/8” wide flange around liner.
**The inside depth shown in the table above assumes a minimum cabinet backboard thickness of 3/8”.
FIG 1:
UIX2916S
UIX3816S
We recommend the base of the custom hood to be 3/4” thick plywood. The sides, front
36 inches
42 inches
48 inches
34 1/2”
1/2”
40
46
1/2”
54 inches 52 1/2”
60 inches
58
1/2”
20 1/2” - 23 1/2” 20 1/8” - 23 1/8”
1/2” - 23 1/2” 20 1/8” - 23 1/8”
20
and backboard (if included) of the custom hood to be 3/4” thick, assuming standard
cabinet widths.
Consider the shape and size of the insert to determine the configuration of the custom hood. For
more details, refer to the installation manual for the UIX2916S and UIX3816S inserts.
Installation - Stainless Steel Liner
Wind Crest™ by CNP Industries, Inc.
SEP12.0201
351 Thor Place
Brea, CA 92821
877-387-6721 (toll free)
714-482-2320
1
www.windcrestcnp.com
Page 2

UL29xxS and UL38xxS Liners
CAUTION:
Before installing, remove any protective film from all parts.
The custom hood liner must be installed before the insert unit. For installation into shallow cabinets
1/2
(20This must be done because the insert flange must fit under the liner front panel section when an
overlap occurs.
Refer to UIX2916S and UIX3816S instructions for mounting height details.
” to 21-
1/2
“ inside depth) the insert must be installed before the liner front panel section.
1
A
Install 1 small pad (A), included in the
hardware package, to each side of the main
liner plate. (See figures 1 and 2)
3 4
B
2
C
A
B
Temporarily install the main liner plate (B) to
the external base of the custom hood (C).
When inserting the main liner plate, push
slightly on the pads (A) to prevent damage.
Main liner plate should be positioned as far
back as possible.
A
Installation - Stainless Steel Liner
Using a pen, mark the outline of the future
opening for the power pack. Remove the
main liner plate (B) from the custom hood.
5
Reinstall the main liner plate to the base of
the custom hood and secure it with (5) 3/4”
screws.
Note: When installing the insert it will need to be secured to a wood surface and not only to
the liner. See insert installation manual for more detailed mounting instructions.
Cut out an opening in the bottom of the
custom hood.
6
D
Slide the front panel section (D) into the nose
of the custom hood base. Take care not to
scratch the main liner plate when installing
the front panel section of the liner. Assemble
it to the cabinet using (3) 1/2” screws.
2
www.windcrestcnp.com
 Loading...