

Wincor Nixdorf TA59 Product Manual
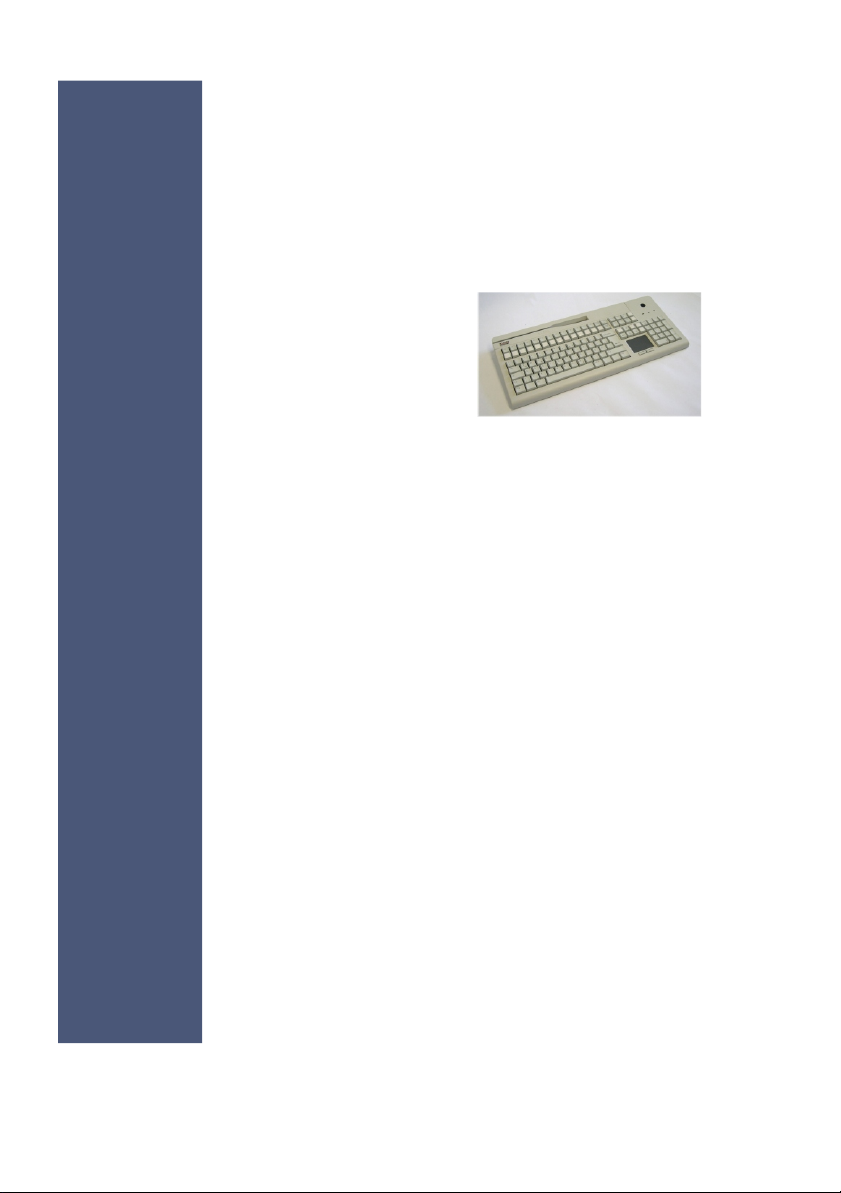
TA59
Keyboard
Product Manual
Edition November 2004

Pen ti um ™ is a re gis te red tra de mark of In tel Cor po ra ti on
Li nux ™ is a re gis te red tra de mark of Li nus Tor valds
MS-DOS ©, Wind ows 95, Wind ows 98SE, Wind ows 2000Pro and Wind ows
NT are re gis te red tra de marks of the Mi cro soft Cor po ra ti on
BEET LE® is a re gis te red tra de mark of the Win cor Nix dorf In ter na tio nal
GmbH
Co py right © Win cor Nix dorf In ter na tio nal GmbH, 2004
The re pro duc ti on, trans mis si on or use of this do cu ment or its con tents is not
per mit ted wit hout ex press aut ho ri ty.
Of fen ders will be li ab le for da ma ges.All rights, in clu ding rights crea ted by pa tent grant or re gi stra ti on of a uti li ty mo del or de sign, are re ser ved.
Delivery subject to availability; technical modifications possible.

Contents
Manufacturer’s De cla ra ti on and Ap pro val ........................1
Ge ne ral Aut ho ri za ti on .................................................................................1
TFCC-Class A De cla ra ti on..........................................................................1
Re cy cling the TA59.....................................................................................2
War ran ty .....................................................................................................3
Sa fe ty In struc tions ......................................................................................3
Clea ning In struc tions ..................................................................................4
Sco pe of supp ly ..........................................................................................4
Moun ting keys .....................................................................5
Ex chan ging the Keys ..................................................................................5
In ser ting Key La bels ...................................................................................6
In ser ting Key Caps......................................................................................7
The TA59 Key bo ard.............................................................8
Ge ne ral .......................................................................................................8
Key pads......................................................................................................9
Self-test.....................................................................................................10
Con nec ti on me thod...........................................................11
Re lea sing the Ca ble Con nec ti on...............................................................11
Key switch..........................................................................12
Mag ne tic Stri pe Card Rea der (op tio nal) ..........................13
Using the mag ne tic stri pe card rea der ......................................................13
Touch pad (op tio nal) ..........................................................14
Ope ra ting .................................................................................................14
Pro gram ming the TA59 .....................................................15
Mo des .......................................................................................................15
Main functions of the Pro grams ................................................................16
Key bo ard Con nec ti on for Pro gram ming ....................................................17
Key bo ard con nec ti on in the field .........................................................18
Firm wa re Up da te and Ver si on Dis play......................................................18
Help ..........................................................................................................19
Crea ting Tab les with KBU TI.EXE..............................................................19

Sen ding and Re cei ving Tab les .................................................................21
Fi les for Pro gram ming...............................................................................21
Use ful hints ...............................................................................................22
Key bo ard Lay out ...............................................................23
In ter na tio nal Lay out (e.g. Ger ma ny) .........................................................23
US Lay out .................................................................................................24
Key bo ard Scan Codes - Tab le 1 ...............................................................25
Key bo ard Scan Codes - Tab le 2 ...............................................................26
Key bo ard Scan Codes - Tab le 3 ...............................................................27
Ap pen dix ............................................................................28
Tech ni cal Data ..........................................................................................28
Mag ne tic Stri pe Card Rea der....................................................................29

GENERAL AUTHORIZATION
Manufacturer’s Declaration and Approval
General Authorization
This device fulfills the requirements of the EEC standards
89/336/EEC “Electromagnetic Compatibility” and 73/23/EEC
“Low voltage Directive”.
Therefore, you will find the CE mark on the device or packaging.
TFCC-Class A Declaration
This equipment has been tested and found to comply with the limits for a
Class A digital device, pursuant to part 15 of the FCC Rules. These limits
are designed to provide reasonable protection against harmful interference
when the equipment is operated in a commercial environment. This
equipment generates, uses, and can radiate radio frequency energy and, if
not installed and used in accordance with the instruction manual, may cause
harmful interference to radio communications.
Operation of this equipment in a residential area is likely to cause harmful
interference in which case the user will be required to correct the
interference at his own expense.
Modifications not authorized by the manufacturer may void users authority
to operate this device.
This class A digital apparatus complies with Canadian ICES-003.
Cet appareil numerique de la classe A est conforme a la norme NMB-003
du Canada.
1

RECYCLING THE TA59
Recycling the TA59
En vi ron men tal pro tec ti on does not be gin when it co mes
time to dis po se of the TA59; it be gins with the
ma nu fac tu rer. This pro duct was de sig ned ac cor ding to
our in ter nal norm “En vi ron men tal cons ci ous pro duct
de sign and de ve lop ment”.
The TA59 is manufactured without the use of CFCs und CCHS and is
produced mainly from reusable components and materials.
The processed plastics can, for the most part, be recycled. Even the
precious metals can be recovered, thus saving energy and costly raw
materials.
Please do not stick labels onto plastic case parts. This would help us to
re-use components and material.
You can protect our environment by only switching on your equipment when
it is actually needed. If possible, even avoid the stand-by-mode as this
wastes energy, too. Also switch your equipment off when you take a longer
break or finish your work.
At this time, there are still some parts that are not reusable. Wincor Nixdorf
guarantees the environmentally safe disposal of these parts in the
Recycling Center, which is certified pursuant to ISO 9001 and 14001.
So don’t simply throw your TA59 on the scrap heap when it has served its
time, but take advantage of the environmentally smart, up-to-date recycling
methods!
Please contact your competent branch or the Recycling Center Paderborn
(for European countries) for information on how to return and re-use devices
and disposable materials under the following fax number:
E-Mail: info@wincor-nixdorf.com
We look forward to your message.
2

Warranty
Wincor Nixdorf guarantees generally a warranty engagement for 12 months
beginning with the date of delivery. This warranty engagement covers all
those damages which occur despite a normal use of the product.
Damages because of
n
improper or insufficient maintenance,
n
improper use of the product or unauthorized modifications of the product,
n
inadequate location or surroundings
will not be covered by the warranty.
For further information of the stipulation look at your contract.
All parts of the product which are subject to wear and tear are not included
in the warranty engagement.
Please order spare parts at the Wincor Nixdorf customer service.
WARRANTY
Safety Instructions
Note the following safety information:
n
Lay all cables and supply lines so that nobody can tread on them or trip
over them.
n
Data cables should be neither connected nor removed during
thunderstorms.
n
Protect the device from dust, moisture and heat.
n
Take care to ensure that no foreign objects (e.g. paper clips) or liquids
can get into the inside of the device, as this could cause electrical shocks
or damage.
n
Place the keyboard on a non-slip, even surface.
3

CLEANING INSTRUCTIONS
Cleaning Instructions
The keyboard should be cleaned with a germicide from time to time. Before
cleaning in between the keys with a brush, loosen and remove the key caps
using the key removing device. Do not allow dust to get in through the open
keyboard mechanics.
Scope of supply
The product includes one TA59 keyboard, one User Guide and one
accessories kit containing the following:
n
Transparent plates
n
Blank sheets for labeling
n
1 key cap remover
n
1 set of keys for key switch
The set of keys contains:
Key 1 for key position 1
Key 2 for key positions 1 and 2
Key 3 for key positions 1, 2 and 3
Key 4 for key positions 1, 2, 3 and 4
The following items can be ordered optionally:
Accessories kit 1:
20 dummy keys (1 x 1)
Accessories kit 2:
6 double key caps
2 quadruple key caps
If damage has occurred during shipping or if the package contents do not
match the delivery note, promptly notify your Wincor Nixdorf sales outlet.
4
Mounting keys
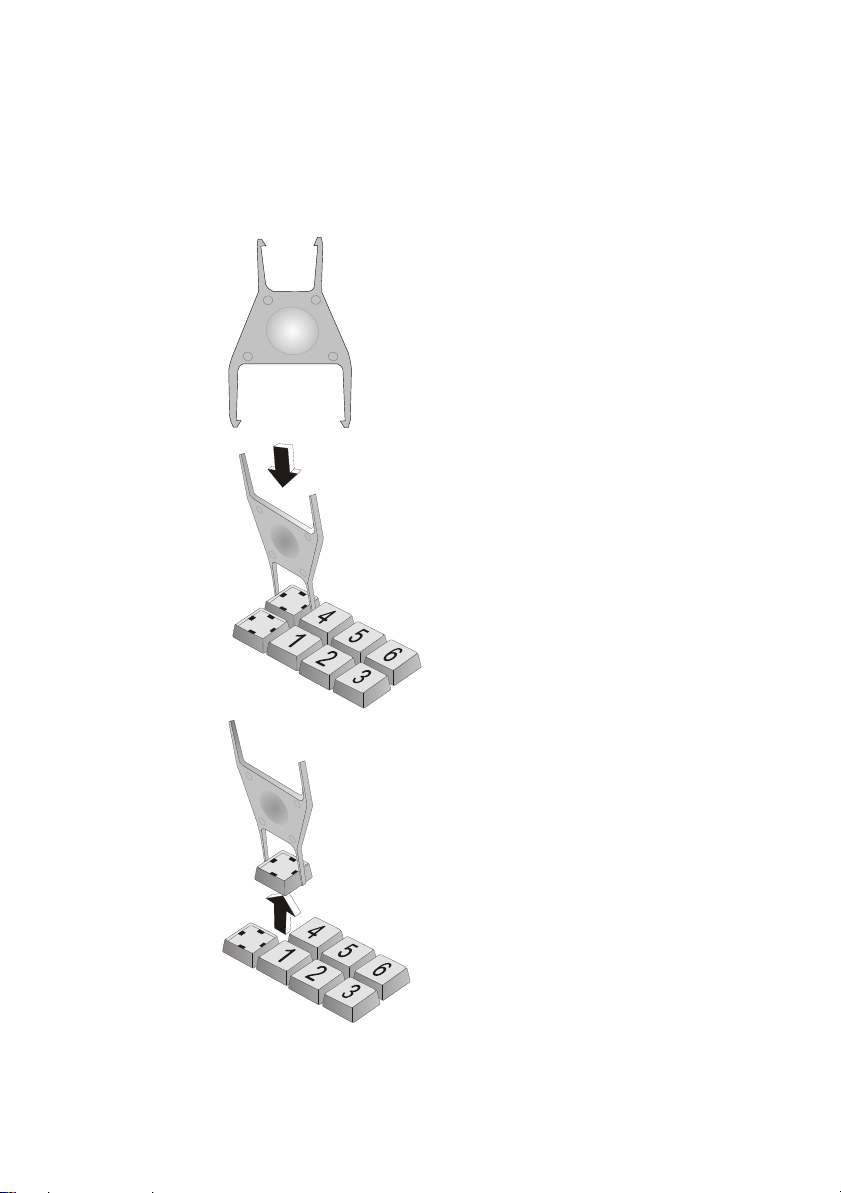
Exchanging the Keys
EXCHANGING THE KEYS
You can remove each of the key
caps using a key cap remover,
pulling the key upwards.
Place the key cap remover on
the selected key until you hear a
click.
Now remove this key from the
keyboard by pulling upwards.
5
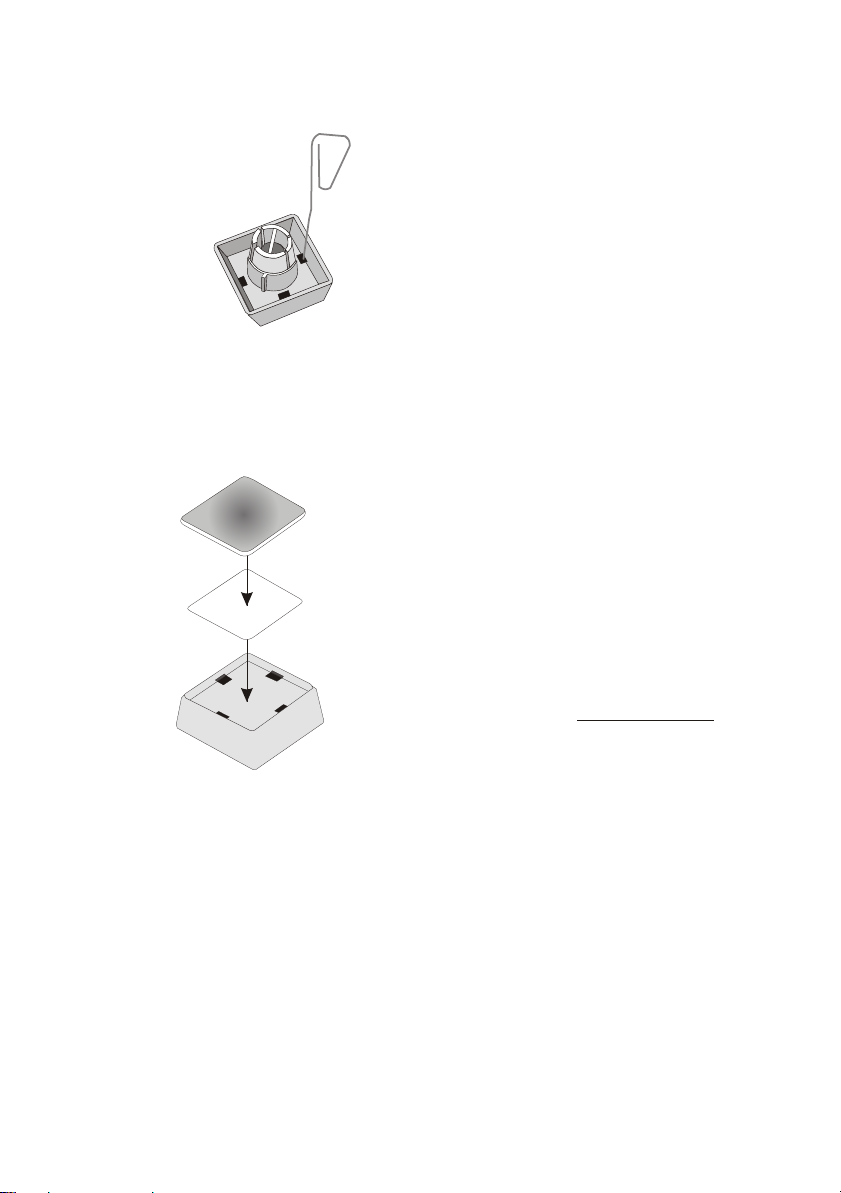
INSERTING KEY LABELS
You can change the lettering as follows:
Using a thin object (e.g.
Paper-clip etc.), press upwards
against the plastic cover through
the opening on the underside of
the key. Please refer to the next
chapter for instructions on how to
insert the new label.
Inserting Key Labels
Below, you will find instructions on how to insert the key labels:
Trans pa rent key co ver
with mat and
con ca ve side up
Each key should be labelled
individually.
The labels are replaced as follows:
n
Remove the key cap from the keyboard (see removing the key cap) and
pull the transparent key cap upwards.
n
The transparent key cover is then released and the label can be removed.
n
Replace the label and fit the transparent key cover (with the mat and
concave side facing upwards) back into the key cap.
6
La bel for keys
Key cap
Place the written label on the key
cap.
Insert the transparent key cover
with the mat and concave side
upwards until it clicks into place
in the key cap.
 Loading...