

Page 1
ENGINE OIL HEATER INSTALL
PSS12 & PSS20
This work instruction docum ent explains and shows how to install the oil heater components on the WINCO PSS12
and PSS20 models. It replaces the previous instruction document, WINCO #15809-103 for these products.
REQUIRED TOOLS
• Torx T25 screwdriver
• 7/16” socket
• 11/16” socket
• 16mm socket (substitute 5/8” socket for PSS20)
• Crescent wrench
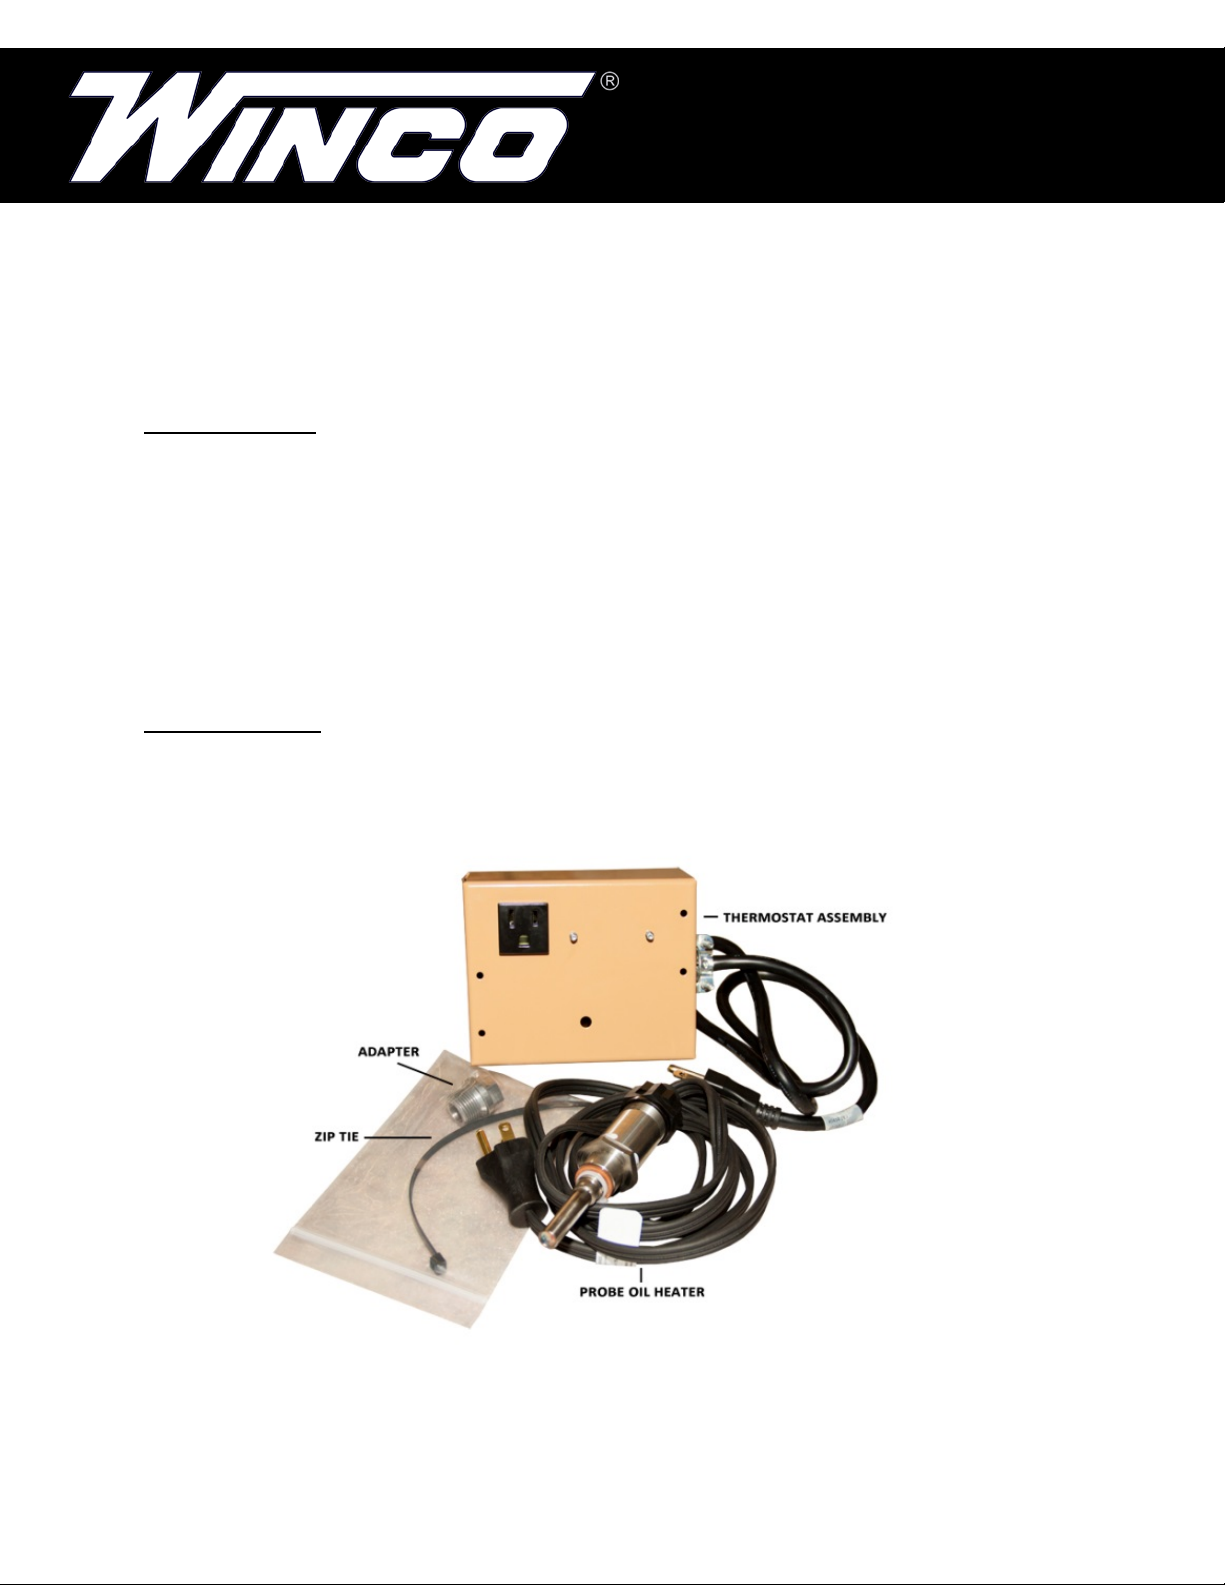
INCLUDED PARTS
• Thermostat assembly
• Probe oil heater
• Adapter
• 1 zip tie
1
15809-003I OIL HEATER INSTRUCTIONS REV B
Page 2
INSTALLATION
1) Switch generator to manual mode. Disconnect negative battery cable. This prevents the
generator from starting automatically. Drain the oil.
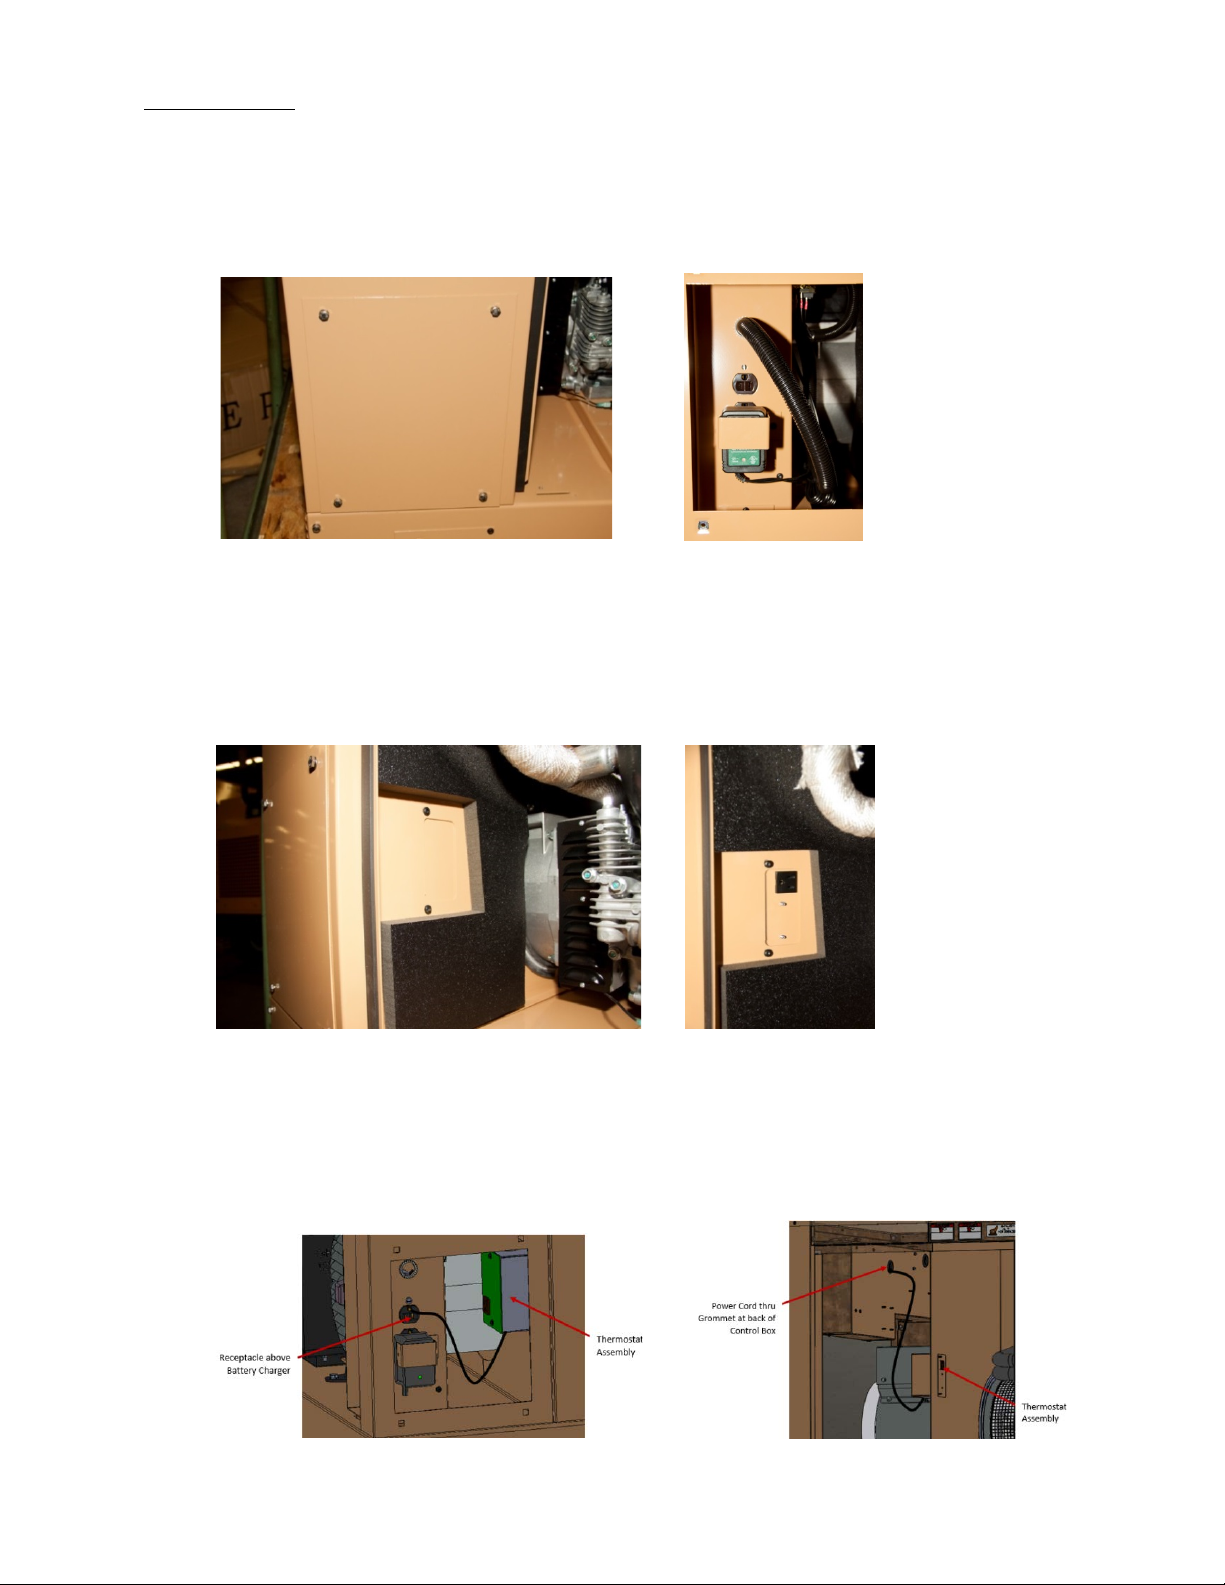
2) Remove side panel bolts using 7/16” socket.
(inside view)
3) Using your Torx T25 screwdriver, remove the small panel on the oil drain valve side of
the engine that is attached to the panel that separates the engine compartment from the
control box. Using the same screws, install the thermostat assembly from the kit. TIP:
These are self-tapping screws so they can be hard to install by hand. You may want to
start the screw in the thermostat assembly before installing. Be careful not to overtorque.
(installed receptacle)
4) Plug thermostat assembly into the receptacle above the battery charger as shown
below. For the PSS12, this is located on the side of the control cabinet assembly. For
the PSS20 models, the receptacle is located inside of the control box assembly, and the
power cord needs to be routed from the thermostat assembly through the grommet in
the back of the control box assembly and plugged in to the receptacle above the battery
charger
PSS12 PSS20
2
15809-003I OIL HEATER INSTRUCTIONS REV B
Page 3

5) Remove the oil drain plug from the opposite side of the oil drain valve using 16mm
socket (or 5/8” socket for PSS20).
For the PSS12 only, install provided adapter while using the washer from the oil plug
with 11/16” socket.
6) Install oil heater and tighten with a crescent wrench.
7) Secure excess wire with provided zip-tie, refill oil, plug in the oil heater to the thermostat
assembly, and reassemble unit.
3
15809-003I OIL HEATER INSTRUCTIONS REV B
 Loading...