

Page 1
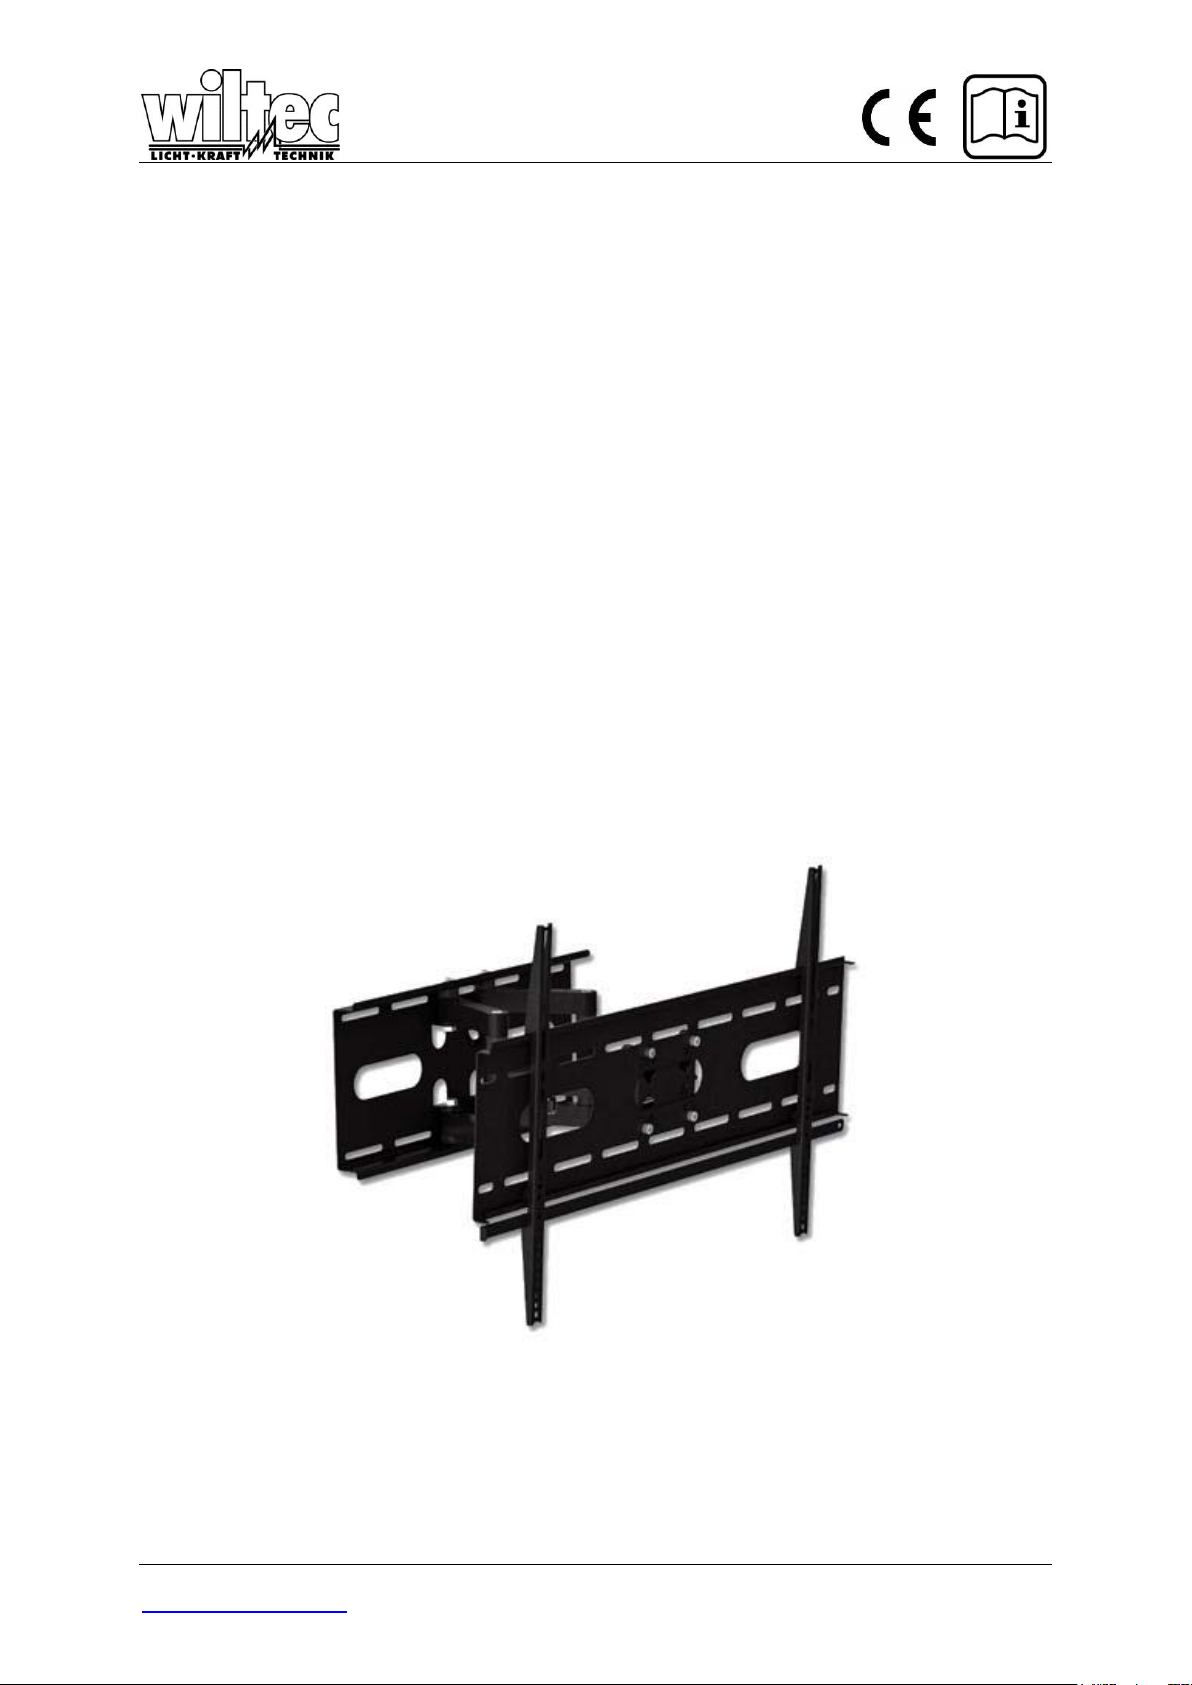
Montageanleitung
TV-Halterung
P14 Artikel: 50555
Tragkraft maximal 60 kg
übliche Gerätegröße: 37-60“ (94-152 cm)
Technische Änderungen vorbehalten!
Durch stetige Weiterentwicklungen können Abbildungen, Funktionsschritte und technische Daten
geringfügig abweichen.
Aktualisierung der Dokumentation
Haben Sie Vorschläge zur Verbesserung oder haben Sie Unregelmäßigkeiten festgestellt, nehmen Sie
bitte Kontakt mit uns auf.
© by WilTec Wildanger Technik GmbH Seite 1
http://www.wiltec.info
Page 2

Einleitung
Vielen Dank, dass Sie sich zum Kauf dieses Qualitätsproduktes entschieden haben. Um das
Verletzungsrisiko zu minimieren bitten wir Sie stets einige grundlegende
Sicherheitsvorkehrungen zu treffen, wenn Sie dieses Gerät verwenden. Bitte lesen Sie diese
Bedienungsanleitung sorgfältig durch und vergewissern Sie sich, dass Sie sie verstanden
haben.
Achtung
Die Wand muss bei 37-60”(90-152 cm) Geräten mindestens 82 kg und bei 25-37”(60-90 cm) Geräten
mindestens 56 kg tragen können. Sollte dies nicht der Fall sein, muss die Wand verstärkt werden. Die
Installation muss von einer qualifizierten Person entsprechend der Installationsanleitung durchgeführt
werden. Fehler können zu schweren Verletzungen oder Tod führen.
Sicherheitsvorschriften müssen bei der Installation beachtet werden. Benutzen Sie einwandfreies
Werkzeug, um Verletzungen zu vermeiden.
Vor der Installation muss diese Anleitung gelesen und ganz verstanden sein, um Personen- und/oder
Sachschäden zu vermeiden. Bewahren Sie diese Anleitung leicht zugänglich für spätere Arbeiten auf.
Die Montagewand muss stabil genug sein, um das Gewicht des TV-Gerätes zu tragen. Bei
Trockenbauwänden befestigen Sie den TV-Halter an vorher lokalisierten Balken oder Schienen oder
mit Spezialdübeln.
Montieren Sie nicht auf vibrierenden, beweglichen oder Stößen ausgesetzten Wänden. Dies könnte zu
Beschädigungen des TV-Gerätes und/oder der Befestigungsfläche führen.
Nicht nahe bei Heizkörpern, Kaminen, Klimageräten, im direkten Sonnenlicht oder anderen
Wärmequellen montieren. Fehler könnten das TV-Gerät beschädigen oder eine Brandgefahr
darstellen.
Die Montage sollte von mindestens zwei ausgebildeten Personen ausgeführt werden. Durch
Herabfallen oder fehlerhafte Behandlung des Gerätes können Verletzungen oder Schäden entstehen.
Empfohlene Montage-Oberflächen: Holzbalken, Beton- und massive Wände. Bei der Montage auf
anderen Oberflächen verwenden Sie bitte Spezialbefestigungsteile aus dem lokalen
Eisenwarenhandel.
Sicherheits-Hinweis
- Vor der Montage sollte diese Anleitung gelesen und verstanden worden sein
- Die Montage sollte durch zwei qualifizierte Personen ausgeführt werden.
- Niemals defekte Teile verarbeiten!
- Nur verwendbar für Wände aus Steinen, Beton, Blocksteinen, Massivholz und hölzerne
Träger. Bei Holz keine Dübel verwenden. Mindestens 5 mm vorbohren.
- Die Wand muss das Gewicht tragen können.
- Das mitgelieferte Befestigungsmaterial ist nur für hölzerne Wände geeignet. Für andere
Wände besorgen Sie das nötige Befestigungsmaterial (Betondübel, Sechskantschrauben etc)
im örtlichen Eisenwarenhandel/Baumarkt.
- Wenn Sie sich über die Wandqualität unsicher sind, lassen Sie sich beraten! Die
Montageanleitung ersetzt keine Ausbildung.
© by WilTec Wildanger Technik GmbH Seite 2
http://www.wiltec.info
Page 3
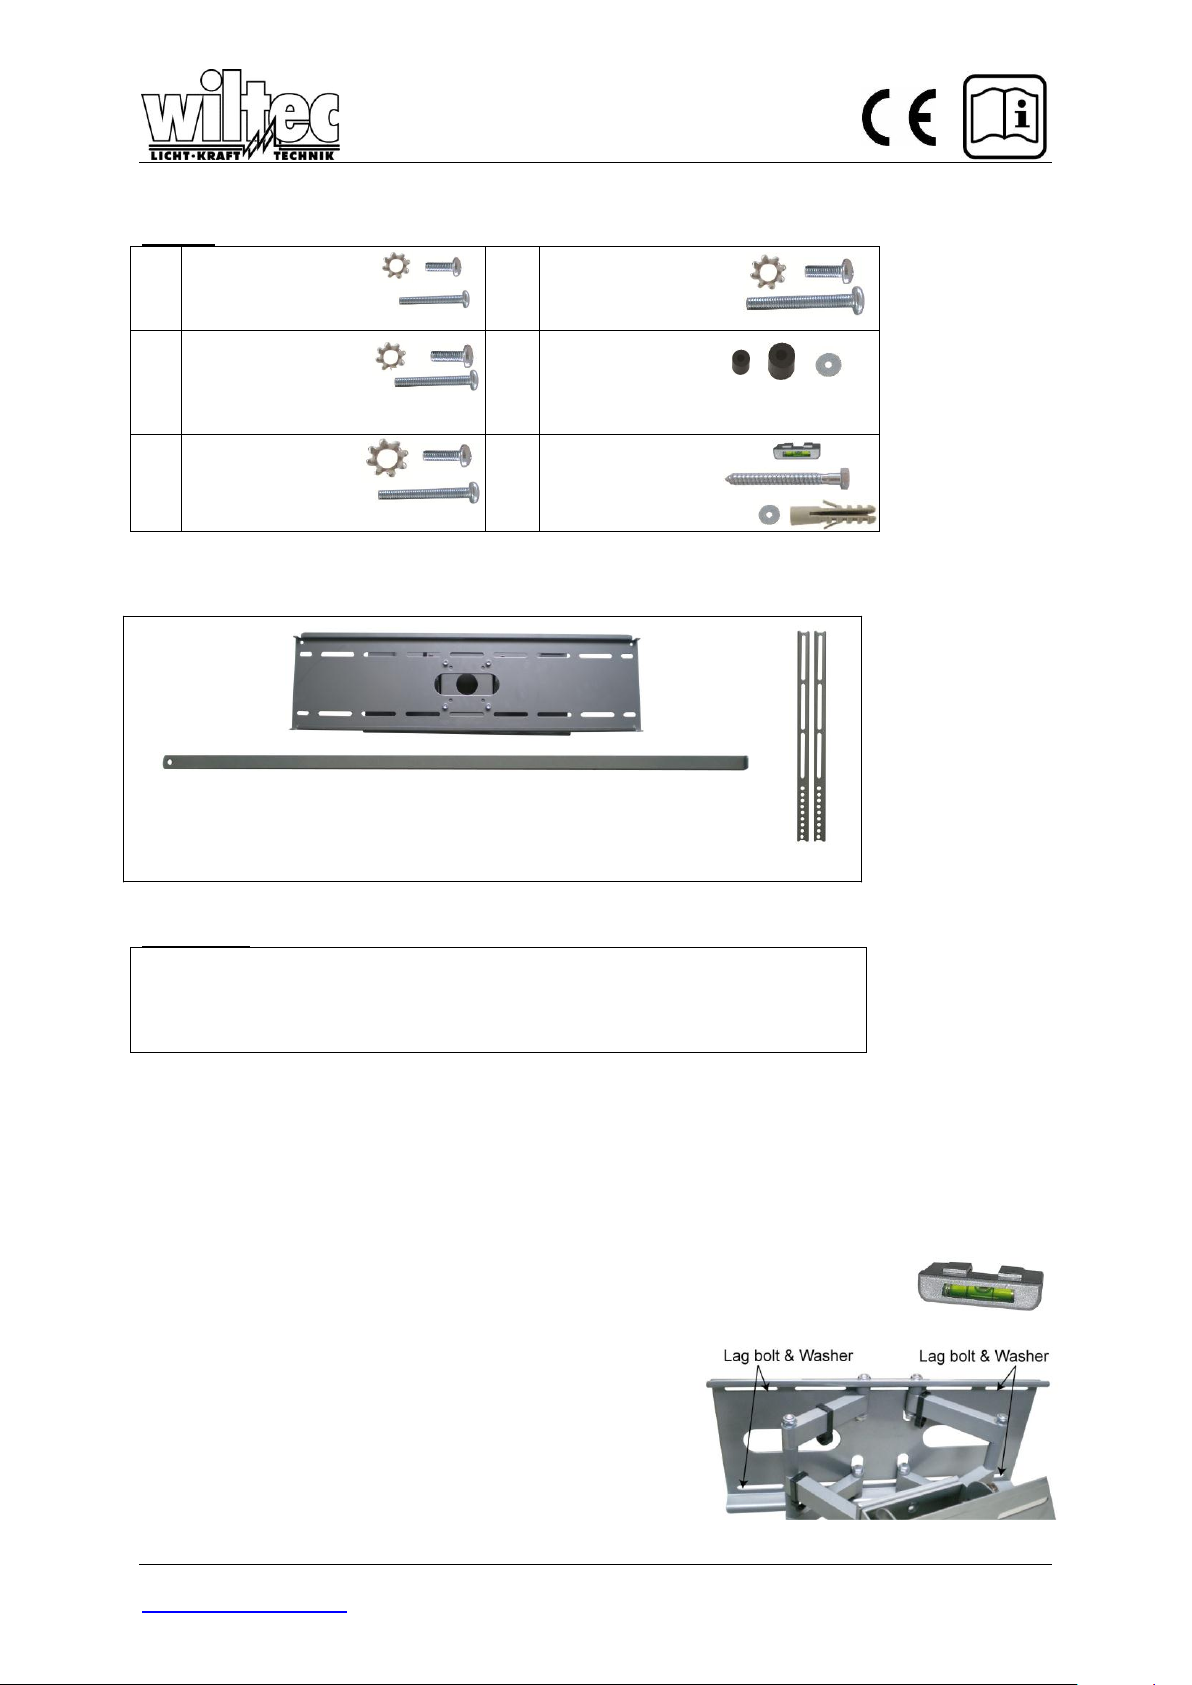
Bag
1
(x4) M4x12 Bolzen
(x4) M4x30 Bolzen
(x4) M4 Unterlegscheibe
Bag
4
(x4) M8x16 Bolzen
(x4) M8x40 Bolzen
(x4)M8
Unterlegscheibe
Bag
2
(x4) M5x12 Bolzen
(x4) M5x30 Bolzen
(x4)M5
Unterlegscheibe
Bag
5
(x4) M4/M5
Abstandhalter
(x4) M6/M8
Abstandhalter
(x4) M4/M5 Unterlegscheibe
Bag
3
(x4) M6x12 Bolzen
(x4) M6x35 Bolzen
(x4) M6
Unterlegscheibe
Bag
6
(x1) Wasserwaage
(x6) M8x60 Bolzen
(x6) Unerlegscheibe
(x6) 10x50 Dübel
Kreuzschraubendreher
Detektor für den Trockenbau
Bohrmaschine
Bohrer
Zubehör:
Sie benötigen:
Setzen Sie die Wasserwaage zum Montieren in die Wandplatte ein und entfernen Sie sie wieder,
wenn Sie die Montage beendet haben.
Trockenbaumontage
Zur sicheren Trockenbaumontage zwei mindestens 30 cm auseinander stehende
Holzbalken / Schienen verwenden.
1. Benutzen Sie einen Metalldetektor, um zwei benachbarte Schienen zu finden,
und markieren Sie deren Lage.
2. Mit Hilfe einer 2. Person und der Wasserwaage
positionieren Sie die Wandplatte an der gewünschten
Stelle.
3. Markieren Sie jeweils rechts und links die oberen,
mittleren und unteren Langlöcher, die über den Balken
oder Schienen liegen.
4. Es sollen insgesamt 4 oder 6 Stellen markiert werden.
5. Zunächst je ein 3 mm Loch in die Wand vorbohren.
6. Mit Hilfe einer 2. Person positionieren Sie die Wandplatte an der Wand und passen die
© by WilTec Wildanger Technik GmbH Seite 3
http://www.wiltec.info
Page 4
7. Langlöcher über die vorgebohrten Löcher
8. An jeder Stelle stecken Sie eine Sechskantschraube mit Unterlegscheibe ein.
9. Ziehen Sie die Sechskantschrauben im Uhrzeigersinn fest.
Vorsicht: Die Schrauben nicht zu fest anziehen, um Beschädigungen der Wand zu vermeiden.
Vorsicht: Die Wandplatte nicht loslassen, bevor sie richtig befestigt ist.
Beton-/ Mauer-Montage
Achtung: Hier müssen die Betondübel oder andere Spezialdübel aus dem örtlichen Eisenwarenhandel
benutzt werden
1. Zuerst die Wandplatte mit Hilfe der Wasserwaage an der Wand positionieren.
2. Markieren Sie jeweils rechts und links die oberen, mittleren und unteren Langlöcher.
3. Zunächst mit einem 8 mm – Steinbohrer Löcher bohren.
4. In jedes Loch einen Betondübel stecken, gegebenenfalls Dübel mit einem Hammer vorsichtig in
das Bohrloch einklopfen.
5. Wenn alle Dübel eingesteckt sind, Wandplatte wieder darüber positionieren.
6. Die Sechskantschrauben in die Dübel schrauben, leicht anziehen, erst
festschrauben, nachdem alle Sechskantschrauben eingedreht sind
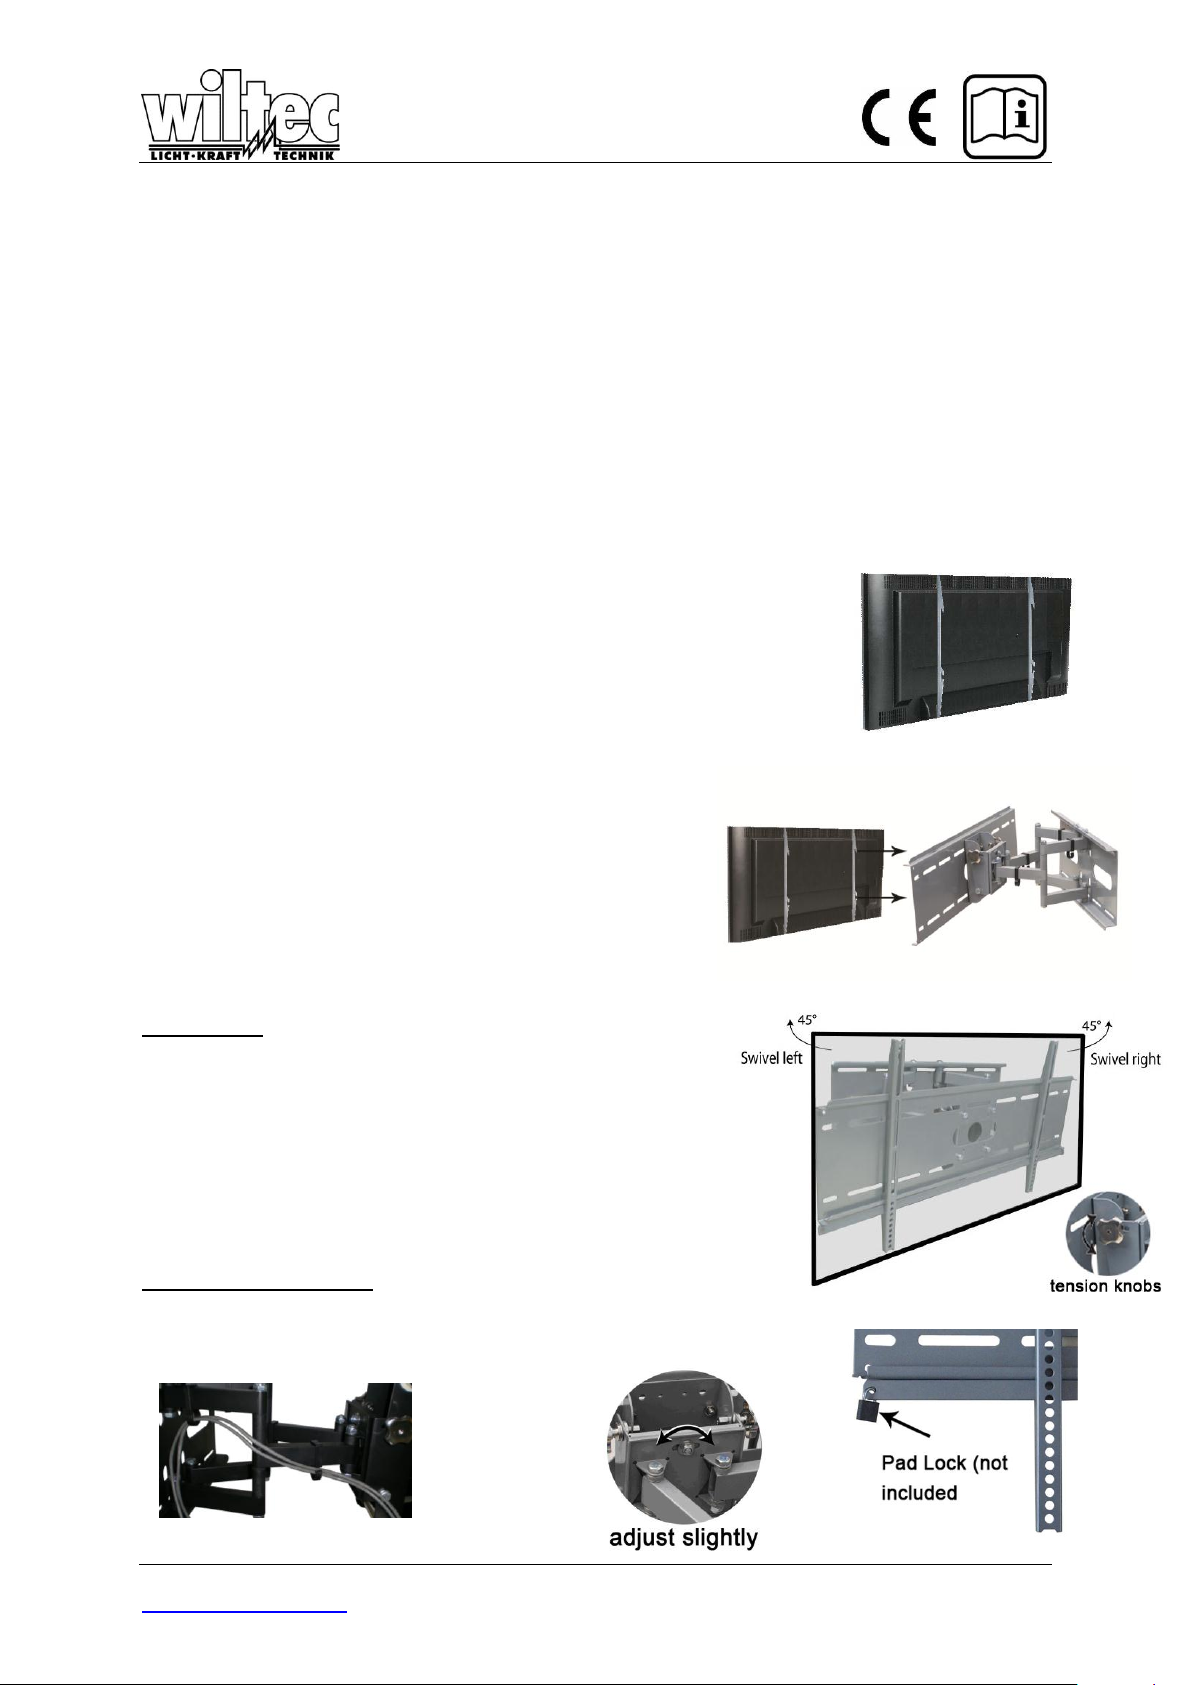
Bildschirm-Halter-Montage
1. Für eine optimale Montage enthält dieses Kit verschiedene Schrauben
verschiedene Längen und Durchmesser.
2. Legen Sie Ihren Bildschirm auf eine weiche Unterlage und suchen Sie
die Gewindelöcher auf der Rückseite.
3. Bestimmen Sie mit Hilfe eines Strohhalmes oder Zahnstochers die Tiefe
der Bohrung.
4. Wenn Ihr Bildschirm eine konkave Rückwand hat,
benutzen Sie die Abstandshalter.
Tip: Verwenden Sie den kleinstmöglichen Abstandshalter,
um den Abstand Bildschirm-Montagehalter möglichst
gering zu halten.
5. Den Abstandshalter zwischen Montagehalter und
Bildschirm einfügen.
6. Wenn eine kleinere Schraube (M4, M5 oder M6) benutzt
wird, bitte eine Unterlegscheibe mit jeder Schraube
benutzen zur Verbesserung der Stabilität.
7. Überdrehen Sie die Schrauben nicht.
Endmontage
1. Bitte beachten Sie bei der Montage, dass Sie nur in die dafür
vorgesehen Löcher Schrauben einsetzen. Ziehen Sie diese
vorsichtig mit einem Kreuzschlitzschraubendreher fest
Achtung: Sie benötigen zwei Personen um diesen Schritt
auszuführen
2. Setzen Sie den Fernseher vorsichtig mit der Halterung in
den an die Wand montierten Teil.
3. Stellen Sie sicher, das die Schrauben nicht zu weit
raustehen.
Bedienung und Einstellung
1. Ihre neue Wandhalterung kann Ihre individuellen
Bedürfnisse angepasst werden.
2. Die folgenden Bilder verdeutlichen die Einstellmöglichkeiten.
© by WilTec Wildanger Technik GmbH Seite 4
http://www.wiltec.info
Page 5
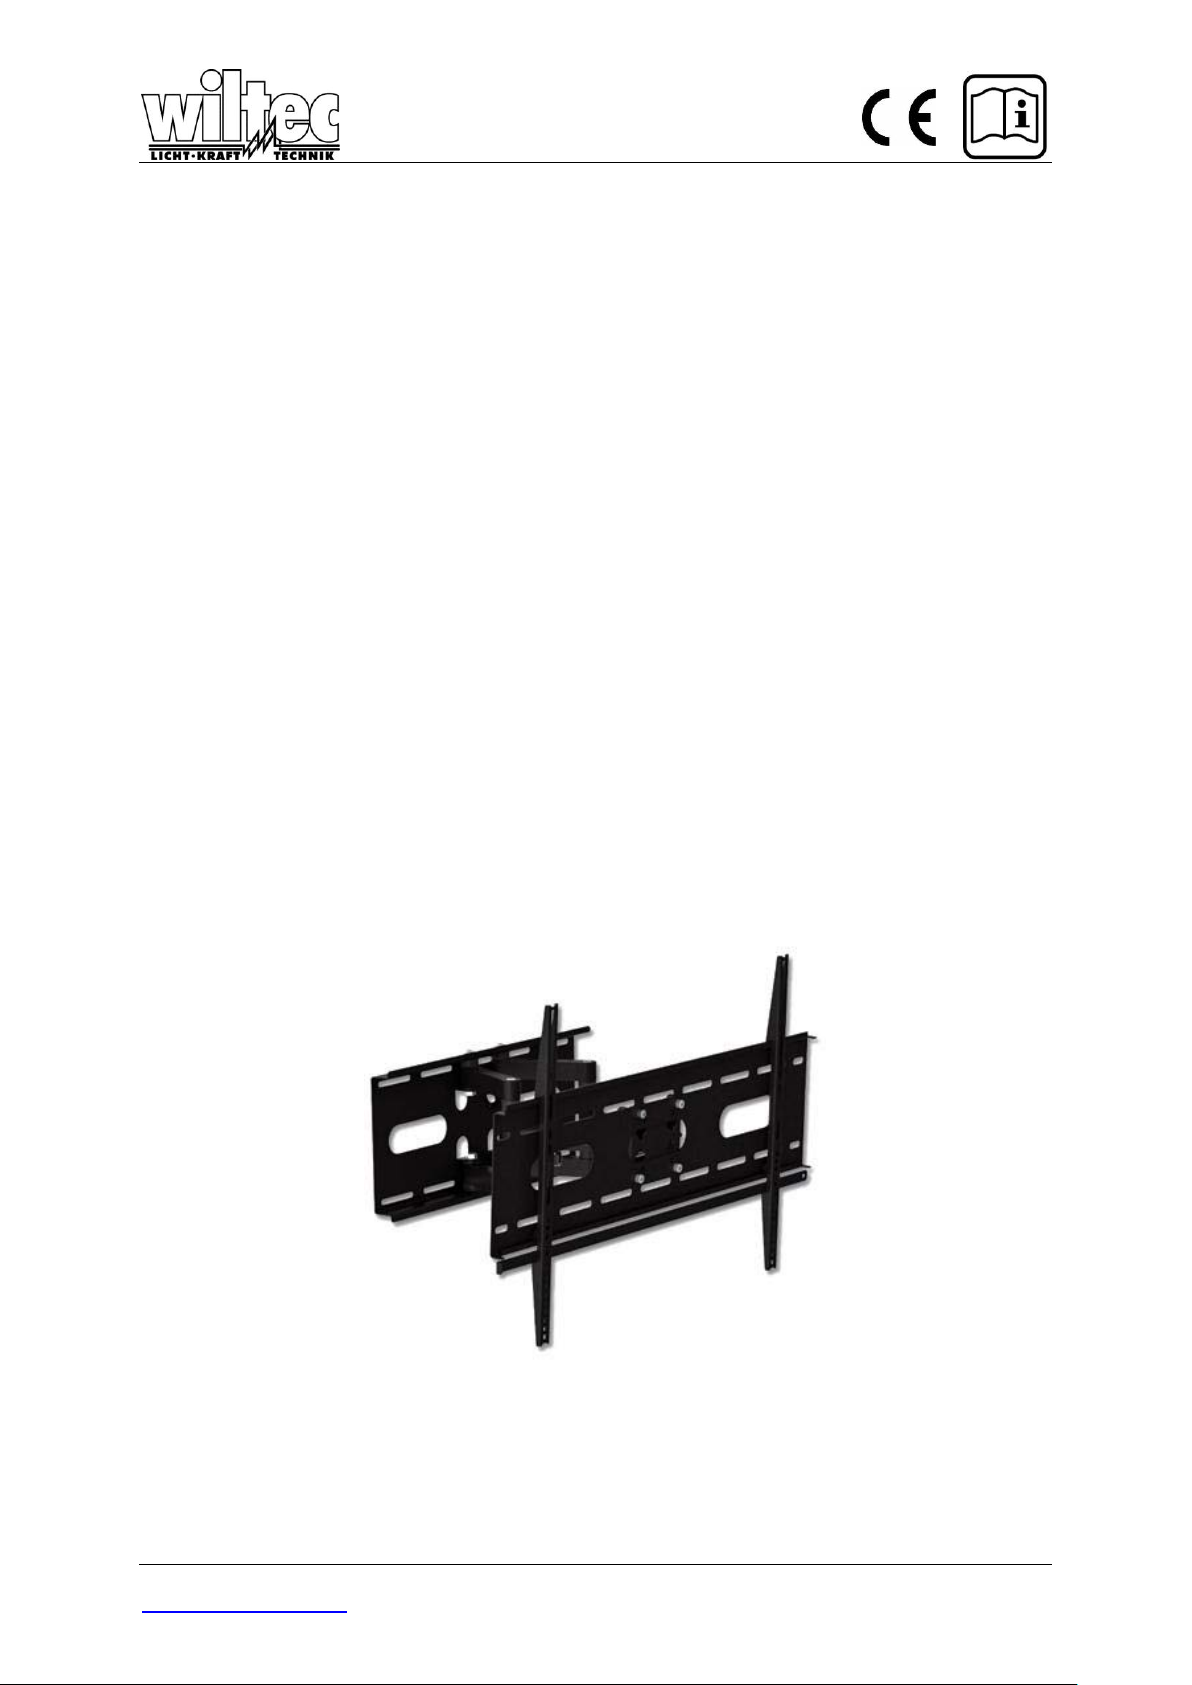
Installtion Guide
Plasma Bracket
P14 – Artikel: 50555
Max. lifting capacity 60 kg
standard size of device: 37-60“ (94-152 cm)
Technical changes reserved!
Due to further developments illustrations, functioning steps and technical data can differ insignificantly.
Updating the documentation
If you have suggestions for improvement or have found any irregularities please contact us.
© by WilTec Wildanger Technik GmbH Seite 5
http://www.wiltec.info
Page 6

Introduction
Thank you for purchasing this quality product. To minimize the risk of injury we urge that our
clients take some basic safety precautions when using this device. Please read the operation
instructions carefully and make sure you have understood its content.
WilTec Wildanger Technik GmbH
Königsbenden 12 / 28
D-52249 Eschweiler
Important notice: The reprint or reproduction, even of excerpts, and any commercial use, even in part
of this instructions manual require the written permission of Wiltec Wildanger Technik GmbH.
© by WilTec Wildanger Technik GmbH Seite 6
http://www.wiltec.info
Page 7
Warning
The wall structure must be capable of supporting at least a
maximum weight of 81.6kg (180lbs) for 37”-60” televisions and 56kg
(123lbs) for 23”-37” televisions. If not, the wall must be reinforced.
Proper installation procedure by a qualified service technician, as
outlined in the installation instructions, must be adhered to. Failure
to do so could result in serious personal injury, or even death.
Warning
Safety measures must be practiced at all times during the
installation of this product. Use proper safety gear and tools for the
installation procedure to prevent personal injury.
Warning
Prior to the installation of this product, the installation instructions
should be read and completely understood. The installation
instructions must be read to prevent personal injury and property
damage. Keep these installation instructions in an easily accessible
location for future reference.
A secure structure must support the weight or load of the display,
When mounting to a wall that contains wooden studs, dead center of
the wooden stud must be confirmed prior to installation.
Do not install on a structure that is prone to vibration, movement or
chance of impact. Failure to do so could result in damage to the
display and/or damage to the mounting surface.
Do not install near heater, fireplace, direct sunlight, air conditioning
or any other source of direct heat energy. Failure to do so may result
in damage to the display and could increase the risk of fire.
At least two qualified people should perform the installation
procedure. Injury and/or damage can result from dropping or
mishandling the display.
Recommended mounting surfaces: wooden studs and solid-flat
concrete. If the mount is to be installed on any surface other than
wooden studs, use suitable hardware (which is commercially
available).
Warning Statements
© by WilTec Wildanger Technik GmbH Seite 7
http://www.wiltec.info
Page 8
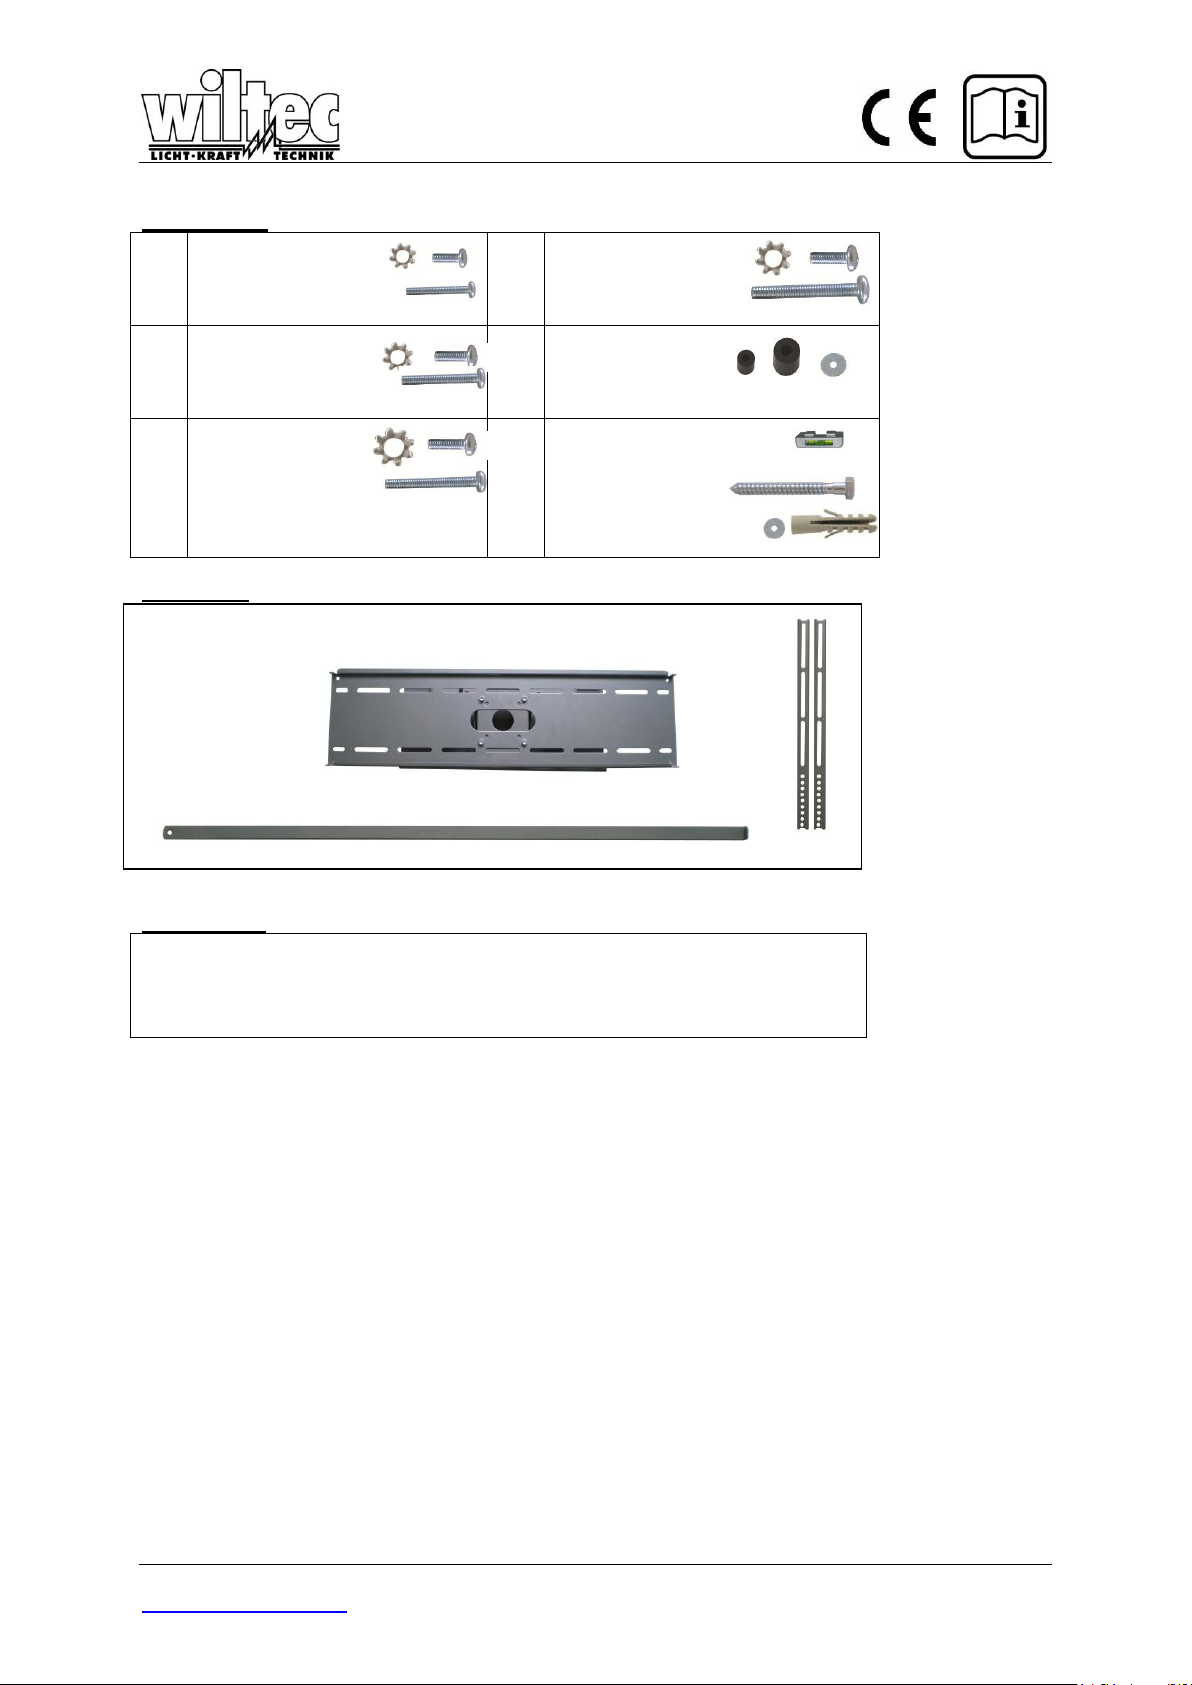
Bag
1
(x4) M4x12 Bolt
(x4) M4x30 Bolt
(x4) M4 Lock
Washer
Bag
4
(x4) M8x16 Bolt
(x4) M8x40 Bolt
(x4) M8 Lock
Washer
Bag
2
(x4) M5x12 Bolt
(x4) M5x30 Bolt
(x4) M5 Lock
Washer
Bag
5
(x4) M4/M5 Spacer
(x4) M6/M8
Spacer
(x4) M4/M5 Washer
Bag
3
(x4) M6x12 Bolt
(x4) M6x35 Bolt
(x4) M6 Lock
Washer
Bag
6
(x1) Bubble Level
System
(x6) M8x60 Lag Bolt
(x6) Washer
(x6) 10x50 Plastic
anchor
Phillips Head Screw driver
Stud finder for drywall installation
5/16” Socket and Wrench
Electric drill and 3/8” (10mm) masonry bit for concrete/brick installation
Spanner
Hardware kit:
Product Parts
Tools Required:
Note: You need to put the bubble level system on the pipe when you install the wall plate and take it
away after you finish installation.
© by WilTec Wildanger Technik GmbH Seite 8
http://www.wiltec.info
Page 9
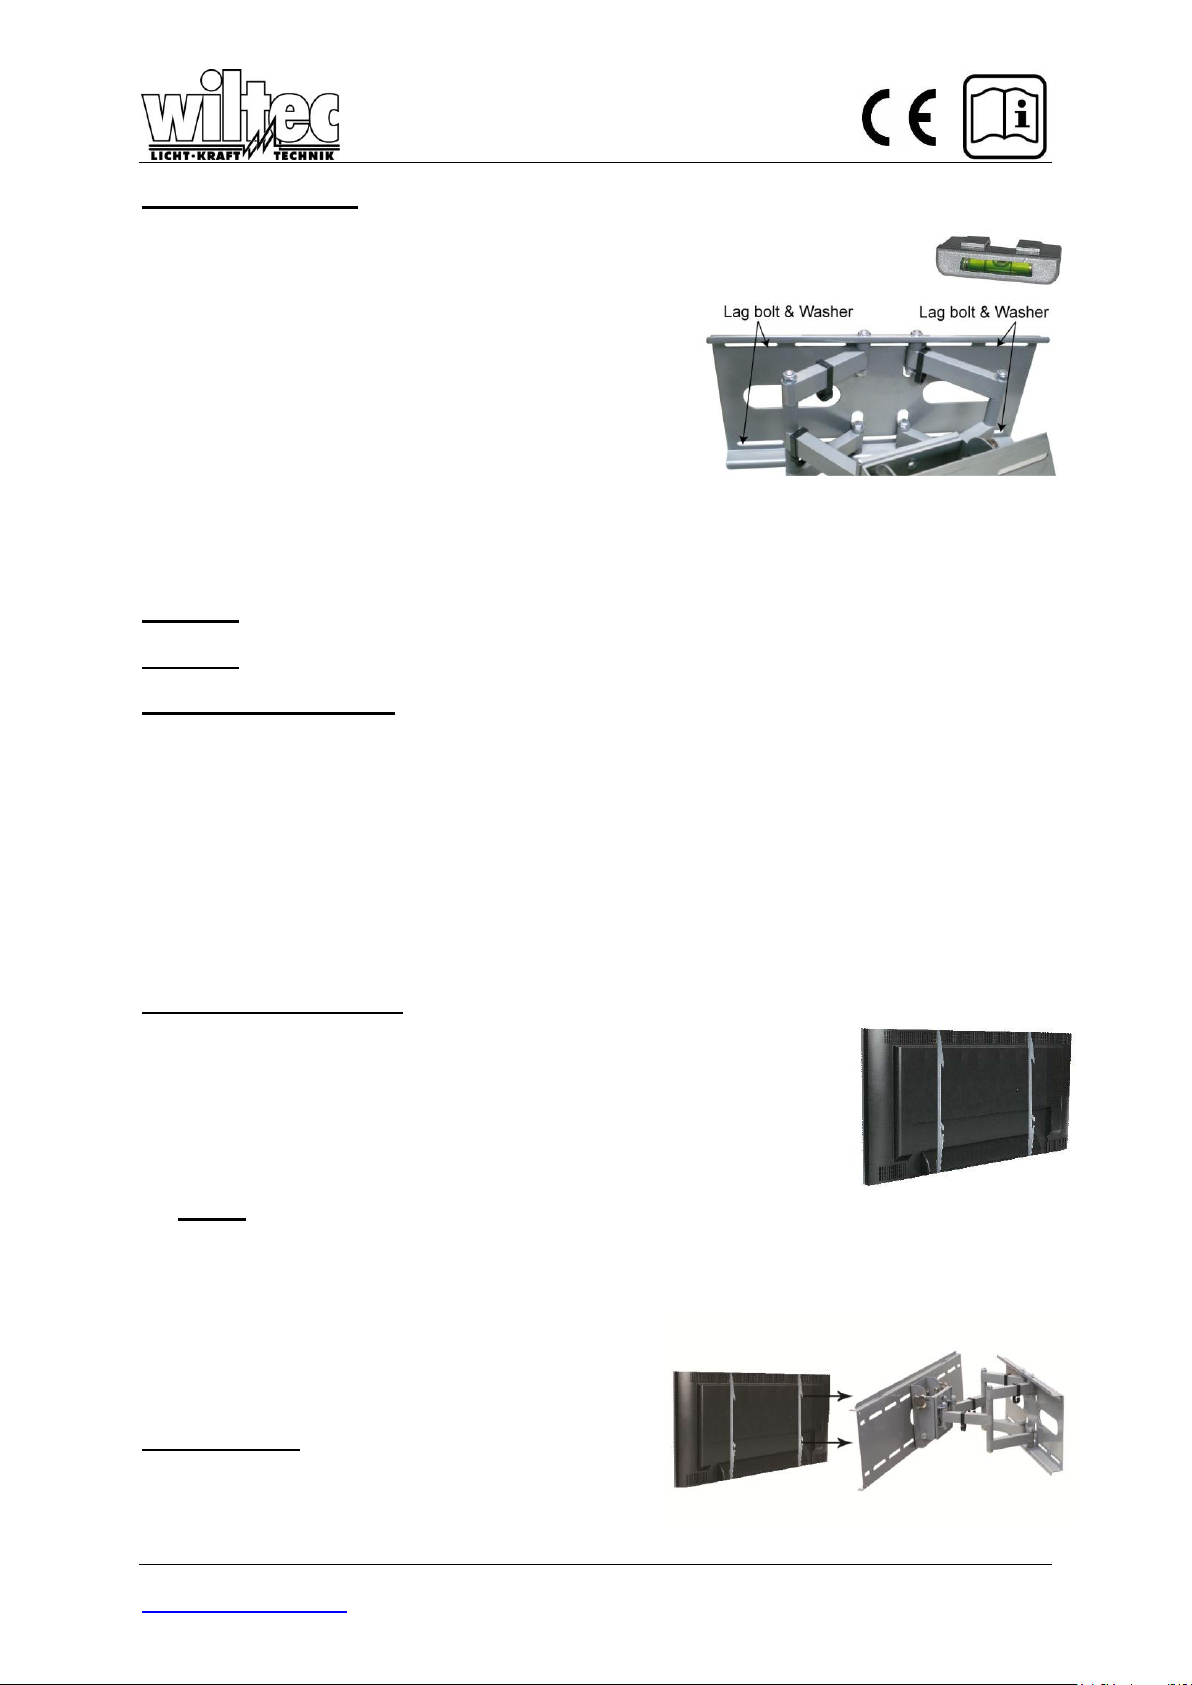
Wood Stud Installation
For secure wood stud mounting, the wall plate must be mounted to two studs at least
16” apart.
1. Use a high-quality electronic stud finder (commercially available) to locate two
adjacent studs and mark their locations with a pencil.
2. With the help of an assistant, and using the bubble level
to ensure the wall plate is level, position the wall plate
against the wall in the desired mounting location.
3. Mark the right, upper and lower and the left (upper and
lower), positions of the small horizontal slots that are in
alignment with the studs.
4. You should mark four positions total.
5. Next, pre-drill a 3mm hole in the wall stud at each
marked location.
6. With the help of an assistant, position the wall plate against the wall and line up the mounting slots
with drilled holes.
7. For each location, insert a lag bolt and washer into the wall.
8. Tighten bolt with an open ended socket wrench by turning clockwise until tight.
CAUTION: Do not over-tighten bolts-doing so may cause unnecessary damage to the wall. Avoid
excessive torque.
CAUTION: Do not release the wall plate until it is properly mounted and secured to the wall.
Concrete/Brick Installation
NOTE: The concrete anchors must be used for concrete installation. They can be purchased at
your local hardware store.
1. Begin by placing the wall plate into position against the wall, using the bubble level to keep it level.
2. Mark off four holes to be used for securing the mount and place the wall plate aside.
3. Next, drill holes using an electric drill and 10mm masonry bit.
4. Insert a concrete anchor into each hole.
5. If necessary, a hammer can be used to lightly tap each anchor into place so that they are flush
with the wall.
6. Once all of the anchors are in place, move the wall plate back into position.
7. Attach the screw into the anchor that is placed in the wall.
8. Do not tighten until all screws are in place.
Display Bracket Installation
1. To ensure optimal installation, this kit includes various screws of different
diameters and lengths.
2. Place your TV screen down on a soft, flat surface, and locate the
threaded mounting points that are located on the back of the display.
3. Determine which screw is the correct length by carefully inserting a
straw, or toothpick, and mark how deep the mounting point is.
4. If your display has a curved back or a recessed thread mounting point, a
spacer must be used.
NOTE: Select the spacer that is closest in depth to the recess to keep
your bracket as close to the display as possible.
5. Place the spacer between the mounting bracket and the display.
6. If a smaller screw is being used(M4,M5 or M6),
please use a washer with each screw for added
stability.
Final Installation
Attach each bracket to the display by aligning the holes
on each bracket, with the threaded inserts on the back
panel of your display, inserting the screws through both
and turning clockwise until they are fully inserted.
© by WilTec Wildanger Technik GmbH Seite 9
http://www.wiltec.info
Page 10
1. Tighten with a Phillips head screw driver.
CAUTION: Two people are required for this step.
2. To complete the installation of your new plasma mount, carefully place the television brackets over
the upper and lower mounting crossbars.
3. Making sure that the lockable screw is not in place when placing the television on the mount.
4. For additional security, you can install the safety-bar that is included with your mount. The
safety bar can be inserted from either side of the mount. It should pass through the interspace
of the lower part of the two TV brackets.
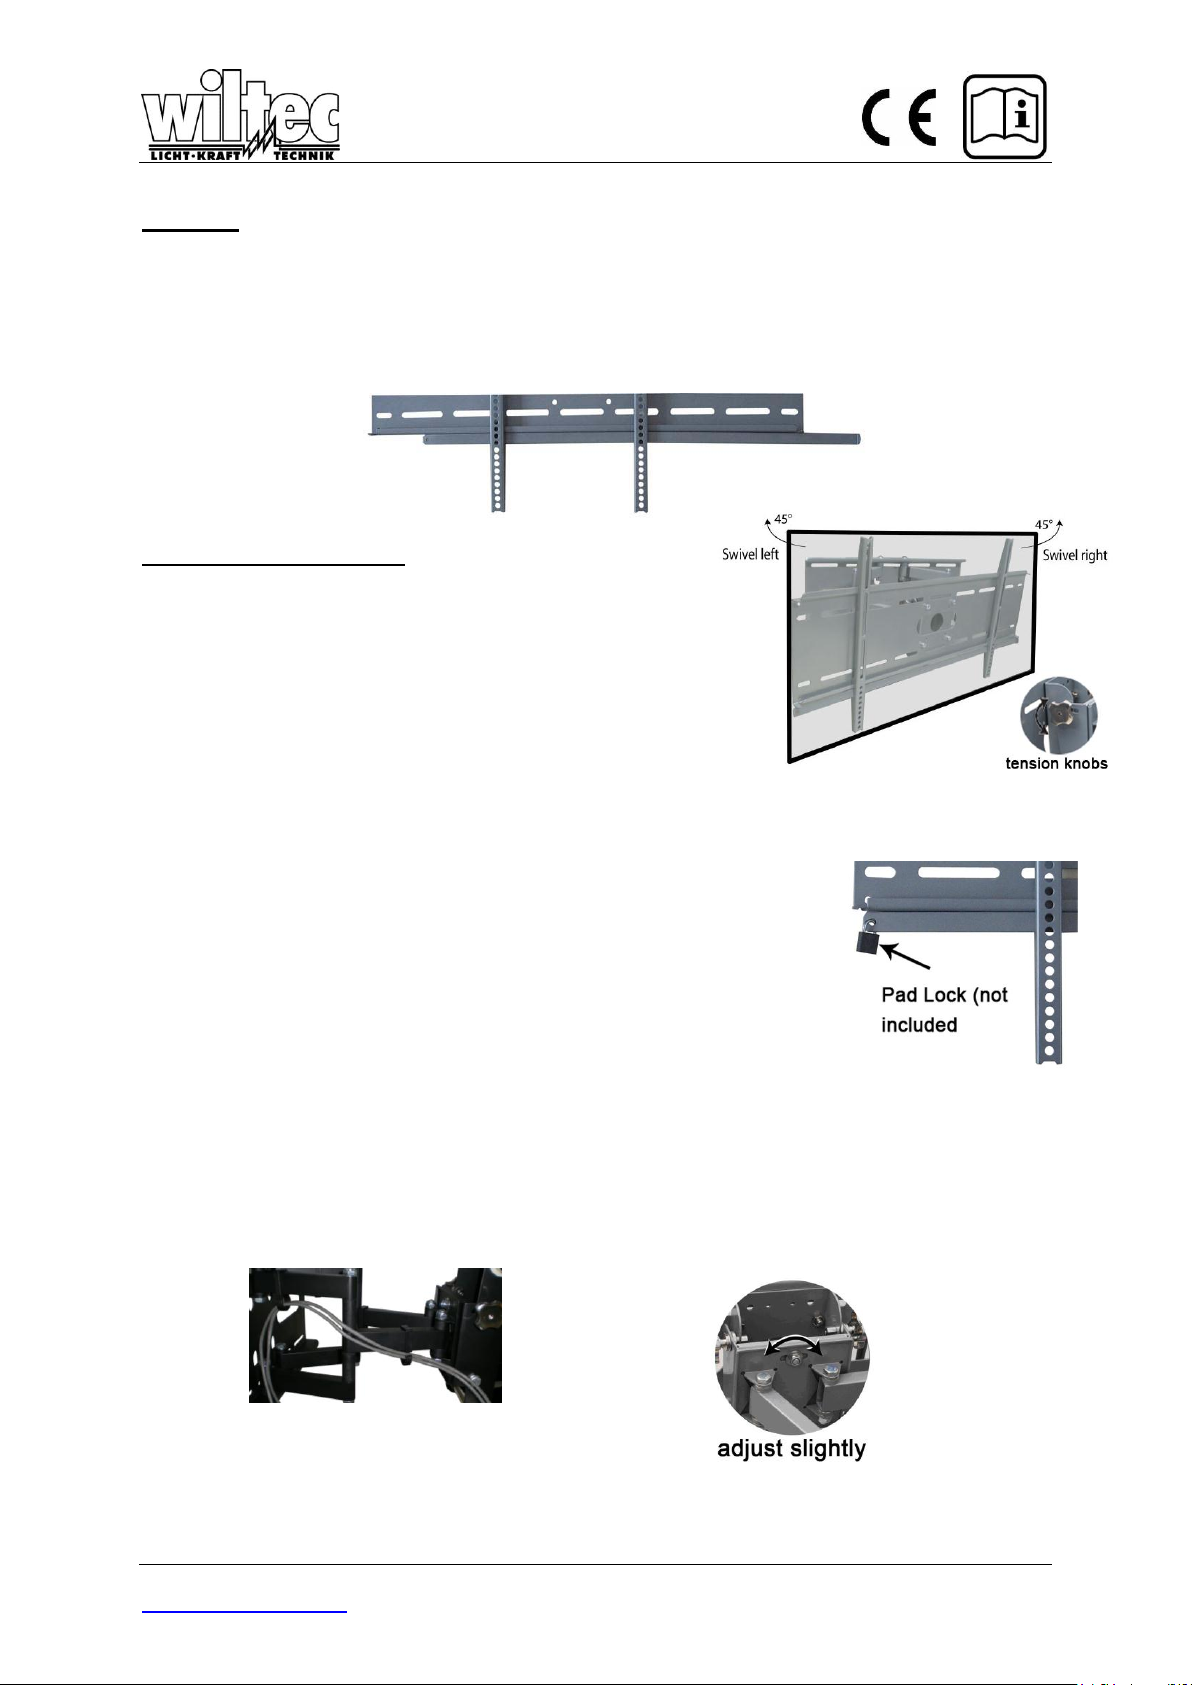
Operation and Adjustment
3. Your new mount can be adjusted to fit your individual
needs.
4. You can adjust the tilt of your television by using the
tension knob located on the right-hand side and lefthand side of the wall plate.
5. Turn the tension knobs counter-clockwise to loosen the
mounting crossbars.
6. Then tilt the mount up or down to the position you want
by pushing the upper or lower crossbar.
7. Once the desired level of tilt is achieved, retighten the mount by turning the tension knobs
clockwise.
8. Second feature of your mount is swiveling left or right.
9. Two persons are required to do the swiveling.
10. If you want to swivel to the left, one need to push the left end of the
crossbar while the other need to pull the right end of bar till to the
position you want.
11. If you want to swivel to the right, one need to push the right end of
the crossbar while the other need to pull the left end of bar till to the
position you want.
12. Third feature of your display mount is the lock designed to prevent
your television from being removed from the crossbar.
13. To use the security lock, locate the small metal tabs located on the arm brackets that attach
to the television and line up the holes.
14. Place a padlock (commercially available) through the holes and engage to secure the locking
tabs in place.
15. Cable management hooks help you to route your cables orderly and neatly.
16. If you failed to install TV horizontally, the fifth feature of your mount can help you adjust
slightly to correct it.
© by WilTec Wildanger Technik GmbH Seite 10
http://www.wiltec.info
 Loading...