

Page 1
Operation Manual
Massage Table
ARTICLE 61175, 61176, 61177
Illustration similar, may vary depending on model
Read and follow the operating instructions and safety information before using for the first time.
Technical changes reserved!
Due to further developments, illustrations, functioning steps and technical data can differ insignificantly.
Updating the documentation
If you have suggestions for improvement or have found any irregularities, please contact us.
Page 2

© by WilTec Wildanger Technik GmbH Seite 2
http://www.WilTec.de
http://www.aoyue.eu Dezember 2019 Version 2
http://www.teichtip.de
The information contained in this document is subject to change without prior notice. No part of this
document can be copied or duplicated in another form without the prior written consent of WilTec Wildanger Technik GmbH. The WilTec Wildanger Technik GmbH assumes no liability for any errors in this
user manual or the connection diagram.
Although WilTec Wildanger Technik GmbH has made every effort to make sure that this user manual is
complete, accurate and updated, errors cannot always be avoided. In the event of problems with this
user manual please complete and send this form back to us.
FAX-notification (+++49 2403 55592-15),
from: ________________________________________
Name: ________________
Firm:_____________________
Tel/Fax:__________________
I would like to report the following mistakes:
___________________________________________________________________
Customer Service WilTec Wildanger Technik GmbH
e-mail: [email protected]
Tel: ++49 2403 55592-0
Introduction
Thank you for purchasing this quality product. To minimize the risk of injury we urge that our clients
take some basic safety precautions when using this device. Please read the operation instructions carefully and make sure you have understood its content.
Keep these operation instructions safe.
Page 3
© by WilTec Wildanger Technik GmbH Seite 3
http://www.WilTec.de
http://www.aoyue.eu Dezember 2019 Version 2
http://www.teichtip.de
INTRODUCTION
Congratulations on your purchase of your new portable massage table. Your new table has been skillfully crafted to exacting standards, utilizing high quality components and materials. With proper use and
care, as outlined in this user‘s guide, your table should provide long-lasting reliable performance. To
insure safe and correct use of your table, please take a moment to read this entire guide prior to using
your table.
PRECAUTIONARY INSTRUCTIONS
• Maintain the table periodically. Make sure all screws are secure and the cable has not deterio-
rated or frayed. Make sure there are no cracks in the wood structure.
• Do not overload the table beyond the recommended weight limit. This could cause damage to
vinyl materials. Use warm soapy water and wipe dry.
• Do not use alcohol-based cleaners when yleaning the vinyl. This could cause damage to vinyl
materials. Use warm soapy water and wipe dry.
• Make that all four legs are on a solid surface and at the same level when using the table.
TABLE SET UP
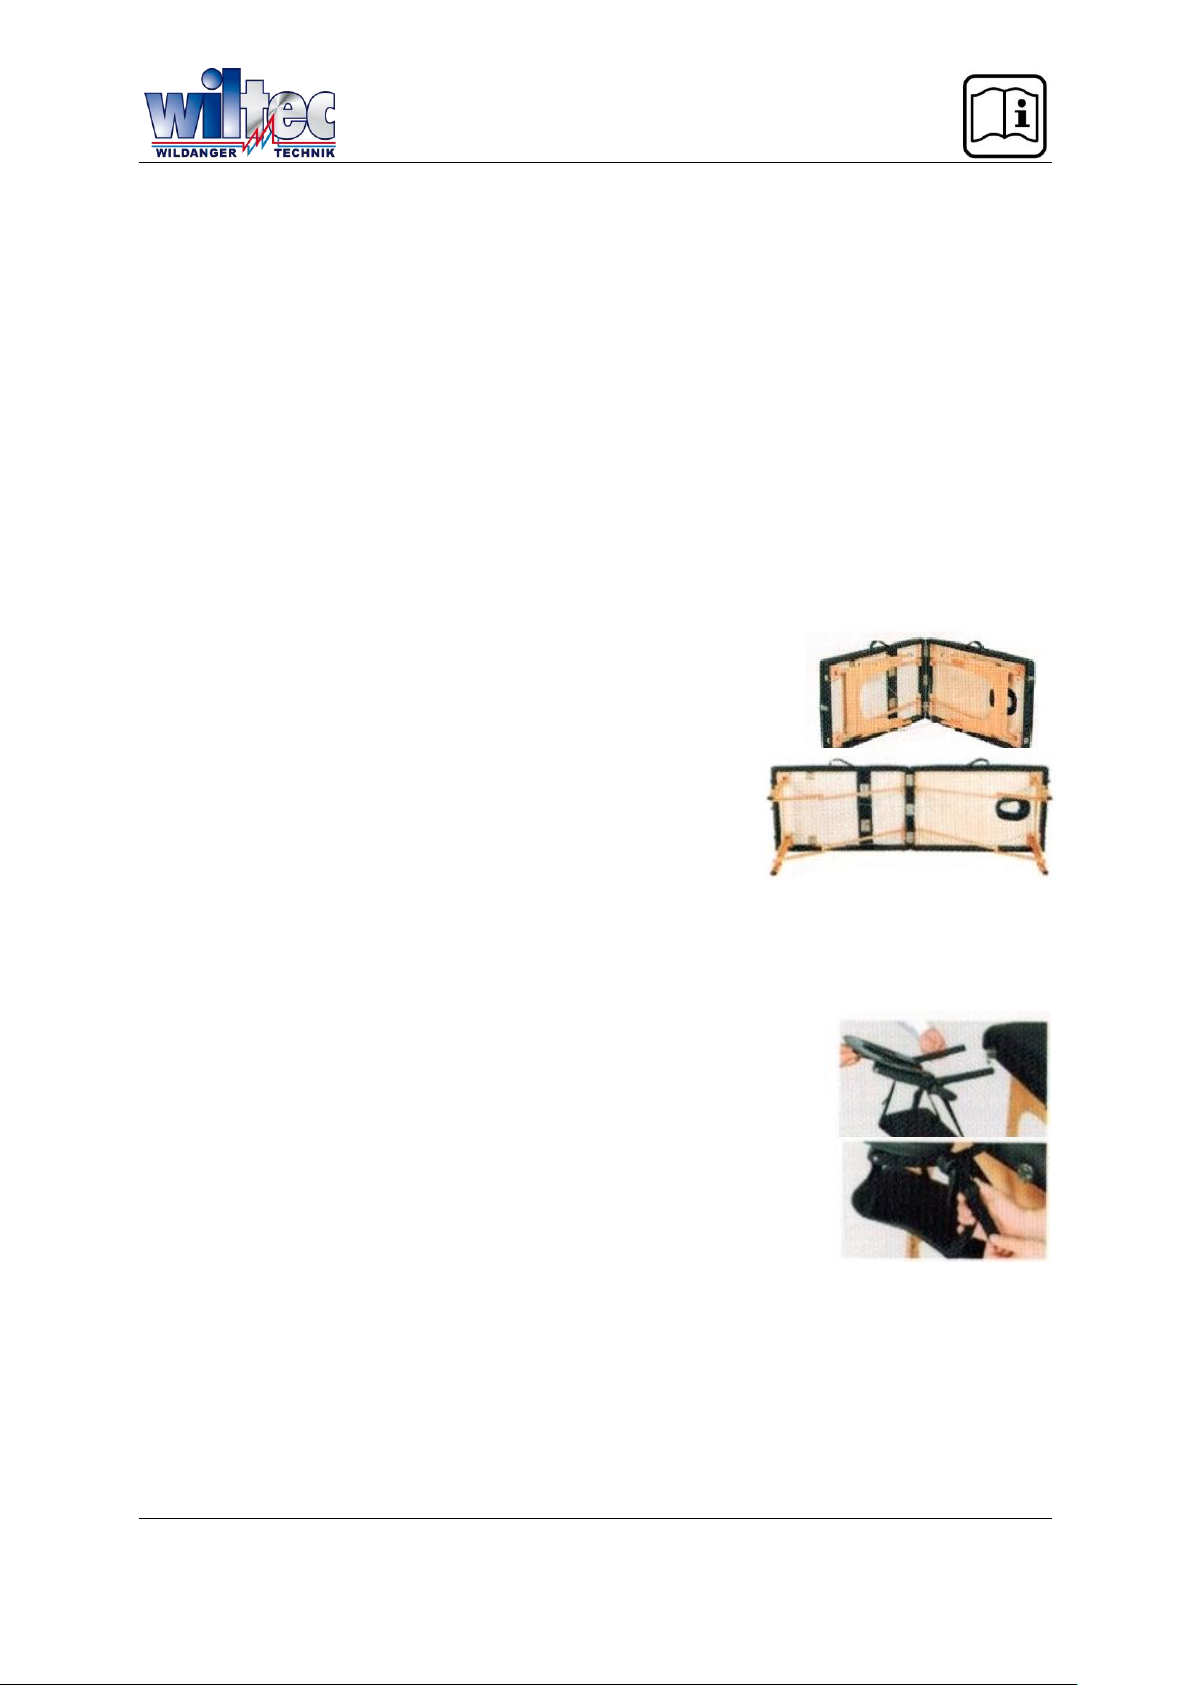
Place the table on its side, release the buckles, partially open the table and
remove the accessories.
Standing behind the table, grasp both table handles and gently swing in an
outward motion to fully open the table. The legs should open automatically.
Turn the table upright by lifting the table. Press down in the middle of
the table to make sure the table lies flat. If the table peaks in the middle,
check and straighten out the cable.
TABLE AND ACCESSORY USE
We provide optional accessories for you. Please read the instructions carefully before use.
HEADREST
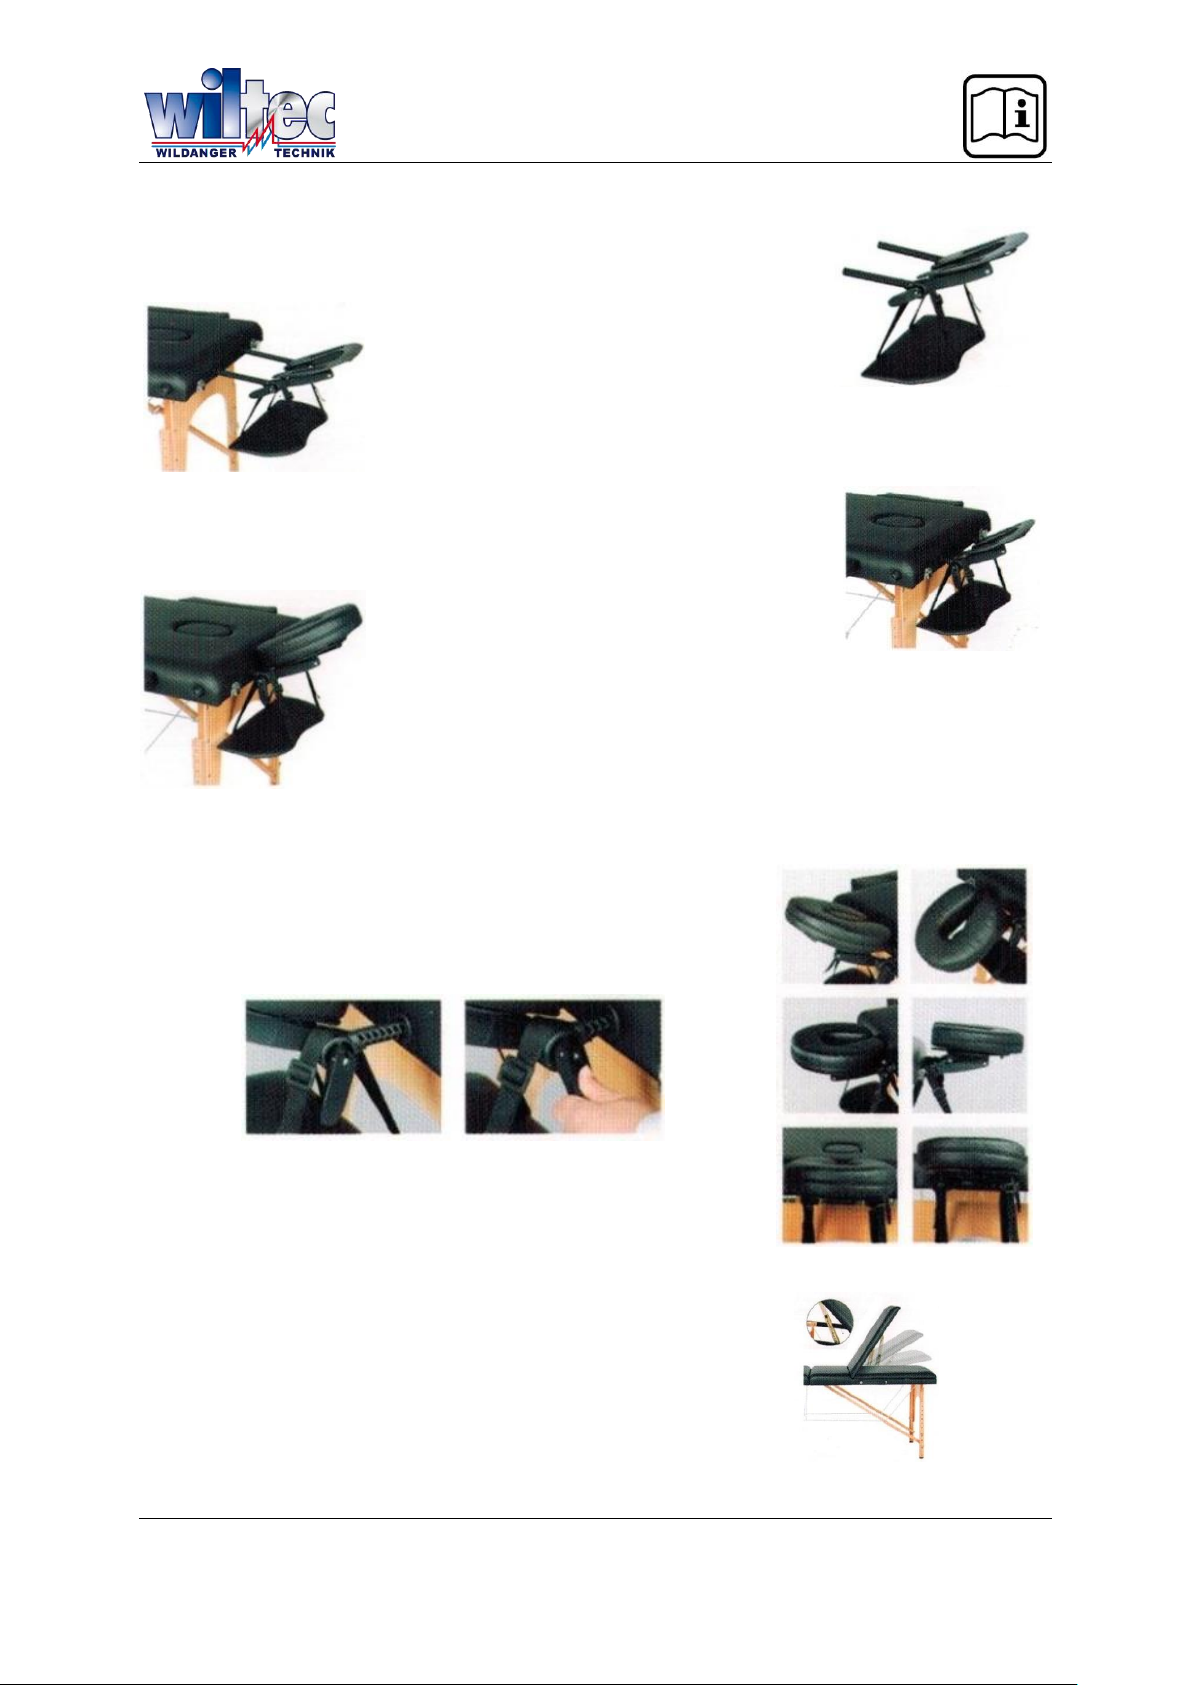
The Headrest consists of a crescent headrest base and crescent face pad. It
will give your client comfortable head and face support. You may have a different option for the headrest base. The adjustable headrest is easy to hang.
Change the angle and height of the base by adjusting the base handle.
ADJUSTABLE ARMREST SHELF
This adjustable armrest shelf is a good device for supporting your client’s arms
at the front of the table. Hang the armrest shelf on the two bars of the headrest
and slide the belt up or down for the optimal position.
Page 4
© by WilTec Wildanger Technik GmbH Seite 4
http://www.WilTec.de
http://www.aoyue.eu Dezember 2019 Version 2
http://www.teichtip.de
SIDE ARM EXTENSION
Your new massage table features a side arm extension. These removable padded side armrests add
table width. They fit into the required accessory holes in each side of the table. That will give your clients
comfortable arm support, especially for larger clients.
HEIGHT ADJUSTMENT
Proper table height is determined by the height of the therapist, modality and technique. You can adjust
the height by removing the grip knob from each leg. Replace the knobs after adjusting each leg to the
desired position.
TABLE WEIGHT LIMITS
Positioning the client in the center of the table will help to distribute the weight evenly and ensure stability. Gently sit near (not on) the center of the table at first, then sit as close to the center (from the
edge) as possible. The working weight is the combined weight of the client and the maximum amount
of downward pressure being applied by the therapist. The maximum working weight for the table is 500
pounds.
For example: For a client weighing 300 pounds, the maximum downward pressure that can safely be
applied is 200 pounds. As pressure is applied at a sideward angle puts considerably more stress on the
table, the maximum sideward pressure should not exceed 50 % of the maximum downward pressure.
DO NOT EXCEED REFERRED MAXIMUM WORKING WEIGHT!
Never exceed the load limits of the table! Doing so may result in serious injury and/or damage!
STORAGE
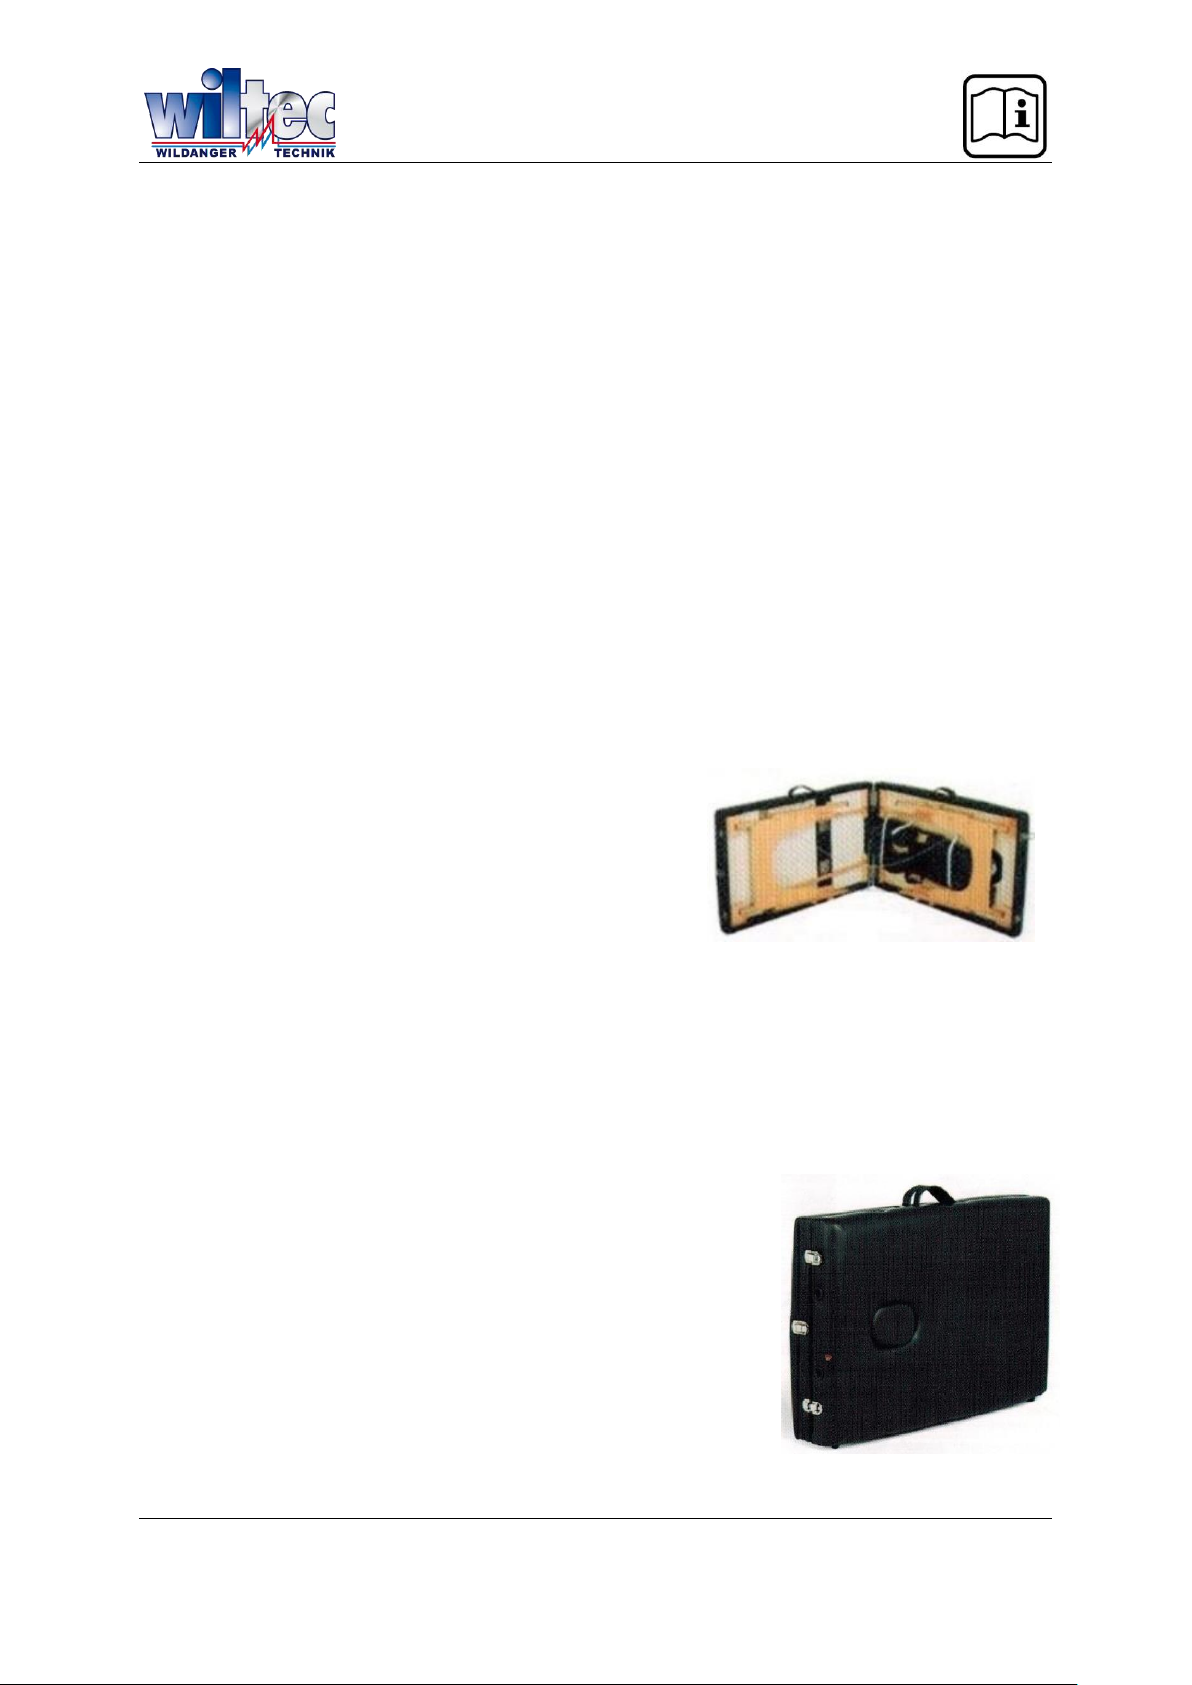
Attach headrest base and face pad onto the elastic under the
table as shown. Place each accessory in its original position as
shown in the figure.
The carry case should be used when transporting or storing the
table to help protecting the table from any possible damage.
When not in use, store the table in a cool, dry place and away
from direct sunlight. Do not expose the table to extreme (hot or cold) temperatures or moisture.
TABLE CASE
UPHOLSTERY CARE
Daily Cleaning: Remove daily dirt and grime from the table with a mild soap and warm water solution.
Dry with a soft, lint-free cloth.
Disinfecting: Disinfect the table as required with an isopropanol based hospital grade disinfectant
cleaner (approved for use on polyurethane vinyl).
STAIN REMOVAL
Some minor stains can beremoved with a mild, non-abrasive cleaner.
Spray a damp cloth with cleaner and gently wipe to remove any stains,
rinse thoroughly with warm water and dry it with a soft lint-free cloth. More
stubborn stains may require a professional cleaning.
WOOD CARE
Your massage table is made of selected hardwood and is finished with
lacquer so that it does not require special care. If desired you may polish
occasionally with quality wood care products.
Page 5
© by WilTec Wildanger Technik GmbH Seite 5
http://www.WilTec.de
http://www.aoyue.eu Dezember 2019 Version 2
http://www.teichtip.de
HEADREST AND ARM SHELFINSTALLATION INSTRUCTIONS
1. Put the headrest tubular arms through the loops of the two arm shelf straps.
2. Insert the tubular arms into the headrest holes in the table and lock the
position using the locking lever of the headrest.
3. Adjust the arm shelf to the desired horizontal position and tighten all the straps
accordingly.
4. Attach the headrest pillow to the headrest with the provided Velcro fastener.
USING YOUR 6-WAY ADJUSTABLE HEADREST
1. Put the tubular arms of the face cradle into the ports.
2. Position the lock lever so that it extends out horizontically with the
ridges on top.
3. Adjust the headrest as desired and the move the lever downwards to
lock into place. Keep the table dry and avoid exposure to wet or humid
environments. Should the table get wet, quickly and thoroughly dry with
a soft cloth.
BACK PLANCK HEIGHT ADJUSTMENT
After removing the one buckle at the end you can raise the back plank.
Adjust it to a desired position.
After you have adjusted the back plank to maximum height, place the buckles back on.
 Loading...