

Page 1
Operation Manual
ARTICEL 52168/52169
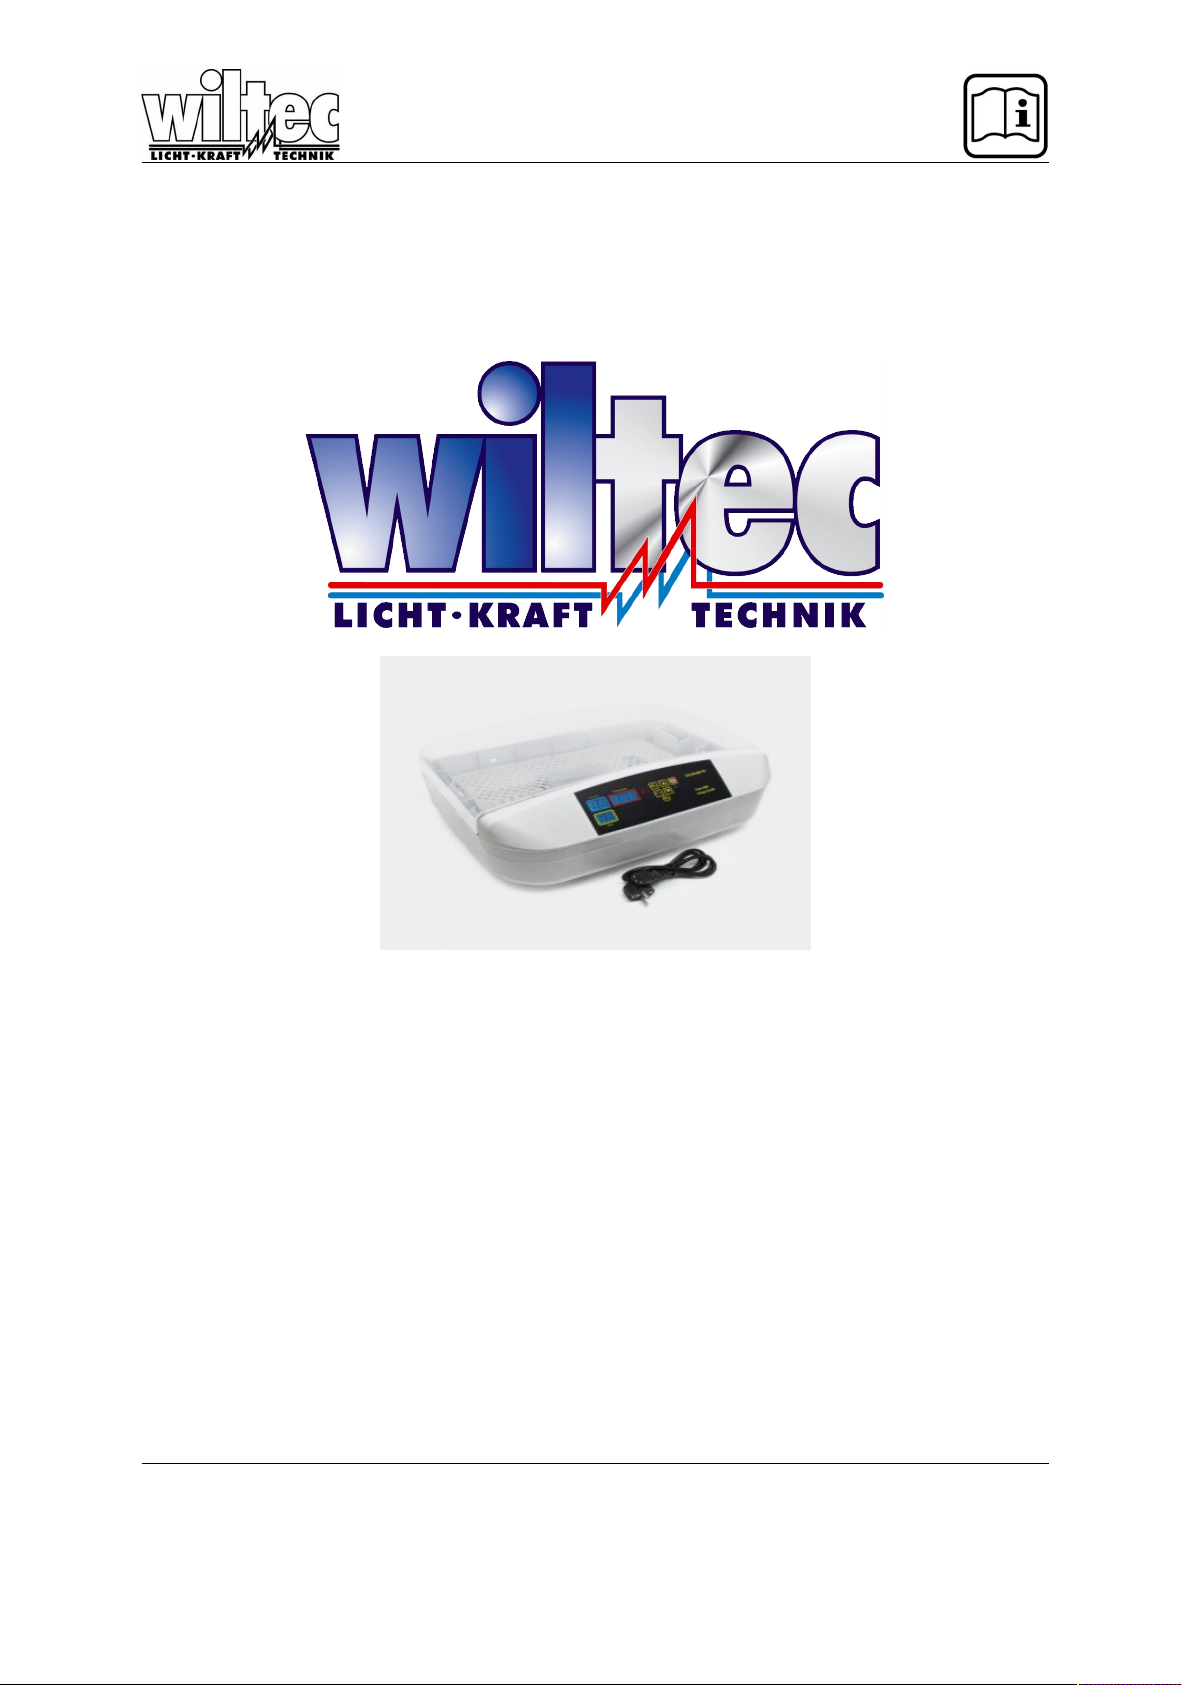
Egg incubator for 32 Reptile
Egg incubator for 48 Reptile
Read and follow the operating instructions and safety information before using for the first time.
Technical changes reserved!
Due to further developments, illustrations, functioning steps and technical data can differ
insignificantly.
Updating the documentation
If you have suggestions for improvement or have found any irregularities please contact us.
© by WilTec Wildanger Technik GmbH Seite 7
http://www.WilTec.de
http://www.aoyue.eu
http://www.teichtip.de
Page 2

The information contained in this document is subject to change without prior notice. No part of this
document can be copied or duplicated in another form without the prior written consent of WilTec
Wildanger Technik GmbH. The WilTec Wildanger Technik GmbH assumes no liability for any errors in
this user manual or the connection diagram.
Although WilTec Wildanger Technik GmbH has made every effort to make sure that this user manual
is complete, accurate and updated, errors cannot always be avoided. In the event of problems with
this user manual please complete and send this form back to us.
FAX-notification (+++49 2403 55592-15),
from: ________________________________________
Name: ________________
Firm:_____________________
Tel/Fax:__________________
I would like to report the following mistakes:
_______________________________ ____________________________________
Customer Service WilTec Wildanger Technik GmbH
e-mail: [email protected]
Tel:++ +49 2403 55592-0
Introduction
Thank you for purchasing this quality product. To minimize the risk of injury by means of fire or
electric shock we urge that our clients take some basic safety precautions when using this
device. Please read the operation instructions carefully and make sure you have understood its
content.
Always use a grounded power connection with the appropriate mains voltage. You can
nd the corresponding mains voltage on the type plate. If you have any doubts about the
connection being grounded, have it checked by a qualied professional. Never use a
faulty electric cable.
Do not inspect the electrical part of the pressure pond lter in a wet or damp
environment or when you are wet yourself and protect it from direct sunlight. Install this
device in a safe location so that nobody can step on the cable, fall over or damage it.
Disconnect the power plug before cleaning it and use only a damp cloth for cleaning.
Avoid using cleaning agents and make sure that no liquid enters the electrical part of the pump.
© by WilTec Wildanger Technik GmbH Seite 8
http://www.WilTec.de
http://www.aoyue.eu
http://www.teichtip.de
Page 3
The electric part of the device contains no parts that can be inspected or serviced by the user. Leave
the maintenance, adjustment and repair to qualified technical personnel. In case of unauthorised
intervention the 2-year warranty is no longer valid! Keep these operation instructions safe.
Thank you for purchasing the Reptile Incubator. Your Incubator is simple to use however we do
strongly recommend you read through these instructions from start to finish before attempting to set
the various parameters.
With this incubator, you can maintain a constant temperature that will enable you to hatch a variety of
reptile eggs. Egg incubation temperatures, humidity and other parameters vary across species, we
suggest you consult a specialist breeder who can advise on the conditions required for the species
you are hatching. An alarm function will warn the user if the internal temperature falls below or rises
above the ‘user set’ temperature limits. In addition the incubator counts the number of days the eggs
have been incubated allowing you to be ready for the possible hatch date. The real time temperature
display allows the user to monitor the internal temperature as required. Note this incubator does not
cool, if the ambient temperature rises above the temperature required the incubator should be moved
to a cooler place.
Operating Conditions.
*The ambient temperature (room temperature) during operation must not rise above your required egg
incubation temperature, if this occurs the incubator will not be heating however egg temperature will
increase, as a result eggs can die. *The device must be protected from moisture, water spray and radiant heat.
Initial Installation.
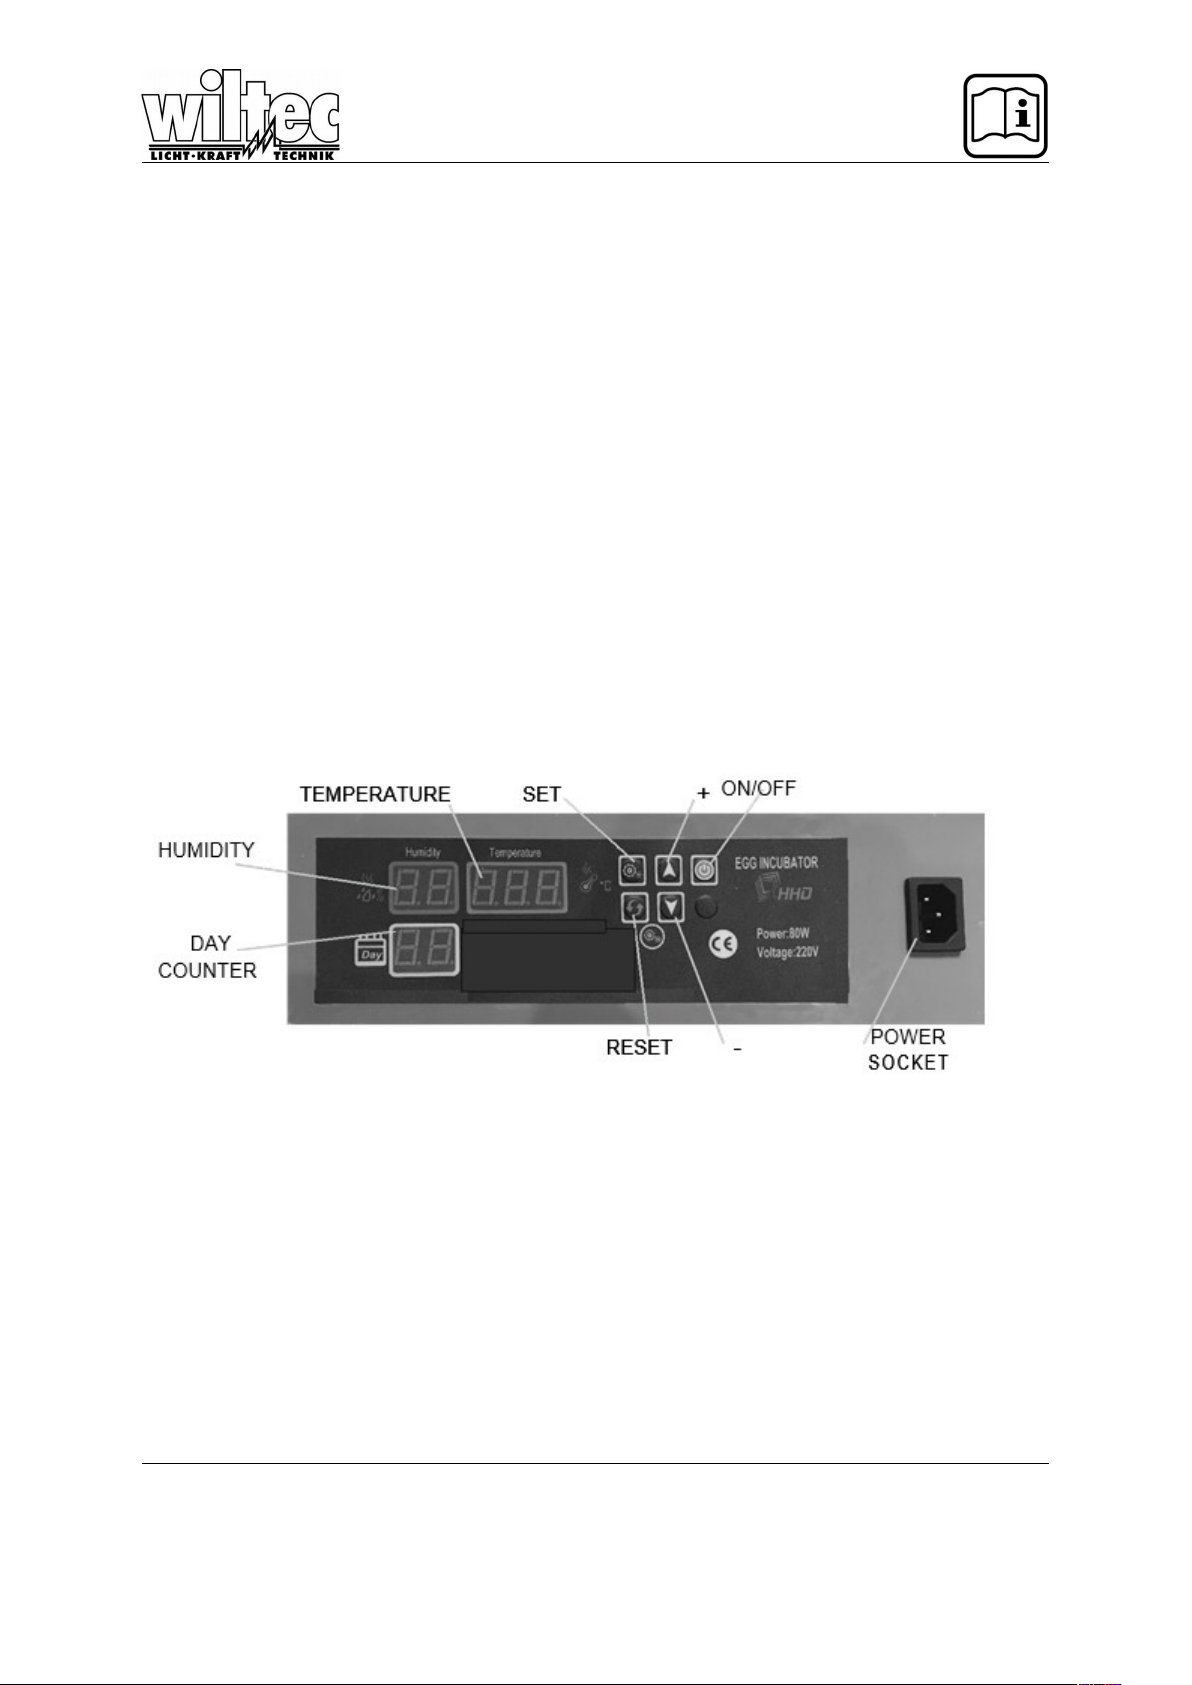
*Plug in the power cord to the wall socket and the front of the incubator.
*Press the ‘ON/OFF’ switch on the control panel if the control panel isn’t lit.
*The incubator will generally be set outside of the settings required so there will be an audible alarm,
press either the ‘+ or -’ buttons to silence it.
NOTE - during any setting sequence if the display is left untouched for more than three seconds the
sequence will need to be re-started.
Setting Temperature.
The incubator is factory set at 30C. You may need to change this dependant on the eggs being incu bated. .
Press the ‘Set’ button once.
Press ‘+’ or ‘-’ to set the desired temperature.
Press the Set button again to exit the setting process.
© by WilTec Wildanger Technik GmbH Seite 9
http://www.WilTec.de
http://www.aoyue.eu
http://www.teichtip.de
Page 4

Setting the Temperature Alarm Value (AL & AH)
The incubator can sound an alarm if the temperatures is too hot or too cold. These upper and lower
values can be changed by the user. The alarm value represents the set number of degrees either
above or below the value already set. For example if the set temperature is 30C and the lower (AL)
value is set at 3C, the lower alarm will sound 3 degrees below 30C, at 27C. Similarly if the upper alarm
(AH) is set at 3C the alarm will sound at 33C. The alarm value for high and low temperature is factory
set at 1C.
For low temperature alarm (AL)
Press the Set button for three seconds.
Press either the + or - button if required until you see AL illustrated on the temperature display.
Press the Set button again.
Press either the + or - button to achieve the lower alarm value.
Press the Set button again to exit the setting process.
For high temperature alarm (AH)
Press the Set button for three seconds.
Press either the + or - button until you see AH illustrated on the temperature display.
Press the Set button.
Press either + or - button to achieve the upper alarm value.
Press the Set button again to exit the setting process.
Setting Upper and Lower Temperature Limits.
To avoid accidental re-setting of the upper and lower temperature limits outside of acceptable limits or
to avoid another person ‘tampering’ with the unit temperature limits can be set. For example if you require 30C as an incubation temperature 27C and 33C could be set as temperature limits. This is differ ent to the alarm values - in this case the incubator cannot be set outside of the upper and lower values.
Press the Set button for three seconds.
Press either the + or - button until you see LS illustrated on the temperature display.
Press the Set button.
Press either the + or - button to set the lower temperature limit.
To set the upper temperature limit as above however press until HS is illustrated.
Setting the Humidity.
In most cases reptile eggs will be placed inside dedicated incubation tubs, which are then placed in
the incubator.
The Incubator humidity probe is within the incubator itself, it is not measuring internal incubation tub
humidity if used. An alternate method of incubation is to partially fill the incubator base with your preferred incubation medium and then place eggs directly into it. The display in this case will be accurately showing the humidity surrounding the eggs. The humidity cannot be controlled by the incubator
however an alarm can be set if you are using the second method of incubation to alert you to falling
humidity.
Press the Set button for three seconds.
Press either the + or - button until you see AS illustrated on the temperature display.
Press the Set button.
Press the + or - button to set the required humidity
Press the Set button again to exit the setting process. The alarm will sound if the humidity falls 10%
below the set value.
© by WilTec Wildanger Technik GmbH Seite 10
http://www.WilTec.de
http://www.aoyue.eu
http://www.teichtip.de
Page 5

Calibrating the Temperature Transmitter.
If there is ever a suspicion that the temperature being displayed has shifted it can be re-calibrated. To
correct the value place a thermometer of known accuracy into the incubator. The difference in temper ature can then be observed and corrected if required. Do not use this setting unless you have a very
accurate thermometer - a laboratory grade glass thermometer can be used.
Press the Set button for 3 seconds.
Press the + or - button until CA is illustrated on the temperature display.
Press the Set button.
Press the + or - button to set the required temperature.
Press the Set button again to exit the setting process.
The ‘Day’ Display
When power is first applied to the incubator the day display will start to count the number of days that
have elapsed. Knowing the incubation time for the species you are hatching will mean you will be able
to better prepare for the event, possibly checking the incubator more often as the hatching date approaches. Pressing the Reset button will start this function from day one.
Summary of Setting Options
Display Description Factory Setting
AL Setting low temperature alarm 3C
AH Setting high temperature alarm 3C
AS Setting the humidity alarm 65%
CA Calibrating the temperature probe 0C
HS Setting upper temperature limit 40C
LS Setting lower temperature limit 15C
FAQ
Q- My eggs went bad and/or didn't hatch. The temperature and humidity were correct! A - Not all eggs
laid are fertile and not all fertile eggs are healthy. Fertile eggs in good condition are fairly tough and
tend “to” hatch if the parameters for the species involved are correct. If you are having repeated fail ures consult a successful breeder of the species concerned.
Q - Can the circulation fan be replaced?
A - Yes the fan can easily be replaced, we suggest any electrical work be carried out by a qualified
electrician.
Q - What are the upper and lower temperature set limits?
A - The lowest temperature setting is 15C, the highest 40C.
Q - What is the torch for?
A - A ‘candling torch can be touched onto the side of new eggs to determine if they are fertile. After a
given length of time ‘veins’ or ‘blood vessels’ can be seen
inside the eggs. Consult a specialist breeder of the species concerned to find out what to look for.
© by WilTec Wildanger Technik GmbH Seite 11
http://www.WilTec.de
http://www.aoyue.eu
http://www.teichtip.de
Page 6

Disposal regulations
EU guidelines regarding the disposal of scrap electric appliances (WEEE, 2002/96/EC) were
implemented in the law related to electrical and electronic equipment and appliances.
All WilTec electric devices that fall under the WEEE regulations are labelled with the crossed-out
wheeled waste bin logo. This logo indicates that this electric equipment must not be disposed with the
domestic waste.
The company WilTec Technik GmbH has been registrated in the German registry EAR under the
WEEE-registration number DE45283704.
Disposal of used electrical and electronic appliances
(intended for use in the countries of the European
Union and other European countries with a separate
collection system for these appliances).
The logo on the article or on its packaging points out
that this article must not be treated as normal
household waste but must be disposed to a recycling
collection point for electronic and electrical waste
equipment. By contributing to the correct disposal of
this article you protect the environment and the health
of your fellow men. Environment and health are
threatened by inappropriate disposal.
Materials’ recycling helps reduce the consumption of raw materials.
Additional information on recycling this article can be provided by your local community, municipal
waste disposal facilities or the store where you purchased the article.
Address:
WilTec Wildanger Technik GmbH
Königsbenden 12 / 28
D-52249 Eschweiler
Important notice:
The reprint or reproduction, even of excerpts, and any commercial use, even in part of this instructions
manual require the written permission of WilTec Wildanger Technik GmbH.
© by WilTec Wildanger Technik GmbH Seite 12
http://www.WilTec.de
http://www.aoyue.eu
http://www.teichtip.de
 Loading...