

Page 1
Operation Manual
ARTICEL 51743
Read and follow the operating instructions and safety information before using for the first time.
Technical changes reserved!
Due to further developments, illustrations, functioning steps and technical data can differ
insignificantly.
Updating the documentation
If you have suggestions for improvement or have found any irregularities please contact us.
© by WilTec Wildanger Technik GmbH Seite 6
http://www.WilTec.de
http://www.aoyue.eu Version 5.2017
http://www.teichtip.de
Page 2

The information contained in this document is subject to change without prior notice. No part of this
document can be copied or duplicated in another form without the prior written consent of WilTec
Wildanger Technik GmbH. The WilTec Wildanger Technik GmbH assumes no liability for any errors in
this user manual or the connection diagram.
Although WilTec Wildanger Technik GmbH has made every effort to make sure that this user manual
is complete, accurate and updated, errors cannot always be avoided. In the event of problems with
this user manual please complete and send this form back to us.
FAX-notification (+++49 2403 55592-15),
from: ________________________________________
Name: ________________
Firm:_____________________
Tel/Fax:__________________
I would like to report the following mistakes:
_______________________________ ____________________________________
Customer Service WilTec Wildanger Technik GmbH
e-mail: [email protected]
Tel:++ +49 2403 55592-0
introduction
Thank you for purchasing this quality product. In order to minimize the risk of injury, we ask you to al ways take some basic safety precautions when using this device. Please read this manual carefully
and make sure you understand them.
The interior of this unit does not contain any user-serviceable parts. Leave maintenance, adjustment
and repair qualified personnel. In the case of a foreign intervention, the 2-year warranty period expires!
Keep these operating instructions in a safe place.
© by WilTec Wildanger Technik GmbH Seite 7
http://www.WilTec.de
http://www.aoyue.eu Version 5.2017
http://www.teichtip.de
Page 3
Description
The professional balancer is a great help in the correction of unbalance. With the use of gravity, it can
find the focus of any tire and is suitable for almost all motorcycles. With the robust steel construction,
this balancing machine guarantees a long-term use.
Safety instructions / warnings
The owner and / or user must have read and understood the operating instructions of the device before using it. Installed personnel should be cautious, competent, trained and qualified in the safe handling of the working equipment used when working on engines and their components. Warnings
should be read and understood.
1. Be familiar with the application control, the application process and the warnings.
2. The engine stand may only be used for the removal and installation of engine stand es.
(Gears, differential gears, etc.)
3. Ensure that all connectors are secure and secure.
4. Make sure you know the contents of the instructions for use.
5. his device is not intended to be used by persons (or even children) with reduced physical,
sensory or mental abilities or persons who do not have the appropriate experience or knowledge, unless they are responsible for their safety Person or have previously been instructed
to use the equipment.
6. Children must be supervised to ensure that they do not play with the appliance.
7. Immediately report to your supervisor or workshop as soon as something unforeseen happens
8. Always pay attention to the optimal lighting of the workplace.
9. Be sure to wear solid footwear.
10. Use a hairnet for long hair
11. Wear tight clothing.
12. Place jewelry (rings, earrings, watches, etc.)
13. Be careful not to wear loose straps or belts.
Use the balancing block
1. Use the balancing block on a stable flat surface. If necessary, adjust the feet.
2. In the first step, install the empty rim without tires on the balancer. When the wheel is centered
on the spindle, fix the screws in the cones with a 3mm hex wrench. Check the tight fit.
© by WilTec Wildanger Technik GmbH Seite 8
http://www.WilTec.de
http://www.aoyue.eu Version 5.2017
http://www.teichtip.de
Page 4
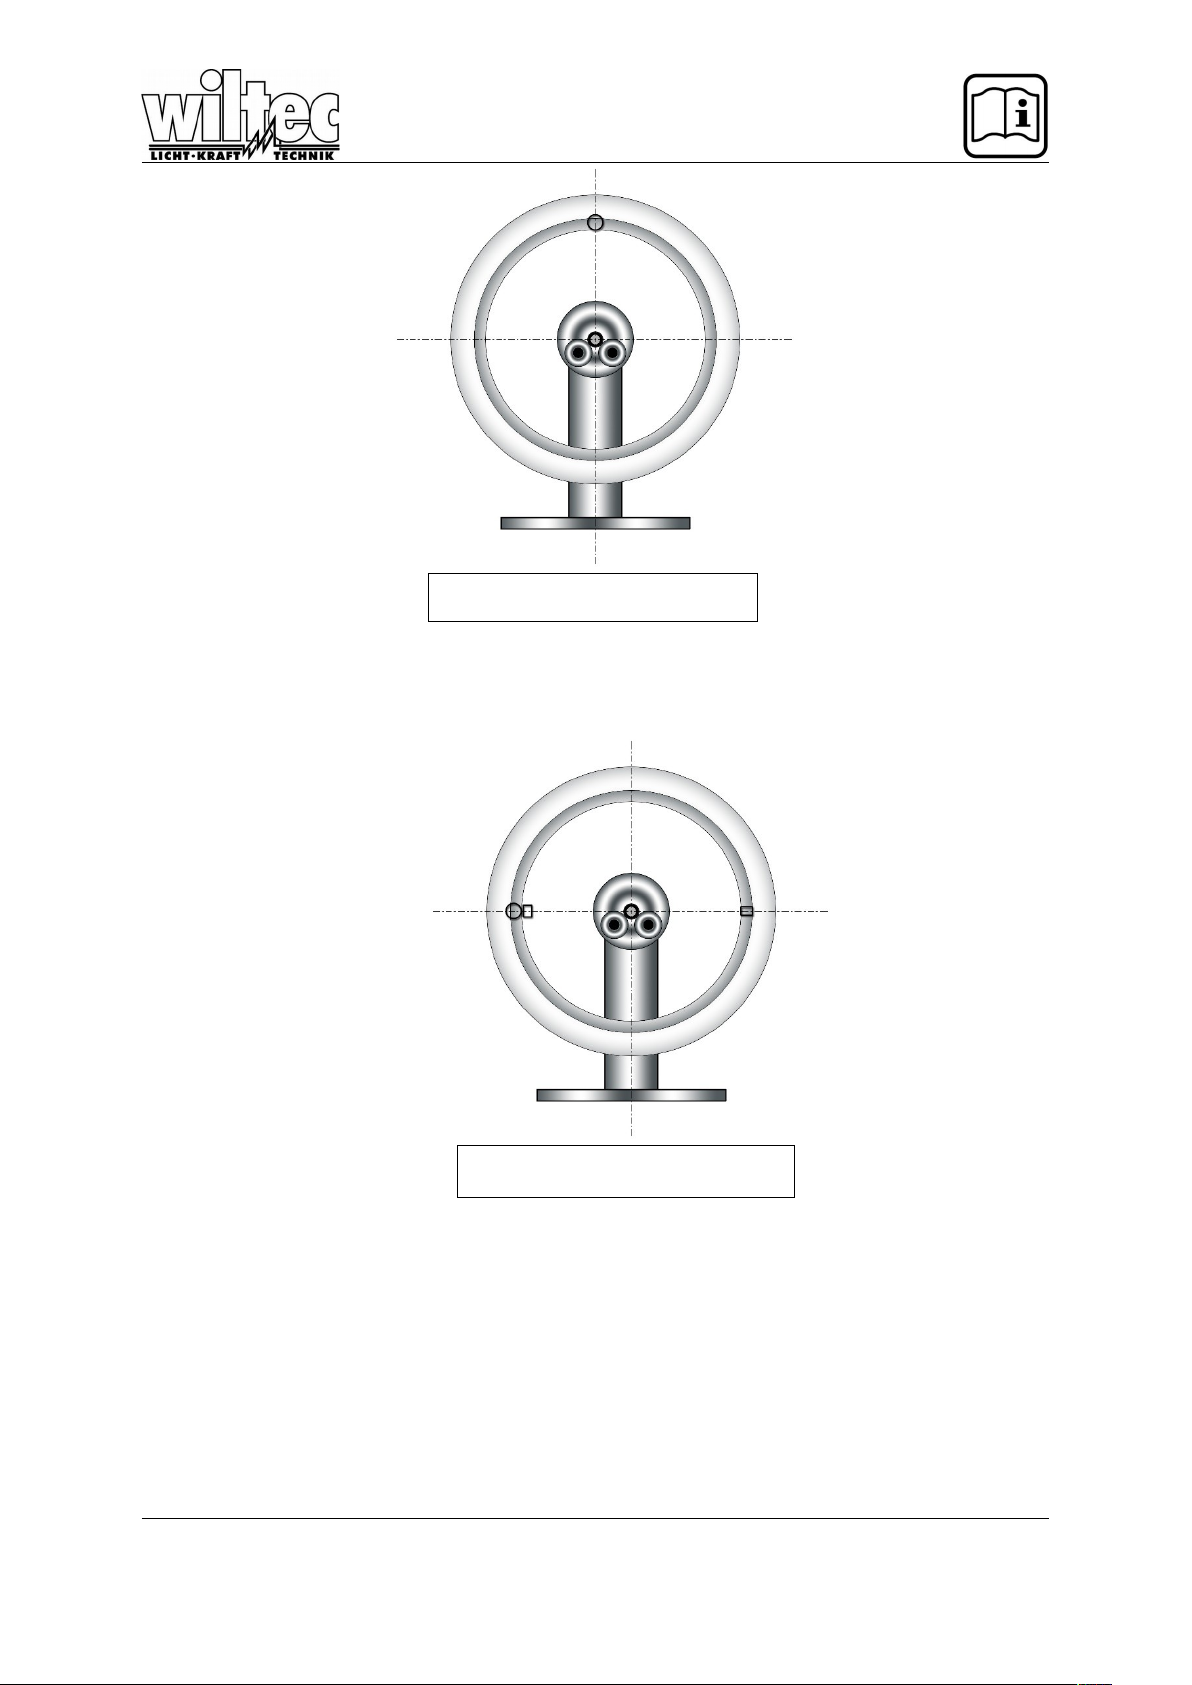
3. When the rim has come to rest, the lightest point is at the top. (Fig. 1 resting rim without tire).
4. For further work it is useful to mark the lightest point. (Point on figure 1 above). For this, you
can use oil chalk or a piece of adhesive tape.
5. At the lightest point, add a lot of provisional weight so that the rim turns around 90 °. (Figure 2
rest position neutral rim) For an empty rim, a maximum of 30 grams of weight should be
required. If you need more weight, you should check the rim and the attachments for damage.
Check the tread. ,
© by WilTec Wildanger Technik GmbH Seite 9
http://www.WilTec.de
http://www.aoyue.eu Version 5.2017
http://www.teichtip.de
Figure 1: resting rim without tire
Figure 2: rest position neutral rim
Page 5
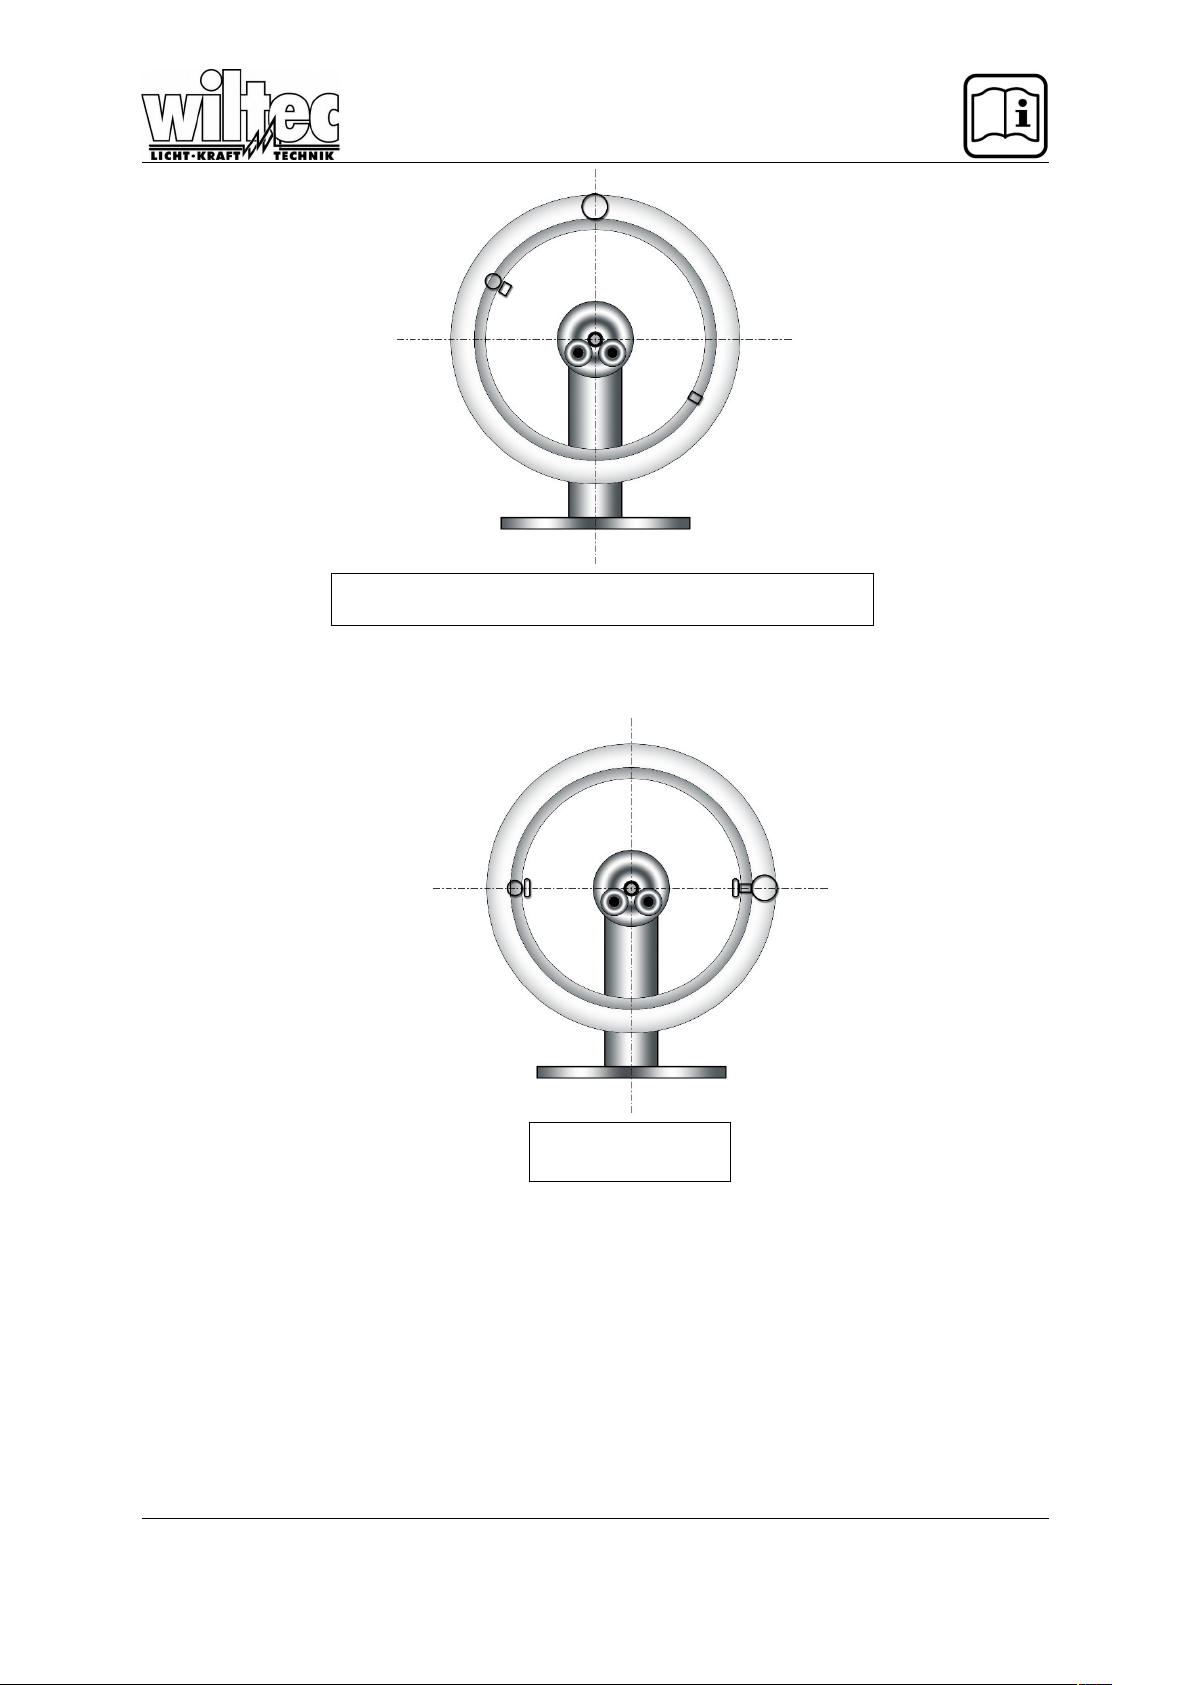
6. Pull the tire onto the neutral rim and let it swing out. The easiest place is now up again.
(Figure 3 rest position neutral rim with mounted tire). Mark this spot in a different color.
7. Now remove the applied balancing weight (step 5). With a little bit of luck, the unbalance of the
rim without tires and the rim with tires is emphasized. To reach this point, turn the tire on the
rim until the unbalance faces. (Both marked points as shown in Figure 4 are opposite). Now
the complete wheel is balanced. Normally, you need only one of the two weighting weights.
The weight must be applied until the complete wheel remains in the rest position. In doing so,
you should be careful to use as little weight as possible, the weight should be evenly
distributed on both sides of the rim. If a total weight of more than 50 grams is required, then
you should reclaim the tire.
© by WilTec Wildanger Technik GmbH Seite 10
http://www.WilTec.de
http://www.aoyue.eu Version 5.2017
http://www.teichtip.de
Figure 3: rest position neutral rim without mounted tire
Figure 4: Matching
 Loading...