

Wilshire JVGC535W2, JVGC535A0, JVGC535A1 Use And Care Manual
WILSHIRE
AUTOMATIC ICE MAKER
Use and Care Guide
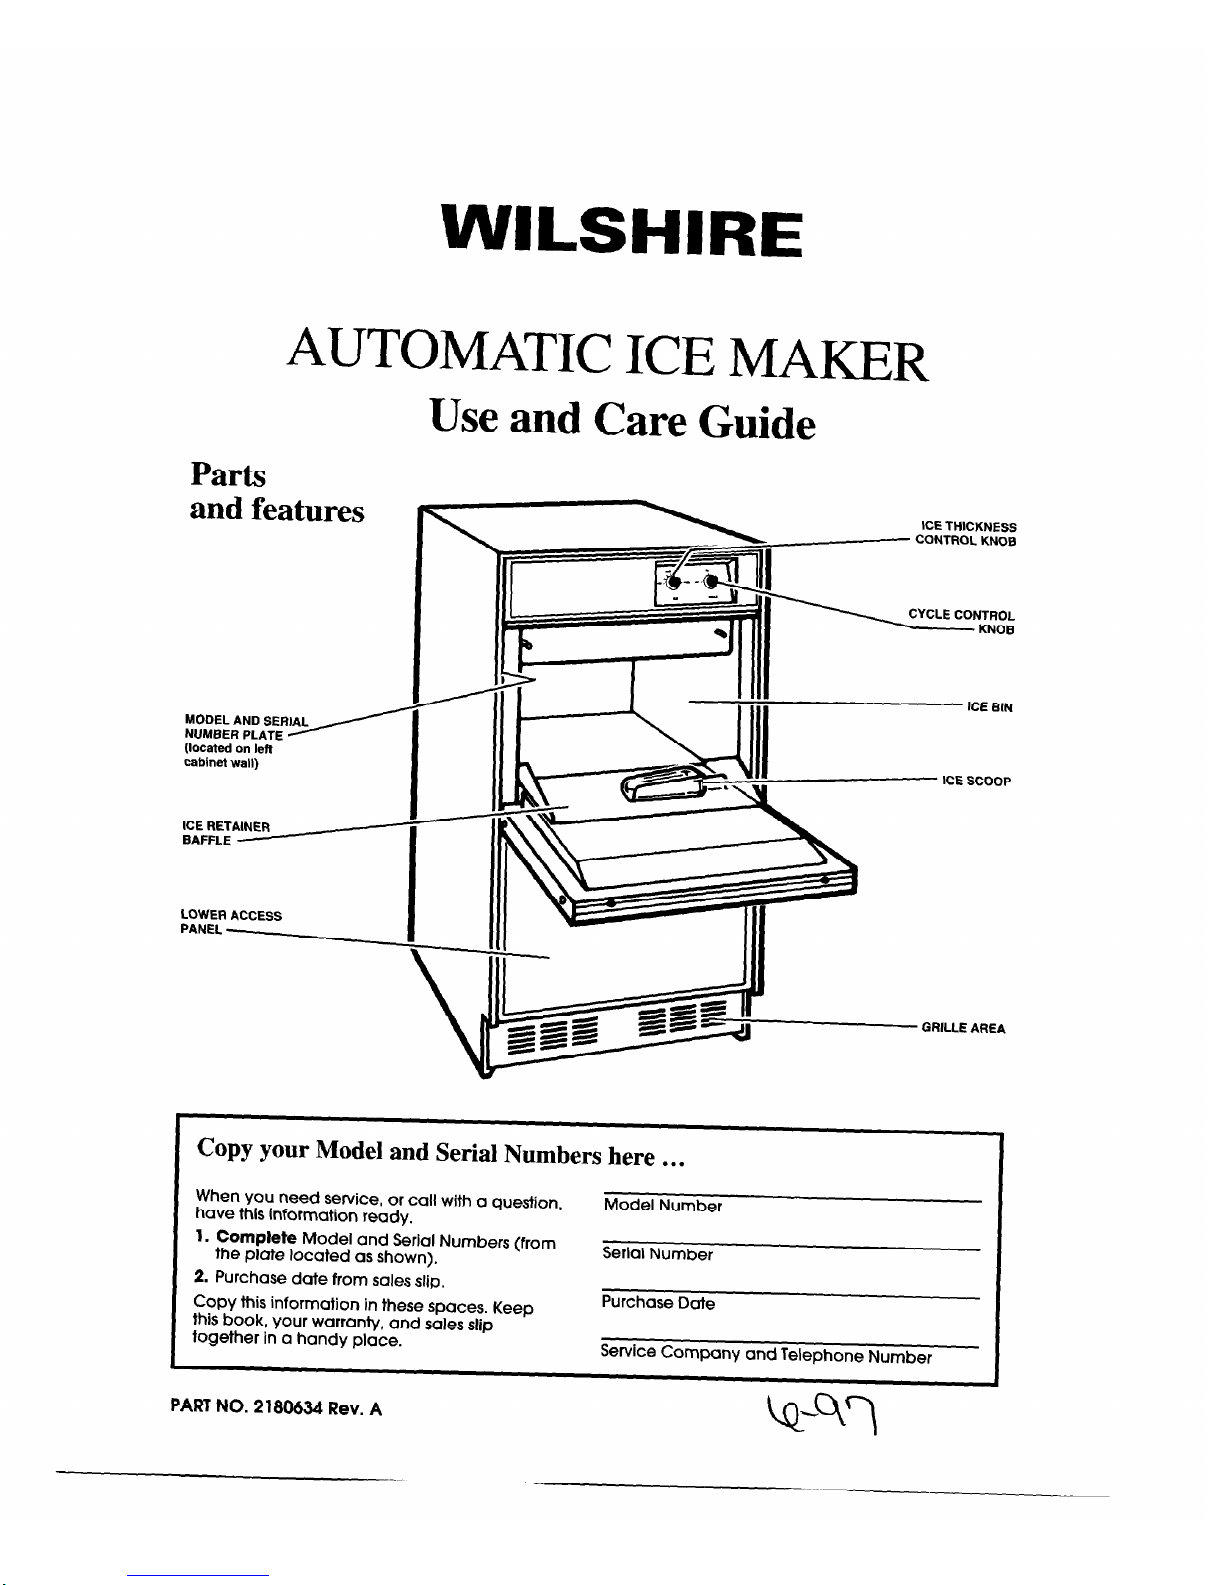
Parts
and features
NUMBER PLATE A----
MODEL AND SERIAL
(located on left
cabinet wall)
ICE RETAINER
BAFFLE
LOWER ACCESS
PANEL -
ICE THICKNESS
c_c_ CONTROL KNOB
M
CYCLE CONTROL
r
KNOB
r
!J
GRILLE AREA
Copy your Model and Serial Numbers here . . .
When you need service, or call with a question,
have this information ready.
Model Number
1.
Complete
Model and Serial Numbers (from
the plate located as shown).
Serial Number
2. Purchase date from sales slip.
Copy this information in these spaces.
Keep
this book, your warranty, and sales slip
together in a handy place.
Purchase Date
Service Company and Telephone Number
PART NO. 2180634 Rev. A
Contents
Page
ICE MAKER SAFETY ............................................... 2-3
USING YOUR ICE MAKER ......................................... 4
How the Ice Maker Works ....................................... .4
Setting the Controls ................................................ .4
Changing the Bin Door Panel .................................. 5
Changing the Lower Access Panel .......................... 6
CLEANING AND CARING FOR
YOUR ICE MAKER ......................................................
7
Cleaning Exterior Surfaces
.....................................
.7
Page
Cleaning the Condenser ....................................... .7
Cleaning the Ice Maker System ............................. 8
Cleaning the Interior Components ........................ .9
Filtering and Treating Water ................................ 10
VACATION AND MOVING CARE
............................. 10
IF YOU NEED SERVICE OR ASSISTANCE
............. 11
Before Calling for Service .................................... 11
WARRANTY
...............................................................
12
Ice Maker Safety
Your safety and the safety of others is very important.
We have provided many important safety messages in this manual and on your appliance. Always read and obey all
safety messages.
This is the safety alert symbol.
This symbol alerts you to hazards that can kill or hurt you and others.
All safety messages will be preceded by the safety alert symbol and the word “DANGER” or
“WARNING.” These words mean:
You )viJl be killed or seriously injured if you don’t
follow instructions.
You can be killed or seriously injured if you don’t
follow instructions.
All safety messages will identify the hazard, tell you how to reduce the chance of injury, and tell you what can happen
if the instructions are not followed.
IMPORTANT SAFETY INSTRUCTIONS
WARNING
- To reduce the risk of fire, electric shock, or injury when using your ice maker, follow these basic
precautions:
l Plug into grounded 3 prong outlet.
*Disconnect power before cleaning.
l Do not remove ground prong.
.Disconnect power before servicing.
l Do not use an adapter.
*Replace all panels before operating.
l Do not use an extension cord.
l use two or more people to move or install ice maker.
- SAVE THESE INSTRUCTIONS -
It is your responsibility to make sure the
ice maker:
l
is installed and properly leveled where it is protected
from the elements.
l
is located so that the front is not blocked to restrict airflow.
l
is located in a well ventilated area with temperatures
above 55°F (13°C) and below 110°F (43°C). Best results
are obtained at temperatures between 70°F (21 “C) and
90°F (32°C).
l
is properly connected to a water supply and drain.
l
is properly connected to electricity. A 115 Volt, 60 Hz., AC
only, 15 or 20 ampere electrical supply circuit, properly
grounded in accordance with the National
Electrical Code and local codes and ordinances,
is required.
NOTE:
A time delay fuse or circuit breaker is
recommended.
l
is not used by anyone unable to operate it
properly.
l
is used only to do what ice makers are designed
to do.
l
is properly maintained.
ELECTRICAL REQUIREMENTS
A 115 Volt, 60 Hz., AC only, 15 or 20 ampere electrical
supply circuit, properly grounded in accordance with the
National Electrical Code and local codes and ordinances,
is required.
It is recommended that a separate circuit, serving only this
appliance, be provided. Use a receptacle which cannot
be turned off with a switch or pull chain.
Electrical Shock Hazard
Plug into a grounded 3 prong outlet.
Do not remove ground prong.
Do not use an adapter.
Do not use an extension cord.
Failure to follow these instructions can result in
death, fire, or electrical shock.
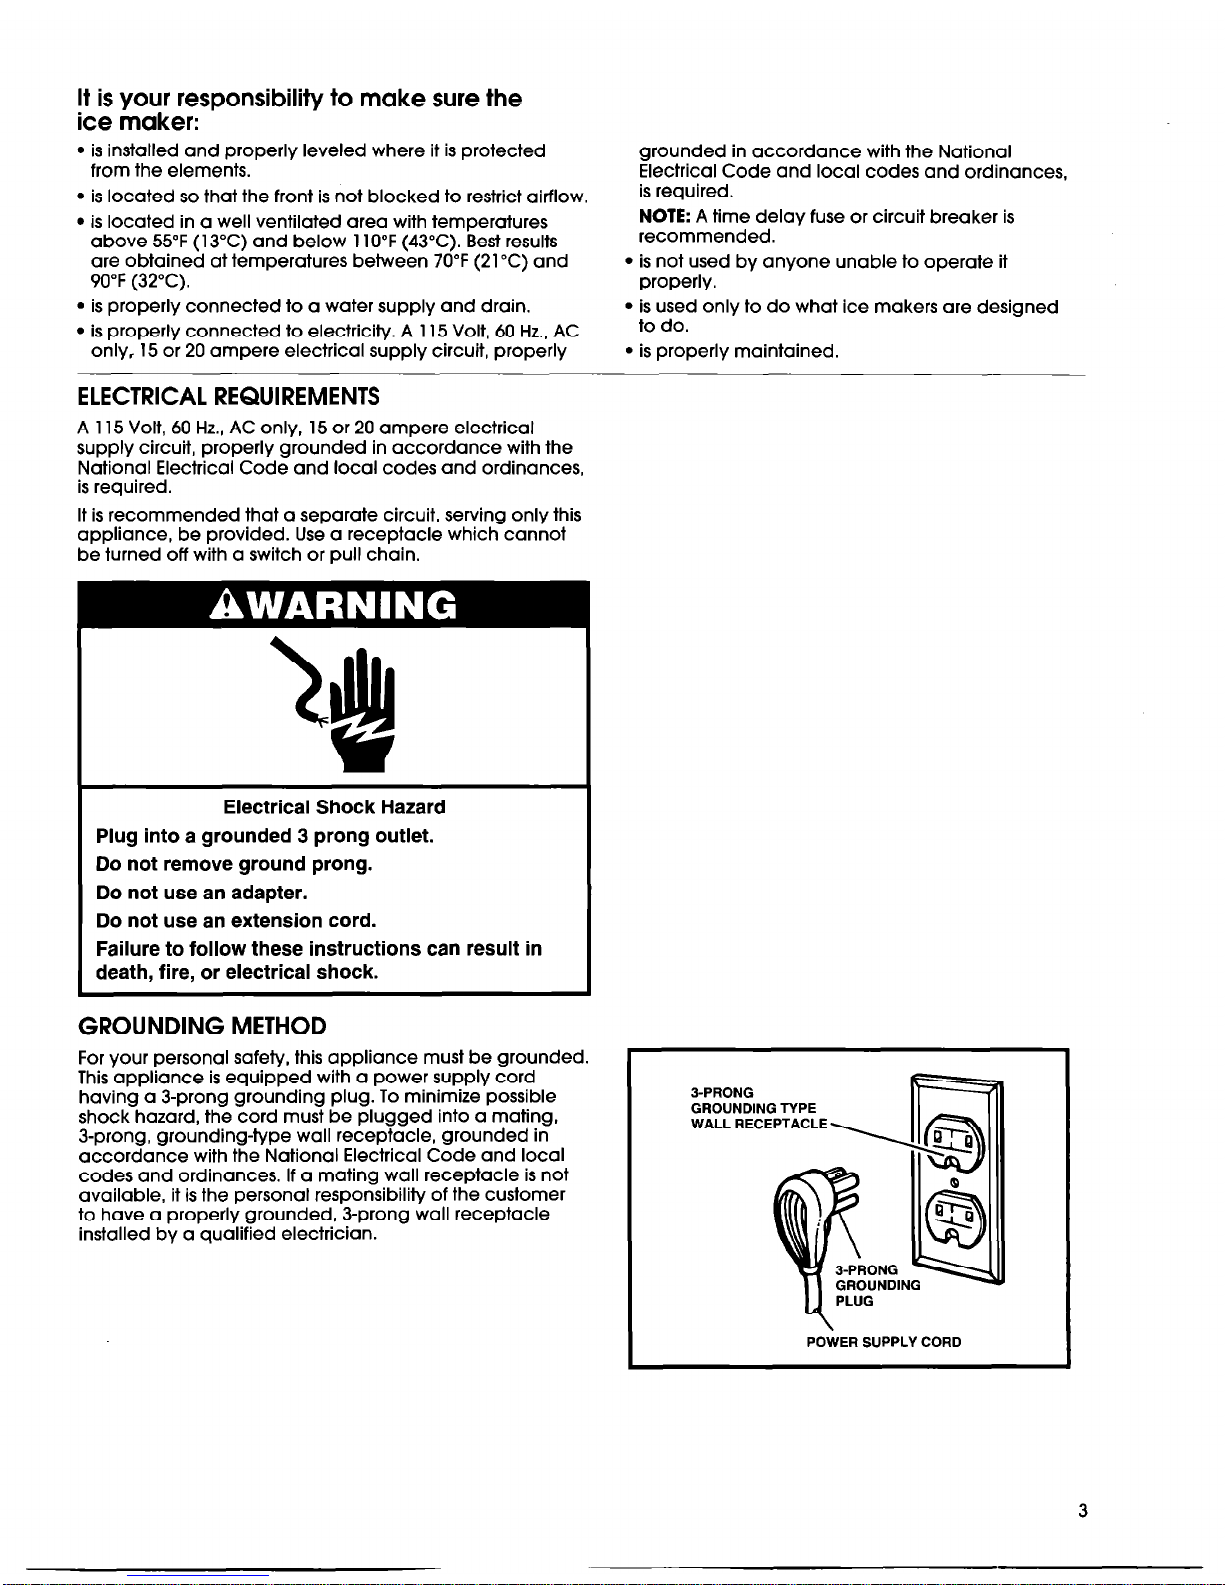
GROUNDING METHOD
For your personal safety, this appliance must be grounded.
This appliance is equipped with a power supply cord
having a 3-prong grounding plug. To minimize possible
shock hazard, the cord must be plugged into a mating,
3-prong, grounding-type wall receptacle, grounded in
accordance with the National Electrical Code and local
codes and ordinances. If a mating wall receptacle is not
available, it is the personal responsibility of the customer
to have a properly grounded, 3-prong wall receptacle
installed by a qualified electrician.
3-PRONG
GROUNDING TYPE
WALL RECEPTACLE
POWER SUPPLY CORD
3
Using your ice maker
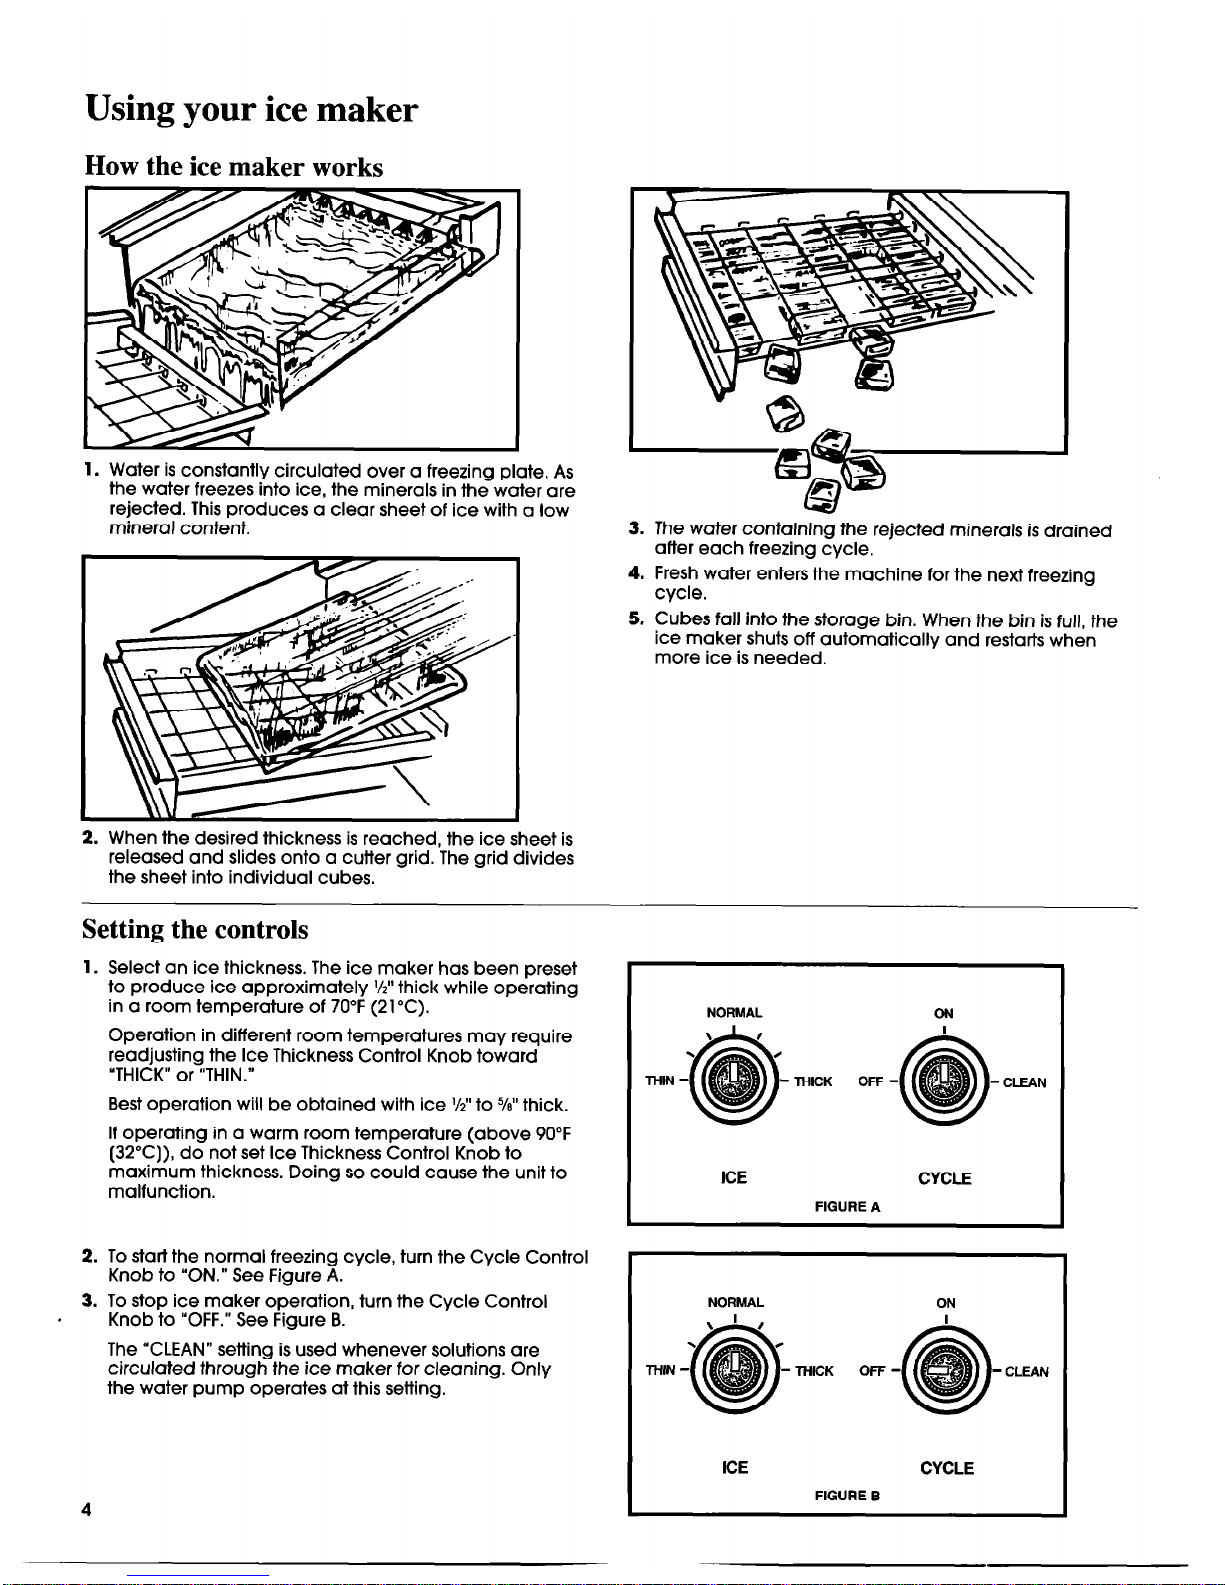
How the ice maker works
1. Water is constantly circulated over a freezing plate. As
the water freezes into ice, the minerals in the water are
rejected. This produces a clear sheet of ice with a low
mineral content.
2. When the desired thickness is reached, the ice sheet is
released and slides onto a cutter grid. The grid divides
the sheet into individual cubes.
3. The water containing the rejected minerals is drained
after each freezing cycle.
4. Fresh water enters the machine for the next freezing
cycle.
5. Cubes fall into the storage bin. When the bin is full, the
ice maker shuts off automatically and restarts when
more ice is needed.
Setting the controls
1. Select an ice thickness. The ice maker has been preset
to produce ice approximately I/Z” thick while operating
in a room temperature of 70°F (21°C).
Operation in different room temperatures may require
readjusting the Ice Thickness Control Knob toward
“THICK” or “THIN.”
Best operation will be obtained with ice %” to %” thick.
If operating in a warm room temperature (above 90°F
(32°C)) do not set Ice Thickness Control Knob to
maximum thickness. Doing so could cause the unit to
malfunction.
2. To star-l the normal freezing cycle, turn the Cycle Control
Knob to “ON.” See Figure A.
3. To stop ice maker operation, turn the Cycle Control
Knob to “OFF.” See Figure B.
The “CLEAN” setting is used whenever solutions are
circulated through the ice maker for cleaning. Only
the water pump operates at this setting.
NORMAL
ON
I
THICK OFF -
- CLEAN
I
ICE
CYCLE
FIGURE A
I
NORMAL
ON
I
-THICK OFF-
- CLEAN
4
I
ICE
CYCLE
FIGURE B
 Loading...