

7.5' LED Color Changing One Plug Tree
SKU#
Safety Information
IMPORTANT SAFETY
INSTRUCTIONS
When using electrical products, basic precautions should always be
followed including the following:
a)
READ AND FOLLOW ALL SAFETY
INSTRUCTIONS.
b) This product is for indoor use only. The electrical rating 120V 60Hz 0.5A
Max.
c) Do not use seasonal products outdoors unless marked suitable for
indoor and outdoor use. When products are used in outdoor applications,
connect the product to a Grou nd Faul t Circuit Interrupting (GFCI) outlet. If
one is not provided, contact a qualified electrician for proper installation.
d) This seasonal use product is not intended for permanent installation or
use.
e) Do not mount or place near gas or electric heaters, fireplace, candles or
other similar sources of heat.
f) Do not secure the wiring of the product with staples or nails, or place on
sharp hooks or nails.
g) Do not let lamps rest on the supply cord or on any wire.
h) Unplug the product when leaving the house, when retiring for the night,
or if left unattended.
i) This is an electric prod uct – not a toy! To avoid risk of fi re, burns perso nal
injury and electric sh ock it s hould no t be pl ayed wi th or placed where s mall
children can reach it.
j) Do not use this product for other than its intended use.
k) Do not hang ornaments or other objects from cord, wire, or light string.
l) Do not close doors or windows on the product or extension cords as this
may damage the wire insulation.
m) Do not cover the product with cloth, paper or any material not part of the
product when in use.
n) Read and follow all instructions that are on the product or provided with
the product.
o)
SAVE THESE INSTRUCTIONS.
Pre-Assembly
Package Contents
A. Tree top
Qty: 1
D. Stand with an eye
bolt
Qty: 1
B. Tree center
E. Power cord
Qty: 1
Qty: 1
C. Tree bottom
Qty: 1
Assembly
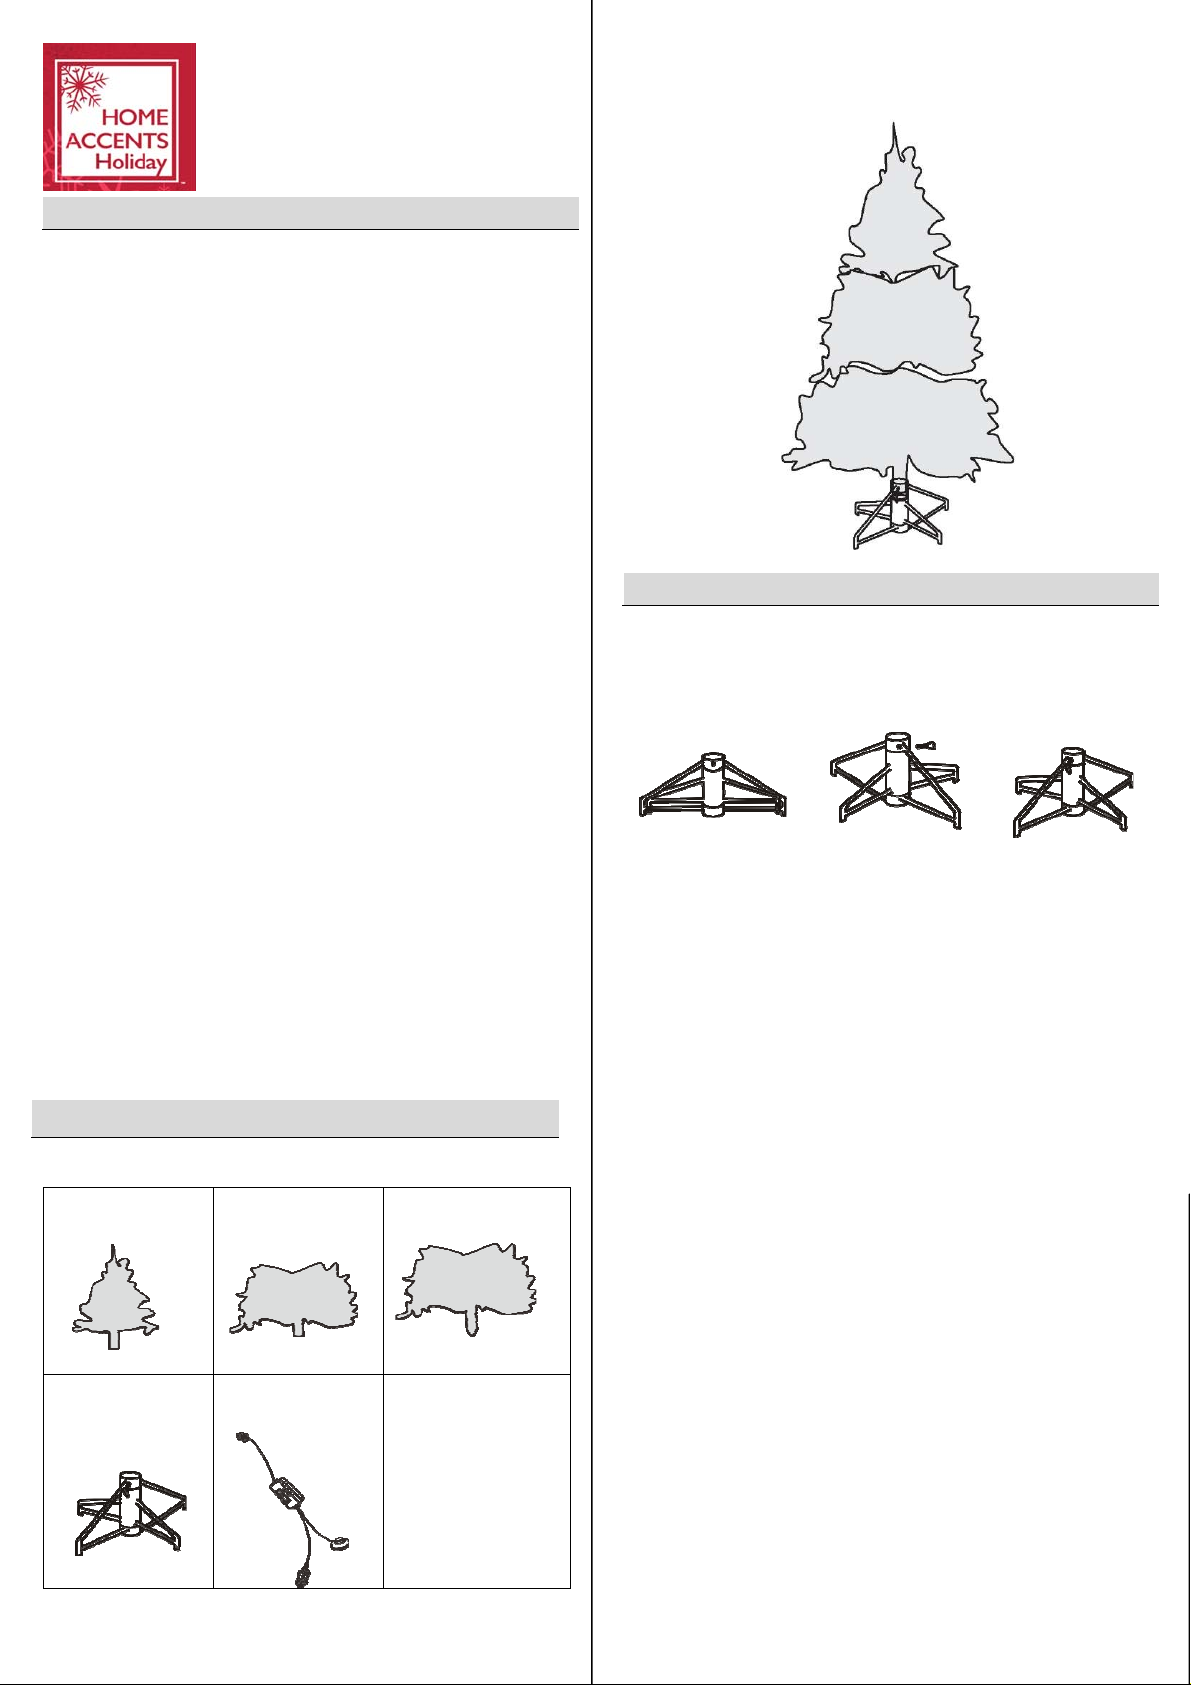
Assembling the tree stand
Step 1. Choose a location near a wall outlet.
Step 2. Open the stand to a 90 degree angle until the hole lines up with the
hole on the tube.
Step 3. Screw an eye bolt into the hole.
CAUTION! – ALWAYS UNPLUG YOUR TREE
FROM ITS POWER SOURCE BEFORE ASSEMBLING OR
DISASSEMBLING.
Assembling the tree
Please remove protective cov ers fro m t he base of th e pole for ea ch tre e
section before assembling.
Step 1. Insert tree bottom (C) into the tree stand and tighten the screw.
(See Fig. 1)
Step 2. Insert middle section (B) into the tree bottom (C). (See Fig. 2)
Step 4. Insert tree top (A) into the middle section (B). (See Fig. 3)
Step 5. Insert the provided power cord into the connector on the tree
bottom (C) in right direction porperly and tightly (always match the
protuberance of the end connector of power cord to the concave
of the connector found on the tree bottom (C) according to the
magnified drawing on fig. 4.).
Step 6. Allow branches to fall into place or gently pull branches up and out.
When adjusting branches be sure that all wires are free of branch
hinges. (See Fig. 5)
Step 7. Shape the branches. Starting with tips closest to the pole, shape
one tip to the right, one to the left and one at the center of the main
stem. Repeat pattern for each branch. (See Fig. 6)
Step 8. Plug the power cord into a proper outlet. This tree comes with a
control box and a foot pedal switch for easy illumination and
changing functions. This tree is Color Changing, the 15 lighting
options available are:
1. Steady On
2. Twinkle
3. Sparkle
4. Instead
5. Fade
6. Rolling

7. Waves
8. Fireworks
9. Rainbow
10. Color Band
11. Up and Down
12. Snow
13. Glow
14. Carnival
15. Alternate
These functions can be changed by using control box or foot
pedal switch.
Please see Instructions of control box as below.
Operation
Turning on the tree
Step 1. Connect each tree section well and plug the well-connected power
cord into a wall outlet.
Instruction of control box and Wifi
Connection
Instruction of control box
1. Press the Function/Reset button on control box:
Short press: switch 15 functions.
Long press at least for 5s: switchover to wifi mode.
2. Press the Color/Timer button on control box:
Short press: switchover to 29 colors and theme.
Long press at least for 2s: set timer.
Instruction of Wifi connection
There are two ways for Wifi connection:
1. STA: Wifi signal indicator light stays on fast flash.
2. AP: Wifi signal indicator keeps flickering slowly.
This two modes can be switchover by long pressing the “Function/Reset”
button at least for 5s. The current instruction should be in AP mode. (wifi
signal indicator light should be in off state)
The wifi signal indicator on the control box flashes continuously for 3
minutes after the power is on.
You can connect wifi when wifi signal indicator is flashing.
1. Download APP
a. Search “Holiday Tree” to download the APP.
b. Scan QR Code to download.
2. Open Wifi settings of your mobile device.
3. Find and select “ShowTree_xxxx” network.
4. Ensure that “ShowTree_xxxx” network is connected.
 Loading...