

Page 1

To Install You Will Need:
• Screwdriver
ROBINSON SCONCE
IMPORTANT SAFETY INSTRUCTIONS:
• These instructions are provided for your safety. It is very important that they are read carefully and completely before installing
fixture.
• We strongly recommend that a professional electrician install all direct wired fixtures.
• This fixture has been rated for up to (1) 25-watt maximum TYPE A bulb. To avoid the risk of fire, do not exceed the recommended
wattage.
• Save these instructions.
Pre-Assembly:
• For your safety and convenience, assembly by two persons is recommended.
• Remove all parts and hardware from box along with any plastic protective packaging. Do not discard any contents until after
assembly is complete, to avoid accidentally discarding small parts or hardware.
Hardware Included:
• (1) WALL LAMP
• (1) Mounting Plate
• (2) Mounting Screws
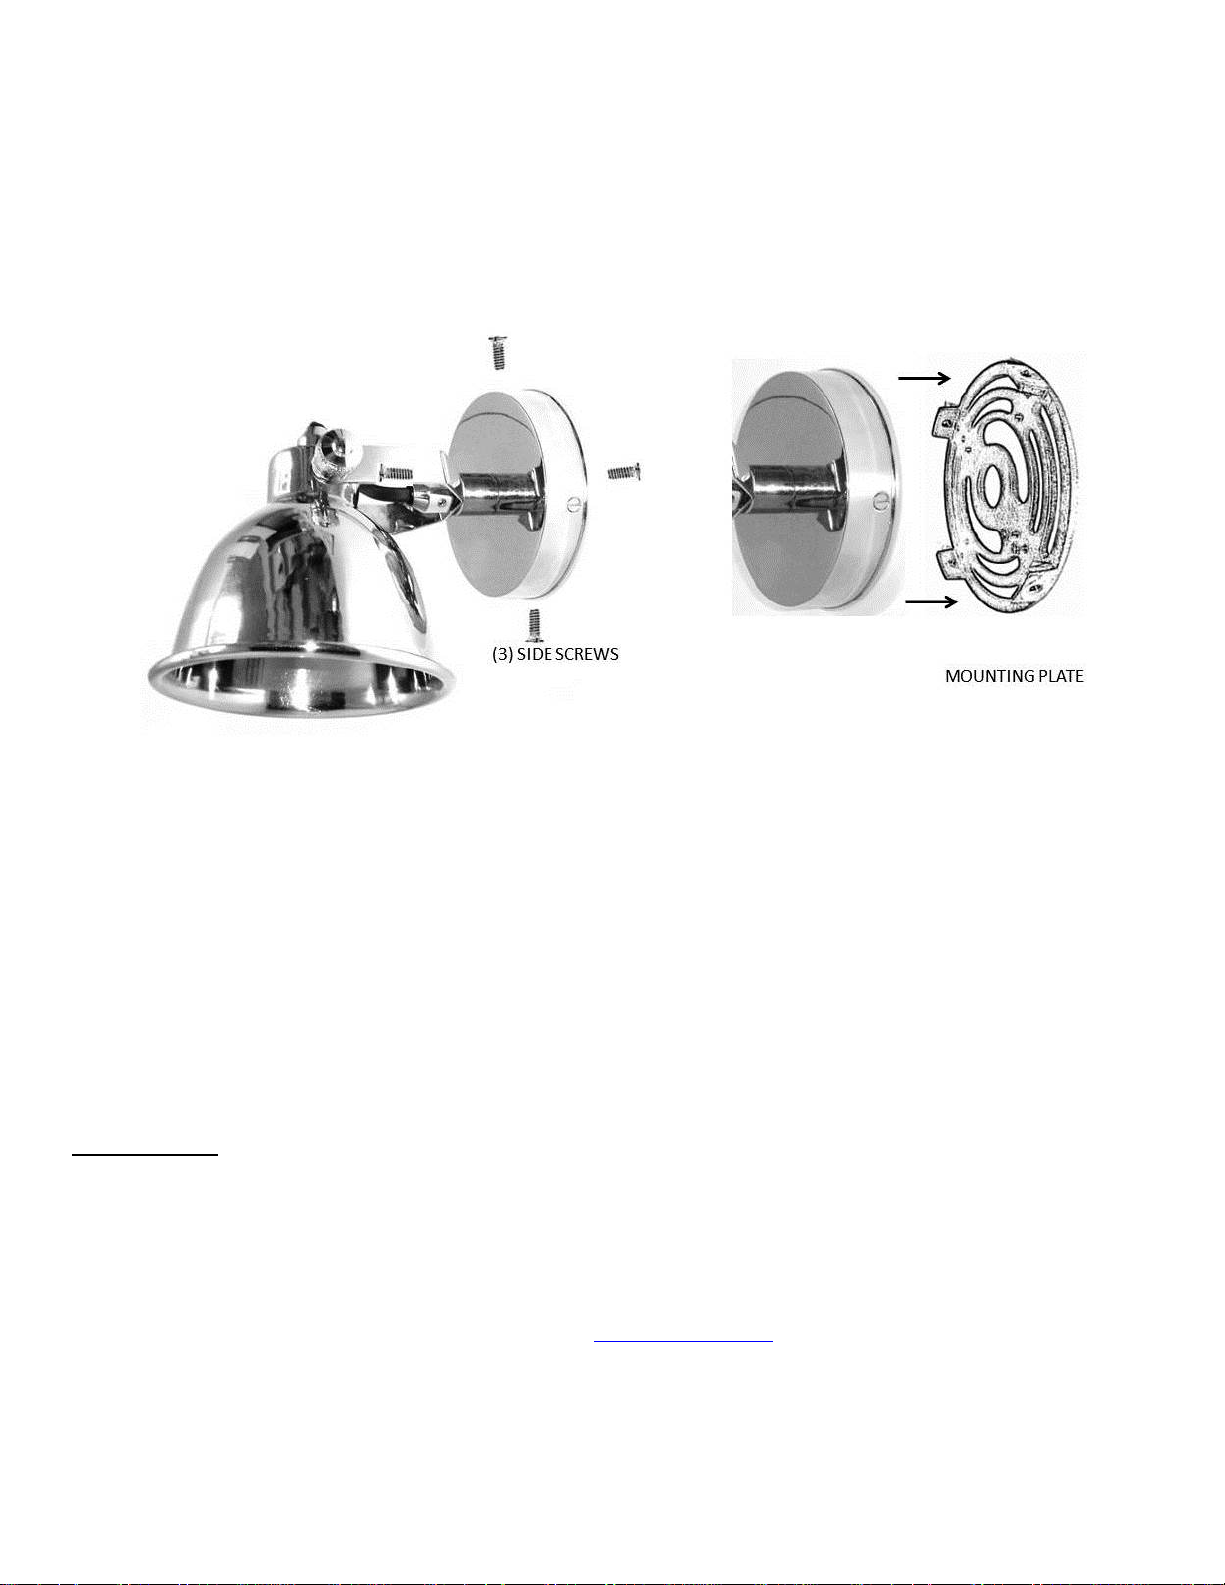
• (3) Side Screws
• (1) Ground Screw
To Install:
1. SHUT OFF THE MAIN ELECTRICAL SUPPLY FROM THE FUSE BOX / CIRCUIT BREAKER.
2. Attach the mounting plate to the wall outlet box with two mounting screws using a screwdriver, until the mounting plate is
securely attached to the wall.
3. Gently pull the wiring down from the Wall outlet box. Identify the three wires:
4. Carefully inspect the Wall Sconce’s three fixture wires:
5. Wrap the GROUND WIRE of the outlet box around the ground screw near the mark “GND” on the mounting plate. Tighten
with a screwdriver. If your outlet box DOES NOT have a GROUND WIRE, leave the fixture’s ground wire as is, attached to the
green ground screw. IT IS IMPERATIVE THAT THE OUTLET BOX IN YOUR HOME BE PROPERLY GROUNDED.
6. Connect the NEUTRAL WIRE of the fixture to the NEUTRAL WIRE of the outlet box. Fasten with a plastic wire connector.
7. Wrap with electrical insulation tape. Be sure no wire strands are exposed.
8. Connect the HOT WIRE of the fixture to the HOT WIRE of the outlet box. Fasten with a plastic wire connector. Wrap with
electrical insulation tape. Be sure no wire strands are exposed.
9. Gently tuck the wire connections completely into the ceiling outlet box.
10. Unscrew the mounting plate from the ceiling base using a screwdriver.
11. Fix the wall sconce onto the mounting plate using the (4) side screws and tighten them securely with a screwdriver.
12. Insert 25W Max Type-A bulb (not included).
13. Restore power to the main electrical supply. Adjust the height of the shade at desired position.
14. Assembly is complete.
• Pliers
• Electrical insulation tape
• Plastic wire connectors (included)
i. HOT WIRE - usually has a black covering.
ii. NEUTRAL WIRE - usually has a white covering
iii. GROUND WIRE - usually has a bare copper or green covering.
i. The NEUTRAL WIRE has white covering.
ii. The HOT WIRE has black covering. This is also marked ‘+’ by a tag.
iii. The GROUND WIRE has Green covering and is already connected to Ground Screw near the mark ‘GND’ on
mounting plate.
1/2
Page 2
Care Instructions:
• Wipe with a soft dry cloth.
• Do not use abrasives or household cleaners.
stores | catalog |
thank you for your purchase
www.william-sonoma.com
2/2
 Loading...