

Page 1

Page 1 of 3
US/CN
MICA TABLE LAMP
Assembly Instructions
Important Safety Instructions:
• This portable luminaire has a polarized plug (one blade is wider than the other) as a safety feature to reduce the risk
of electric shock. This plug will fit in a polarized outlet only one way. If the plug does not fit fully in the outlet, reverse
the plug. If it still does not fit, contact a qualified electrician. Never use with an extension cord unless plug can be fully
inserted. Do not alter the plug. Do not attempt to defeat this safety feature.
• These instructions are provided for your safety. It is very important that they are read carefully and completely before
beginning the assembly and installation of this lighting fixture.
• This fixture has been rated for up to one (1) 60-watt maximum TYPE A standard incandescent light bulb (not
included) or one (1) 13-watt compact fluorescent light bulb ( not included) or one (1) 9-watt LED light bulb
(included). To avoid the risk of fire, DO NOT EXCEED THE RECOMMENDED LAMP WATTAGE.
• Use with approved Williams-Sonoma Home Shades only, having a minimum opening diameter of 3-1/2 inches and a
minimum lamp-to-shade spacing of 2-1/2 inches.
• This lamp is meant for indoor use.
• Save these instructions.
WARNING:
• To reduce the risk of fire, electrical shock or personal injury, always turn off and unplug the light fixture and
allow it to cool prior to replacing the light bulb.
• Do not touch bulb when fixture is turned on. Do not look directly at lit bulb.
• Keep flammable materials away from lit bulb.
Pre-assembly:
Remove all parts and hardware from box along with any plastic protective packaging.
Do not discard any contents until after assembly is complete to avoid accidentally discarding small parts or
hardware.
Parts Included:
(A) Finial (1)
(B) Shade (1)
(C) Harp Top (1)
(D) Harp (1)
(E) Harp Caps (2)
(F) Socket (1)
(G) Saddle (1)
(H) Lamp Base (1)
Page 2
Page 2 of 3
US/CN
To Assemble:
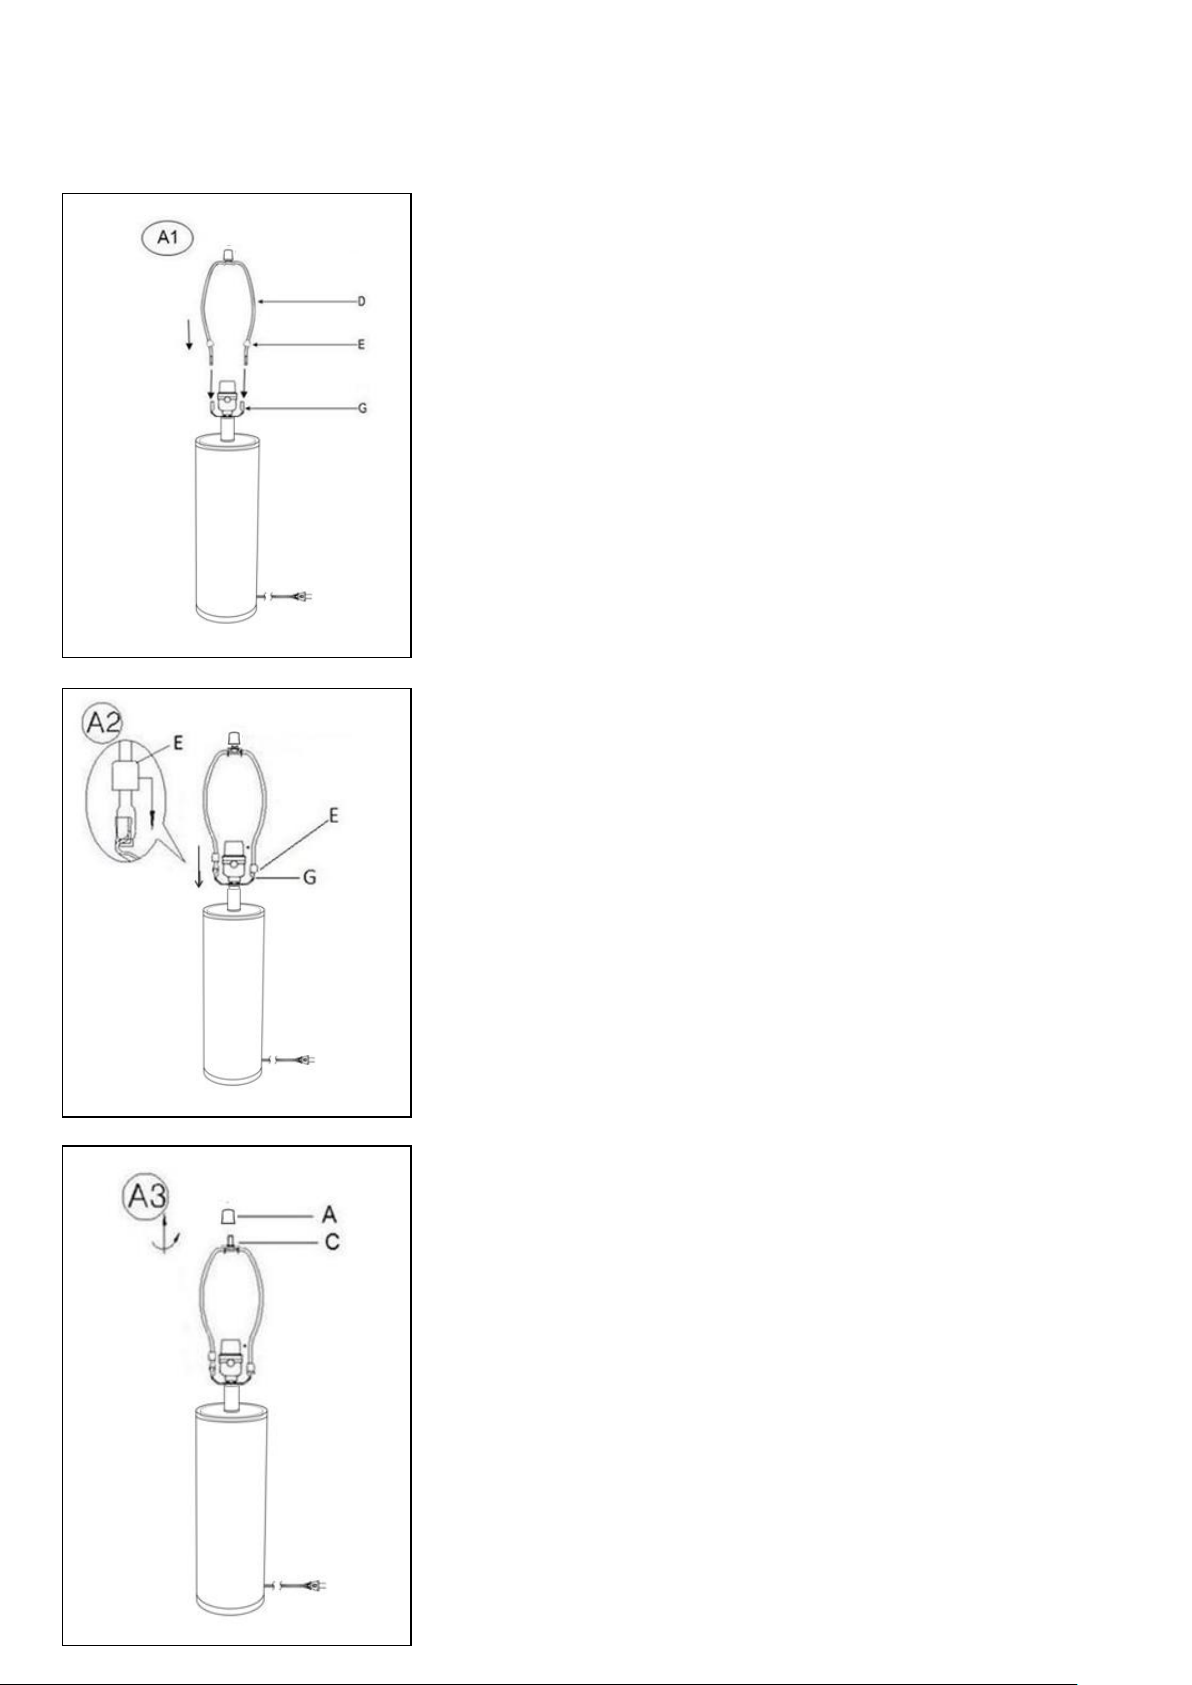
Raise the Harp Caps (E) and insert the bottom ends of Harp (D) into
the Saddle (G)
Lower the Harp Caps (E) until they cover the two-pronged Saddle (G)
Unscrew the Finial (A) from the Harp Top (C)
Page 3
Page 3 of 3
US/CN
Care instructions:
• Wipe clean with a soft, dry cloth or static duster.
• Always avoid the use of harsh chemicals or abrasive cleaners as they may cause damage to the fixture’s finish
Thank you for your purchase
Stores | catalog | www.williams-sonoma.com
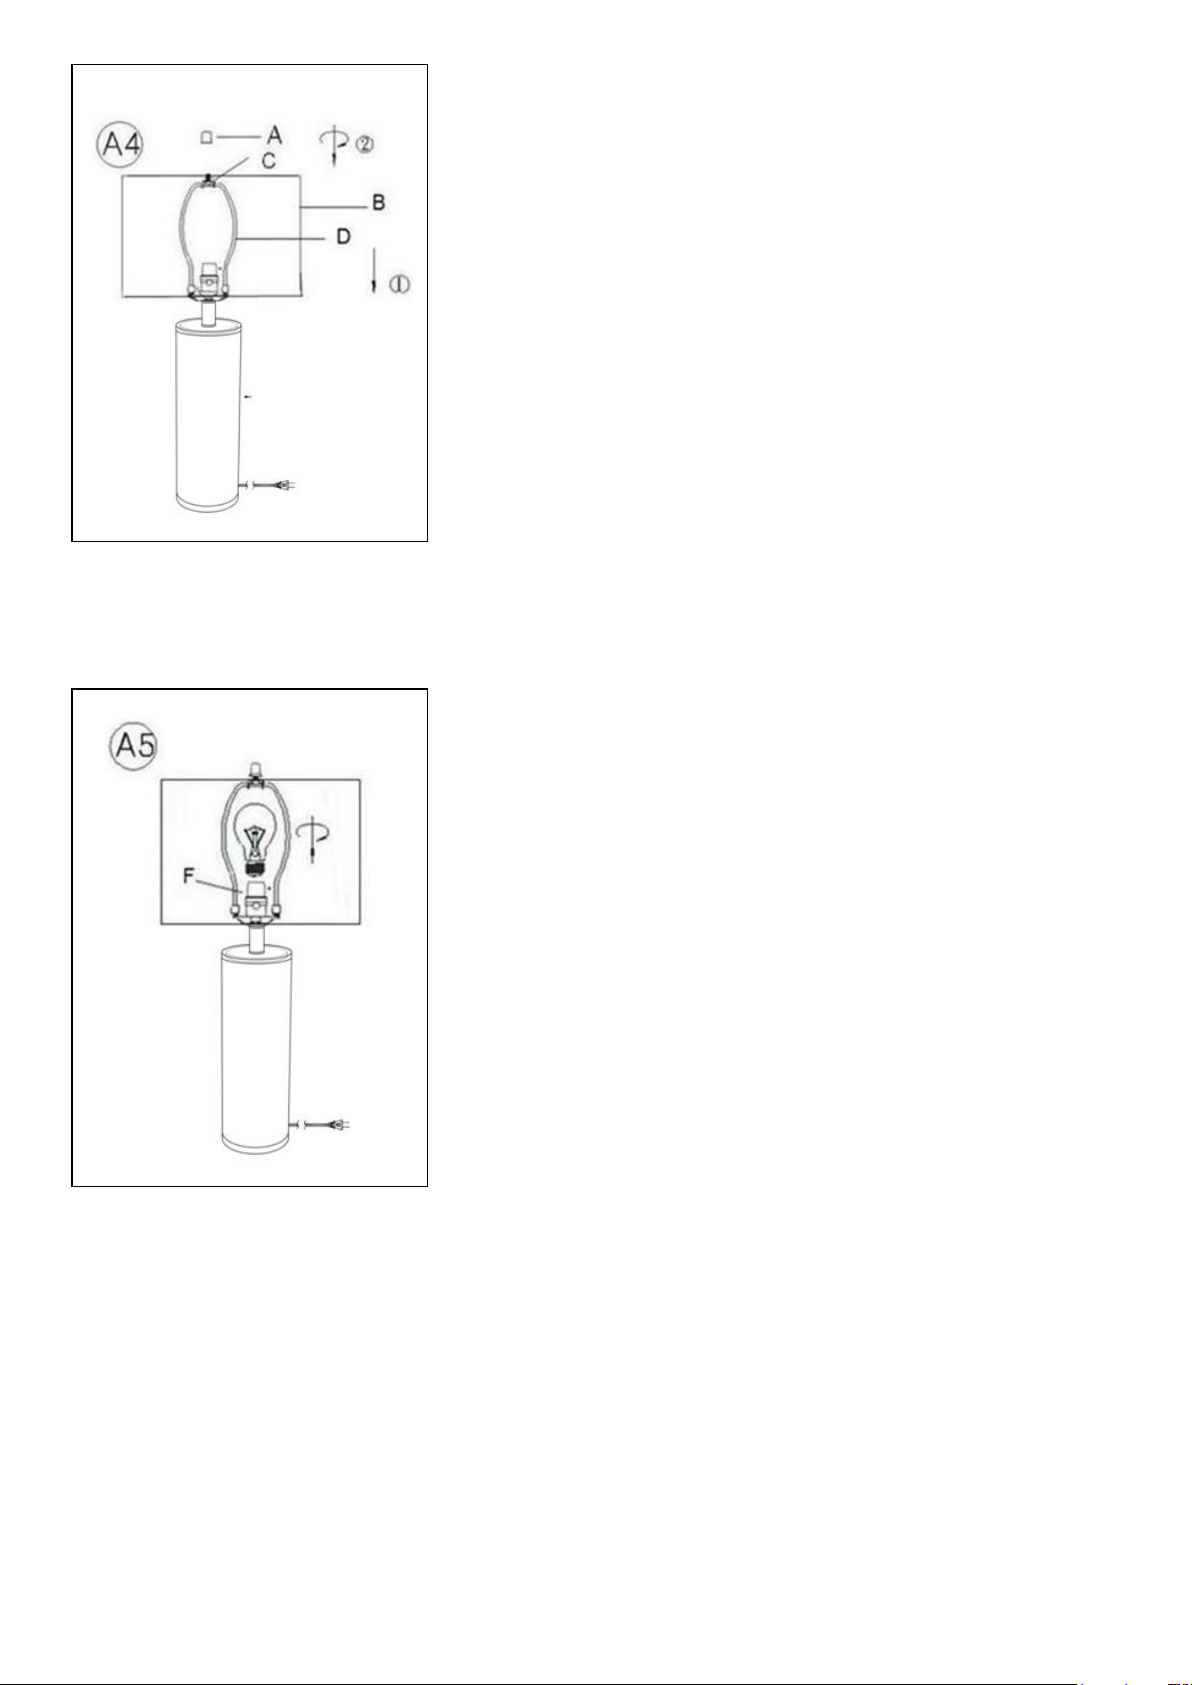
1. Place the Shade (B) over the Harp (D) making sure the Harp
Top (C) extends through the top ring of Shade (B).
2. Secure the Shade (B) by turning the Finial (A) onto the Harp
Top (C).
Insert the specified light bulb into the Socket (F). DO NOT
EXCEED THE SPECIFIED WATTAGE.
 Loading...