

WILLIAMS REFRIGERATION SC900, SC1200, PC900 Operating Manual

To achieve the optimum performance and reliability of your Chiller please read and
follow these installation, operating, cleaning and maintenance instructions. Failure to
do so may affect the warranty of your equipment.
Temperature parameters are set as:
Sandwich Chiller +2°C (36°F) / +5°C (41°F)
Pastry Chiller +5°C (41°F) / +8°C (47°F)
Declaration of Conformity References:
Low Voltage Directive 2006/95/EC
Machinery Directive 2006/42/EC
Electromagnetic Compatibility Directive 2004/108/EC
Pressure Equipment Directive 97/23/EC
Waste Electrical and Electronic Equipment Directive (WEEE) 2002/96/EC
Restriction on Use of Certain Hazardous Substances Directive (RoHS) 2002/95/EC
CFC Free Refrigerant
We declare that all products manufactured by Williams Refrigeration comply with the above
directives where applicable and as such are declared to be in conformity with the provisions
of the above legislation.
Model No.:
Serial No.:
OPERATING MANUAL
GEM SANDWICH CHILLER SC900 & 1200
GEM PASTRY CHILLER PC900
Refrigerant Designation Global Warming Potential
HFC - R134a 1300
HFC - R404a 3260
INSTALLATION
Removal of Redundant Cabinets
Please ensure that old or redundant refrigeration
cabinets and equipment are disposed of safely and
legally.
It is recommended that doors are removed prior to
disposal in order to ensure safety.
Unpacking
Remove all external and interior packing and
accessories. Ensure all such material is disposed of
safely.
Ventilation
It is essential to ensure that the room in which the
unit is to be installed has adequate ventilation.
Refrigerators generate a considerable amount of heat
and, if operated in a small unventilated room in warm
weather, these will quickly cause the room temperature to
become excessive. This could cause the motor to
overheat and possibly damage the windings. At the very
least such an installation will cause the unit to use an
excessive amount of electricity. The SC1200 Sandwich
Chiller generates 2850W of heat, the SC900 2450W and
the PC900 Pastry Chiller 715W.
In addition to ventilation in a room, please ensure that
the Chillers have 200mm clearance between the back of
the Chiller and the wall to ensure efficient and effective
performance. Do not block vents by stacking boxes on
top or in front of the unit as this could affect performance.
Castors
The Chiller should stand level to ensure correct
operation and proper drainage of condensate from the
evaporator.
It Is important that Display Chillers are positioned on a
level platform / floor. When in position ensure the brakes
have been activated by pressing the metal bar down.
Remember to release brakes before trying to move the
chiller.
Loading with Food
Sandwich and Pastry Display Chillers are not designed to
cool food from ambient temperature. It is essential that
all products placed in the display chiller have been chilled
to +2/+5°C (for the Sandwich Chiller) and +5/+8°C (for
the Pastry Chiller) before being placed inside. The unit
should be allowed 30 minutes with the night blind pulled
down to pull down to temperature before loading
(Sandwich Chillers only).
2
Mains Connection
The cabinet comes fitted with a 13 Amp fused plug and
must be earthed. If the plug or cable should fail please
contact the Williams Spares Department on +44 (0)1553
817017 for a replacement.
If the cabinet has been laid on its back or tipped,
DO NOT switch on immediately. Leave in an upright
position for at least one hour before switching on.
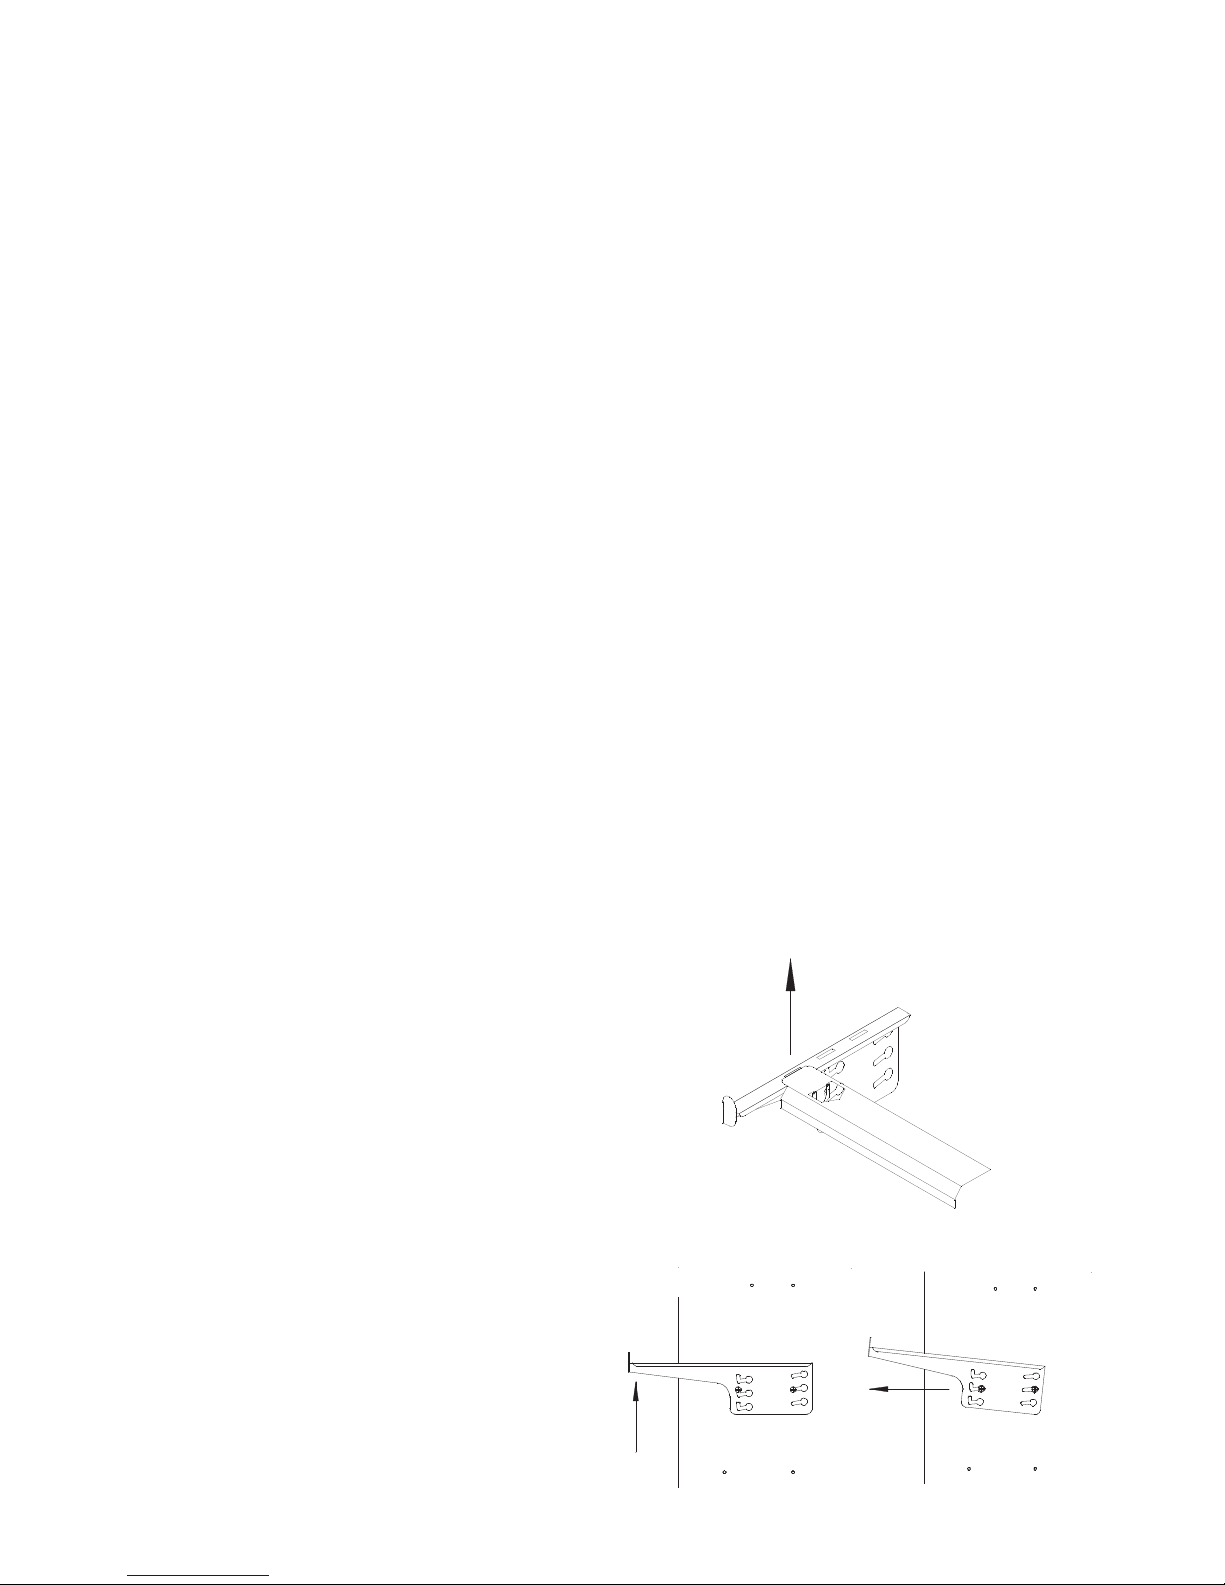
Shelf Fixing and Adjustment
Shelving is fitted in the central position as standard with
25mm adjustment up or down in a horizontal position.
To adjust:
● Isolate power supply before commencing with shelf
removal.
● Remove glass shelves before shelf adjustment begins.
● Place glass shelves carefully on a suitable surface to
avoid damage.
● Unplug power lead from the three shelf lights.
● Lift the glass supports and remove from the Chiller
(Fig. 1).
● To remove the shelving brackets loosen the retaining
screws. Lift the front of the bracket (Fig. 2) and pull
gently towards the front of the cabinet (Fig. 3). The
bracket should now detach freely.
● Repeat this process in reverse to refit the shelves.
● Brackets must be set at equal heights for each side of
the shelf.
● Light supports can be placed in any of the three slots
depending on where you require the light.
Fig. 1
Fig. 2
Fig. 3
3
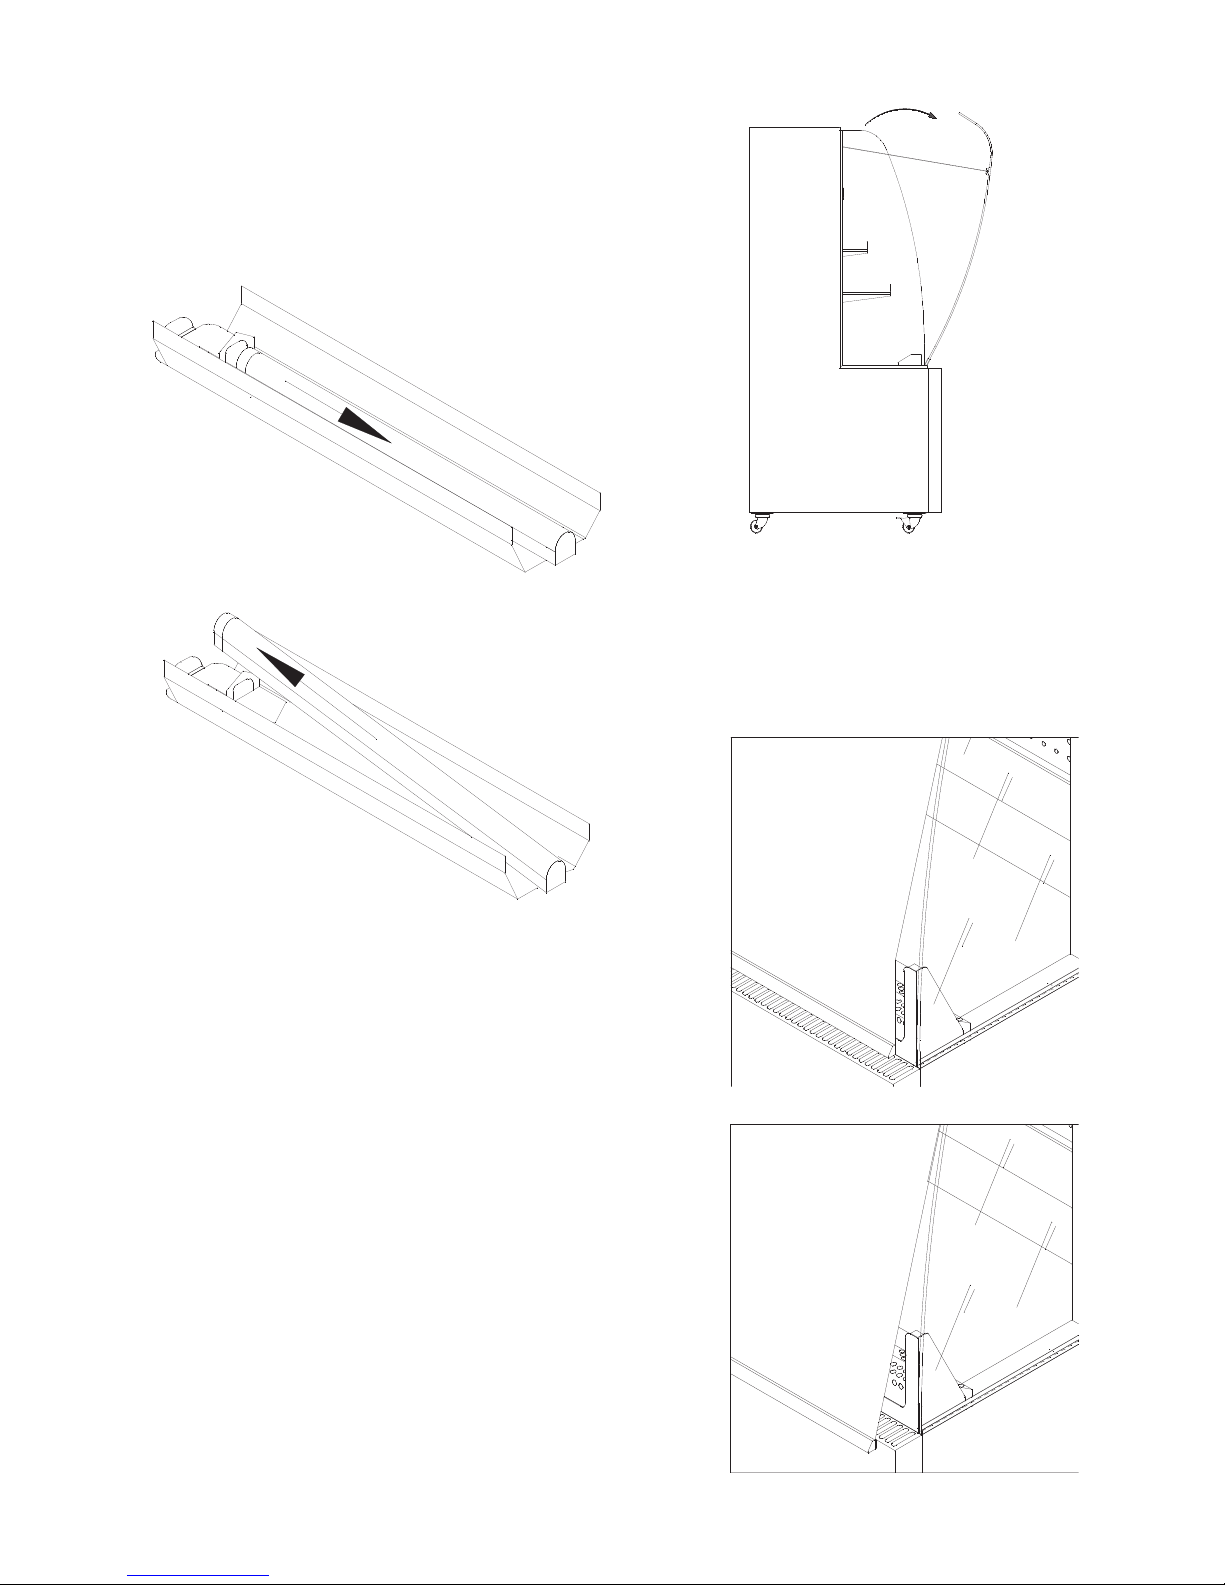
OVERNIGHT OPERATION
Night blind must be closed overnight with the magnet
in the blind attached to the surround of the sneeze
screen (Fig. 7) and NOT to the front of the condenser
cover (Fig. 8), as this will cover the vent and impair
performance.
Carefully tilt glass back
until safety cord is taut.
Fig. 6
Correct fitting of
magnetic night blind,
allowing air to be drawn
into the condenser.
Fig. 7
Lighting Removal
● Slide the light fitting back until it is clear of the first
mount (Fig. 4).
● Slide it back out over the mount and continue until light
fitting is removed (Fig. 5).
● Reverse process to refit.
Curved Glass Screen (Pastry Chiller Only)
The curved glass front of the Pastry Chiller should be
opened for cleaning. To do so stand in front of the unit
and slowly pull towards you until the safety chains
become taut. (Fig. 6).
Do not leave the chiller unattended with the screen in
the open position. If the glass is required to be opened
for an increased period of time then it should be removed
for safety reasons.
Removal of curved glass front:
● Two people are required.
● One person should ensure the glass is held in place
while the other removes the screws attaching the
cables to the Chiller.
● Standing with one person each side of the glass, open
fully and lift straight up to remove from the securing
angle at the base of the glass.
● Place glass shelves carefully on a suitable surface to
avoid damage.
Fig. 4
Fig. 5
Incorrect fitting of
magnetic night blind,
restricting airflow and
performance.
Fig. 8
 Loading...