

Williams pianos Overture Install Manual
A
B
B
C
A
Before enjoying your new Williams electronic piano, take a moment to read this simple assembly sheet.
Follow these instructions, and you’ll have your piano up and running in just a few short minutes.
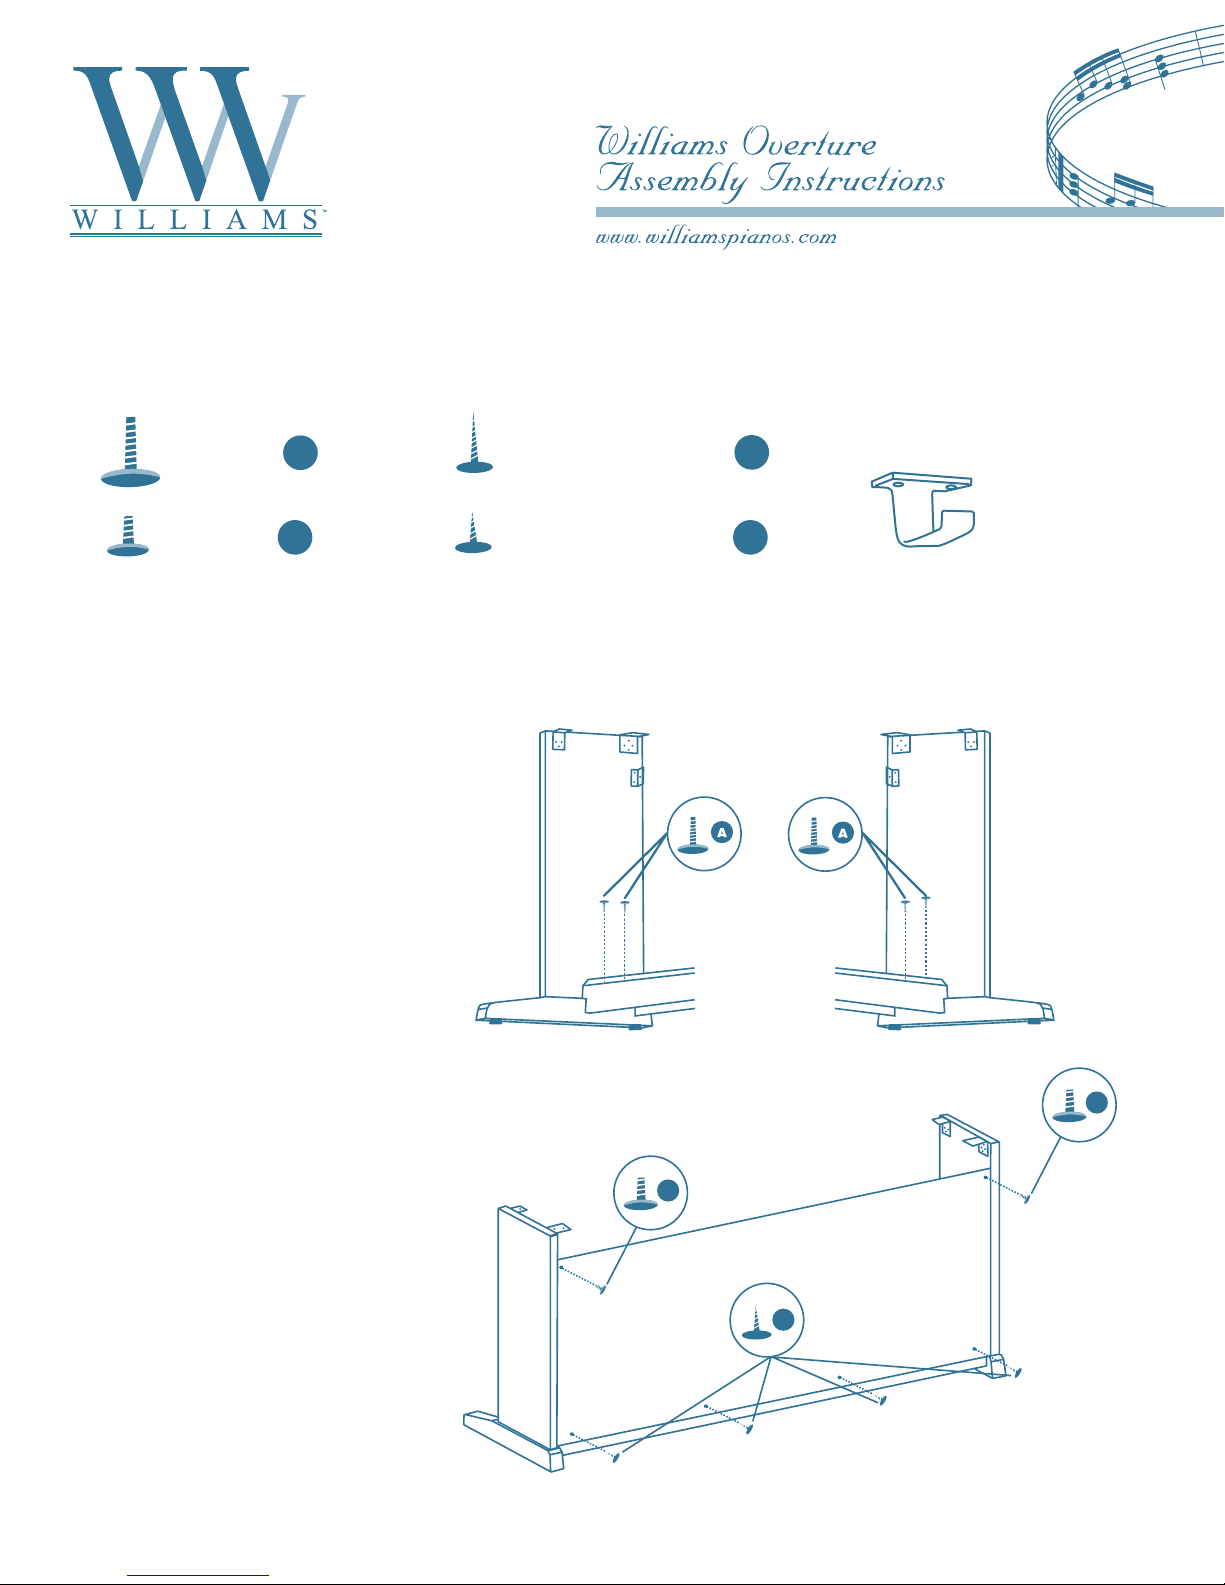
Check the Package Contents
Eight large screws
Two small screws Two small self-tapping screws
A
B
Assembly
Tool required: Phillips screwdriver
Install the Pedal Cross Bar
Four large self-tapping screws
C
D
Sideboard (Left)
Pedal Cross Bar
Headphone
Holder
Sideboard (Right)
Install the Back Board
Back Board
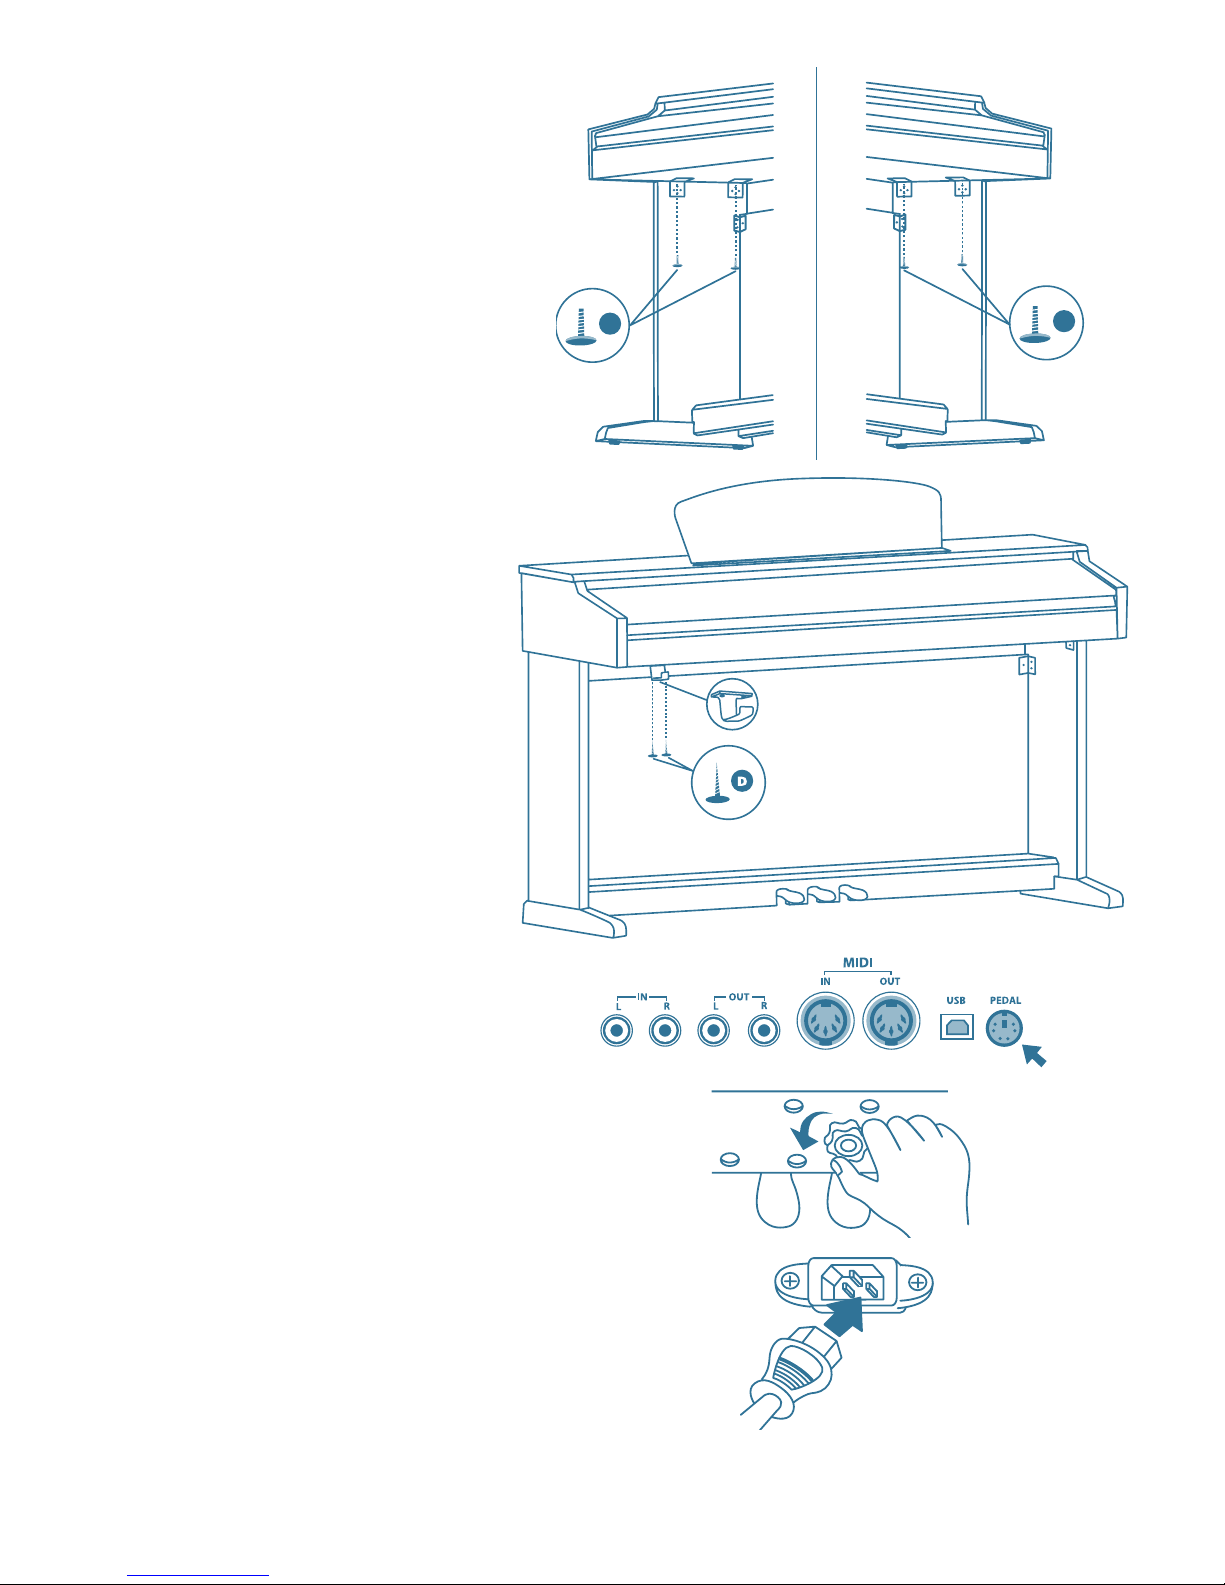
Attach the Piano Body
A
A
Piano Body
Install the Headphone Holder
Plug in Pedal Cable
Screw Down the Brace Pedal Knob
(to secure Pedal Cross Bar to floor)
Plug in the Power Cord
Now that the piano is fully assembled, make sure to read the enclosed user’s manual to get the most enjoyment
from your new Williams piano.
0707-7958
 Loading...