

Williamson-Thermoflo 9SRA-HE, 24SRA-HE, 12SRA-HE, 15SRA-HE, 18SRA-HE Owner's Manual
M00035-V00
R-410A
This system uses
Owner’s manual
IMPORTANT!
CAUTION:
This symbol refers to a hazard or unsafe practice, which can result in personal injury and the potential
for product or property damage.
NOTE:
Installer - Please take time to review this owner’s manual with the owner. Explain all maintenance, setup and
service procedures.

Owner’s manual
CONTENTS
1_Introduction 1
2_Safety precautions 2
3_Remote control buttons and display 3
4_Led display functions 4
5_Installing remote control batteries 5
6_Setting the clock 6
7_Automatic mode 7
8_Cooling mode 8
9_Dehumidifying mode 9
10_Fan mode 10
11_Setting the timer 11
12_Sleep mode 12
13_Adjusting the airflow direction 13
14_Setting the fan speed 14
15_Cleaning 15
16_Auxiliary control 16
17_Troubleshooting 17_18
18_Tips for saving energy 19

Owner’s manual _1
1_ INTRODUCTION
For future reference, we suggest you attach a copy of your sales slip/receipt to this page, along with the following
information which is located on the manufacturer’s nameplate located on the side of the unit. You will be asked this information if your unit requires servicing and/or for general inquiries.
Model number
Indoor unit:
Outdoor unit:
Serial number
Indoor unit:
Outdoor unit:
Date of purchase:
Date of installation:
Dealer’s Name and Address:

Carefully read these safety precautions before using your air conditioner.
These precautions must be taken at all times.
Keep this document for future reference.
- Unit must be supervised in presence of children or anybody unfamiliar with it.
- Do not hang or place any clothing or other objects on the unit.
- Do not place any obstacles in front of the unit.
- This device must be installed according to the national electrical code or any other state codes or regulations.
- Never spill any liquid into the indoor unit. If this should accidentally happen, turn off the electrical circuit breaker used
for your air conditioner and contact your installation specialist.
- Do not insert anything between the airflow blades to avoid any damage to the inner fan and to avoid possible harm.
- If the remote control is not used for a long period of time, remove the batteries to prevent leakage of electrolyte.
- Any damaged electrical component should be replaced by a qualified installer / service technician.
- Users of this appliance are warned NOT TO ATTEMPT ANY REPAIRS on this product, doing so is at their own risk.
Instead, they are requested to contact a qualified installer / service technician.
Owner’s manual _2
2. SAFETY PRECAUTIONS
CAUTION:
The manufacturer does not take any responsibility for any damage or injuries caused by inadequate installation.
An accident may occur if the installation is not executed as instructed in the installation manual. If you experience
any difficulty, contact a qualified installer / service technician.
Farenheit °F/Celsius °C
press °F/°C button to select the
desired temperature scale.
Owner’s manual _3
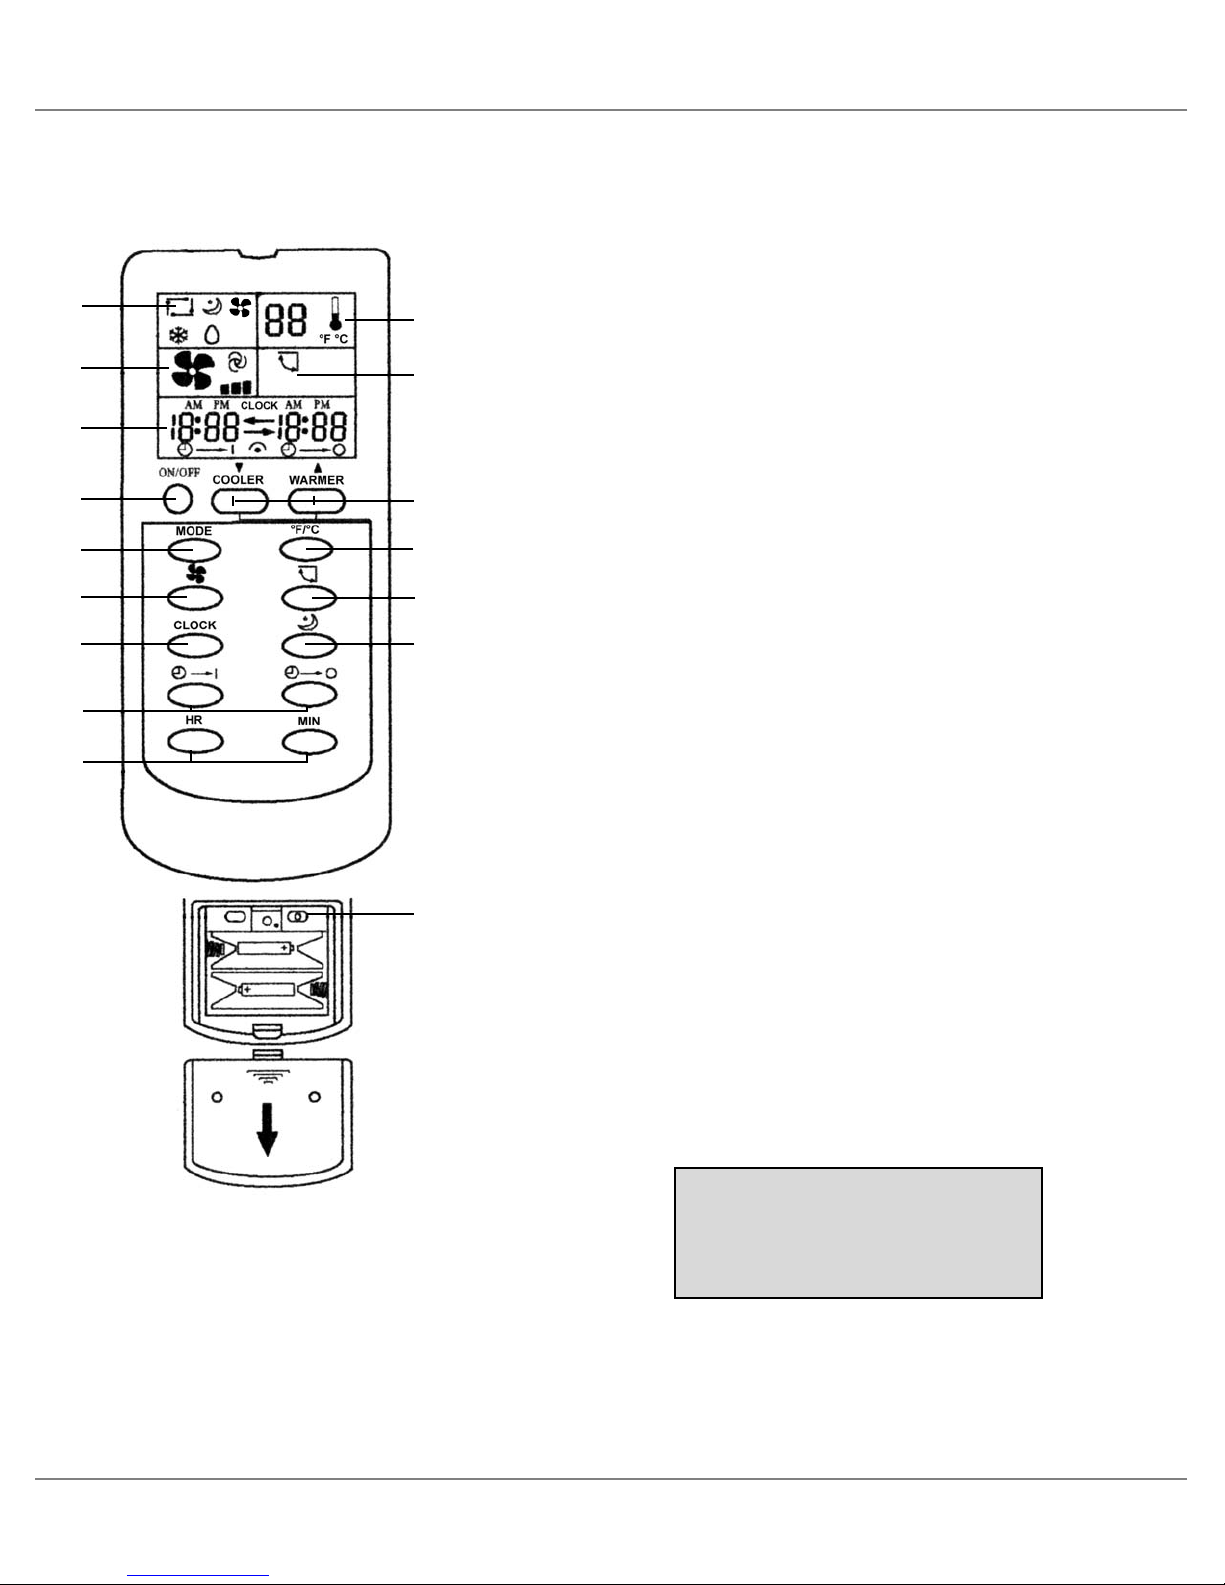
3. REMOTE CONTROL BUTTONS AND DISPLAY
1. Operating mode setting display
2. Fan speed display
3. Temperature display
4. Airflow sweep icon
5. Clock and timer display
6. On/Off button
7. Temperature adjustment buttons
8. Mode button (auto, cooling, dehumidifying)
9. °F/°C switch button
10. Fan speed adjustment button
11. Airflow sweep button
12. Clock button
13. Sleep button
14. Timer setting buttons
15. Clock setting buttons
16. Reset button
When operating the air conditioner, point the remote control toward
the signal receiver on the air conditioner and the operation should be
confirmed by a beep sound and icon display.
Note:
• The remote control works within a distance of 23 ft. (7 m) and at a
maximum angle of 30 degrees.
• Dust, high temperatures and strong vibrations must be avoided.
To open the
back cover
1
2
5
6
8
10
12
14
15
16
11
4
3
7
9
13
88
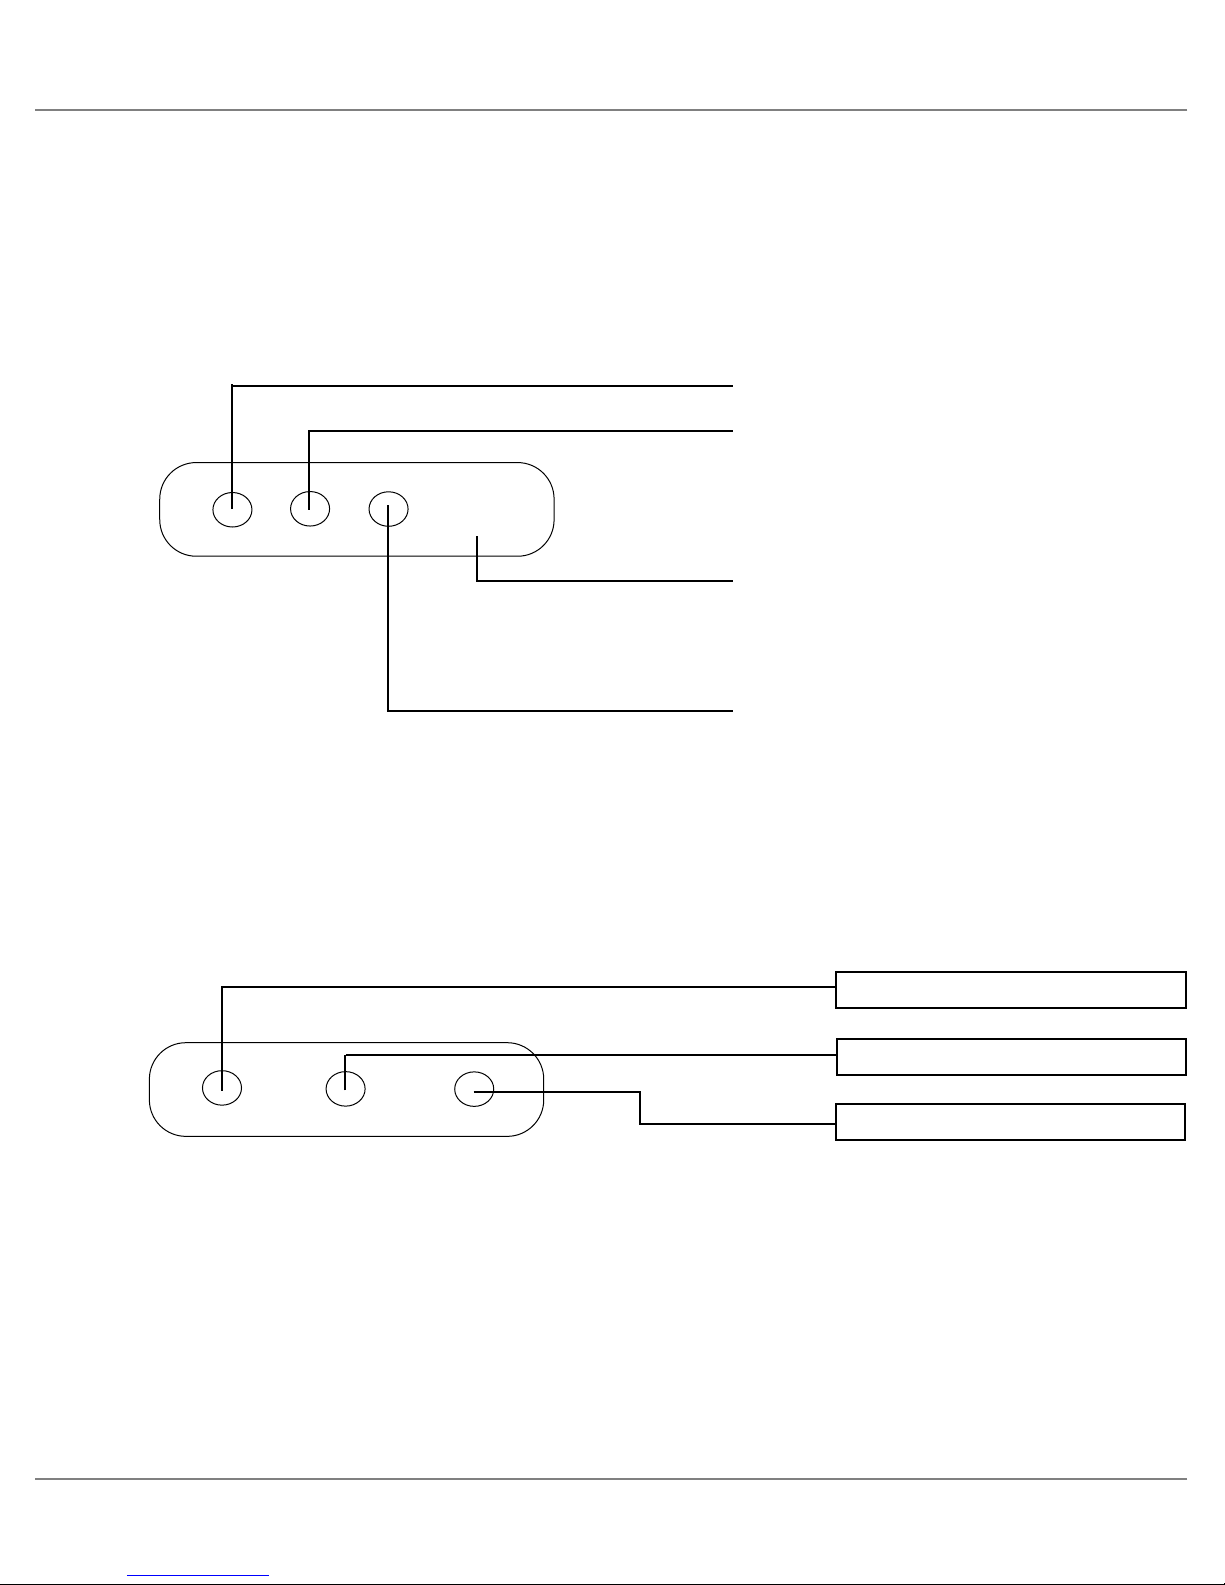
POWER
OPERATING
TIMER/SLEEP
Power Indicator (Red)
Operating Indicator (Blue)
Timer/Sleep Indicator (Yellow)
LED display 9 000-12 000 BTU
LED display 15 000-18000-24 000 BTU
Power indicator (Red)
Operating indicator (Blue)
Timer/Sleep indicator (Yellow)
This display screen shows:
- the selected temperature for 3 seconds
before the screen becomes blank again;
- The trouble indicator code.
Owner’s manual _4
4_ LED DISPLAY FUNCTIONS
 Loading...