

Page 1
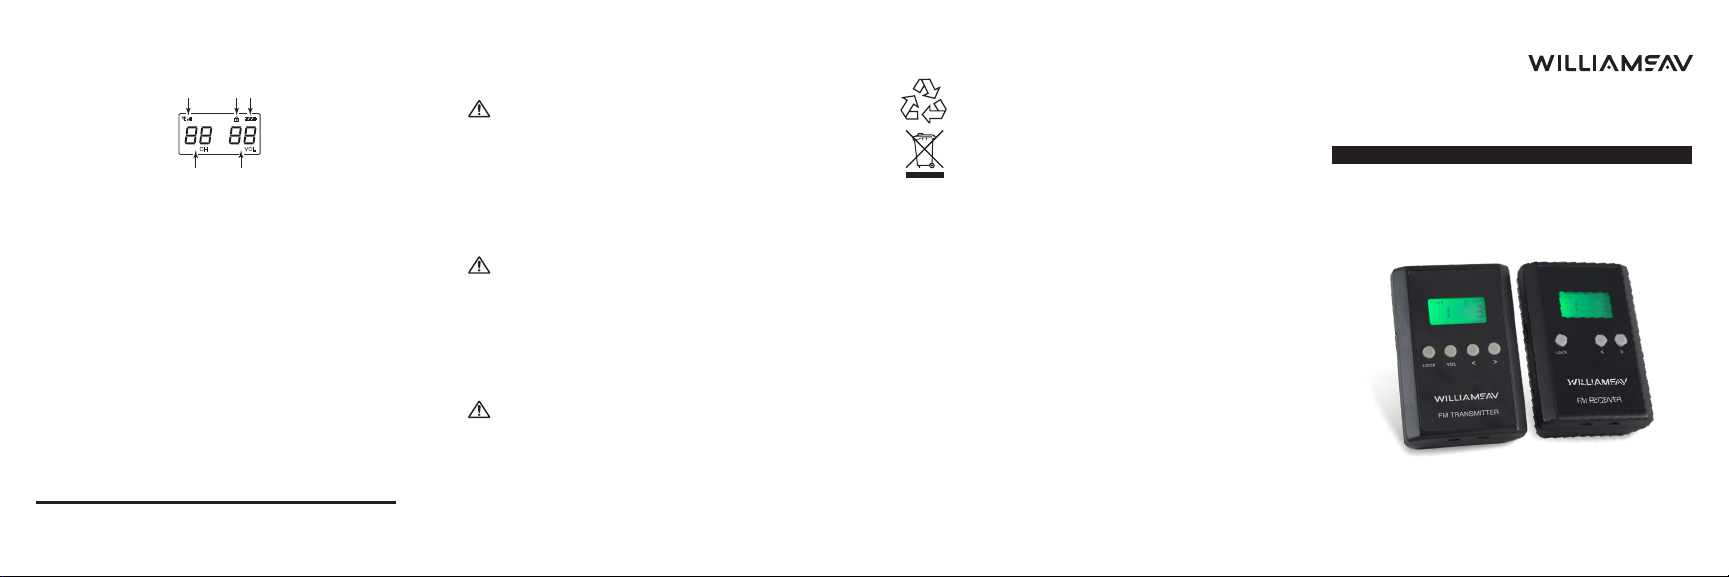
FIG. E: R2863 Receiver Display
10. Select the desired operating channel on the receiver (the same
channel chosen in step 6). Push and hold the “LOCK” button until
the lock symbol disappears, then select the channel by pushing the
“<” or “>”arrow buttons. (Fig. D).
11. To adjust the volume on the receiver, at any time, push the “<” or
“>”arrow buttons repeatedly. (Fig. D).
12. If no buttons are pushed for a period of time on either the
transmitter or receiver, (1) the display backlight will shut off to
conserve battery power, and (2) the unit re-locks itself, indicated by
the lock symbol on the display.
WilliamsAV.com
U.S. | 800.843.3544 [email protected] INTL | +1.952.943.2252 [email protected]
RF SIGNAL
STRENGTH
CHANNEL
LOCK
BATTERY
SYMBOL
LIFE
VOL
CH
HEADPHONE
VOLUME
LEVEL
© 2023, Williams AV, LLC MAN 182J
Safety Information
HEARING SAFETY
CAUTION!
This product is designed to amplify sounds to a high volume. To protect
your hearing and the hearing of others:
1. Make sure the unit is OFF or the volume is turned down before
putting on the earphones.
2. Set volume level at the minimum setting you need to hear.
3. Do not allow children or other unauthorized persons to have access
to this product.
BATTERY SAFETY
CAUTION!
Do not attempt to recharge alkaline or other non-rechargeable batteries,
which may explode, release dangerous chemicals, cause burns, or cause
other serious harm to the user or product. To reduce the risk of fire or
burns, do not crush, puncture, short contacts, or expose to temperatures
above 140F (60C). Replace only with battery types designated for this
product. Recycle or dispose of properly.
MEDICAL DEVICE SAFETY
CAUTION!
Before using this product with a pacemaker or other implantable
medical device, consultant your physician or the manufacturer of the
device to make sure that you are using this product in accordance with
their safety guidelines.
Recycling Instructions
Help Williams AV protect the environment!
Please do not dispose of equipment or used batteries in
the household trash. Take the equipment to an electronics
recycling center or return to the factory. Take batteries to a
retail or community recycling location.
Battery Information
The T2863 and R2863 each use 2 AA batteries. We recommend using
Williams AV Alkaline batteries (BAT 001-2) or NiMH rechargeable
batteries (BAT 026-2) for longer battery life than other brand batteries.
NiMH batteries can be charged with a USB A to Mini-B cable using the
Mini-B port on the side of the unit(s).
Warranty
For warranty information, please visit www.williamsav.com.
Additional Documentation
Hereby, Williams AV declares that the FM transmitter is in compliance with
Directive 2014/53/EU and other Union harmonization as applicable.
The full text of the EU declaration of conformity (or other technical
documents) is available by contacting Williams AV at the following email
address: [email protected]
Hereby, Williams AV declares that the FM transmitter is in compliance with
Directive 2014/53/EU and other Union harmonization as applicable.
T2863 Transmitter, R2863 Receiver
863 MHz Portable FM Listening System - Europe
QUICK SETUP GUIDE
MAN 182J
Page 2
LOCK VOL
< >
ADJUST BUTTONS
VOLUME SELECT
LOCK BUTTON
CHARGING
CONTACTS
BATTERY DOOR
CHANNEL
MICROPHONE
VOLUME
LEVEL
VOL
CH
RF SIGNAL
STRENGTH
LOCK
SYMBOL
BATTERY
LIFE
CHANNEL
MICROPHONE
VOLUME
LEVEL
VOL
CH
RF SIGNAL
STRENGTH
LOCK
SYMBOL
BATTERY
LIFE
CHANNEL
MICROPHONE
VOLUME
LEVEL
VOL
CH
CHANNEL
RF SIGNAL
STRENGTH
LOCK
SYMBOL
BATTERY
LIFE
HEADPHONE
VOLUME
LEVEL
Operating Instructions
1. Open the battery compartment by sliding the compartment door
away from the lanyard slot (Fig. A).
2. Install two AA Alkaline or NiMH batteries in the transmitter and
receiver(s). Be sure to observe proper polarity (+/-). If using NiMH
batteries, recharge with a USB A to Mini-B cable, using the charging
port (Figures B, D). When the batteries are nearly depleted, the
battery symbol will have no bars (Figures C, E) and the display
backlight will flash; you may continue to use until the unit quits
operating, then replace or recharge the batteries.
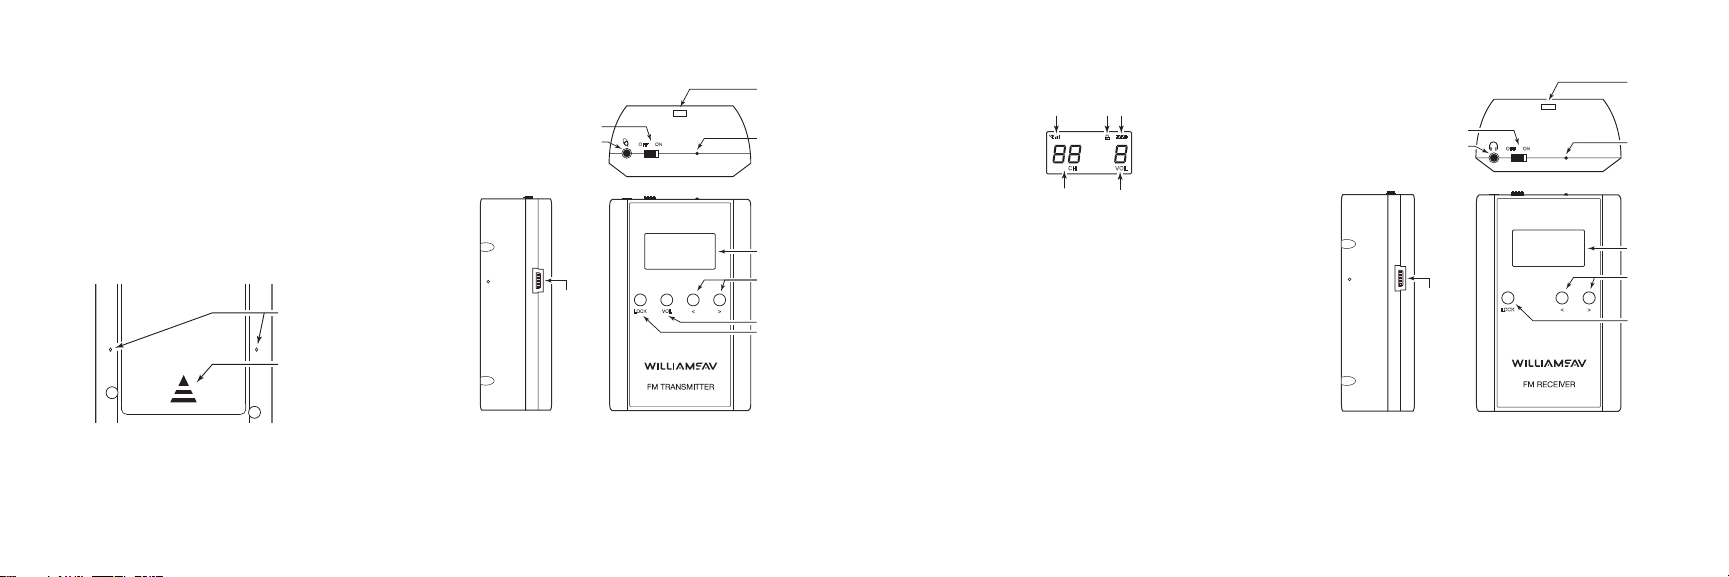
FIG. A: Battery Compartment
BELT CLIP
HOLES
BATTERY
COMPARTMENT
DOOR
(PRESS ON ARROW
AND SLIDE
IN DIRECTION
OF ARROW)
3. Plug a Williams AV microphone into the microphone jack on the
transmitter (Fig. B). Plug a Williams AV earphone into the
headphone jack on each of the receivers (Fig. D).
FIG. B: T2863 Transmitter Top / Front
POWER SWITCH
MICROPHONE
USB
MINI-B
CHARGING
PORT
4. Power on the transmitter by sliding the power switch from “OFF” to
“ON” position (Fig. B).
5. The display will light up and show the current channel, microphone
volume level, transmitted RF signal strength, locked status, and
battery level. (Fig. C, above)
OFF ON
JACK
LOCK VOL
< >
LANYARD
SLOT
CHARGING
INDICATOR
LCD DISPLAY
ADJUST BUTTONS
VOLUME SELECT
LOCK BUTTON
FIG. C: T2863 Transmitter Display
6. Select the desired operating channel on the transmitter. Push-and-
hold the “LOCK” button until the lock symbol disappears. Adjust the
Channel by pushing the “<” or “>” buttons. When the desired
channel is reached, push and hold the LOCK button (Fig. B) until the
lock symbol reappears (Fig. C).
7. To adjust the microphone volume on the transmitter, push and hold
the LOCK button (Fig. B) until the lock symbol disappears, then push
the VOL button repeatedly to adjust the volume between 0-3 (Figure
C).
8. More than one transmitter may be used simultaneously, but must
have at least two channels of separation, i.e. channels 1, 3, 5, 8. If
interference is experienced, try increasing the channel separation
between the two competing transmitters.
FIG. D: R2863 Receiver Top/Front
POWER SWITCH
* Requires a standard
USB A to Mini-B Cable
HEADPHONE
USB
MINI-B
CHARGING
PORT *
OFF ON
JACK
LOCK
< >
LANYARD
SLOT
CHARGING
INDICATOR
LCD DISPLAY
ADJUST BUTTONS
LOCK BUTTON
9. Power on the receiver(s) by sliding the power switch from “OFF” to
“ON” position (Fig. D). The display will light up and show the current
channel, headphone volume level, received RF signal strength,
locked status, and battery level (Figure E).
 Loading...