

Page 1
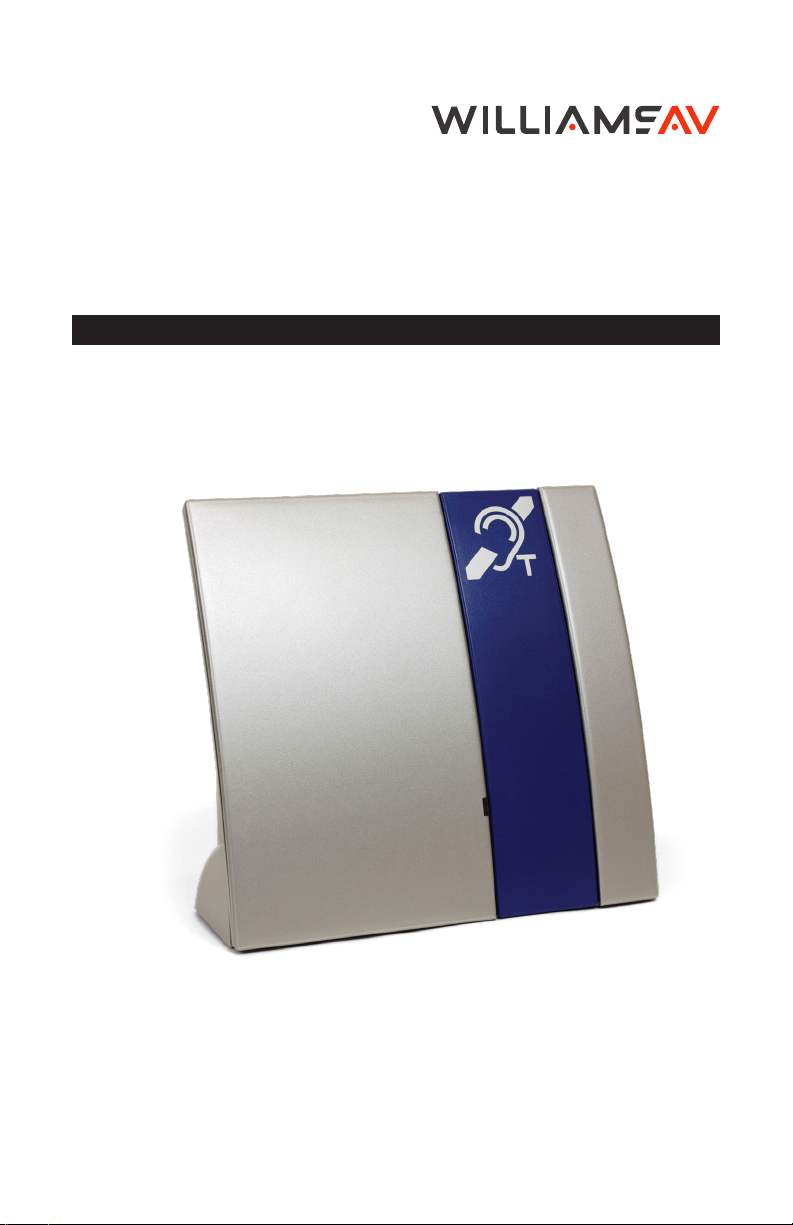
PLA 90
Counter Loop
User MANUAL
MAN 173E
Page 2

Please read these operating instructions carefully. This describes how to
set up the system correctly and explains all the system features.
Standard components
Please check if all following components are included:
- Portable induction loop system PLA 90 with integrated battery,
- Power supply unit
- 3 color signal strips
- 2 T-coil labels
- 4 rubber feet
- Operating instructions
- Warranty card
If any parts are missing, please contact your dealer immediately.
How it works
The PLA 90 uses its built-in microphone or an external microphone to pick
up sounds and emits them via the integrated induction loop. The signals
emitted in this way can be received by a hearing aid that is set to the “T” or
“MT” position.
Setting up the PLA 90
The induction loop system is already completely installed and set up in the
housing. All you have to do is to place the PLA 90 at the desired position
between you and the person you are talking to and connect the power
supply unit. Please note that the microphone on the back of the device
should be facing the person speaking.
Switching the device on
To switch the induction loop system on, press the “Power on“ button on the
rear side of the device. Once the device is switched on, the “Power on”
light on the rear of the device will light up green, and the “Power on” light
on the front will light up blue.
Picking up/ emitting signals
If sounds are picked up by the microphone on the back of the device or via
an external microphone and emitted by the device as magnetic signals, the
status light “loop signal” will flash orange.
Page 3
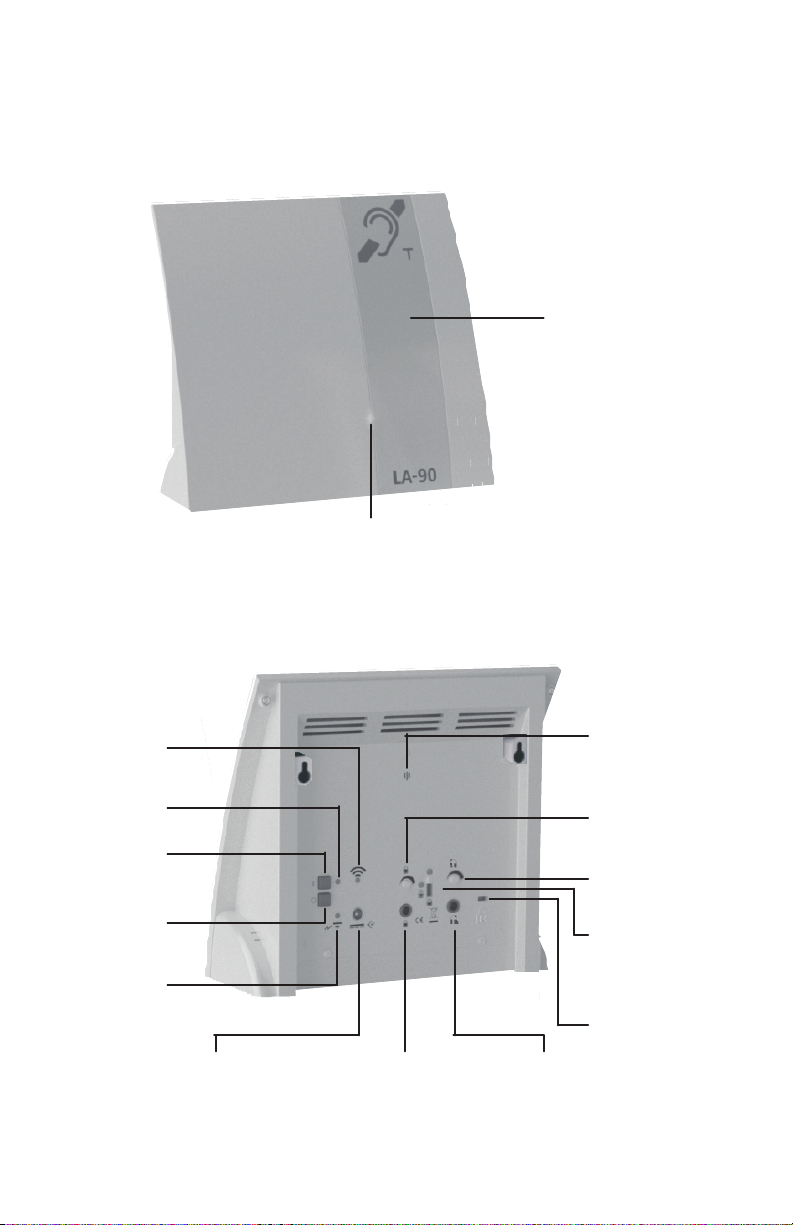
Controls and Indicators
“Power on” light
Color signal strip
Front View
Front View
Rear View
Status light
“loop signal”
Color signal strip
“Power on” light
Built-in
microphone
“Power on”
light
Power on
button
Power off
button
Charging
indicator
Power supply
jack
Additional
microphone
input
Headphone
jack
Microphone
adjustment
Volume
control
Microphone
selection switch
(internal/external)
Theft protection
via Kensington™
lock
Page 4

Additional microphone input
(3.5 mm plug)
An external microphone can be connected to the additional microphone
input.
Microphone selection switch
With the microphone selection switch you can choose the microphone
which should record the sounds.
Switch position:
Up: internal microphone
Down: external microphone
Setting the sensitivity of the microphone input
With the control dial on the backside of the device you can adjust the
sensitivity of the microphone input. This is useful if you want to connect a
low-output microphone to the PLA 90.
Headphone jack (3.5 mm plug)
You can connect the following products to the Headphone jack:
- Under-the-chin receiver
- Unobtrusive earphones
- Lightweight headset
- Audio-Cable monaural
- Audio-Cable binaural
- Induction Link monaural
- Induction Link binaural
Volume control
The volume control adjusts the volume of the headphone jack.
Automatic switch o
The PLA 90 will switch o automatically after 2 minutes if no signal is
received, from either the internal or external microphone.
Charging control light
LED flashes red = Battery is in the process of being recharged
LED o = Battery is fully recharged
Page 5
Permanent installation of the PLA 90
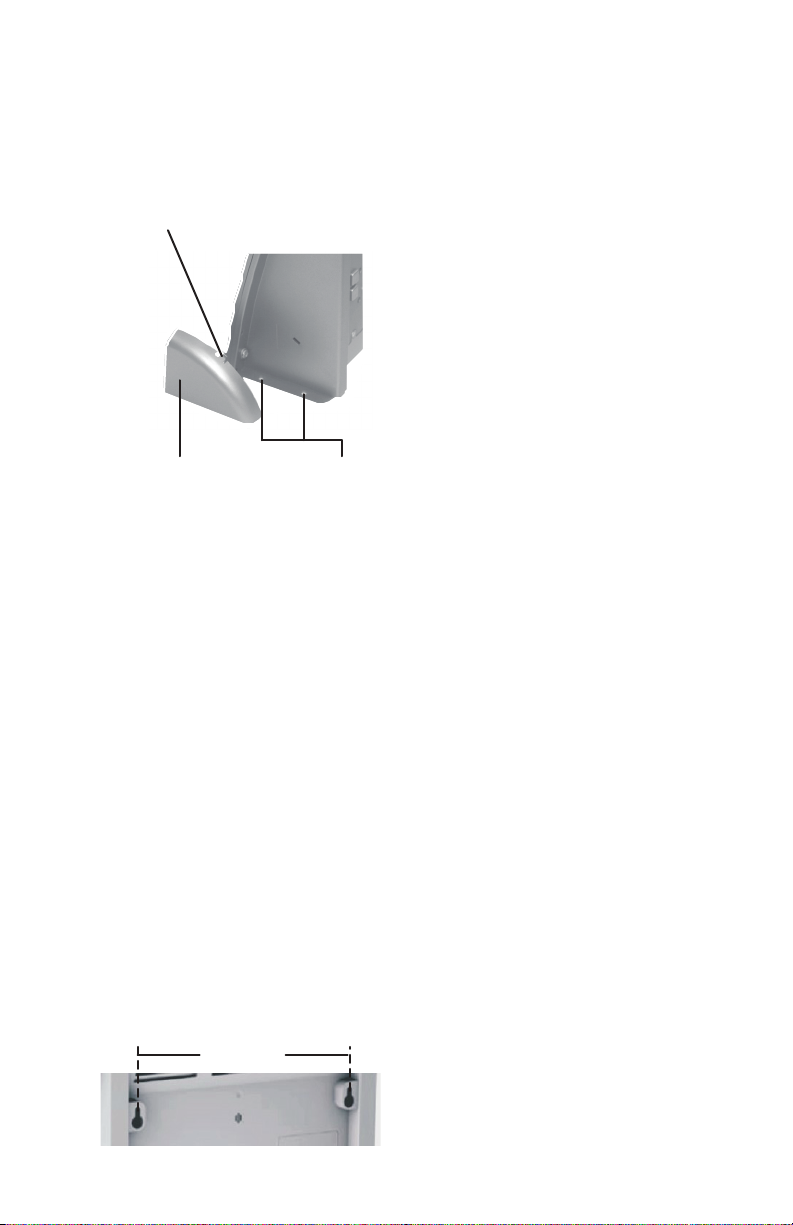
The PLA 90 can be screw-fastened through the lateral holes to a tabletop
or other surfaces. The holes are located under the side covers. Remove
the covers as shown in the picture below.
Retaining clip
Side cover Holes for screw fastening
Switching the device o
To switch the induction loop system o, press the “Power o” button on the
rear side of the device. The “Power on” control light goes o.
Power supply for the PLA 90
The PLA 90 can be operated using the built-in rechargeable battery or
the power supply unit. If the battery is fully charged, the device can be
used for up to 6 hours.
A depleted battery has to be recharged for approximately 3 hours until it
reaches full capacity again. You can also use the PLA 90 while it is being
charged, but please note that this will lengthen the time required to fully
recharge the battery. The device can remain connected to the power
supply for as long as desired
NOTE. The battery must remain in place, even when the PLA 90 is
connected to AC Power.
Wall mounting
1. Screw in two screws (not included)
14.1 cm apart at the place you would like to mount the PLA 90 on the wall
(see figure).
2. Now set the PLA 90 on the screws and slide it down slightly to secure it
in place.
5.55 in
Page 6
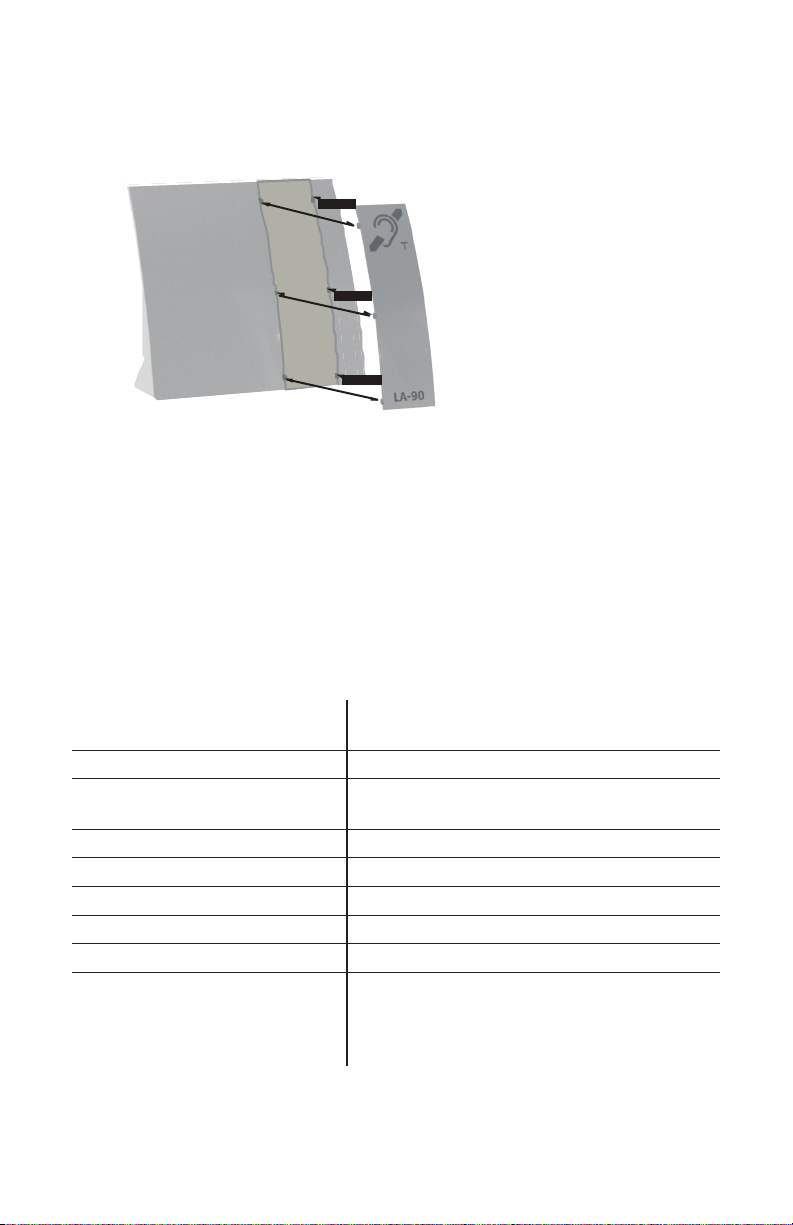
Changing the color signal strip
5.55 in
You can change the color signal strip of the PLA 90, as shown below.
Maintenance and care
The PLA 90 does not require any maintenance. If the unit becomes dirty,
simply wipe it clean with a soft, damp cloth. Never use spirits, thinners or
other organic solvents. Do not set up the unit where it will be exposed
to full sunlight for long periods. In addition it must be protected against
excessive heat, moisture and severe mechanical shock. Note: This product
is not protected against splash water. Do not place any containers filled
with water, such as flower vases, or anything with an open flame, such as a
lit candle, on or near the product.
Specifications
Dimensions: 7-7/8" H x 7-1/4" W x 2-15/16" D
(200 x 185 x 70 mm)
Weight: 1.4 lb (635 g) (with battery installed)
Power supply: Input: 100-240 VAC, 50-60 Hz
Output: 16 VDC
Rechargeable battery: 12 V NiMH, user-replaceable.
Operating time per charge: Up to 6 hours
Battery charging time: Approximately 3 hours
Output power: 10 W
Microphone Sensitivity: Up to 60 dB ±3 dB
CE Certification
(EU directives):
Compliance with the directives listed above is confirmed by the CE seal on the device.
Specifications subject to change without notice.
2002/95/EG RoHS
2002/96/EG WEEE
2004/108/EG EMC
2006/95/EG Low voltage
Page 7
Warranty
The PLA 90 is a very reliable product. Should a malfunction occur despite
the unit having been set up and operated correctly, please contact your
dealer.
The warranty covers the repair of the product and returning it to you free
of charge during the warranty period. It is essential that you send in the
product in its original packaging, so do not throw the packaging away.
The warranty does not apply to damage caused by incorrect handling or
attempts to repair the unit by people not authorized to do so (destruction of
the seal on the unit). Repairs under warranty are only carried out providing
the enclosed warranty card is filled out and returned to dealer; also a copy
of the sales slip is required.
Unit disposal
Disposal of used electric and electronic units (applicable in the
countries of the European Union and other European countries
with a separate collection system). The symbol on the product
or the packaging indicates that this product is not to be handled
as ordinary household waste but has to be returned to a
collecting point for the recycling of electric and electronic units. You protect
health and environment by the correct disposal of this product. Material
recycling helps to reduce the consumption of raw material. You will receive
further information on the recycling of this product from your local
community, your communal disposal company or your local dealer.
Rechargeable battery disposal
The rechargeable battery that comes with the device can be
recycled.
Please dispose of this rechargeable battery in receptacles
designed for that purpose or return it to a retail outlet. Dispose
only of those batteries that have been completely discharged to
ensure environmental protection.
Page 8

[email protected] / www.williamsav.com
800-843-3544 / INTL: +1-952-943-2252
©2022 Williams AV • All Rights Reserved
MAN 173E
 Loading...