

Wiley X Saber User Manual
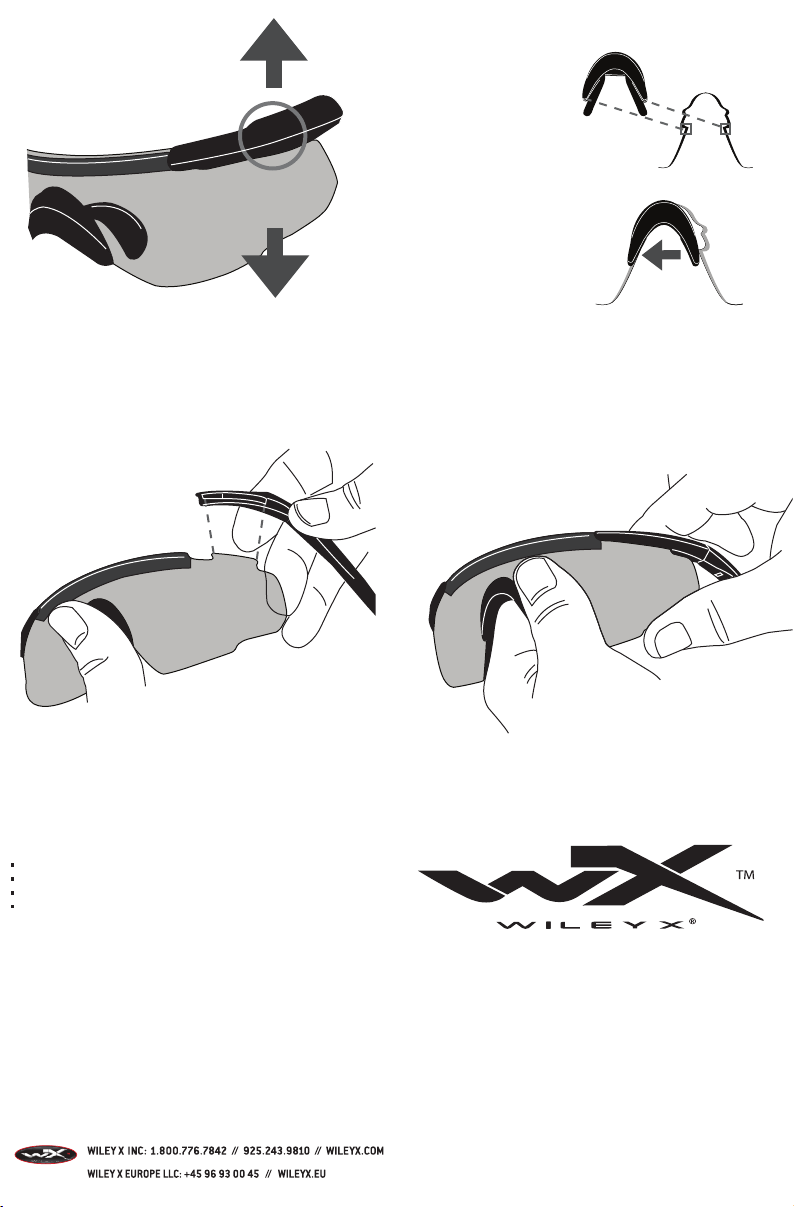
LENS REMOVAL
NOSE PIECE REMOVAL*
The nose piece
1)
and primary lens
are interlocking.
2)
To detach pull a leg
of the nose piece.
Once the leg is
disengaged the
nose piece will
simply rotate out.
To separate the lens from the frame grasp the brow bar
indicated in the drawing and pull apart.
*Should you require corrective lenses remove the rx carrier
prior to removing the nosepiece. See Rx Carrier instruction
INSTALLING THE LENS - STEP 1 INSTALLING THE LENS - STEP 2
Position the slot of the brow bar to the notch of the lens... ... and squeeze together as pictured
MAINTENANCE:
resistance. Please follow below instructions to prolong the life of your lenses
and keep them performing at their best:
Clean lenses with water only.
Do not use solvents or special cleaners.
Use micro-fiber cleaning cloth provided to gently wipe clean.
Never use paper products to clean and avoid wiping lens surface
when dry and/or dirty as this may potentially scratch the lens.
Wiley X lenses are specially coated to offer superior abrasion
WARNING:
Wiley X brand eyewear is tested tough. However, impact resistant
eyewear is not unbreakable and does not provide unlimited eye protection under all
circumstances and conditions. Misused, abused, scratched and/or damaged
eyewear can reduce impact protection (and void your limited warranty). Dirty
and/or wet eyewear can impair vision and reduce safety (resulting in personal injury
and/or property damage). Keep your Wiley X eyewear clean with water only. Do not
use solvents or abrasives as it could scratch or damage the product reducing its
effectiveness. Store your Wiley X eyewear in the protective case provided to
prolong the life of the lenses. Most of all, take all appropriate precautions when
wearing your Wiley X eyewear during hazardous and/or dangerous activities and
conditions. Wiley X, Inc. is not responsible for personal injury, property damage or
losses incurred while using Wiley X brand products.
7800 PATTERSON PASS ROAD, LIVERMORE CA 94550 USA
SØNDERGADE 8-10 7570 VEMB DENMARK
ICSABER(0)
WILEY X, WX, BLACK OPS, logos, tag lines and product names are trademarks or registered trademarks (marcas
registradas) of Wiley X, Inc. in the U.S. and other countries. Logos © 2007-2014 Wiley X, Inc. All rights reserved.
SABER
INSTRUCTIONS
COPYRIGHT © 2014 WILEY X, INC. ALL RIGHTS RESERVED.
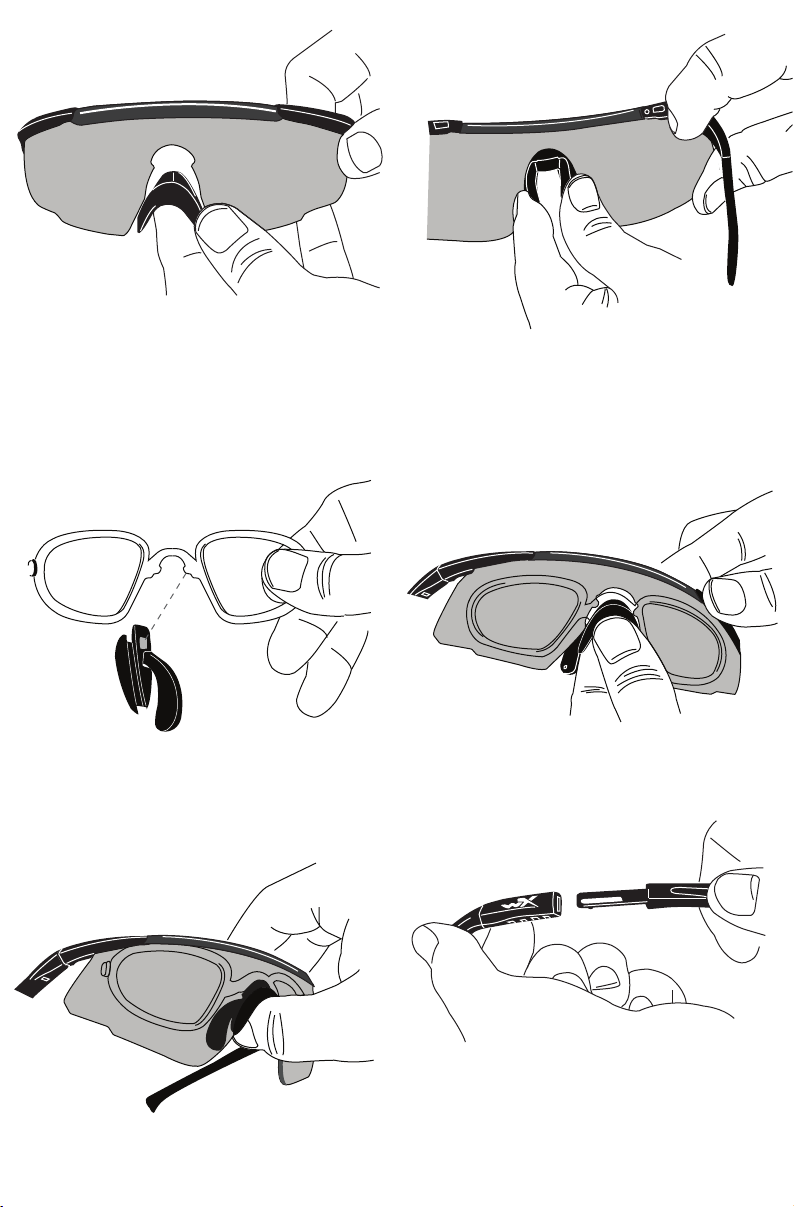
INSTALLING NOSE PIECE
NOSE PADS ADJUSTMENT
To install the nose piece, simply align the slot of the nosepiece
with the lens and squeeze together.
INSTALLING THE PRESCRIPTION CARRIER- STEP 1
The prescription carrier is held in place by aligning the buds on
the Rx carrier into the notches on the nose piece.
INSTALLING THE PRESCRIPTION CARRIER - STEP 3
The wire core nose pads are adjustable ensuring the best fit
for you.
INSTALLING THE PRESCRIPTION CARRIER - STEP 2
Align the groove of the nose piece into the center notch of
the frame.
TEMPLES / TACTICAL STRAP
Position hands as pictured above and squeeze together until
the nose piece completely seats into the lens.
TEMPLE ADJUSTMENT
The length of the temple arm may be adjusted by up to .75” with
the 4 position extendable arm.
INSTALLING TACTICAL STRAP
Pull the adjustable temple arm so it is seperated from the frame.
Replace with tactical strap connectors, pushing firmly until they click.
 Loading...