

Wildtronics Pro Mini Parabolic Instruction Manual

Wildtronics, LLC
Pro Mini
Parabolic
Instruction Manual
2016 Model

Thank you for purchasing the Wildtronics Pro Mini Parabolic. Your new
parabolic reflector kit was designed for years of service, ease of use,
superior performance, and allows installing many cylindrical
omnidirectional, cardioid, and even lavalier microphones. You may also
easily install the high performance, low noise Wildtronics Micro Mic
series microphones. The Pro Mini Parabolic is a modular system that will
require mounting a microphone into the hub to complete the parabolic
microphone. Use commonly available cables to connect your microphone
to your recorder. Read the entire manual before installing your
microphone.
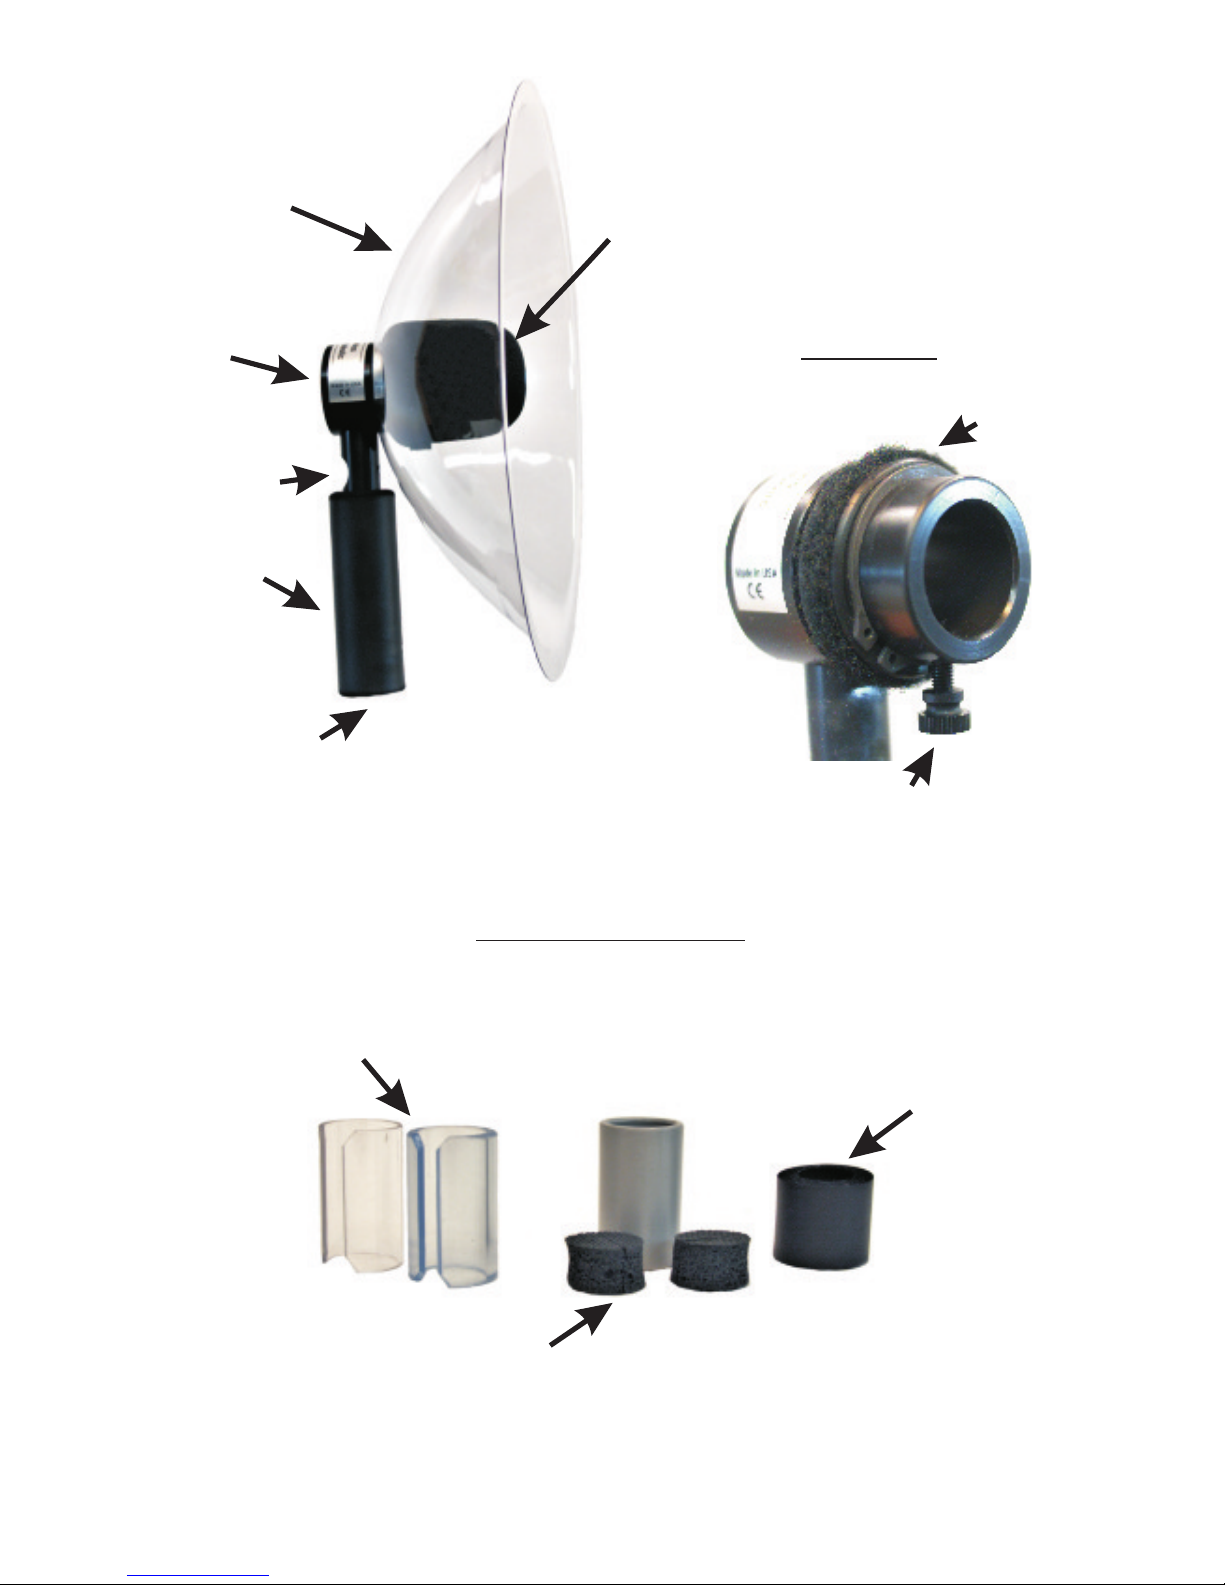
Parts Identification:
Referring to the photo on page 2, the part names of the Pro Mini
Parabolic are labeled. These names will be used throughout the manual to
describe parts.
1. Parabolic Reflector -Depending on the model, it will be clear
polycarbonate or black ABS.
2. Hub -This is where the microphone is inserted and secured.
3. Accessory Mount -Used for mounting our Mini-Accessory Bar.
4. Handle -With a foam comfort grip.
5. 1/4-20 Tripod/Hotshoe Threaded Insert -Metal insert that allows
attachment to tripods and hotshoe adapters.
6. Hairy Ring -Retains the windscreen when the windscreen is installed.
7. Thumbscrew -Used to retain the microphone.
8. Mic Adapter Sleeves -Used to adapt to different diameter
microphones. One is thin, and one is thick.
9. Lavalier Mic Adapter -Used to mount a lavalier microphone into the
Hub.
10. Cardioid Mic Vent Seal -Used to cover the vents on the side of a
cardioid microphone, in case a cardioid microphone is used.
1
2
Pro Mini Parabolic Parts
1 Thin, 1 Thick
Mic Adapter Sleeves
Lavalier Mic Adapter
Cardioid Mic
Vent Seal
Parabolic Reflector
Hub
Accessory
Mount
Hub Detail
Hairy Ring
Thumbscrew
Handle
1/4-20 Tripod/Hotshoe
Threaded Insert
Microphone Adapters
Foam
Windscreen
3
Recommended microphones to use:
We recommend using an omnidirectional microphone for best results.
You can use a cardioid microphone, if that is all you have, but you must
seal the vents on the side of the microphone as described later. Shotgun
microphones will not work with parabolic reflectors at all, since their
polar response is too narrow, and would pick up very little of the sound
reflected by the parabolic dish. Use cylindrical, pencil style, microphones
that are 19-26mm in diameter. You may also use most lavalier
microphones with the included lavalier mic adapter. Remember that
lavalier microphones are typically noisy, and should be avoided for long
range use or faint sounds. For best results, use a microphone with less
than 16dBA self noise. The lower the better for increased range and
quality of recordings. Wildtronics offers the Micro Mic Series
Microphones that are high quality, low noise, and easily fit into the Pro
Mini Parabolic. Other common microphones that would work well are:
Sennheiser MKH20, MKH8020; Audio Technica 4022; DPA 4060;
Schoeps Mk5, and MK2H.
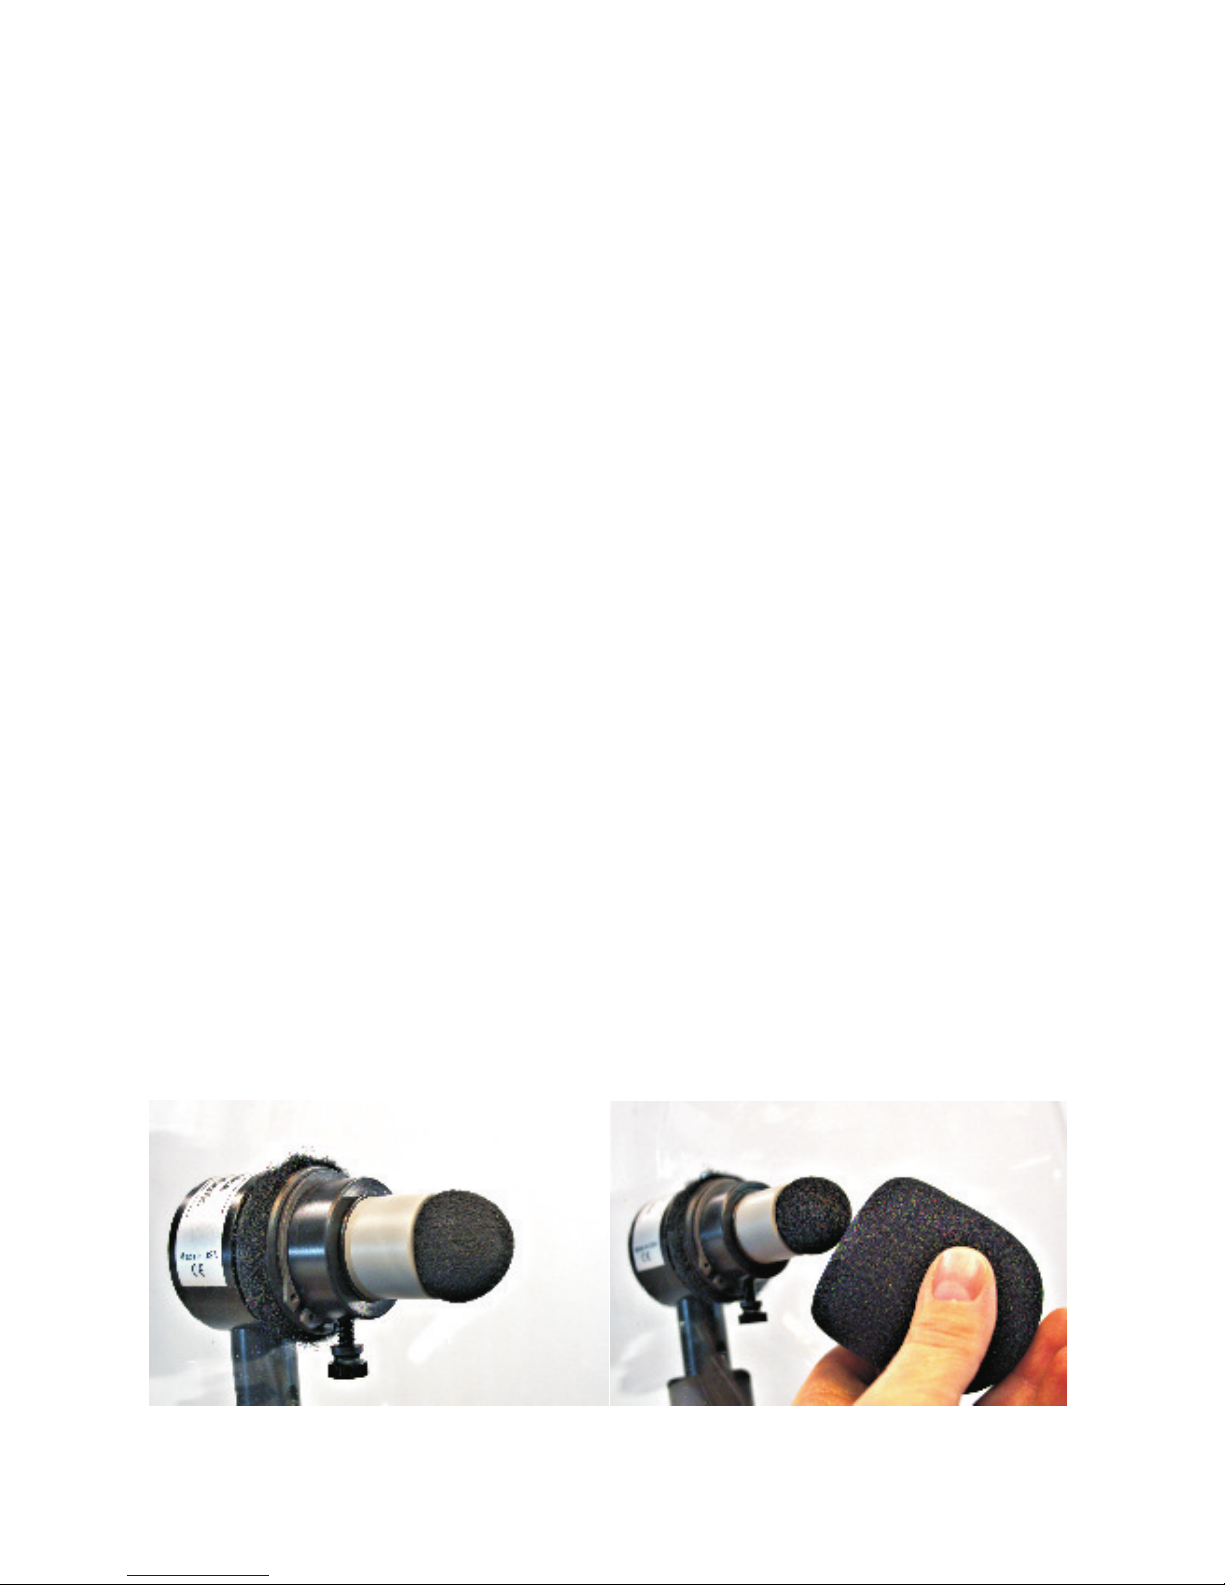
Installing a Wildtronics Micro Mic PIP Microphone:
Installing a Micro Mic PIP microphone is very straight forward and easy.
Attach your cable and slide the cable and microphone in from the front of
the dish until the o-ring contacts the Hub. The microphone is now at the
focal point. Tighten the Thumbscrew to retain the microphone. Next, slip
the Windscreen over the hub and carefully pluck the sides to fit the
Windscreen around the Hairy Ring. The Hairy Ring provides firm
retention of the Windscreen. That is it, your microphone is ready to use.
Install Micro Mic PIP so that the
O-ring contacts the Hub, and
tighten the Thumbscrew.
Install the Windscreen over the
Micro Mic PIP, and around the
Hairy Ring.
 Loading...