

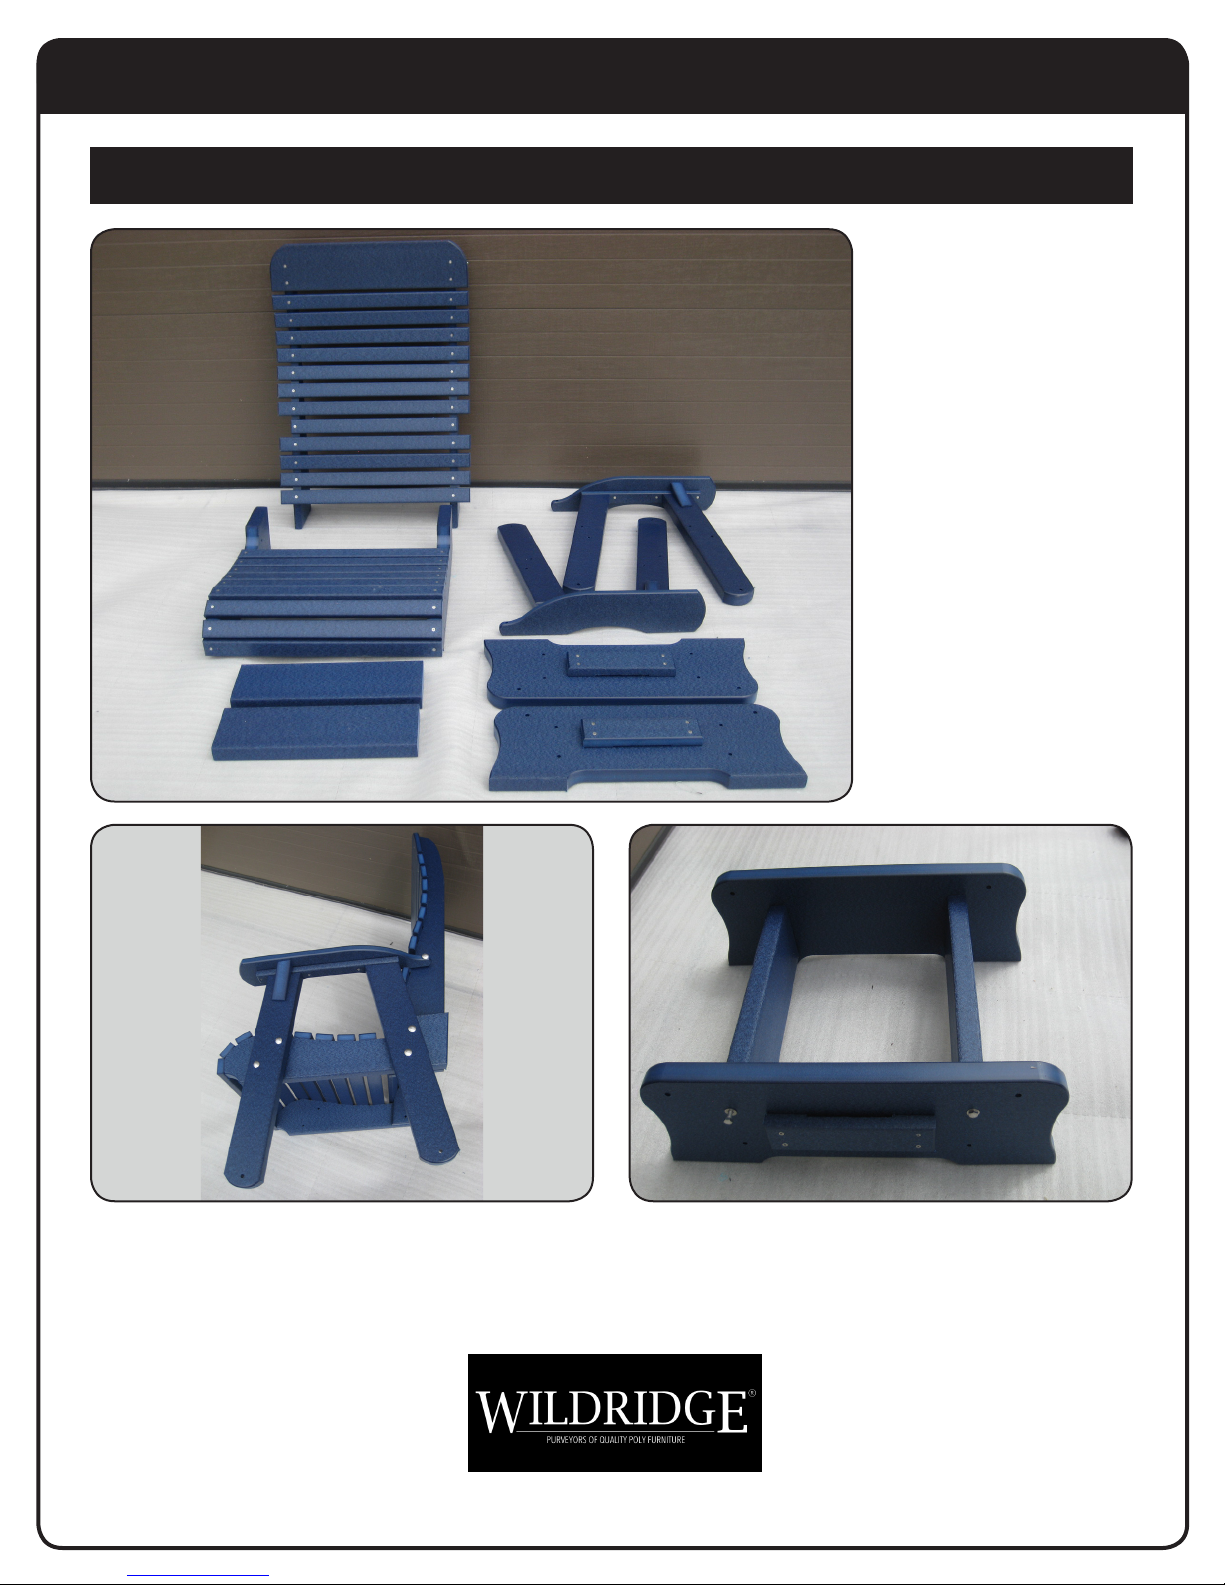
Assembly Instructions
LCC-406 Single Signature Glider
Required Tools:
- Hammer
- Cordless Drill
- 1/2” & 9/16 Wrench or
Socket
B
Hardware:
- (4) 5/16” x 5” bolts
- (8) 3/8” x 2 1/2” Machine
Bolts
- (4) 5/16” x 3 1/2” bolts
- (8) 3/8” Lock nuts
C
A
- (2) 5/16” x 3” Bolts
- (16) 3/8” Washers
- (10) 5/16” Flange Nuts
- (4) Glider Brackets
- (8) 5/16” x 3” Lag bolts
- (8) 5/16” Washers
E
Step 1
Using (2) 5/16 x 5 and (2) 5/6 x 3 1/2 bolts and (1)
5/16x3, (5) 5/16 Flange Nuts attach leg (C) to chair
back (B) and seat (A) repeat on other side.
D
Step 2
Assemble the base as shown with (8) 5/16 x 3 Lag Bolts
and (8) 5/16 washers through holes provided in base
(D) and into pilot holes in cross members (E) Note: turn
block out)
www.wildridge.com
330-893-4212
© 2017
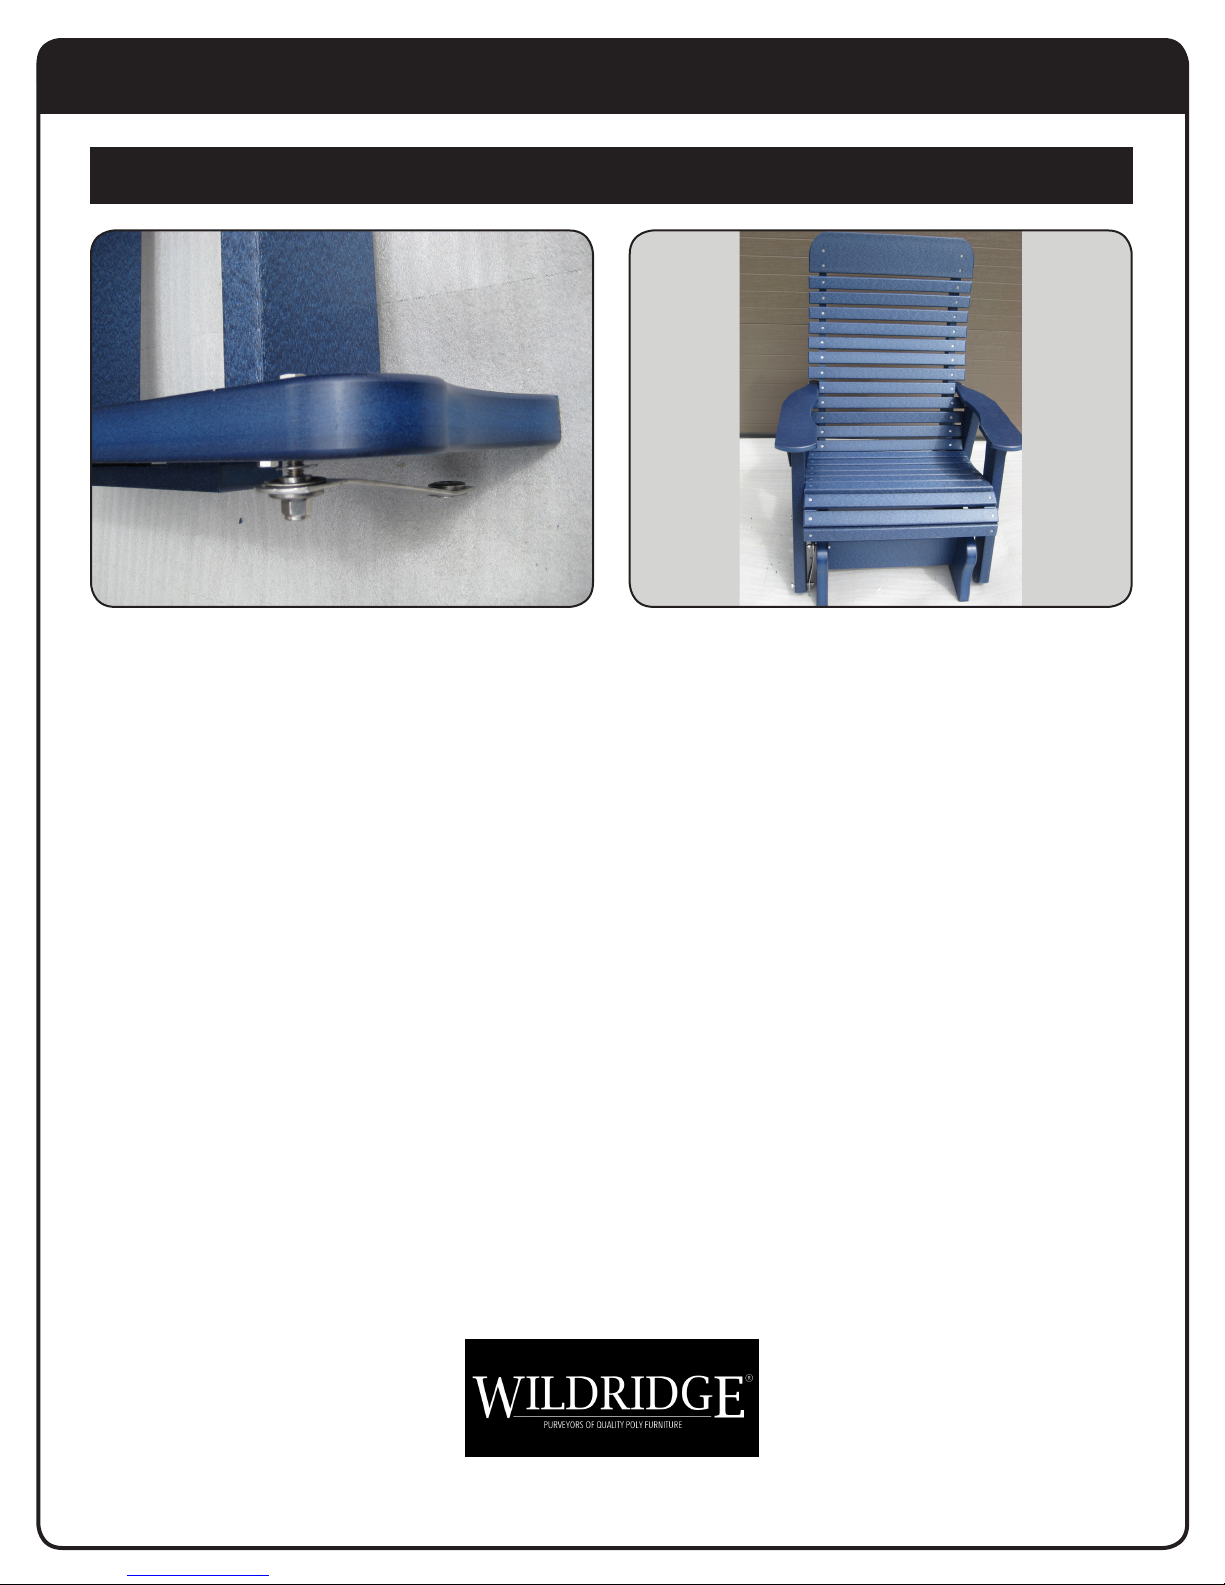
Assembly Instructions
LCC-406 Single Signature Glider
Step 3
Using (4) 3/8 x 2 1/2 Bolts and (4) 3/8 Locknuts and (8)
3/8 washers attach the bearing glider hanger to base.
Slide washer on bolt then through 3/8 hole provided, in
base add another washer then hang glider bracket on
bolt. Hang glider bracket with curve away from base at
bottom then fasten 3/8 locknut.
Step 4
Using (4) 3/8 x 2 1/2 Bolts and (4) 3/8 Locknuts and (8)
3/8 Washers attach the chair legs to the glider brackets.
Complete.
www.wildridge.com
330-893-4212
© 2017
 Loading...