


Metal Wall Sculpture
Assembly Instructions
Page 1

1
Quantity
A
Quantity
B
.
Quantity
Metal Wall Sculpture
Parts List
Please check packaging for all parts and hardware before discarding. Unpack and lay parts on
clean, padded surface like carpet or a blanket. Check that you have all parts indicated. Call
customer service if any hardware is missing. Before beginning assembly, carefully study the
diagrams below and sort your hardware according to the pictures. Using the incorrect hardware will
cause damage.
of 1
Metal Wall Sculpture
of 4
Screw Dia 1/4”x1-1/8”L
of 4
Plastic Anchor
Care and Cleaning Instructions:
Before using, wipe with a clean, dry cloth.
Avoid rubbing or scratching the surface with rough
or abrasive objects.
Assembly Tool Required No.2 Phillips
Screwdriver (Not Included)
Tool List: Electric Drill, 3/16: bit, Tape Measure, and Pencil.

Metal Wall Sculpture
Assembly Instructions
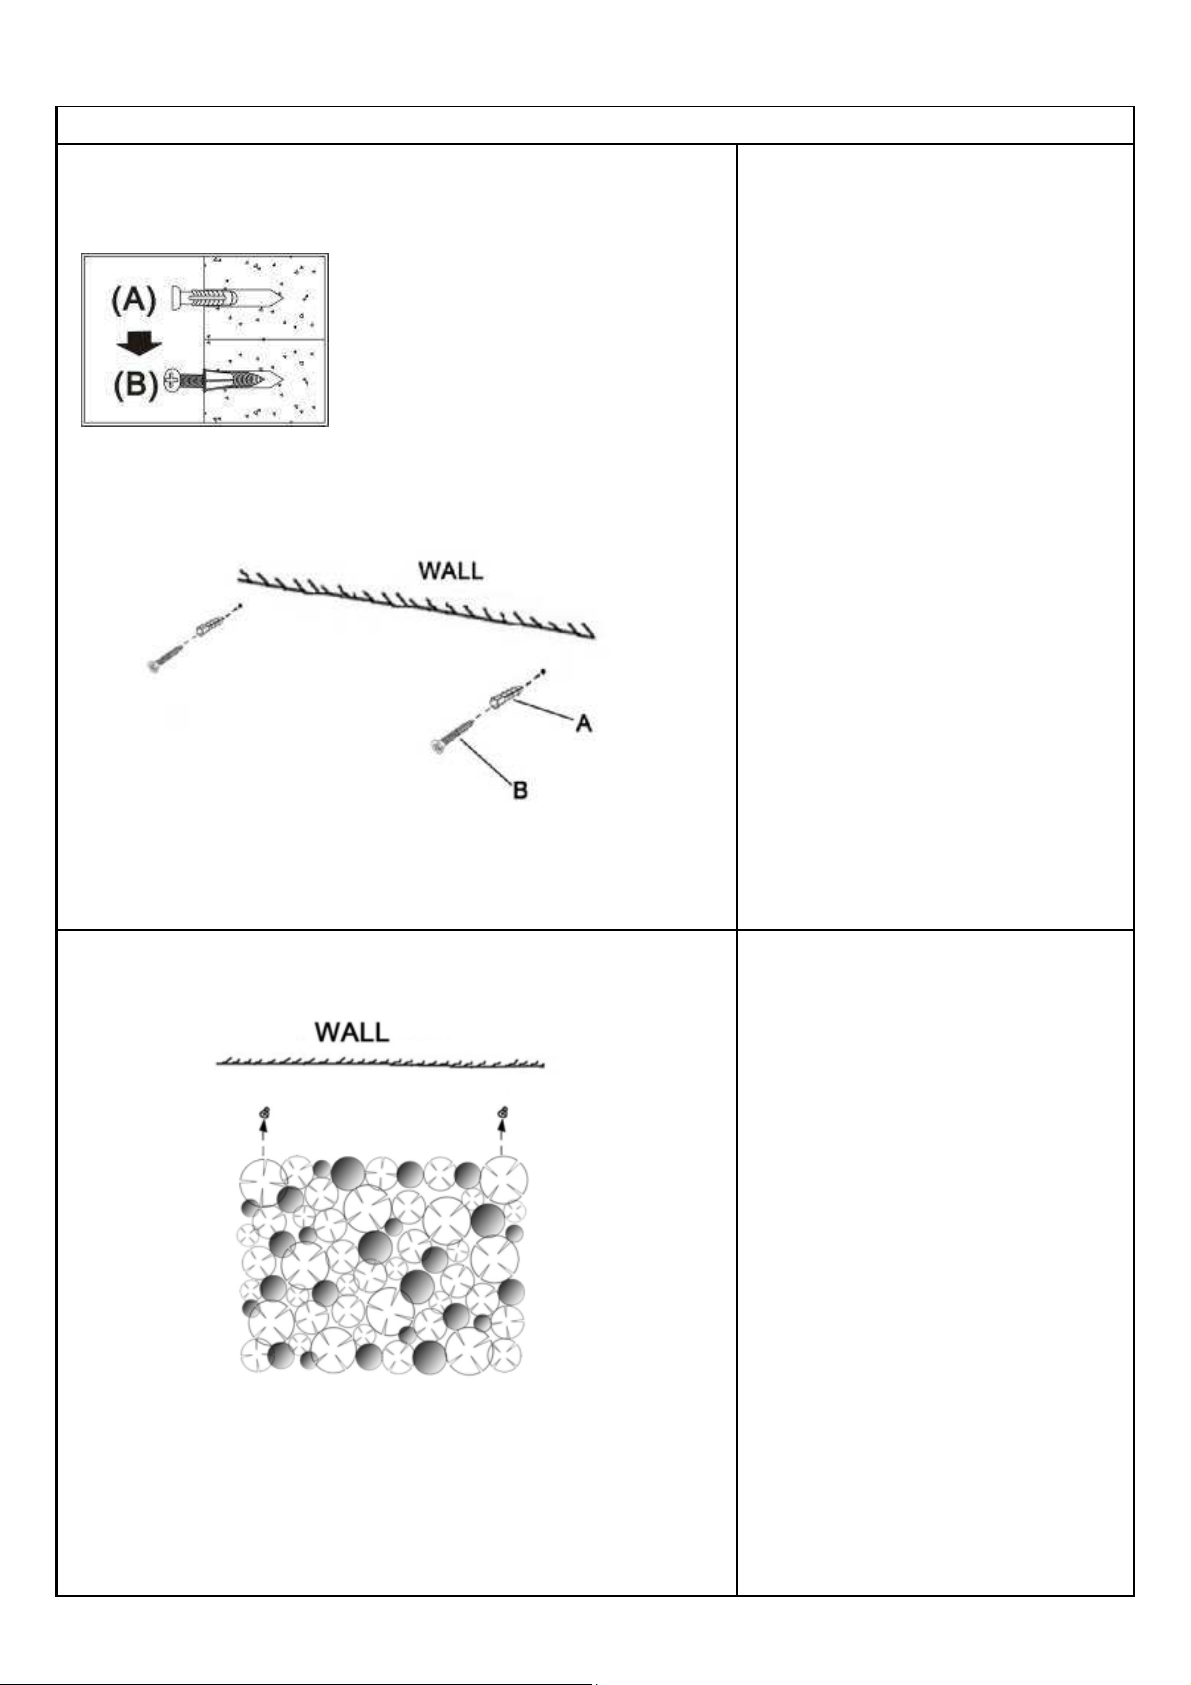
Note: Drilled hole or plastic anchor not required when
mounting to stud, use screw only. We do not supply hardware
for mounting on concrete walls.
The measurements on the wall
must match with the
measurements on back of the
unit
Find a desired location and mark 2
locations for screws on wall.
Drill two 3/16" holes.
Insert plastic Anchors (A) into the holes
on wall. Tap Anchors with Hammer (not
included) as needed.
Using the Phillips screwdriver (not
included), install Screws (B) into the
anchors (A) and any remaining holes.
Turn the Screws (B) until there is a gap
of approximately 1/8" between the head
of the screw and the wall.
Figure 1
Hang the wall sculpture onto the Screws
(B) and verify the wall sculpture is
resting securely.
Now your Metal Wall Sculpture is ready
to use.
Figure 2
Page3
If you prefer to hang this product in horizontal configuration, please follow below instructions.
Note: Drilled hole or plastic anchor not required when
mounting to stud, use screw only. We do not supply hardware
for mounting on concrete walls.
The measurements on the
wall must match with the
measurements on back of
the unit
Find a desired location and mark 2
locations for screws on wall.
Drill two 3/16" holes.
Insert plastic Anchors (A) into the holes
on wall. Tap Anchors with Hammer (not
included) as needed.
Using the Phillips screwdriver (not
included), install Screws (B) into the
anchors (A) and any remaining holes.
Turn the Screws (B) until there is a gap
of approximately 1/8" between the head
of the screw and the wall.
Figure 3
Figure 4
Hang the wall sculpture onto the Screws
(B) and verify the wall sculpture is
resting securely.
Now your Metal Wall Sculpture is ready
to use.
Page 4

Customer Information
Name
Address
City/State/Zip Code
Phone Number
Please indicate where you purchased this item: Store/Website/Catalog
Please indicate color/size/style number:
Style No Parts Letter Parts Description Quantity Needed
Parts Replacement Form
Page 5
 Loading...