

Wildix WP600ACG, WP600A User Manual

3/16/2016
WP600A / WP600ACG – User Guide
This User Guide explains how to use WP600A / WP600ACG and Wildix Phone App.
HW version: 47.145.7.438
WMS Version: 3.84
App version: 2.7.92
Updated: May 2017
Release notes: http://www.wildix.com/changelog-wp600a/
WP 2016 Datasheet and technical notes: https://manuals.wildix.com/#phones
Phone overview
First time login
Change language
Network connection
Login to Wildix Phone application
Wildix Phone application
Status
BLF keys
Dialpad
Live search
Place a call
Call management
Blind / Attended call transfer
Blind / Attended call transfer via BLF keys
History
Chat
Join the WebRTC ubiconf videoconference
Voicemail
Settings
Personal and Account settings
Call features (Call forwarding, call waiting, mobility) for each call class
Advanced Settings and Phone upgrades
Appendix 1. Phone settings
Appendix 2. Supported Headsets and Speakerphone
Appendix 3. Integration with intercoms
Door open function
Display incoming video stream before answer
Appendix 4. Phone recovery
Phone overview
Video tutorials: https://manuals.wildix.com/video-tutorials/
LED Indicator: New Voicemail / Incoming call / Missed call (blinking blue)
Keypad instruction:
1/15
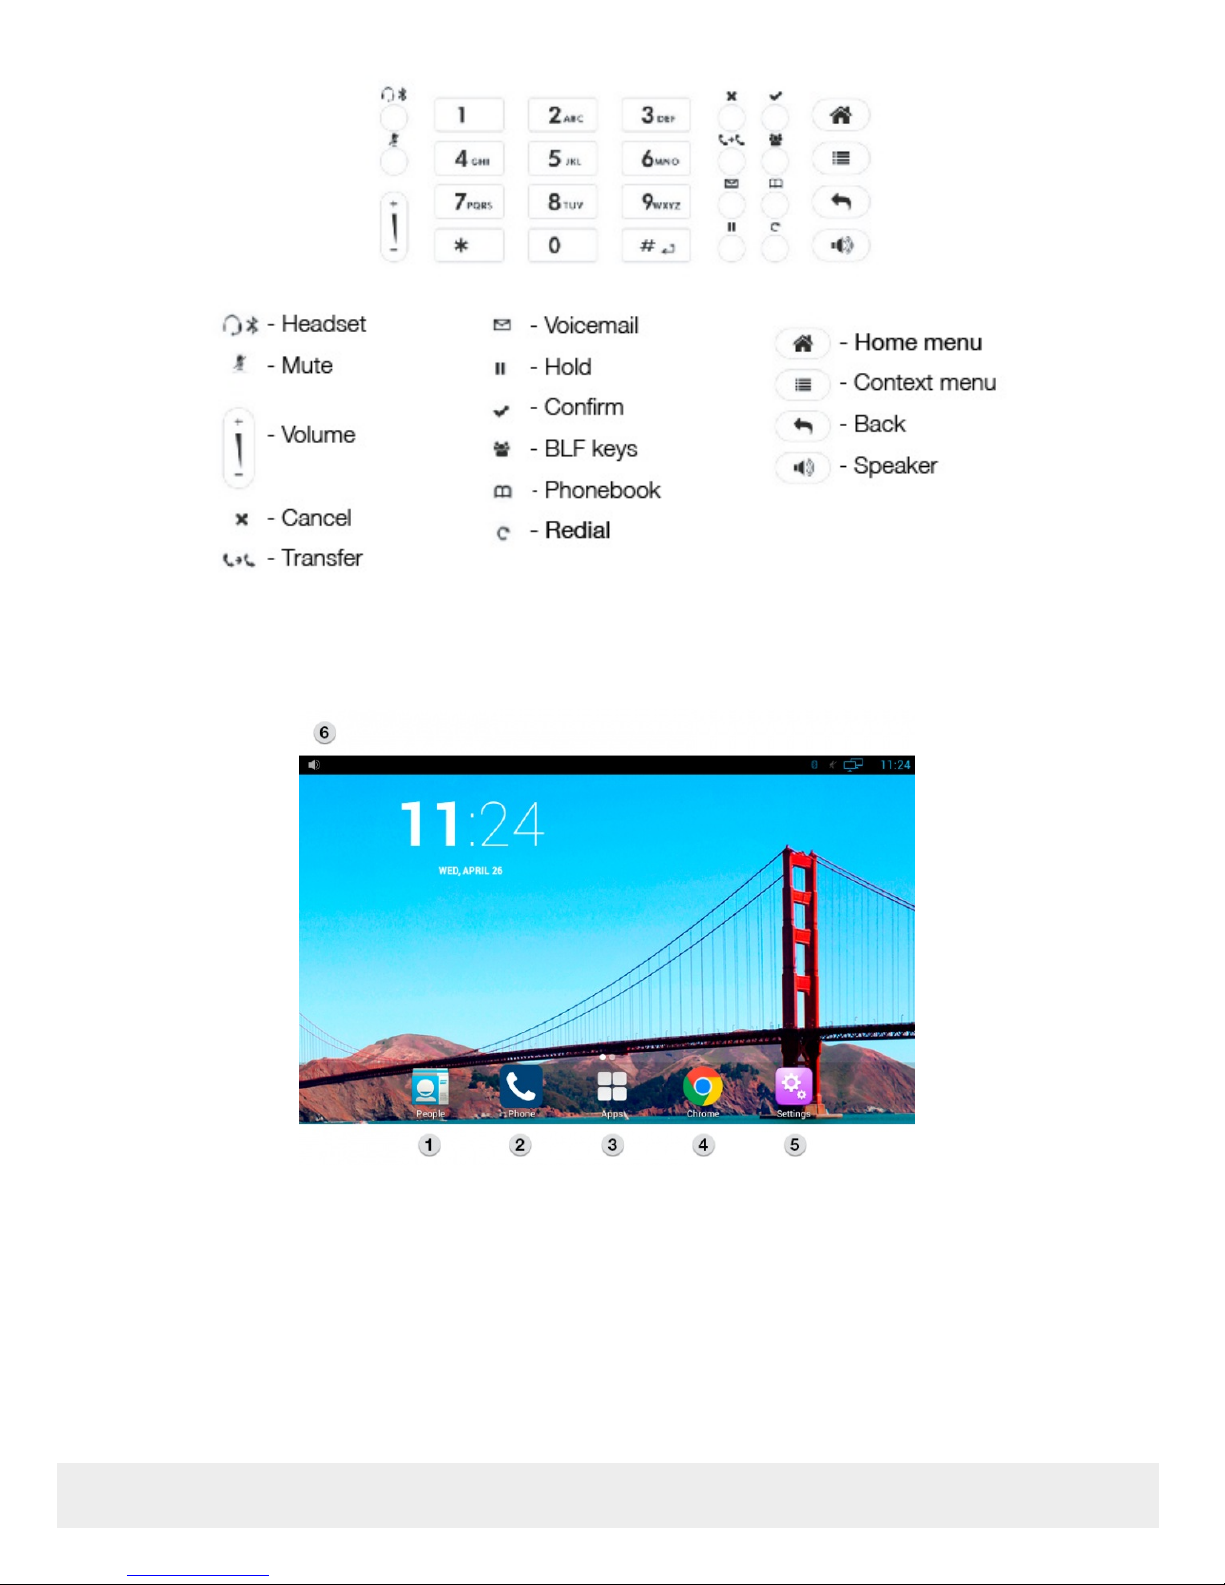
Home screen:
1 – People (personal phonebook)
2 – Wildix Phone app
3 – Applications folder
4 – Chrome browser (read the note on first time use of Chrome on WP600AXX )
5 – Phone settings
6 – Notification drawer and status bar
First time login
Change language
2/15
1. Go to Settings > Personal > Language & input
2. Tap “Language”
3. Select the language from the list
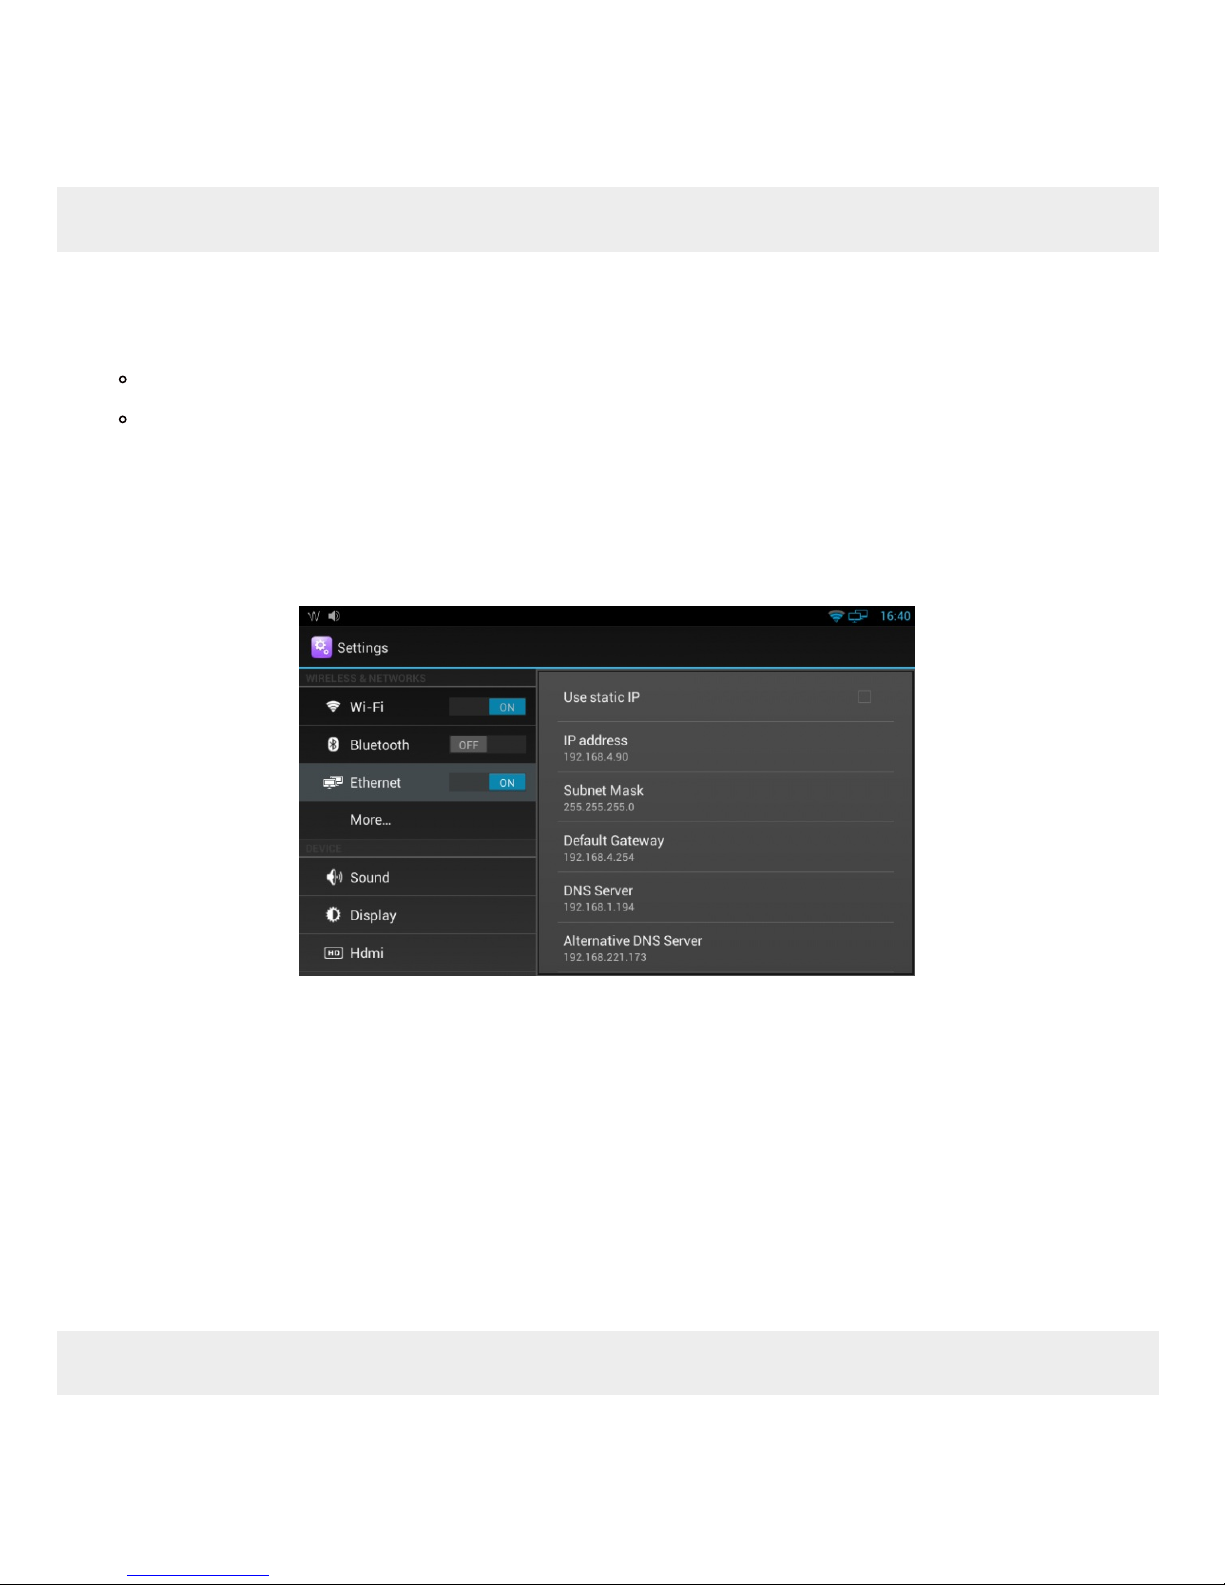
Network connection
1. Settings > Wireless & Networks
2. Select the Network:
Ethernet
Wi-Fi
Ethernet
1. Ethernet -> ON
2. IP address: the phone automatically receives the IP address from the DHCP Server
In case the phone has not received an IP address automatically, you can set up the Static IP:
1. Static IP: tick off
2. Enter the IP address manually
Wi-Fi
1. Wi-Fi -> ON
2. Select the Network from the list and enter the password (if necessary)
3. Tap “Connect”
Login to Wildix Phone application
After the phone has booted, the Phone app opens automatically.
3/15
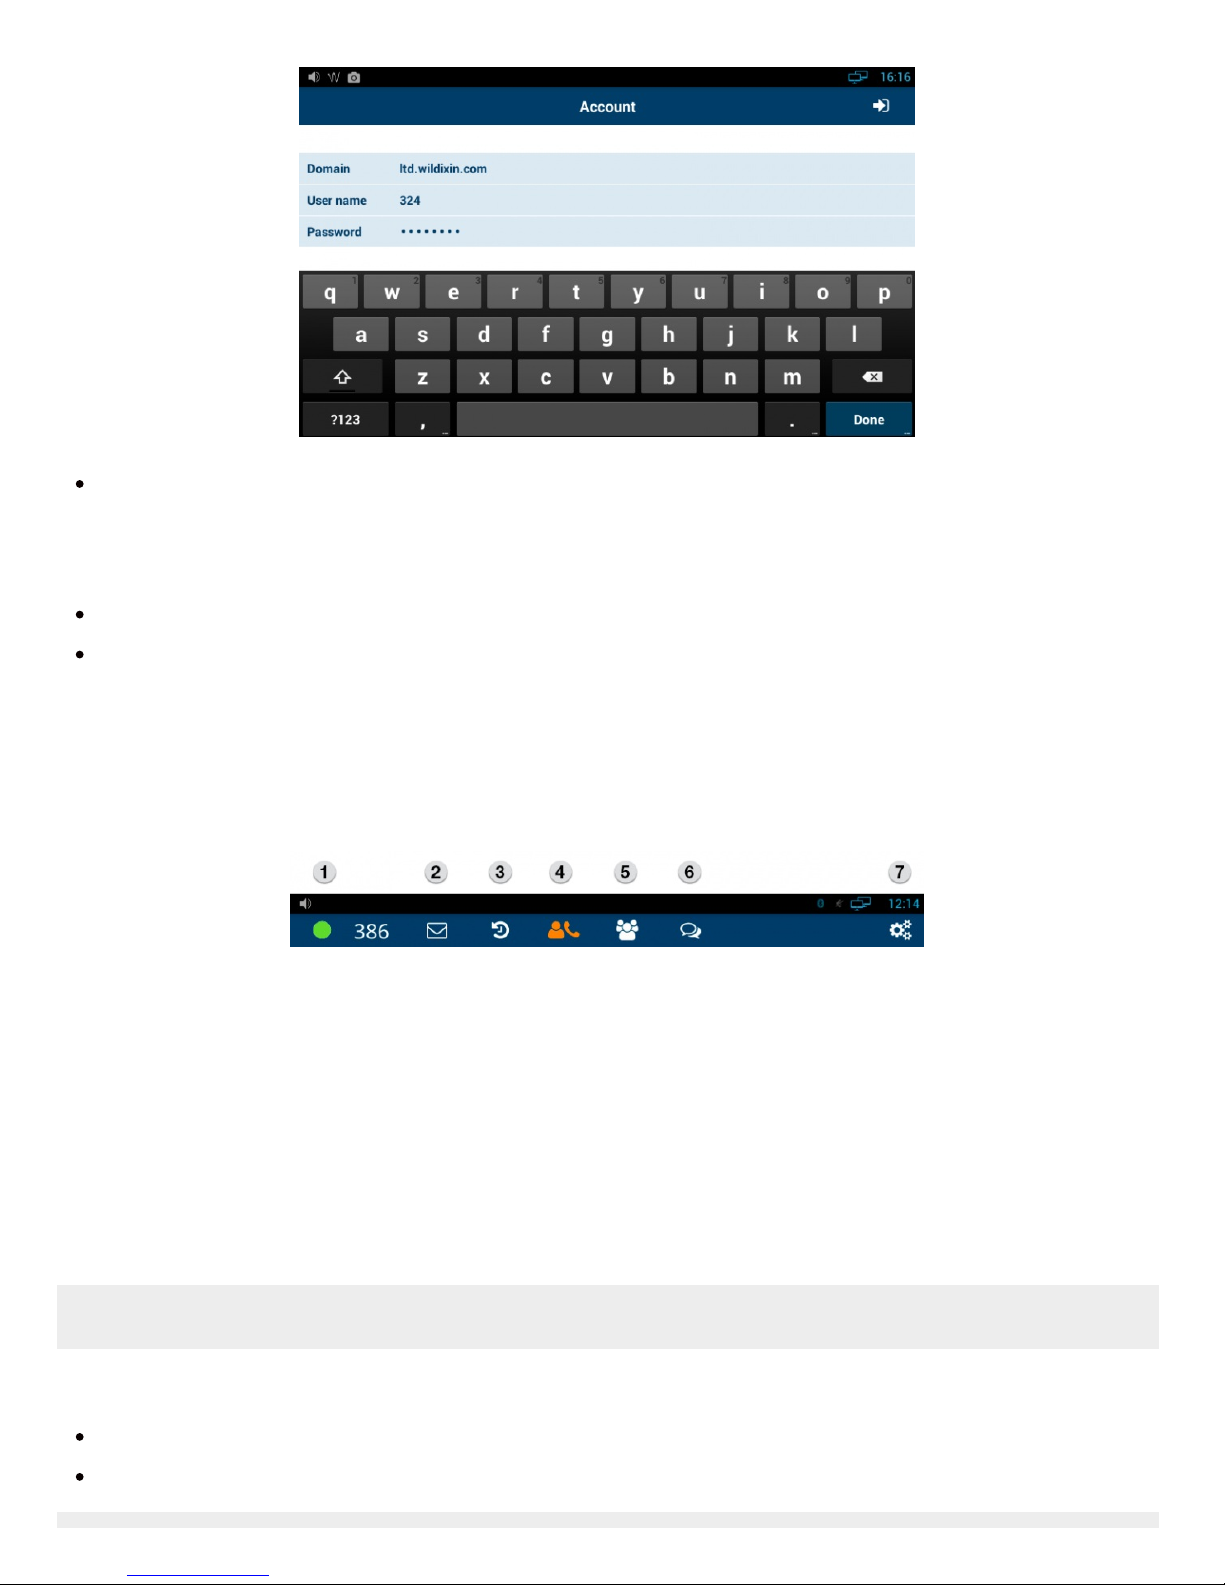
Domain: PBX IP address or domain name
You can enter the PBX name, “wildixin.com” domain is added automatically; if you leave this field blank,
“auto.wildixin.com” is automatically added;
User name: extension number, user name or email address of user
Password: user WEB password
Go to Settings -> Advanced -> Check for Updates. In case there is a new version available, follow the instructions
on the screen to update.
Wildix Phone application
1 – Status
2 – Voicemail
3 – History
4 – Dialpad
5 – BLF Keys
6 – Chat
7 – Settings
You can swipe between the Phone app menu tabs by swiping with the finger on the phone screen to the right / to the
left.
Status
Click user status to:
Set your status to DND / Away and set expiry time for this status (optional)
Set the status message (optional)
4/15
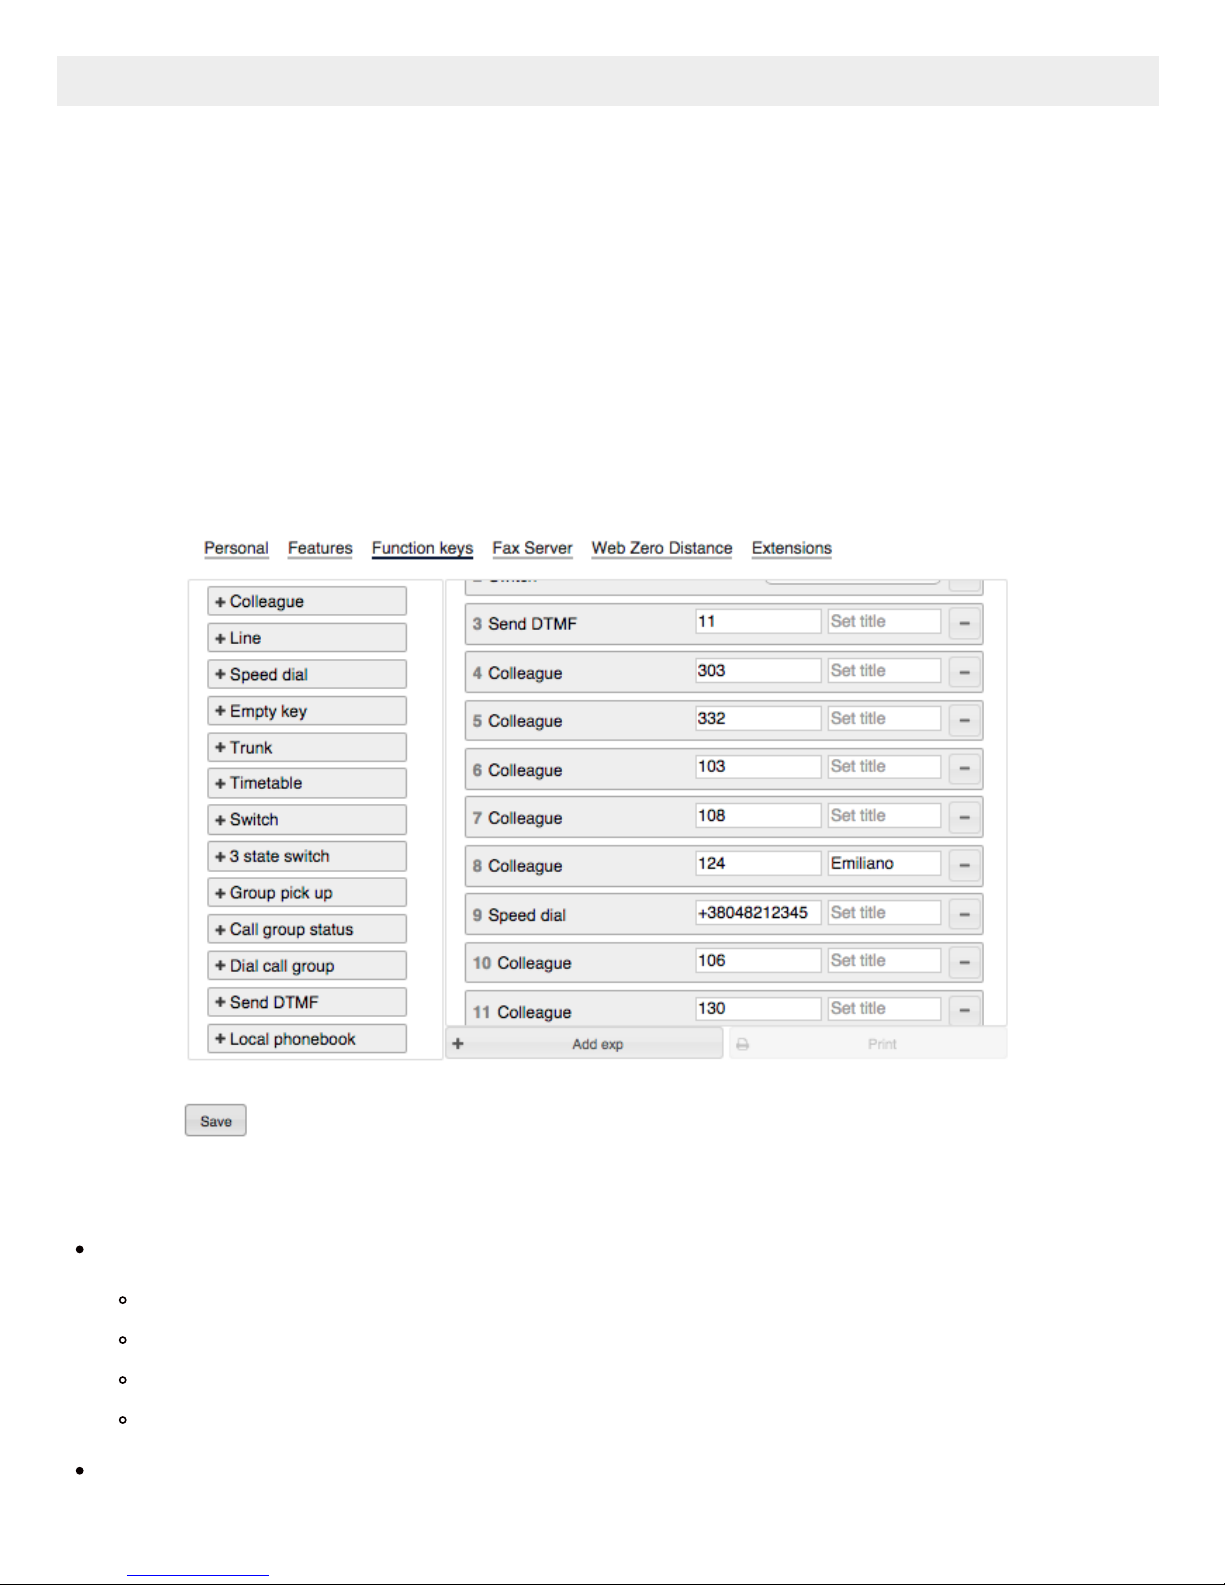
BLF keys
Monitoring and management of colleagues and features.
Max 120 elements can be added for monitoring (features and colleagues). Swipe on the screen to the left/to the right
to move between the pages of Feature keys.
You can customize the size of the BLF keys in this menu in Phone App > Settings > Advanced Settings “X keys per
page”. (More info: Advanced Settings)
Configure BLF keys
BLF keys must be configured in Collaboration > Settings > Feature keys / or in WMS (more info:
https://manuals.wildix.com/function-keys-blf-keys-wp/)
Example of BLF keys configuration in Collaboration:
Supported BLF Keys
Colleague
monitor status (ringing/in call; dnd/away)
call (tap the element and select “call”)
call pickup (tap the element while the status is “ringing” and select “pickup”)
transfer a call (tap the element and select “transfer” during a call)
Speed Dial
5/15
 Loading...