

Wild Goose Kamado User Manual

USER GUIDE
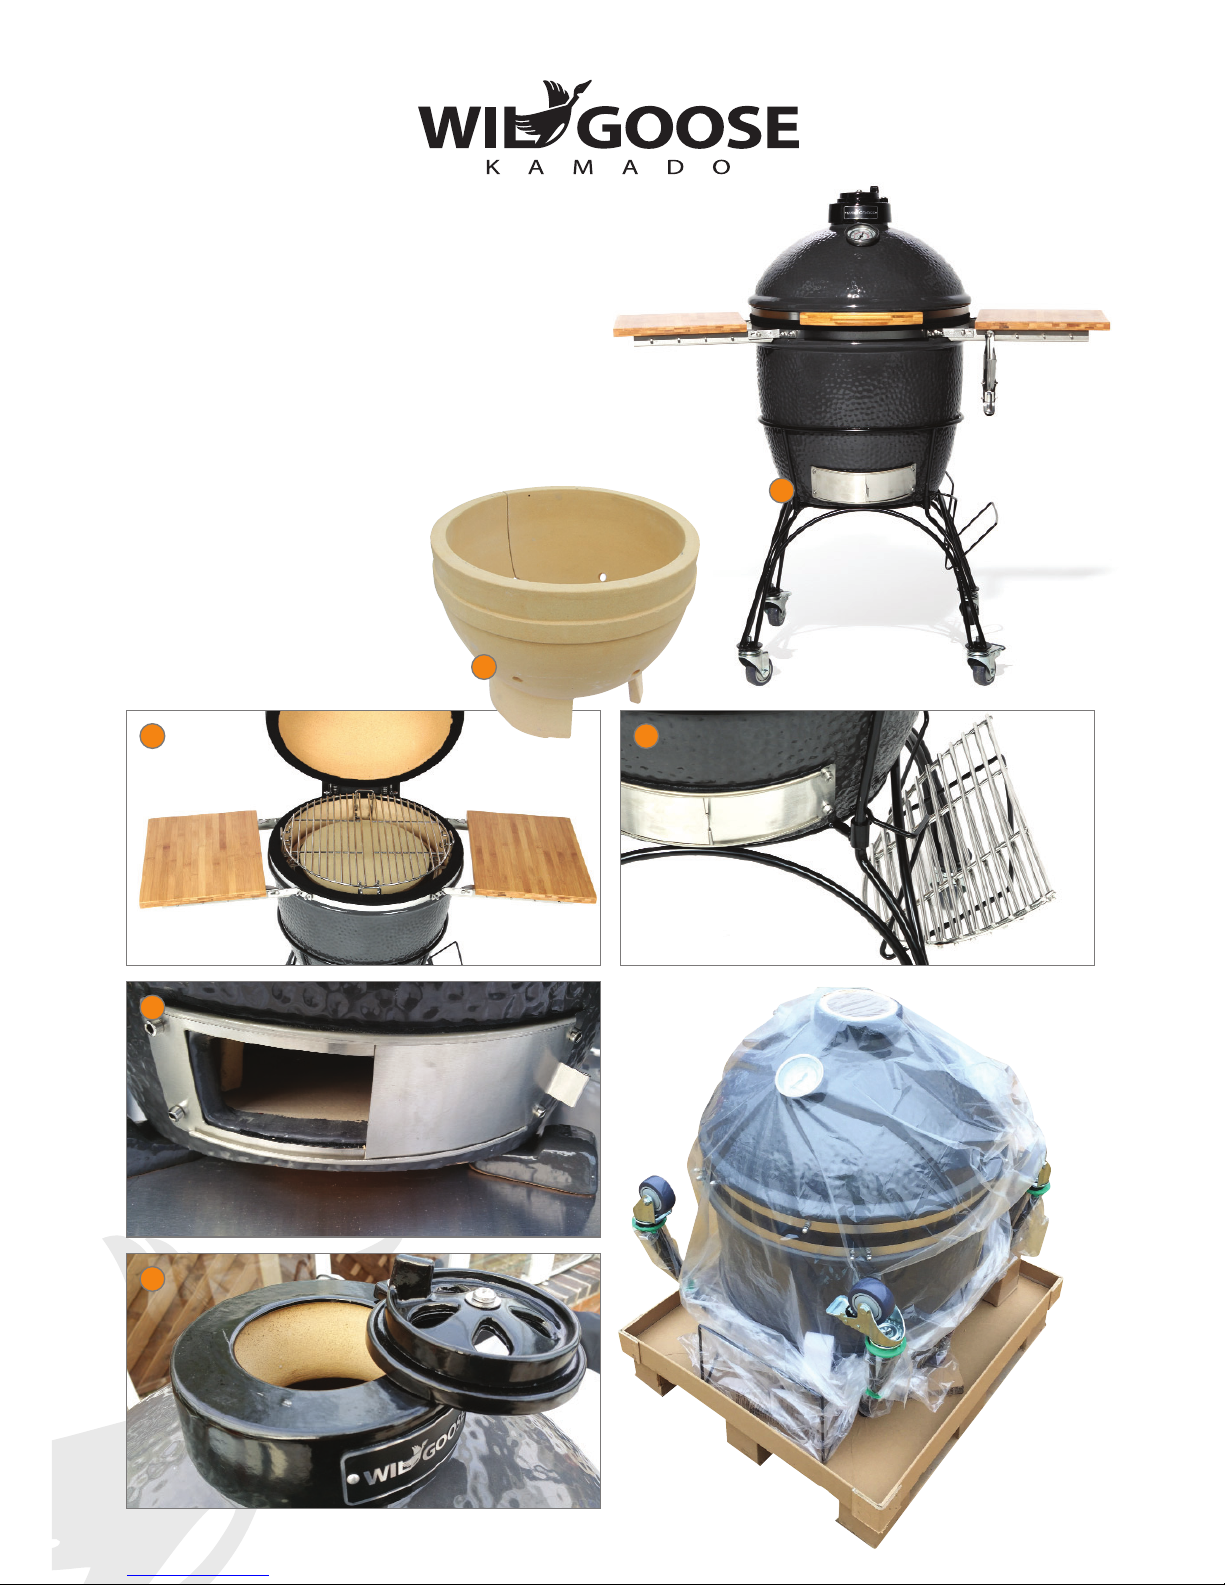
Included in your Wild Goose Kamado
1. Trolley cart (with cart model only)
2. Ceramic fire bowl
3. Wooden side shelves and hooks (with cart model only)
4. Grill holder shelf (with cart model only)
5. Bottom vent
6. Cast Iron top vent
2
1
2
3 4
5
6
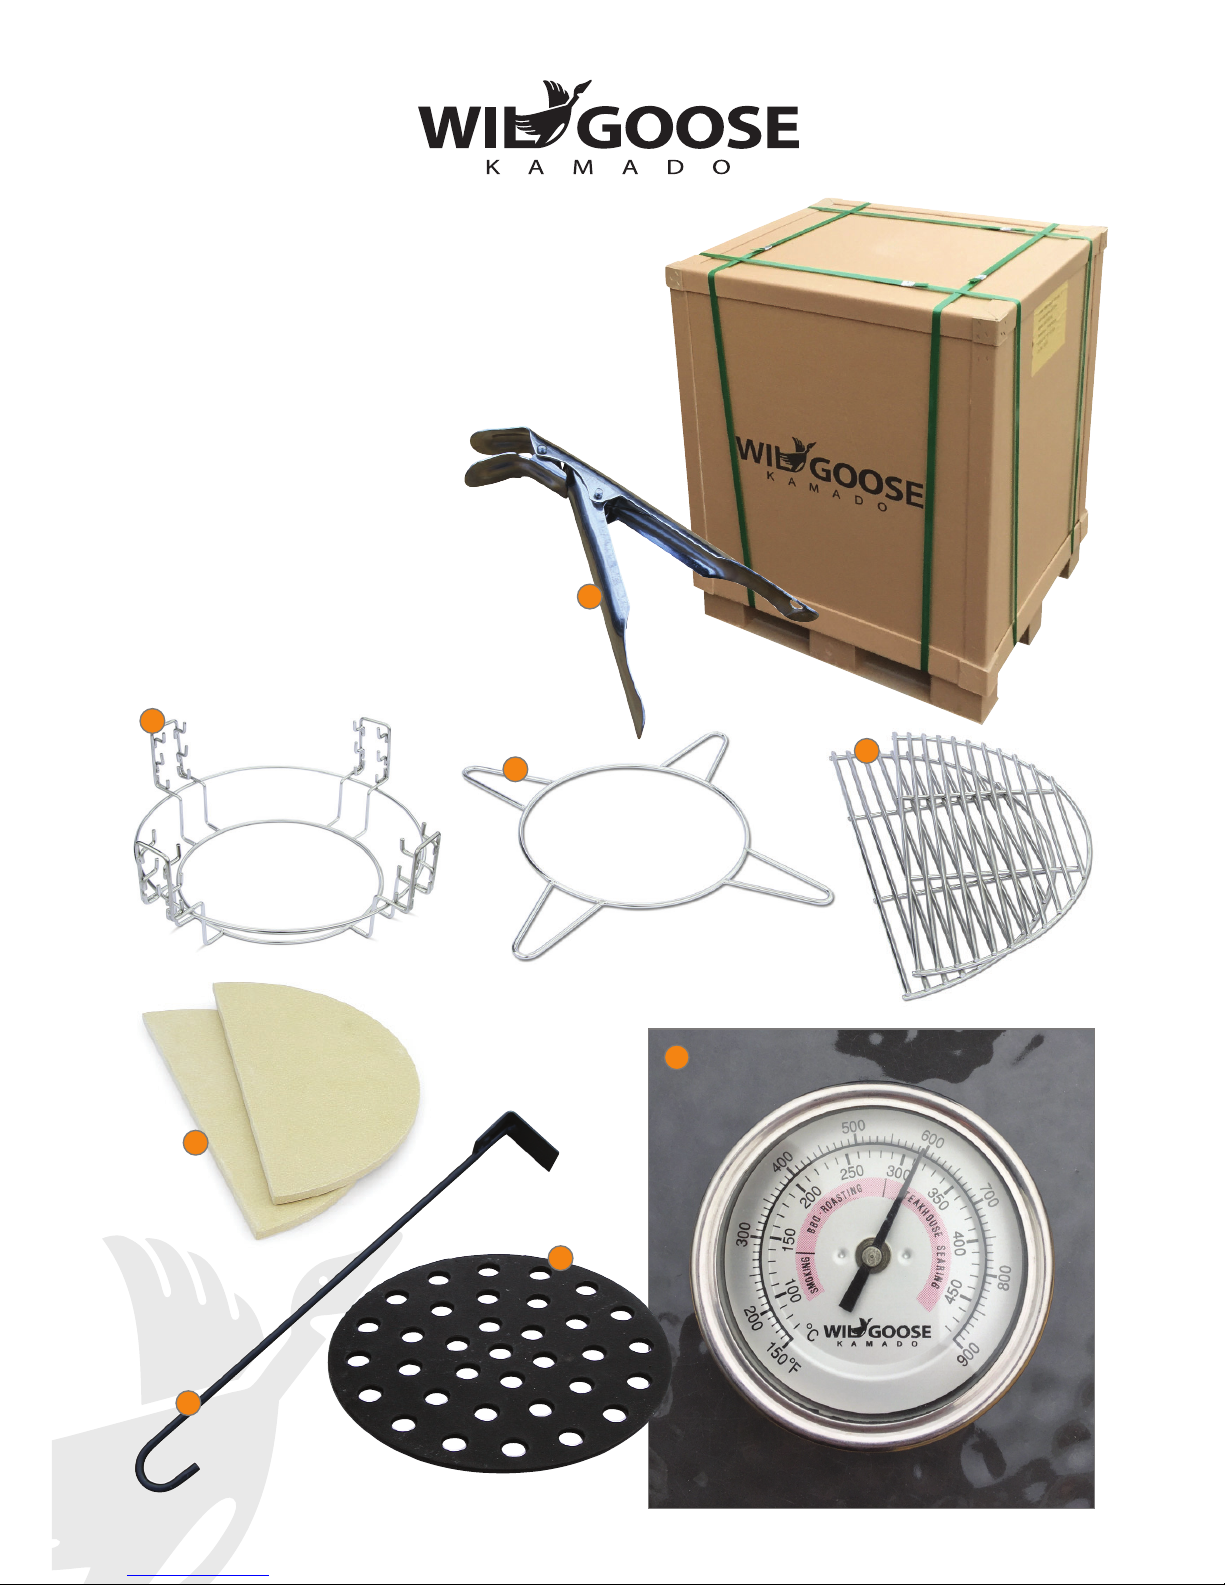
Included in your Wild Goose Kamado
1. Grill lifting grabber
2. Grill Rack
3. Heat defelector shelf
4. 2 x Half moon stainless steel grills
5. 2 x Half moon ceramic heat deflectors
6. Ash removal tool
7. Cast iron charcoal grate
8. Thermometer
3
2
3
8
1
6
7
5
4
A totally new concept in outdoor cooking
If you think that you have bought a barbeque,think again! Cooking on a kamado grill is whole new way of cooking
that is probably different to anything you’ve ever done before. It’s not complicated,just different to run-of-the-mill
barbequing and you should read this guide book carefully all the way through before you assemble and then cook
on your Wild goose Kamado.
You c a n u s e y o u r Wild G o o s e K a m a d o in t h e f o l l o w i n g d i f f e r e n t w a ys:
• Low and Slow.Slow Cook and smoke joints like shoulder of Pork and Beef brisket for a delicious flavor and a
delicate texture.
•
Normal Roast. For items like a whole chicken or sausages.
•
Fast Blast. For more aggressive grilling – for example when you want to cook a steak.
•
Warp Factor.Yo u ca n g e t y ou r W i ld go o se K am a do to 3 50 or m or e C e lc i us an d co o k a n a m az i ng Pi z za i n
under two minutes.
In this guide we will tell you how to do all this, and more,and how to generally use and look after your Wild
Goose Kamado.
4
Assembling your Wild Goose Kamado (With Cart Version)
No doubt you are keen to get started in assembling your Kamado,but please read through this whole section first
so that you know the overall procedure.
1. Remove the metal cart from the box and assemble the two parts together using the screws provided.
2. Place the cart on a firm level surface and apply the brakes by pressing the tabs down on the two locking casters.
3. Empty the Wild Goose Kamado (WGK) of all accessories including the ceramic fire bowl.
4. When lifting the WGK, it is important that you do not use the shelf tabs (which look like ideal handles for this –
but are NOT) or the hinge. Instead, the whole unit should be lifted from below for safety.You can open the
bottom vent and use this hole as a handle. THIS IS A TWO MAN JOB.
5. The bottom vent, and therefore the front of the WGK should be orientated in between the two brake wheels
when you lift the whole unit into the cart.
6. Lift the lid and return the ceramic fire bowl to the WGK.You should orientate this so that the gap at the bottom
lines up with the main bottom vent.The best way to lift the ceramic fire bowl is to put your arm down the
middle of the bowl and place your hand in the air vent recess for grip.
7. Place the cast iron charcoal grate in the bottom of the ceramic fire bowl.
8. Place the stainless steel rack on top of the ceramic fire ring, and add the two half moon grills.
9. Close the lid and place the cast iron top vent on top of the WGK, so that the logo faces forward.
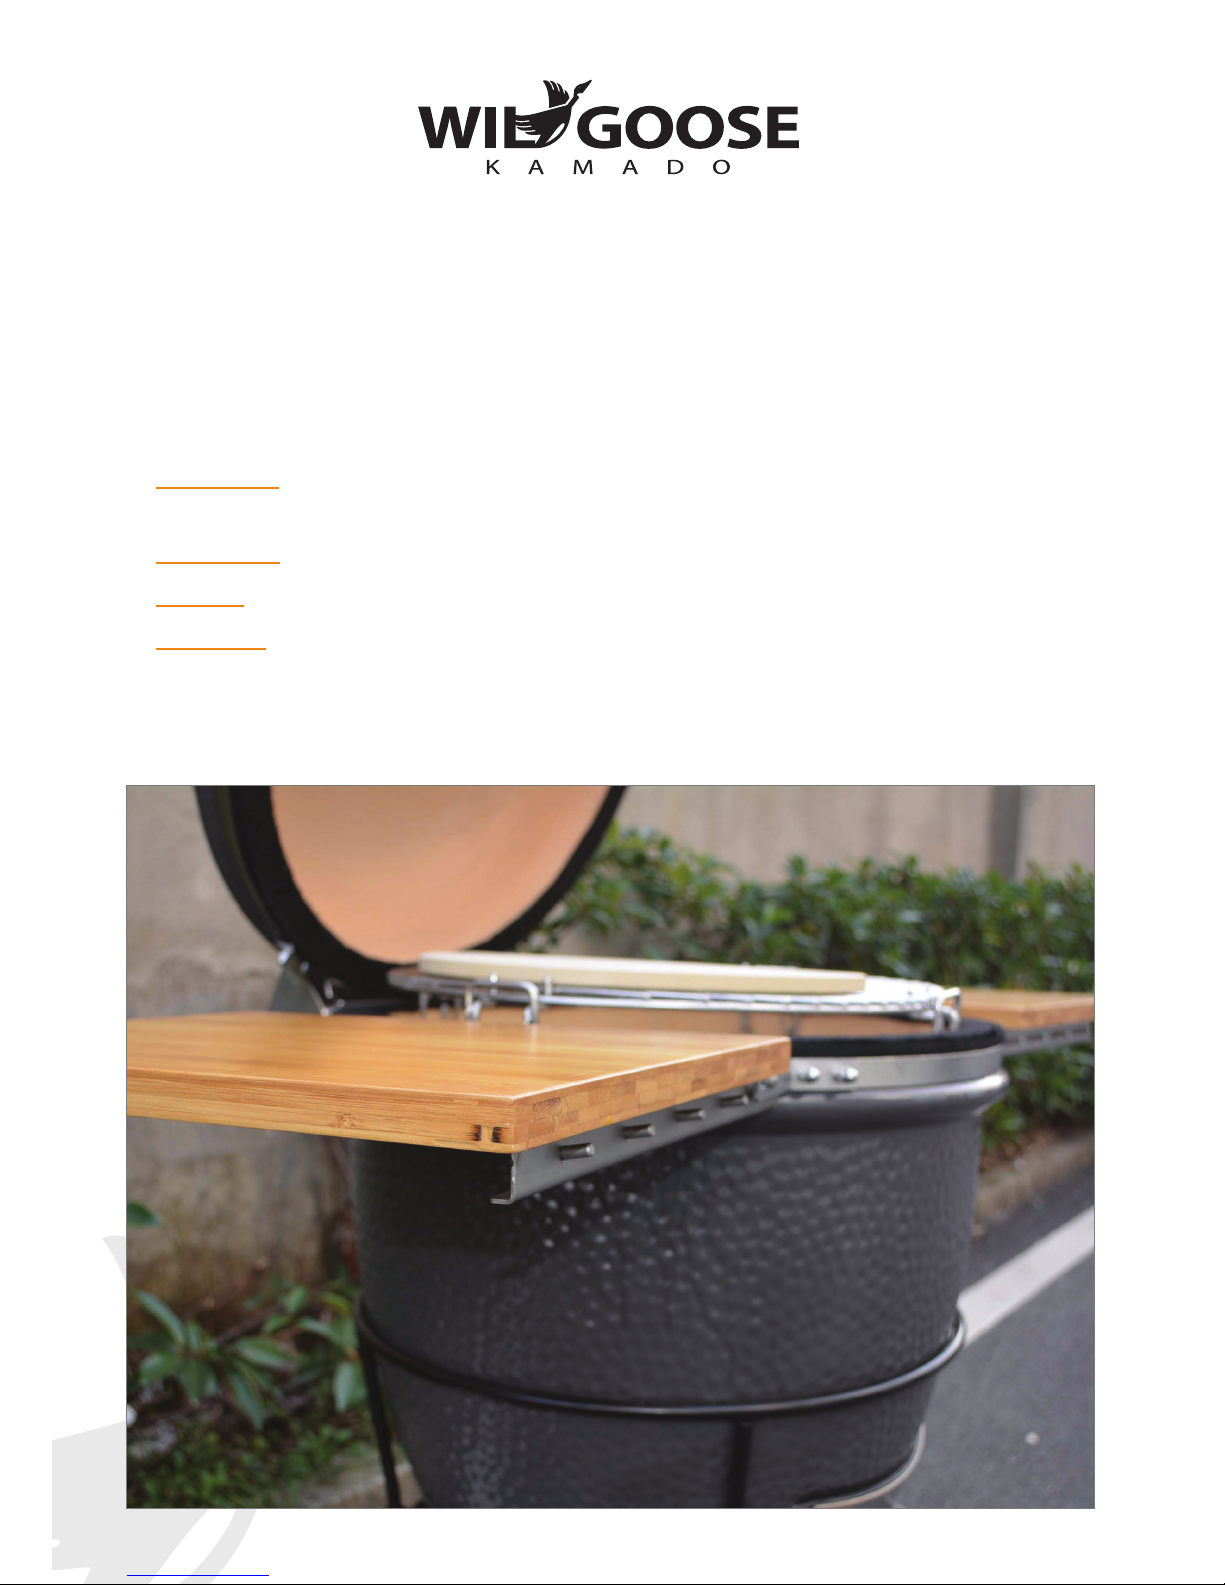
10. Attach the side shelves as shown in fig 5.These can be folded down when not in use.
Assembly of a free standing Wild Goose Kamado and placing into a wooden or steel trolley
1. Open the WGK lid and remove all the contents including the Ceramic fire bowl from within. The best way to
lift the ceramic fire bowl is to put your arm down the middle of the bowl and place your hand in the air vent
recess for grip.
2. You can place the WGK into a special Wooden or steel trolley stand table or you can place it onto any firm level
surface. Either way you need to place the base of the WGK onto the three ceramic feet. Arrange the feet as a
triangle on the surface ready for the WGK to sit on.
3. Gently lift the WGK into position to rest on the
ceramic feet. If you are using a wooden or steel
table, take extra care not to catch the bottom vent
on the wood or steel as you lower the WGK
through the hole.
THIS IS A TWO MAN JOB
4. Follow steps 6-9 in the previous page instructions.
5
 Loading...