

Page 1
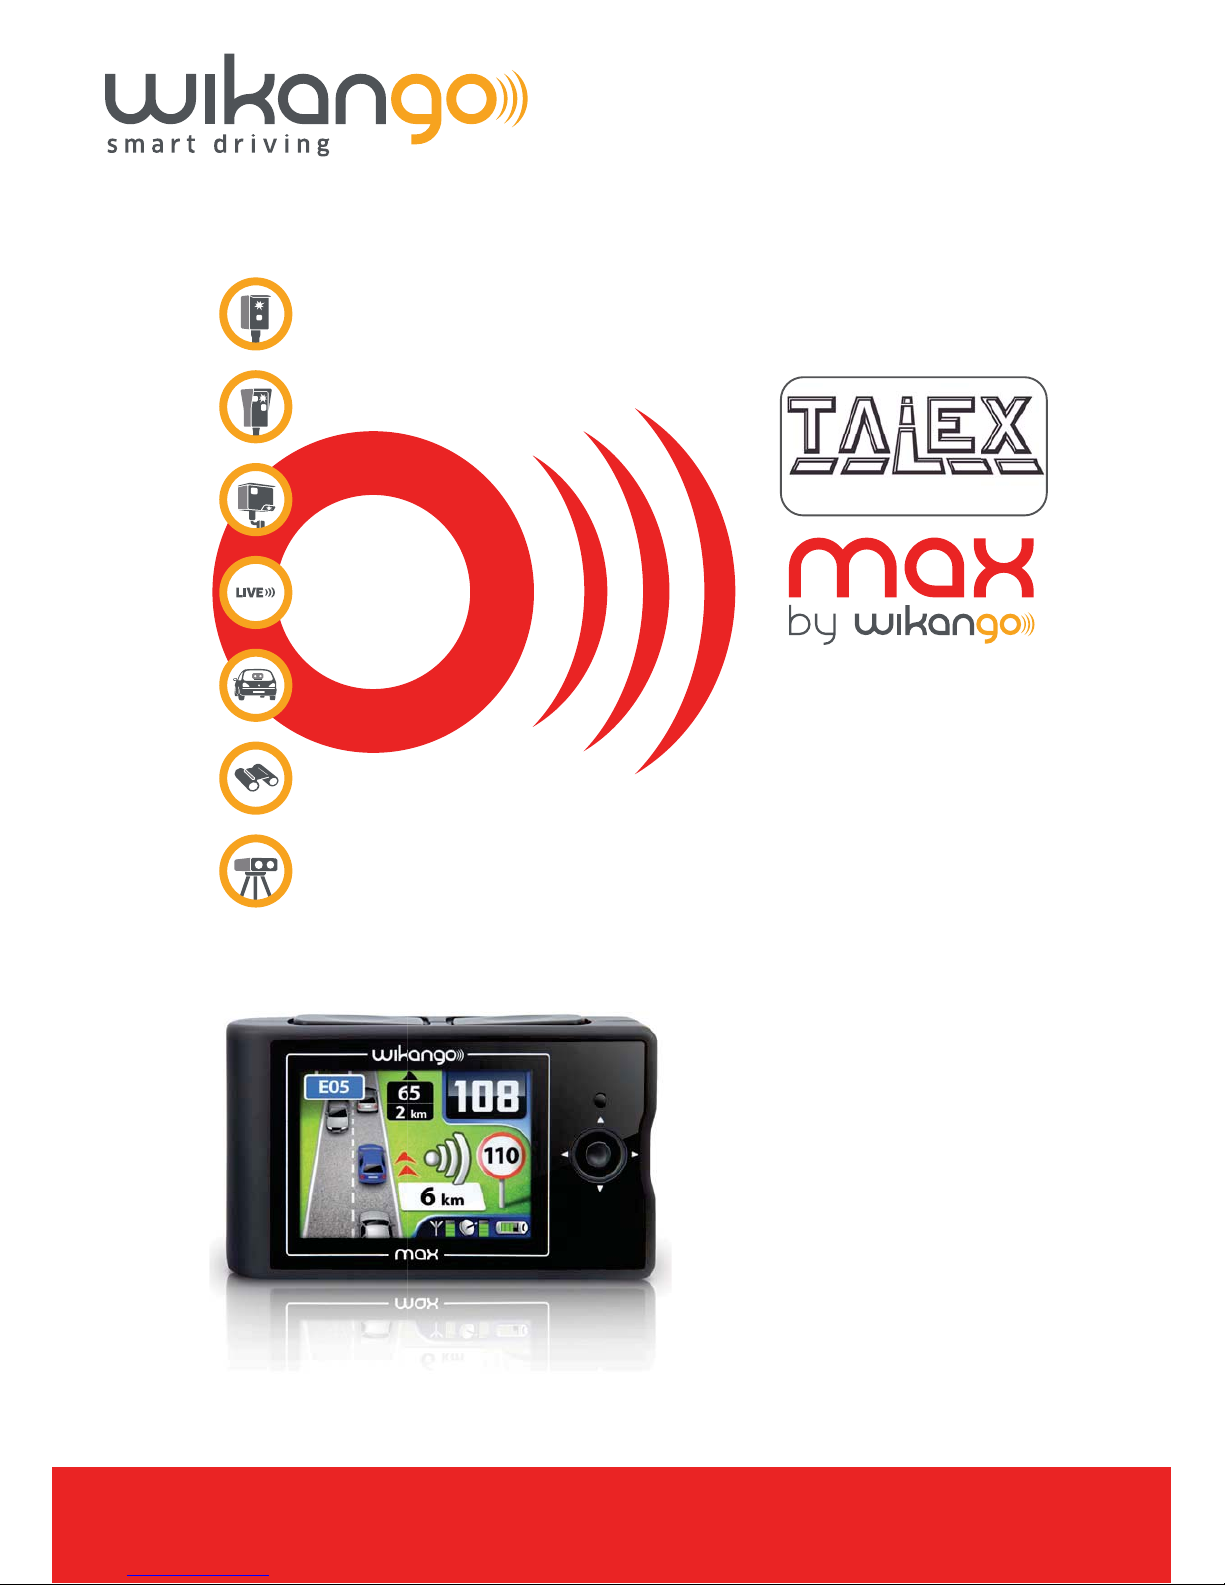
Owner’s Manual
UK DATABASE INSIDE
v1.0.0
Page 2

Contents
2
1. Box Contents & Installation
2. Overview
3. First Start & LIVE Services
4. Operation
3
5
6
8
5. General notices & Warnings
8
9
10 - 19
11
12 - 15
15 - 16
16
17
17 - 18
18
19
20 - 21
21 - 26
22
26 - 27
25
4.1: Basics
4.2: Start
4.3: Settings
4.4: Road mode / Zone mode
4.5: Warnings
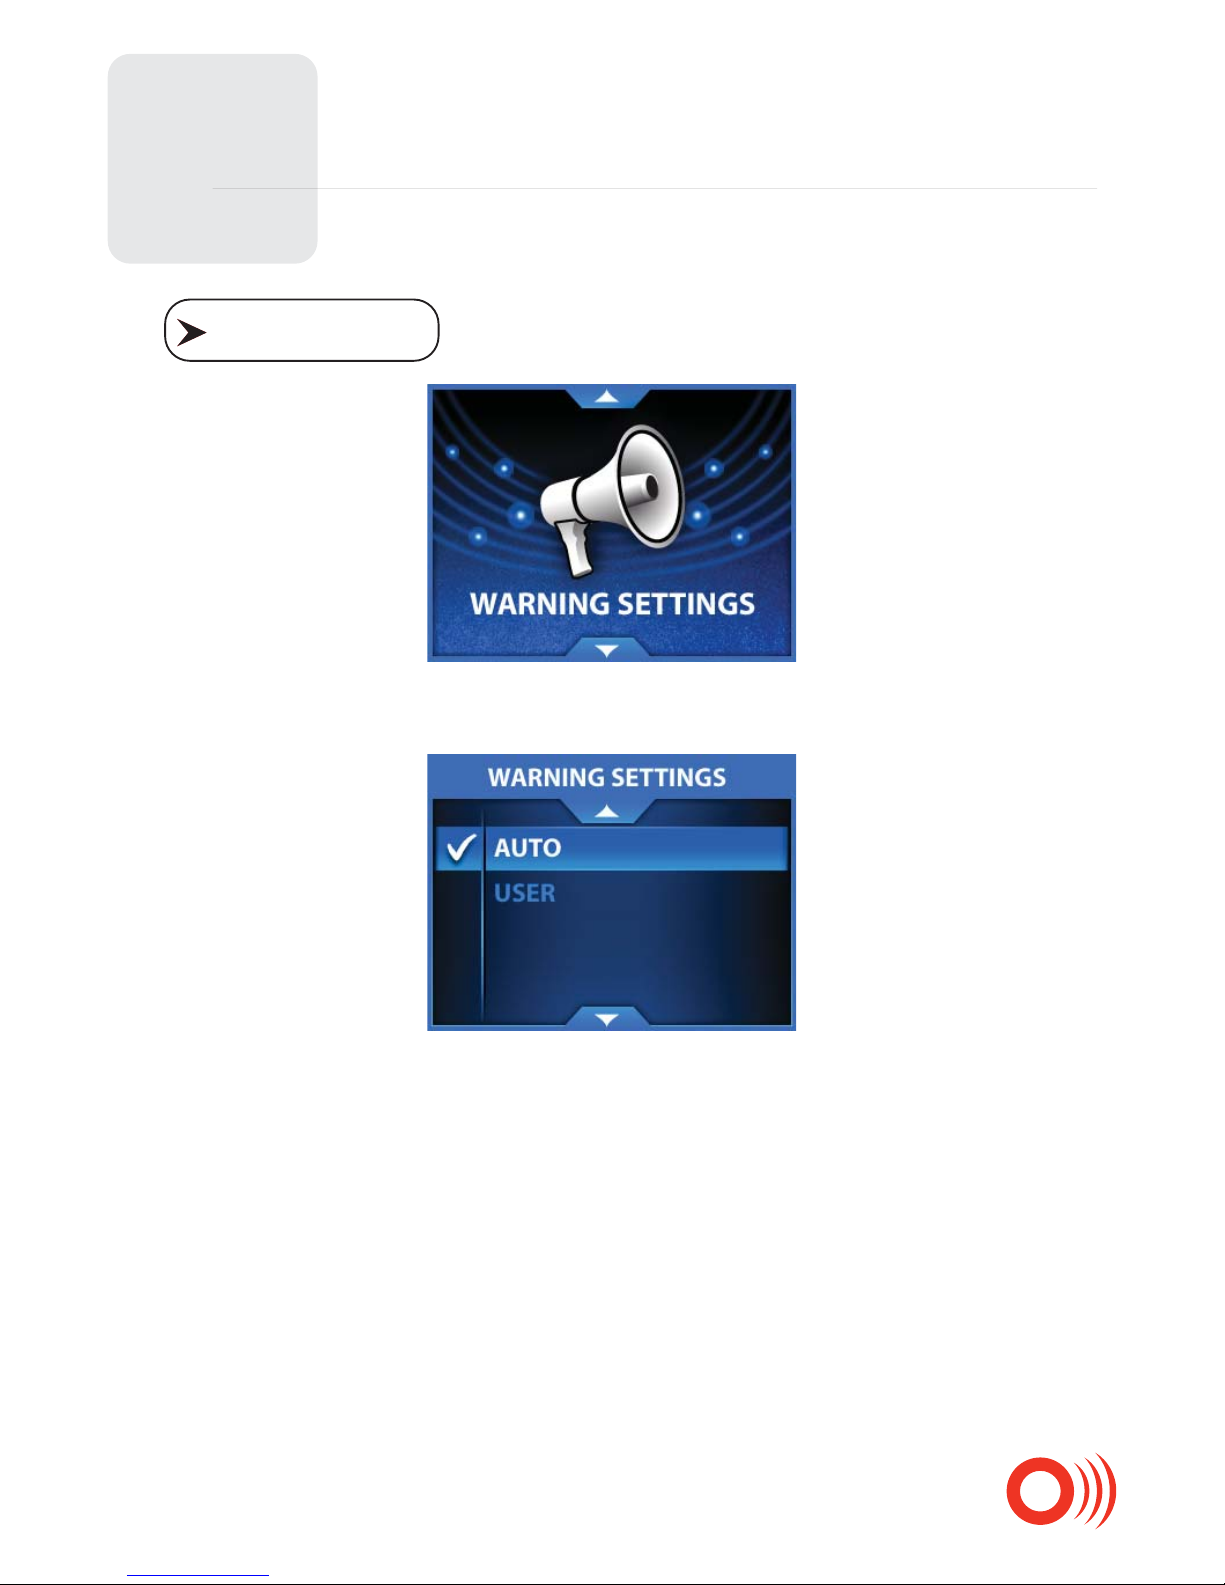
Warning settings
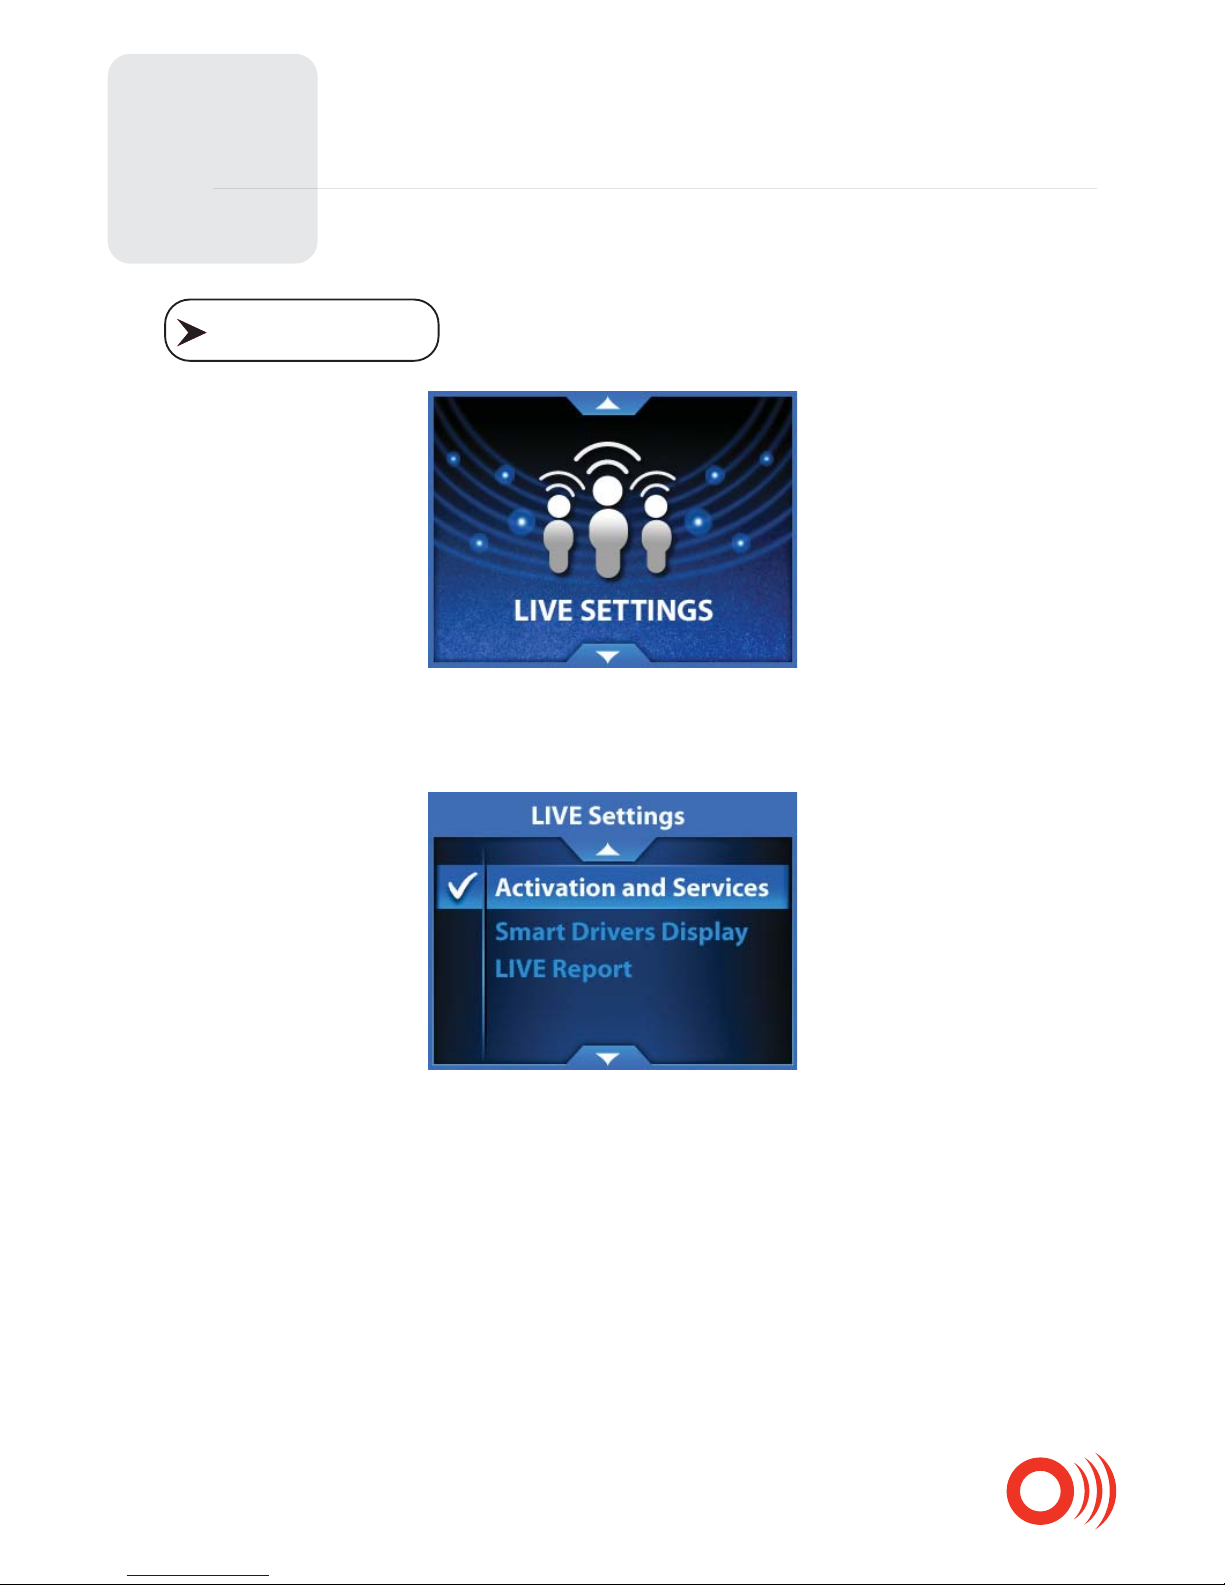
LIVE settings
Sound settings
21
23 - 24
Integrated database
LIVE warnings
Reporting a LIVE warning
Sound mute
Screen settings
Local settings
Battery settings
Speed limiters
Information
Page 3
1
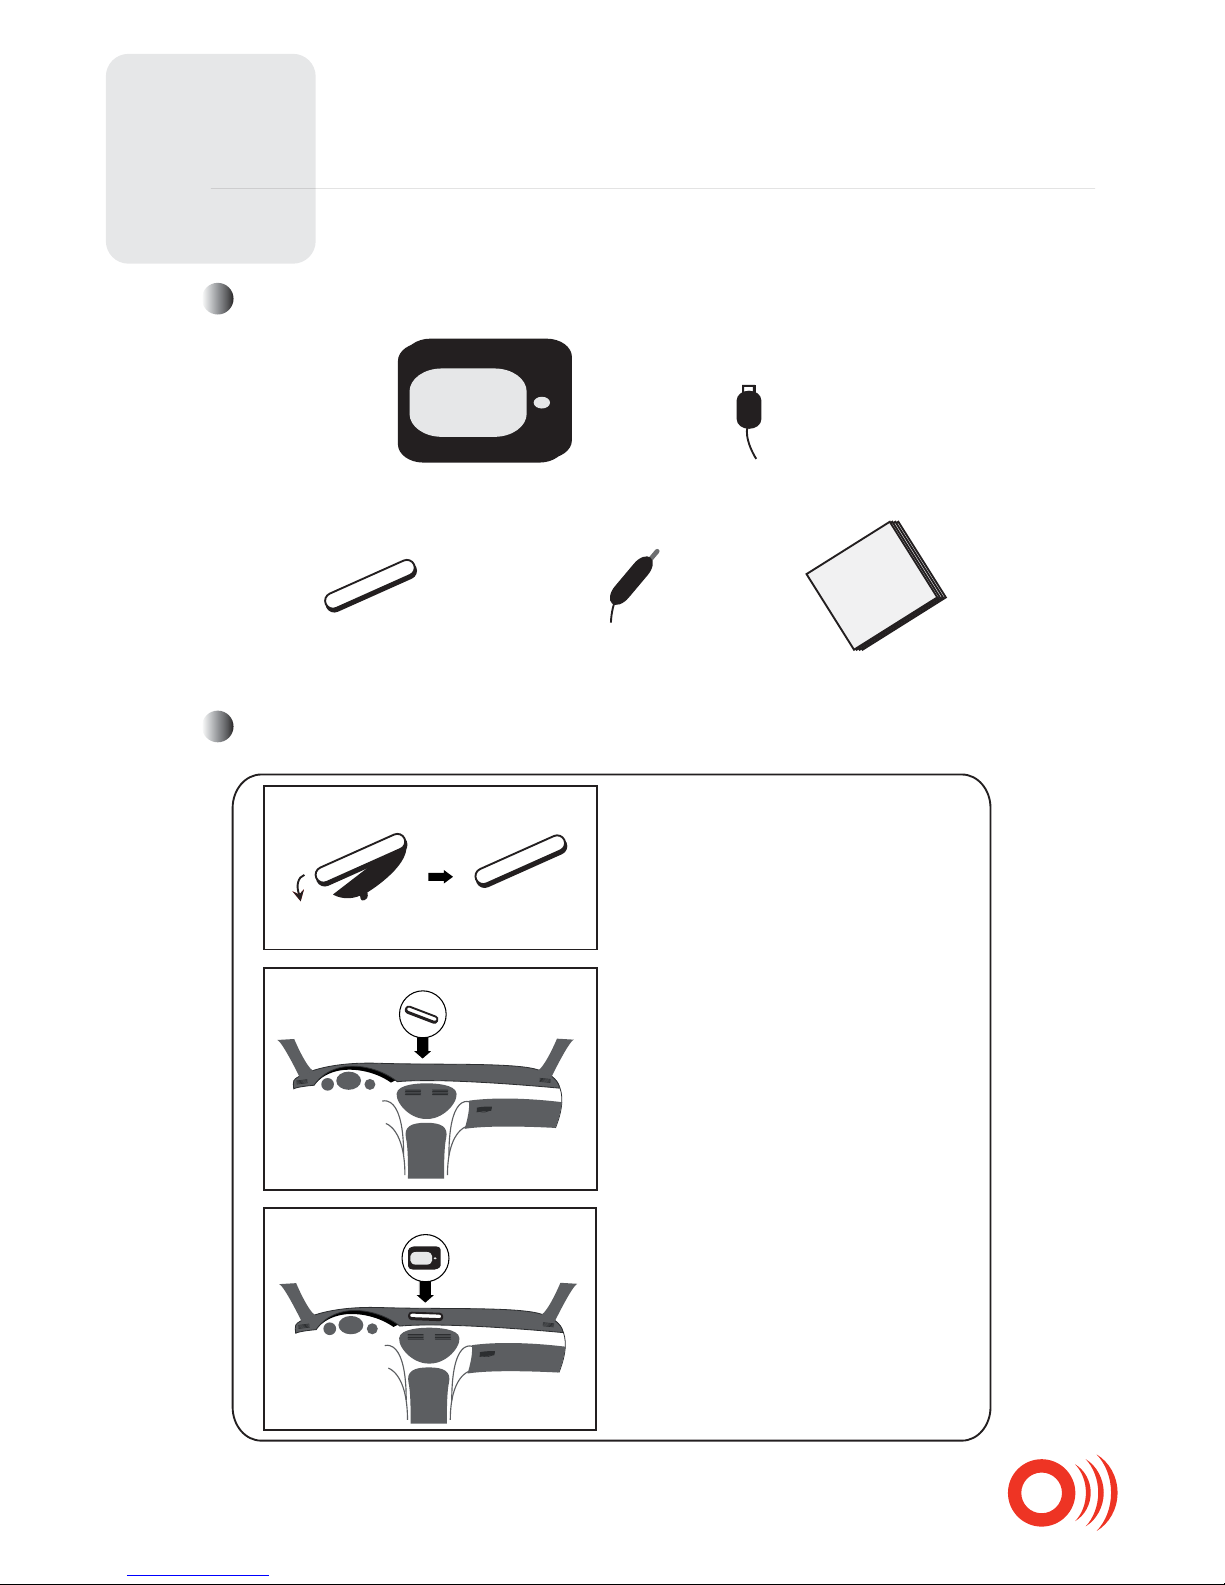
Contents and Installation
Talex Max
by Wikango
USB Cable
Manual
Cigar-lighter adpaterMagnet
Remove the protection
from the magnet
Fix the magnet on your
dashboard
Place the device on the magnet.
Press ca.1 second on the ON / OFF
button to switch your device on.
Box contents:
Installation:
3
Page 4
1
Contents and Installation
Caution
Install the device properly in order to avoid disturbances on the internal
antenna.
Don’t leave your device on the dashboard: Remove it simply from the
magnet to avoid degradations and thefts.
Climatic conditions may inuence the satellite connection.
Avoid prolonged exposure to the sun: Don’t leave the device on the
dashboard.
If your vehicle has been parked in the heat, please let the device cool
down before you use it.
The device operates at temperatures between -10°C and 45°C.
4
Page 5
2
Overview
5
3
1
2
4
5
6
1
2
3
4
5
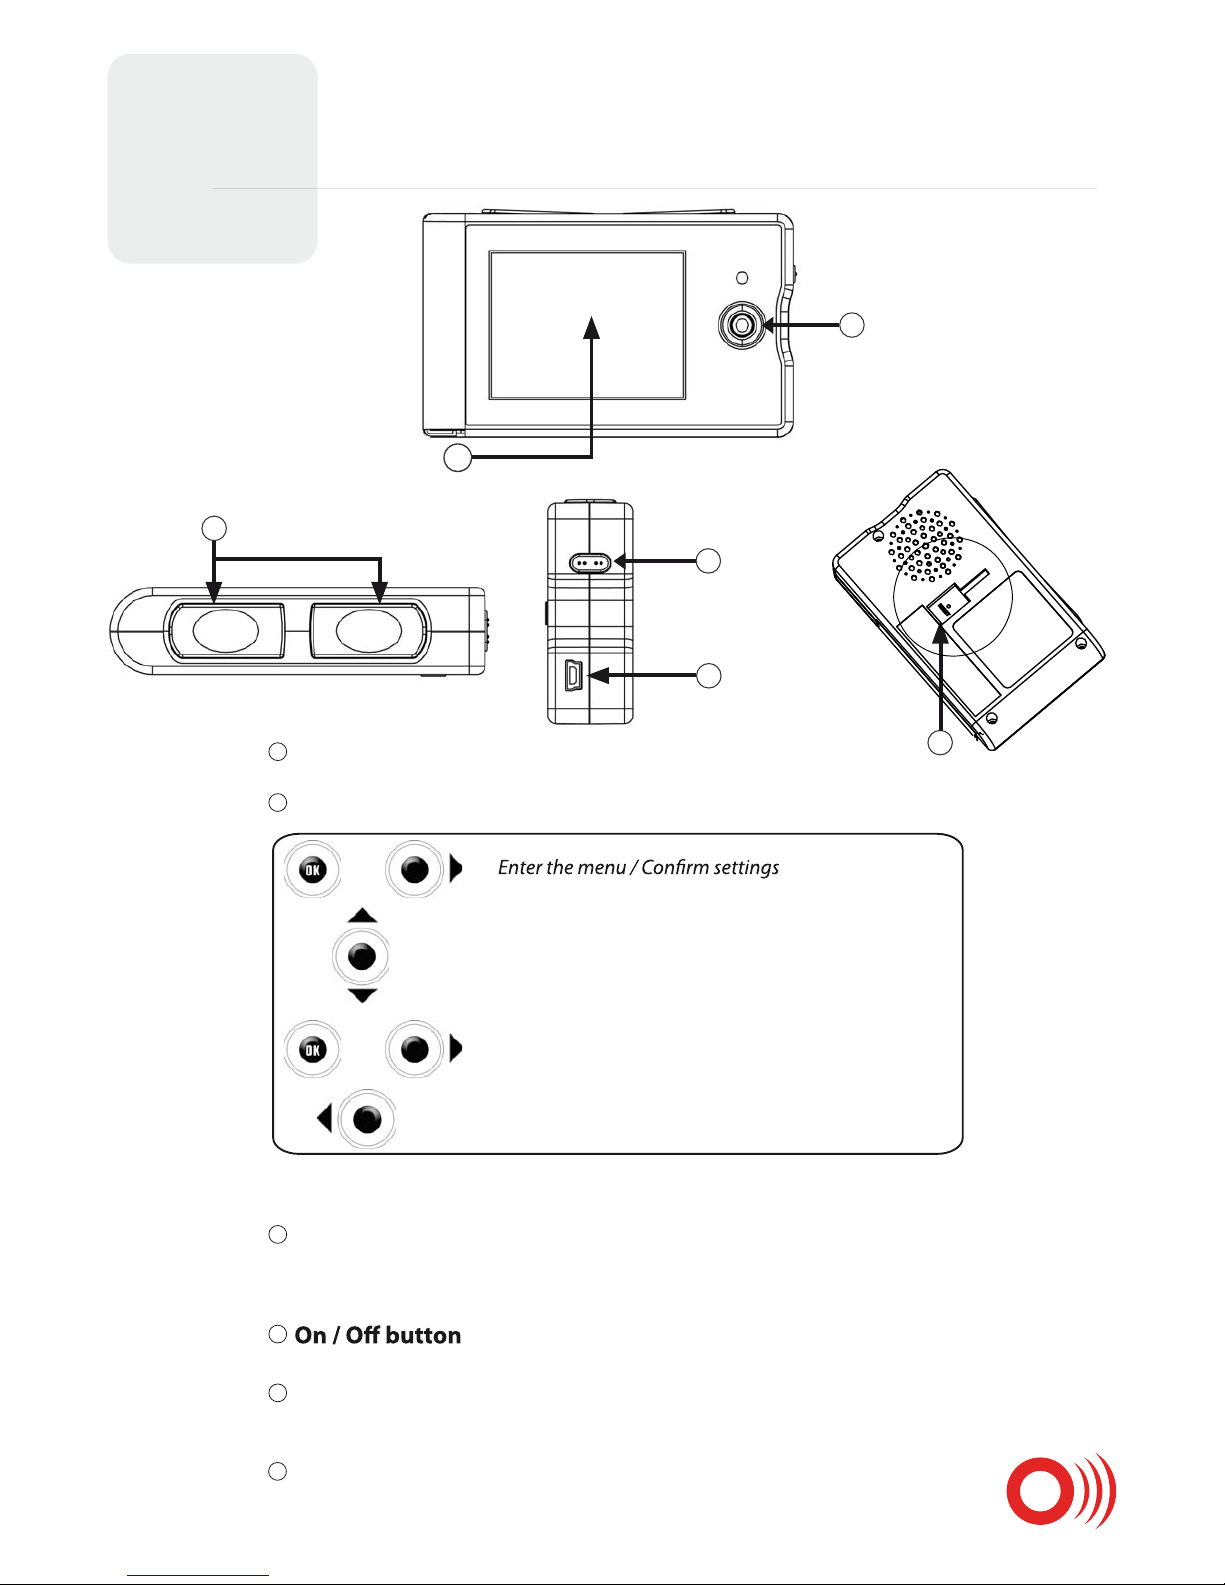
LIVE Buttons
Joystick
To report warnings and real time and send the information to the Wikango
community.
To charge the battery, connect to a cigar-lighter, connect to a PC.
See optional kits p. 28.
On the standard screen, the joystick is also used to set the volume (up / down).
USB connector
6
Mounting kit socket and reset button
Color display
Up / down
Exit the menu
OR
Enter the sub-menus
OR
Page 6
3
First Start and Activation of the LIVE Service
6
Activation of the LIVE service*:
*Please note that your device may already be activated. If no activation message appears, please go to page 8.
Select your language, the vocal messages, the speed unit and the time zone
The Max will then connect to the satellite and to the GPRS network
Important: Wait until the GPRS connection is complete.
Two consecutive beeps indicate that the connection is complete
Select “YES” by clicking on the LIVE button located on the top of the device.
Once the device has restarted, the LIVE service is active.
The Max will ask you if you want to activate the device
The Max will then restart
Page 7

3
7
If your subscription has expired,
please visit talex.co.uk
to activate the LIVE services again.
First Start and Activation of the LIVE Service
Expired subscription:
Once your subscription has expired, the LIVE services won’t be available anymore.
It means you will not receive LIVE information anymore: LIVE warnings,
number of users in real time, messages of thanks, automatic updates ...
The Max requires an active LIVE service in order to work properly.
Page 8
4
4.1 : Basics:
Operation
8
The LIVE functions allows the exchange of information between users in real time..
You can send the location of a speed control to the whole community of users, called
the Smart Drivers.
The Talex Max warns you as you approach xed speed cameras, red light cameras, SPECS,
mobile speed cameras. It complies with the new French Protocol regarding speed camera
warning and is therefore 100% legal.
The coverage includes: Great-Britain, France, Belgium, the Netherlands, Spain, Italy, Portugal,
Sweden, Norway, Finland, Germany, Austria**.
*The device requires an active LIVE service to work properly.
**Users shall make sure that speed camera warning devices are legal in the country
where they want to use the device.
The Talex Max is a connected speed camera warning devices that combines both the GPS
and the GPRS technologies.
The Talex Max is connected*:
The Talex Max also features the Talex speed camera database for UK and the Wikango
database for other countries:
Page 9
4
4.2 : Start:
Operation
9
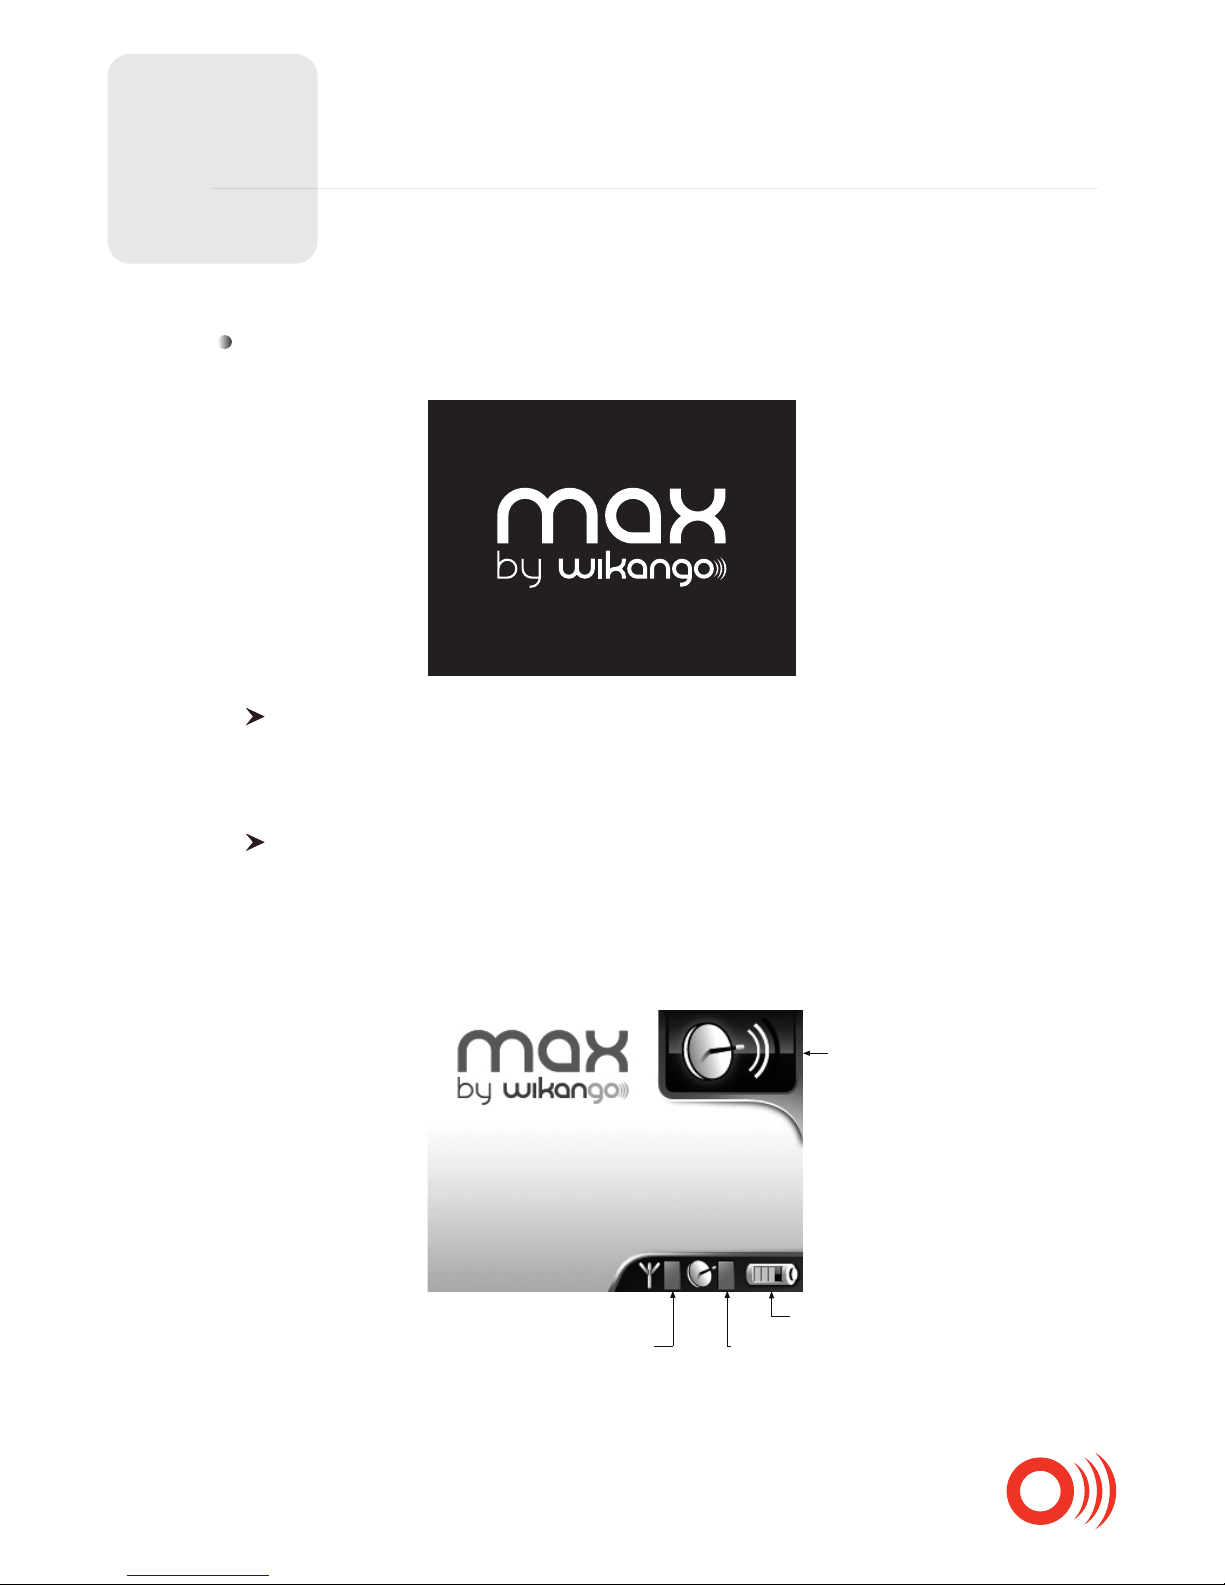
Press the On / O button ca. 1 second to start the Max.
Splashscreen
Select your language, your speed unit, the voices and the time zone.
You can change these settings from the “Local Settings” section in the menu.
Then, the device will connect to the satellites and to the GSM network.
A vocal message indicates that the satellite search is complete.
The device shows “Connected” on the secreen when it is connected to the GSM network.
The Talex Max is fully operational once the GPS and GSM connections are complete.
Connection screen
GSM signal
GPS signal
Battrey level
GPS network
Page 10
4
4.3 : Settings:
Operation
10
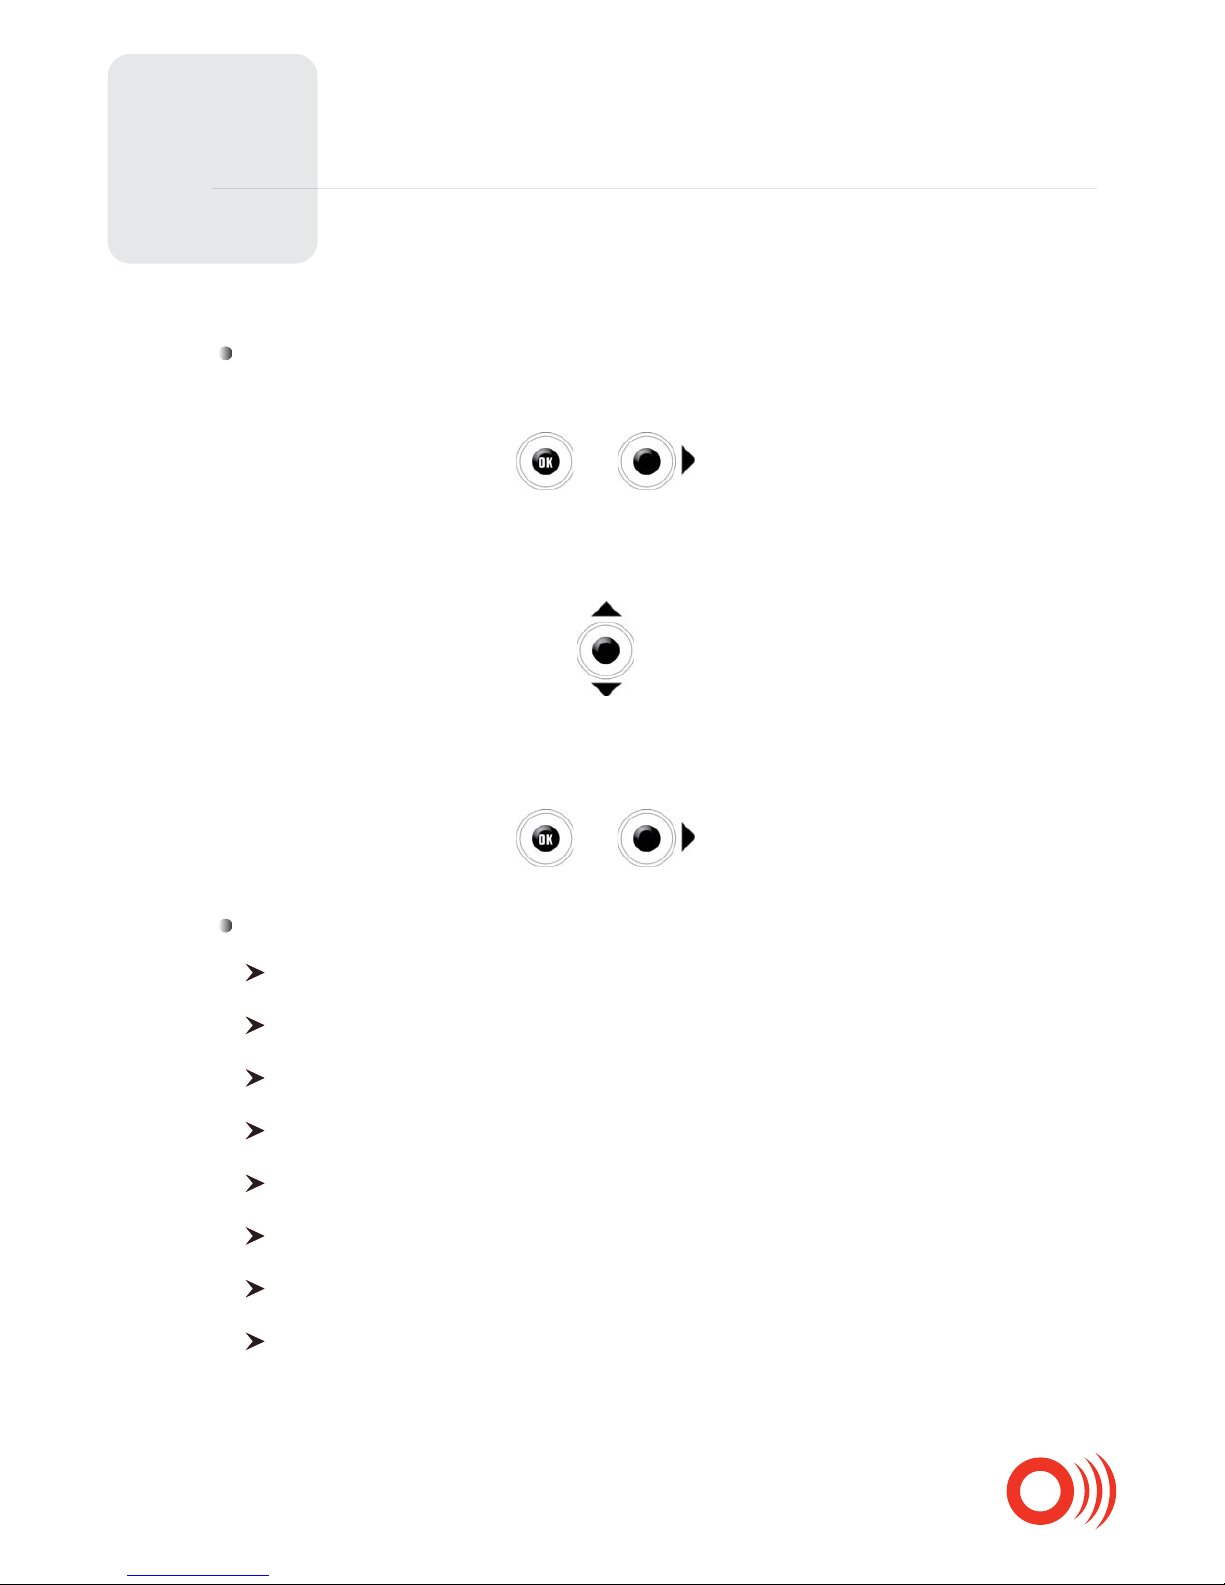
Enter the menu by pressing the joystick or by pushing it to the right:
The various sections of the menu can be accessed by pushing the joystick up or down:
Once the desired section has been reached, press the joystick or push it to the right:
Sections of the menu:
Warning settings
LIVE settings
Sound settings
Screen settings
Local settings
Battery settings
Speed limiter
Information
OR
OR
Page 11
4
Operation
11
User: Select your own warning setting, in seconds, between 15 and 30 seconds.
With that setting, the distance varies according to the speed of the vehicle.
Warning settings
Select the warning distance in this section. Two settings are available: automatic or user.
Automatic: default setting, distance recorded in the database.
Page 12
4
Operation
12
LIVE Settings
Activation of the LIVE services (when required), Smart Drivers display mode and LIVE report mode.
In some cases, this menu can be used to activate the LIVE services.
This method should only be used with the help of the support team.
Activation and Services:
Page 13
4
Operation
13
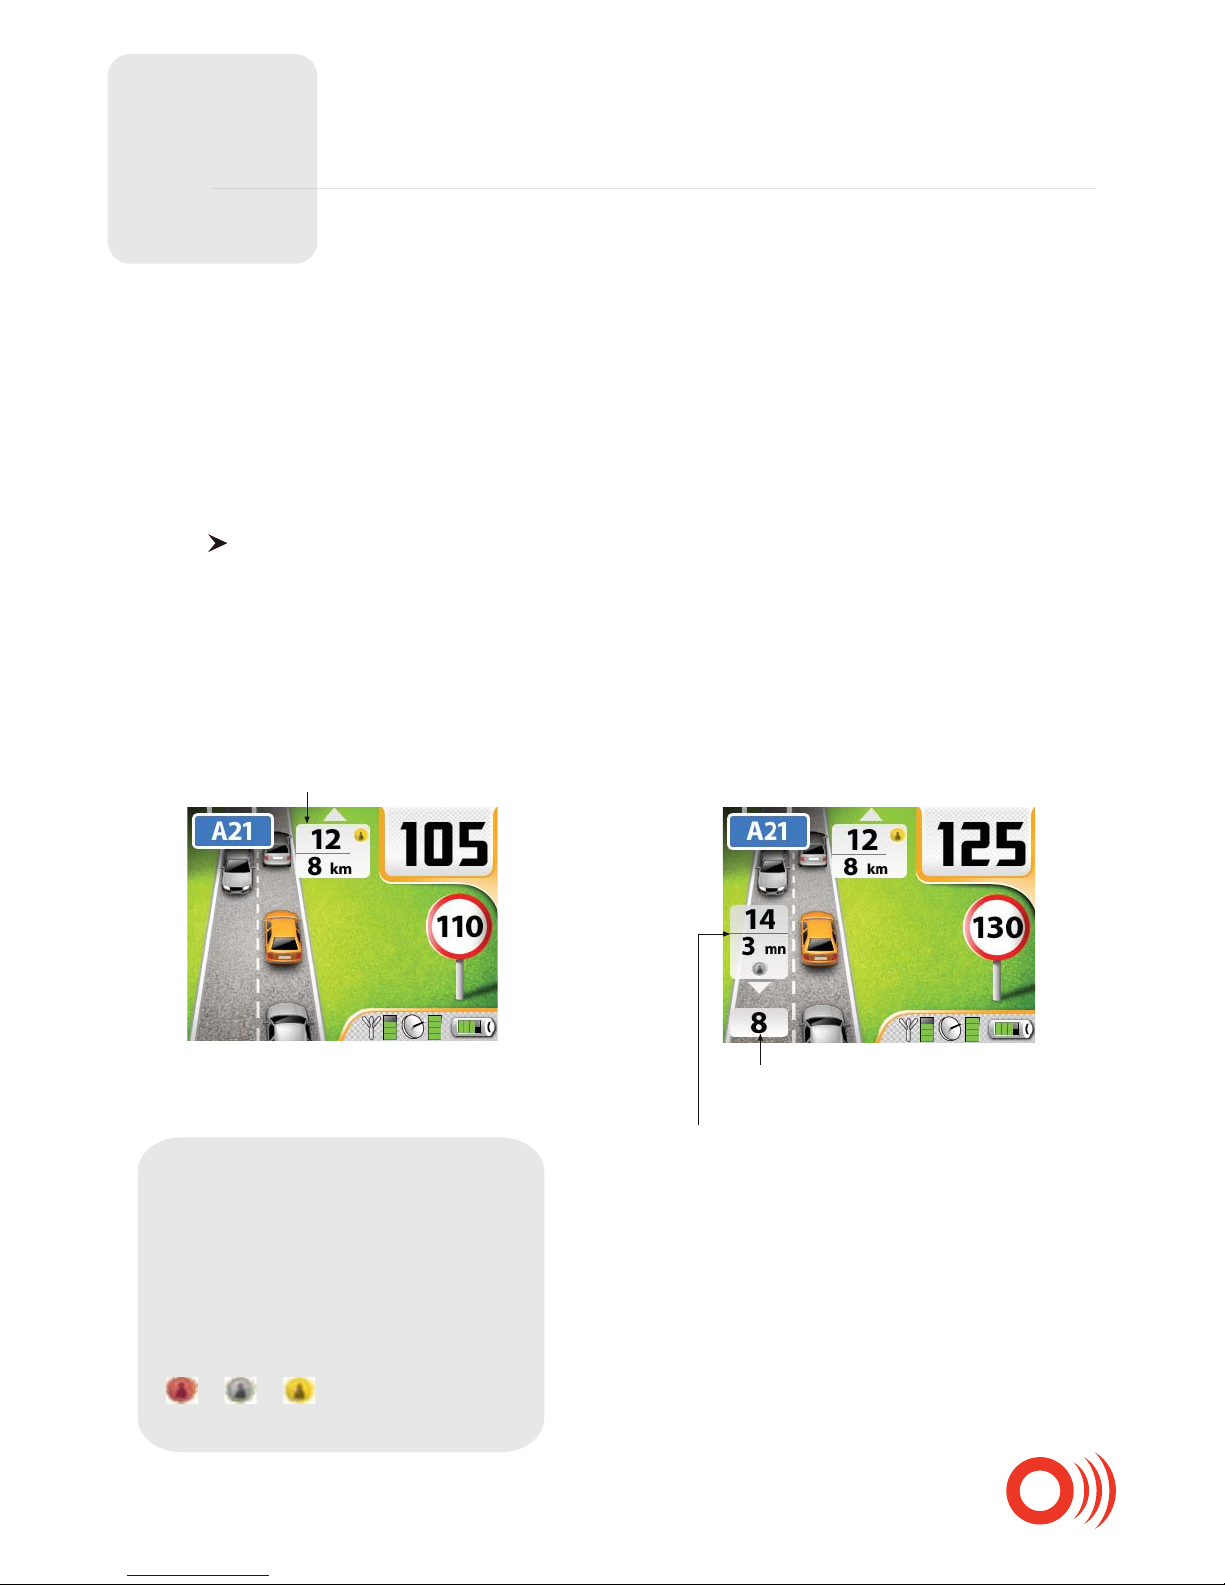
Smart Drivers get a bronze, silver or
gold medal according to their
contribution to the community.
Rank is indicated for the nearest
Smart Driver ahead only.
Smart Drivers ahead,
Smart Drivers Rank:
on the same road, distance and rank of the nearest one
E.g.:
25 Smart Drivers ahead,
nearest one at 2km.
E.g.:
12 Smart Drivers ahead,
nearest one at 8km, gold medal.
14 Smart Drivers ahead in the opposite direction,
nearest one in 3 km, silver medal.
8 Smart Drivers behind,
in the same direction.
In road mode
Smart Drivers in the opposite direction located
ahead, distance and rank of the nearest one
ahead
Smart Drivers behind,
on the same track
Select between the advanced or simple mode for the information related to the Smart Drivers.
The Smart Drivers are the members of the Wikango community. The Talex Max indicates their number
in road and zone mode.
You can select between simple or advanced mode to see more or less information related
to the Smart Drivers in road mode and in zone mode.
Smart Drivers Display:
Simple / advanced display:
Simple display Advanced display
Page 14
4
Operation
14
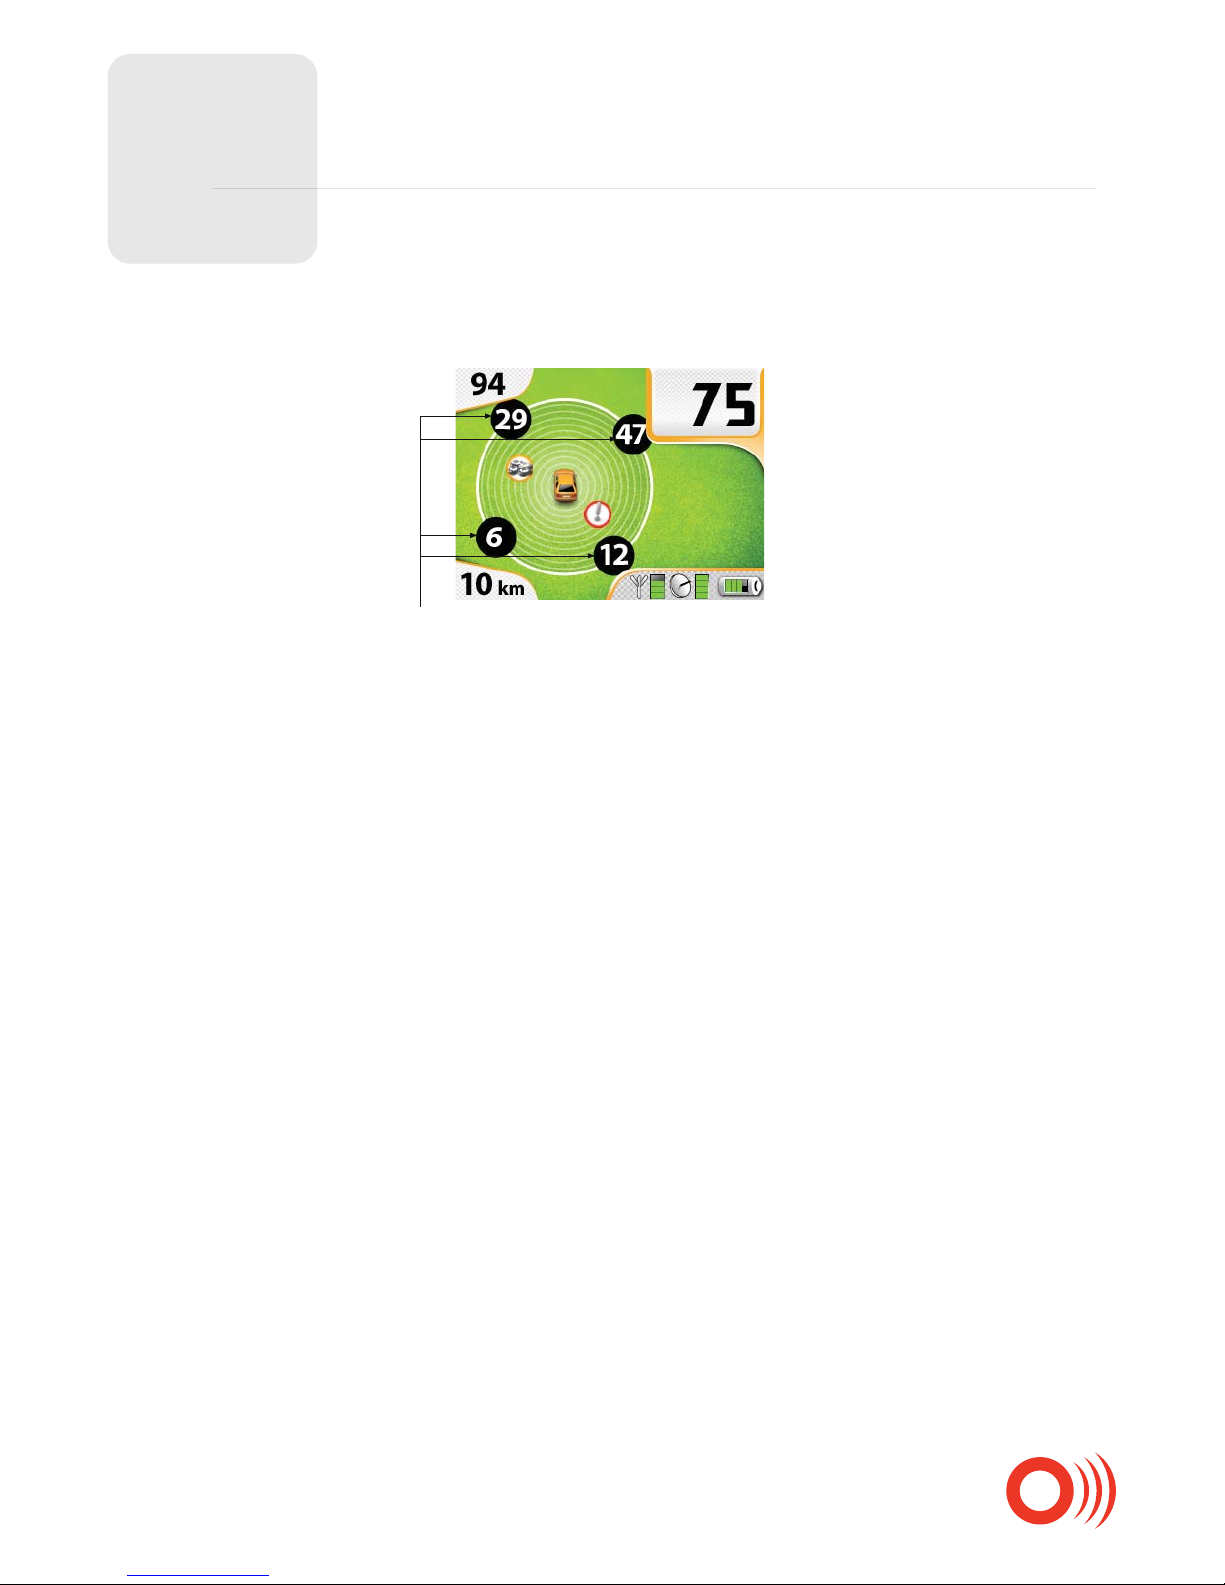
Distribution of the Smart Drivers located in your zone
E.g.:
94 Smart Drivers in a zone
of 10km around you,
and distribution in your zone.
In zone mode
Page 15
4
Operation
15
Set the report mode of the LIVE warnings. Two modes are available: simple or advanced report.
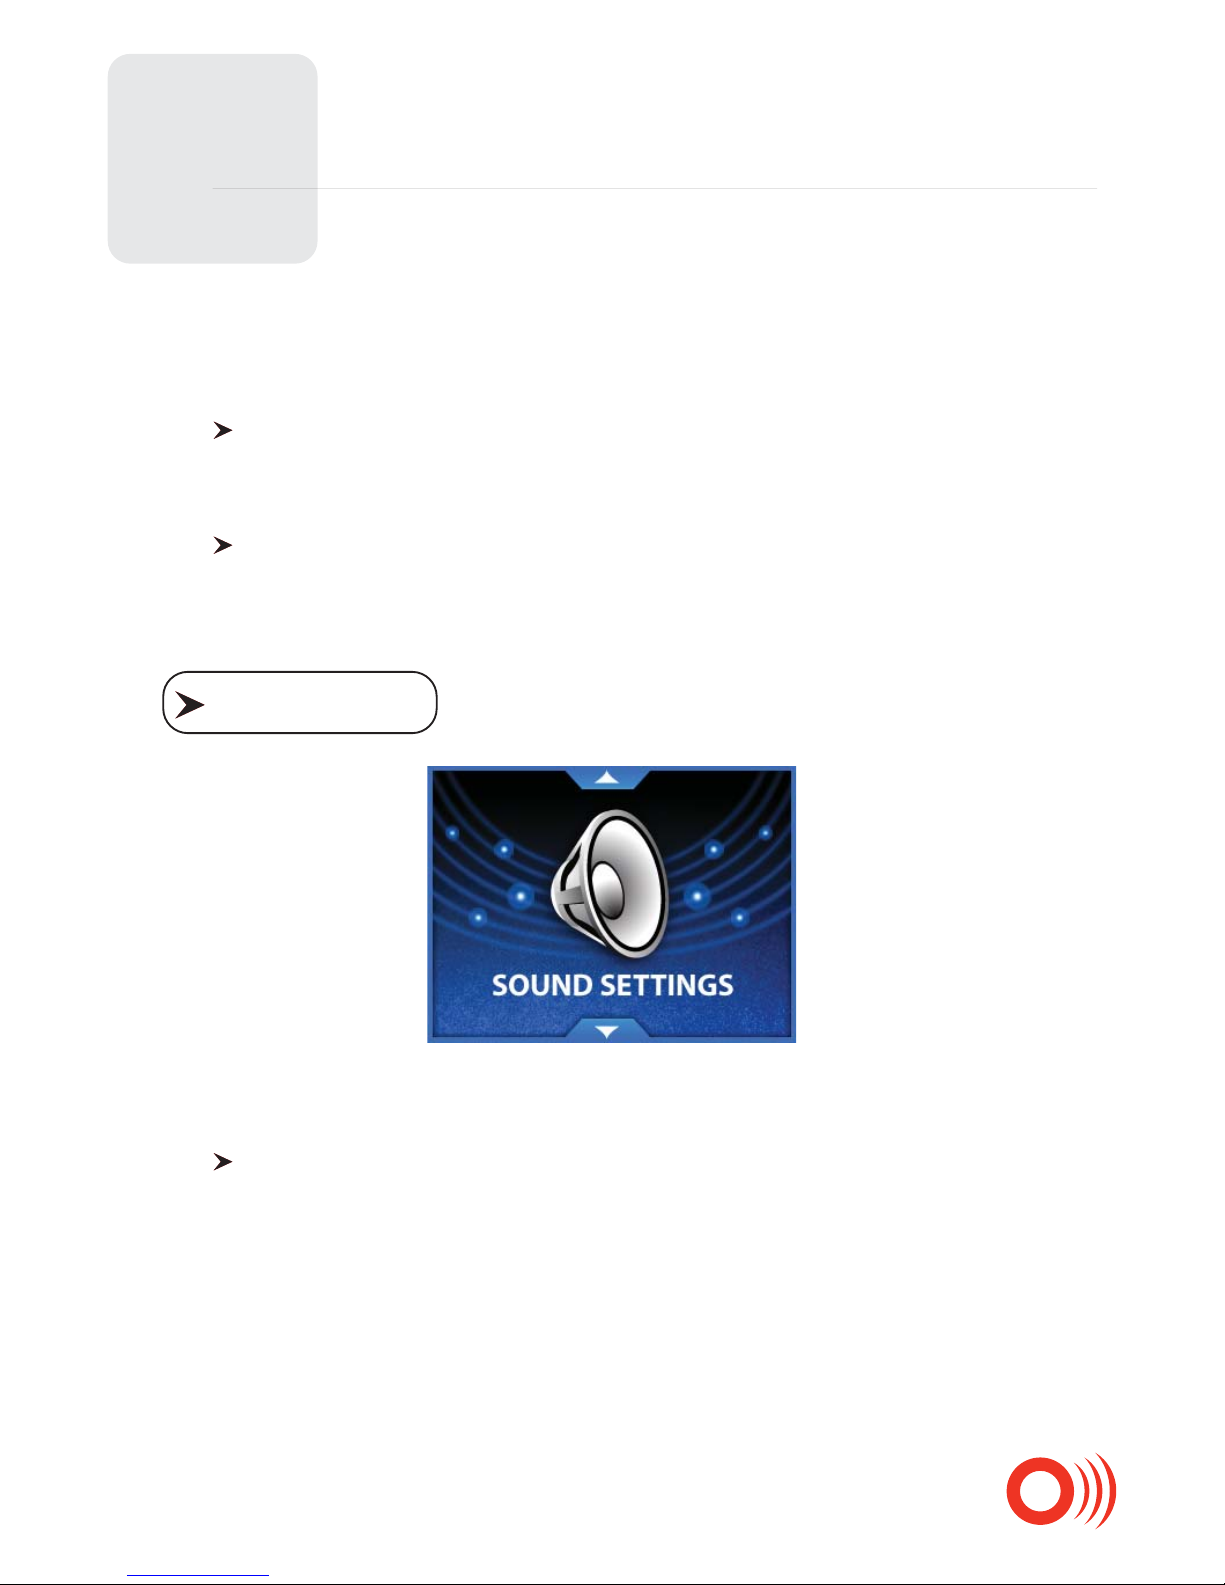
Set the warnings of your device: Warnings, Smart Mute function, overspeed and joystick sounds.
For each warning category, you can select between a vocal message (Voice), a sound (Beep)
or no sound at all (Mute).
Use this mode to report in real time mobile speed cameras only, very quickly.
LIVE report:
Simple report:
Use this mode to report other warning types: Speed controls and trac congestions.
Advanced report:
Sound Settings
Warnings:
Page 16
4
Operation
16
Enable or disable the Smart Mute function. This function manages the vocal message according
to the speed of the vehicle: If you drive under the speed limit as you approach a warning, no
sound will be emitted.
The Smart Mute function can be set between 10 to 30mph under the speed limit.
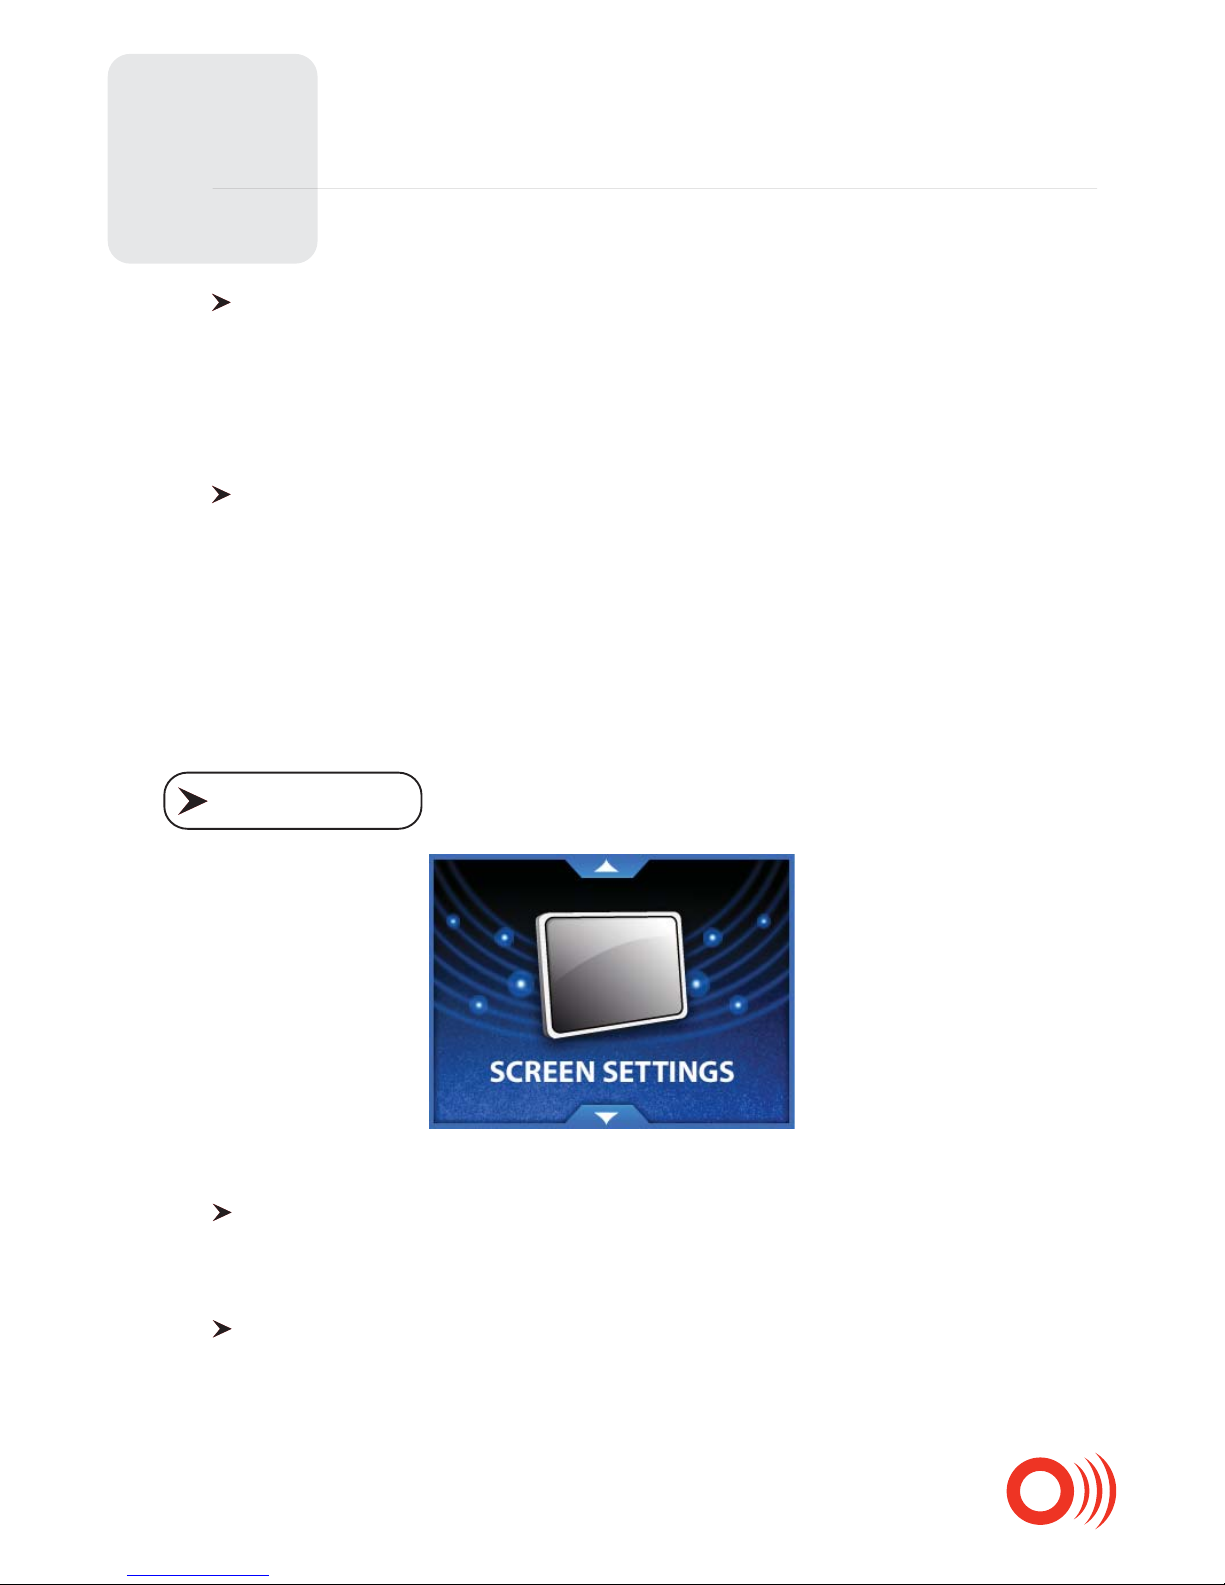
Set the start time for the day and night modes, as well as the brightness level for each
mode.
Smart Mute:
Enable or disable the overspeed beep that is emitted when the speed of your vehicle exceeds
the speed limit as you approach a warning.
The overspeed beep can be enabled or disabled for the ixed and mobile speed cameras.
Overspeed:
Day and night mode settings, ashing screen settings.
Screen settings
Day / Night:
Enable or disable the ashing screen as you approach warnings.
This function is useful to avoid disturbing the passengers, especially in the night.
Flashing screen:
Page 17
4
Operation
17
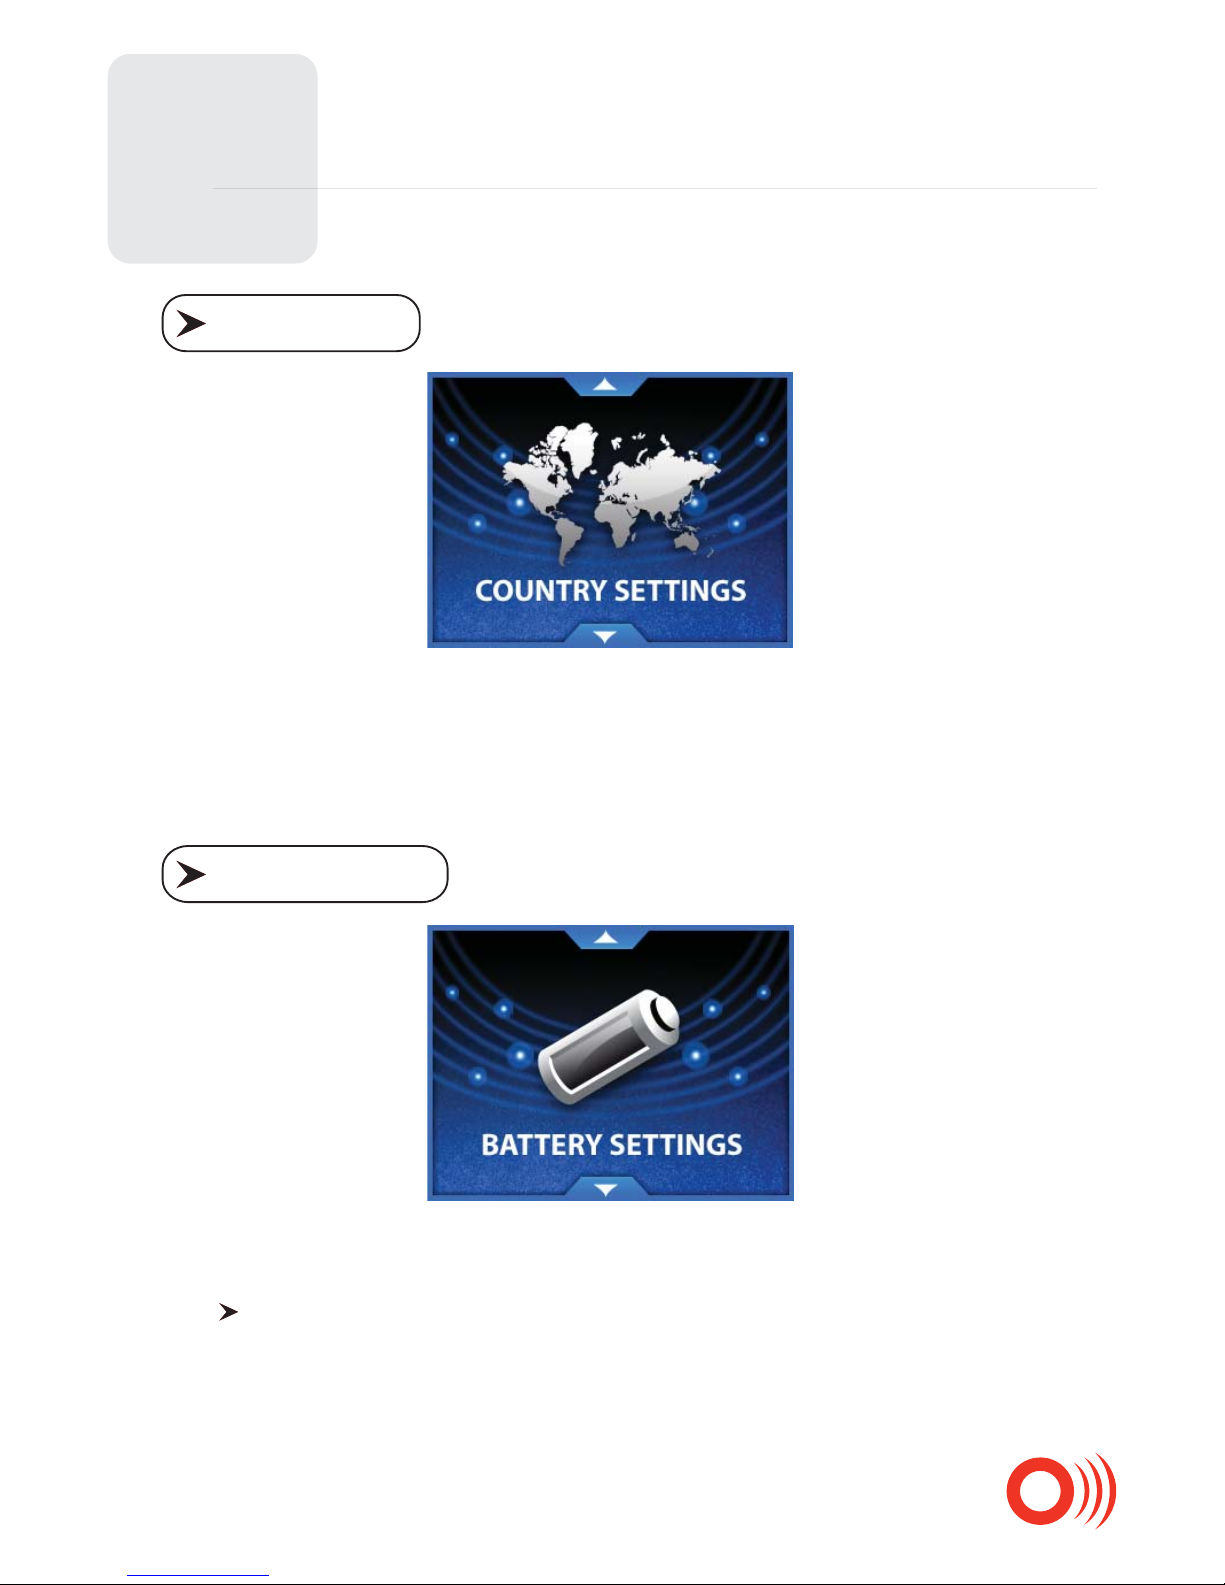
In this section, you can nd all settings related to your country: Language, voices, time zone, time
format and speed unit.
Here, you can view the remaining level of the battery and set the auto-stop function.
Battery level, from 0 to 100 %.
Please note that a sucient battery level is required in order to use the GPRS functions of the
device.
Local Settings
Status:
Battery Settings
Page 18
4
Operation
Set the time before the device shuts down automatically when it’s not used or doesn’t receive
any GPS signal.
The auto-stop can be set between 0 and 30 minutes.
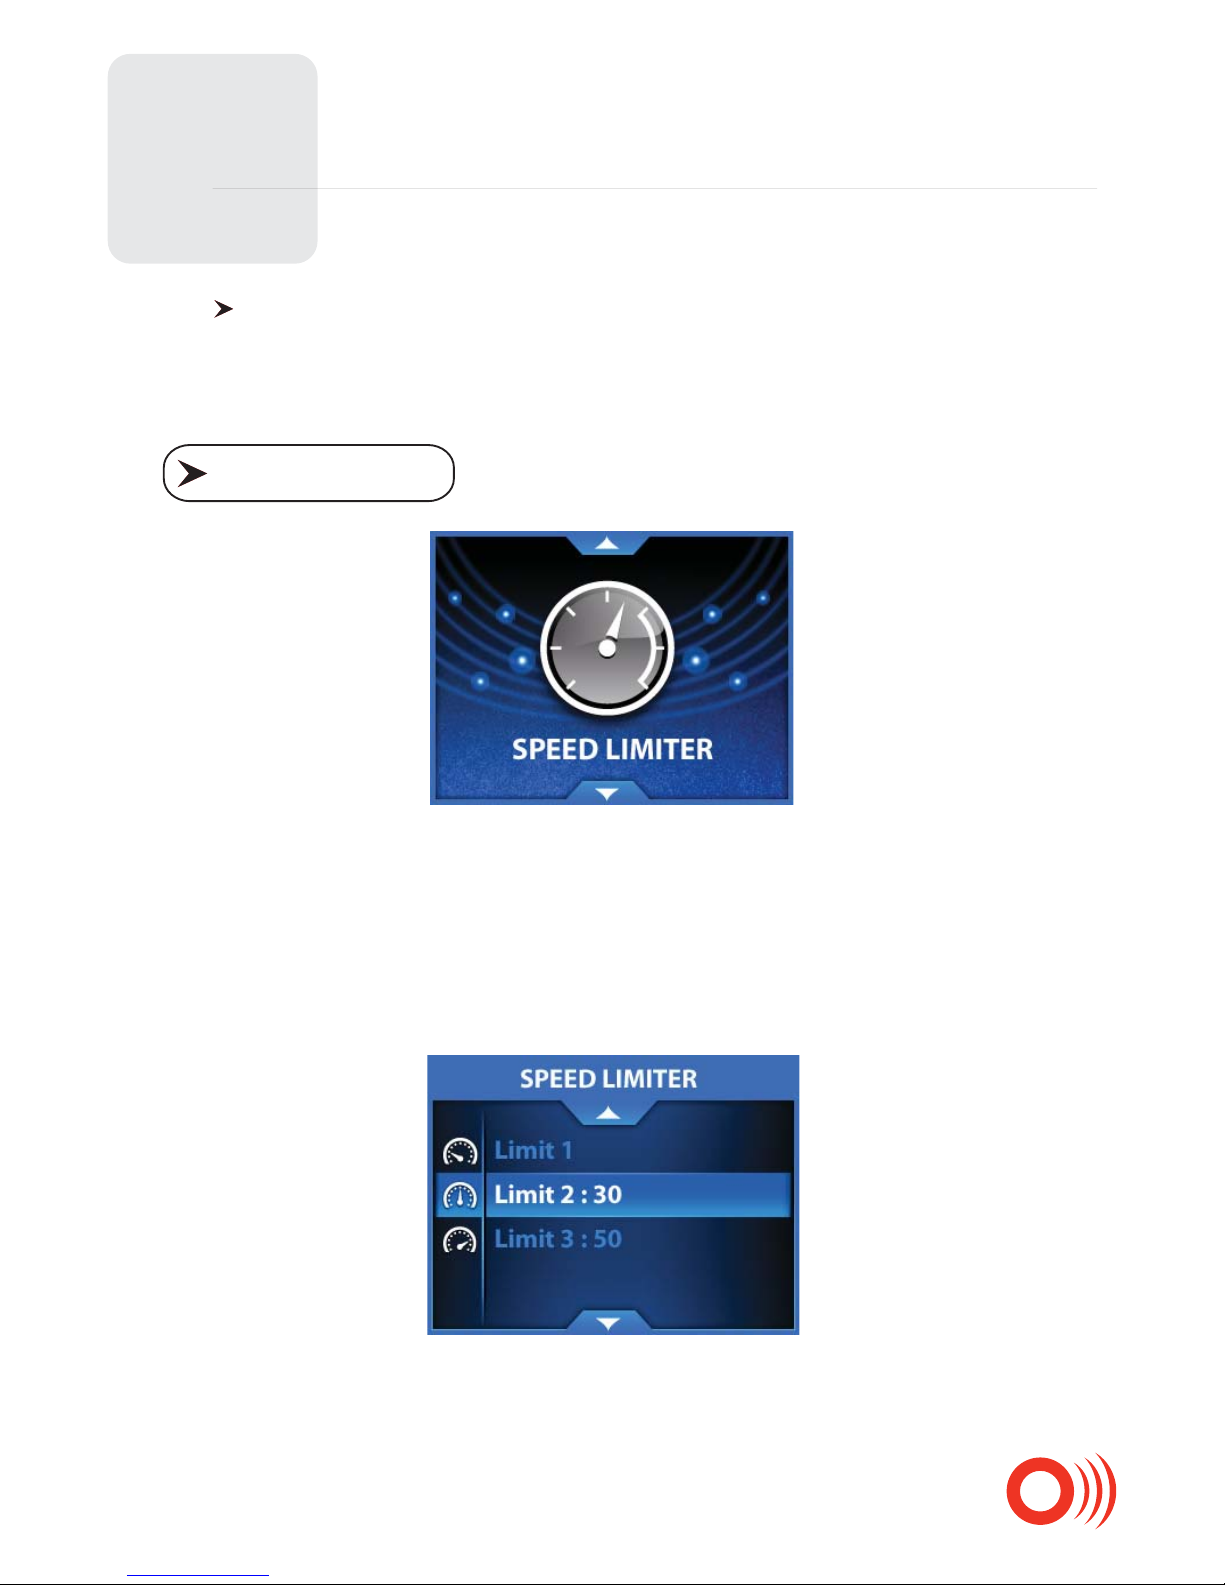
The Talex Max has 3 independent speed limiters: You can assign a dierent speed limit to each limiter.
Each sub-menu of this section allows the activation or deactivation of each limiter and the setting
of the speed. When you exceed the saved speed limit, a beep is emitted.
When a limiter is activated, its speed is shown in the menu.
Speed Limiters
Auto-stop:
18
Page 19
4
Operation
19
The information related to your device is available here: The version of the rmware, of the database,
the activation of the demo mode etc.
Firmware, database and map versions.
Information
System:
Your GPS position (latitude, longitude and heading in degrees
Satellite:
Enable / disable the demo mode.
Demo:
Set back to the factory settings.
Reset:
Page 20
4
4.4: Road mode / Zone mode
Operation
20
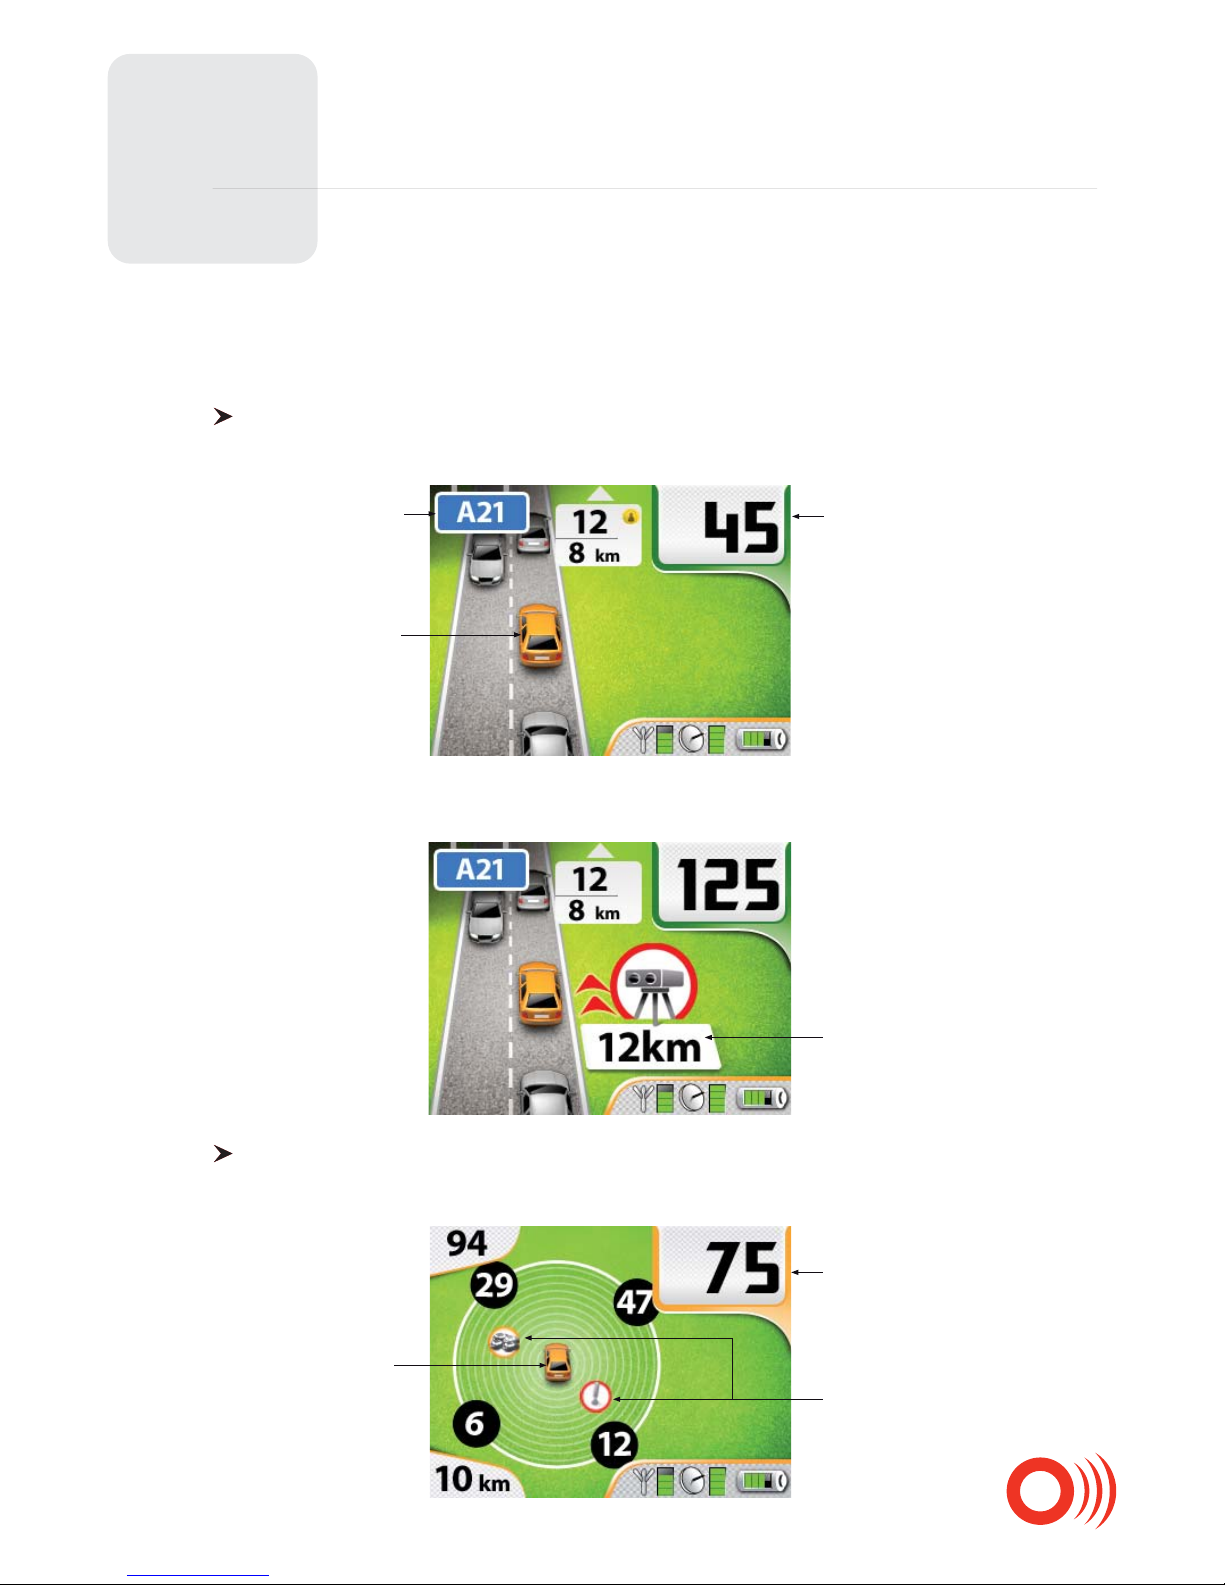
According to the location where you are driving, the Talex Max will show you the road mode
or the zone mode.
On registered roads, the Talex Max shows the road mode.
Warnings are previewed and the remaining distance to the warning is also shown.
On non-registered roads, the Talex Max shows the zone mode:
Road mode:
Zone mode:
Road number Speed of your
vehicle
Mobile camera preview,
in 12 km
Your vehicle
Speed of your
vehicle
Your vehicle
LIVE warnings
Page 21
4
4.5 : Warnings:
Operation
21
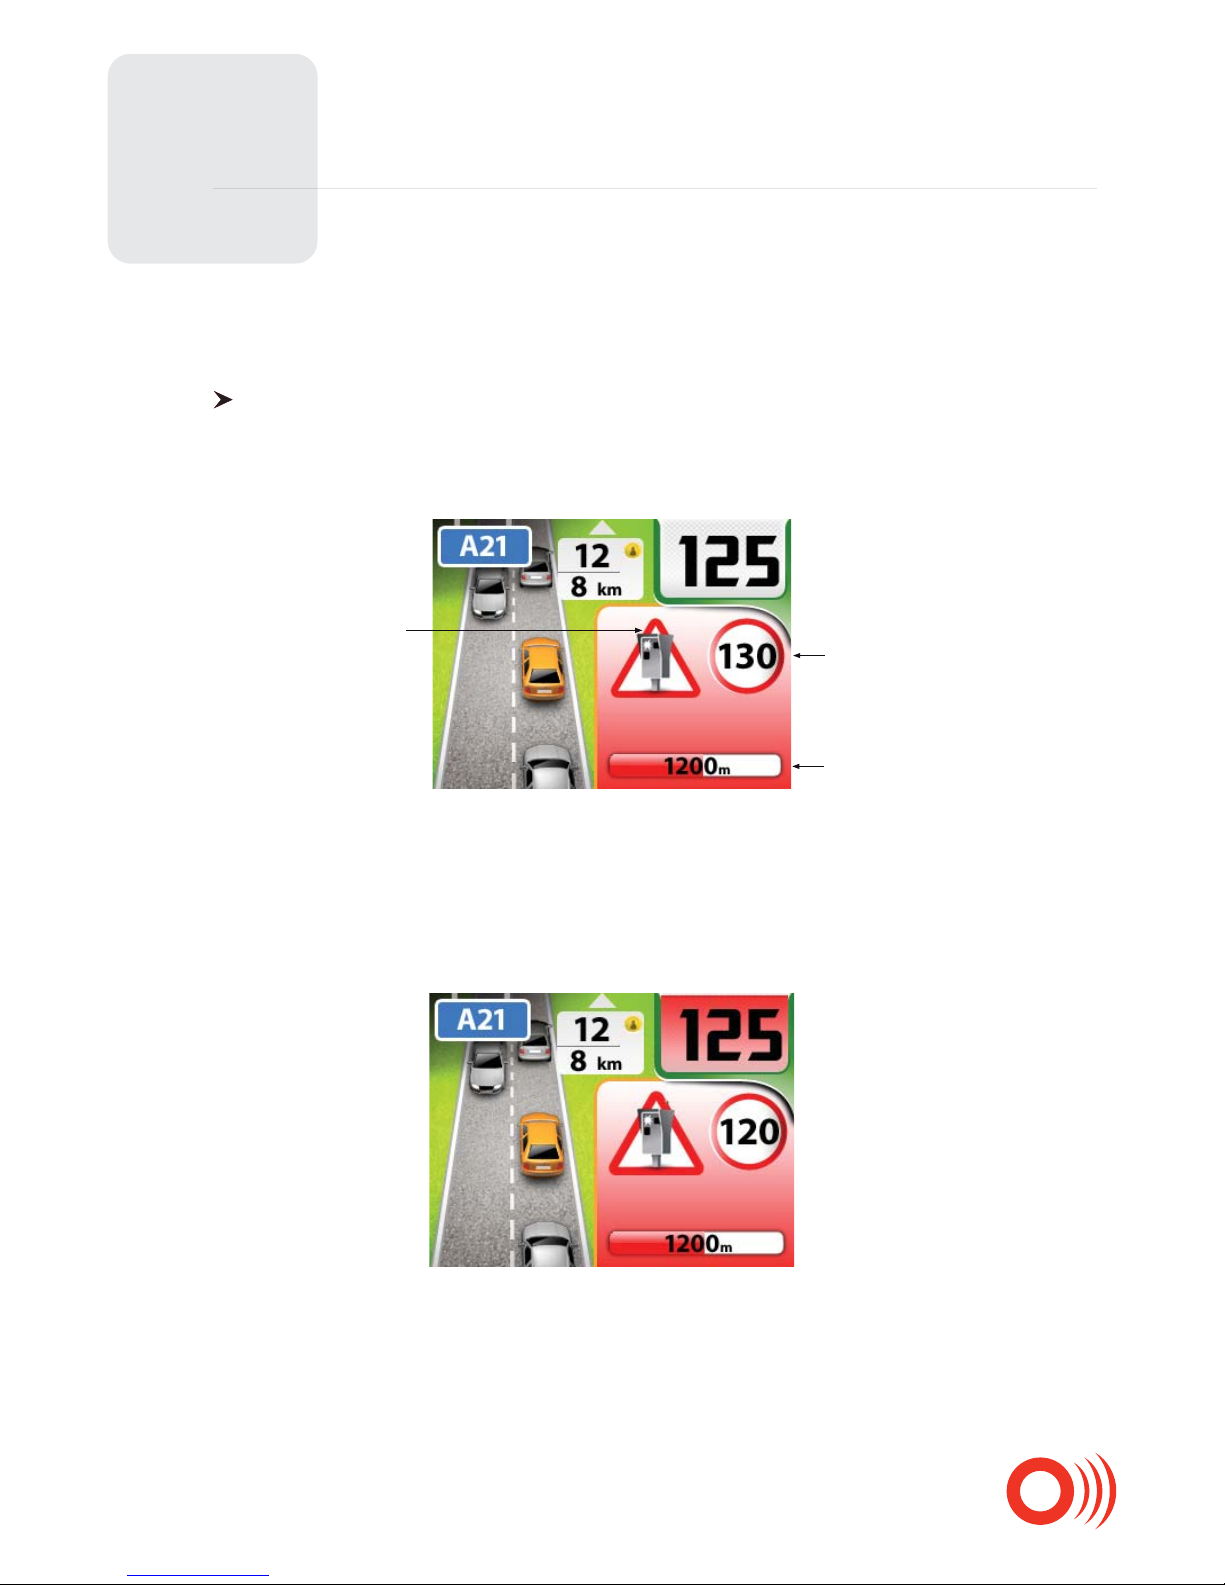
In each mode, the device switches to the warning screen as you approach a warning.
Please note that the icons and speed units shown here may vary according to the local
settings.
Integrated database:
Fixed speed camera warning
Warning type
Speed limit
Distance bar
Overspeed indicator: The speed meter turns to red when you exceed the speed limit of the
warning.
Page 22
4
Operation
22
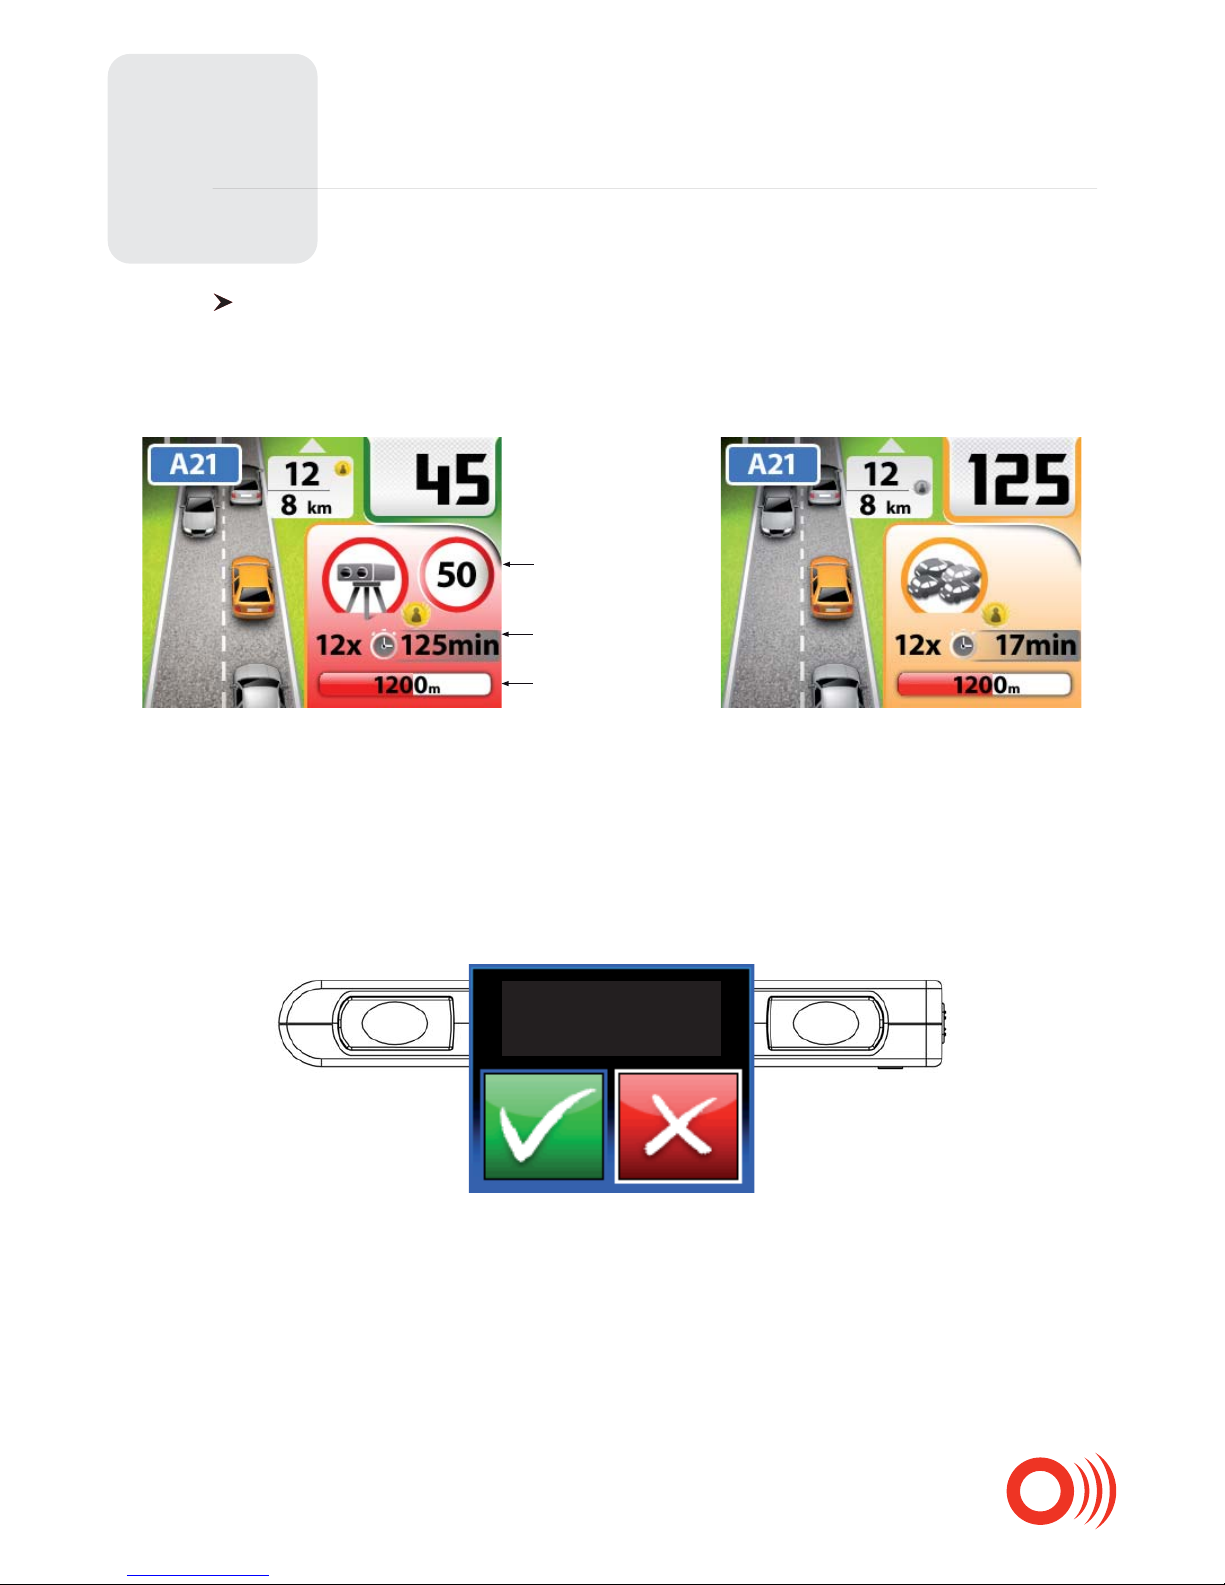
The Talex Max reports LIVE warnings sent by the community, in real time: Mobile speed cameras,
trac congestions. It shows the age of the warning and the rank of the Smart driver who reported
it.
LIVE Warnings:
Messages of thanks:
LIVE mobile speed camera LIVE trac congestion
Speed Limit
Warning age
Distance bar
Once the warning is nished, the device will ask you to conrm or cancel the warning.
Press the corresponding LIVE button on the top of the device to conrm or cancel the warning.
When you conrm a LIVE warning, it is kept for an additional time (30 minutes) on the servers.
When you conrm a LIVE warning, you send a message of thanks to the Smart Driver who reported
the LIVE warning.
In the same manner, you receive a message of thanks when another Smart Driver conrms your
LIVE warning.
Conrm =
Left button
Cancel =
Right button
CONFIRM
OR CANCEL
Page 23
4
Operation
23
When you see a speed control or a trac congestion on your way, send the information
to the whole community in real time!
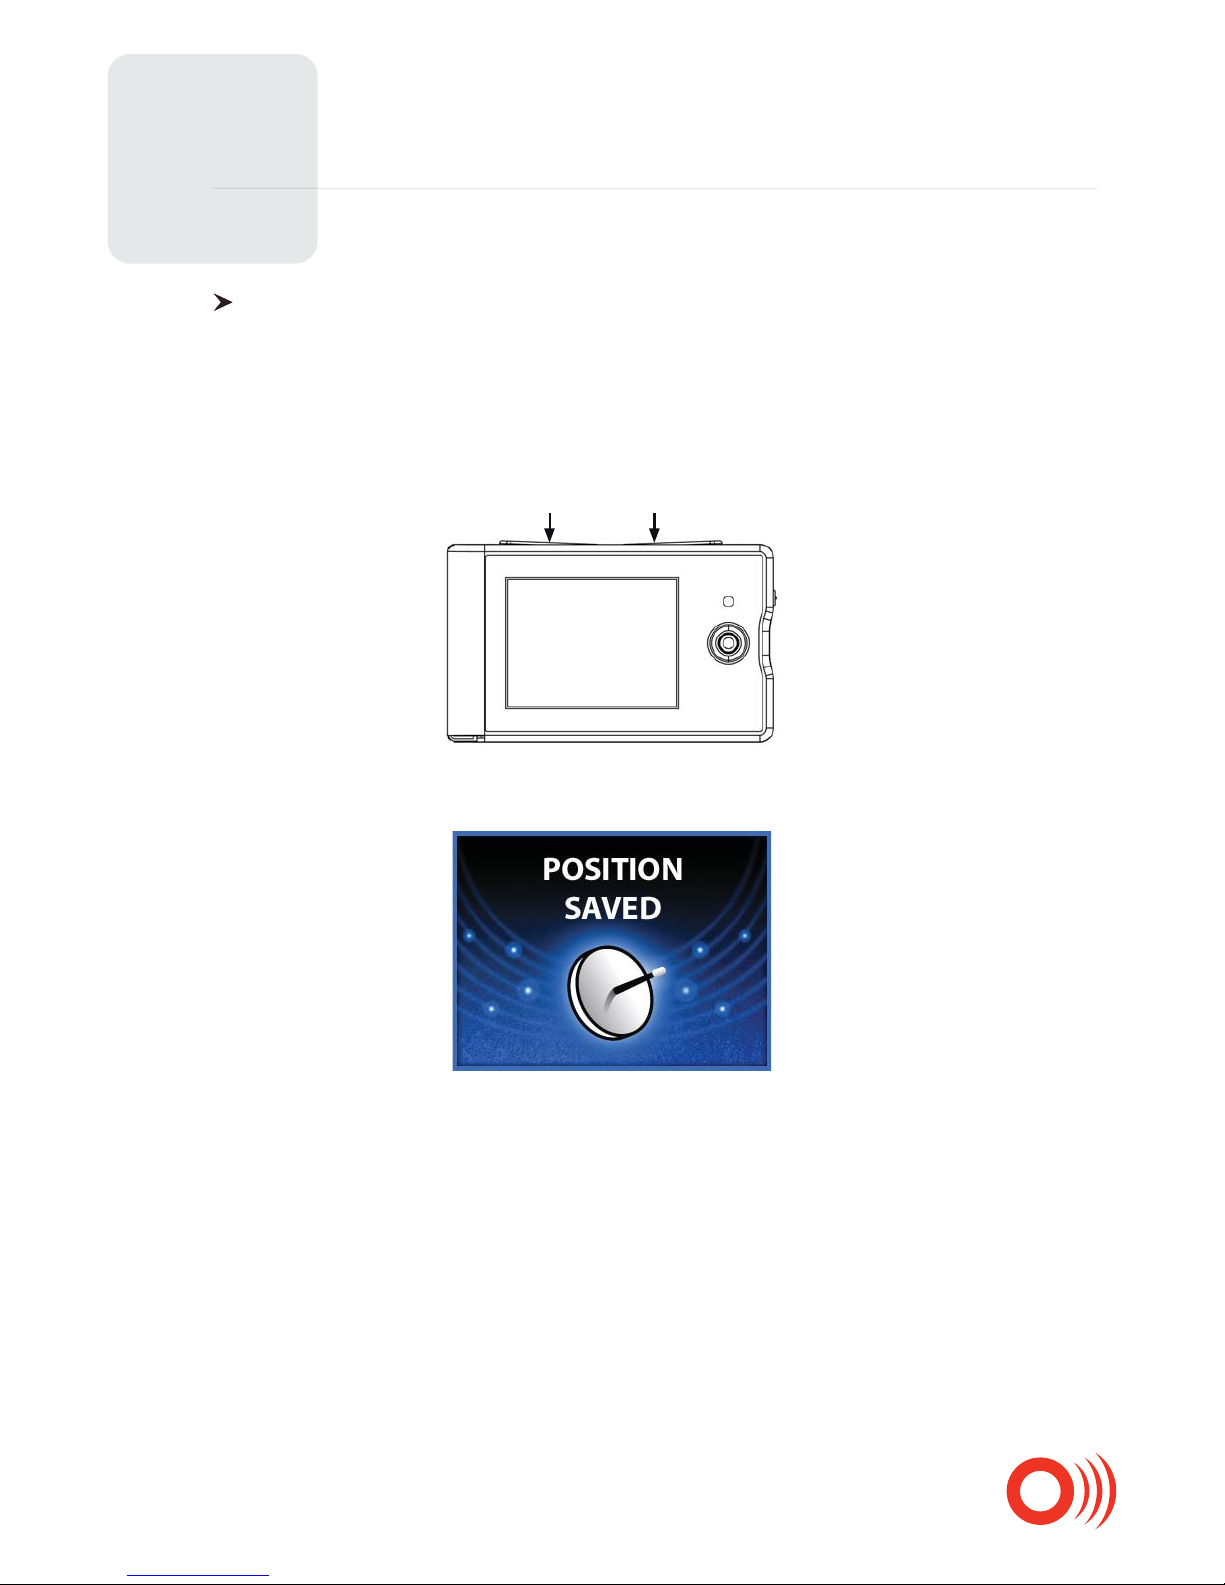
Simply press one of the LIVE buttons located on the top of the device.
The device will then ask you additional information about the warning before it is sent
to the community.
The type of information requested varies according to the report mode: Advanced or simple.
Reporting a LIVE warning:
1. Press one of the LIVE buttons
2. The following screen appears
3. Warning information:
Move the joystick to cancel your report.
Page 24
4
Operation
24
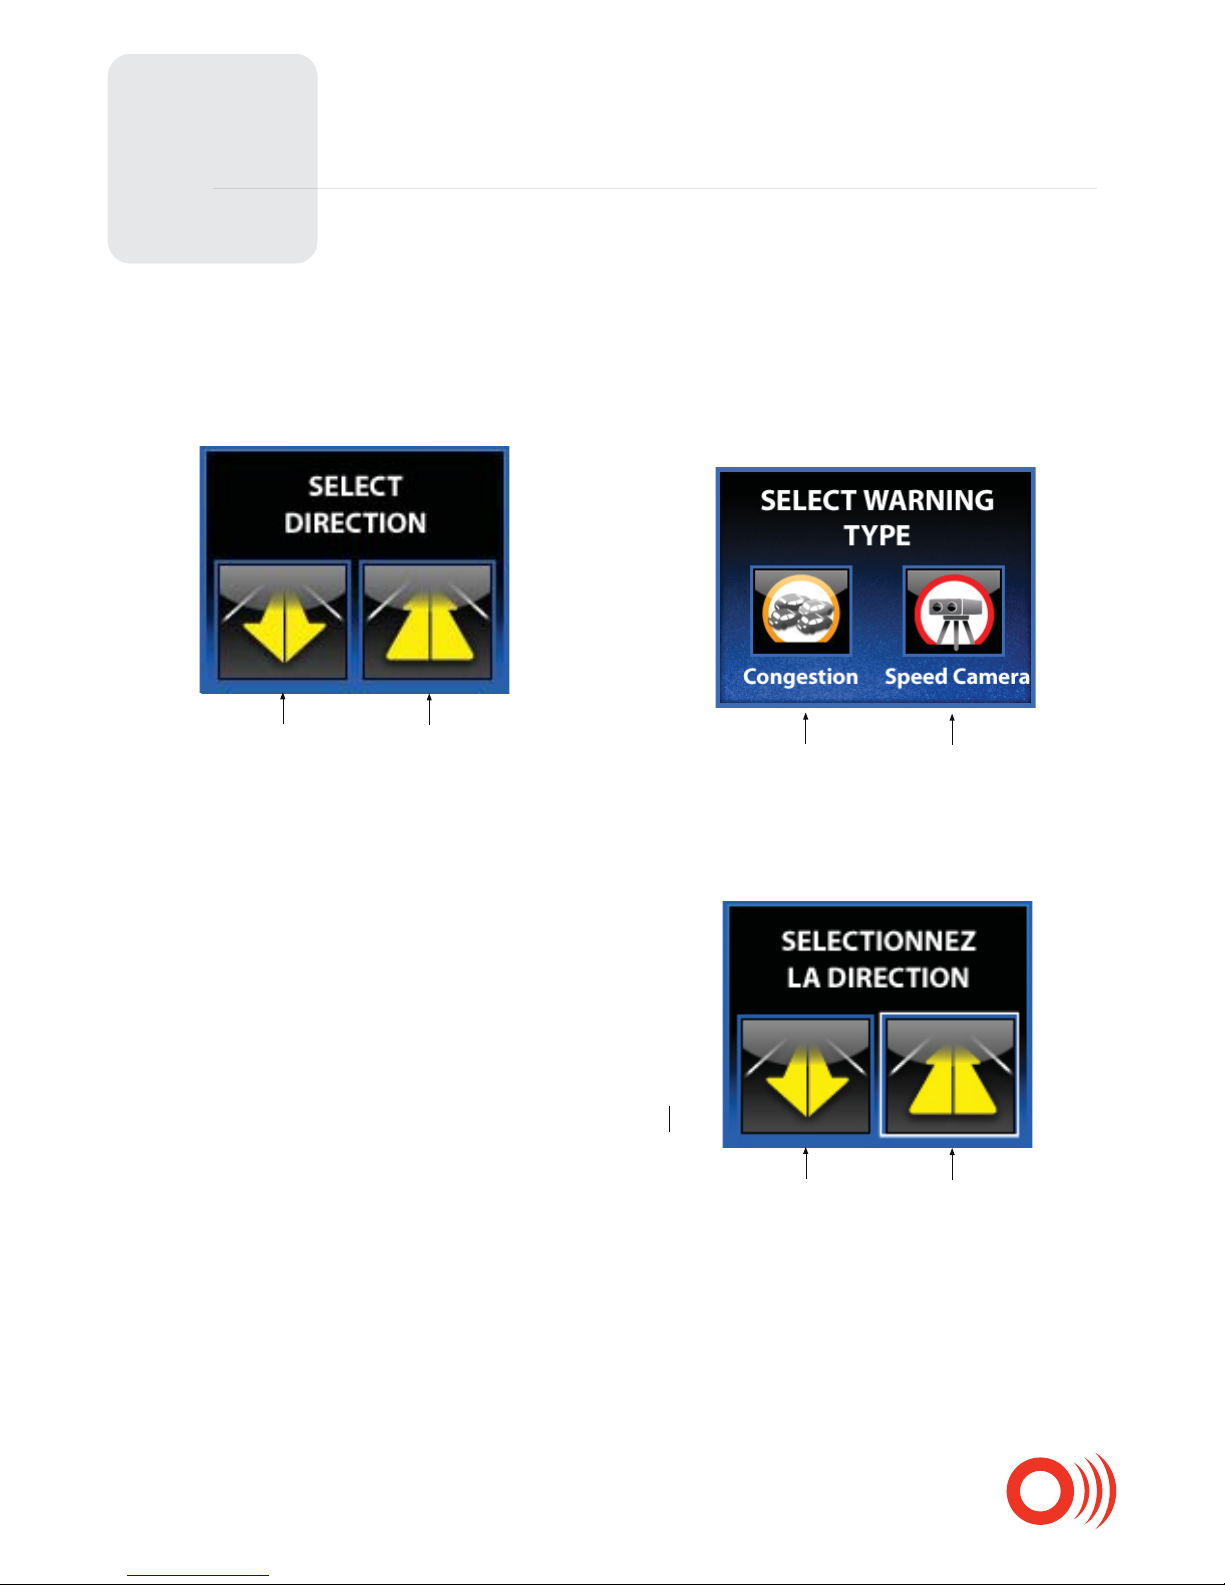
Only mobile speed cameras are reported in this
mode. Once you have pressed the LIVE button,
the device will ask you to indicate the warning
direction.
You can select between speed c ameras
and trac congestions in this mode.
Select the warning type rst using the LIVE
buttons.
A countdown starts before the warning is sent.
Move the joystick to cancel your report.
A countdown starts before the warning is sent.
Move the joystick to cancel your report.
Then, select the direction:
Left LIVE button:
Opposite direction
Right LIVE button:
Your direction
Simple report mode Advanced report mode
Left LIVE button:
Congestion
Right LIVE button:
Mobile speed camera
Left LIVE button:
Opposite direction
Right LIVE button:
Your direction
Page 25
4
Operation
25
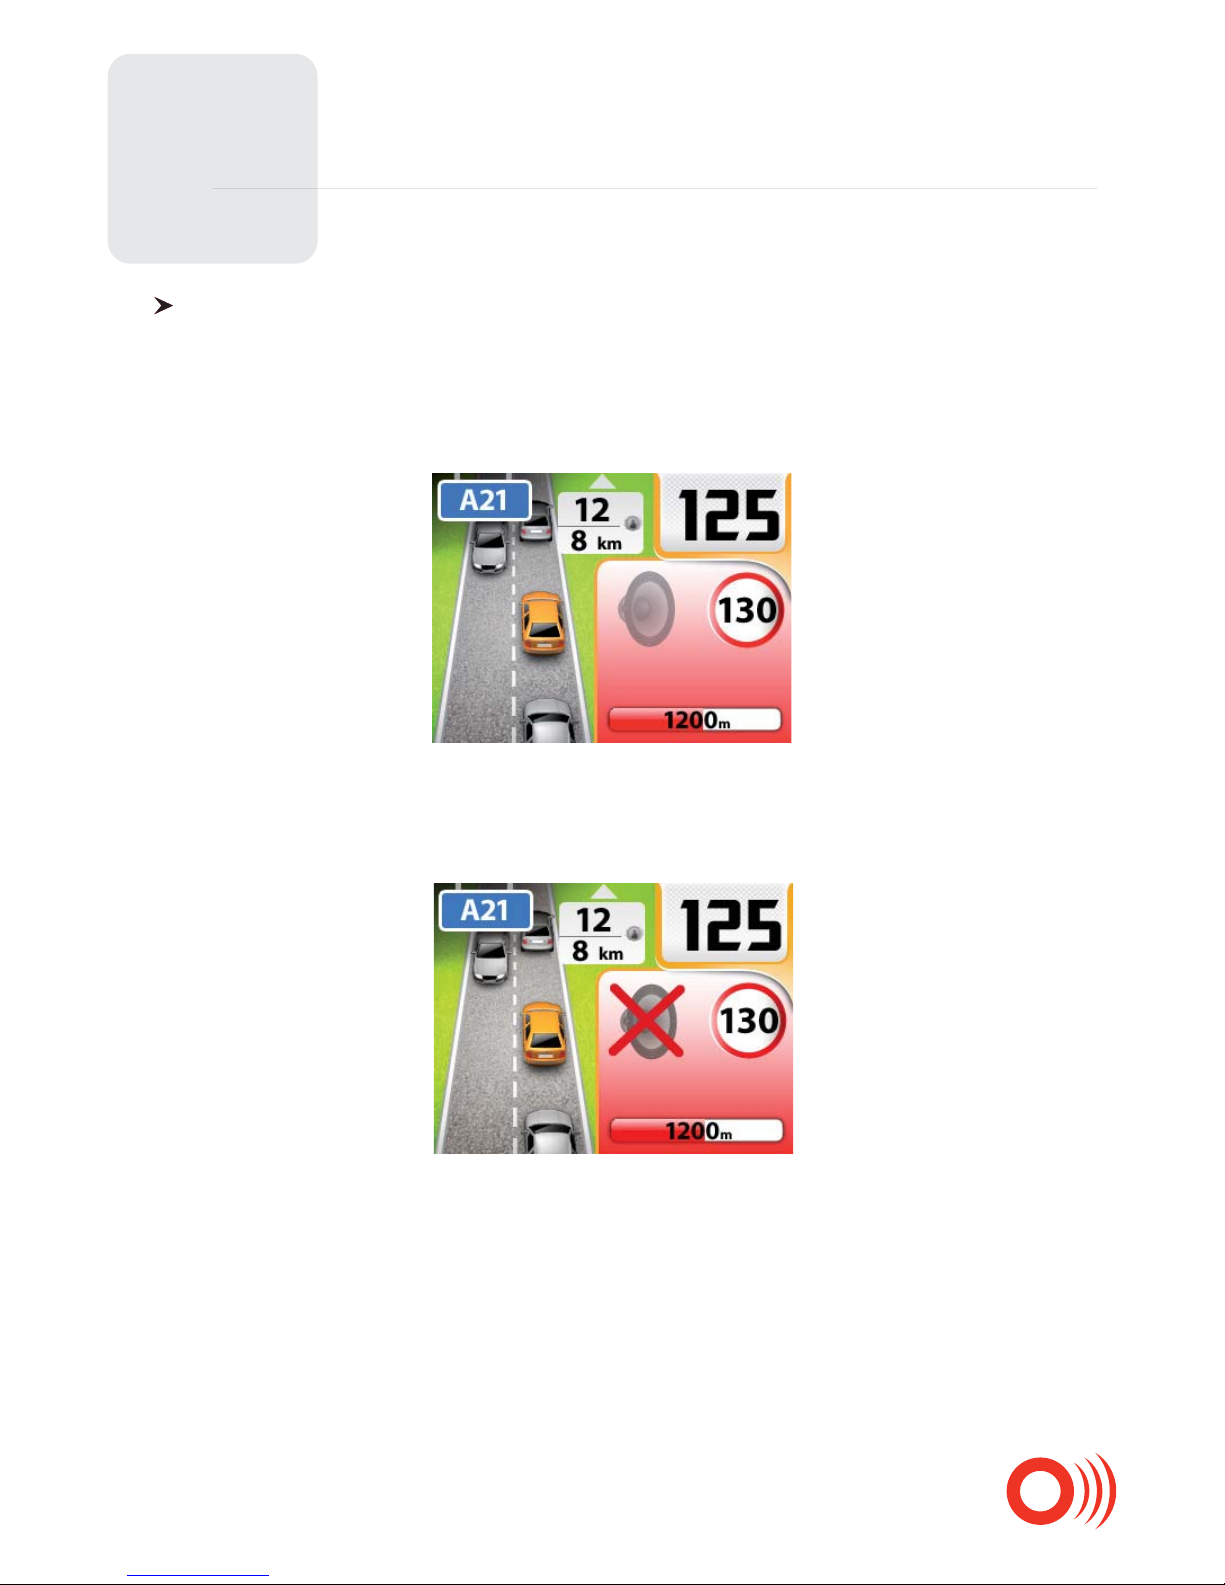
Sound mute: You can mute the sounds of the warnings of every type. You can mute
temporarily or denitely the sound of a warning (denitive mute works only on the
integrated warnings, not on LIVE warnings).
Temporary mute: During a warning, move the joystick one time. The warning will be replaced
by a speaker.
Denitive mute: During a warning, move the joystick a second time, the warning will be replaced
by a crossed speaker.
To enable the sound again, simply move the joystick when you pass the warning.
Page 26
5
26
General Notices & Warnings
Waste Electrical and Electronic Equipment Directive
According to Directive 2002/96/EC on Waste Electrical and Electronic Equipment, household
electrical appliances cannot be dispersed in the conventional waste stream. Used electrical
and electronic equipments must be collected.
s The Max cannot work properly in a tunnel or a basement, because the satellite reception is disturbed. We strongly recommend driving carefully in those areas. The Max needs a short time to establish the connection to the satellites again.
s The Max calculates the direction of the vehicle to avoid wrong alerts. Anyway, false alerts can
occur sometimes. If you’re driving a parallel road that is sited very close to a road on which an alert
is located, a wrong alert may occur.
s The Max is a driving help that must be considered as a prevention tool. The purpose of this system
is to incite you to drive carefully and to respect the road safety rules. We decline all responsibility
for any infraction to the legislation and the road safety rules.
s Hardware and software of this device are the property of Wikango / AlerteGPS Hardware and are
protected by copyright laws and intellectual property laws. They may not be copied or distributed
in any illegal manner.
s The GPS (Global Positioning System) is placed under the authority of the American government.
Wikango / AlerteGPS Hardware cannot be held responsible for the availa bility and precision of the
GPS.
s You must respect all road safety rules.
s Do not disturb the driver or cause any damage to the safety elements of the vehicle while instal-
ling the GPS.
s While installing the device, make sure that it cannot be dangerous to the occupants of the vehicle,
particularly in case of projection.
s Keep the unit and the cigar-plug away from water.
t If the unit or the cigar-plug falls in the water, don’t touch the unit before you have disconnected
the cigar-plug from the cigar socket of your vehicle, and remove the unit using the cable.
t Read this manual and all safety warnings carefully before you use or install this unit.
t If your vehicle is parked in the sun, let the unit cool down before you use it.
t Clean-up instructions: don’t use solvents. Clean regularly.
t Don’t let liquids or objects enter the housing through the ventilation holes. They may damage the
t Do not try to repair and disassemble the unit by yourself. This may cause an electric shock. Please
t Disconnect the unit when it’s not in use. To protect this unit in case of a storm or when it’s not
used during a long time, disconnect it from the network.
Page 27
5
27
General Notices & Warnings
t 12/24 V negative earth socket only. Remove cigar-plug while leaving vehicle. Disconnect cigarplug when starting vehicle. Always use the correct rated fuse.
t Use in temperate areas.
t A minimum space of 2 inches should be maintained around the unit for its ventilation.
t Don’t connect any cable to the unit before removing or connecting the power cable. Connect the
external antenna after the power cable, and disconnect it before you remove the power cable.
t The software and the drivers are provided as is. Wikango / AlerteGPS Hardware declines all
responsibility in case of software or hardware incompatibility.
t The access to the website is not guaranteed in case of site maintenance, network disturbance,
connection problems or any problem that could disturb access to the website.
t To minimize the risks of interactions between two GPS devices, a distance of 20 inches should be
maintained between this unit and another GPS device.
Battery:
t Batteries are liable to short circuits. A shortcut could occur if the battery poles are in contact with
another battery or a metallic object.
t Use only at temperatures between 5°C (41°F) and 35°C (95°F).
t To prolong the battery life, charging should only occur at moderate room temperatures.
t Use exclusively replacement batteries recommended by alertegps. Never use batteries designed
for other devices or not recommended by alertegps.
t Don’t leave the Max connected to the cigar-plug of your vehicle when you leave your vehicle. The
battery could overheat or ignite after a very long connection.
CAUTION
Risk of explosion if battery is replaced by an incorrect type
Dispose of used batteries according to the instructions.
Dispose of batteries according to local regulations. Do not dispose as household waste.
t The battery is guaranteed 3 months.
Battery charger (optional):
t The battery charger must exclusively be used with this device. Never try to use it with other
devices.
t Never use other battery chargers.
t If the device remains unused during a long period, disconnect the battery charger
from the socket.
Page 28
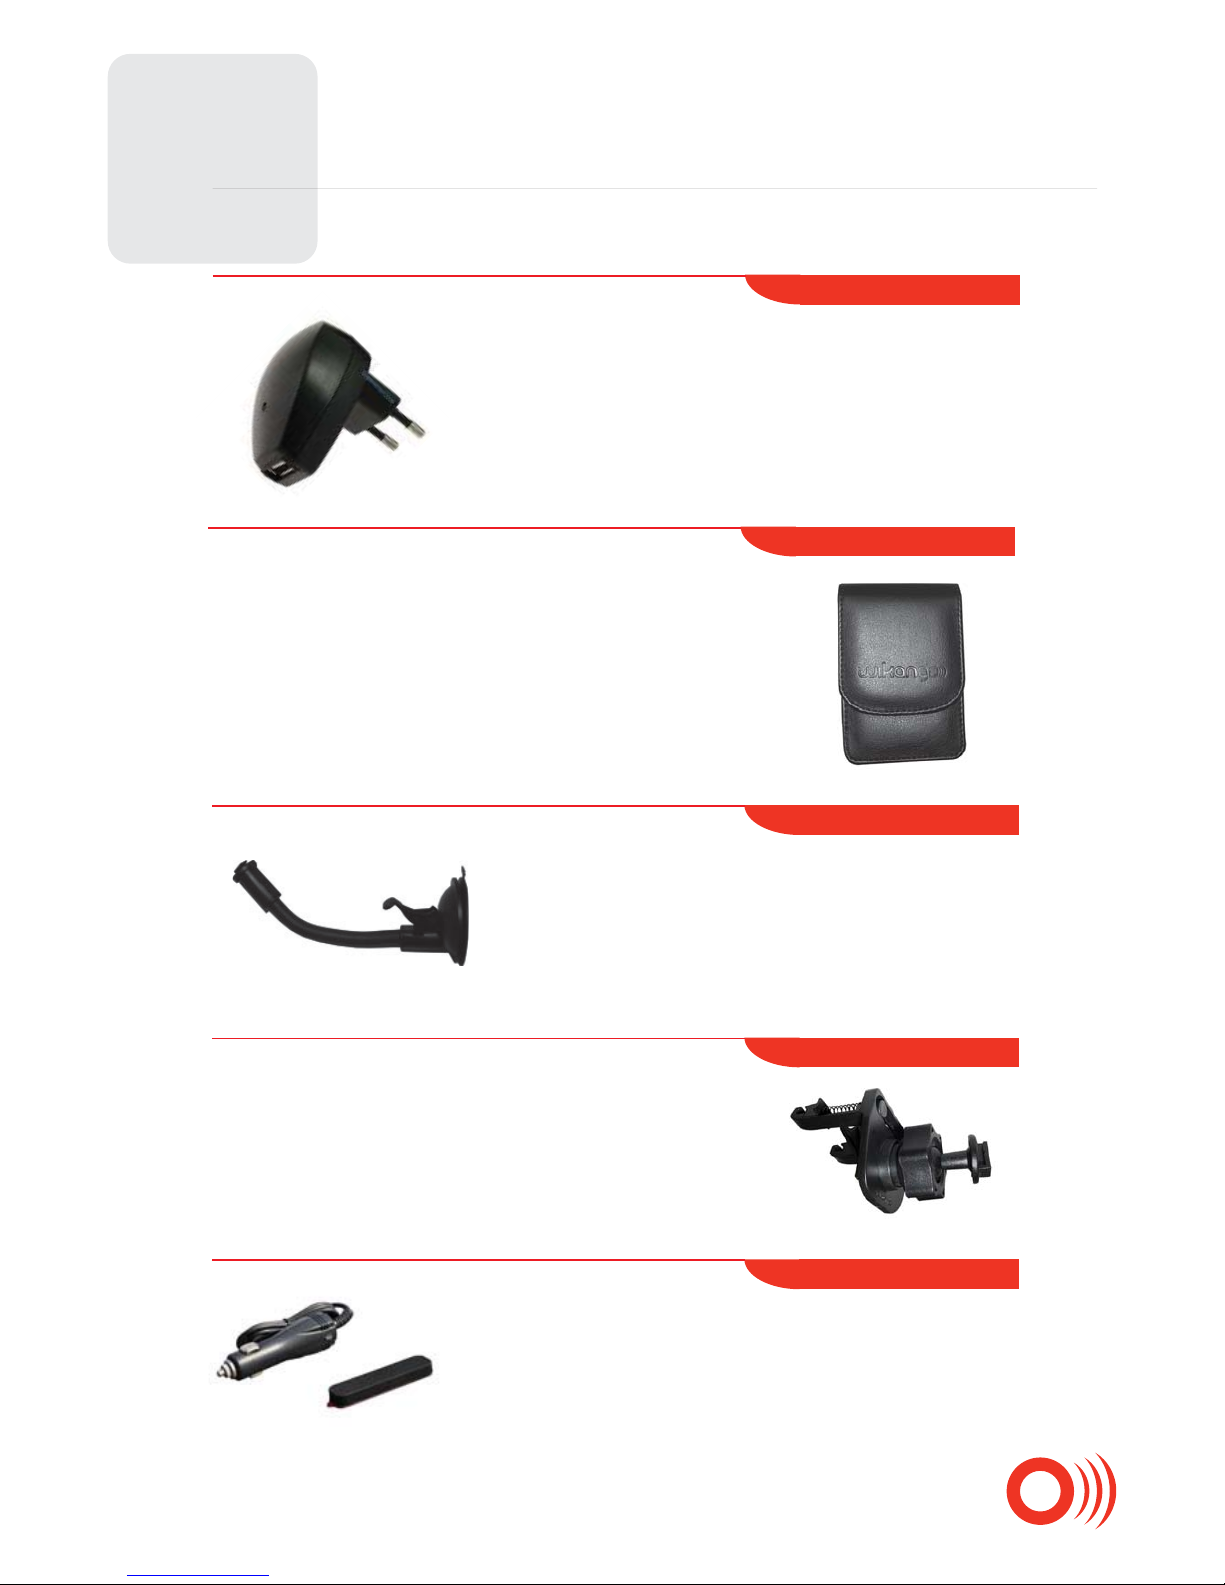
Accessories
28
Charge the battery of your Max faster!
Protect your device against dust and humidity.
Fix your device on the windshield of your
vehicle to ensure optimal readability.
A very convenient way to x your device
in your vehicle!
An easy way to use your device in a second
vehicle.
Home Charger
Cover
Air Vent Mount Kit
2nd Car Kit
Suction Mount
 Loading...