

Wiggly-Amps Engage Touchscreen Installation Instructions

Wiggly-Amps Ltd
40, Market Place
North Walsham
Norfolk
NR28 9BT
Web: www.wiggly-amps.com
e-mail: info@wiggly-amps.com
Telephone: +44 (0)1263 834648
Engage Touchscreen
Installation instructions
27/11/13 JW Initial release for compact screens

Overview
These instructions are intended to allow anyone with a basic level of DIY skills to install the Engage
Touchscreen system in a safe and secure fashion. If you are unsure of anything or just need to
confirm your understanding, please contact Wiggly-Amps and we'll be pleased to help.
Specification
Dimensions: 440 x 373 x 75
Weight: 7.75 Kg
Power: 35W
Choosing a location
There are a number of things to consider when siting your screen, some obvious and some less so.
Think first about the flow of people around your surgery:
• Will it be easily seen by patients on arrival?
• Is it going to be obscured by people queuing at reception?
• Is a patient likely to be easily overlooked when using the system?
You should also consider the physical aspects of the installation:
• How are the power and network cables going to be routed?
• Is it going to be in direct sunlight at any time of year?
• Is it clear of any direct heat source such as a radiator or heater?
• Is it going to have 50mm clear at the top and bottom to allow airflow for cooling?
Installing the Screen
There are three methods that you can use to mount your system:
• Desktop
• VESA mount
• Direct to wall
Detailed instructions are available in the Annexes to this document.
Setting up the software
The last step is to configure your screen to talk to your Clinical system. Once the screen is powered
up and connected to your network, please give us a call on 01263 834648 and we'll finish off the
setup process and give you a run through of the system, and it's features. This involves the
installation of a small piece of software on one of your workstations (Ideally reception) to allow you
to control the screen remotely.
ANNEX A – Desktop Mount
The optional Desktop mounting bracket lets you place the screen on a table or low counter top.
Fitting the mount is a simple process, requiring a medium sized cross-head screwdriver.
Start by placing the screen face down on the table, you may want
to place a towel or similar under it to protect the display and the
work surface.
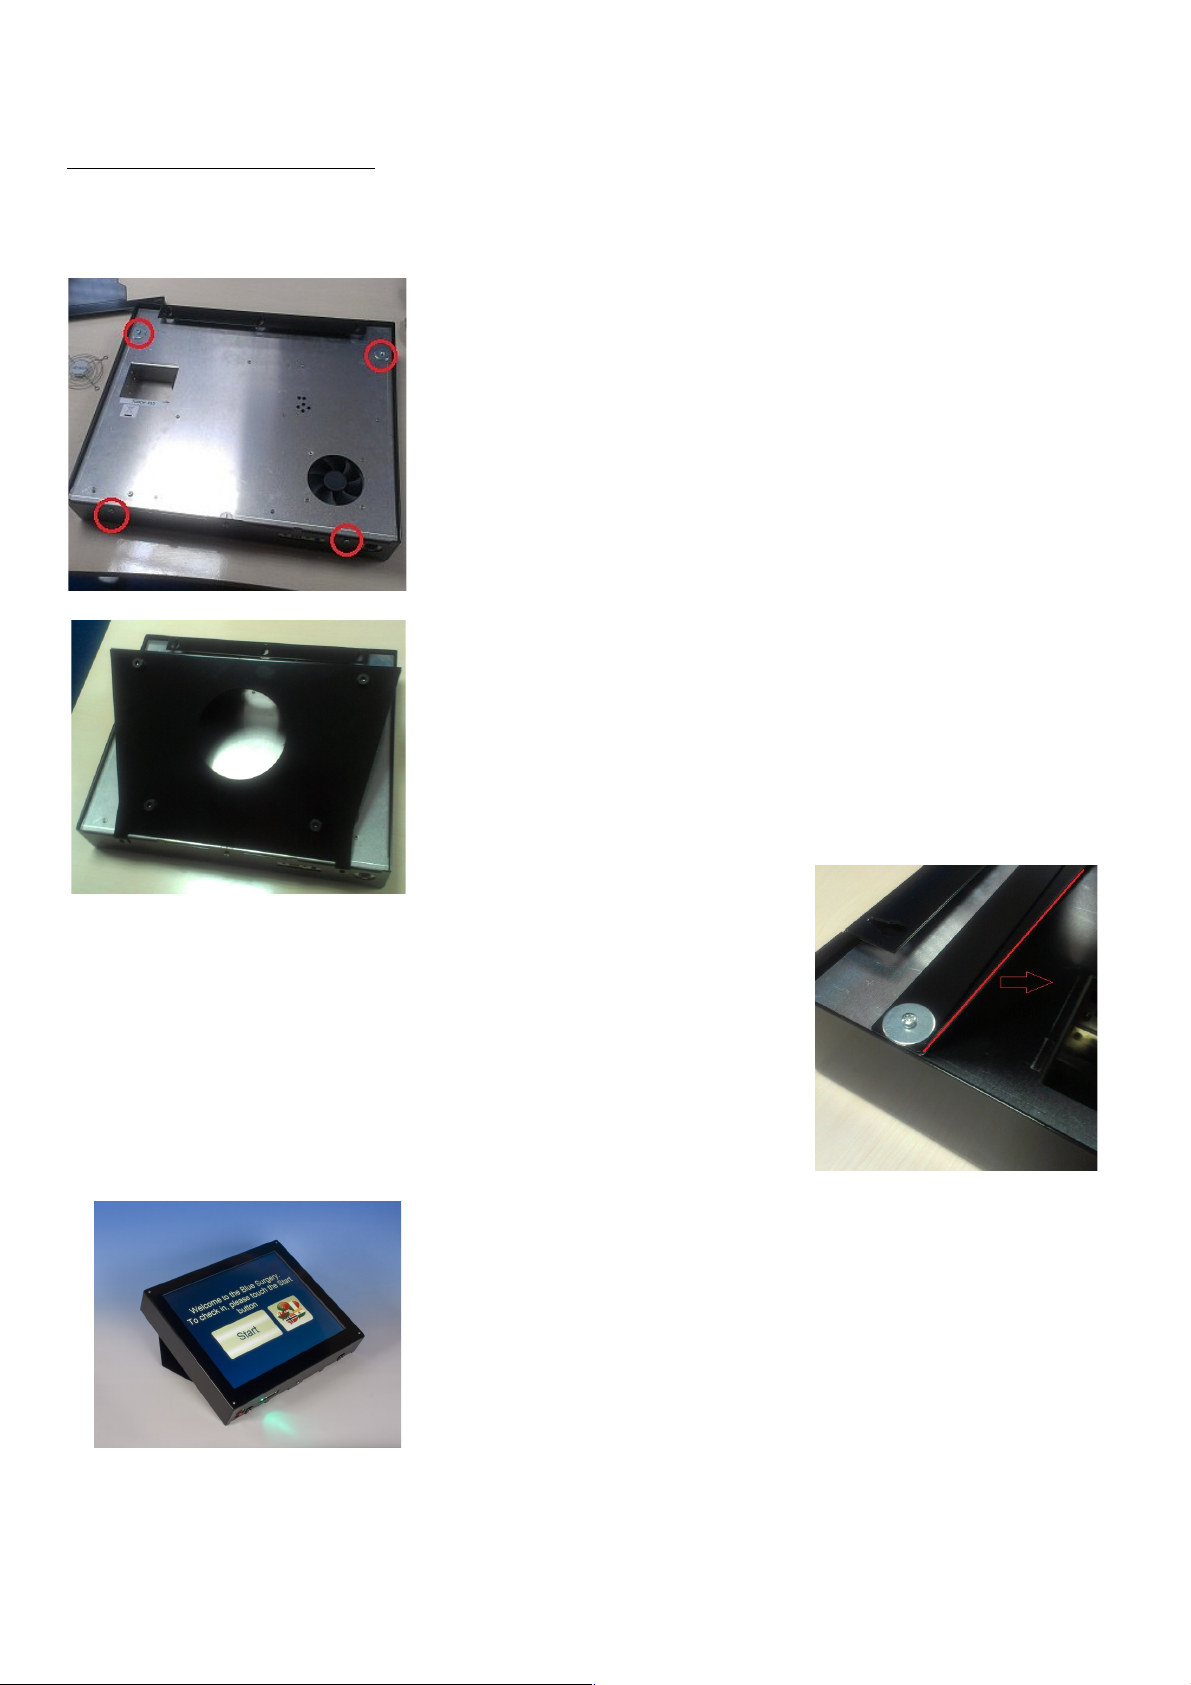
Next, unscrew the 4 screw bolts highlighted opposite and put
them to one side.
Place the mount on the screen as shown, then replace all 4
screw bolts loosely with your fingers (Don't forget the washers on
the top two bolts)
Tighten the BOTTOM pair of bolts first.
Finally, tighten the top two screw bolts. You may need to slightly flex
the mount to get the washers to sit flush.
Your screen is now ready for putting in position.
 Loading...