

WiFi and scales WIFI ADAPTER Installation Manual

Web Page Installation Guide
WiFi RS232 Adapter
WIFI ADAPTER Quick Start Guide, web page configuration www.wifiandscales.com
2
1 Introduction
This guide will help you install and configure the WIFI ADAPTER for the first time use. It describes how to
configure the required WiFi and IP parameters via the web interface so it can be connected to a serial port of a
scale.
2 Requirements
Things you need to have:
The WIFI and Scales Serial to WiFi 802.11b+g adapter
A WiFi Access Point that you have full control of (Does not have to be the actual AP the adapter is going to be
configured for)
A PC that connects to the Access Point via Ethernet or WiFi
A web browser installed on the PC
Things you need to know:
The SSID (the name) of the WiFi Network you want the Serial Adapter to connect to.
The Security Key of the WiFi Network
If you are to set a static IP address for the Serial WiFi adapter you need to know:
IP address to set
The network mask
The default gateway
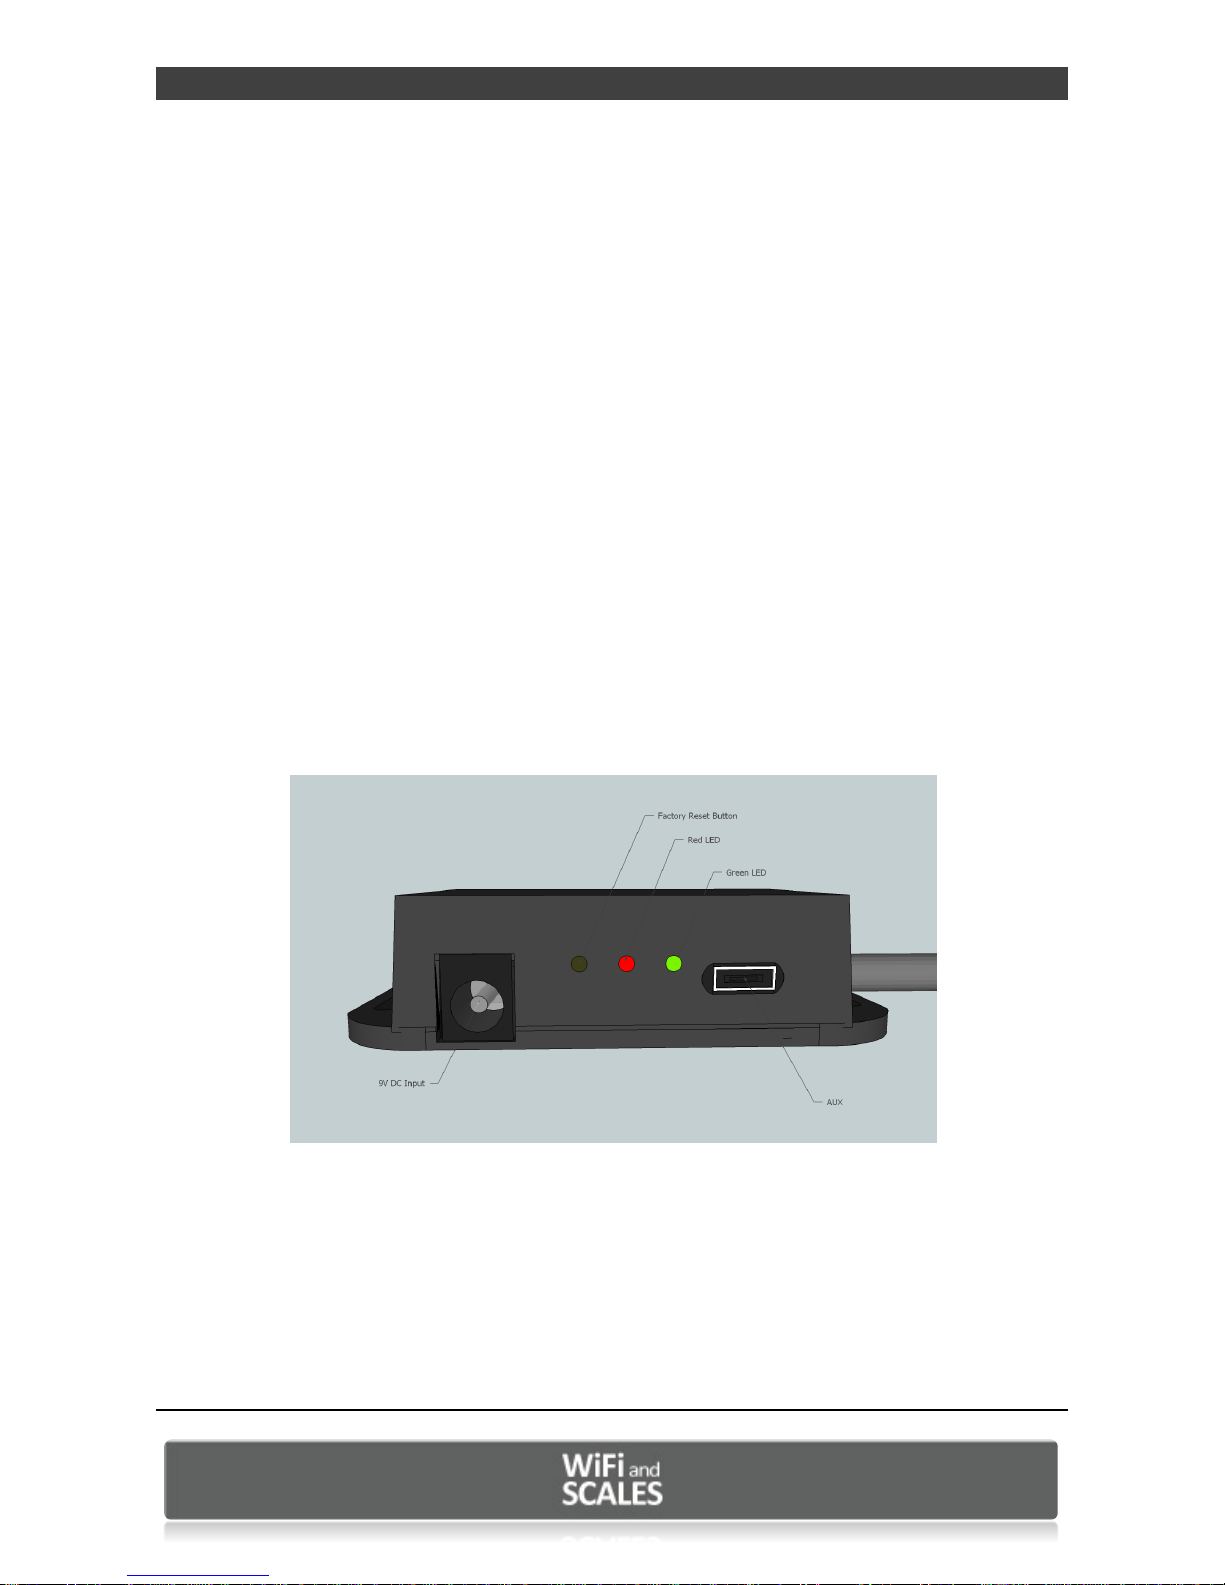
3 The WIFI ADAPTER Connections
All input and outputs of the WIFI ADAPTER except for the DSUB-9 connector, is located on the side of the
adapter.
From left to right these are:
DC-jack for a 2.1 mm DC plug with positive sleeve and negative tip.
Factory reset button (accessed with a pin inserted to the hole)
Red LED indicates power.
Green LED indicates established connection (association) with a WLAN access point
Aux connector for additional equipment.
WIFI ADAPTER Quick Start Guide, web page configuration www.wifiandscales.com
3
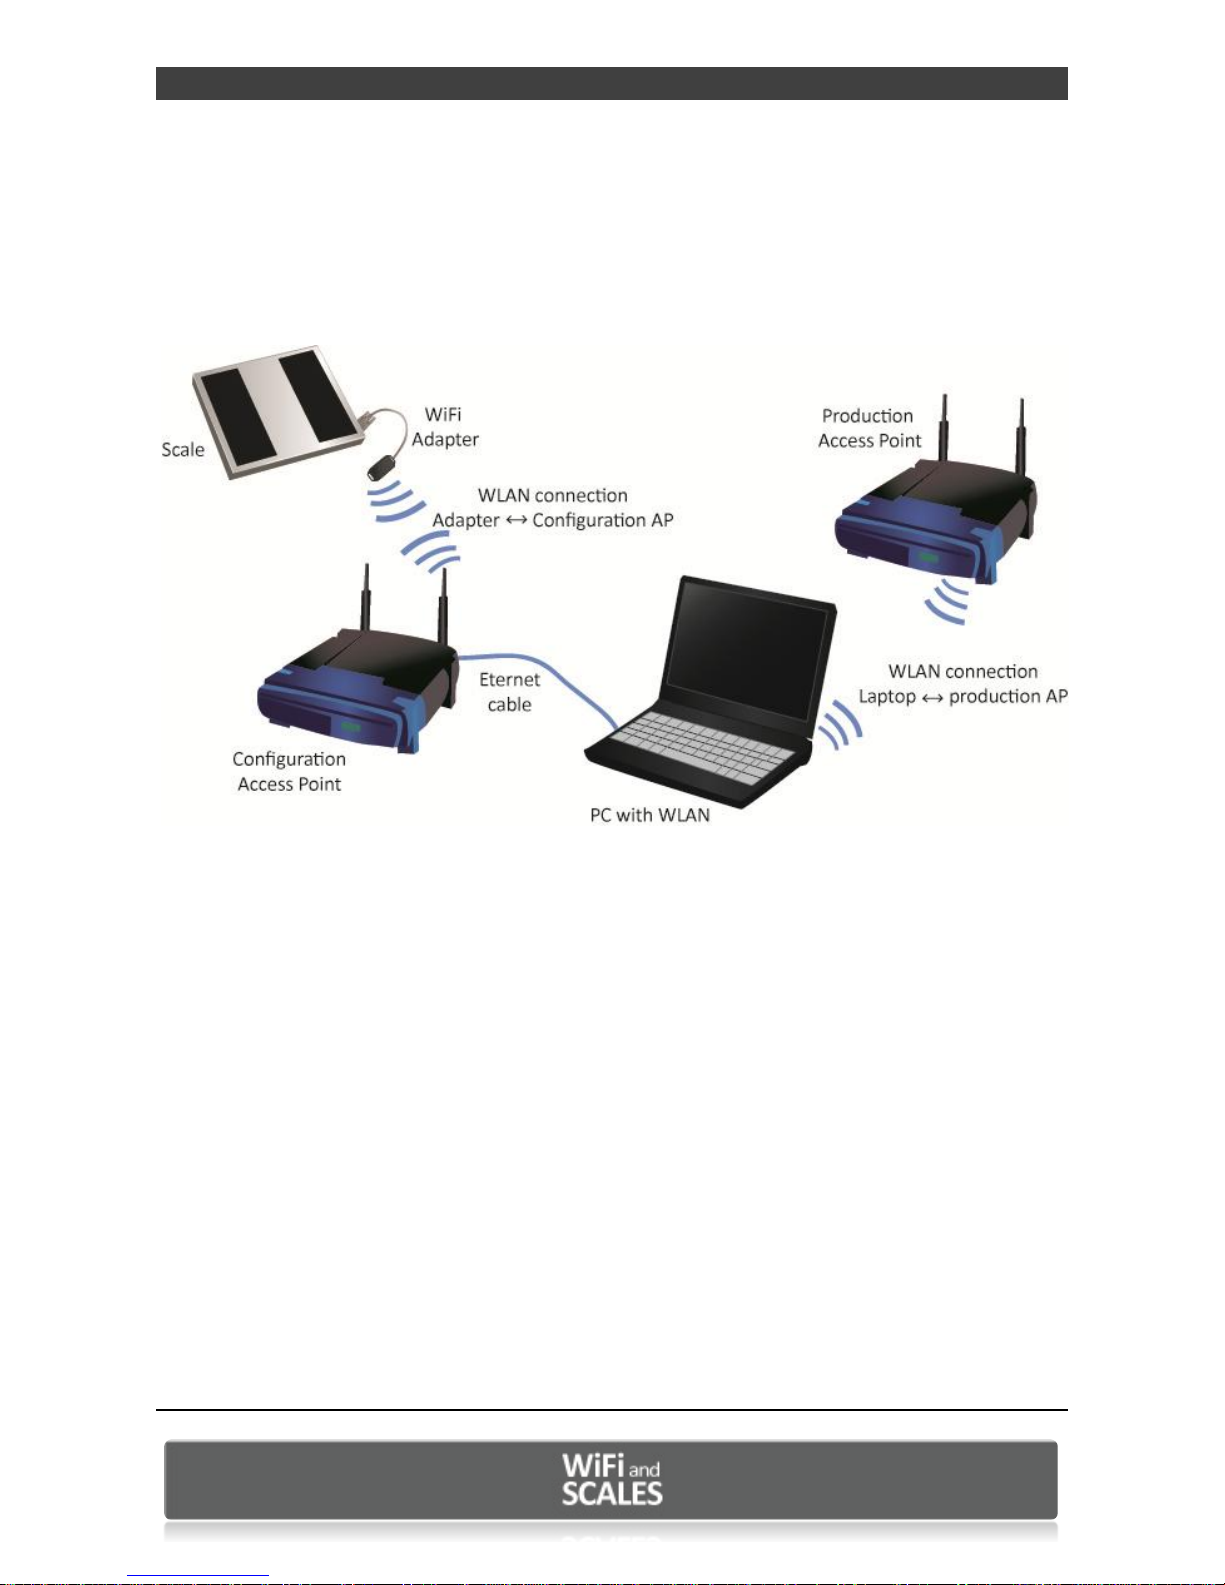
4 Getting started with the WIFI ADAPTER
To simplify the setup it is convenient to use a PC with one Ethernet interface and one WLAN interface.
Connect the access point for configuration with an Ethernet cable and connect the Wireless LAN interface
to the production access point to which you wish to connect the WIFI ADAPTER adapter.
4.1 Configuring the WIFI ADAPTER via the web interface
4.1.1 Configuring the AP
Connect the PC to the access point. This is easiest done via Ethernet cable as we are going to
change the Wireless LAN parameters of the AP.
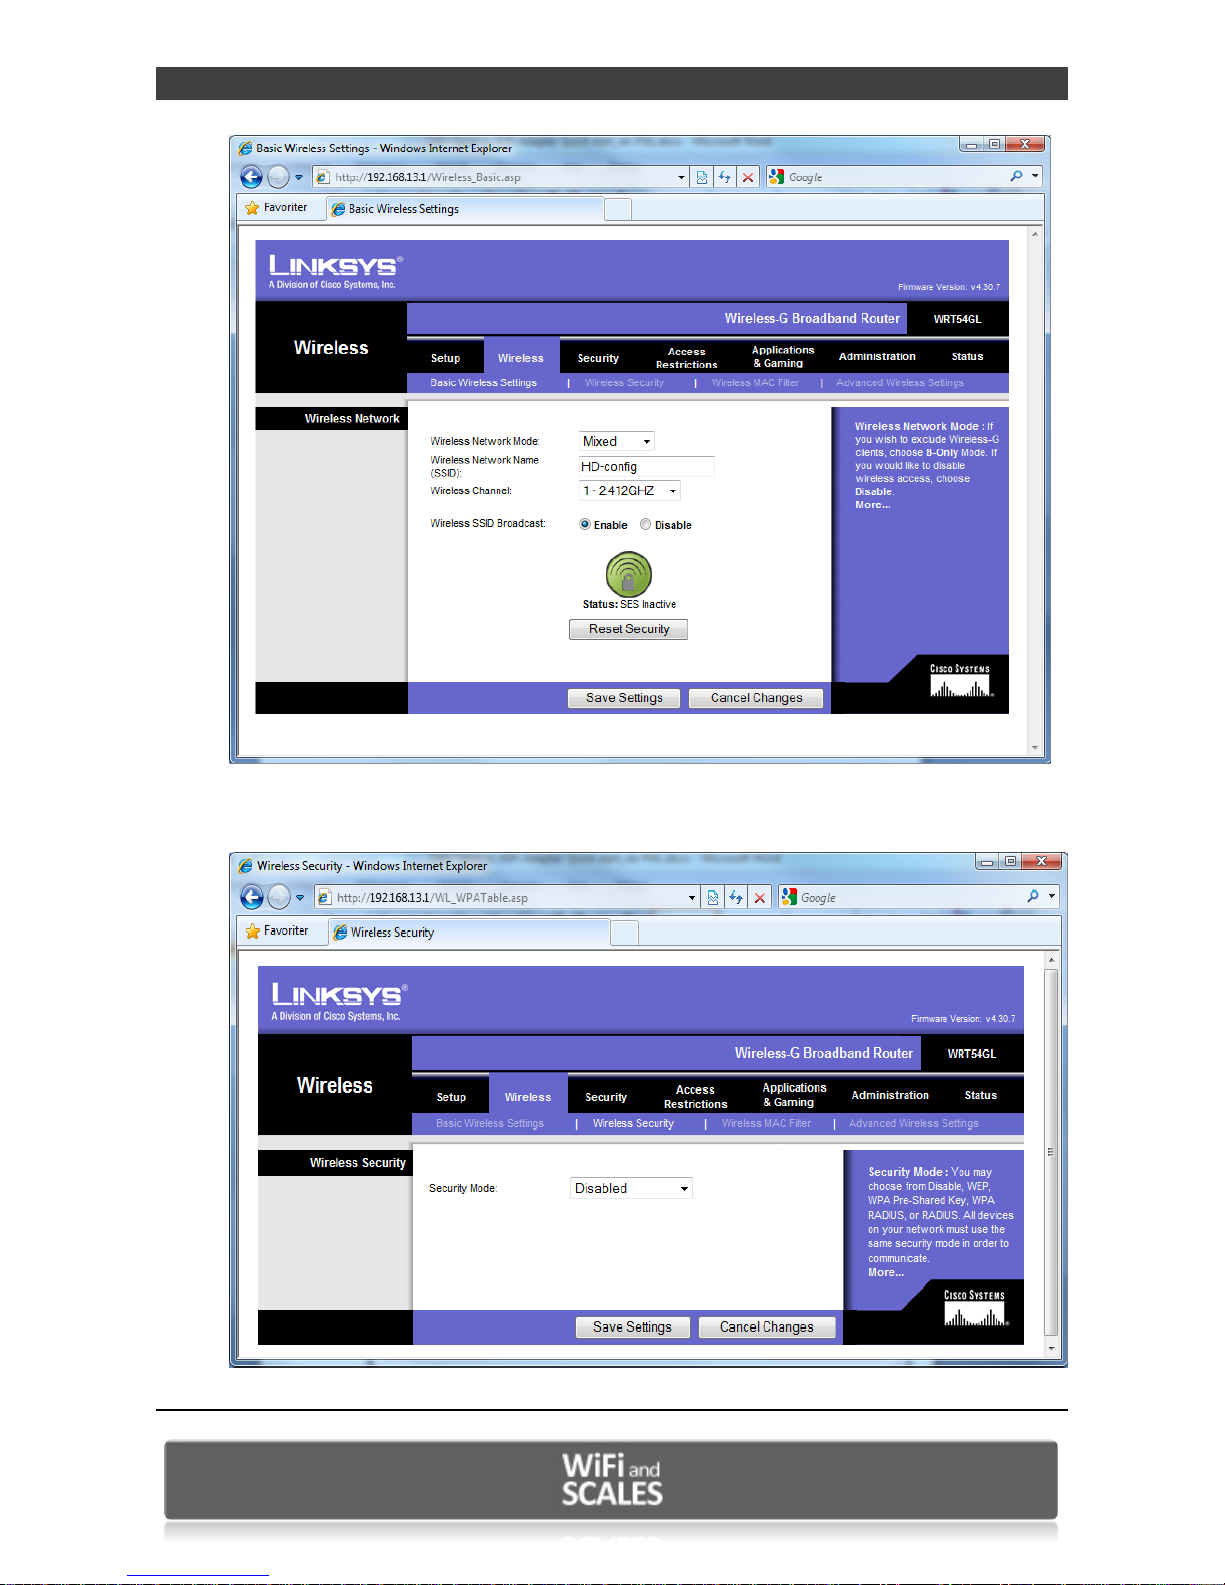
Log into the management of the AP and set the SSID to “HD-config”
WIFI ADAPTER Quick Start Guide, web page configuration www.wifiandscales.com
4
Figure 1: Setting SSID on a Linksys as an example
Turn off all wireless security
Figure 2: Turn off Wireless Security protocols (Linksys example)
 Loading...