

Page 1
WIDOS Einsteinstr. 5 Telephone +49 (0) 71 52 / 99 39 - 0
W. Dommer Söhne GmbH D-71254 Ditzingen-Heimerdingen Telefax +49 (0) 71 52 / 99 39 - 40
E-mail: [email protected] Internet www.widos.de
Kunststoffschweißtechnik
Working Instructions
Translation
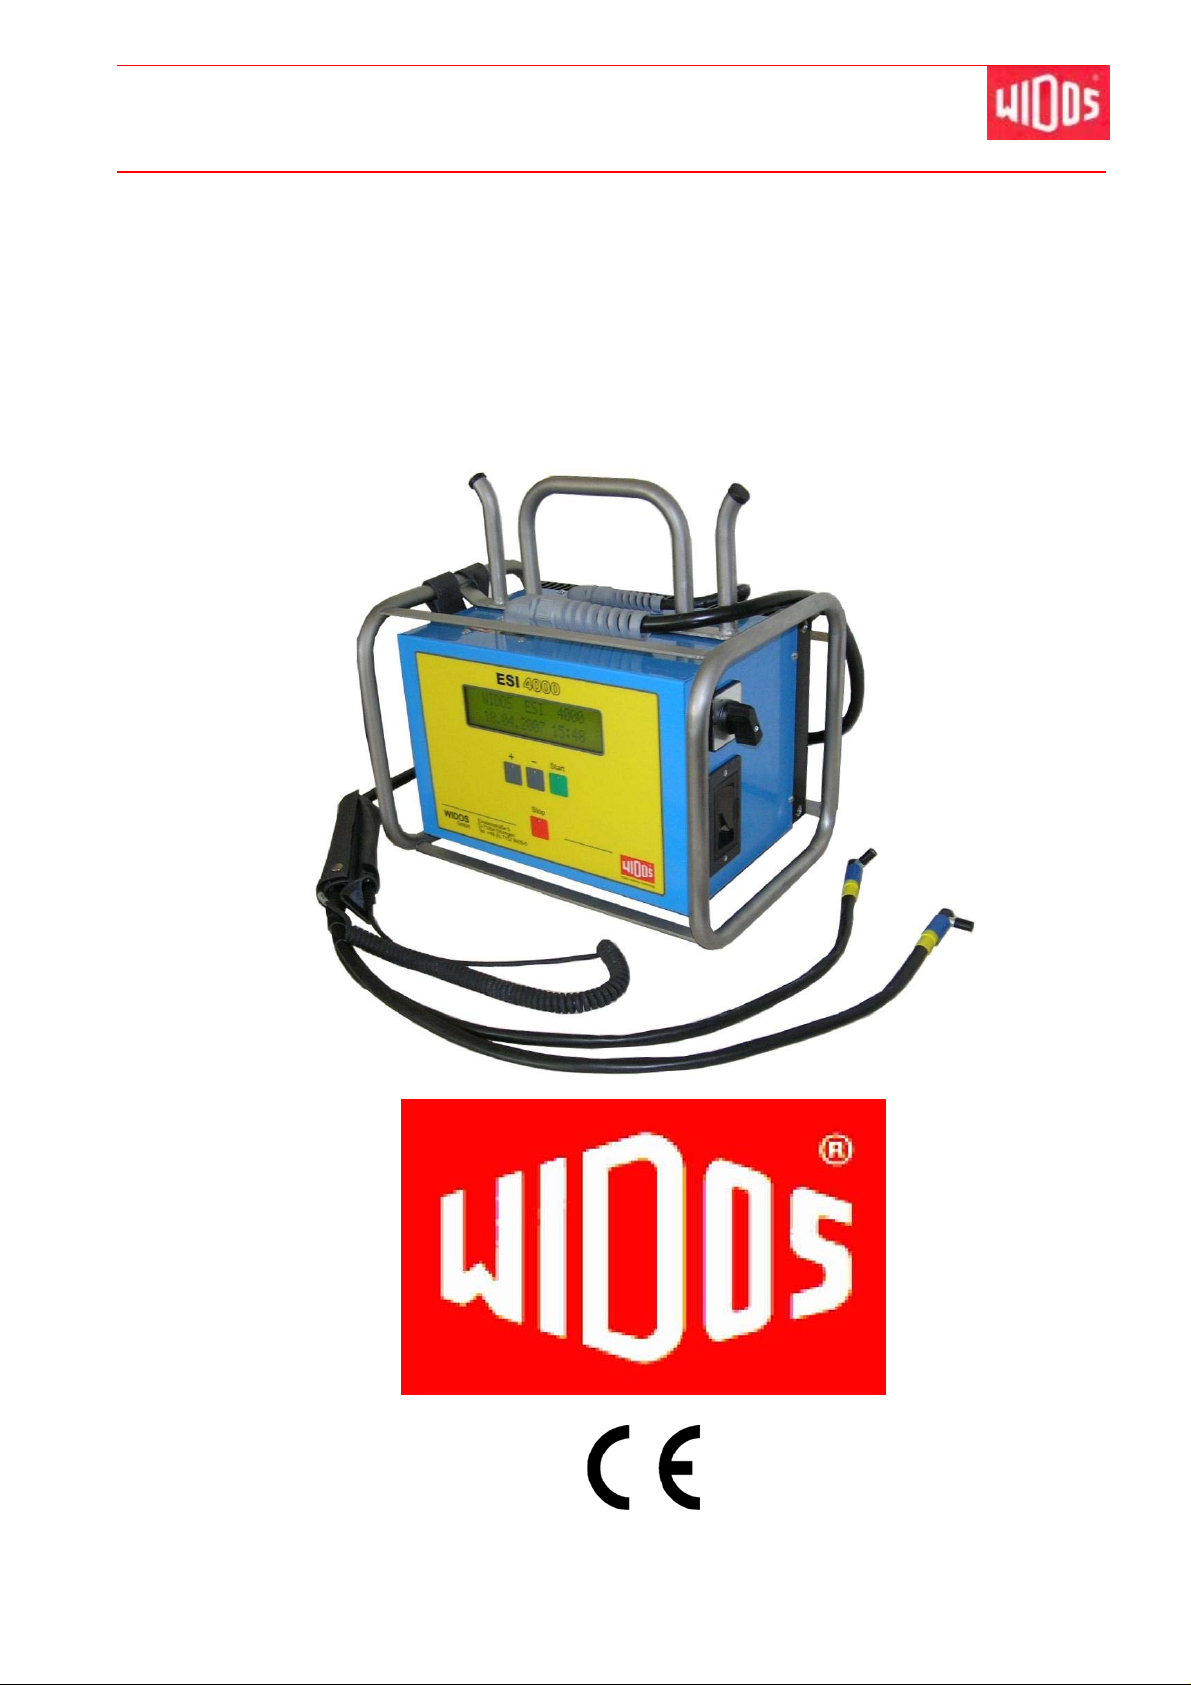
WIDOS ESI 4000
Keep for further use!
Headquarters: D-71254 Ditzingen-Heimerdingen Country court Stuttgart HRB 200973 Managing director: Jürgen Dommer
Page 2

Product Identification
Type: WIDOS ESI 4000
Kunststoffschweißtechnik
Serial no.: / year of construction:
see type label
Customer’s entries
Inventory no.:
Location:
Order of spare parts and sales service:
Manufacturer’s address WIDOS
W. Dommer Söhne GmbH
Einsteinstr. 5
D-71254 Ditzingen-Heimerdingen
T elephone: +49 (0) 71 52 / 99 39 - 0
Telefax: +49 (0) 71 52 / 99 39 - 40
E-mail: [email protected]
Subsidiaries
WIDOS
WIDOS GmbH W. Dommer AG
An der Wiesenmühle 15 St. Gallerstr. 93
D-09224 Grüna / Sachsen CH-9201 Gossau
Phone: +49 (0) 3 71 / 8 15 73 - 0 Phone: +41 (0) 79 432 5737
Fax: +49 (0) 3 71 / 8 15 73 - 20
18.07.2013 Working Instructions WIDOS ESI 4000 Page 2 of 37
Page 3

Introduction
Kunststoffschweißtechnik
Purpose of the document
These working instructions give you information about all important questions which refer to
the construction and the safe working of your machine.
Just as we are, you are obliged to engage in these working instructions, as well.
Not only to run your machine economically but also to avoid damages and injuries.
Should questions arise, contact our advisers in the factory or in our subsidiary companies.
We will help you with pleasure.
According to our interest to continuously improve our products and working instructions, we
kindly ask you to inform us about problems and defects which might appear in practical
experience.
Thank you.
Structure of the working instructions
This manual is arranged in chapters which belong to the different using phases of the machine.
Therefore the searched information can be easily found.
18.07.2013 WIDOS
W. Dommer Söhne GmbH
Einsteinstraße 5
D-71254 Ditzingen-Heimerdingen
All rights reserved
Reprinting only allowed with permission of the corporation.
Any changes subject to technical innovations.
18.07.2013 Working Instructions WIDOS ESI 4000 Page 3 of 37
Page 4

Contens
1. PRODUCT DESCRIPTION .............................................................................................. 6
1.1. Application and intended use.............................................................................................. 6
1.2. Safety measures ...................................................................................................................6
1.3. Conformity.............................................................................................................................6
1.4. Designation of product.........................................................................................................6
1.5. Technical data.......................................................................................................................7
1.6. Equipment..............................................................................................................................7
1.7. Wear parts .............................................................................................................................7
2. SAFETY RULES .............................................................................................................. 8
2.1. Explication of the different symbols ................................................................................... 8
2.2. Obligations of the operator.................................................................................................. 8
2.3. Obligations of the worker ....................................................................................................8
2.4. Structural modifications on the device ..............................................................................9
Kunststoffschweißtechnik
2.5. Dangers by electrical energy ...............................................................................................9
2.6. Danger of stumbling over the connecting line ..................................................................9
2.7. Danger of combustion at the socket...................................................................................9
2.8. Danger by toxic vapors........................................................................................................ 9
2.9. Warranty and liability..........................................................................................................10
3. FUNCTIONAL DESCRIPTION ...................................................................................... 11
4. INDICATING AND OPERATING ELEMENTS .............................................................. 12
4.1. Overview device ..................................................................................................................12
4.2. Welding device....................................................................................................................13
4.3. Control panel .......................................................................................................................14
5. STARTING AND OPERATING...................................................................................... 15
5.1. Security advice....................................................................................................................15
5.1.1. How to work while using a generator ...............................................................................15
5.1.2. How to work with an extension cable...............................................................................16
5.2. Accessories for data read in / out.....................................................................................16
5.2.1. Authorization card.............................................................................................................16
5.2.2. Bar code reading pen.......................................................................................................16
5.2.3. SD – card and reading device.......................................................................................... 16
5.2.4. USB card reader............................................................................................................... 17
5.3. Pipes and sockets...............................................................................................................17
5.4. How to switch on the machine.......................................................................................... 18
5.5. How to weld w ith the ESI 4000 ..........................................................................................19
5.6. How to weld w ithout fitting bar code................................................................................22
5.7. Error messages ...................................................................................................................24
18.07.2013 Working Instructions WIDOS ESI 4000 Page 4 of 37
Page 5

Contens
5.8. Enter parameters ................................................................................................................24
5.9. How to change the language.............................................................................................25
5.10. How to change date and time............................................................................................27
5.11. How to change authorization.............................................................................................28
5.12. Traceability–how to activate information and pipe length.............................................29
5.13. How to ask for project name prior to each w elding........................................................ 30
5.14. How to delete the memory.................................................................................................31
5.15. Welding data management ................................................................................................32
5.16. Possible defects and their elimination............................................................................. 32
5.17. Short instruction.................................................................................................................32
6. MAINTENANCE / STORING / TRANSPORT ................................................................ 33
6.1. Cleaning and care...............................................................................................................33
6.2. Transport and storing.........................................................................................................33
Kunststoffschweißtechnik
6.3. Waste management............................................................................................................ 33
7. SPARE PARTS LIST..................................................................................................... 34
8. DECLARATION OF CONFORMITY .............................................................................. 37
18.07.2013 Working Instructions WIDOS ESI 4000 Page 5 of 37
Page 6

WIDOS Einsteinstr. 5 Telephone +49 (0) 71 52 / 99 39 - 0
W. Dommer Söhne GmbH D-71254 Ditzingen-Heimerdingen Telefax +49 (0) 71 52 / 99 39 - 40
E-mail: [email protected] Internet www.widos.de
Kunststoffschweißtechnik
1. Product description
This chapter gives important basic information about the product and its prescribed use.
All technical details of the machine are put together as a general arrangement.
1.1. Application and intended use
The WIDOS ESI 4000 was especially designed for the use on building sites in order to weld
PE and PP pipes with all common socket types on the spot.
Any other use exceeding this is to be considered non-intended.
For damages resulting from it, the manufacturer cannot be held liable.
The risk is exclusively on the user’s side.
Also part of the purpose-oriented use is
respecting all the indications of the working instructions and
performing the inspection and maintenance works.
1.2. Safety measures
In case of wrong use, wrong operation or wrong maintenance the machine itself or products
being in the surrounding can be damaged or destroyed.
Persons being in the endangered area may be injured.
Therefore these working instructions have to be thoroughly read and the corresponding safety
advices must be necessary adhered to.
1.3. Conformity
The machine corresponds in its construction to the valid recommendations of the European
Community as well as to the European standard specifications.
The development, manufacturing and mounting of the machine were made very carefully.
1.4. Designation of product
The product is designated by two signs at the frame.
The type-labels are fixed on the control unit and on the basic machine.
They contain the type of the machine, the serial number, and the year of construction.
18.07.2013 Working Instructions WIDOS ESI 4000 Page 6 of 37
Page 7
Product description Chapter 1
1.5. Technical data
Weight: 12 kg
Voltage: 230 V
Power: 3.2 kW
Current: 16 A
Frequency: 50 Hz
Size: (WxHxD) 370 x 370 x 260 mm
Length connecting cable: 4 m
Length welding cable: 4 m
Material of base frame: Niro
Packing crate (wood, optional):
Size: (WxHxD) 410 x 450 x 330 mm
Weight: 6.4 kg
Packing case (aluminium, optional):
Size: (WxHxD) 400 x 400 x 300 mm
Weight: 4,5 kg
1.6. Equipment
Kunststoffschweißtechnik
Piece Denomination / Function
1 General authorization card
1 User authorization card
1 Initialization card (optional)
1 Bar code reading pen
2 each Adaptor for Ø 4.7
2 each Adaptor flat (optional)
1 SD-card
1 USB card reader
1.7. Wear parts
Piece Denomination Part-no.
2 Adaptor for Ø 4.7 H WAR 001
2 Adaptor flat (optional) HWAF001
Order numbers and individual parts can be inquired from company WIDOS.
18.07.2013 Working Instructions WIDOS ESI 4000 Page 7 of 37
Page 8
WIDOS Einsteinstr. 5 Telephone +49 (0) 71 52 / 99 39 - 0
W. Dommer Söhne GmbH D-71254 Ditzingen-Heimerdingen Telefax +49 (0) 71 52 / 99 39 - 40
E-mail: [email protected] Internet www.widos.de
Kunststoffschweißtechnik
2. Safety rules
A basic premise for working safely and without disturbances is the knowledge of the basic
safety signs and rules.
These working instructions provide you with the most important information to safely run the
device and the safety information has to be respected by all persons working with the device.
2.1. Explication of the different symbols
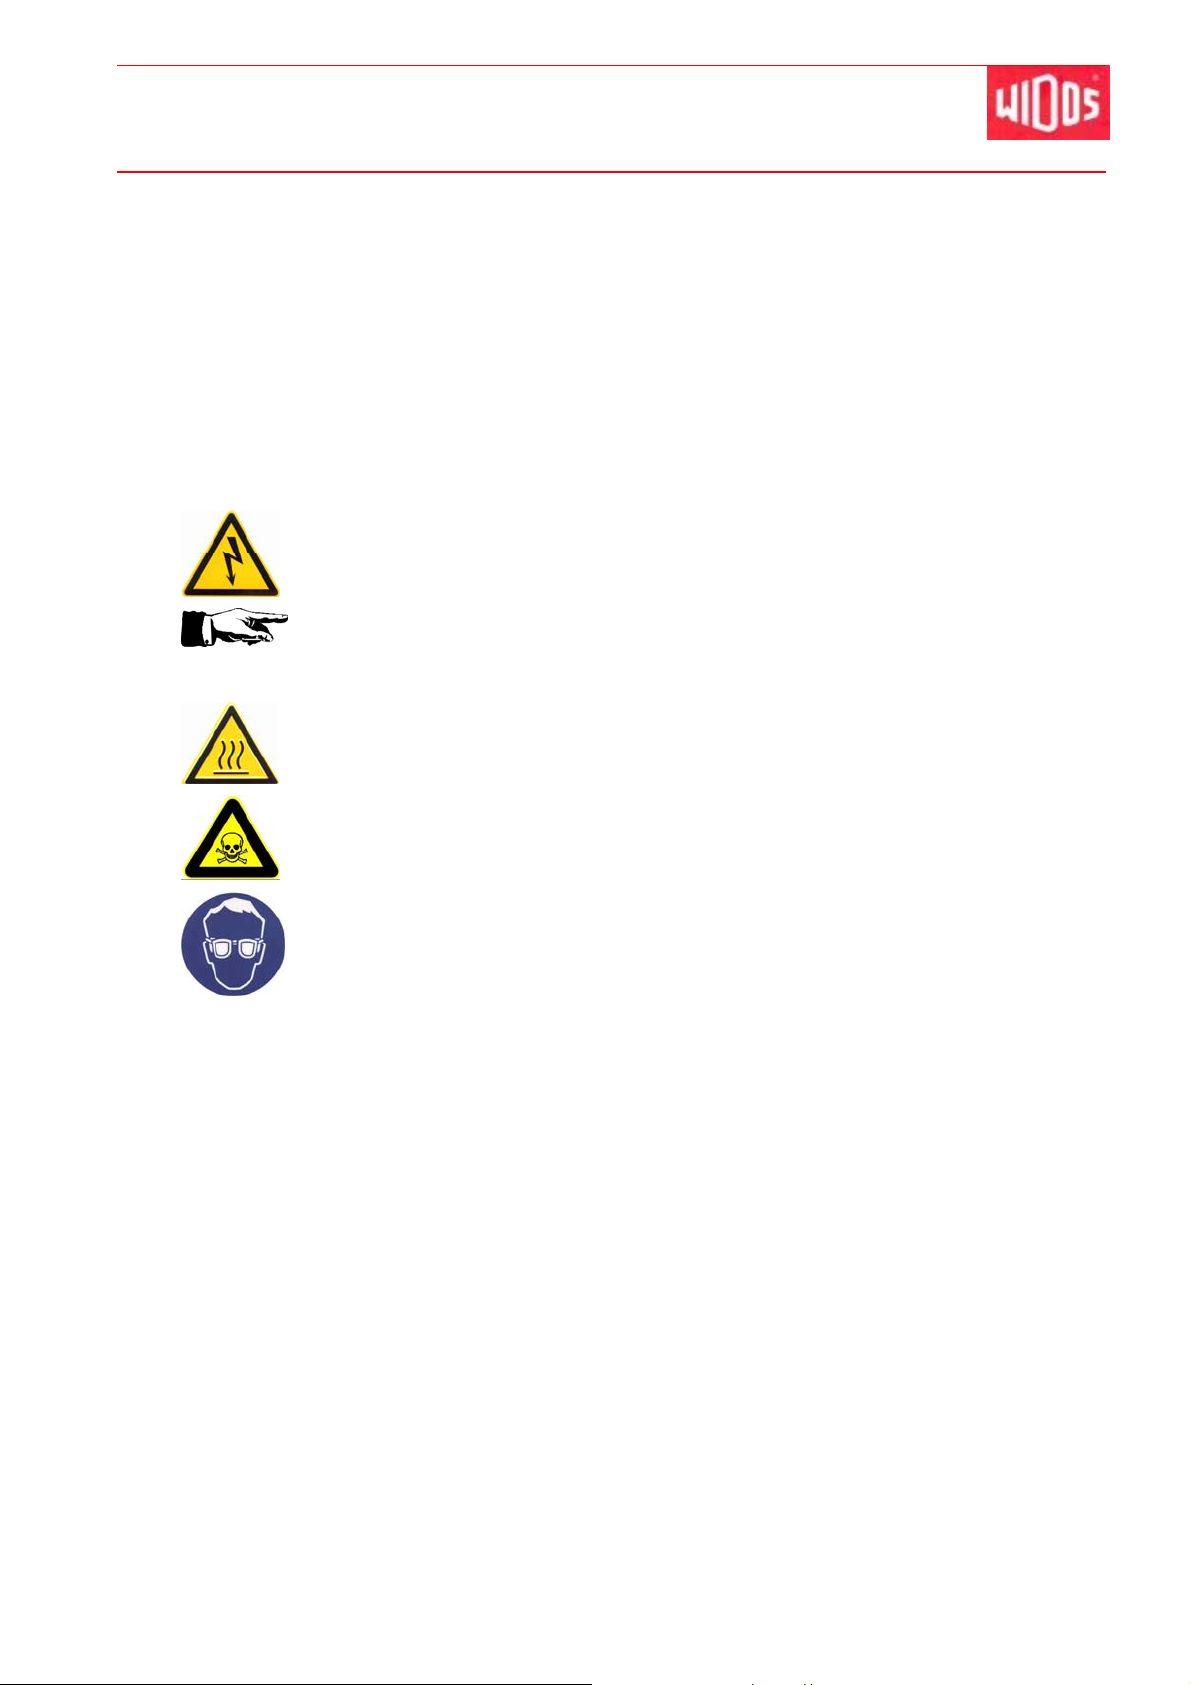
The working instructions contain the following signs for certain situations:
This symbol indicates a possibly dangerous situation.
The disrespect of it may result in injuries or damages on device parts.
This symbol gives important indications for the proper use of the device.
The disrespect of this indication may lead to malfunctions and damages on
the machine or on parts in the surrounding.
This symbol indicates a possibly dangerous situation due to hot surfaces.
The disrespect of these indications may lead to heavy burns, respectively to
The regulations for the prevention of accidents are valid (UVV).
ignition or even fire.
This symbol indicates a possible danger due to toxic vapors.
The disrespect of it may lead to hygienic damages.
This symbol means a possible danger of injury by spillings.
It is obligatory to wear safety glasses”
2.2. Obligations of the operator
The owner is obliged to only let persons work at the device who
know about basic safety and accident prevention rules and who are instructed in the
handling of the device
the worker also must have read and understood the safety chapter of this manual and
certify this by his signature.
The safety-conscious working of the staff has to be checked in regular intervals.
2.3. Obligations of the worker
Before working at the machine, all persons in charge of it oblige themselves:
to follow the basic safety and accident protection rules.
to have read and understood the safety chapter and the warnings in this manual and to
confirm by their signature that they have understood well.
to inform themselves about the functions of the device before using it.
18.07.2013 Working Instructions WIDOS ESI 4000 Page 8 of 37
Page 9
Safety rules Chapter 2
Kunststoffschweißtechnik
2.4. Structural modifications on the device
No modifications, extensions or reconstructions may be made on the machine without
permission of the manufacturer. In case of disrespect the warranty or liability will expire.
Machine parts which are not in a perfect condition are to be immediately replaced.
Only use original WIDOS spare and wear parts.
In case of purchase orders please always indicate the machine number!
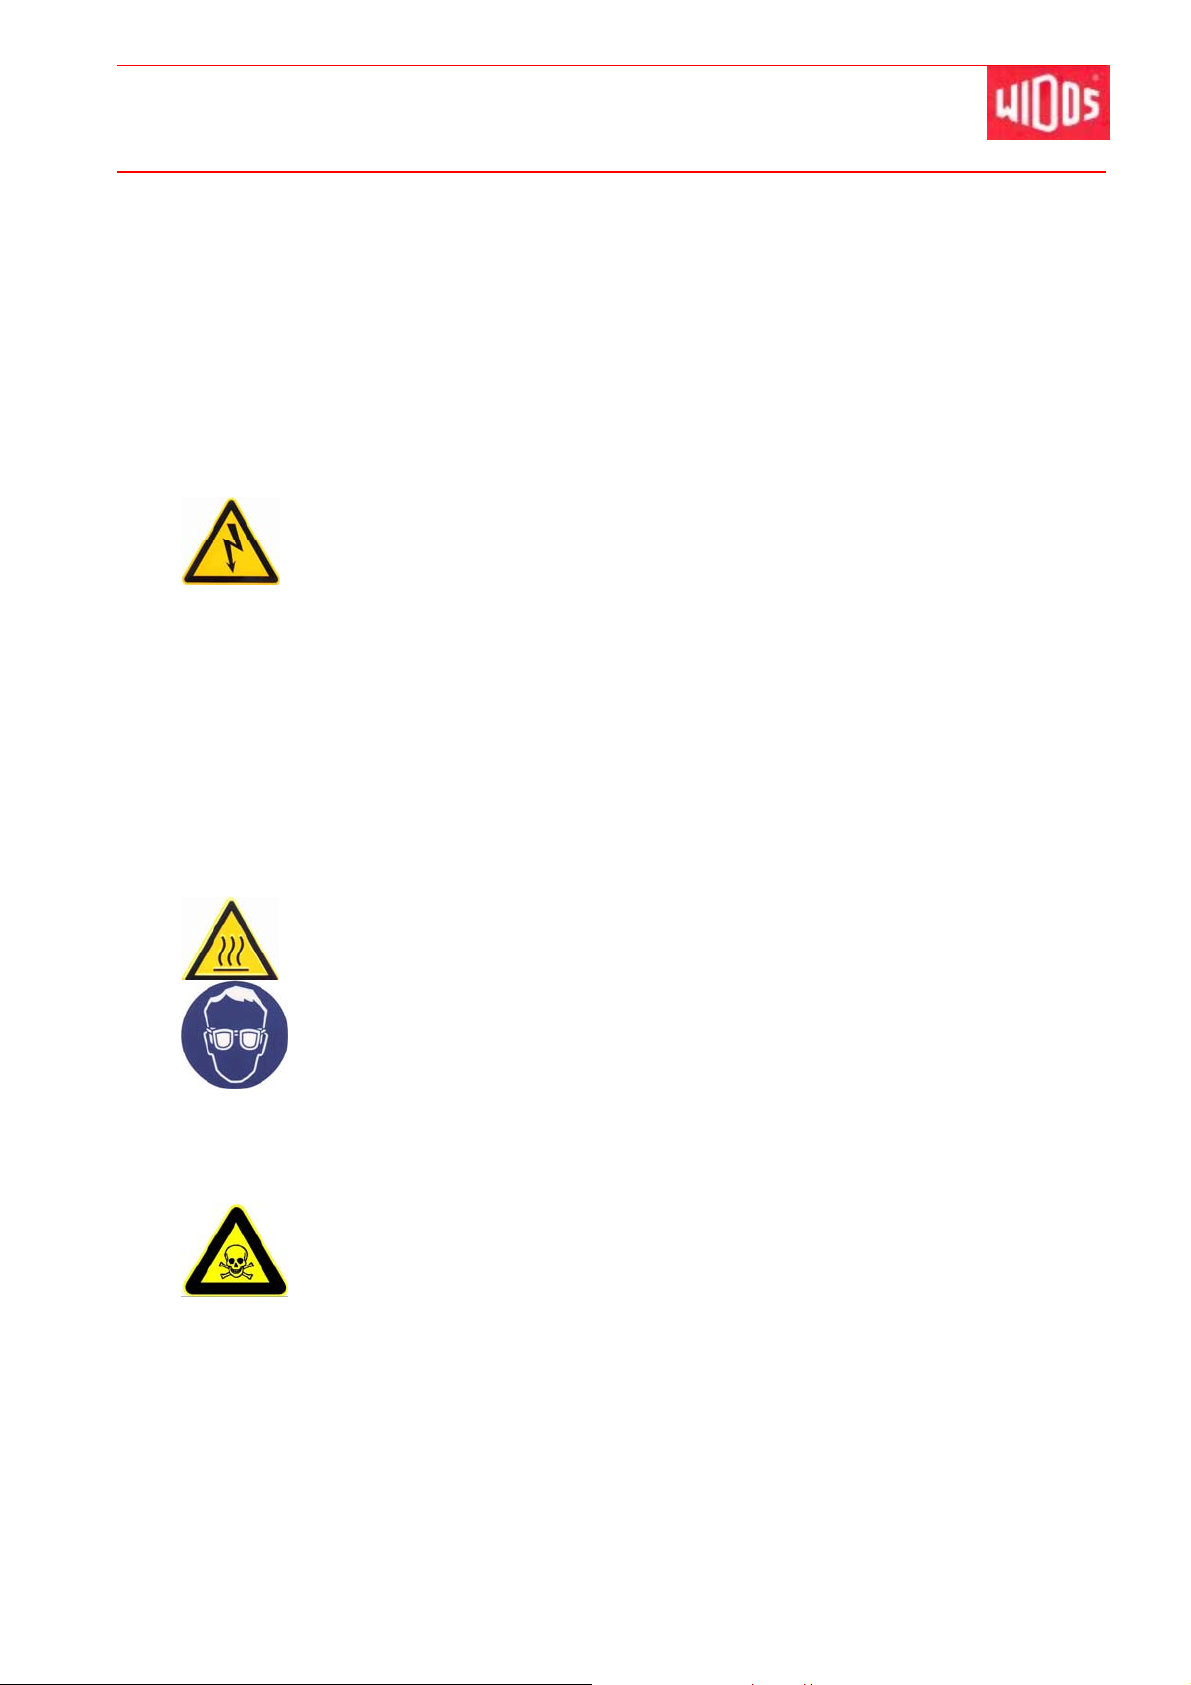
2.5. Dangers by electrical energy
Only skilled persons are allowed to work at electric appliances.
The electric equipment of the machine has to be regularly checked.
Loose connections and damaged cables have to be immediately replaced.
The device has to be protected against humidity.
Only qualified WIDOS personnel resp. authorized service partners are allowed
to open the device.
2.6. Danger of stumbling over the connecting line
Pay attention that nobody has to step over the connecting lines (230 V).
2.7. Danger of combustion at the socket
You may burn parts of your body , inflammable materials may ignite! The socket
may get hot!
Do not leave the device unattended.
Do not touch the welded socket before the cooling time has elapsed.
Wear protective gloves.
Wear safety glasses.
Keep sufficient safety distance to inflammable materials.
2.8. Danger by toxic vapors
In unfavorable circumstances, toxic vapors may escape during the welding
process.
Care for good ventilation during welding in closed locations.
Keep sufficient space between machine and the welded joint.
18.07.2013 Working Instructions WIDOS ESI 4000 Page 9 of 37
Page 10

Safety rules Chapter 2
Kunststoffschweißtechnik
2.9. Warranty and liability
Our „General Sales and Delivery Conditions“ are principally valid.
They are at the owner's disposal at the latest when signing the contract.
Warranty and liability demands referring to damages of persons or objects are suspended if
they are caused by one or several of the following reasons:
not using the machine according to the prescriptions
improper transport, building-up, starting and operating the machine and maintenance
operating the machine with defective or improperly installed safety measures
ignoring the information given in this manual
structural changes at the machine without permission
unsatisfactory checking of machine parts which are worn out
repairs performed in an inexpert way
catastrophes by external influence and Acts of God.
18.07.2013 Working Instructions WIDOS ESI 4000 Page 10 of 37
Page 11

WIDOS Einsteinstr. 5 Telephone +49 (0) 71 52 / 99 39 - 0
W. Dommer Söhne GmbH D-71254 Ditzingen-Heimerdingen Telefax +49 (0) 71 52 / 99 39 - 40
E-mail: [email protected] Internet www.widos.de
Kunststoffschweißtechnik
3. Functional description
The socket welding machine ESI 4000 carries out an electric socket welding process in which
pipes are welded to a fitting.
The prepared pipes are fed into the socket and then aligned and clamped in the clamping tool.
The contacts are plugged to the socket.
The sockets are furnished with a bar code, it will be read in with the bar code reading pen or
manually entered at the machine.
The welding process is started, the welding joint is heated (Heating up), and afterwards the
machine automatically shifts.
The welded pipe cools down without tension. (Cooling down)
The welded pipe can be unclamped, the welding process is completed.
18.07.2013 Working Instructions WIDOS ESI 4000 Page 11 of 37
Page 12
WIDOS Einsteinstr. 5 Telephone +49 (0) 71 52 / 99 39 - 0
W. Dommer Söhne GmbH D-71254 Ditzingen-Heimerdingen Telefax +49 (0) 71 52 / 99 39 - 40
E-mail: [email protected] Internet www.widos.de
Kunststoffschweißtechnik
4. Indicating and operating elements
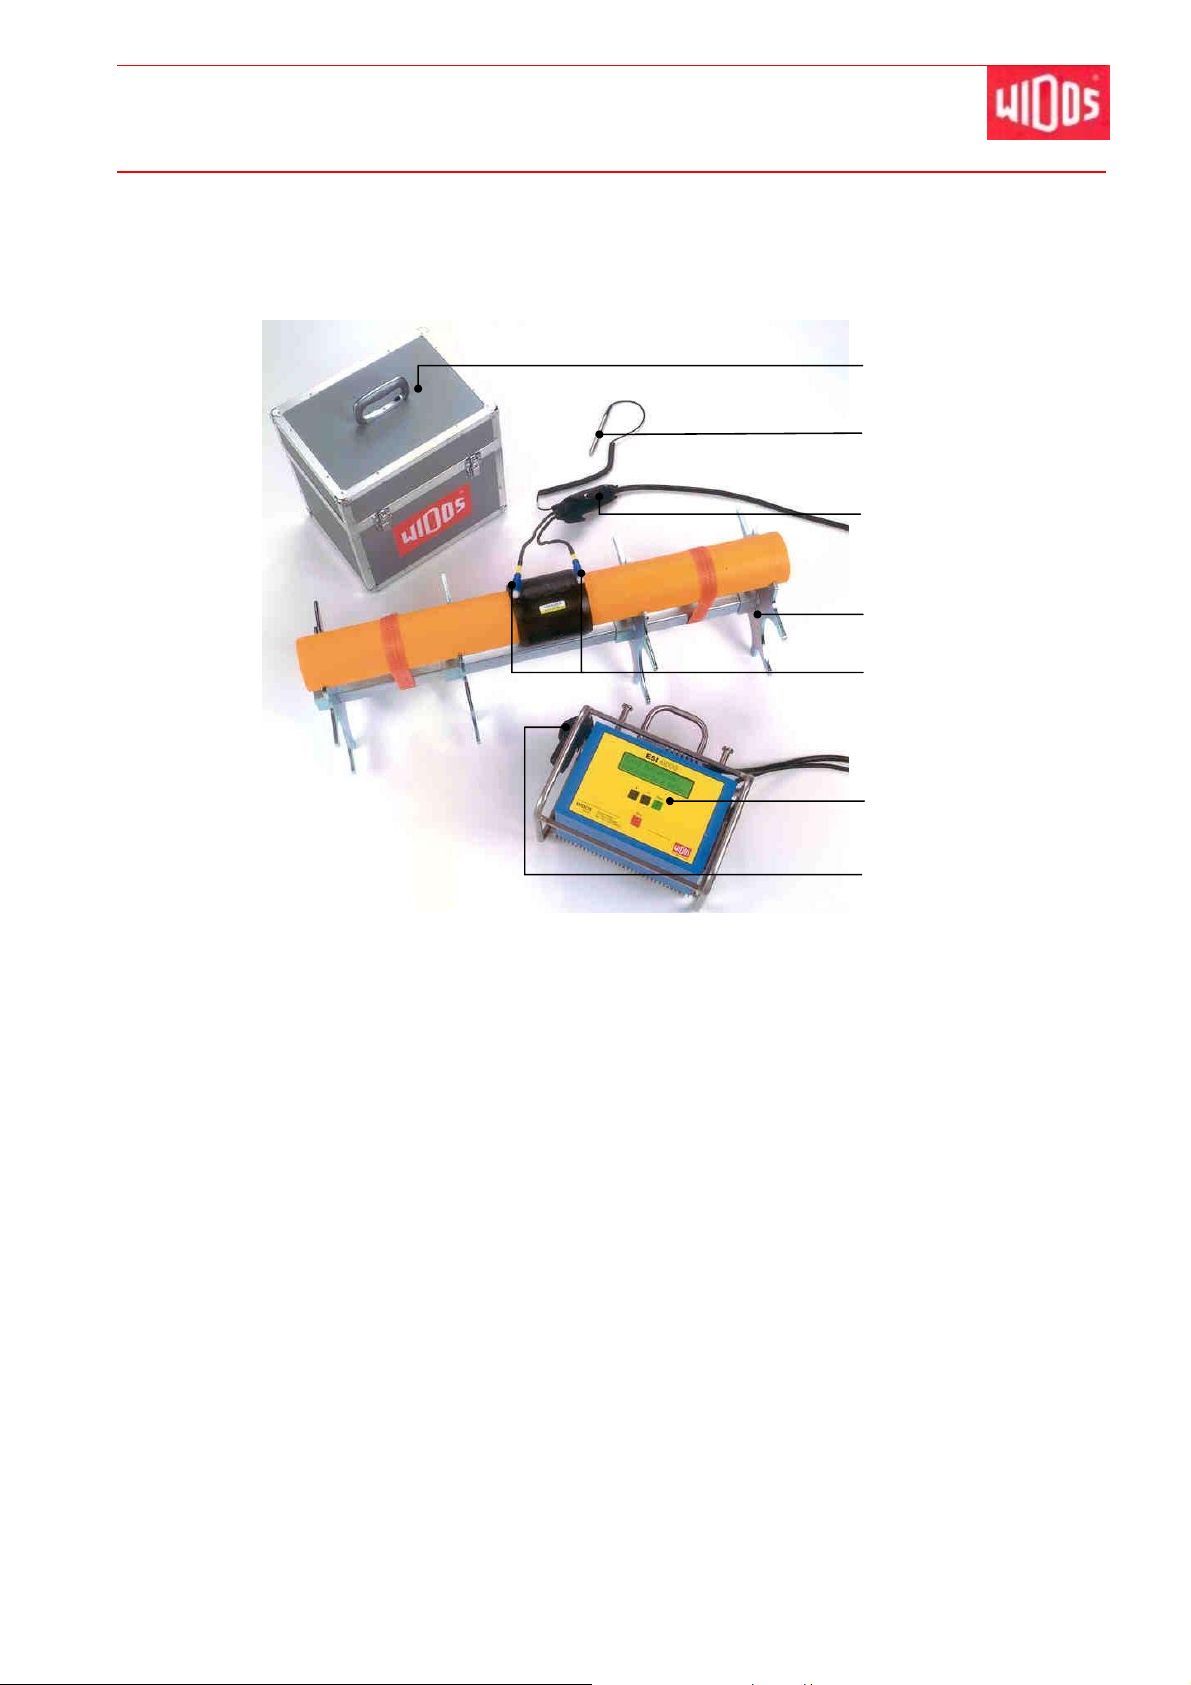
4.1. Overview device
Transport case
Bar code reading pen
Safety bag for bar
code reading pen
Support device with
securing straps
(optional)
Connection plug
Welding device
Bag for adaptors and
authorization cards
18.07.2013 Working Instructions WIDOS ESI 4000 Page 12 of 37
Page 13
Indicating and operating elements Chapter 4
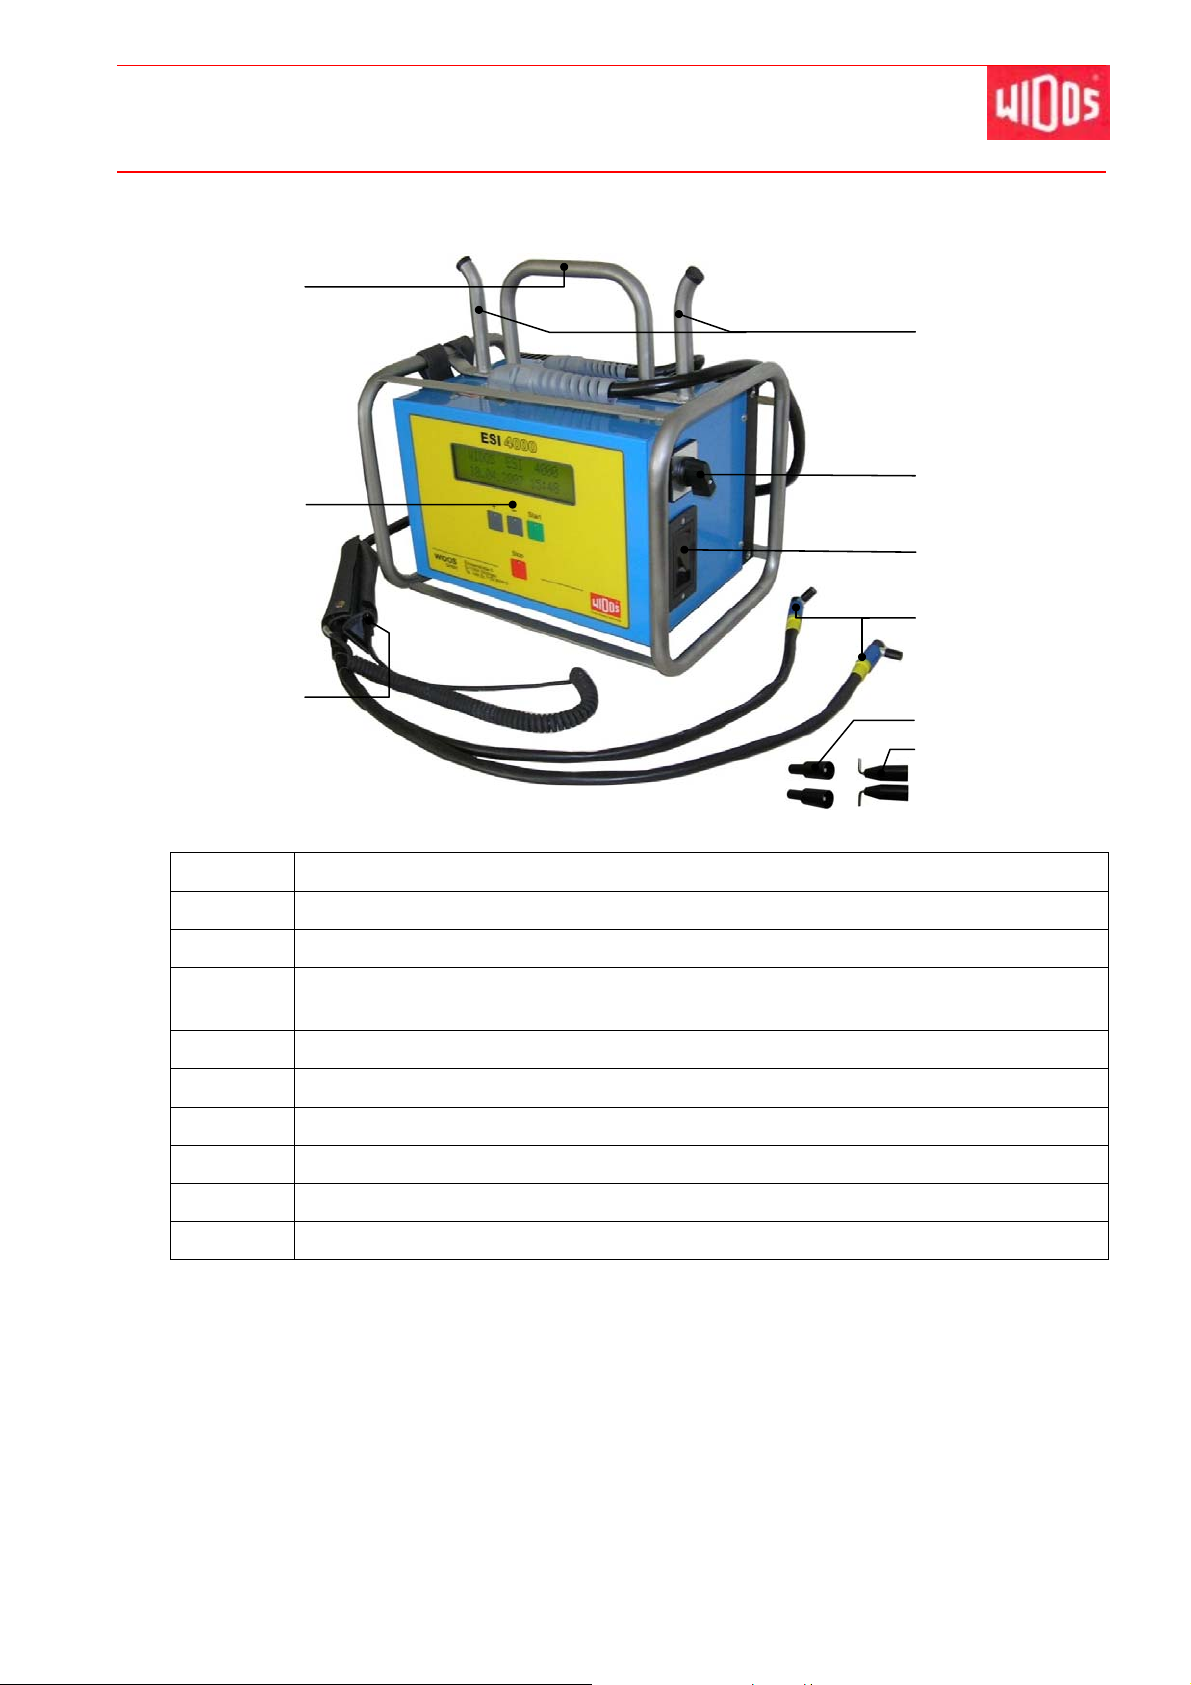
4.2. Welding device
No. Denomination / Function
1
2
3
Kunststoffschweißtechnik
5
6
7
4
8
9
1 Device holder with handle
2 Control panel with display and buttons (chapter 4.3)
3 Bar code reading pen to authorize and read in the socket codes (here pouched
in the safety bag)
4 Plug with connector for adaptors, connection to socket
5 Holder for coiling the cables
6 ON/OFF switch
7 SD-card drive
8 Adaptor, for fitting connection Ø 4,8 mm
9 Adaptor, for fitting connection flat (optional)
18.07.2013 Working Instructions WIDOS ESI 4000 Page 13 of 37
Page 14
Indicating and operating elements Chapter 4
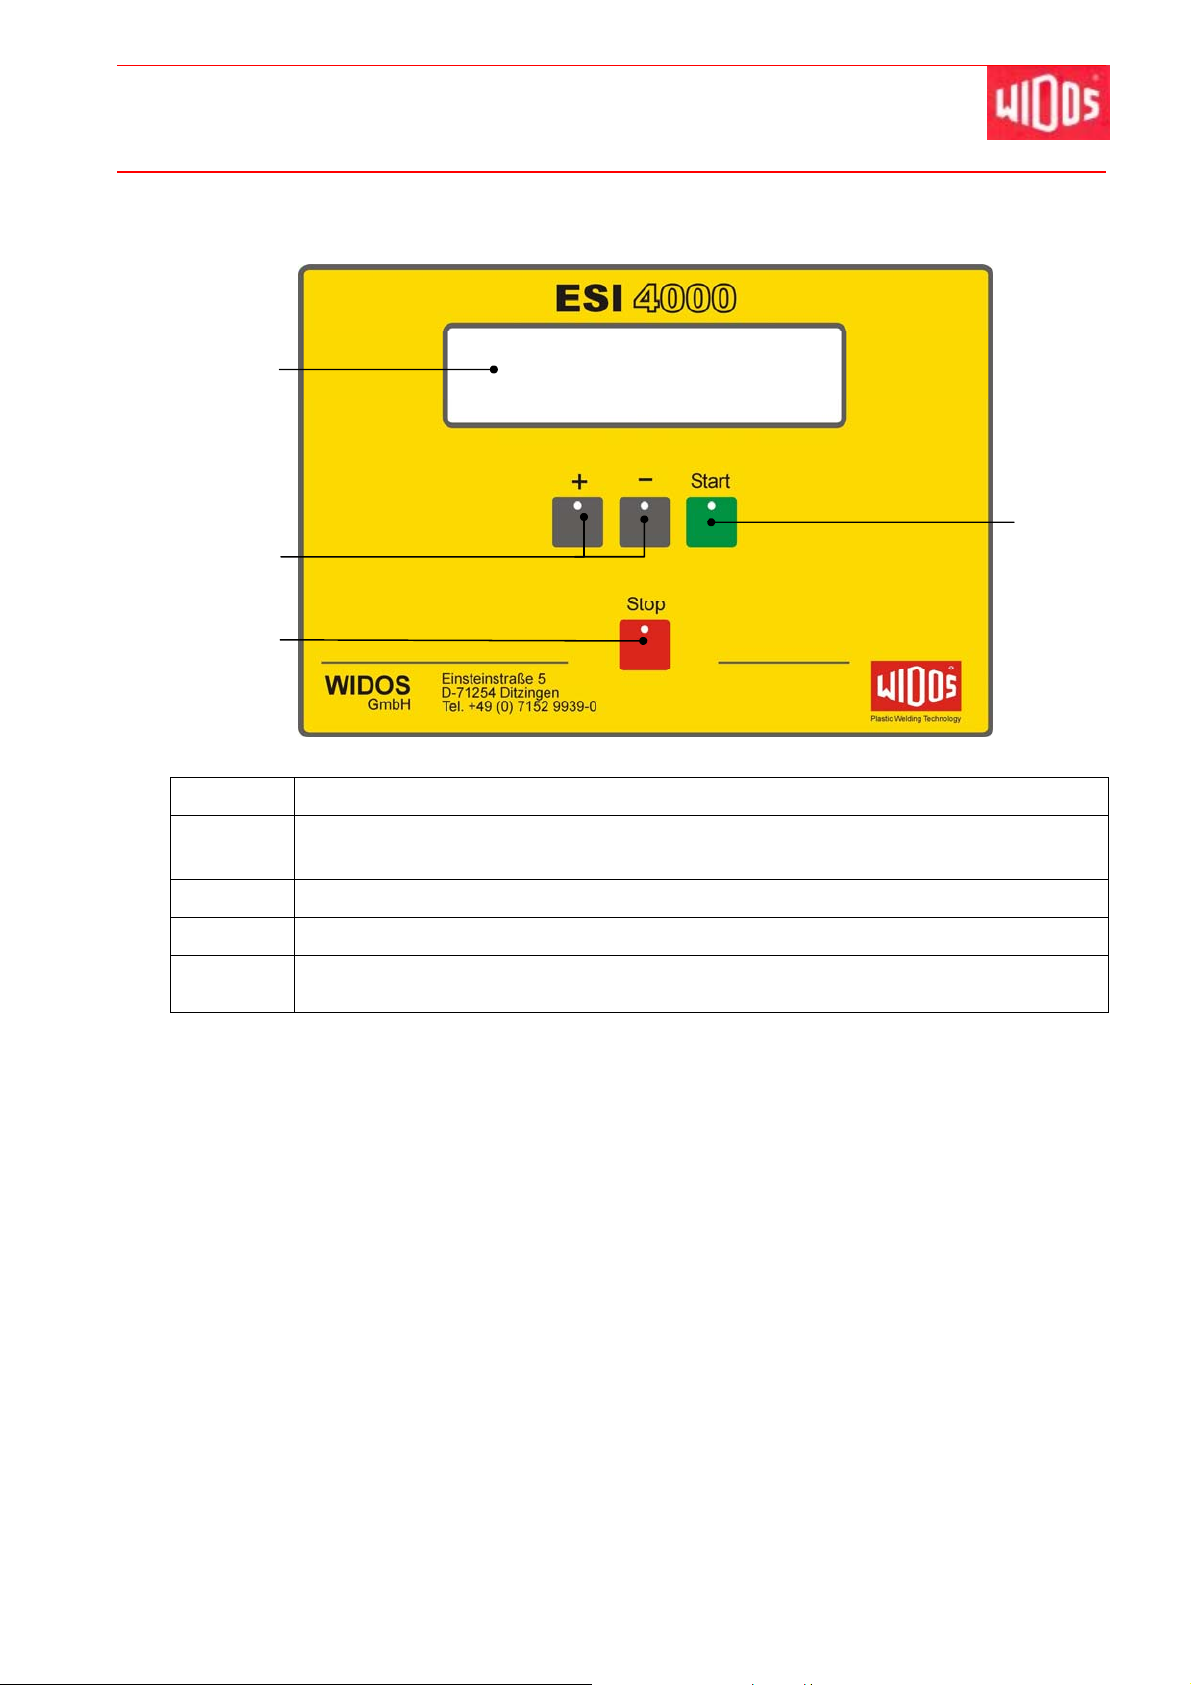
4.3. Control panel
15
16
17
No. Denomination / Function
Kunststoffschweißtechnik
18
15 Display, indicates working steps and status messages, several values can be
indicated at once.
16 <+> / <-> - buttons, for manually entering socket code number / parameter
17 <Stop> - button, aborts the welding process
18 <Start> - button: starts the welding process
- Confirms the entered parameters
18.07.2013 Working Instructions WIDOS ESI 4000 Page 14 of 37
Page 15
WIDOS Einsteinstr. 5 Telephone +49 (0) 71 52 / 99 39 - 0
W. Dommer Söhne GmbH D-71254 Ditzingen-Heimerdingen Telefax +49 (0) 71 52 / 99 39 - 40
E-mail: [email protected] Internet www.widos.de
Kunststoffschweißtechnik
5. Starting and operating
The instructions of this chapter are supposed to guide you in the operation of the machine and
lead you during the appropriate starting of the machine.
This includes:
the safe operation of the machine;
using all possible options of the machine;
economic operation of the machine.
5.1. Security advice
The machine only has to be introduced and used by skilled persons. For their qualification
they can pass an exam of plastic welding according to DVS and DVGW.
In cases of danger for man and machine, immediately press the emergency switch, turn off
the main plug or pull the power plug.
Having finished the welding work and during intervals you have to turn of f the machine.
Furthermore you have to control that no unauthorized person can use the machine.
The operation on building sites is only allowed via power distributor with FI security switch
according to VDE 0100.
Observe the environmental conditions:
The welding must not be carried out with direct solar radiation, if necessary erect welding
shield.
With temperatures below 5° C, measurements have to be taken:
If necessary erect welding tent or heat pipe ends.
The device ESI 4000 is connected to the local mains supply 230 V / 16 A / 50 Hz resp. to a
generator (Chapter: 5.1.1.).
5.1.1. How to work while using a generator
The nominal capacity of the generator is depending upon the size of the sockets, the
connecting circumstances, the environmental conditions, the generator type and the
adjustment traits. The nominal capacity of the generator is single-phase, 220 – 240 V / 50 – 60
Hz.
Socket size: Generator type:
< d 160 mm 3,2 kW mechanica lly controlle d
> d 160 mm
Always start the generator first, connect the device ESI 4000 with a idling voltage being
adjusted up to 230 V.
After the welding always detach the ESI 4000 first, afterwards switch off the generator .
During welding do not connect any other consumer to the generator at the same
time
4,0 kW mechanically controlled
5,0 kW electronically controlled
18.07.2013 Working Instructions WIDOS ESI 4000 Page 15 of 37
Page 16
Starting and operating Chapter 5
Kunststoffschweißtechnik
5.1.2. How to work with an extension cable
Only use extension cables that are admitted and marked with the following conductor crosssections:
Up to 20 m: 1,5 mm² ; Type H07RN-F
Beyond 20 m: 2,5 mm² ; Type H07RN-F
The extension cable may only be used in an unfolded and straight condition!
5.2. Accessories for data read in / out
5.2.3. Authorization card
Each supplied machine normally includes a general authorization card. It authorizes to carry
out all functions (including special functions).
Moreover, a user authorization card is included. It entitles to carry out all functions except
modifications of date, time and authorization.
Optionally, an initialization card can be purchased by which the welding is started
independently from the device (e.g. in the trench).
Keep card dry and clean.
Do not fold card or expose to strong magnetic fields.
The card is not transferable.
5.2.4. Bar code reading pen
In order to read in the bar codes, equally draw the reading pen over the bar code (hold pen
vertically), the scanning is acoustically confirmed.
The reading pen is ready when the red lamp at the pen top illuminates.
Always store the pen in the bag after its use.
5.2.5. SD – card and reading device
The ESI 4000 is equipped with a drive for a SD card.
The drive memorizes the welding data in the internal memory as well as on the SD card as
soon as a card is in the drive.
Data of appr. 32000 weldings can be stored on a card with a memory of 64 MB.
The SD card has to be formatted by „FAT 16“ before use.
Insert the card with the marking to the top and cautiously into the reading device with
minor efforts.
The card can be read out with a WICON program.
Do not fold, open, overheat and wet the card!
Please only use SD cards purchased from WIDOS. We will not be liable for any
cards from other manufactures!
18.07.2013 Working Instructions WIDOS ESI 4000 Page 16 of 37
Page 17
Starting and operating Chapter 5
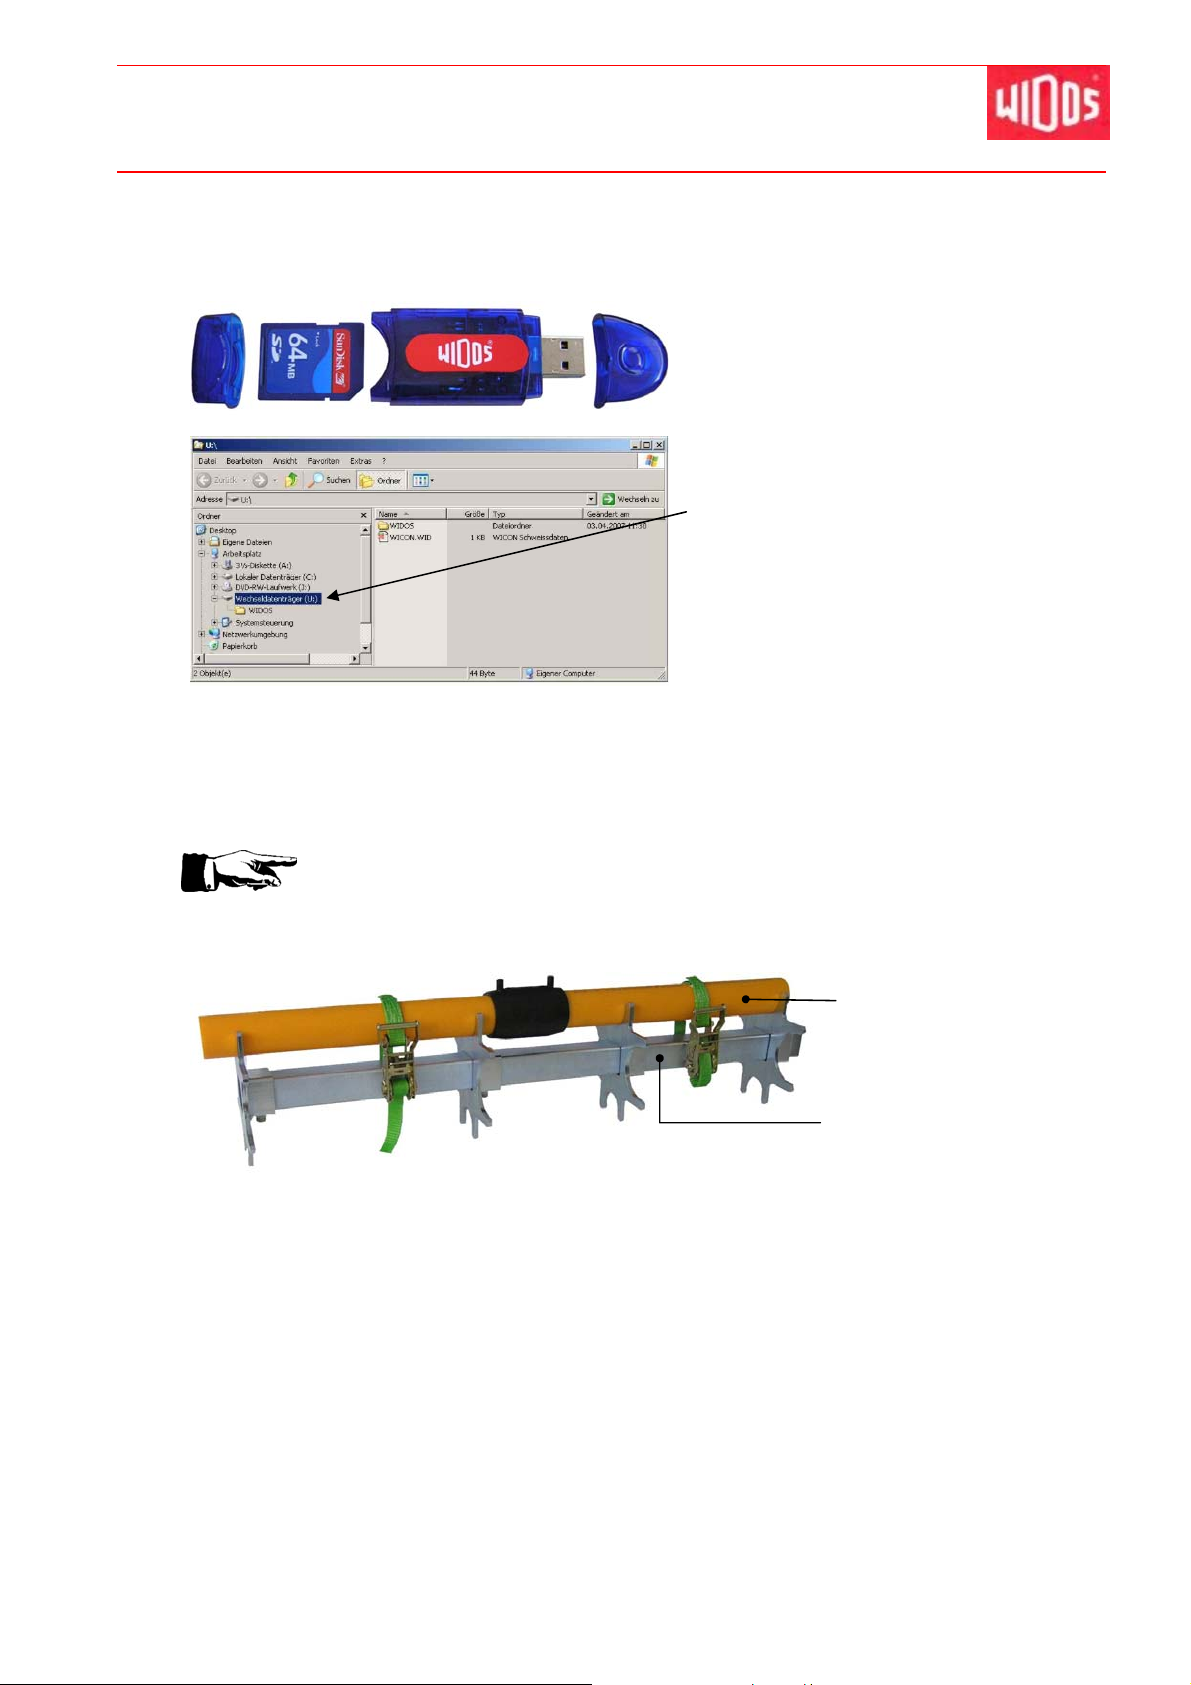
5.2.6. USB card reader
You may read out the welding data onto a PC by the USB card reader.
Remove the card from the SD card drive of the ESI 4000.
Remove the rear cap and plug card
according to the image into the USB card
reader.
Remove the front cap and plug USB card
reader into the USB interface in your PC.
As soon as the USB card reader has been
plugged, it appears as removable medium
in the drive list.
Open the WIDOS folder, there you will
find:
- WICON2000 viewer for considering and
printing the welding data,
- working instructions for WICON2000
viewer as PDF file.
5.3. Pipes and sockets
Kunststoffschweißtechnik
The prepared pipes are fed into the socket on both sides in a flush manner, the
connection has to be tension-free.
The pipes being plugged into the socket e. g. are inserted in optional supporting devices and
firmly clamped.
Pipes with socket
clamped
Supporting device
(optional)
18.07.2013 Working Instructions WIDOS ESI 4000 Page 17 of 37
Page 18
Starting and operating Chapter 5
Kunststoffschweißtechnik
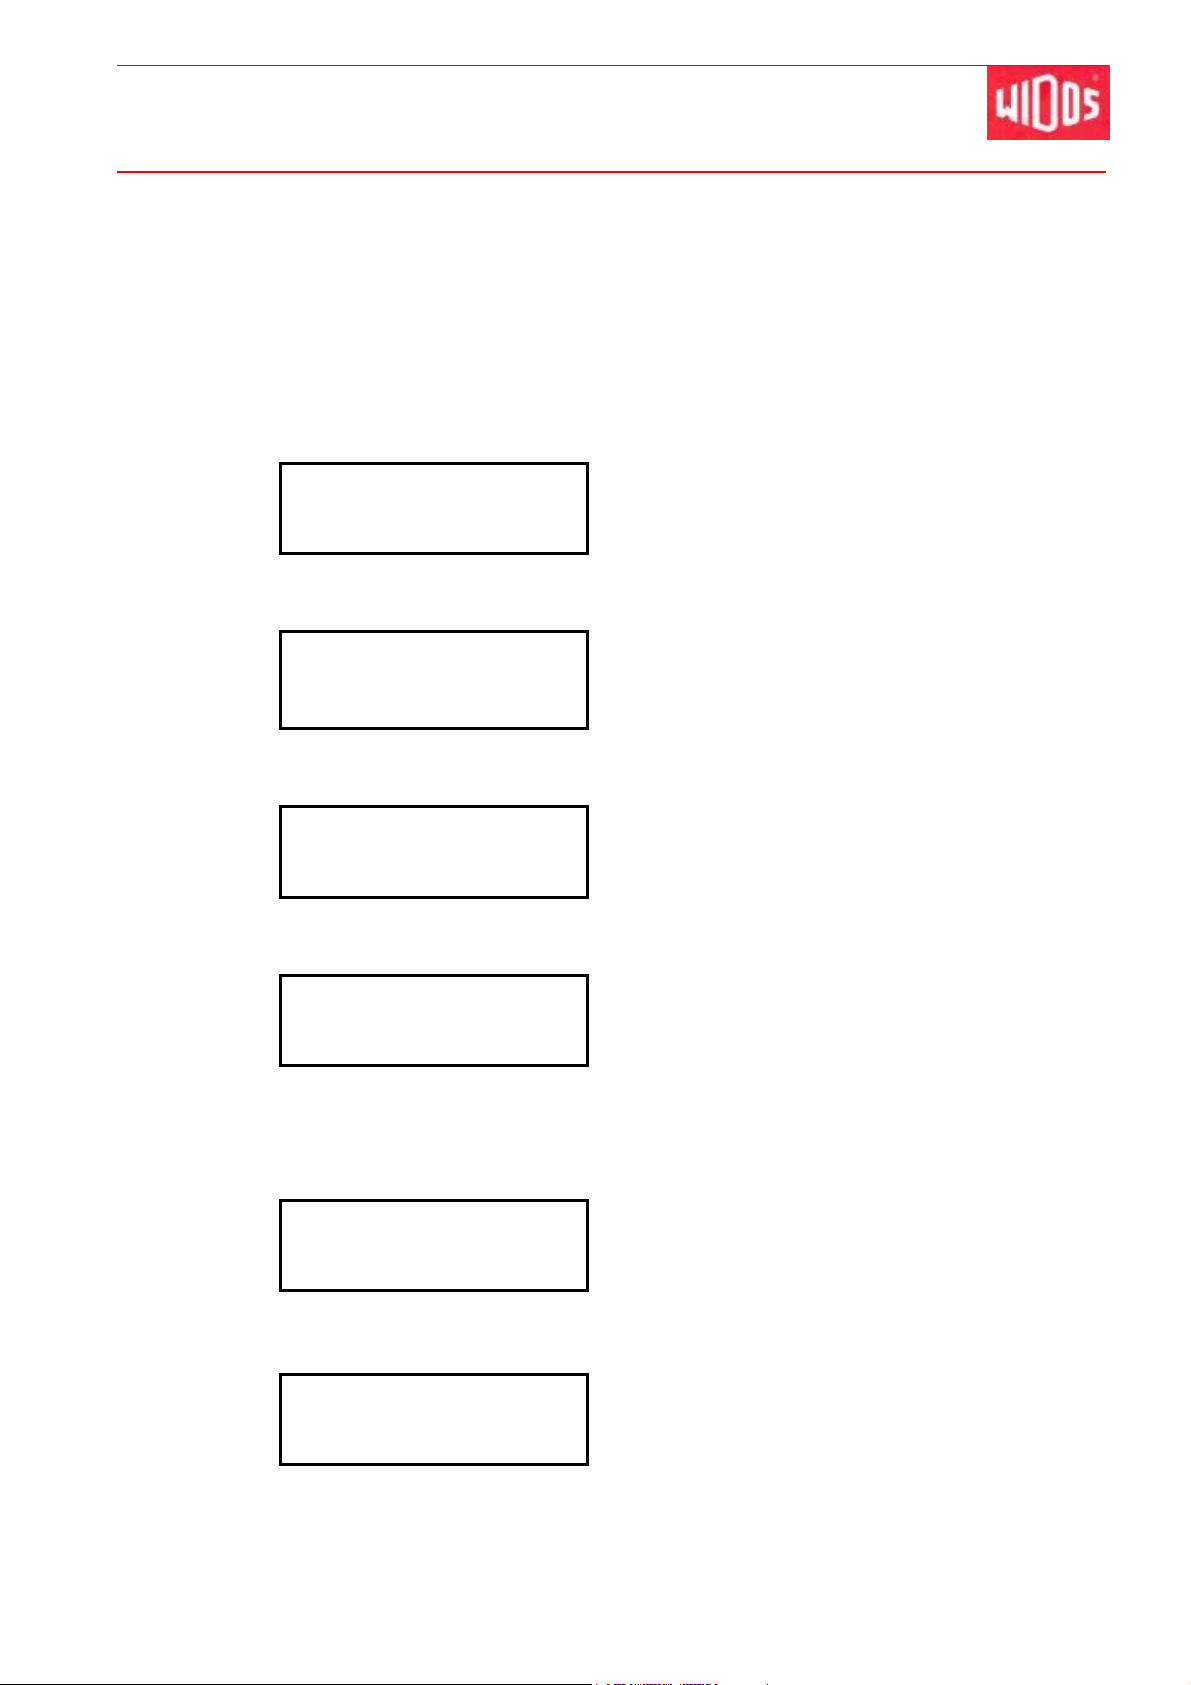
5.4. How to switch on the machine
The device ESI 4000 is connected to the local mains supply resp. distributor 230 V / 16 A / 50
Hz, completely roll out cable.
Activate <Main switch>
As soon as the power plug of the ESI 4000 is connected and the main switch activated, the
display will get bright (the processor is initialized).
Display:
WIDOS GmbH
2nd line:
After a few seconds the display changes to
Germany
Display:
2nd line:
Version 0.00.00
Serial no. 0000000
Number of software version
Serial number of device
After a few seconds the display changes to
Display:
2nd line:
000 Weldings free
0000 SD-card
Number of free disc space in memory (RAM)
Number of free disc space on SD-card
After a few seconds the display changes to
Display:
2nd line:
WIDOS ESI 4000
Please authorize
Indication of machine type
Read in the code from the general or user or ISO-welding authorization
card via the bar code reading pen, this is confirmed by a signal.
After a few seconds the display changes to
Display:
2nd line:
WIDOS ESI 4000
Welcome XXXX
Indication of machine type
Indication of general or user name
After a few seconds the display changes to
Display:
2nd line:
WIDOS ESI 4000
10.10.2011 10:10
Indication of machine type
Current date and time
18.07.2013 Working Instructions WIDOS ESI 4000 Page 18 of 37
„Basic menu“
Page 19
Starting and operating Chapter 5
Kunststoffschweißtechnik
5.5. How to weld with the ESI 4000
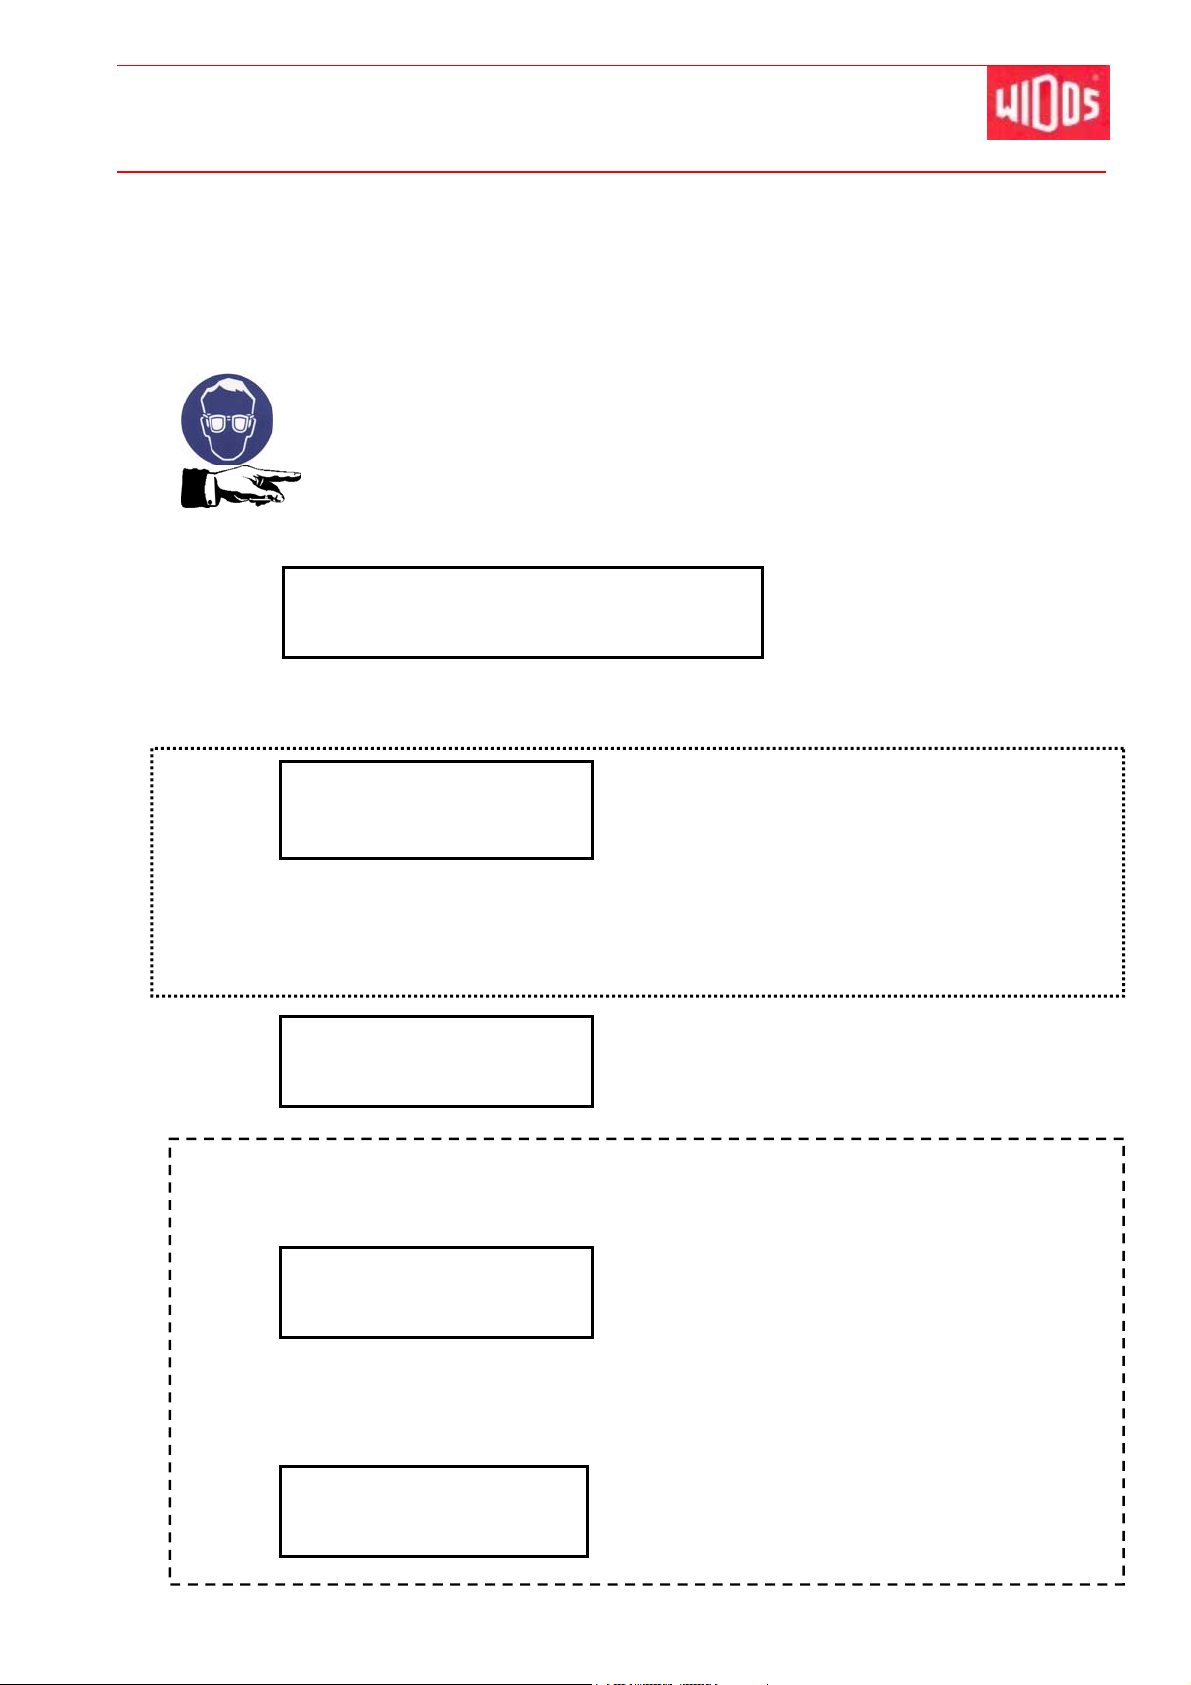
Basically, the respectively valid welding guidelines have to be
respected (ISO / CEN / DVS ...).
Entirely roll out welding cable, plug ESI 4000 to the sockets if necessary use adaptor.
Wear safety gloves to prevent burnings.
You may be injured by spillings.
Wear safety glasses during welding.
Only insert prepared pipes (peeled) into the socket!
Only use connecting contacts that fit the socket type.
Observe a tight fit of these contacts!
Display:
2nd line:
no.0000 read in socket
R=0.000hm
Read in code of the socket via the bar code reading pen, this is confirmed
by a signal.
Display:
2nd line:
Error: Socket does
not fit to code
Appears if socket and pipes do not match, or if
socket still is too warm after aborting the welding
process. => This occurs unless the wires inside
the fittings have cooled down inbetween two
welding processes, and thus the actual resistance
does not match the required value.
Delete error and confirm error message with <Start> - button
Display:
2nd line:
Manu Type Diam Time
XXXX XXX 000 000
Indicates the manufacturer, socket type, socket
diameter [mm] and heating [sec]
If the bar code is to be entered manually:
Current joint number is indicated.
Current resistor is indicated.
Keep button <+> pressed for 4 s
Display:
2nd line:
Manually enter code
0
Manually enter the socket bar code via the buttons <+ / - / Start>, at the
end of the code number press start several times until following indication
appears
Display:
2nd line:
18.07.2013 Working Instructions WIDOS ESI 4000 Page 19 of 37
Manu Type Diam Time
XXXX XXX 000 000
Indicates the manufacturer, socket type, socket
diameter [mm] and heating [sec]
Page 20
Starting and operating Chapter 5
Kunststoffschweißtechnik
Press <Start> - button
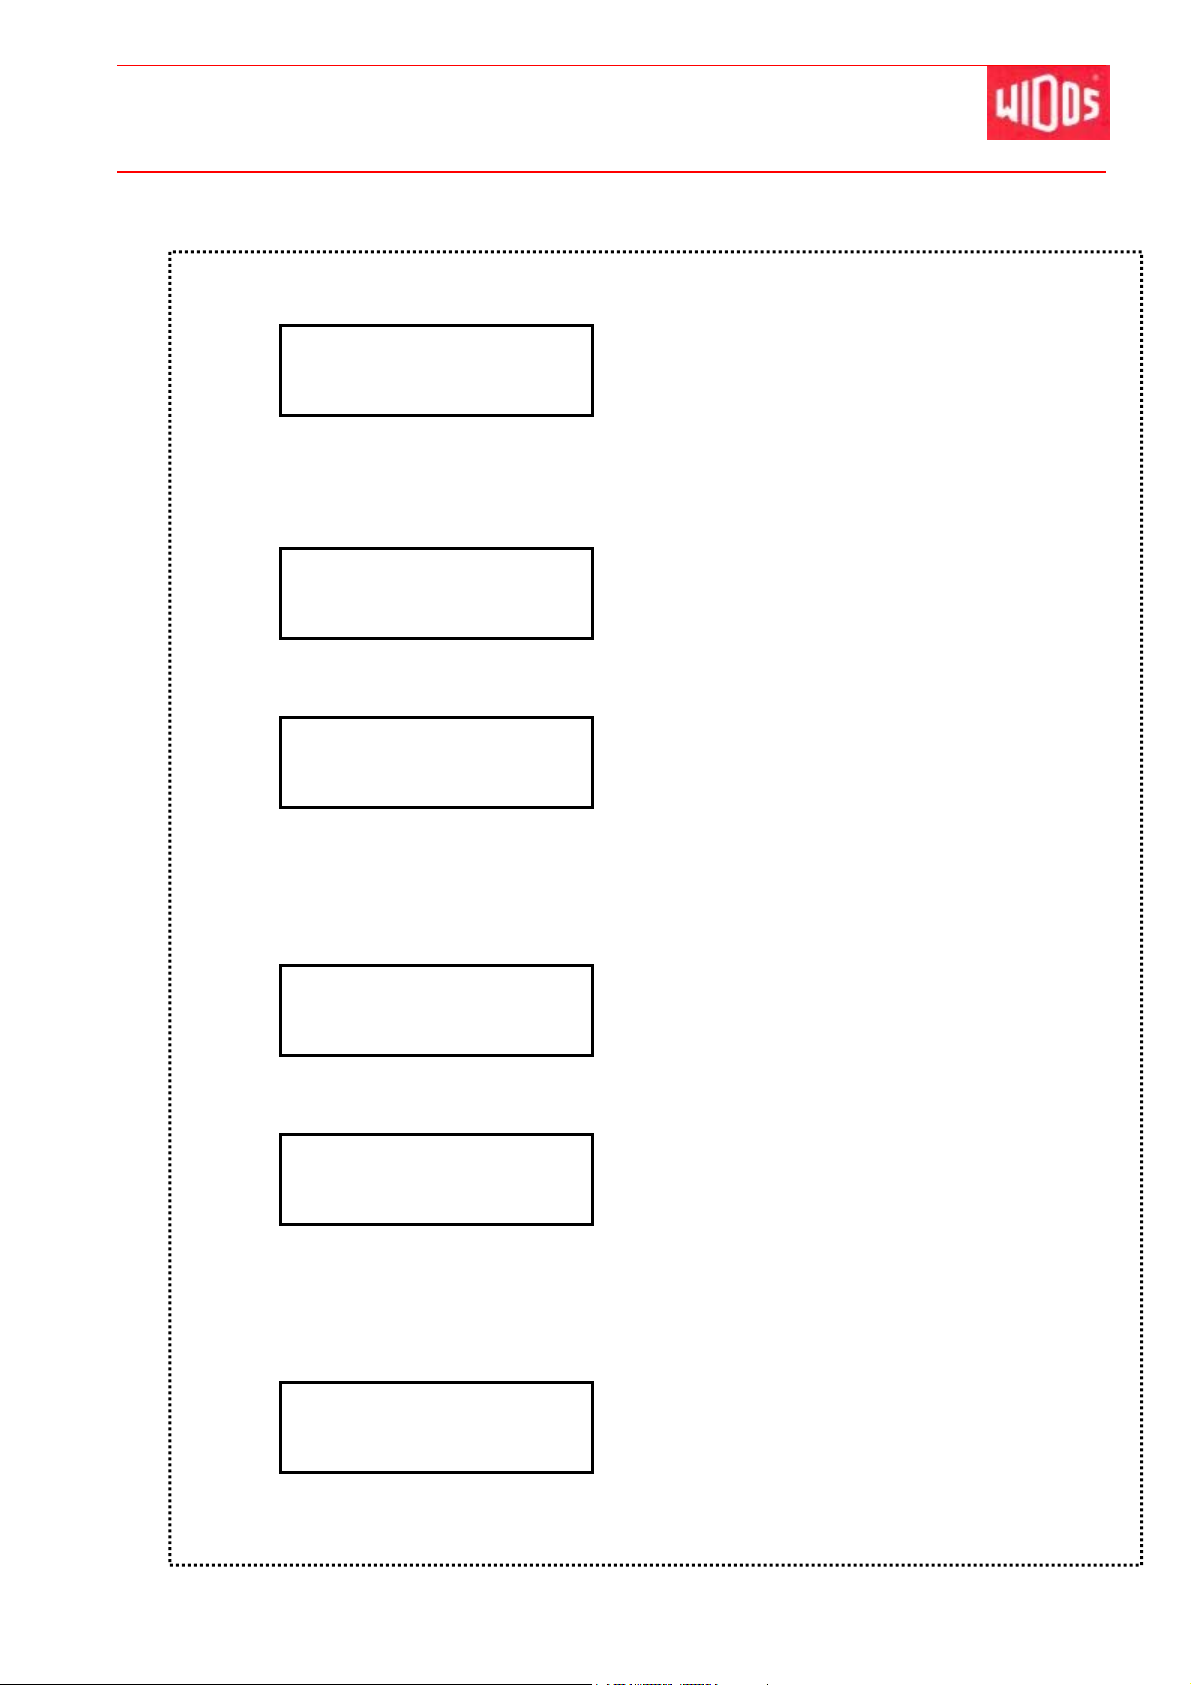
In case traceability has been confirmed with "yes", (chapter: 5.12) the display indicates:
Display:
2nd line:
Please read
trac.Code (fitting)
E i t h e r : Read in traceability 1 of the fitting via the bar code reading pen
O r : Keep button <+> pressed for 4 s, then manually enter the socket bar code
via the buttons <+ / - / Start>
Display:
2nd line:
Traceability 1:
FR PE100 50 4.5
After a few seconds the display changes to
Display:
2nd line:
Please read addit.
trac.Code 2nd pipe
E i t h er : Read in traceability 2 of lefthand pipe with barcode reader
O r : Keep button <+> pressed for 4 s, then manually enter the 2nd socket bar
code via the buttons <+ / - / Start>
O r : skip with <Start>
Display:
2nd line:
Traceability 2:
FR PE100 50 4.5
After a few seconds the display changes to
Display:
2nd line:
Please read addit.
trac. Code 3rd pipe
E i t he r : Read in traceability 3 of righthand pipe with barcode reader
O r : Keep button <+> pressed for 4 s, then manually enter the 3rd socket bar
code via the buttons <+ / - / Start>
O r : skip with <Start>
Display:
2nd line:
Traceability 3:
FR PE100 50 4.5
After a few seconds the display changes to
18.07.2013 Working Instructions WIDOS ESI 4000 Page 20 of 37
Page 21
Starting and operating Chapter 5
Kunststoffschweißtechnik
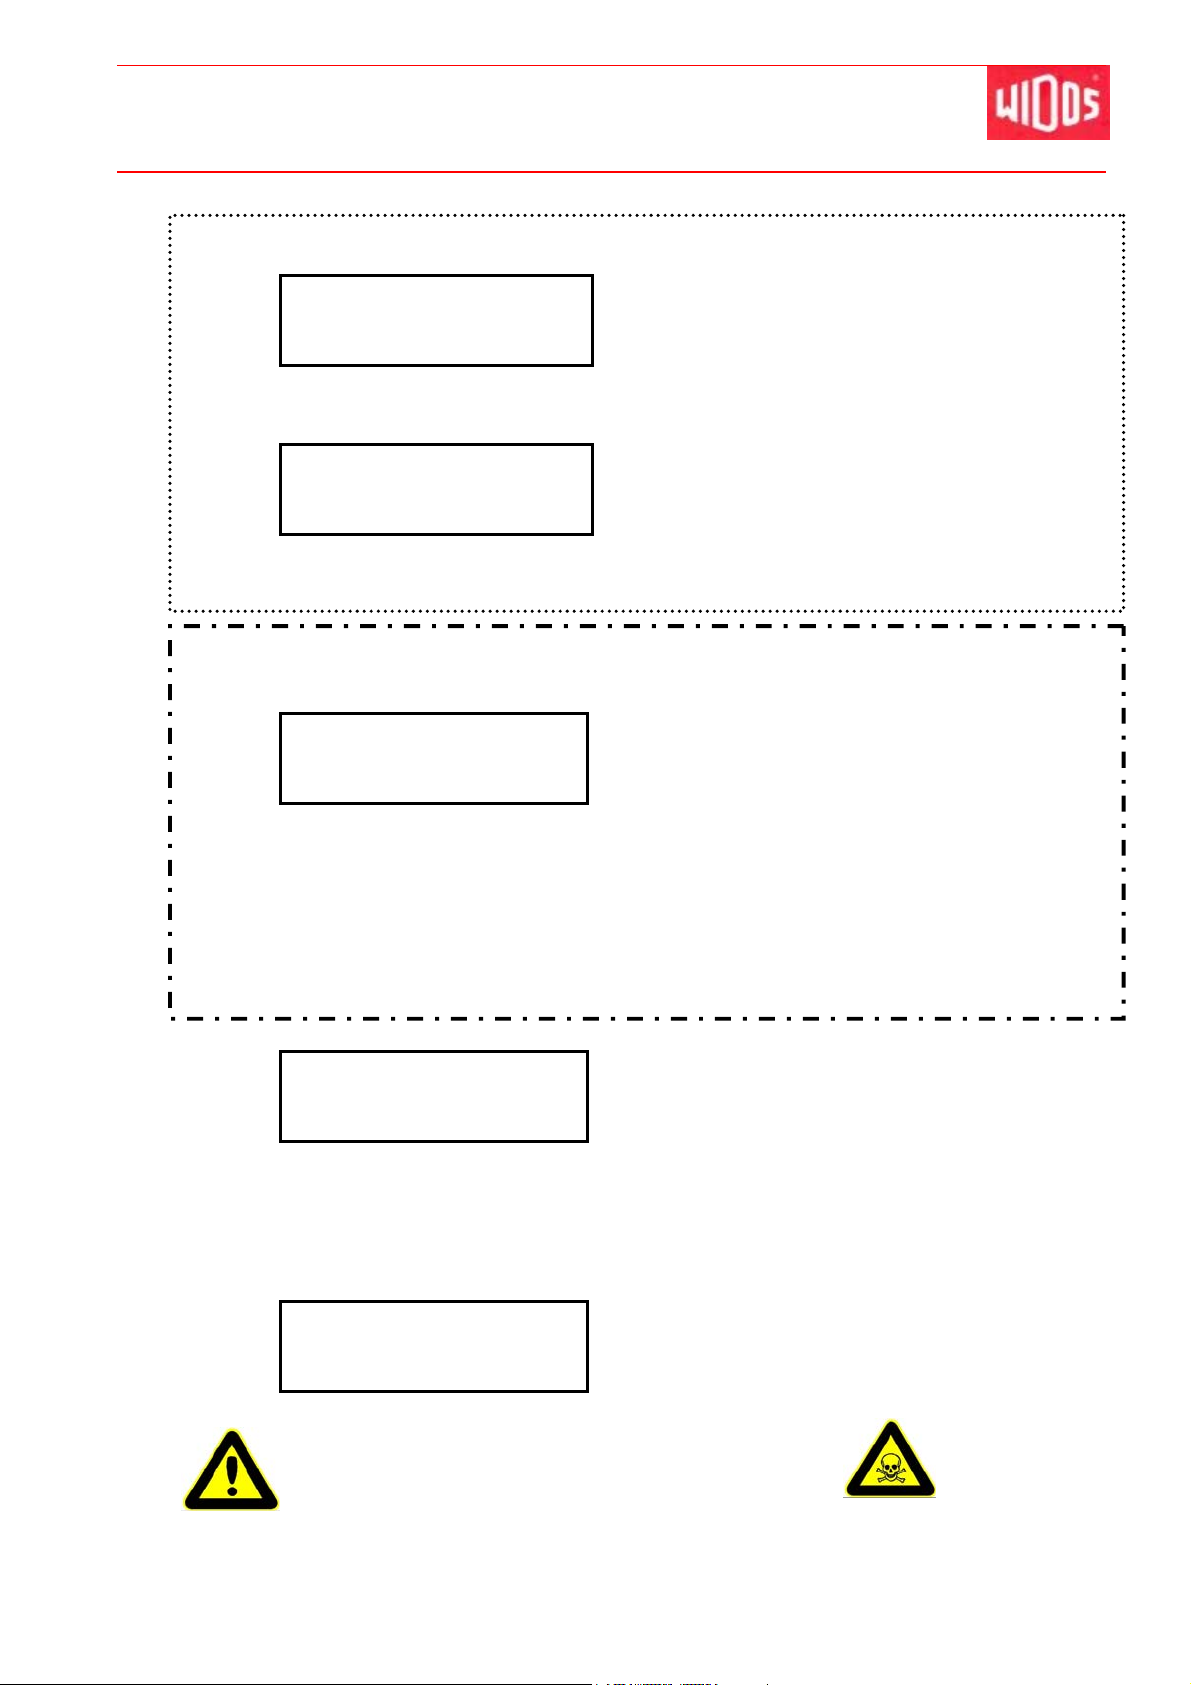
If pipe length has been selected with „yes“ (chapter: 5.12), the display shows:
Display:
2nd line:
Dist. Joint/Code 1
0000.00m
Enter first pipe length with <+ / - / Start>
Display:
2nd line:
Dist. Joint/Code 2
0000.00m
Enter second pipe length with <+ / - / Start>
If „ask for project name“ has been selected with „yes“ (chapter: 5.13), the display shows:
Display:
2nd line:
Edit project name
Widos--------------
Change indicated project name if necessary with <+ / -> (then the name
of the last project is overwritten)
Press <Start> to jump to the next figure,
or: keep <Start> pressed to go to the end of the figures
or: read in barcode of a project name with the barcode reading pen (barcode
may be created with WICON2000)
Display:
2nd line:
Pipe prepared?
and start
Either: Press <Start> - button to confirm prepared pipes and simultaneously start
the welding process.
Or: Read in the barcode from the pipe with reading pen
The welding process can be aborted with <Stop> at any time
Display:
2nd line:
Welding t= 000s
25°C 40V 14A 9 kJ
Special attention:
- vapors may escape during heating
- in unfavorable circumstances material may laterally
squirt
Current project name is indicated
Query if pipes and socket are ok (check visually)
Elapsed welding time is indicated
Welding parameters are indicated
18.07.2013 Working Instructions WIDOS ESI 4000 Page 21 of 37
Page 22
Starting and operating Chapter 5
Kunststoffschweißtechnik
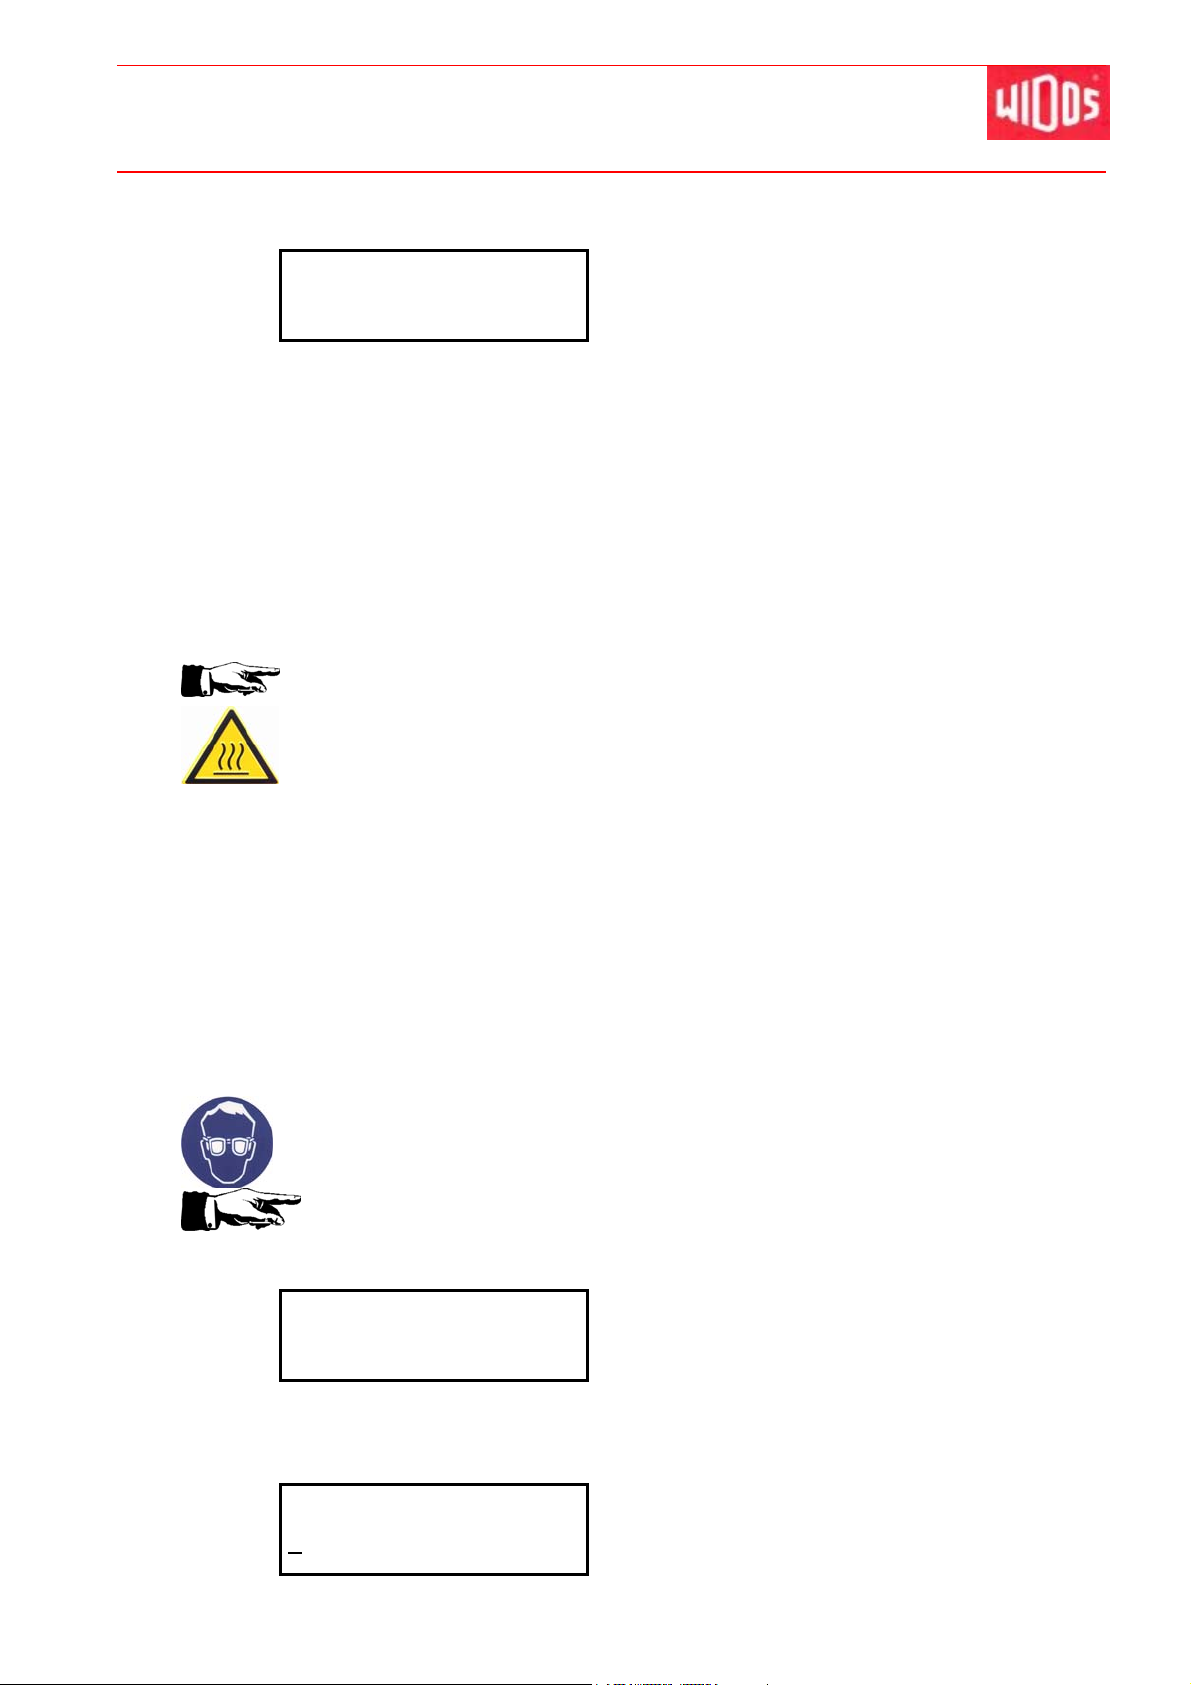
3 signals confirm the end of the welding process
Display:
2nd line:
Parameter OK 000s
Cooling time 00:00
* Display changes: R = 0.40Ohm (resistance at the end of the welding)
No = 0000 (joint number)
WIDOS------- (project name)
OD = 160 mm (outer pipe diameter)
T ype: I FR (type of fitting)
E i t h e r : The cooling can be aborted by <Start> e.g. for a further
welding
O r : Read in start code from the cable with the barcode reading pen in order to
abort cooling.
The aborting may only be carried out if the welding connection remains tightly
clamped during the cooling time!
Welding time is indicated
* Elapsed cooling time in min : sec is indicated
Caution danger of combustion! W elding connection is very hot!
At the end of the cooling time, the welding connection is unclamped, the
welding process is completed.
5.6. How to weld without fitting bar code
In general, the respective valid welding regulations have to be complied with
(ISO/CEN/DVS...).
Completely roll out welding cable, connect ESI 4000 plug into the fitting, if
necessary use adaptor.
Wear safety gloves to prevent burnings.
You may be injured by spillings.
Wear safety glasses during welding.
Only insert prepared (peeled) pipes into fitting!
Only use connections suiting the fitting type, care for a tight fit of the
connections!
Display:
2nd line:
no. 0000 Read in
fitting R=0.000hm
Read in the bar code from the general authorization card by the bar code
reading pen
Display:
2nd line:
Voltage Heating
0 V
0
Actual joint number is indicated.
Actual resistance is indicated.
18.07.2013 Working Instructions WIDOS ESI 4000 Page 22 of 37
Page 23
Starting and operating Chapter 5
Kunststoffschweißtechnik
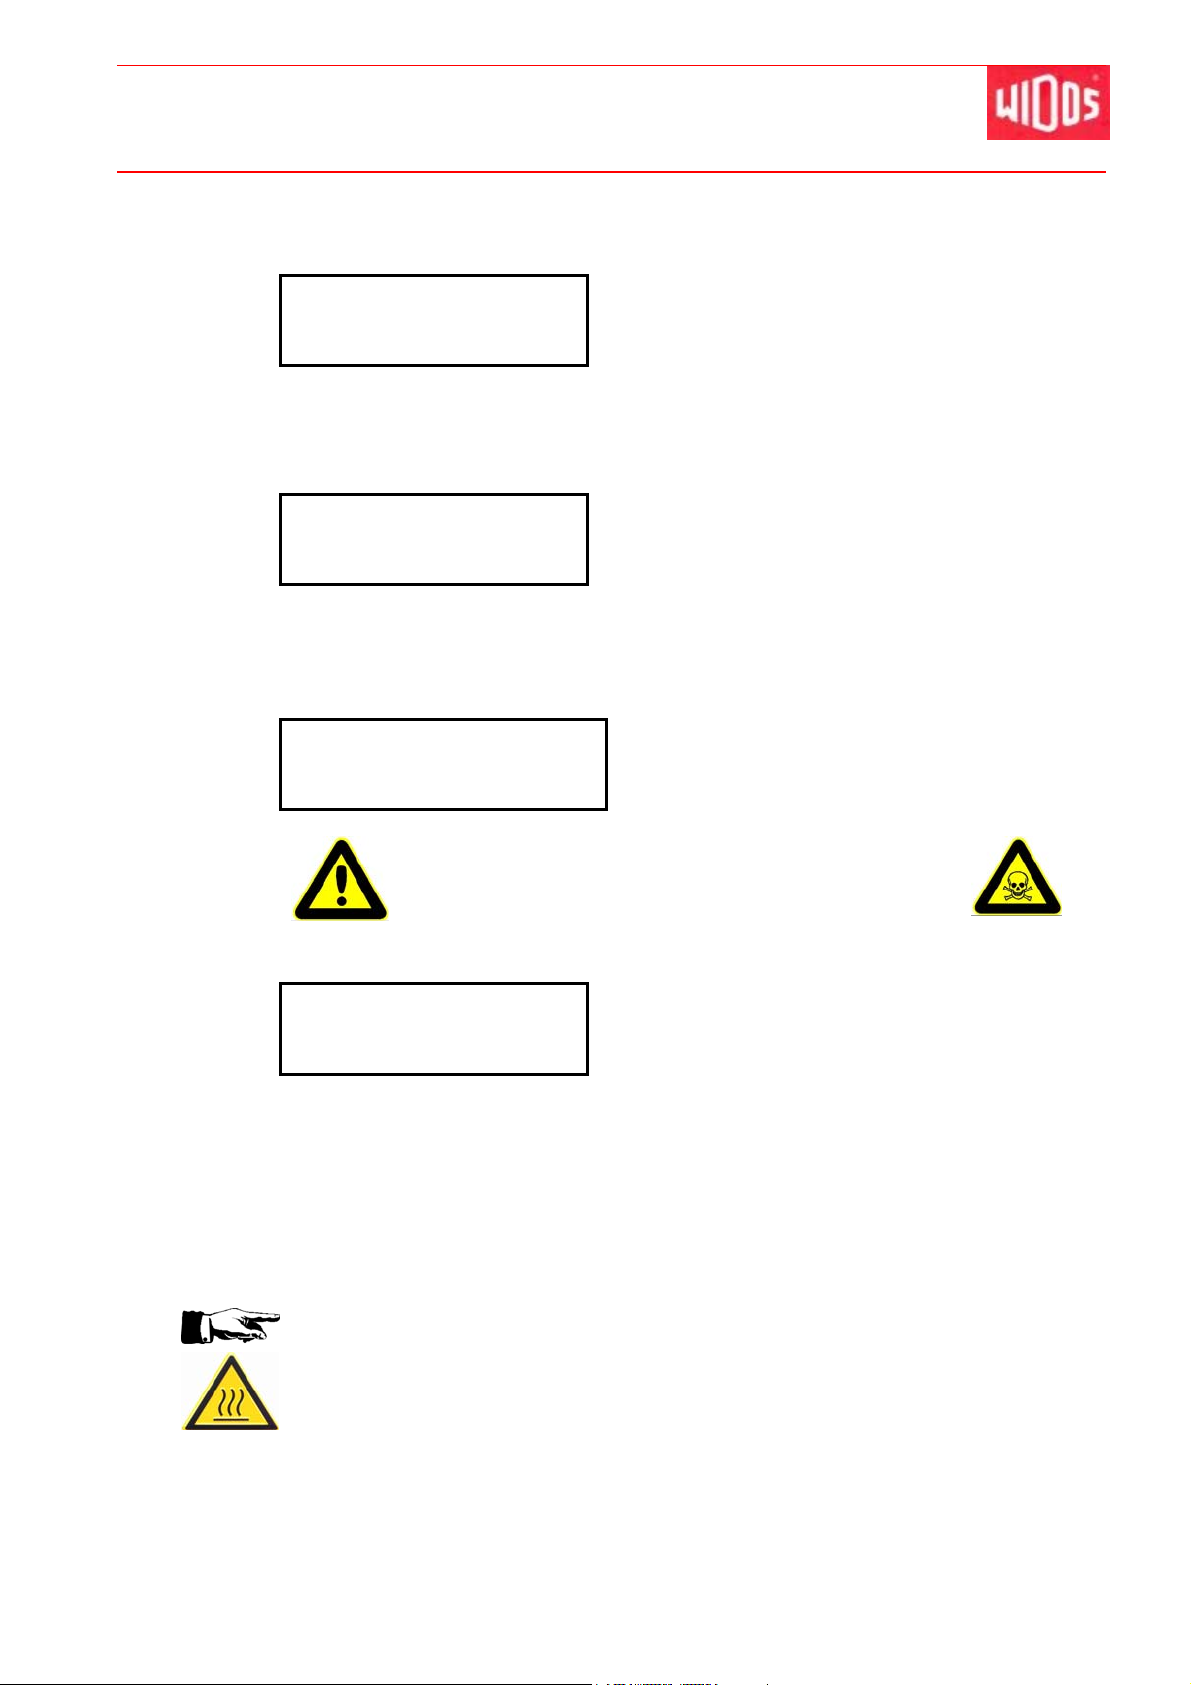
Enter voltage indicated on/at the fitting (by manufacturer) via buttons
<+ / - / Start>
Display:
2nd line:
Voltage Heating
0000 S
Enter heating time indicated on/at the fitting (by manufacturer) via buttons
<+ / - / Start>.
Start welding process by pressing <Start>.
Display:
2nd line:
Pipe prepared?
and start
Confirm prepared pipes by pressing <Start> and simultaneously start the
welding process.
The welding process can be aborted by <Stop> at any time.
Display:
2nd line:
Welding t= 000s
25°C 40V 14A 9 kJ
Special attention:
- vapors may escape during heating
- in unfavorable condition material may laterally spurt
3 signals confirm the end of the welding process
Display:
2nd line:
Parameter OK 000s
Cooling 00:00
* Display changes: R = 0.40Ohm (resistance at the end of the welding)
No = 0000 (joint number)
WIDOS------- (project name)
OD = 160 mm (outer pipe diameter)
Type: I FR (type of fitting)
The cooling time may be aborted by <Start> e.g. for another welding
The abortion may only be carried out if the welding connection remains tightly
clamped during all of the cooling down!
Query if pipe and fitting are ok (check visually)
Elapsed welding time is indicated
Welding parameters are indicated
Welding time is indicated.
* Elapsed cooling time is indicated in min:sec.
Attention, danger of combustion! Welding connection is very hot!
The welding connection is unclamped at the end of the cooling down, the
welding process is completed.
18.07.2013 Working Instructions WIDOS ESI 4000 Page 23 of 37
Page 24
Starting and operating Chapter 5
Kunststoffschweißtechnik
5.7. Error messages
In case that the following happens during working with the ESI 4000:
The rules according to DVS have not been observed,
The socket shows a defect,
The plug was unintentionally separated from the socket,
Certain measuring facilities do not work, one of the following error messages appears on
the display:
W Error welding time
U Error voltage
I Error socket current
c Error cooling down
T Error heat sink too hot
S Error current failure
B user’s abort
All error messages are logged.
5.8. Enter parameters
Display:
2nd line:
WIDOS ESI 4000
10.10.2011 10:10
Basic menu
Current date and time
Simultaneously press <+> and <-> - buttons
Display:
2nd line:
last project
WIDOS
-------------------
Last project is indicated,
Select one of the last 4 projects by <+> or <->
Confirm by <Start>
Display:
2nd line:
Name of project
WIDOS
-------------------
Current project name is indicated
<+ / -> - buttons, change project name if necessary (then the name of the
last project is overwritten)
Confirm by <Start>
o r : keep <Start> pressed to go to the end of the figures
o r : read in barcode of a project name with the barcode reading pen (barcode
may be created with WICON2000)
Display:
2nd line:
Number of joint
0000
Current joint number of last project
18.07.2013 Working Instructions WIDOS ESI 4000 Page 24 of 37
Page 25
Starting and operating Chapter 5
Kunststoffschweißtechnik
<+ / -> - buttons, change joint number if necessary, the number
automatically increases with each welding without error.
Press <Start> - button
Display:
2nd line:
Weather Protect
34 31
Weather conditions and applied safety measures
(according to DVS rules).
Weather Safety measures
1 = sunny
1 = none
2 = dry 2 = shield
3 = rain or snowfall 3 = tent
4 = wind 4 = heating
In case of multiple nominations, order of digits as above
(e. g.: 34 = rain and wind)
Adjusting meteorological data: confirm digits by pressing <+> and <-> one
position to the right by pressing <Start>
confirm data by <Start> - button
Display:
2nd line:
copy
_
Store data on SD card
In case the SD card is inserted, an automatic storage is carried out.
If no SD card was inserted, it can be done now and storing of the data can
be started by <+> from RAM to SD card.
Repeatedly press <Start> or wait for basic menu to appear.
Display:
2nd line:
WIDOS ESI 4000
10.10.2011 10:10
Basic menu
Current date and time
5.9. How to change the language
Display:
2nd line:
WIDOS ESI 4000
10.10.2011 10:10
Basic menu
Current date and time
Simultaneously press buttons <+ and - > for next menu item
Display:
2nd line:
last project
WIDOS
-------------------
Last project is indicated,
Confirm by <Start>
18.07.2013 Working Instructions WIDOS ESI 4000 Page 25 of 37
Page 26
Starting and operating Chapter 5
Display:
2nd line:
Name of project
WIDOS
--------------------
Confirm by <Start>
Display:
2nd line:
Number of joint
0000
Confirm by <Start>
Display:
2nd line:
Weather Protect
34 31
Confirm by <Start>
Display:
2nd line:
copy
_
Confirm by <Start>
Display:
2nd line:
Language English?
_
Select language by <+ / ->
Repeatedly press <Start> or wait for basic menu to appear.
Display:
2nd line:
WIDOS ESI 4000
10.10.2011 10:10
Current project name is indicated
Current joint number of last project
Weather conditions and applied safety measures
(according to DVS rules).
Store data on SD card
Language selectable
Basic menu
Current date and time
Kunststoffschweißtechnik
18.07.2013 Working Instructions WIDOS ESI 4000 Page 26 of 37
Page 27
Starting and operating Chapter 5
5.10. How to change date and time
Kunststoffschweißtechnik
Display:
2nd line:
WIDOS ESI 4000
10.10.2011 10:10
Basic menu
Current date and time
Simultaneously press <- and Start> for next menu item
Display:
2nd line:
WIDOS ESI 4000
Please authorize
Only possible with general authorization card
Authorize by bar code reading pen and general authorization card
Display:
2nd line:
WIDOS ESI 4000
10.10.2011
Current date is indicated
Change date by <+ / ->
Press <Start>
Display:
2nd line:
WIDOS ESI 4000
1
0:10
Current time is indicated
Change time by <+ / ->
Repeatedly press <Start> or wait for basic menu to appear.
Display:
2nd line:
WIDOS ESI 4000
10.10.2011 10:10
Basic menu
Current date and time
18.07.2013 Working Instructions WIDOS ESI 4000 Page 27 of 37
Page 28
Starting and operating Chapter 5
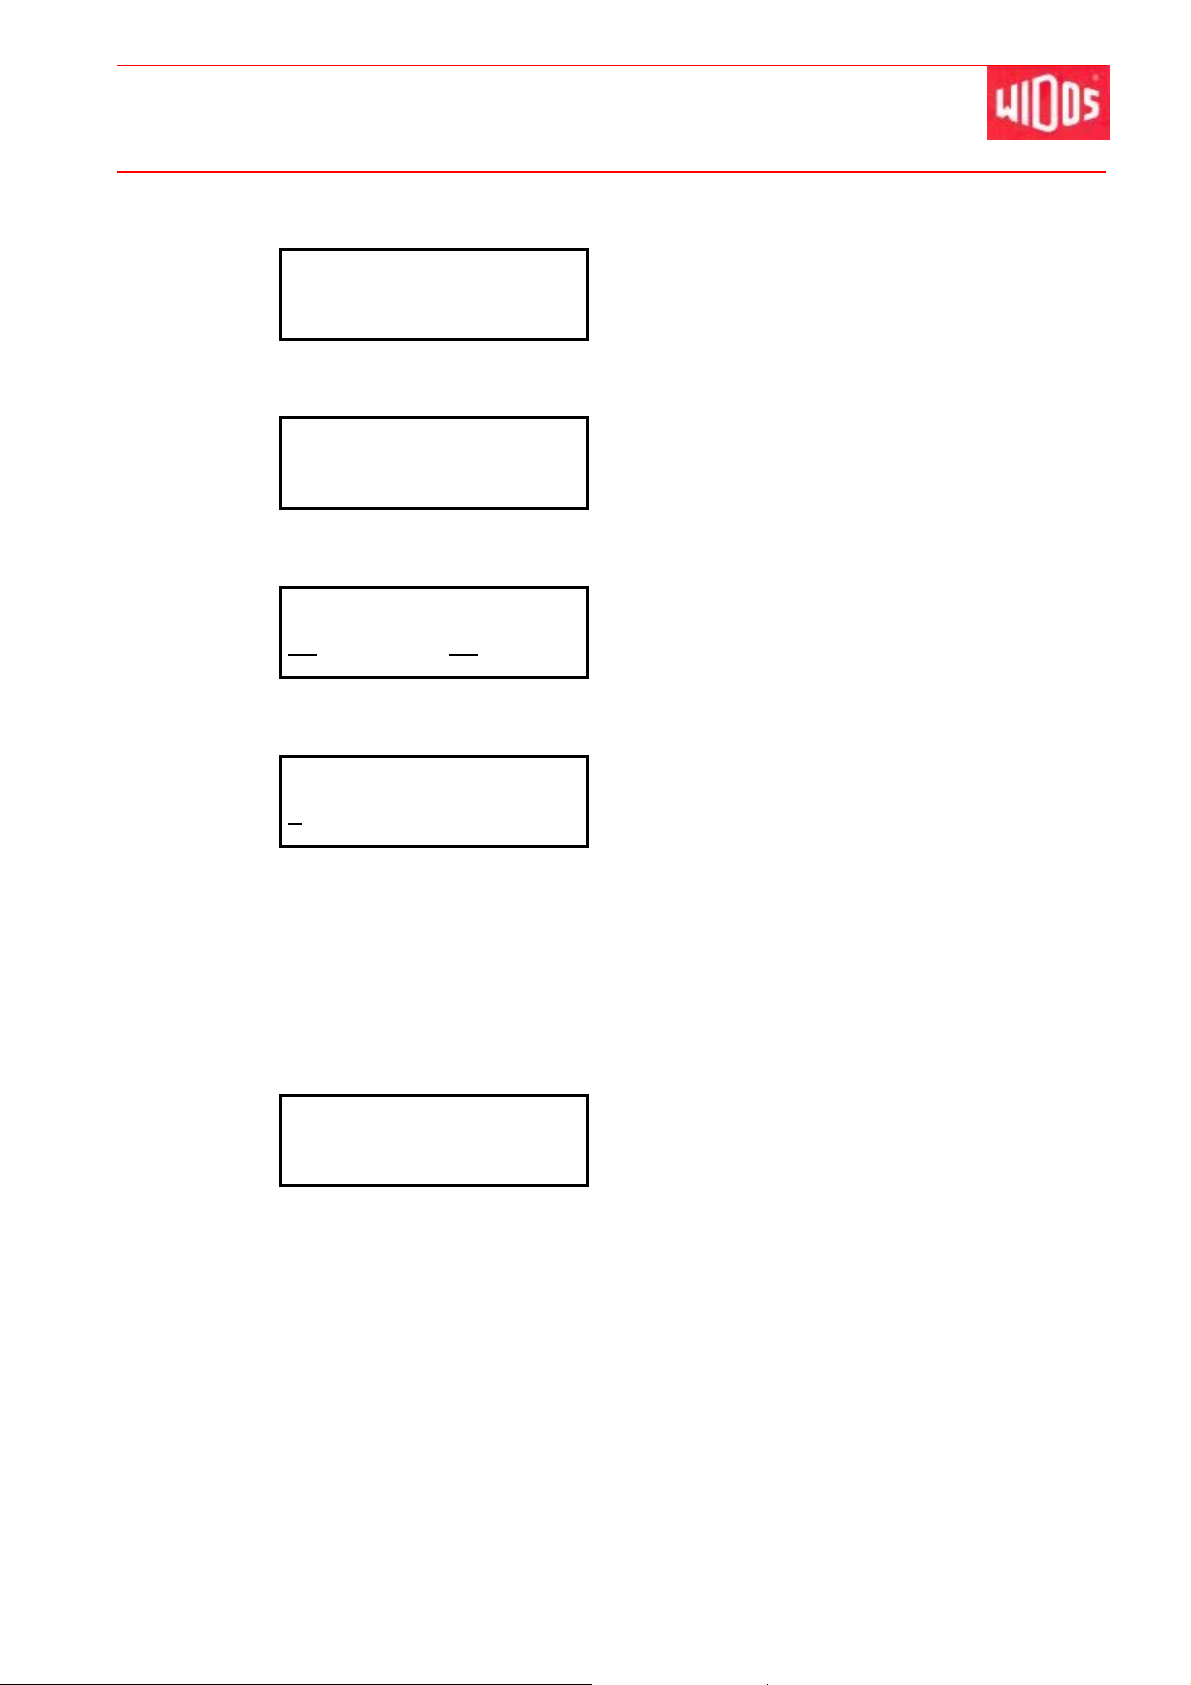
5.11. How to change authorization
Kunststoffschweißtechnik
Display:
2nd line:
WIDOS ESI 4000
10.10.2011 10:10
Basic menu
Current date and time
Simultaneously press <- and Start> for next menu item
Display:
2nd line:
WIDOS ESI 4000
Please authorize
Only possible with general authorization card
Authorize by bar code reading pen and general authorization card
Display:
2nd line:
WIDOS ESI 4000
.10.2011 10:10
10
Current date and time is indicated
Press <Start>
Display:
2nd line:
Authorization
y
es
Welding with or without authorization can be
selected.
By selecting: “NO” welding is always possible, even after switching the
machine on and off.
Instead of the authorization number the welding protocol indicates
XXXX
In case of selection „1x a day“, authorizing is only required once a day
Select authorizing with <+ / ->
Repeatedly press <Start> or wait for basic menu to appear.
Display:
2nd line:
WIDOS ESI 4000
10.10.2011 10:10
Basic menu
Current date and time
18.07.2013 Working Instructions WIDOS ESI 4000 Page 28 of 37
Page 29
Starting and operating Chapter 5
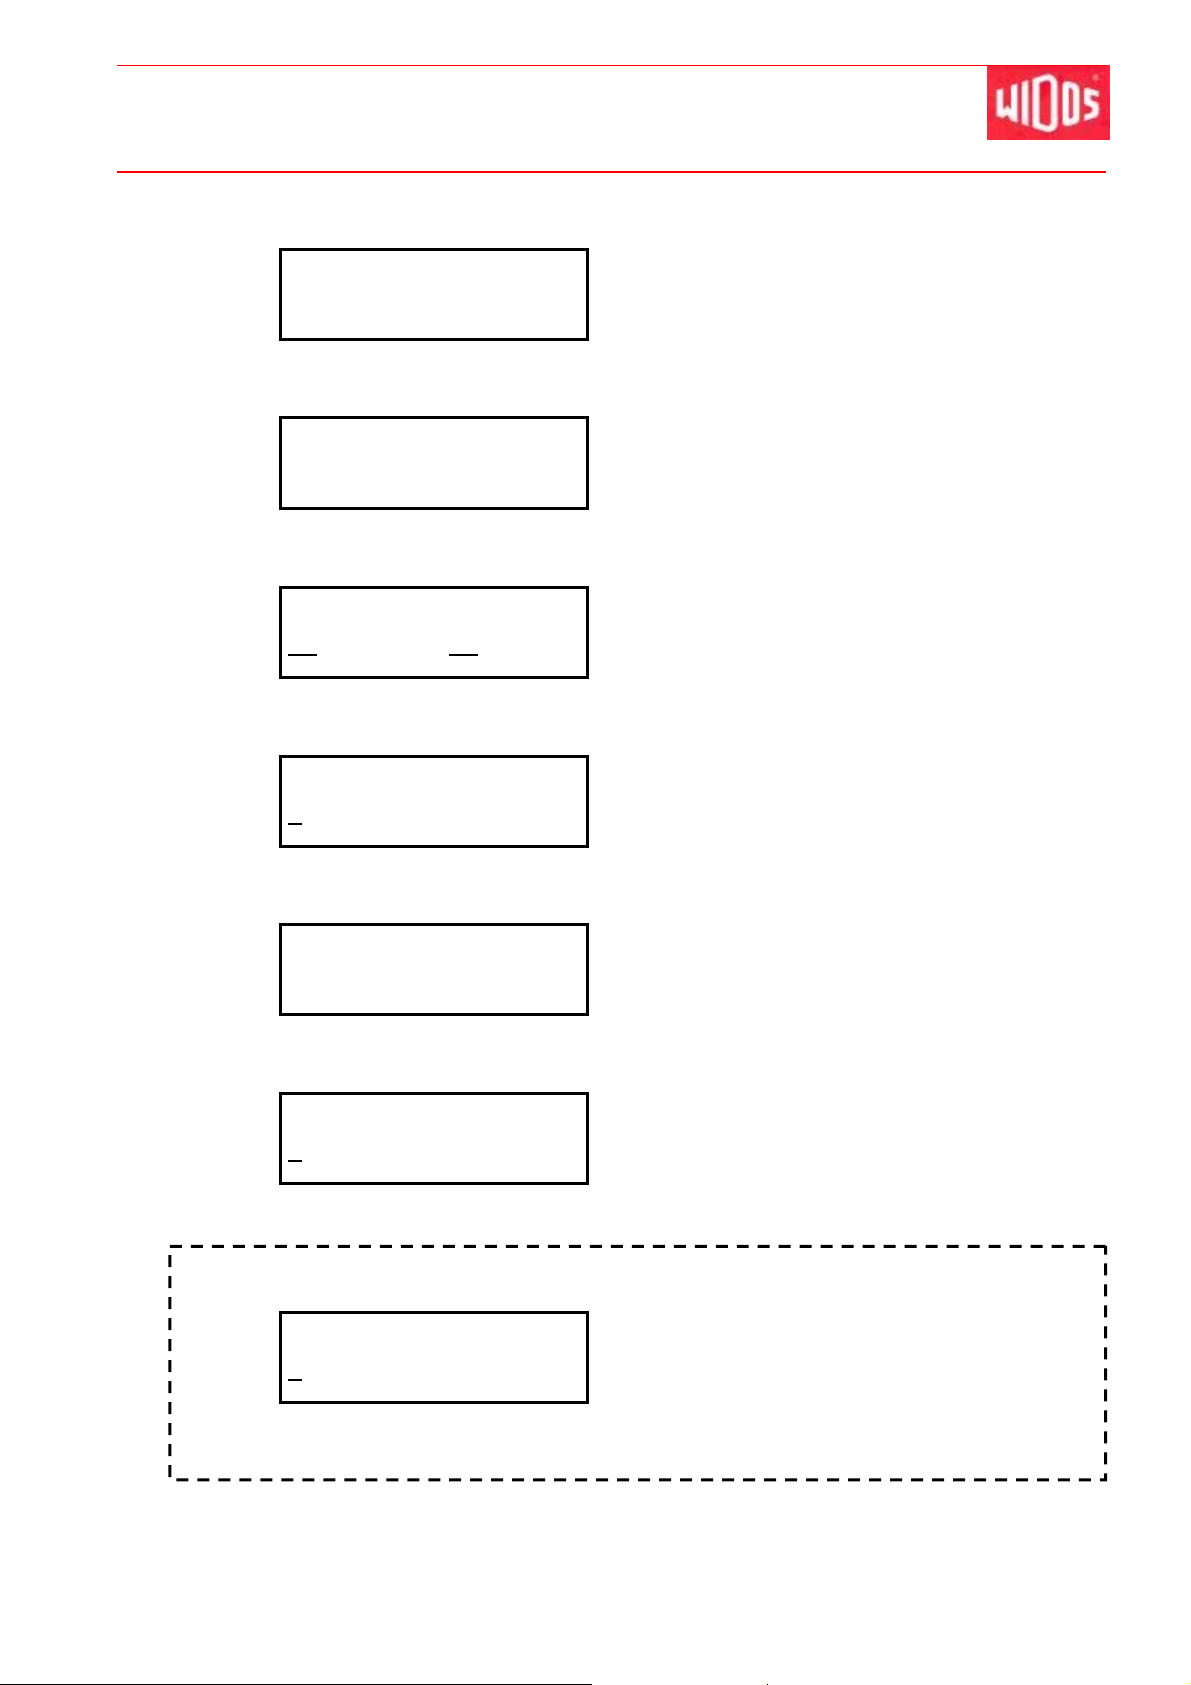
5.12. Traceability–how to activate information and pipe length
Kunststoffschweißtechnik
Display:
2nd line:
WIDOS ESI 4000
10.10.2011 10:10
Basic menu
Current date and time
Simultaneously press <- and Start> for next menu item
Display:
2nd line:
WIDOS ESI 4000
Please authorize
Only possible with general authorization card
Authorize by bar code reading pen and general authorization card
Display:
2nd line:
WIDOS ESI 4000
.10.2011 10:10
10
Current date and time is indicated
Press <Start>
Display:
2nd line:
Authorization
y
es
Press <Start>
Display:
2nd line:
Name of project
WIDOS
--------------------
Current project name is indicated
Confirm by <Start>
Display:
2nd line:
Traceability
n
o
You may select traceability yes / no
Select “YES” with <+> if you require traceability
Only appears if traceability has been selected with yes.
Display:
2nd line:
pipe length
y
es
You may select pipe length yes / no
Select pipe length yes by <+>
18.07.2013 Working Instructions WIDOS ESI 4000 Page 29 of 37
Page 30
Starting and operating Chapter 5
Repeatedly press <Start> or wait for basic menu to appear.
Display:
2nd line:
WIDOS ESI 4000
10.10.2011 10:10
Basic menu
Current date and time
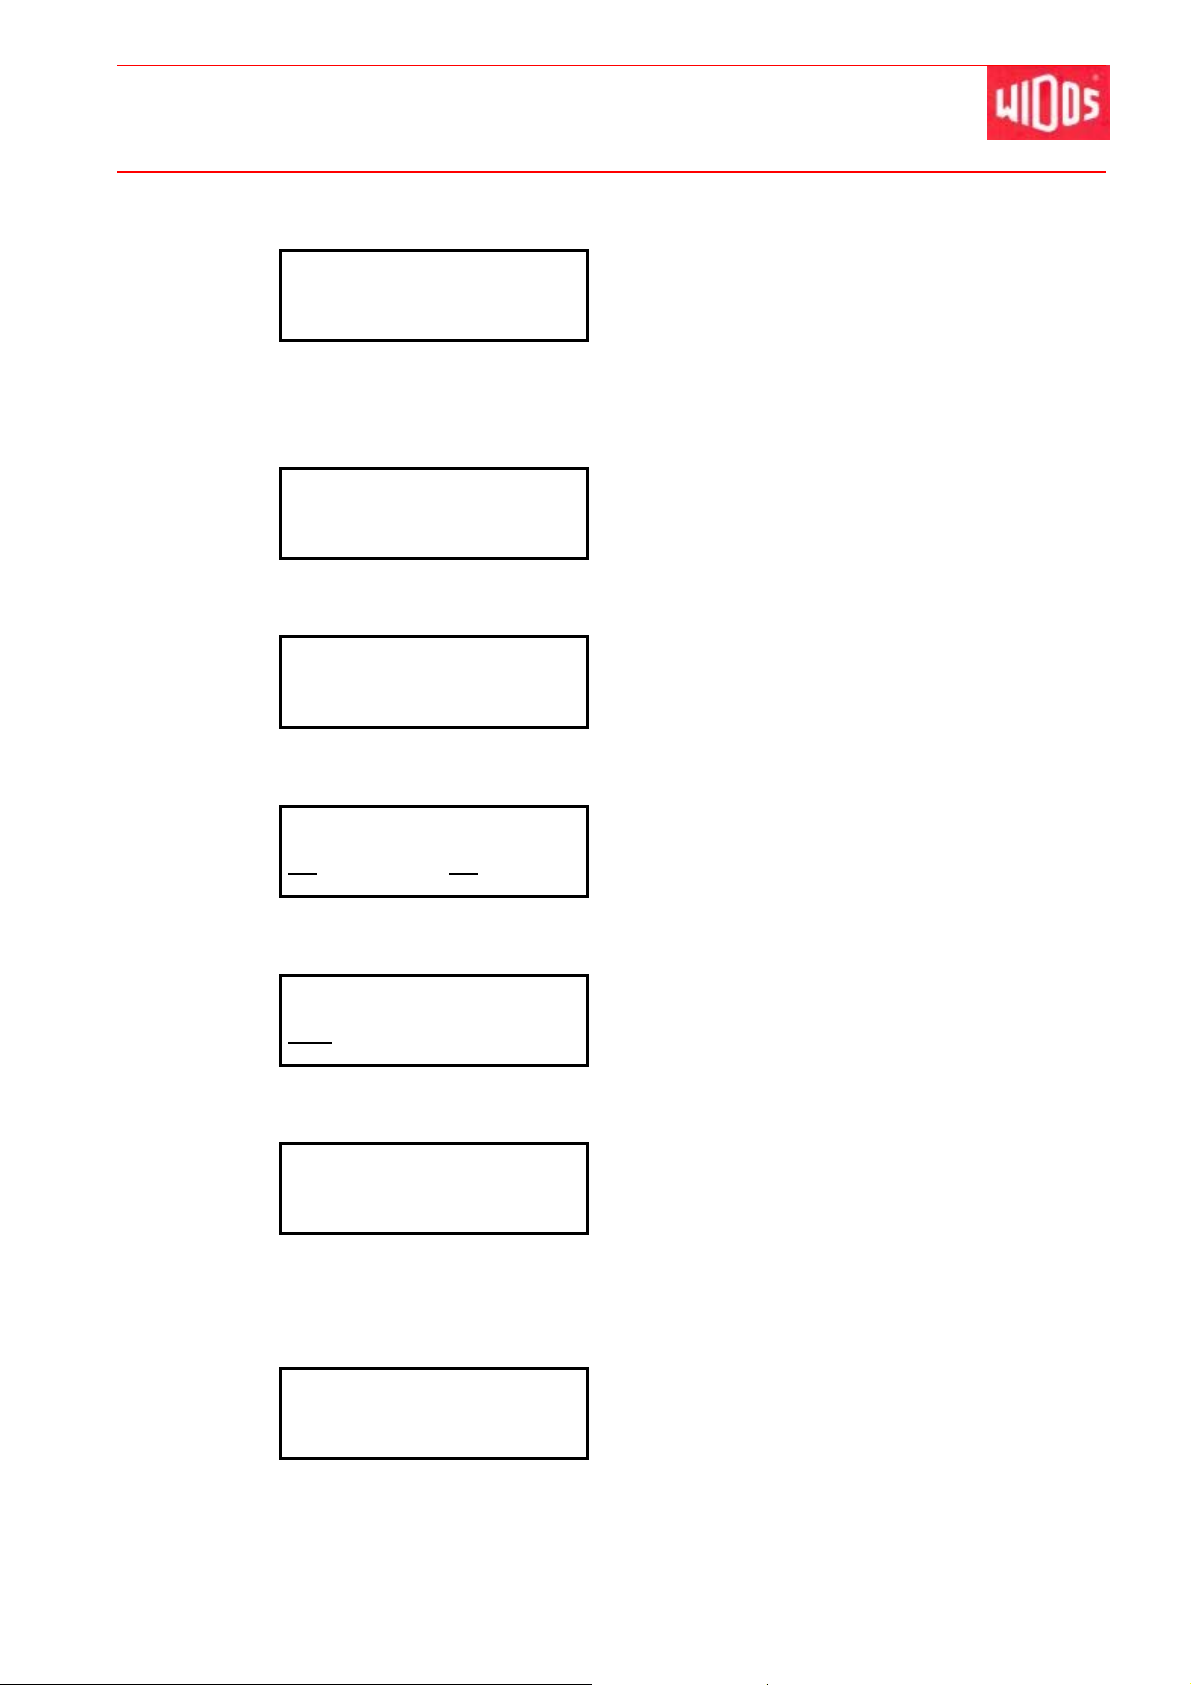
5.13. How to ask for project name prior to each welding
Kunststoffschweißtechnik
Display:
2nd line:
WIDOS ESI 4000
10.10.2011 10:10
Basic menu
Current date and time
Simultaneously press <- and Start> for next menu item
Display:
2nd line:
WIDOS ESI 4000
Please authorize
Only possible with general authorization card
Authorize by bar code reading pen and general authorization card
Display:
2nd line:
WIDOS ESI 4000
10
.10.2011 10:10
Current date and time is indicated
Press <Start>
Display:
2nd line:
Authorization
yes
Press <Start>
Display:
2nd line:
ask for project name
WIDOS
--------------------
Select yes with <+> if you wish to be ask for the project name prior to
each welding.
Repeatedly press <Start> or wait for basic menu to appear.
Display:
2nd line:
WIDOS ESI 4000
10.10.2011 10:10
Basic menu
Current date and time
18.07.2013 Working Instructions WIDOS ESI 4000 Page 30 of 37
Page 31
Starting and operating Chapter 5
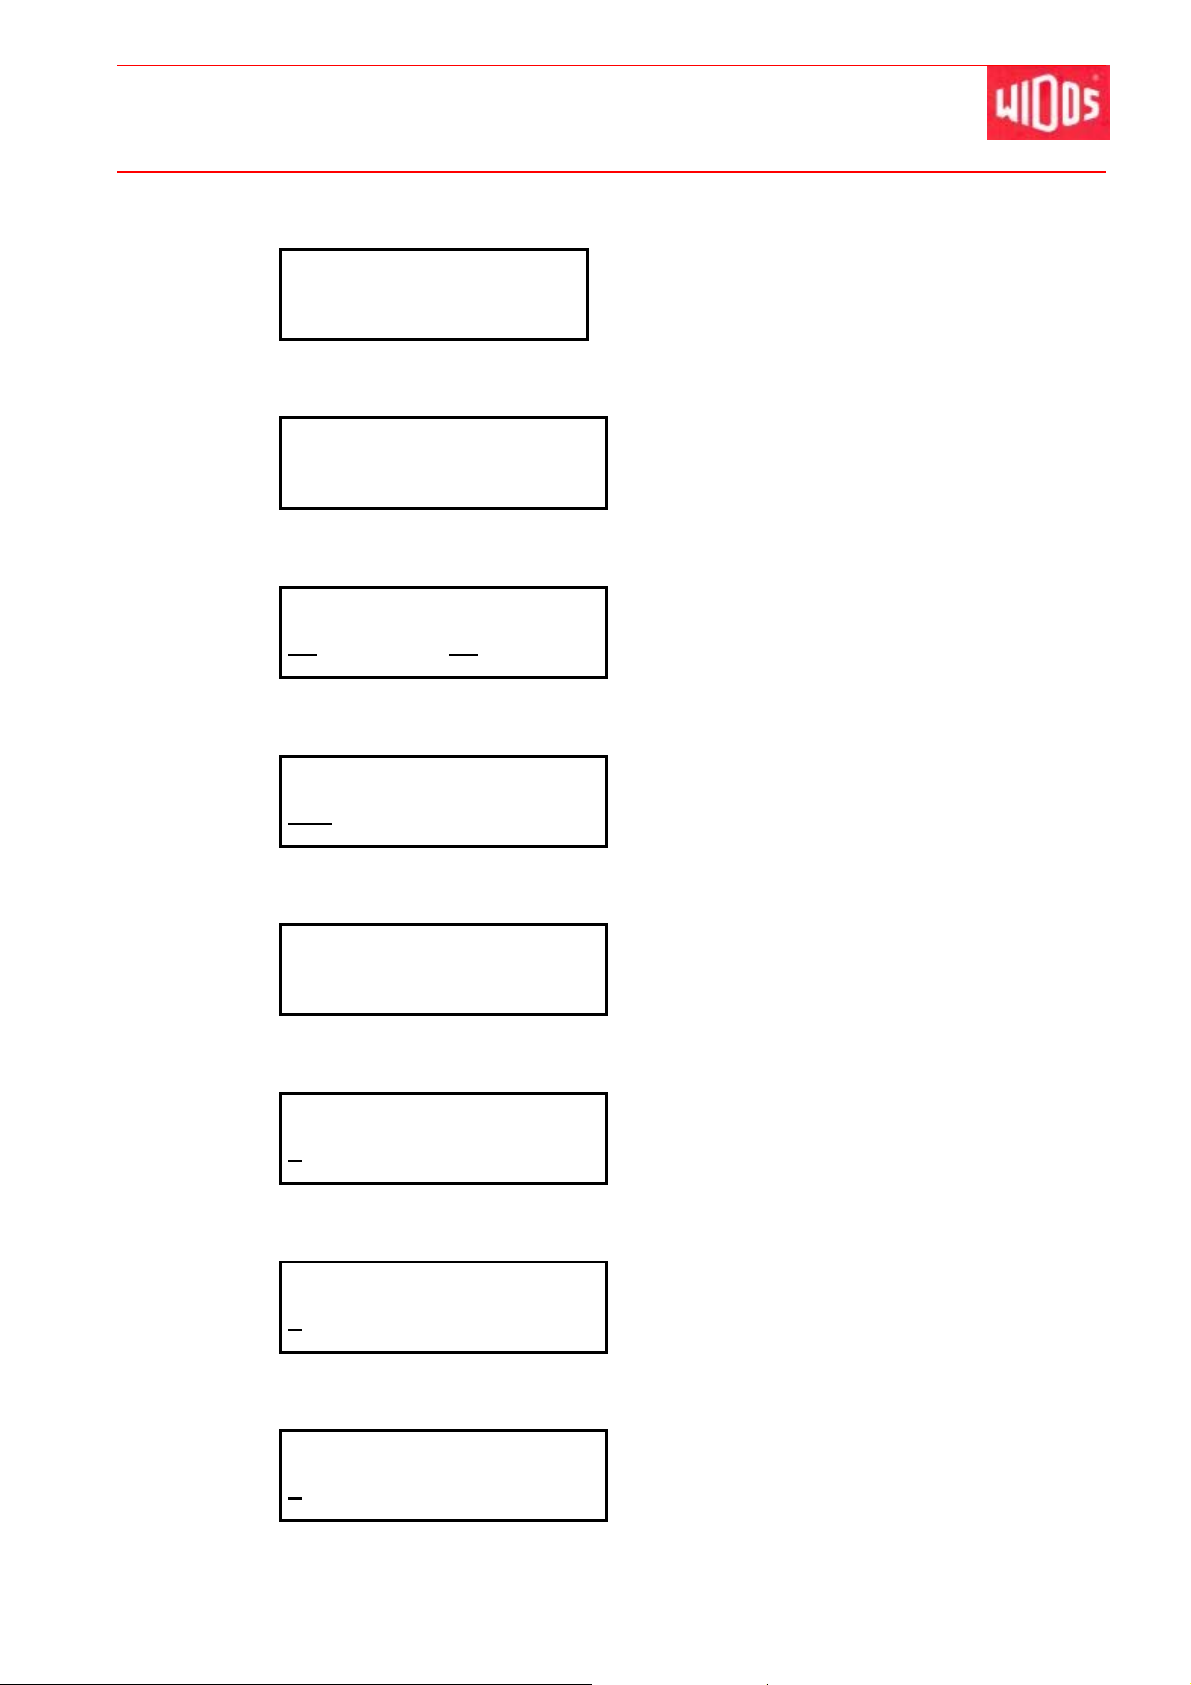
5.14. How to delete the memory
Kunststoffschweißtechnik
Display:
2nd line:
WIDOS ESI 4000
10.10.2011 10:10
Basic menu
Current date and time
Simultaneously press <- and Start> for next menu item
Display:
2nd line:
WIDOS ESI 4000
Please authorize
Only possible with general authorization card
Authorize by bar code reading pen and general authorization card
Display:
2nd line:
WIDOS ESI 4000
.10.2011 10:10
10
Current date and time is indicated
Press <Start>
Display:
2nd line:
Authorization
yes
Press <Start>
Display:
2nd line:
ask for project name
WIDOS
--------------------
The current project name is indicated
Press <Start>
Display:
2nd line:
Traceability
y
es
You may select traceability yes / no
Press <Start>
Display:
2nd line:
delete memory
_
Select with <+ > if memory is desired
Display:
2nd line:
delete memory
y
es
You may select „delete memory yes / no“
Select YES with <+ > if memory is desired, or NO with <-> i fit isn’t
desired.
18.07.2013 Working Instructions WIDOS ESI 4000 Page 31 of 37
Page 32
Starting and operating Chapter 5
Display:
Delete CNC memory?
2nd line:
Attention! The CNC memory is deleted with <+>.
Display:
2nd line:
WIDOS ESI 4000
10.10.2011 10:10
Basic menu
Current date and time
5.15. Welding data management
The battery buffered CNC memory (RAM) can store appr. 350 weldings.
Make sure that this figure is not exceeded (error message „memory full“
appears on the display) otherwise the first stored welding is overwritten.
If necessary read out welding data in time.
5.16. Possible defects and their elimination
Kunststoffschweißtechnik
Defect Possible Cause Identification and Elimination
Welding breaks off - Soiled or damaged contact - Change the contact
Barcode does not work - Barcode soiled
- Reading pen defective
- Clean barcode, repeat read in
- Manually enter digits of the
barcode: simultaneously
press all three buttons
<+ / - / Enter>, afterwards
manually enter the digits.
5.17. Short instruction
18.07.2013 Working Instructions WIDOS ESI 4000 Page 32 of 37
Page 33
WIDOS Einsteinstr. 5 Telephone +49 (0) 71 52 / 99 39 - 0
W. Dommer Söhne GmbH D-71254 Ditzingen-Heimerdingen Telefax +49 (0) 71 52 / 99 39 - 40
E-mail: [email protected] Internet www.widos.de
Kunststoffschweißtechnik
6. Maintenance / Storing / Transport
Goal of the chapter is:
Keeping of the nominal state and the operation capacity of the device.
Increasing of the efficiency by avoiding non-planned outage.
Efficient planning of the maintenance works and the maintenance tools.
Immediately replace damaged parts.
Only use WIDOS spare parts for reparation works.
Prescribed maintenance and inspection works are to be carried out in due time.
It is recommended to execute inspection works every year.
These works are to be carried out by company WIDOS GmbH or by a contractual
partner.
Handle the device with care.
The housing may only be opened by qualified WIDOS personnel or by authorized service
partners.
Regularly check the contact plugs on their tight fit, always observe matching connecting
contacts.0
Always remove plug from power socket not using the cable.
6.1. Cleaning and care
The device ESI 4000 is to be cleaned with a humid and soft cloth.
Never put the device under water or hose down with water.
6.2. Transport and storing
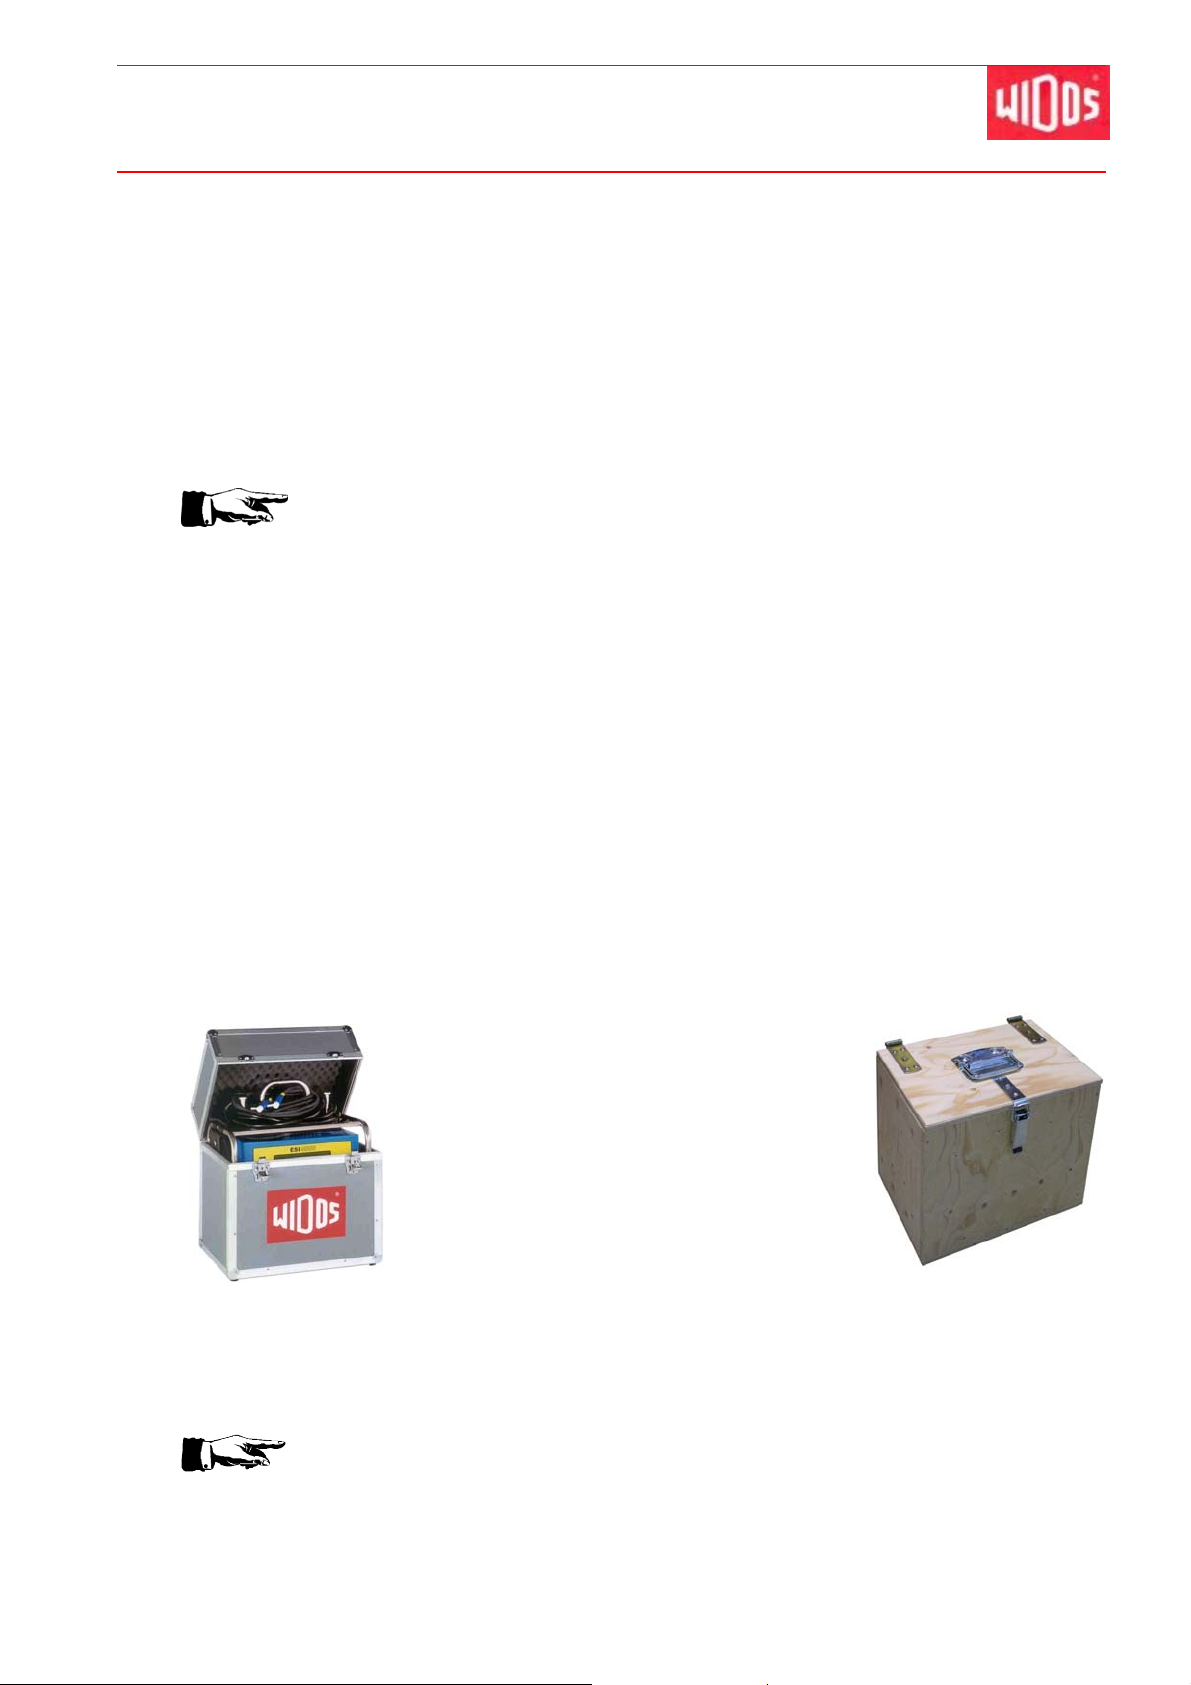
The device ESI 4000 should be carried and
stored in the supplied transport case or
transport crate in order to protect against dirt
and humidity.
In case of a welding the device should be carried at the intended carrying handle, never lift it
up at the cables
6.3. Waste management
The device is to be disposed of in an appropriate and environmentally sound
manner after its service life has elapsed, respecting customary waste
management laws.
18.07.2013 Working Instructions WIDOS ESI 4000 Page 33 of 37
Page 34
WIDOS Einsteinstr. 5 Telephone +49 (0) 71 52 / 99 39 - 0
W. Dommer Söhne GmbH D-71254 Ditzingen-Heimerdingen Telefax +49 (0) 71 52 / 99 39 - 40
E-mail: [email protected] Internet www.widos.de
Kunststoffschweißtechnik
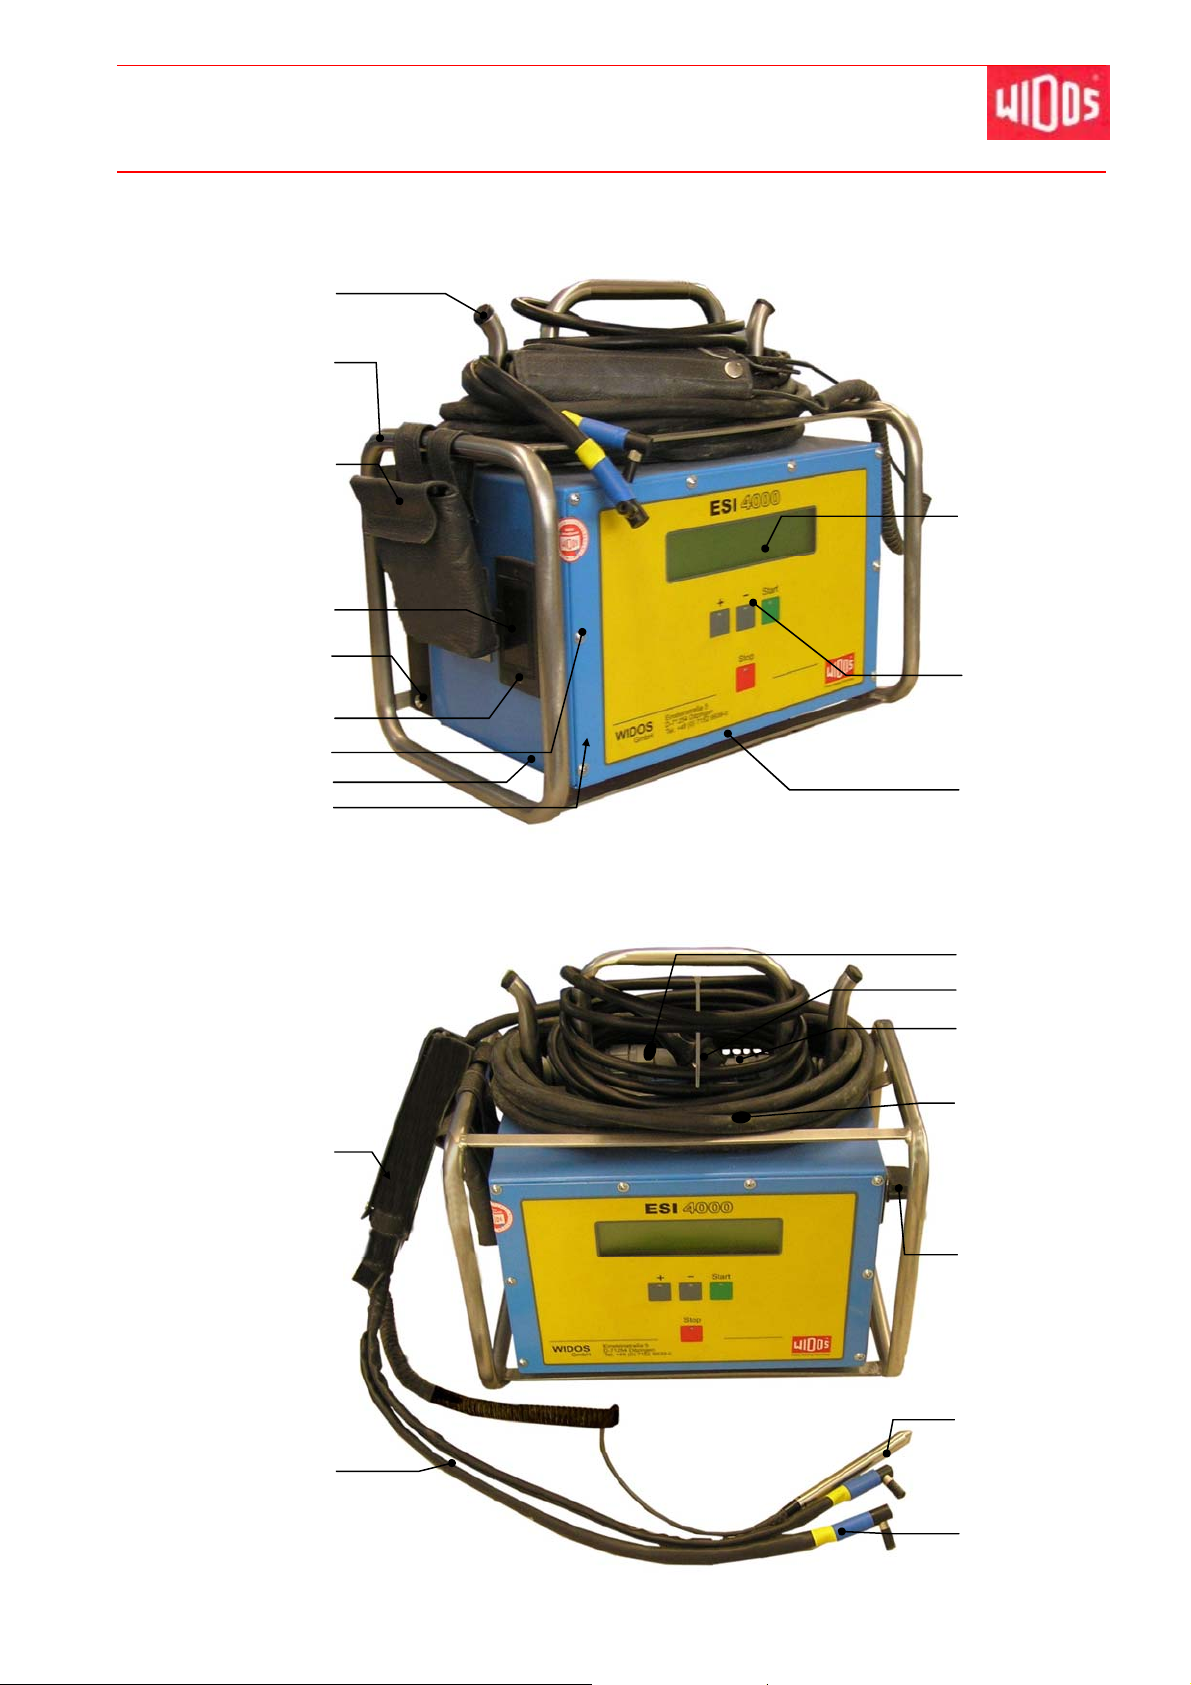
7. Spare parts list
1
2
3
17
4 - 8
9 - 12
13
14
15
16
18
19
23 - 25
26
27 - 29
20 - 21
30
31
32 – 34
22
35 - 38
18.07.2013 Working Instructions WIDOS ESI 4000 Page 34 of 37
Page 35
Spare parts list Chapter 7
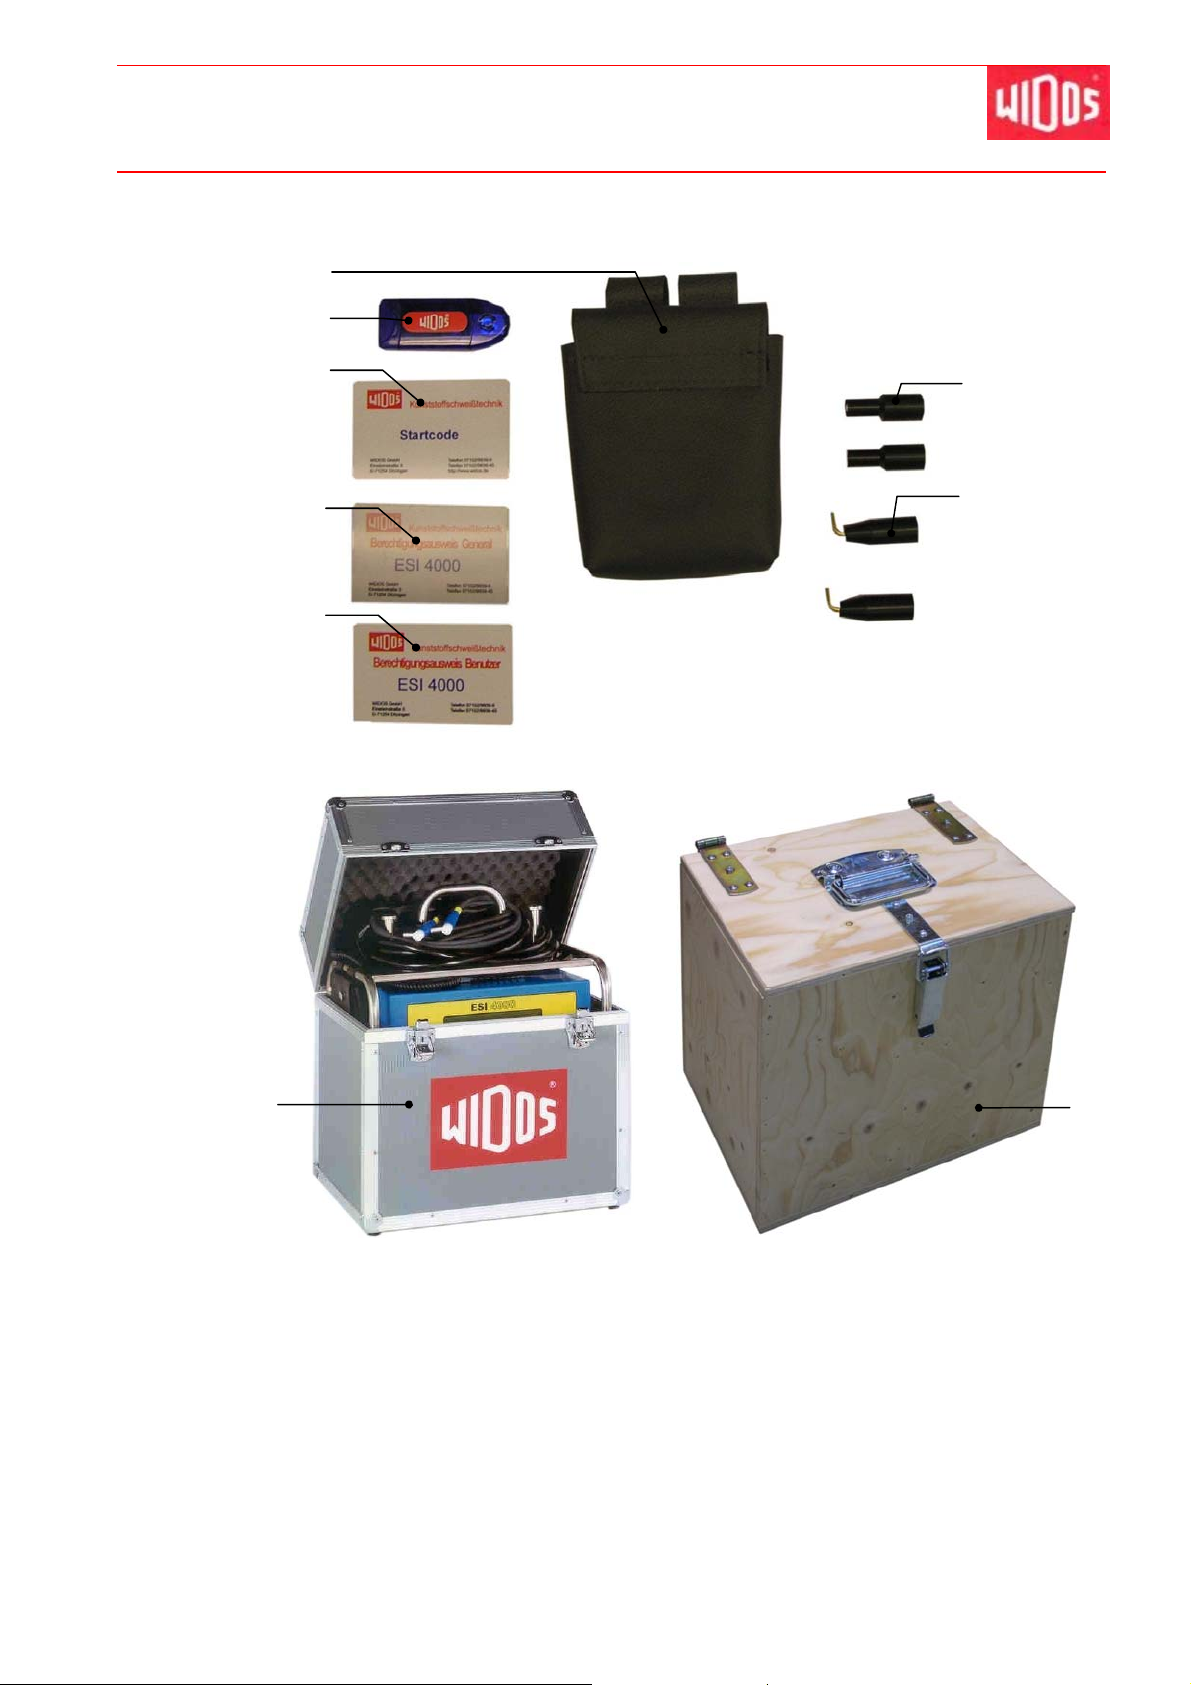
Accessoires (option):
(3)
39
40
41
42
45 46
Kunststoffschweißtechnik
43
44
18.07.2013 Working Instructions WIDOS ESI 4000 Page 35 of 37
Page 36

Spare parts list Chapter 7
Kunststoffschweißtechnik
WIDOS ESI - 4000
Pos. Name Piece Order no.
1 Sealing cap 1 J0214
2 Supporting frame ESI Niro 1 41 0111
3 Accessory bag 1 TAHW2
4 SD drive W7D 1 EG 0612
5 SD card 1 GB 1 EPR0610
6 Front insertion, splash-water proof 1 EST0602
7 Support plate for card reader CNC 3.0 1 105107
8 Cap for SD slot 1 1051 15
9 Heat sink ESI 4000 1 4101022
10 Tapped bushing M6 10 x 16 4 HG EW -M61
11 Pan head screw M 6x22 DIN 7984 4 7984F022
12 Tooth lock washer M 6 DIN 6797 4 67 97F
13 Spax button-head screw d 3,5x15 2 SPR3.5 x15
14 Lens-head screw M 4 x 10 DIN 84 8 7380D010
15 Lower housing element ESI 4000 1 410121 1
16 Seal for housing ESI 4000 2,7m DHW10
17 LCD display 1 EG01143
18 Plastic film keyboard ESI 4000 1 EF0641
19 Housing cap ESI 4000 1 4101212
20 Ambient temperature sensor 1 EE04042
21 Accessory bag ambient temperature sensor 1 TAHW1
22 Silicone hose without inner fabric 10 x 0,7 1,5 m EA09 ISHW1
23 Cable screw connection, plastic M 25 x 1,5 1 E VS25 G
24 Angle screw connection, plastic M 25 x 1,5 1 EVWK 25G
25 Counter nut M 25 x 1,5 1 EV 222 5
26 Connecting cable with isolated plug 1 EK5230
27 Cable screw connection, plastic M 16 x 1,5 1 E VS16 G
28 Angle screw connection, plastic M 16 x 1,5 1 EVWK 16G
29 Counter nut M 16 x 1,5 1 EV 221 6
30 Welding cable ESI 4000 complete 1 EKHW05
31 On - Off switch 2-pole 1 ES 1040
32 Barcode reading pen 1 EG0600
33 Circular plug 103 connector plug 1 ES THWRS 2
34 Circular plug 103 strain relief 1 ES THWRE 2
35 Set of contacts 4 mm 1 set HW AF00 3
36 Set of shrink hoses blue yellow 1 set EA0 9SBG
37 Plastic sleeve with drill hole 5 mm 2 E HWKP
38 Retainer for wire spring bushing 4 mm 2 EH WKM
39 Card reader SD / MMC USB 2.0 1 EP R061 1
40 Start code card 1 HWBA0 03
41 General card electro socket welding device 1 HWBA00 1
42 User card electro socket welding device 1 HW BA002
43 Electro socket round adaptor 1 HW AR001
44 Electro socket flat adaptor (optional) 1 HW AF001
45 Transportcase 1 TKESIA
46 Transport crate 1 TKESIH
18.07.2013 Working instruction WIDOS ESI 4000 Page 36 of 37
Page 37

WIDOS Einsteinstr. 5 Telephone +49 (0) 71 52 / 99 39 - 0
W. Dommer Söhne GmbH D-71254 Ditzingen-Heimerdingen Telefax +49 (0) 71 52 / 99 39 - 40
E-mail: [email protected] Internet www.widos.de
Kunststoffschweißtechnik
8. Declaration of conformity
In sense of the EC guideline EC Machinery Directive 2006/42/EC
Company
WIDOS GmbH
Einsteinstr. 5
D-71254 Ditzingen-Heimerdingen
declares under own responsibility that the product
WIDOS ESI 4000
to which this declaration refers, conforms to the following norms and normative documents:
1. DIN EN ISO 12100 – 1 and 2 (substitute for DIN EN 292 part 1 and 2)
Safety of machines, basic terminology, general design guidelines
2. DIN EN 60204.1
Electric equipment of industrial machines
3. DIN EN 60555, DIN EN 50082, DIN EN 55014,
Electro-magnetic compatibility
4. DIN EN 60950
Safety of facilities of information technology
The technical documentation is completely available.
The working instructions are available in the user’s language.
Ditzingen-Heimerdingen, 18.07.2013
Martin Dommer (Technical director)
18.07.2013 Working Instructions WIDOS ESI 4000 Page 37 of 37
 Loading...