

Page 1
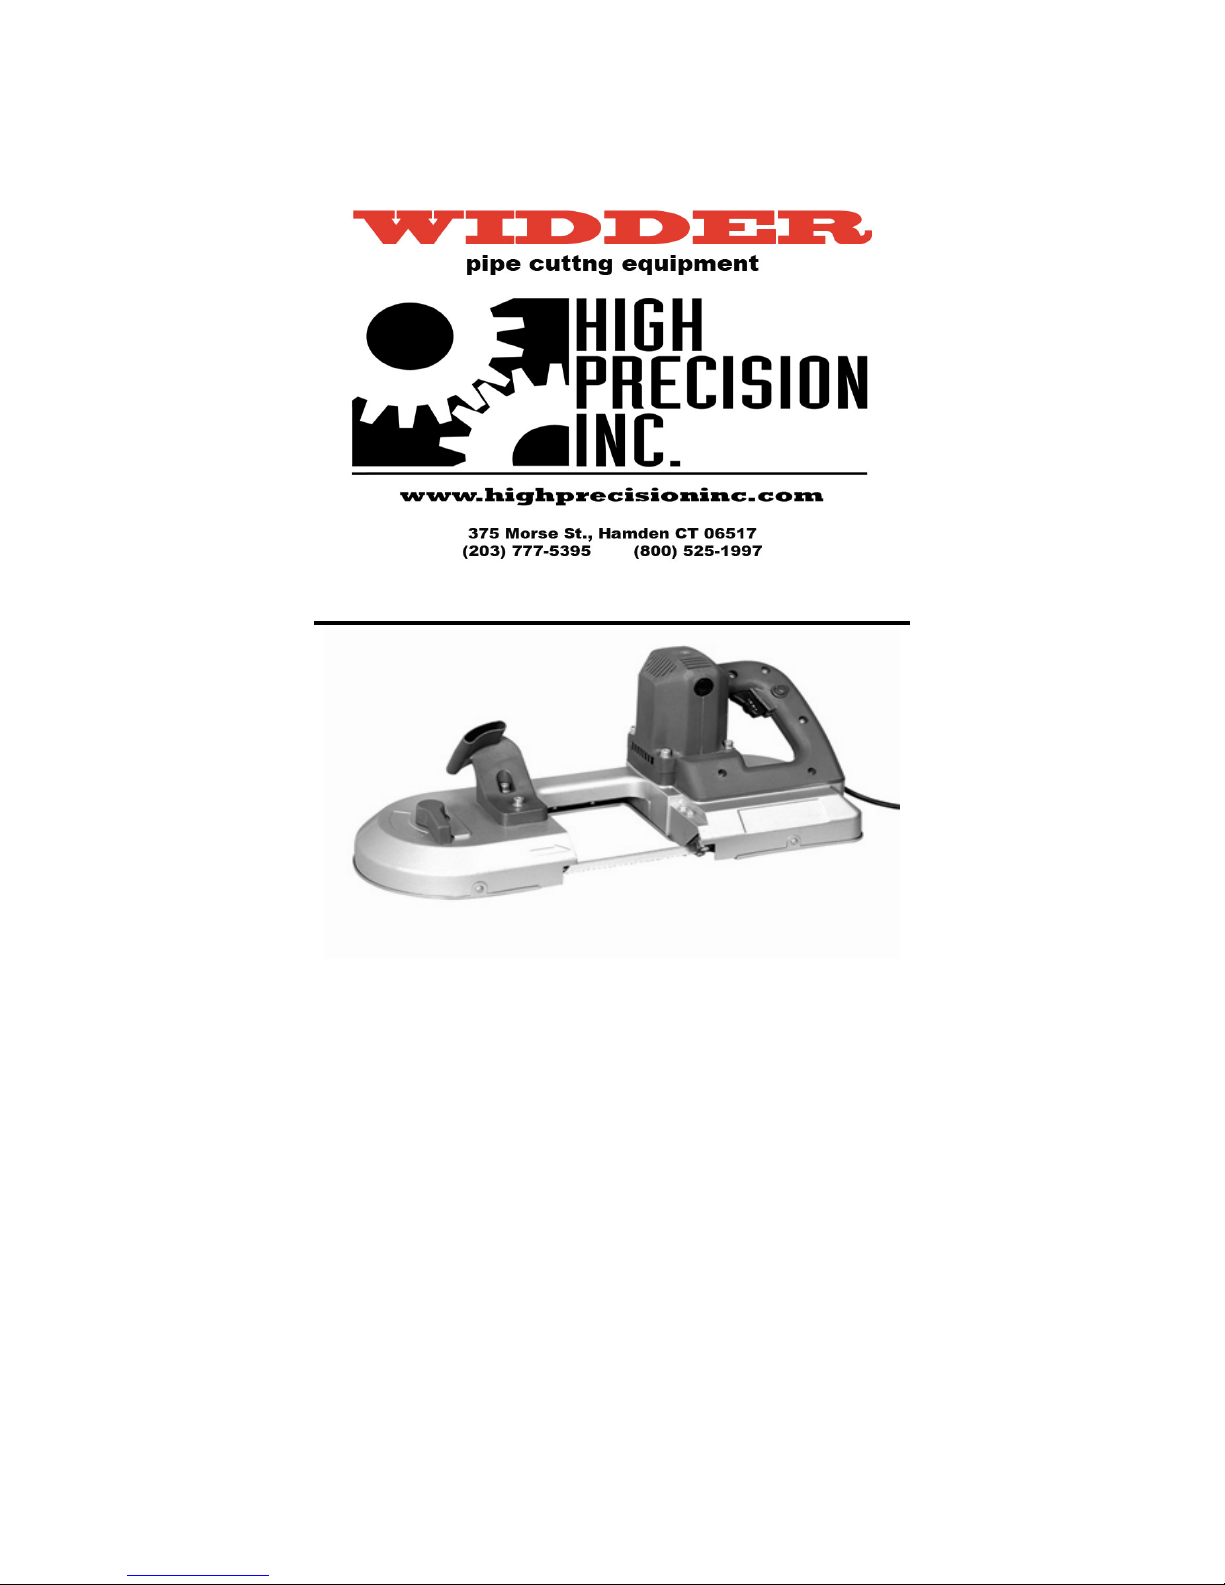
18401 Electric Portable Band saw
Drive Motor: 120 V, 6 Amps
Speed – 0-240 Feet per Minute
Replacement Blade: 3 Ft. 8-7/8 In. x ½”
Cutting Size: 4.5” Round, 4.5” Square
Safety Warnings:
Warning: This is an outline of suggested safety precautions. As with all power tools,
follow generally accepted precautions for any electrical tool and metal cutting
application.
Caution – follow all precautions outlined below, read all warnings and operating
instructions before using this or any power tool.
Page 2

1- Be sure work area is clean and free of debris. Be sure operator has secure footing.
Use tool only in a steady, secure work position.
2- Do not operate under the influence of drugs or alcohol. Do not operate if drowsy
or ill.
3- Be sure tool is used clear from other workers, children, or animals.
4- Do not operate near power lines, in wet areas or on wet applications.
5- Wear proper safety equipment including proper ANSI or OSHA approved safety
glasses, boots, and gloves. Do not operate with any loose clothing, lines, jewelry,
etc., that could become caught in the tool, blade, or workspace.
6- Inspect tool before each use for damaged or frayed cords, broken plugs, bent or
damaged components, etc. Do not operate with loose or dull blade.
7- Do not plug or unplug machine with power switch engaged.
8- Unplug tool when not in use. Store tool unplugged. Do not attempt to inspect or
service tool while plugged in.
9- Use only appropriate circuits and cords for this tool. Power tools should be used
with the shortest extension cords only, rated for at least 50% more than the rated
amp load listed above. Do not combine cords for extra length. This could cause
cord failure and fire and could damage the drive motor. In outdoor applications,
use on GFI circuits only with outdoor rated cords.
Tool Operating Instructions:
Warning: Do not plug in tool until the following procedures are complete. Attach
blade guide before using.
Page 3
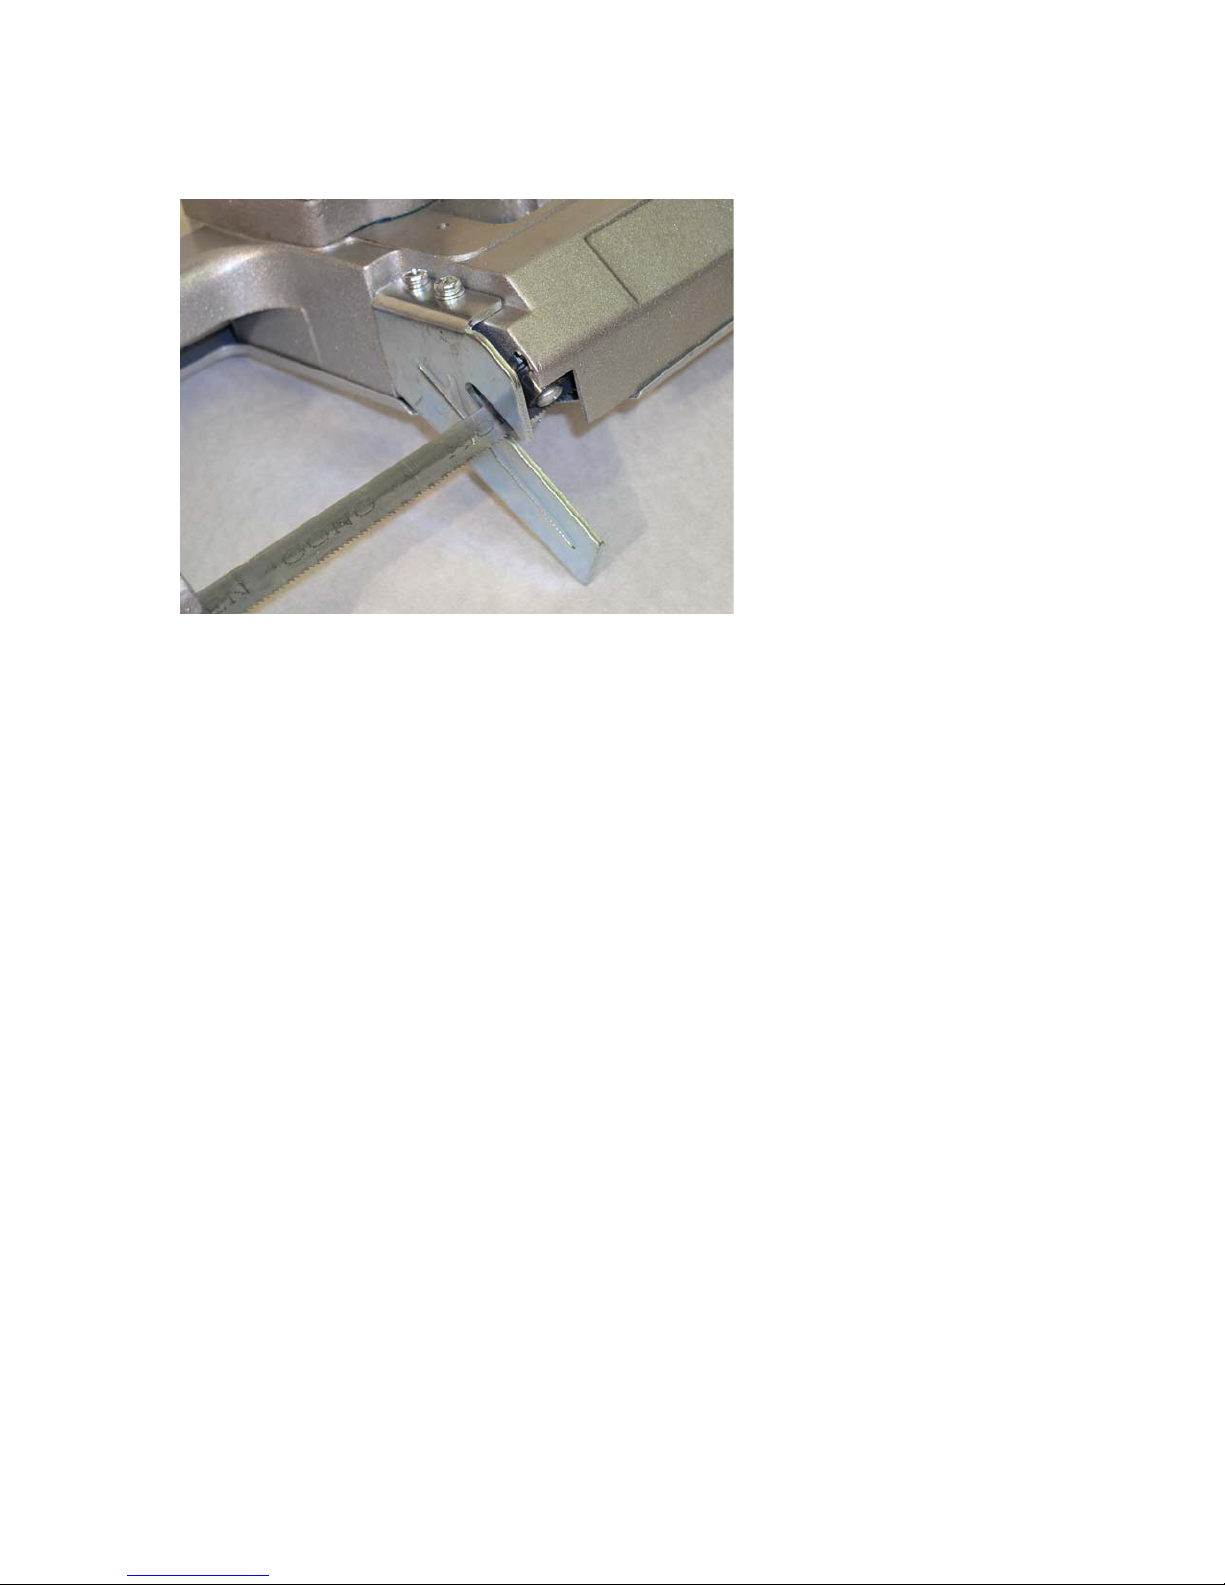
1 - Install blade guide per photo below:
2 - Inspect blade for damage and be sure blade is sharp. Be sure blade is in roller guides
and teeth point in proper direction.
3 - Tighten blade by flipping blade tensioning lever – be sure the blade is in the guides
and still moves smoothly.
4 - Plug in tool following all safety warnings.
5 - Be sure work piece is secure.
6 - Place blade guide against work piece. Power on the tool by depressing the on/off
switch. Place tool into cut slowly with blade at right angles to the work piece with firm
grip. Do not force the tool, chips should be in the shape of small number “6”s or “9”s.
7 - Allow tool to come to a stop before setting down.
8 - Store with blade tension removed and tool unplugged.
Page 4
Page 5
Item
Part # MFG# Description Q/unit
Item
Part # MFG# Description
Q/unit
Item
Part # MFG# Description
Q/unit
1
18409
271016
Stud 4
23
18453
271104
Gear Shaft 1
66
18475
271126
Pin Shaft
1
2
18480 27-
1131
Cover 1
24
18510
281101
Gear 1
67
18473
271124
Blade Guide
Fasteners
3
3
18479 27-
1130
Blade
1
25
18451
271102
Ball Bearing 1
68
18488
271139
Bearing
Assembly
4
4&5
18469 27-
1120
Screw (Ring
Gear)
2
26
18450
271101
Stop Ring 1
69
18476
271127
Screw
4
6/9/10/11
18464 27-
0013
Spring Plate
Assembly
1
27
18511
281102
Bushing
1
70
18482
271133
Square
1
7
18463 27-
1114
Screw – M5x15 4
28
18489
271140
Ball Bearing 2
71
18483
271134
Hex Key
1
8
18462 27-
1113
Collar
4
29
18452
271103
Pin 2
12
18459 27-
1110
Left Guide
1
30
18512
281002
Gear, Helical 1
13
18458 27-
1109
Frame
2
31
18513
281003
Needle Bearing
1
14
N/A
1
32
18514
281004
Gear Shaft
1
15
18484 27-
1135
Bushing
1
33
18515
281005
Ball Bearing
1
16
N/A
1
34-60
18516 28-
1001
Motor
Assembly
1
17
18454 27-
1105
Tension Handle
-
40
18517
281006
Switch & Lock
1
18
18485 27-
1136
Pan-head Screw
-
49&50
18518 28-
1007
Cord Assembly
1
19
18456 27-
1107
Grip Handle
-
61&62
18468 27-
1119
Pulley
Assembly
2
20
18457 27-
1108
S.H.S.C. 2
63
18486
271137
Pulley Stud Fixed
1
21
18478 27-
1129
Guide Bar
1
64
18474
271125
Bearing
3
22
18477
271128
Guide Bar
Fasteners
2
65
18470
271121
Right Guide
1
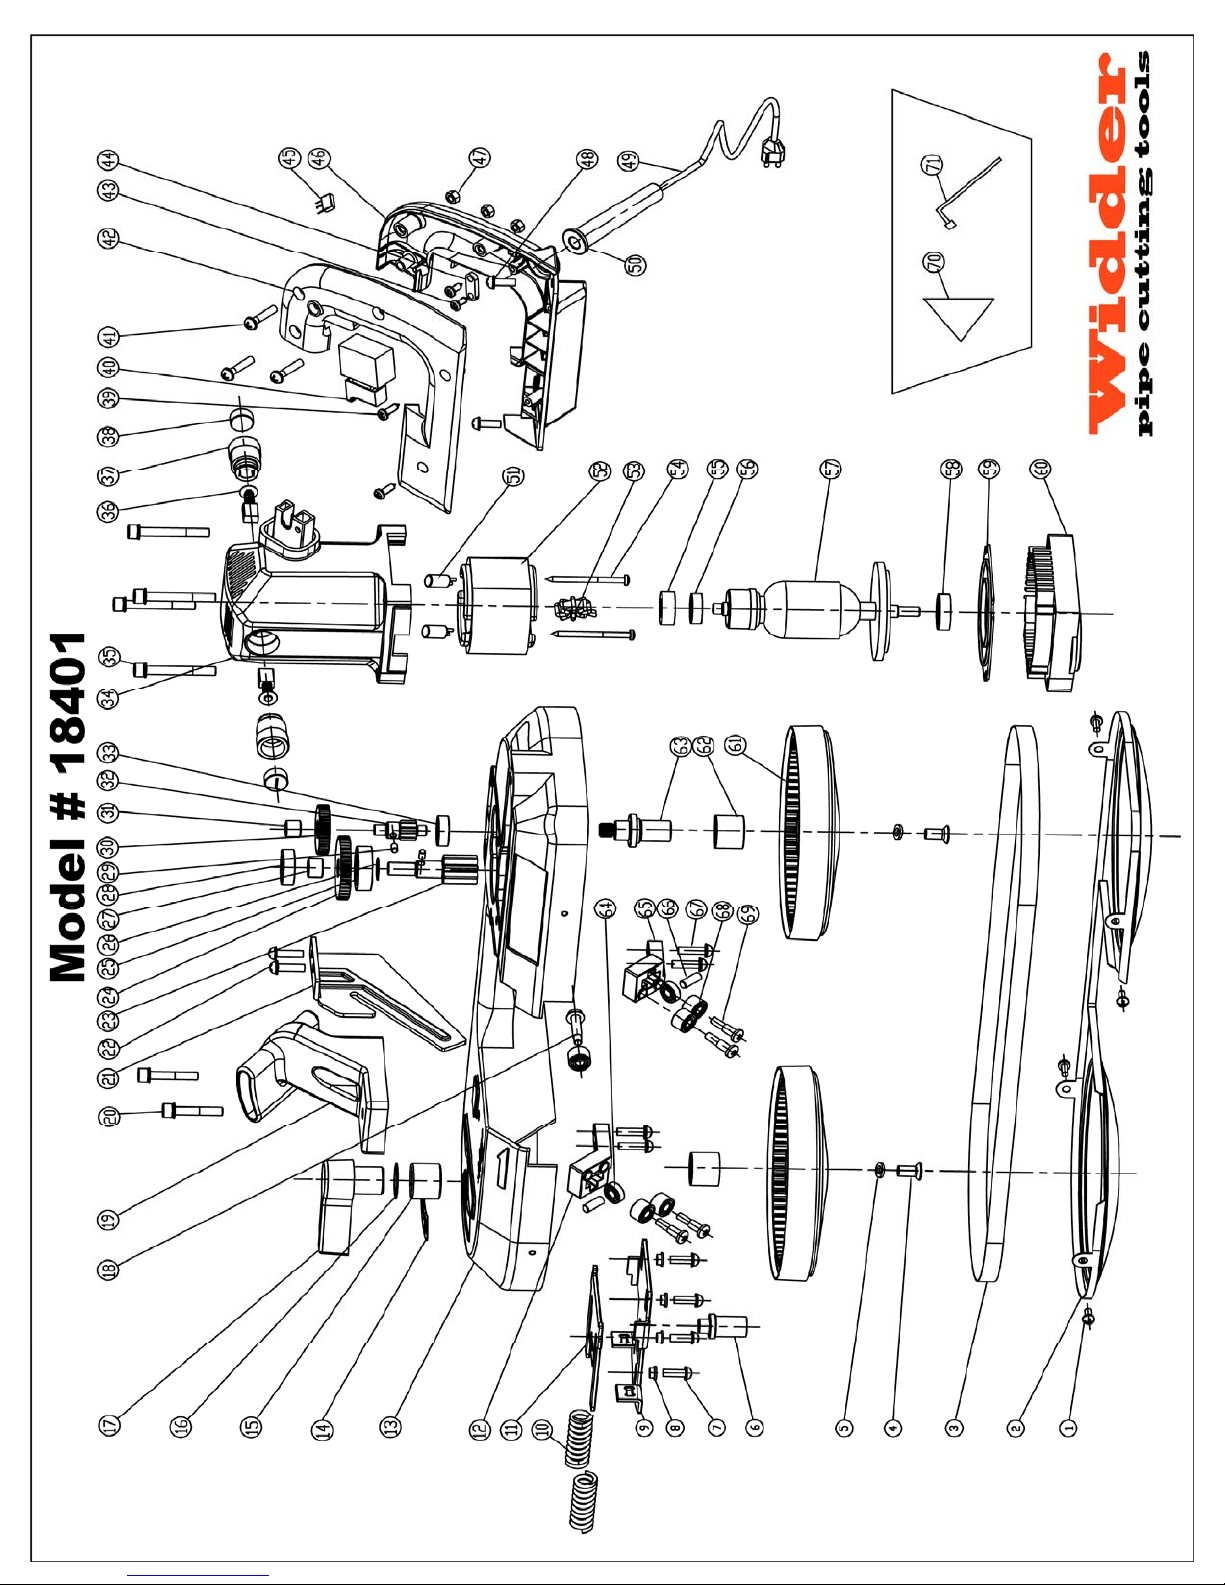
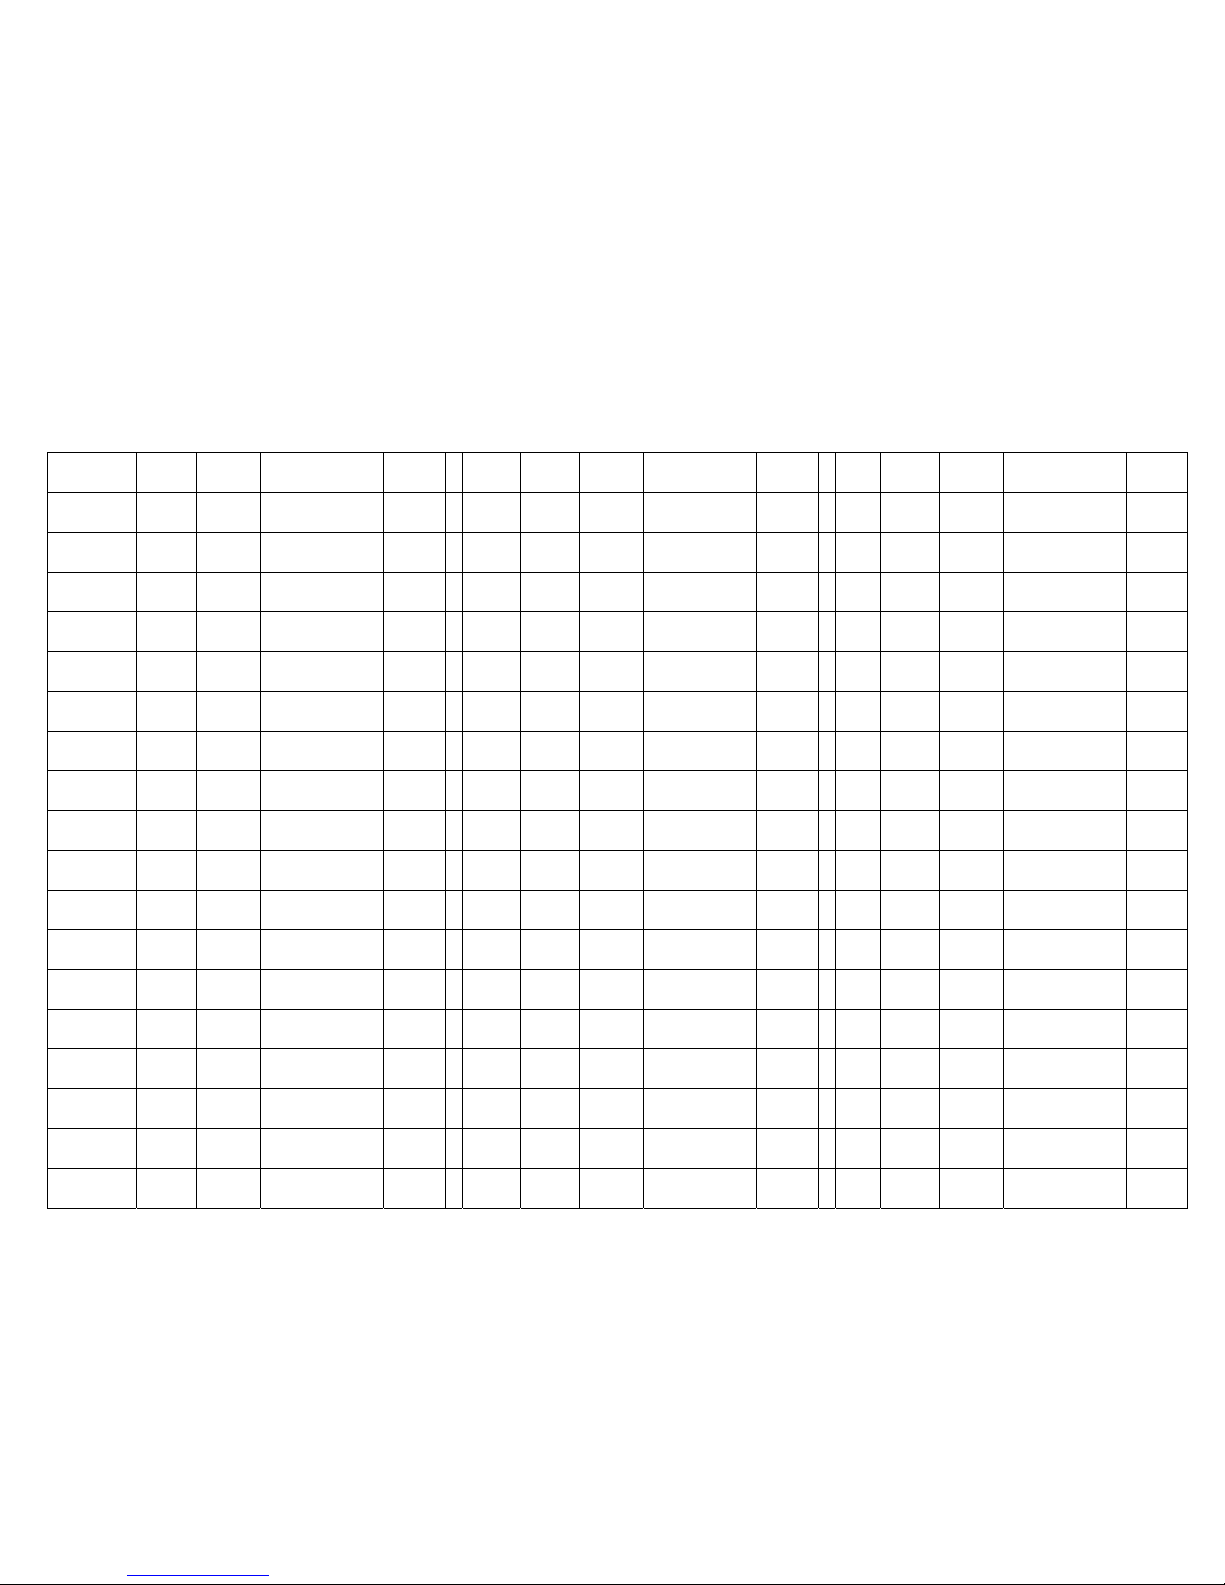
WIDDER Electric Band Saw #18401 – (MFG# 28-0001)
 Loading...