

Page 1
01/30/2008
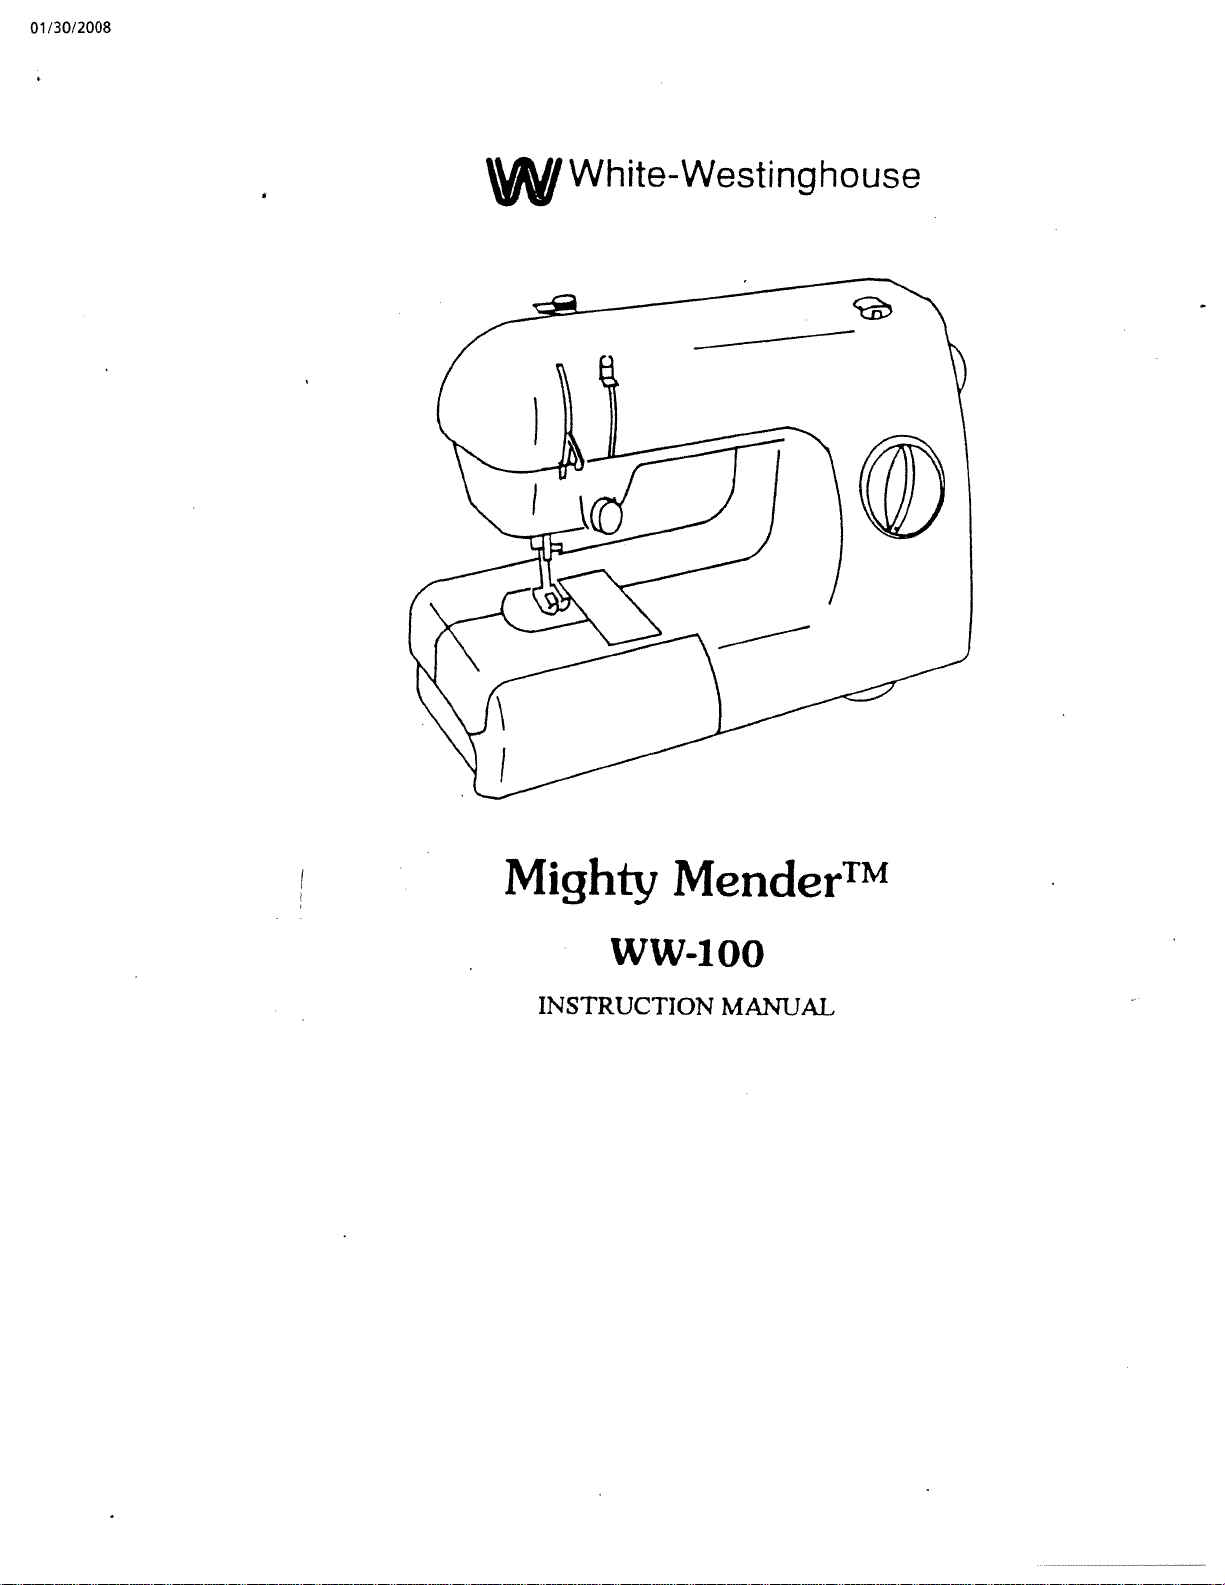
White-Westinghouse
Mighty
ww-100
INSTRUCTION
MenderTM
MANUAL
Page 2
01/30/2008
Table
Parts
Getting
Bobbin
Threading
Place
Raise
Contents
of
and
Started
Winding
the
Wound
the
Bobbin
accessoiy
the
MendingAScain
Changing
Needle
TABLE
Top
(Needle)
Bobbin
Thread
-
OF
CONTENTS
Thread
—
3
4
6
-—
—
--
——
—__—
7
9
11
12
13
14
AdjustTension—
—
15
Page 3
01/30/2008
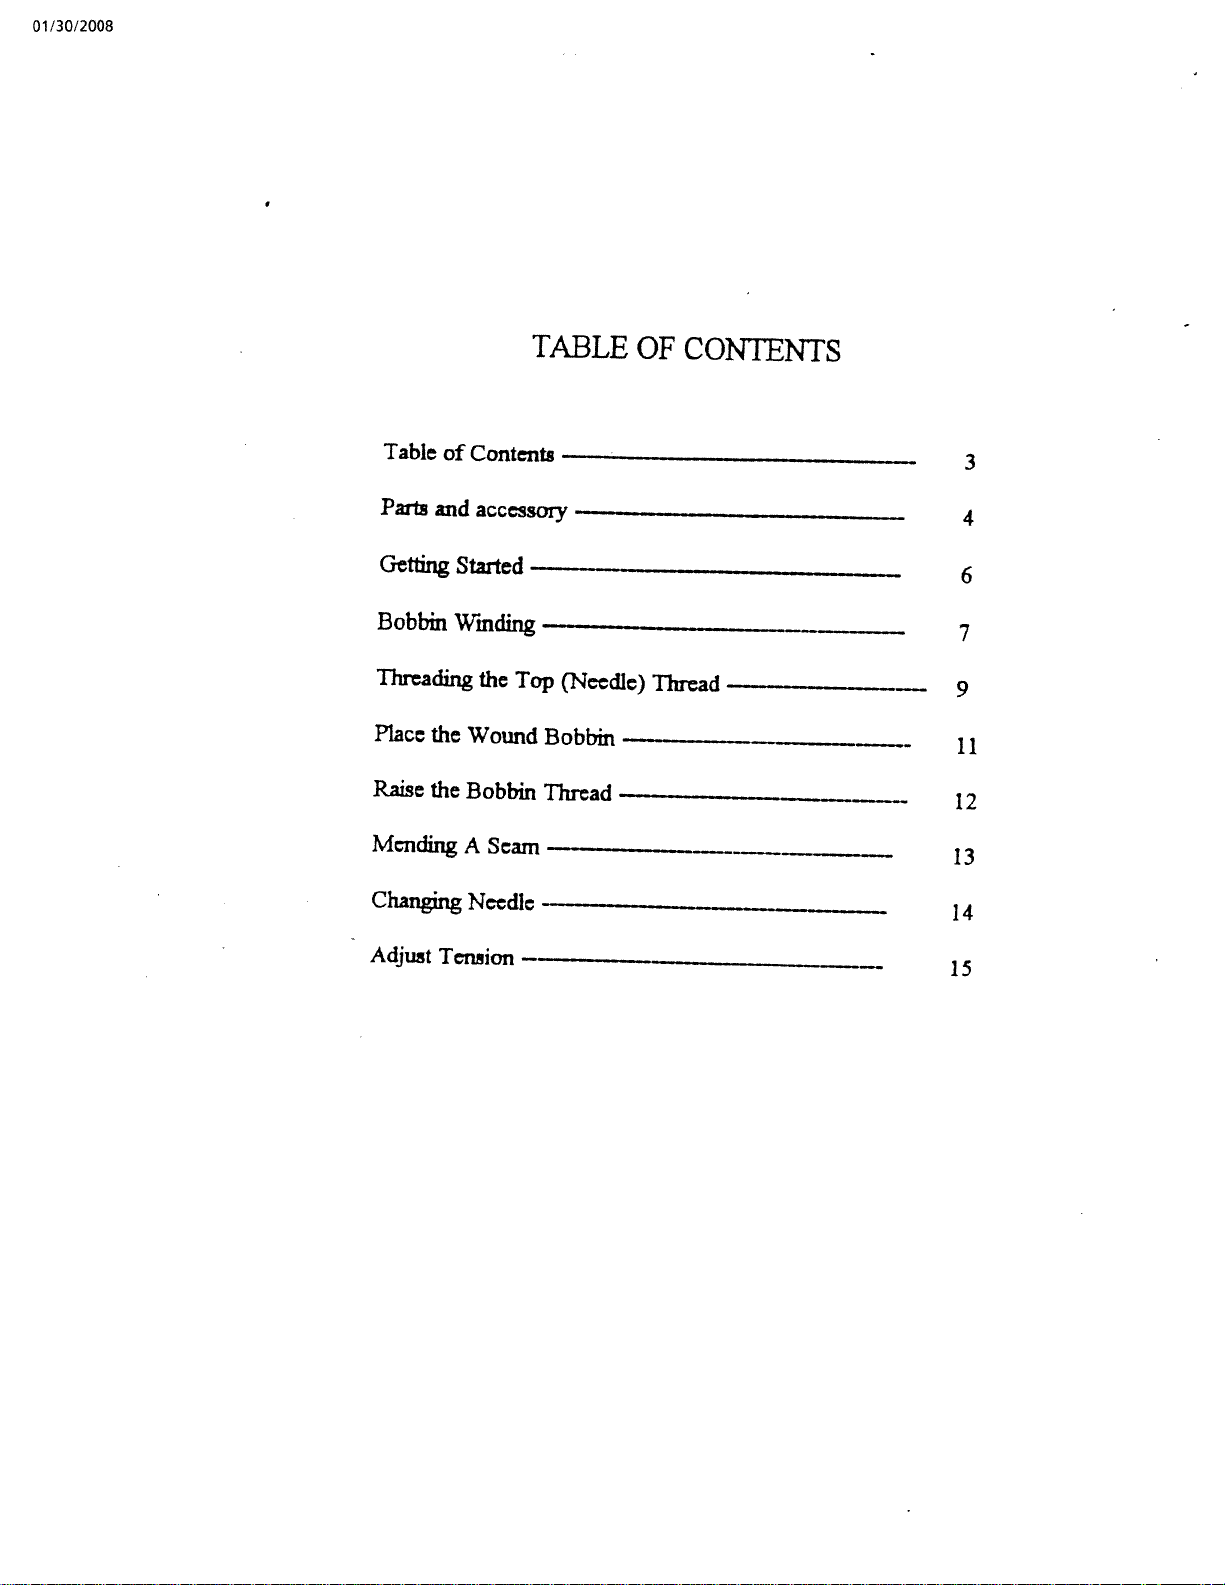
Bobbin
Tension
Thread
Guides
Needle
Plate
Bobbin
Switch
Winder
Disc
Winder
Presser
Presser
Bar
Lifter
foot
Bobbin
Needle
Stitch
Winder
Thread
Length
Reverse
&.
Tension
I)iai
Knob
Switch
Receptacle
AC
Spool
Adaptor
Pin
Receptacle
Page 4
LO
8OOIOEI
4flIOSSDDV
Aui
ui
1ossooV
aafl1DI
E
t)
U!
suzqqoq
t
I
spU
pU
um
i)
(unpLU
U!
(;unowU1
1pB1tT
pxtç/zdd!1
iztutu
podS
pums
POdS
deD
tood/
uij
ooj
DV
IcmUOD
izdvpy
Page 5
01/30/2008
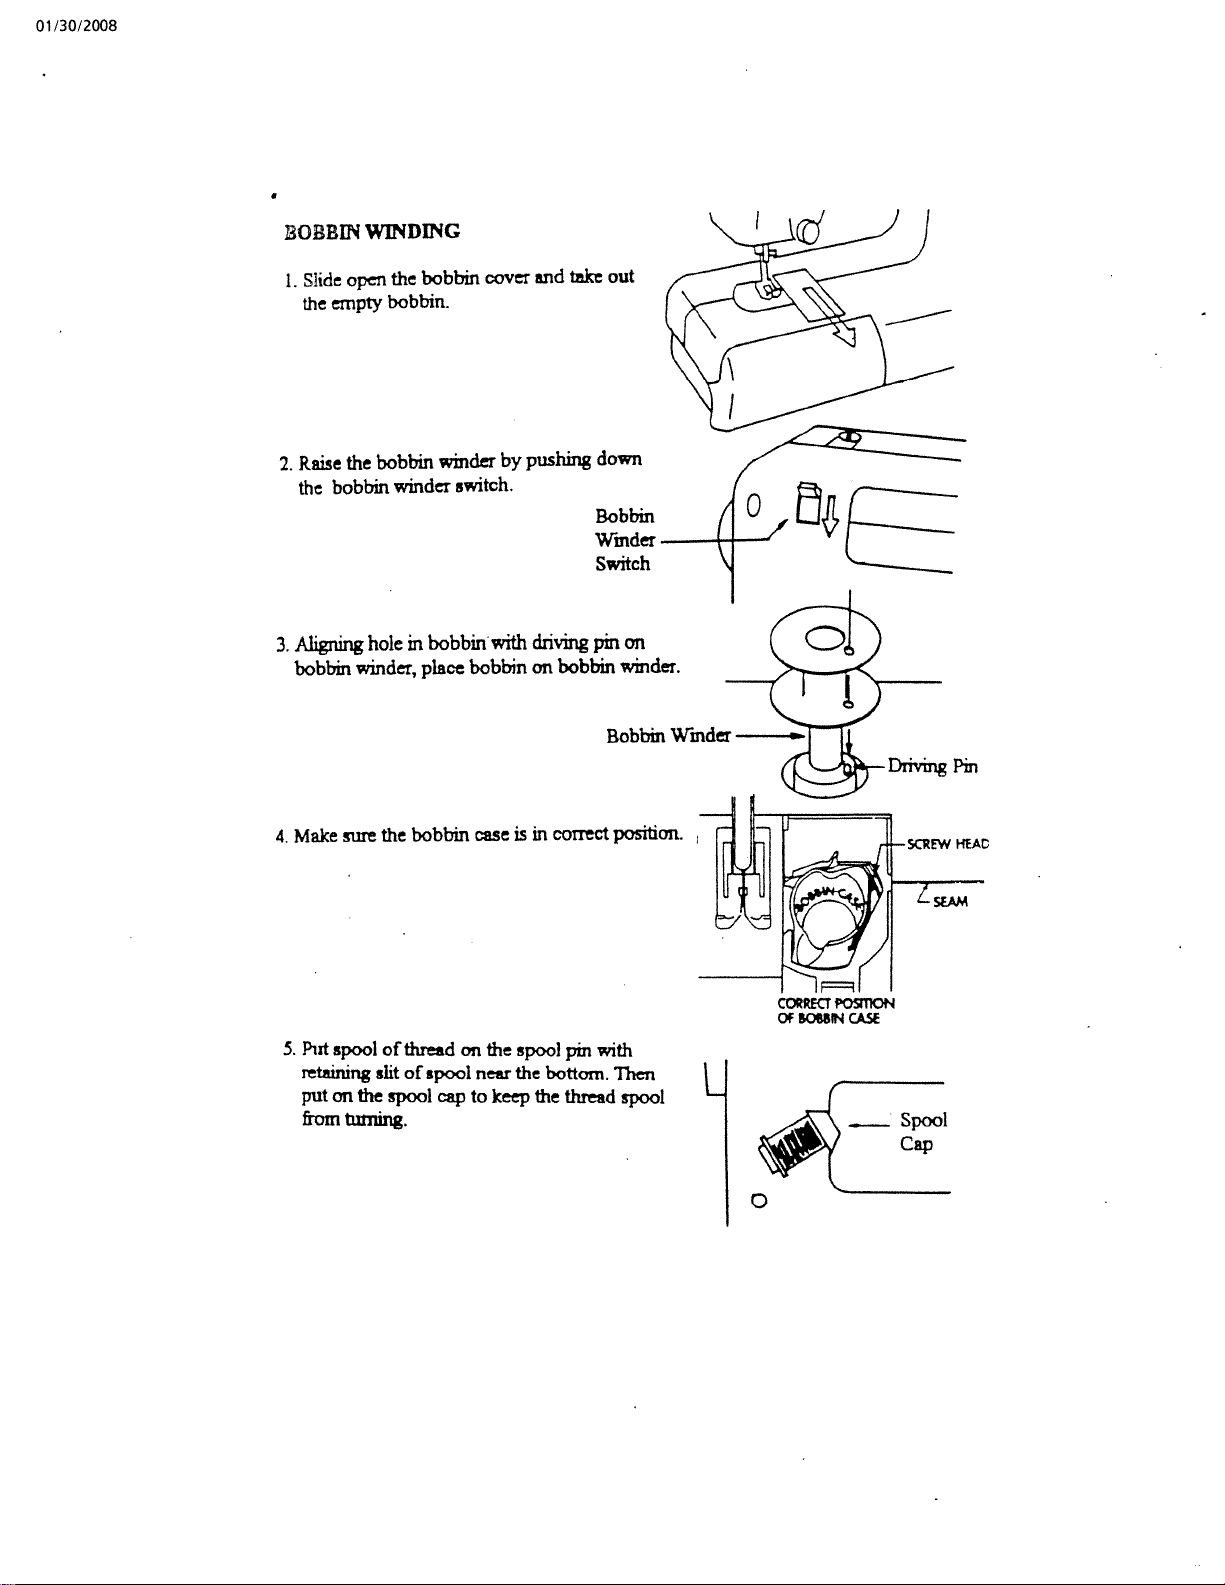
BOBBIN
Slide
1.
the
Raise
2.
the
Aligning
3.
bobbin
WINDING
open
empty
the
bobbin
hole
windet
the
bobbin.
bobbin
winder
in
bobbin
winder
switch.
bobbin
place
covet
by
with
bobbin
take
and
pushing
driving
on
bobbin
out
down
Bobbin
Winder
Switch
on
pin
winder.
Make
4.
Put
5.
retaining
put
from
sure
spool
on
the
tinning.
bobbin
the
of
threadonthe
of
slit
spool
spooi
case
near
captokeep
in
is
spool
the
the
correct
pin
bottom.
thread
position.
with
Then
spool
L
0
Page 6

01/30/2008
•
THREADING
I.
2.
Pull
the
fist
Pull
thread
thread
thread
thread
guide.
THE
from
guide.
through
TOP
spool
the
(NEEDLE)
and
slip
circular
into
slit
THREAD
the
slit
of
the
of
second
3.
4.
Turn
lever
the
Hold
tension
thread
handwheel
at
hole
thread
discs
tension
its
highest
from
tight
of
dial).
your
and
the
third
toward
position.
right
slip
it
thread
you
to
left.
in
and
Pull
between
guide
make
thread
the
two
(Needle
the
take
through
Take
Lever
Thread
Tension
Dial
up
up
Page 7

01/30/2008
6.
7.
Put
from
Pull
thread
the
first
around
thread
inside
from
thread
tension
through
for
spool
guide,
disc.
the
about
and
then
small
Y
pull
wrap
long.
hole
it
through
one
of
time
the
bobbin
Bobbin
Winder
8.
Cut
9.
thread
desired
10.
Slide
thread
a.fter
the
Cut
thread
wound
bobbin
switch
pow
the
end
few
a
thread
Inromer.
amount
bobbin
winder
up.
switch
tightly
and
coils
are
nd
Then
of
threadiswound.
4
from
from
by
to
step
wound.
the
on
continue
the
bobbin.
the
pushing
ON
position,
on
the
of
top
winding
machine.
bobbin
the
foot
bobbin
the
Remove
Lower
hold
the
control.
by
until
the
the
winder
Stop
HERE
Page 8

01/30/2008
PLACE
Hold
1.
left
the
Feed
2.
the
THE
the
hand
bobbin
the
bobbin
WOUND
thread
and
case
thread
case
end
place
as
through
as
BORBII
with
wound
the
shown.
shown.
the
3”
long
two
by
bobbin
notches
yoin
into
of
Bobbin
Case
1st
notch
Leave
3.
the
threading
about
bobbin
4”
long
toward
isconiplete.
the
of
thread
left
of
laying
you.
on
Then
top
of
bobbin
2nd
notch
Page 9

01/30/2008
3’.A!3E
1.
2.
3.
THE
presser
the
Raise
lifter.
bar
top
the
Hold
counterclockwise
up
back
and
up
thread.
up
ripper
thread.
the
by
the
bobbin
Open
bobbin
open
seem
of
BOBBIN
foot
thread
to
and
you
loop
to
you
If
hands,
to
help.
THREAD
pulling
by
turn
and
make
see
will
find
the
find
can
you
the
it
the
a
thread
is
use
the
up
handwheel
needle
go
formed
loop
end
difficult
the
flat
presser
down
by
of
to
side
back
back
of
into
place.
Then
ends
thread
both
4.
Pull
the
start
bobbin
mending
and
you
slide
can
the
to
cover
now.
the
machine
Page 10

01/30/2008
GETrING
1.
Make
OFF
and
AC
2.
Take
the
the
accessory
ñgure
STARTED
sure
the
position.
adaptor
spool
shown.
power
Connect
plug.
stand
tray
then
switch
the
and
spool
assemble
is
foot
the
in
control
pin
from
as
the
Slide
3.
machine.
the
spool
stand
on
the
rear
left
of
the
L
0
Page 11

01/30/2008
MENDING
1.
Set
by
Raise
2.
andliftupthepresserfoot.
Make
3.
behind
4.
Put
the needle
lower
Step
5.
stitches
step
6.
Thrn
backstitch
stitch
the
needle
swe
the
the
on
off
stitch
A
control
stitch
both
the
needle,
fabric
into
presser
foot
control
overlap
the
foot
control
4
-
SEAM
control
turning
by
threads
under
the
the
control.
stitches
5
your
to
knob.
the
existing
foot
to
old
knob
desired
handwhed
the
ends
presser
old
start
mending
stitches
reverse
to
to
secure
stitch
are
pulled
foot
stitches.
about
the
length
counterclockwise
4
back
md
lower
Then
until
new
Then
1.
position
and
seam.
PRE5SE
SARLJFIER
PRESSER
FOOT
I
f
/
/?
7.
Raise
the
of
from
presser
machine.
the
edge
foot
Then
of
and
fabric.
pull
cut
fabric
both
straight
thread
backward
ends
about
4
Page 12

01/30/2008
cJIANGINGNEEDLE
I.
2.
3.
Raise
Ibid
clamp
Insert
side
the
new
to
needle
the
needle
screw.
needle
right
the
and
Then
Place
to
take
mto
its
highest
loosen
the
as
away
clamp
far
position.
needle
the
the
as
up
old
with
it
needle.
the
will
flat
go.
Needle
Screw
Clamp
Tighten
4.
:1
—)‘tA%&
the
needle
clamp
screw.
Flat
side
Page 13

01/30/2008
handwheeL.
threader
and
the
the
of
Insert
pull
thread
theader
Lower
5.
thread
guide.
Raise
6.
the
through
the
forward
As
the
needle
the
nedIe
to
shown
needle.
from
eye
wire
by
the
on
Put
loop
turning
back
figure.
the
righi
bscktorightThenneedlemthreadecL
thread
filth
through
Pull
Page 14

01/30/2008
ADJUSTING
performance
stitch
Test
you
With
threads
lock
If
straight
Correct
If
straight
Correct
are
correct
both
upper
upper
going
tension
threads
tension
along
turn1ng
by
tension
along
turning
by
THREAD
use.
to
tension
equal
is
in
too
is
upper
too
is
lower
tension
on
®
and
cente
tight,
surface
tension
loose,
surface
TENSION
scrap
a
,
upper
strong
upper
of
dial
bottom
fabric
of
dial
of
lower
end
enough
thread
fabric
illusimtecL
as
thread
as
Illustrated.
material
to
lies
).
lies
©.
(N
 Loading...