

Page 1
RECORD OF THERMOSTAT OPTIONS SELECTED
HOMEOWNER USER GUIDE
OV ER VI EWQU IC K STA RTUS AG E GU ID ESE T-U PPR OG RA MM IN GDI AG NO ST IC S
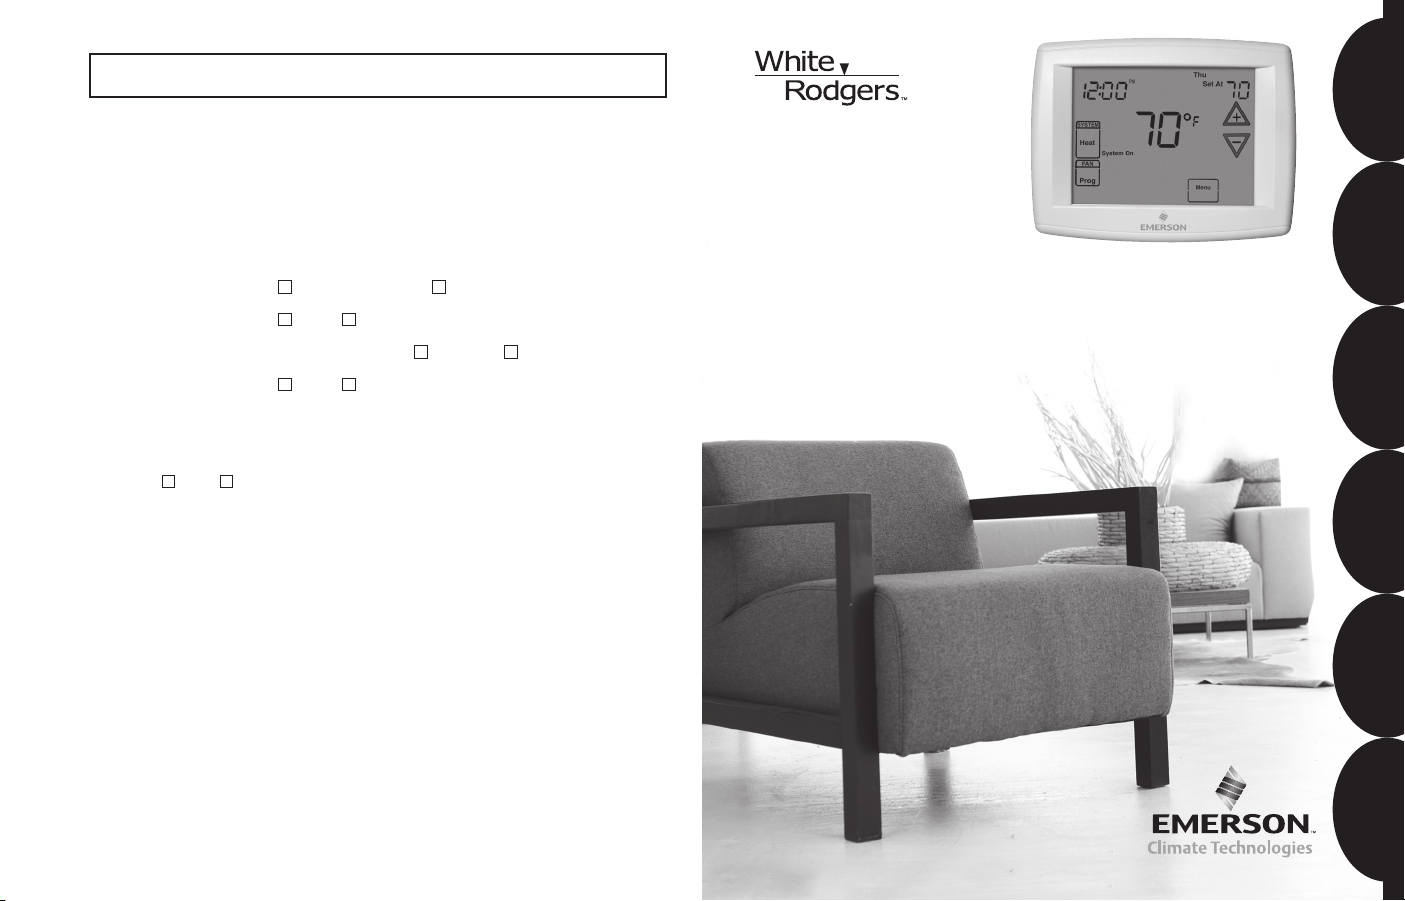
EMERSON BLUE™
Thermostat 1F98EZ-1421 / 1F98EZ-1441
For your quick reference, below are the options selected by your installing dealer
to optimize your equipment settings and your personal home comfort preferences.
(Contractor to fill in value or check box. N/A = Not Applicable for your equipment or
application.)
Factory Thermostat Options Configuration Menu
Keypad Lockout “PIN” number:______ Off
Program Days Per Week: 7 Program Days 0/Non-Programmable 7
Continuous Backlight: On Off On
Temperature Offset: _____(0, 1, 2, 3, 4, 5°) Hi (+) Lo (-) 0°
Temperature Display: °F °C (Fahrenheit/Celsius) °F
Heat High Limit: ______ 99°
Cool Low Limit: ______ 45°
Beeper: On Off (Touch Key Input Confirmation) On
Air Filter Maintenance: _____ Hours (System Runtime) Off
UV Lamp Maintenance: _____ Days Off
Humidifier Pad Maintenance: _____ Hours (Continuous Clock) Off
If you need help adjusting the programmed time or temperatures
in your thermostat, please call Homeowner Help Line at 800-284-2925
Factory
Setting
For All Other Service, Please Call:
Installing Dealer: ______________________________________________________
Phone: ______________________________________________________
Date Installed: ______________________________________________________
Manual 37-7212A
1046
PROGRAMMING SET-UP USAGE GUIDE QUICK START OVERVIEWDIAGNOSTICS
Page 2

WORD TO HOMEOWNER
DIAGNOSTICS
You are now in command
of one of the most
sophisticated and easy
to use home comfort
systems available. Your
Emerson Blue Thermostat
will provide you and your
family improved comfort,
optimal energy effi ciency,
and enhanced reliability
and performance. Your Blue
Touchscreen Thermostat
interface constantly
communicates with your
heating and cooling system to reliably and effi ciently provide
you with the utmost in home comfort and peace of mind. The
Blue Thermostat System is so smart it even lets you know
when a service call or maintenance is needed to protect your
heating and cooling investment. Now you can relax in total
comfort in your home. Please read on to learn more about your
new Emerson Blue Thermostat System.
System Problem Screen
If your thermostat detects a problem
with the system, the touchscreen
thermostat Home Screen Display
will indicate “Call for Service”
and CHECK CROSSOVER in the
scrolling message area. When this
is present contact your qualifi ed
service technician.
The Fault message and the “Call
for Service” clears itself when
faults have been corrected.
Reset Operation
If a voltage spike or a static discharge blanks out the display or causes erratic operation,
you can reset the thermostat.
To reset the thermostat, touch
thermostat will go blank and then all segments will be displayed momentarily.
Note: When the thermostat is reset, the Thermostat Options Confi guration Menu
settings, time and programming schedule will reset to the factory settings. Refer to the
customized settings for your thermostat and system on the back cover of this book. Use
this Guide to put Menu options back as they were before the thermostat Reset. For your
convenience, Factory Settings are as shown.
and and the SYSTEM keys at the same time. The
2 19
DIAGNOSTICS
Page 3

Enter the Heating Program
1. Touch the Menu key to display additional key choices.
2. Touch the Set Schedule key. The
top of the display will show the day
being programmed. The time and Set
At temperature are also displayed.
“MORNING” will also be displayed to
indicate the period.
3. Touch SYSTEM key to select Heat in
the SYSTEM switch area indicating
the active mode being programmed.
You can change to the other mode by
touching the SYSTEM key at any time.
4. Touch
the temperature to your selected
temperature for the 1st heating period
(Morning).
5. Touch or key to adjust the start
time for period. The time will change in
15 minute increments.
6. Touch FAN to select Auto or Prog.
7. After you have set the time and the
temperature for the period to begin,
touch Set Schedule to advance to the
next program period.
8. Repeat steps 4 through 7 until all of
PROGRAMMING
the program times and temperatures
are set for all program periods for that
day.
9. Use the Copy Key to copy the program as described previously or touch
Advance Day to change to the next
day and repeat steps 4 through 9 until
programs for all days are entered.
and key to change
10.When programming is complete and
all of the times and temperatures
match your desired heating schedule,
touch Run Schedule. The thermostat
will now run your program.
Enter the Cooling Program
1. Touch the SYSTEM key until the Cool
icon appears.
2. Follow Enter Heating Program instructions for entering cooling times and
temperatures.
Programmable Fan
The indoor fan/blower can be selected
to turn on and off with the cycle of the
system or to run all the time whether the
system is on or off. In the Set Schedule
mode, the FAN key is used to select the
fan operation during a program period.
The default state of the FAN key is FAN
Auto. It can be changed to FAN Prog.
In the Run Schedule mode, during a program period that has FAN Prog sched-
uled, the fan will turn on and stay on
during the complete period. The display
will show FAN On Prog. The programma-
ble fan can be overridden by touching the
FAN key to select Auto or On.
TABLE OF CONTENTS
TOUCHSCREEN THERMOSTAT DISPLAY OVERVIEW...... 4
QUICK START GUIDE................................ 7
Set Current Time and Day........................... 7
Choose the System Setting.......................... 8
Energy Saving Factory Pre-program................... 8
USING YOUR THERMOSTAT .......................... 9
SETTING UP YOUR THERMOSTAT OPTIONS ............. 12
PROGRAMMING YOUR THERMOSTAT .................. 16
Planning Your Program . . . . . . . . . . . . . . . . . . . . . . . . . . . . . 16
Programming Tips – Copy Program . . . . . . . . . . . . . . . . . . . 16
Heating and Cooling Worksheet ...................... 17
Enter the Heating Program .......................... 18
Enter the Cooling Program .......................... 18
Programmable Fan . . . . . . . . . . . . . . . . . . . . . . . . . . . . . . . . 18
DIAGNOSTICS...................................... 19
Diagnostics (Fault) Screen .......................... 19
Record of Thermostat Options Selected ........ Back Cover
Service Information ........................ Back Cover
18 3
Page 4

10
9
8
7
6
5
4
3
2
1
12
14
13
11
Menu T o uch Key
for entering
menu functions
of thermostat
T e mperature
UP/Down Touch Key
used for modifying
setpoint as well as to
navigate the menus
Desired T e mperature
or Setpoint
Ti me of Day
System
Setting
Touch Key
Fan
Touch Key
to select
fan setting
Indicates when
thermostat is calling
for Heating or Cooling
Day of Week
Room
T e mperature
OVERVIEW
TOUCHSCREEN THERMOSTAT DISPLAY OVERVIEW
3. Touch the Advance Day key until the
day you wish to copy to is flashing and
the day you are copying is on. The
scrolling message will show “COPY
ONE DAY”
4. Touch the Copy key. The scrolling
message will change to “MORNING”.
The day you copied from will disappear and the day you copied to will
5. If you wish to copy this same program
into other days, touch the Copy key
and repeat steps 3 and 4.
6. Touch the Run Schedule key to return
to normal operation.
Fill in the blank worksheet provided below with your desired times, temperatures
and fan operation:
remain on.
Worksheet for Re-Programming 7 Day Program
Heating
Wake Up
Program
(Morning) FAN
Home Screen Display
MON 6:00 AM 70°F Auto 8:00 AM 62°F Auto 5:00 PM 70°F Auto 10:00 PM 62°F Auto
TUE
WED
THU
FRI
SAT 6:00 AM 70°F Auto 8:00 AM 62°F Auto 5:00 PM 70°F Auto 10:00 PM 62°F Auto
Display of All Possible Icons and Touch Keys Used by Thermostat
and Configuration Items
Touch Keys for Programming
4 17
SUN 6:00 AM 70°F Auto 8:00 AM 62°F Auto 5:00 PM 70°F Auto 10:00 PM 62°F Auto
Cooling
Wake Up
Program
(Morning) FAN
MON 6:00 AM 75°F Auto 8:00 AM 83°F Auto 5:00 PM 75°F Auto 10:00 PM 78°F Auto
TUE
WED
THU
FRI
SAT 6:00 AM 75°F Auto 8:00 AM 83°F Auto 5:00 PM 75°F Auto 10:00 PM 78°F Auto
SUN 6:00 AM 75°F Auto 8:00 AM 83°F Auto 5:00 PM 75°F Auto 10:00 PM 78°F Auto
Leave For Work
(Day) FAN
Leave For Work
(Day) FAN
Return Home
(Evening) FAN
Return Home
(Evening) FAN
Go To Bed
(Night) FAN
Go To Bed
(Night) FAN
PROGRAMMING
Page 5

PROGRAMMING YOUR THERMOSTAT
Planning Your Program –
Important
This thermostat is set up for 7 independent day programming with 4 time/temperature periods per day.
The Heating and Cooling Worksheet on
page 17 allows you to pencil in your own
program times and temperatures. Factory
settings are listed on Monday (for Monday thru Friday), Saturday and Sunday.
If you are re-programming all 7 days, fill
in all lines with the times and temperatures you want. Use this worksheet as a
guide to reprogram the thermostat.
Keep the following guidelines in mind
when planning your program.
• InHeating,lowertemperatureswill
save energy.
• InCooling,highertemperatureswill
save energy.
• IfyouplanonusingAutoChangeover,
do not program the heating tempera-
PROGRAMMING
tures higher than those for cooling.
Programming Tips:
Copy Program
When programming your thermostat, you
may copy the program from one day to
another day or to all six other days.
To copy a program from one day to all
other days:
1. In Set Schedule mode, enter the program for the day or select the day you
wish to copy by touching the Advance
Day key.
2. Touch the Copy key. The day of the
week that will be copied is on and the
other days of the week will be flashing. The scrolling message will show
“COPY EVERY DAY”
3. Touch the Copy key again. The scrolling message will change to “MORN-
ING”. The day you copied will remain
on.
4. Touch the Run Schedule key to return
to normal operation.
To copy a program from one day to
another day:
1. In Set Schedule mode, enter the program for the day or select the day you
wish to copy by touching the Advance
Day key.
2. Touch the Copy key. The day of the
week that will be copied is on and the
other days of the week will be flashing. The scrolling message will show
“COPY EVERY DAY”
1. Run Schedule touch key to exit
any menu and begin operating the
program.
2. Set Time touch key used for setting
thermostat time (page 7) or Hold
touch key used to permanently
override program temperature (page
10).
3. Copy touch key used to copy
programs (page 16) or Installer
Config touch key used to enter menu
to set thermostat options (page 12).
4. Clean Display touch key allows 30
seconds to wipe off the display. Clean
Display will also reset change filter,
change humidifier pad, and change
UV light (page 11). Advance Day
touch key used for programming
(page 16).
5. SCROLLING MESSAGE CENTER
Displays system information or
maintenance reminder during
thermostat operation. Displays
thermostat information during setup
and programming.
6. “Call For Service” indicates a fault in
the heating or cooling system (page
19). It does not indicate a fault in the
touchscreen thermostat.
7. “Low” indicates when heating or
cooling first stage is called for. “High”
indicates when a second stage is
called for (page 9).
8. and used in programming to
set time and in configuration menu to
change selections (page 12).
9. “Outdoor Temperature” indicates
the outdoor temperature is being
displayed. Outdoor temperature
reading will display in time of day
area. This feature is only available for
heat pump systems
10. “Hold At” is displayed when the
thermostat is in the Hold mode (page
9). “Temporary Hold At” is displayed
when the thermostat is in a temporary
Hold mode (page 10).
11. “Auxiliary Heat” indicates the
auxiliary heating or emergency
heating is on (page 9). (Heat Pump
system only.)
12. “Advanced” indicates the Advanced
Installer Configuration Menu used by
your contractor during setup.
13. “RH XX%” displays the indoor relative
humidity (page 12).
14. Displays the active humidification /
dehumidification setpoint.
OVERVIEW
16 5
Page 6

2 "AA" Batteries
1
2
12121
2
OVERVIEW
Battery Location
2 “AA” alkaline batteries are included
in the thermostat to keep time during a
power outage. They are also required for
armchair programming (see below).
If “LOW BATTERY” is displayed in the
scrolling message area, the batteries
are low and should be replaced with
fresh batteries. For best results use
premium brand alkaline batteries, such
as Duracell® or Energizer®.
To replace batteries, set thermostat
SYSTEM touch key to Off, remove
thermostat from wall by grasping the
top and bottom of the thermostat and
pulling it straight away from the wall. The
base will remain on the wall. Install the
batteries in the rear along the top of the
thermostat. Reposition the thermostat
over the base plate and gently snap into
place.
• Select temperature offset. Scrolling
message will show “TEMPERATURE
ADJUSTMENT”. Your thermostat was
accurately calibrated at the factory,
however this option allows you to
change the display temperature to
match your previous thermostat if
you prefer. Default is 0° with current
temperature. Adjustment can be
made from 5° Lo to 5° HI to change
the displayed temperature.
• Select temperature display as Fahr-
enheit or Celsius. Scrolling message
will show “SELECT TEMPERATURE
DISPLAY”. This option selects the
temperature display as °F or °C.
• Select humidity display. Scroll-
ing message will show “HUMIDITY
DISPLAY”. Turning ON will show RH
in scrolling message area and the
current Humidity.
Armchair Programming
The thermostat uses 24 Volt AC power
supplied by the system for normal operation. However, with “AA” batteries
installed, the thermostat can be removed
from the wall for convenient programming. Set thermostat SYSTEM touch key
to Off before removing it from the wall.
• Select keypad lockout. Scroll-
ing message will show “KEYPAD
LOCKOUT”. Keypad lockout keeps
unauthorized users from changing the
settings or desired temperature on
your thermostat. Turning this feature
ON will enable keypad lockout. You
will be asked to enter a 3-digit “PIN”
number which you will use to unlock
your thermostat.
SET-UP
System Power Loss
When thermostat loses 24 Volt AC power
supplied by your heating or cooling
system, the scrolling message area will
display “Power Fail”.
6 15
Page 7

• Select program days per week.
2
1
2
1
2
1
1
2
1
2
121
2
Scrolling message will show “PROGRAM TYPE”. Default is 7 Days
to indicate individual day programming. It can be changed to 0 Days
to indicate no programs will be run.
When set for 7 Days, the thermostat
will follow the factory program or the
program that you entered.
• Select heat high limit. Scrolling
message will show “HEAT HIGH
LIMIT”. Selecting a temperature from
62-98 will enable the heating high
limit.
The heat high limit is the highest
temperature that your thermostat can
be set to in heat.
Set Current Time and Day
•
On the Home Screen Display, touch
the Menu key to display additional key
choices.
• Touch Set Time once to display hour
and AM or PM designation in clock
display.
QUICK START GUIDE
QUICK START
• Touch either the or key until you
reach the correct hour and AM or PM
• Select cool low limit. Scrolling mes-
sage will show “COOL LOW LIMIT”.
A selection from 44-82 will enable the
SET-UP
cooling low limit.
The cool low limit is the lowest tem-
perature your thermostat can be set
to in cool.
designation. Then touch Set Time
again to display minutes only in clock
display.
• Touch and hold either the or keys
until you reach the correct minutes.
Then touch Set Time once again to
display the day of the week.
• Select fast stages. Scrolling mes-
sage will show “FAST STAGES”.
Turning ON will enable this feature.
If you need to rapidly heat or cool
your home, manually changing the
setpoint by 3 degrees or more will
enable all stages of heat or cool.
14 7
• Touch either the or key until you
reach the correct day.
• Touch Run Schedule to save the Time
and Day settings and return to the
Home Screen Display.
Page 8

Choose the System Mode (Cool, Off, Heat, Em, Auto)
1
2
1
2
1
2
Touch the SYSTEM key to select:
Cool: Cooling is on.
Off: Heating and Cooling are off.
QUICK START
Heat: Heating is on.
Em: Emergency heat setting available only
with heat pump systems (see page 9).
Auto: Auto Changeover is used where
both heating and cooling may be
required during the same day. Auto
allows the thermostat to automatically
select heating or cooling depending on
the indoor temperature and the selected
heat and cool temperatures. The desired
temperature must be equal to or higher
than the desired temperature for cooling
when using auto changeover.
• Select humidifier pad maintenance
reminder. Scrolling message will
show “HUMIDIFIER PAD MAINTE-
NANCE”. Default is OFF. It can be
changed to a setting from 25 to 1975
hours in increments of 25 hours to
select the amount of time for the
reminder. Setting of 100 hours is typically 6 months of run time.
Based on this setting, the scrolling
message area will show “CHANGE
HUMIDIFIER PAD” to indicate maintenance is required.
• Select beeper (audio prompt)
Default is On for the beeper to sound
with any touch key press. It can be
changed to OFF.
Energy Saving Factory Pre-Program
This touchscreen thermostat is programmed with the energy saving settings shown in
the table below for all days of the week. If this program suits your needs, simply touch
the Run Schedule key.
Factory Pre-Programmed heating and cooling schedule for all days of the week
Wake Up
(Morning)
Heating Program 6:00 AM 70°F 8:00 AM 62°F 5:00 PM 70°F 10:00 PM 62°F
Cooling Program 6:00 AM 75°F 8:00 AM 83°F 5:00 PM 75°F 10:00 PM 78°F
Leave For Work
(Day)
Return Home
(Evening)
Go To Bed
(Night)
• Select continuous display light.
Scrolling message will show “DIS-
PLAY LIGHT”. When selected ON, the
display light will be on continuously
with power to the system. Selecting
OFF will allow the display light to
turn on momentarily when any key is
touched. If system power is off, and
thermostat is operating on battery
only, the display light will not turn on.
SET-UP
If you wish to set your heating and cooling schedule to something other than the factory
pre-programmed settings, please proceed to the “Programming Your Thermostat”
section.
8 13
Page 9

SETTING UP YOUR THERMOSTAT OPTIONS
1
2
1
2
USING YOUR THERMOSTAT
The Thermostat has comfort and performance options that can be selected and adjusted. These options are in the Thermostat Options Configuration Menu. On the Home
Screen Display, touch the Menu key to display additional key choices.
NOTE:
When in the Thermostat Options Configuration Menu, holding the Installer Config key
for 3 seconds again will change the display to the Advanced Installer Configuration
Menu which is used by your contractor. To exit this menu and return to the Thermostat
Options Configuration Menu, press the Menu key, or press Run Schedule to return to
the Home Screen Display.
System Operation
Touch the SYSTEM key to select the
thermostat operating mode desired.
When the system is calling for first stage
heat or cool, “Low” will display on the
touchscreen. When second stage is required, the display will show “High”. The
setpoint temperature can be changed by
touching the
or keys.
• Select air filter maintenance re-
minder. Scrolling message will show
“AIR FILTER MAINTENANCE”.
Default is OFF. It can be changed
to a setting from 25 to 1975 hours
in increments of 25 hours to select
the amount of time for the reminder.
Consult your contractors for the hours
and type of filter. Setting of 225 hours
is typically 3 months of run time.
SET-UP
When the system has run for the
selected length of time, the scrolling
message area will show “CHANGE
FILTER” to indicate maintenance is
required.
• Select UV lamp maintenance re-
minder. Scrolling message will show
“UV LAMP MAINTENANCE”. Default
is OFF. It can be changed to a setting
from 25 to 1975 days in increments of
25 days to select the amount of time
for the reminder. Setting of 350 days
is an annual reminder.
Based on this setting, the scrolling
message area will show “CHANGE
UV LAMP” to indicate maintenance
is required.
12 9
Auxiliary Heating
Heat Pump Only
The system automatically activates
Auxiliary Heating when the outside temperature is too cold for the heat pump to
efficiently heat the home. When Auxiliary
Heating is called for, the display will show
“Auxiliary Heat”.
Emergency Heating
Heat Pump Only
Heat pump malfunction is rare, but
should it happen, Emergency Heat can
be manually activated by touching the
SYSTEM key to Em. This will start the
electric or fossil fuel system to provide
heat. The display will show “Auxiliary
Heat”.
Temporary Temperature Hold
You can temporarily adjust the temperature in your home at any time while
your thermostat is running a program by
touching either
play will indicate “Temporary Hold At”
to the left of the setpoint temperature. To
cancel the temporary setting before the
next period begins, touch Run Schedule
to return to the program.
Example: If you turn up the heat during
the Morning program, it will remain at the
new temperature until the time for the
next program period (Day program).
or keys. The dis-
USAGE GUIDE
Page 10

Permanent Temperature Hold
The Permanent Temperature Hold
feature bypasses the program and allows
you to permanently hold a temperature.
The temperature you set in Hold will
be maintained indefinitely. Touch Run
Schedule to cancel Hold and resume the
programmed schedule.
Touch
perature. The Hold key will appear on the
screen. Touch the Hold key to maintain
the new setpoint temperature. “Hold
At” will display to the left of the setpoint
temperature. To cancel the permanent
USAGE GUIDE
hold setting at any time and return to the
program, touch Run Schedule.
Example: If you turn up the heat during
the Morning program and touch the Hold
key, it will remain at the new temperature
until you touch Run Schedule or you
manually adjust to another temperature.
or keys to adjust the tem-
Choose the FAN Setting
(Auto or On)
FAN Auto is the most commonly select-
ed setting and runs the fan automatically
when the heating or cooling system is .
FAN On selection runs the fan continuously for increased air circulation or to
allow additional air cleaning.
Non-Programmable Mode
If Program days per week is set for 0
days (Non-programmable) in the Thermostat Options Configuration Menu, the
thermostat will not follow any program
periods. Time of day and day of week will
not display. Touch the SYSTEM key to
select Heat or Cool and use the
buttons to adjust the temperature to your
desired setting.
or
Auto Mode
In Programmable mode or Non-programmable mode, you can touch the SYSTEM
key to select Auto to allow the thermostat to automatically change between
Heat and Cool. When the SYSTEM key
is touched to select Auto the thermostat
will change to Heat or Cool, whichever
ran last. If it switches to heat but you
want cool, or it changes to cool but you
want heat, touch both
simultaneously to change to the other
mode.
or keys
Maintenance Reminder Message
A reminder will display in the scrolling
message area when it is time for accessory maintenance if selected in the
Thermostat Options Configuration Menu.
When a reminder appears, it can be
cleared by touching the Clean Display
key. This will also reset the timer to begin
a new time period for the reminder.
Maintenance reminders are:
USAGE GUIDE
10 11
 Loading...