

Page 1
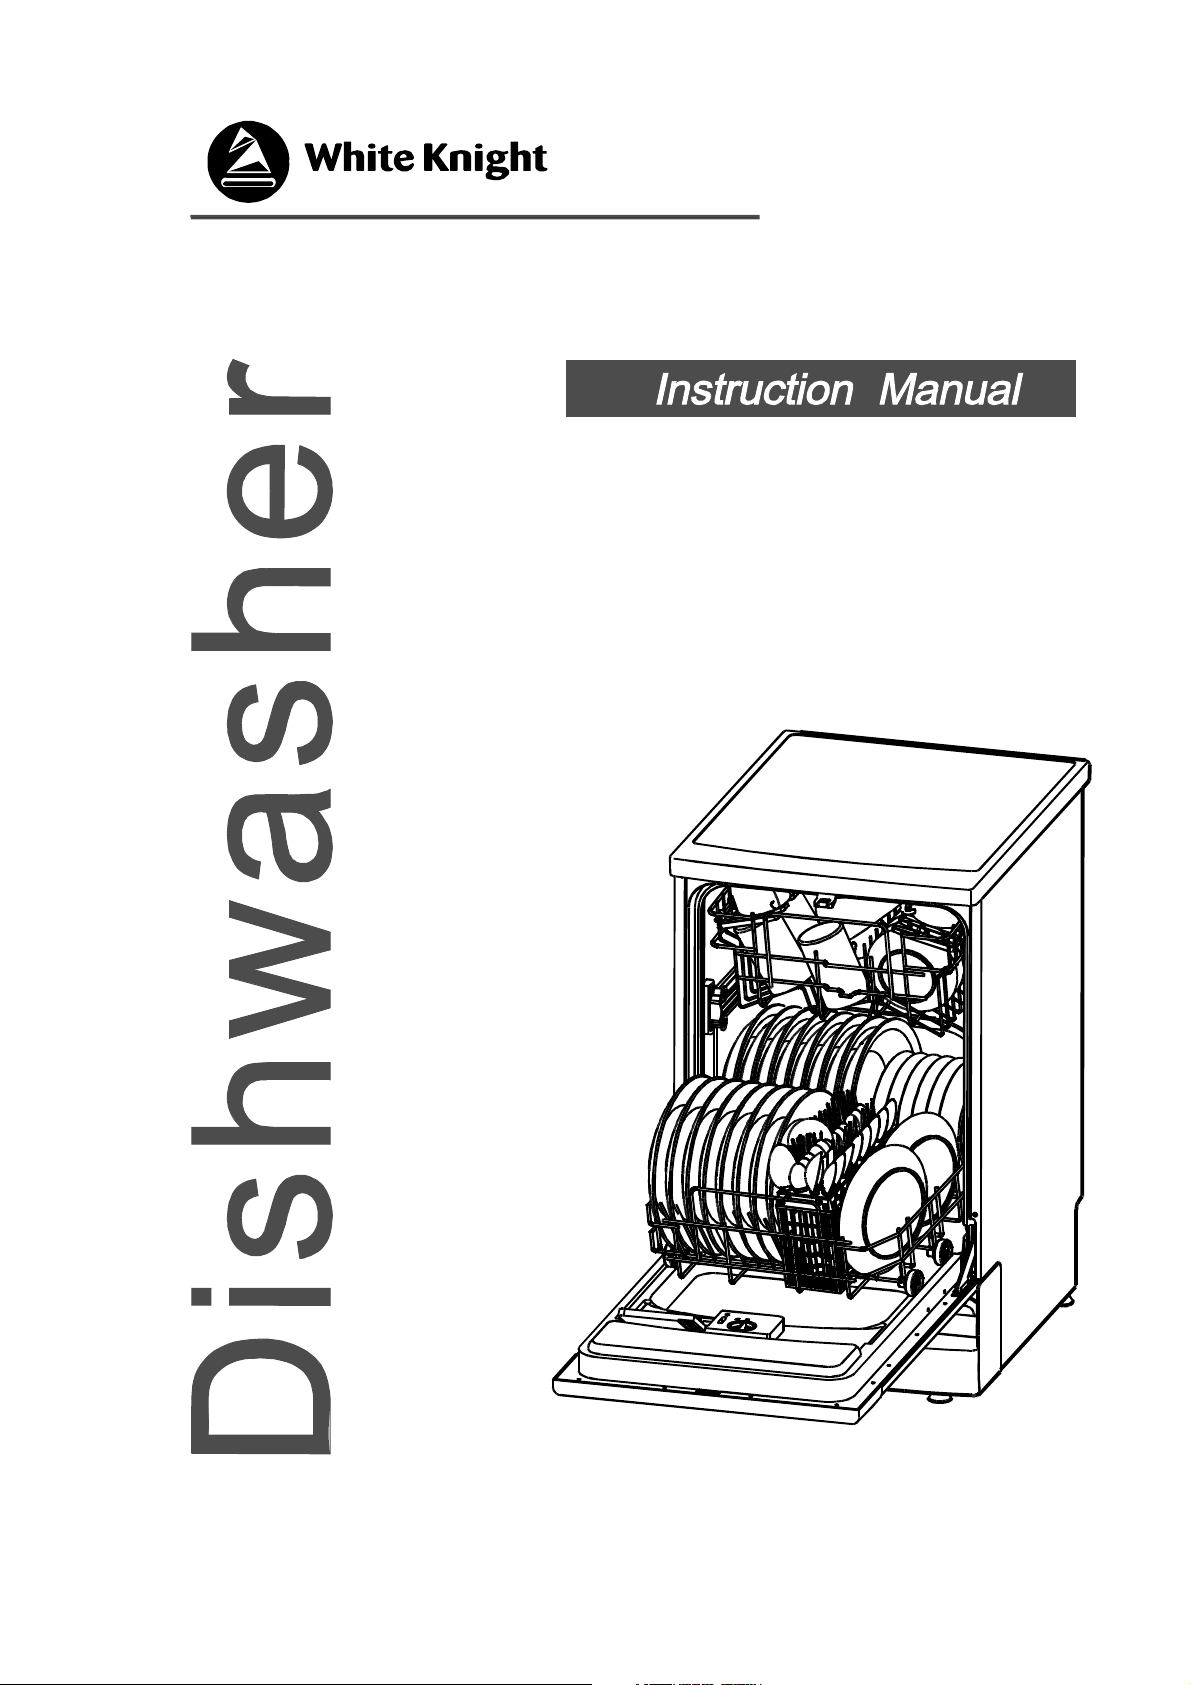
DW0945WA
Page 2
For detailed operating method read the corresponding content on t he instruction manual.
Switch on the appliance Press the On/Off button to swit ch on the appliance, Open the door.
Witheachwashcycle.
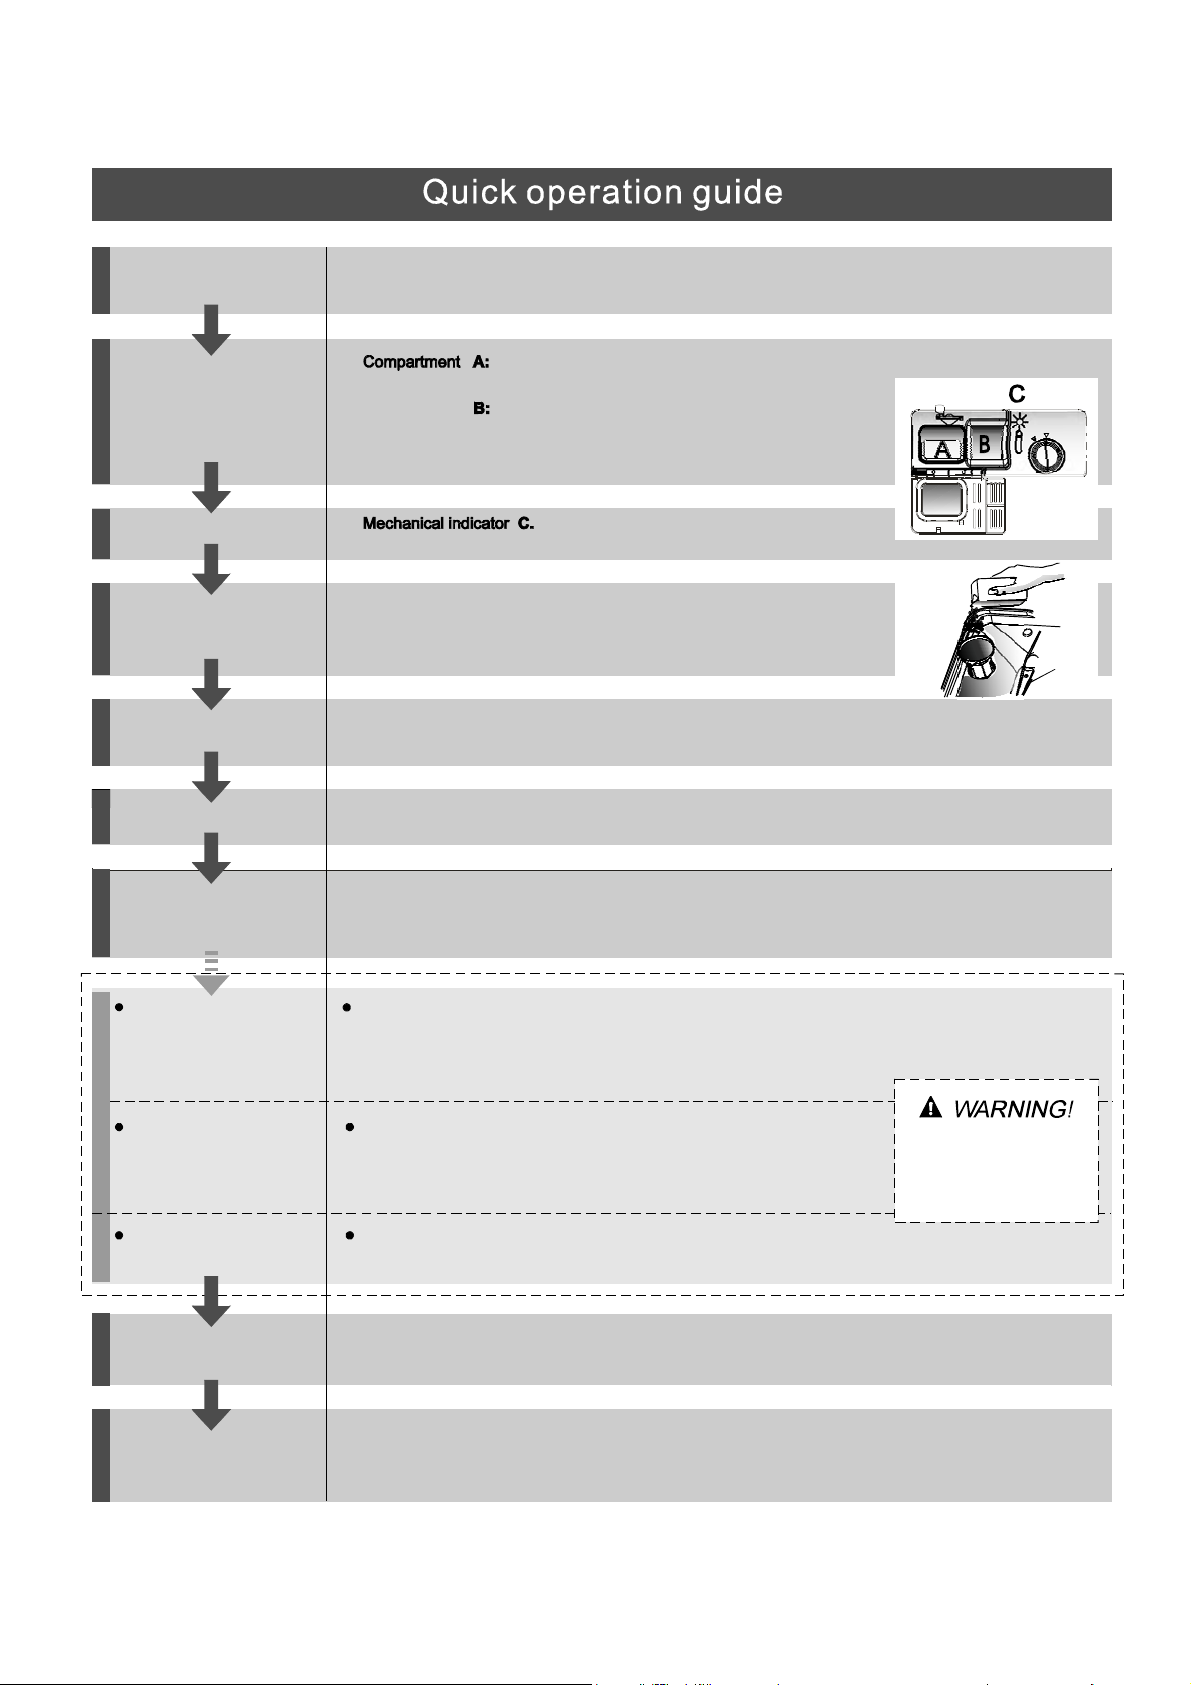
Fill the detergent dispenser
Compartment
For programmes with pre-wash only.
(Follow the user instructions!)
Check the rinse aid level
Check the regeneration
salt level
Load the basket s
Select a programme
Running the dish washer
Changing the programme
Electric indicator on control panel (if provided).
(On models with water softener system only.)
Electric indicator on control panel (if provided).
If there is no salt warning light in the control panel
(for some models), you can estimate when to fill the salt into
the softener by the number of cycles the dishwasher has run.
Scrape off any large amount of leftover food. Soften remnants of burnt food in pans,
then load the baskets. Refer to the dishwashe r loadin g instructi ons.
Close the door, Press th e Programme button un til the selected programme lights up.
( See the section entitled Operationg instruction )Ŷŷ
T urn on the water ta p and press the Start/reset button. The machine will st art wo rking
after about 10 seconds.
1. A running cycle can o nly be modified if it has been running for a short time. Otherwise the detergent
may have already been rele ased and the water already drained. If this is the case, the detergent
dispenser must be refilled.
2. Press the Start/Reset button for more than 3 seconds to cancel the running programme.
3. Select a new programme.
4. R estart the dishwasher.
Add forgotten dishes in the
dishwashe r .
If the appliance is switched
off during a wash cycle.
Switch off the appliance
Turn off the water tap,
unload the baskets
1.Open the door a little to stop the dishwasher.
2.After the spray arms stop working , you can open the door completely.
3.Add the forgotten dishes.
4.Close the door, the dishwasher will start running again after 10 seconds.
If the appliance is switched off during a wash cycle, when switched
on again, please re-select the washing cycle and opera te the dishwasher
according to the ori ginal Power-on sta te ).
When the wor king cycle has finished, the buzzer of the
dishwasher will sound 8 times, then stop.
Turn off the appliance using the ON/OFF button.
Warnin g: wait a few minutes (ab out 15 minutes) before unloading the dishwasher to a void h andling
the dishes and utensils while they are still hot and more susceptible to break .
They will also dry better.Unload t he appliance, starting from the lower basket.
Open t h e doo r c arefu lly.
Hot st eam m ay escape
when the door is opened!
Page 3
Dear Custom e r,
This appliance is intended to b e used in household
and similar applications such as:
-staff kitchen areas in shops, offices and other
workin g enviro nme nts;
-farm houses;
-by clients in hotels, motels and other residential
ty pe environments ;
-bed and breakfast type environments.
Please carefully read this manual before using the
dishwasher, it will help you to use and maintain the
dishw ash er properly.
Keep it to refer to it at a later date.
Pass it on to any subsequent owner of the appliance.
Control Panel...................................................3
Dishw as h er Fe at ure s... ... .. .. .. . ... ... .. .. . . ... ... .. . .. ... 3
A Water So ften er............ ....... .. ....... ...... ..... ..4ʙ ..
B Loadi n g th e Sal t in to t he Sof t en er.......... .. ... . .5ʙ
C F ill the Rinse Aid Dispenser.........................5ʙ
D Function of Detergent .................................6
ʙ
This ma nual c ont ain s sec ti ons on safety In stru ct ion s,
Operating Instructions, Installation Instructions and
Troubles hoo ting Tips, etc.
To r eview the section on troubleshooting Tips
will help you to solve some common problems
by yourse lf .
If yo u can not solve the pro blems by yourself ,
please ask f or the help o f professional techn icians.
The manufacturer, fol lowing a policy of c onstant
development and updating of the product, may
make modifications without giving prior notice.
Attentio n before or after loadi ng the Dishwas her
Baskets..........................................................9
Loading the upper ...............................10Basket
Loading the Lower ............................. ..10Basket
The recommended method loading big
dishware......................... ........................... ...11
Wash Cycle Table...........................................12
Turning on the Appliance................................13
Change the Programme.............. ................13....
At the end of the Wash Cycle........ ...................13
Filtering System.............................................14
Caring for the Dishwasher..................... .........15.
Positioning the Appliance................... ..........16..
About P ower C onne c ti on..... ..... ... ......... . . .... ... 1 6.
Water Connec ti on.... ... .... .. ... . ..... . ... ..... .. . ... ... .1 7.
Start of dishwasher................................ ......18..
Before calling for service........................... .....19.
Error codes.................................... ..............20.
Technical information.............................. .....21..
Page 4
When using your dishwasher, follow the precautions listed below:
This appliance must be grounded. In the event of a
malfunction or breakdown, grounding will reduce
the r isk o f an electric shock by providing a path of
least resistance of electric current. This appliance
is equipped with a cord having an equipmentgrounding conductor and a grounding plug.
The plug must be plugged into a n appropriate outlet
that is installed and grounded in accordance with
all local codes and ordinances.
Donotabuse,siton,orstandonthedoorordish
rack of the dishwasher.
Do not touch the heating element during or
immediately after use.
(This instruction is only applicable to machines
with a visual heating element.)
Do not operate your dishwasher unless all
enclosure panels are properly in place. Open
the door very carefully if the dishwasher is
operating, there is a risk of wate r squirting out.
Do not place any heavy objects the
door when it is open. The appliance could tip
forward.
When loading items to be washed :
1) Locate sharp items so that they are not likely
to damage the door seal;
2 Warning: Knives and other utensils with
)
sharp points must be l oade d in the bask et
with their points down or place d in a
horizontal position.
When using your dishwasher, yo u s houl d
pr ev e nt pl a st ic ite m s f rom com i ng i n to c o nt act
with the heating element.(This inst ruction is only
applicable to machines with a visual heating
element. )
Check that th e deterg ent c omparm ent i s empty
after completion of the wa sh cycle.
Do not wash plastic items unless they are marked
dishwasher safe or the equivalent. For plastic items
n
ot so marked, check the manufacturer's
recommendations.
Use only detergent and rinse additives
design ed for an autom atic dis hwa sher.
Never use so ap, laundry detergent, or hand
washing detergent in your dishwasher. Keep
thes e prod ucts out of the r each of c hi ldren.
on or stand on
Improper connection of the equipment-grounding
conductor can result in the risk of an electric shock.
Check with a qualified electrician or service
representative if you are in doubt whether the
appliance is properly grounded. Do not modify the
plug provided with the appliance; If it does not fit
the outlet. Have a proper outlet installed by a
qualified electrician.
Keep children away from detergent and rinse aid, keep
child away from the open door of the dishwasher,
ren
there could still be some detergent left inside.
This appliance is not intended for use by persons
(including children with reduced physical, sensory or
mental capabilities, or lack of experience and
knowledge ,unless they have been given supervision
or instruction concerning use of the appliance by a
person responsible for their safety.
Children should be supervised to ensure that they do
not play with the appliance.
Dishwasher detergents are strongly alkaline, they
can be extremely dangerous if swallowed. Avoid
contact with skin and eyes and keep children away
from the dishwasher when the door is open.
The door should not be left open,
since this could increase the ris k of tripping.
If the s upply cord i s damaged, it must be replaced
bythemanufactureroritsserviceagentora
similar ly quali fied pers on in orde r to avoid a
hazard.
Remove the door to the washing compartment when
removing an old dishwasher from service or discarding it.
Plea se d ispo s e of pa cking m at e r ials properly.
Use the dishwasher only for its intended function.
During installation, the power supply must n ot
be excessively or dangerously bent or flattened.
Do not tamper with controls.
The appliance is to be connec ted to the water
mains using new hose sets and that old hose-sets
should not be re used.
The maximum number of place setting s to be
washed i s 9.
The maximum permissible inlet water pressure is
1Mpa.
The minimum permissible inlet water pressure is
0.04Mpa.
)
Page 5
Dispose of the dishwasher packaging material correctly.
All packaging materials can be recycled.
Plastic parts are marked with the s tandard internati onal abbreviations:
PE for polyethylene, e.g. sheet wrapping material
PS for polystyrene, e.g. padding material
POM polyoxymethylene,e.g.plasticclips
PP polypropylene , e.g. Salt filler
ABS Acrylonitri le Butadiene Styrene, e.g . Control Panel .
Packaging material could be dangerous for children!
For disposing of package and th e a ppliance please go to a recycling centre. Therefore cut
off the power supply cable and make the door closing device unusable.
Cardboard packaging is manufactured from recycled paper and should be disposed in the
waste paper collection for recycling .
By ensuring this product is disposed of correctly, you will help prevent potential n egat ive
consequences for the environment and human health, which could otherwise be c aused
by inappropriate waste handling of this product.
For more detailed informatio n a bout rec ycling of this product, please contact your local
city office and your hou sehold waste disposal service.
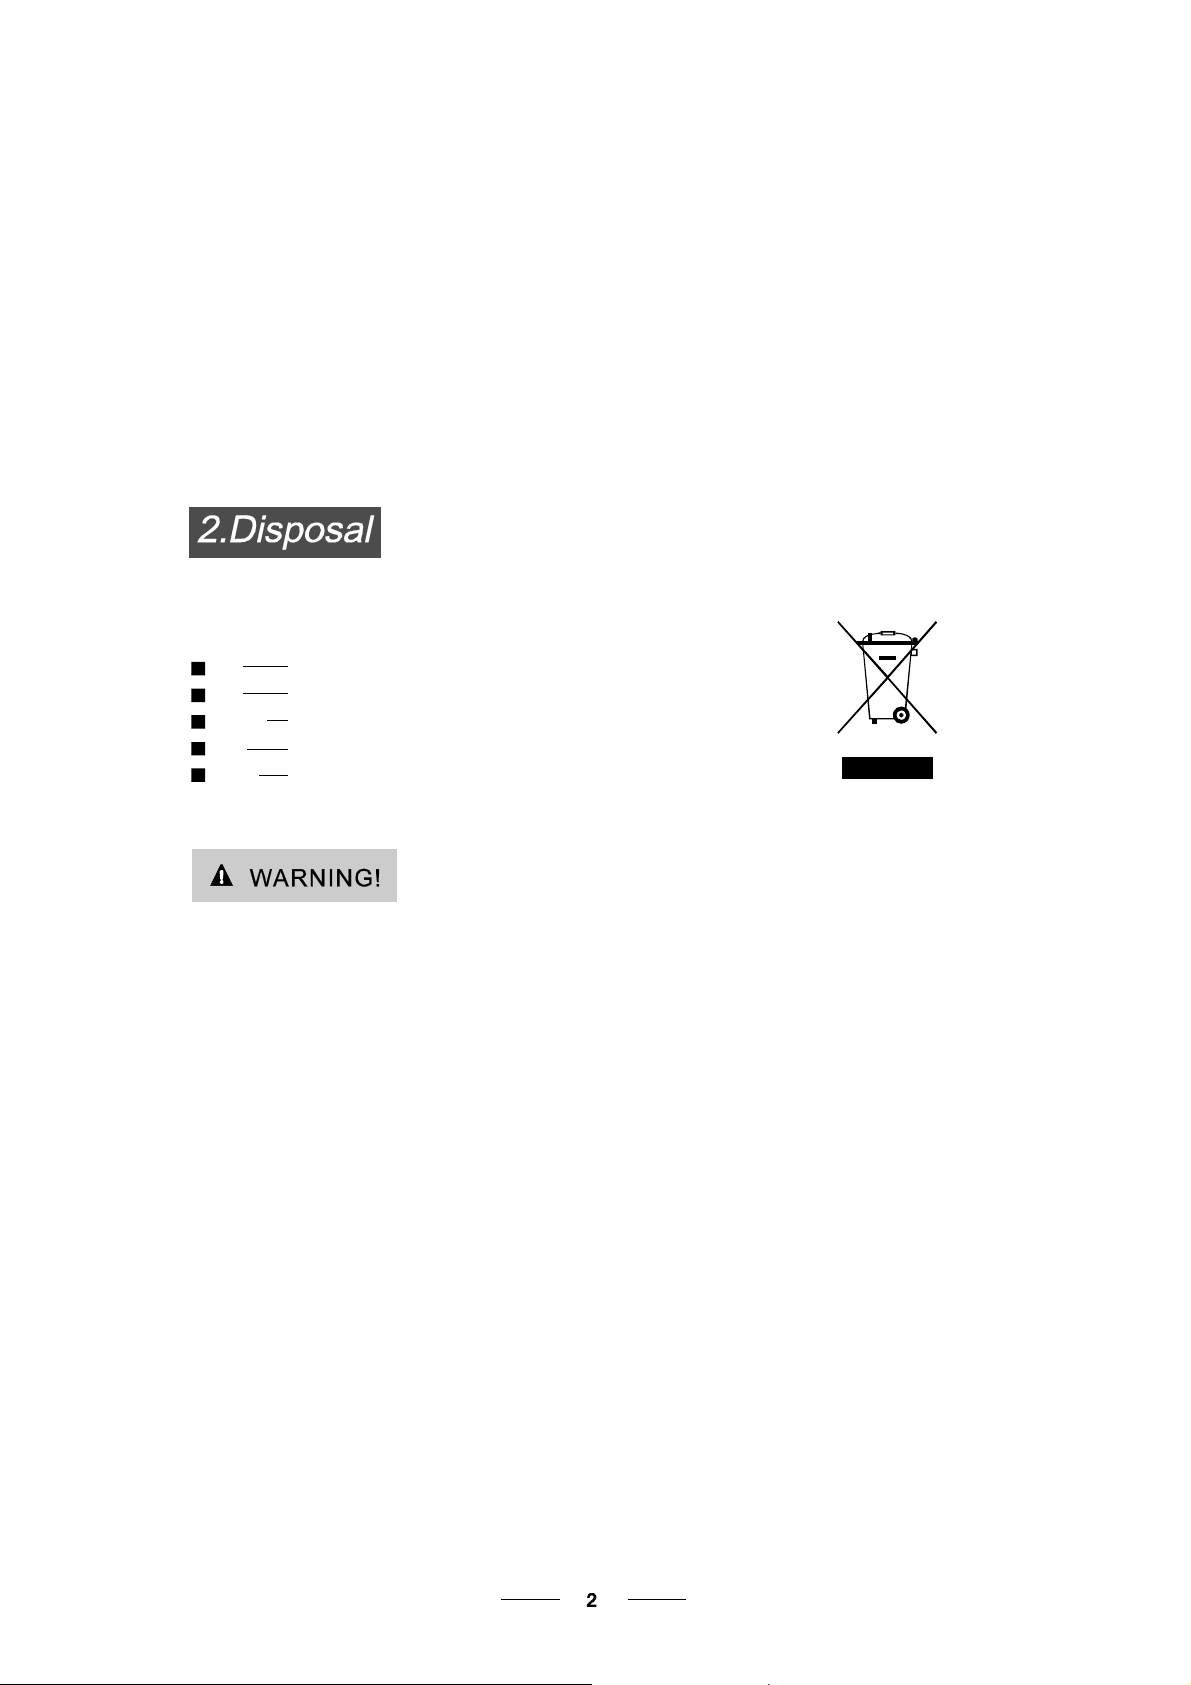
DISPOSAL: Do not dispose this pr oduct as unsorted municipal waste. Collection of such
waste separately for special treatment is necessary.
Page 6
To get the best performance from your dishwasher, r ead all operating instructions
before using it for the first time.
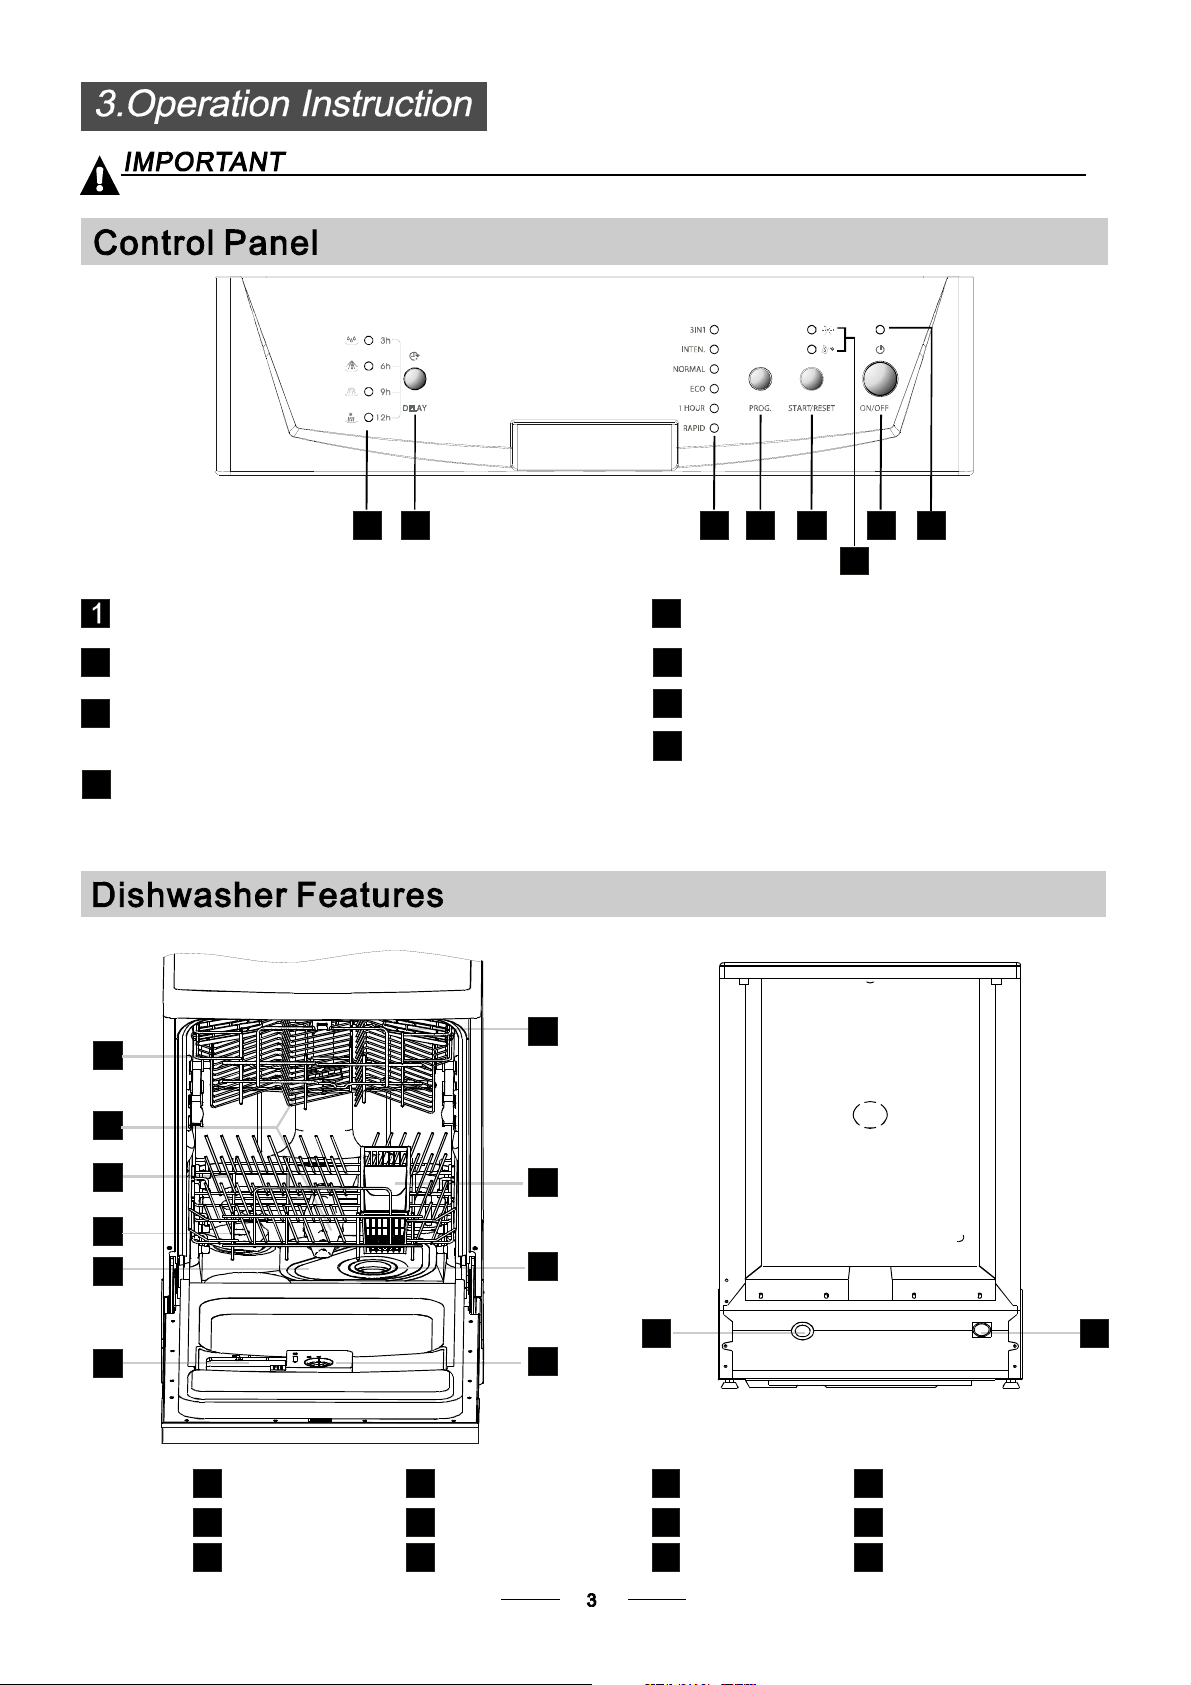
Power indicator light: To show t he power supply.
Power switch: To t urn on/off the power supply.
2
Salt and rinse aid warni ng lights: To sh ow
3
when the salt container or dispenser need to be
refilled.
Start /Reset button: To start the selected
4
was h ing program o r r eset the washi ng prog ram
when the machine is w orki ng.
Front view
1
578
6
4 2
1
3
Washing P rogram Selector: To select o ne of
5
the six washing programs.
Program indic ator lights: To show t he washi ng
6
program.
DelayButton:ToPressthebuttontodelay.
7
Dela y time /Wa shi n g Pha se s in dica tor light:
8
When you delay time(3, 6, 9, or 12 hours), the
indicators light will be on to show one of the
delay time. When the m achine is working, the
indicators will be on to show one of the washing
phases of cycle.
Back View
7
2
3
4
5
6
on
Off
Upper Basket
1
Spra y A rms
2
Lower Basket
3
8
9
10
Salt Container
4
Main Filter
5
Detergent Dispenser
6
11 12
Cup Shelf
7
Cutlery Basket
8
Coarse Filter
9
Rinse Aid Dispenser
10
Drain pipe connector
11
Inlet pipe conne ctor
12
Page 7

Before u sing your dishwasher for the first time:
A. Set the wat er softener
B. Add 1.5Kg dishw asher salt and then full fill the salt con tainer with water
C. Filltherinseaiddispenser
D. Fill i n d eterg en t
The water so ftener must be set m anu ally, using the water hardness dial.
The water so ftener is designed to remove minerals and salts from t he water, wh ich would have
a de trimental or adverse effect on the ope ration of the appliance. The h igher the
content of th ese minerals and salts, the harder y our water is. The s oftener should be
adjusted according to the har dness of the water in you r area. Your local Water Aut hority
can advise you on the hardness of the water in your area.
Adjusting Salt Consumption
The dishwasher is de signed to allow for adjustment in the amount of sa lt consumed bas ed on the ha rdness of
the water used. This is intended to optimise and customise the level o f salt consumption.
Please follow the steps below f or adjustmen t in salt consumption.
1. Unscrew the cap from the salt container.
2. There is a r ing on the container with an a rrow on it (see figure
on the side), if necessary, rotate the ring in the anticlockwise
direction from th e "-" Setting toward the "+" s ign, based on the
hardness o f the water being used.
It is rec ommende d t hat adjust ments should be made in
accord ance wit h the followin g sch eme:
WATER HARDNESS
dH
45~60 80~107 56~75 8~11
dH=1.25 C larke=1.78 fH=0.178mmol/l
1
dH: German degree
fH: French degree
Clarke: British degree
fH
0~140~8 0~1.4
14~398~22 1.4~3.9 - 20 50
39~8022~45 3.9~8 Mid 40 25
Clarke
0~10
10~28
28~56
mmol/l
Selector Position
/
+
""/
No salt n eed added
"-"
Settingtowardthe"-"sign
"+"
Settingtowardthe"+"sign
Settingtowardbetween
"Mid "
the "-" si gn and "+" sign
Salt consumption
(gram/cycle)
0
60 16
Auto nomy
(cycles/1kgs)
/
Contact your local water board f or information on the hardness of your w ater supply.
If your model doe s not have a ny water softener, you may skip this section.
WATER SO FTE NER
The h ardness of the water v aries from place to place. I f hard water is us ed in t he dishwasher, de posits will
form on the dish es and utensils.
The a pplian ce i s equipped with a sp ecial softener that uses a salt c ontainer specifically des igned to eliminate
lime and minera ls from the wate r.
Page 8
Always use the salt i ntended for use with dishwasher.
The salt c ontain er is located beneath the lower basket and should be f illed as explained
in t he following :
Attention!
Only use s alt specifically designed for the use i n dishwashers! Every other type of
salt n ot specifically designed for the use in a dishwas her, especially t able salt, will
damage the w ater softener. In case of da mages caused by the use o f unsuitable
salt t he manufact urer does not g ive any warranty nor is liable for any damages caused.
Only fill wi th salt just b efore starting one of the co mp lete washing programs.
This will prevent any g rains of salt or salty water, whi ch may have b een spilled,
remaining on the bottom o f the machine for any p erio d of ti me, which may cause
corrosion.
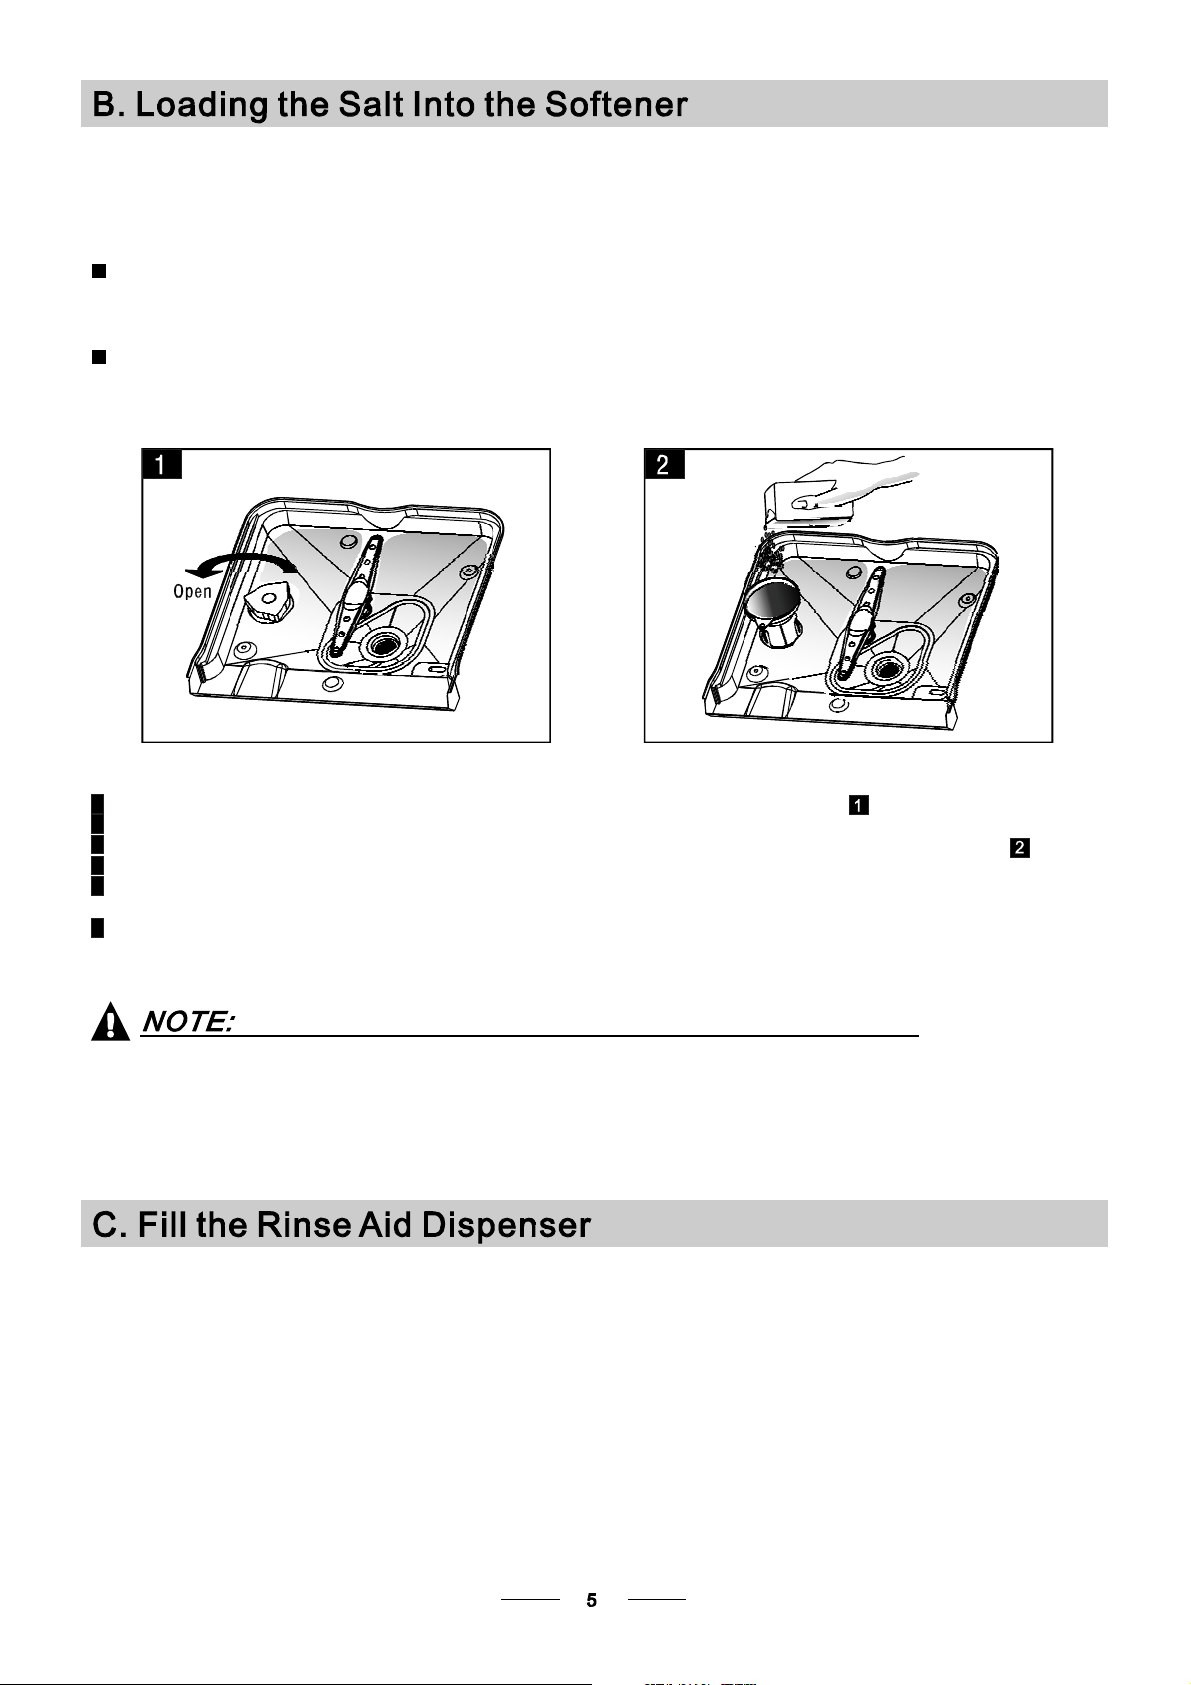
A Remove the lower basket and then unscrew and remove the cap from the salt container.
B Place the en d of the funnel(supp lied) into th e h ole and intro duce about 1.5kg of dishwash er salt.
C Full f ill the salt container w ith water.It is normal for a small amount of water to come out of the salt container.
D Afte r filling the contain er , screw the c ap tightly back clo ckwise.
E Usually, the salt warning light will stop being illuminat ed within 2-6 days afte r the s alt contain er has been filled with
salt.
F Immediately after fillin g the salt into the salt container, a was hing program should be s tarted
soak or rapid ).
by salty water. This is out of warranty.
program Otherwis e the filter system, pump or other importan t parts of the machine may be damaged
1. The salt container must only be ref illed when the salt warning light in t he control panel comes on.
Depending on how w ell the salt dissolve s, the s alt warning light may still be on even tho ugh the
salt container is filled.
If there i s no s alt warning light in the control p anel (for some Models),you can estimate when to f ill
the s alt into the softener by the cycles that the dishw asher has run.
2. If there are spills of the salt , a soa k or a rap id program should be run to remove the excessive salt.
(We su ggest to use the
Rinse Ai d Dispe nser
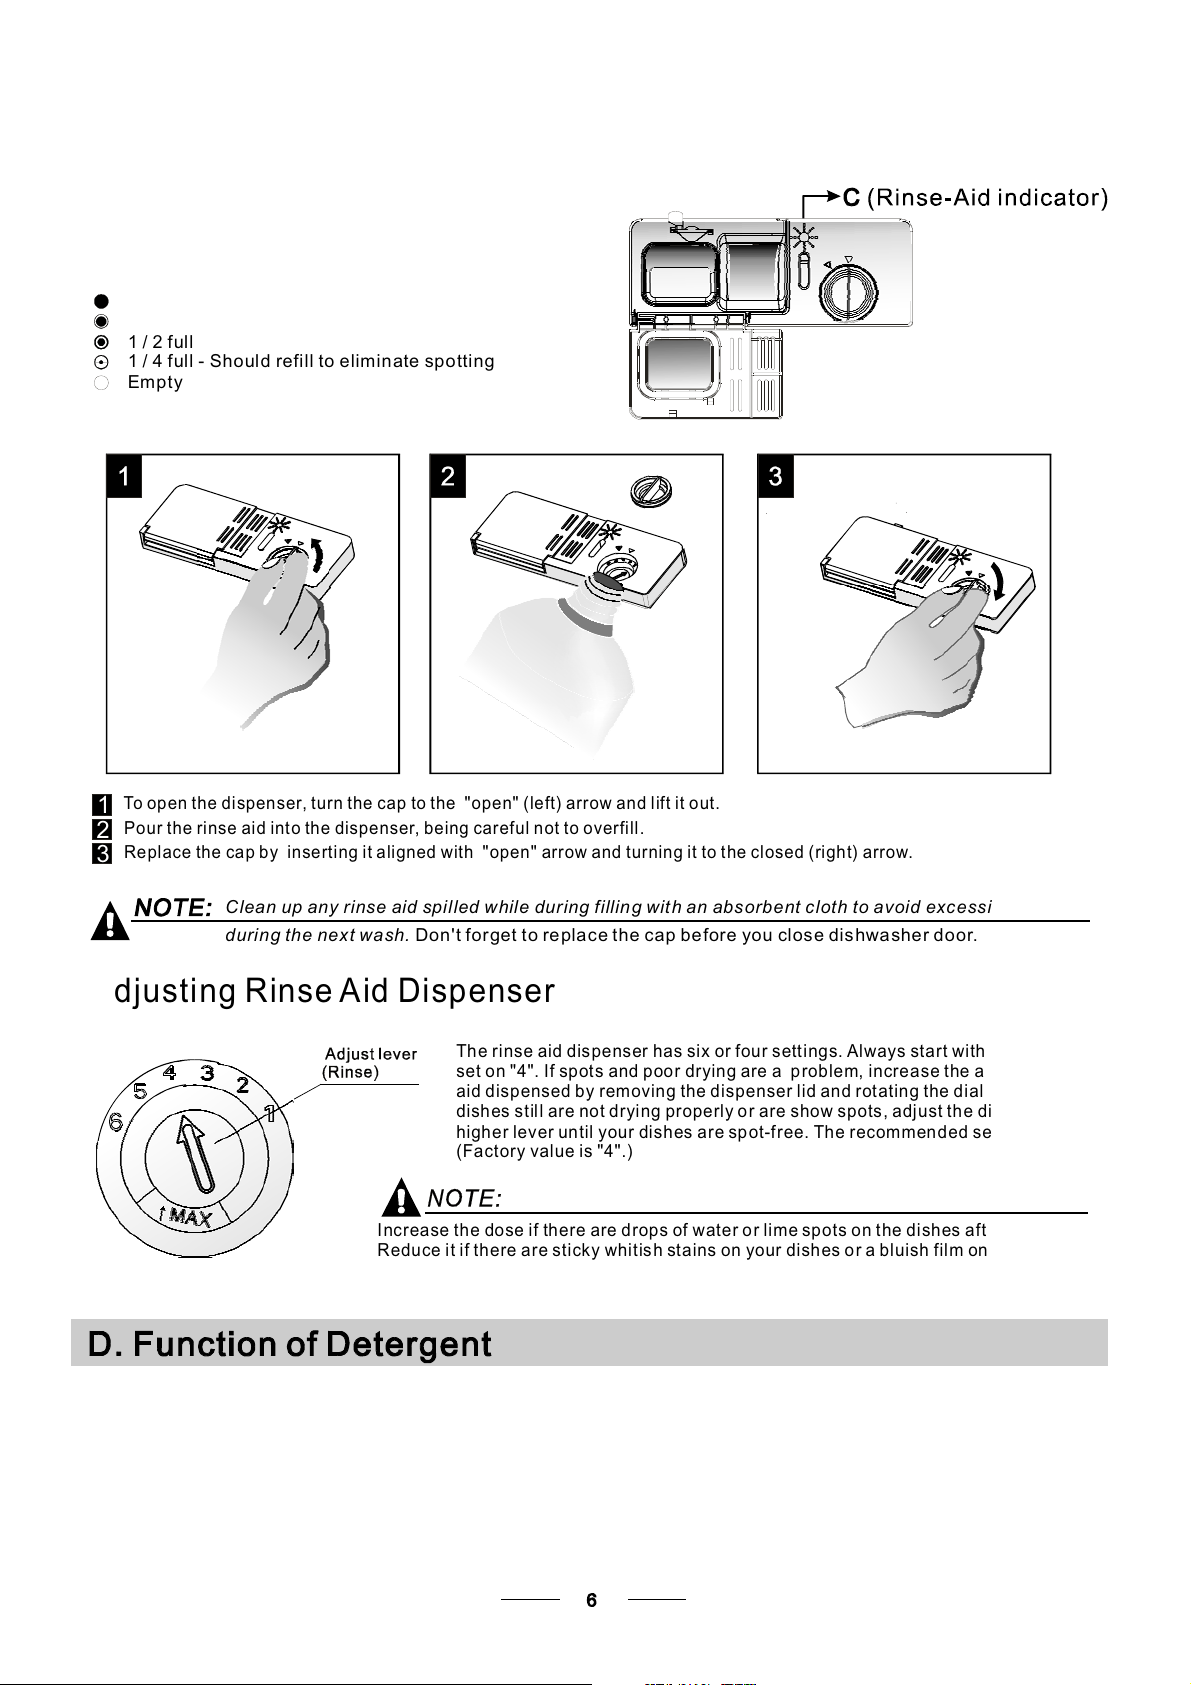
The r i nse aid is releas ed during the fi nal rinse to preve nt water fro m forming droplets on your dishe s, which can
leave spots and st reaks. It also improves dryi ng by allowing water t o r oll off t he dishes. Your dishwasher is
designed to use liquid rinse aids. The rinse a id dispenser is located inside the door next to the detergent dispenser.
To fill the dispens er, open the cap and pour the rinse ai d into the dispens er until t he lev el indicat or turn s complete ly
black. The vol ume of the rinse aid container is about 110ml.
Function of Rin se Aid
Rinse aid is aut oma tically added during the last rinse, ensuring thorough rinsing, and spo t and streak free drying.
Attention!
Only use branded rinse aid for dishwasher. Never fill the rinse aid dispenser with any other substances
(e.g. Dishwasher cleani ng agent, liqu id deterge nt). This would damage the appliance.
Page 9
When to Refill the Rinse Aid Dispenser
If th ere is no rinse-aid warning light in the c ontrol panel, you can estimate the amount from the colo ur
of th e optical level indicator C located next to the cap. When th e rinse-aid container is full, the whole
indicator will be d ark .As the rinse-aid diminishes, the size of the dark dot decr eases. You should never let
the r inse aid leve l fall 1 / 4 full .
As t he rinse aid d imin ishes, the size o f the black dot
on the rinse aid level indicator changes, as illustrated below.
Full
3/4full
1/2full
1 / 4 full - Should refill to eliminate spotting
Empty
To open the di spenser, turn the cap to the " ope n" (left) arr ow and lift it out.
1
Pour the rinse aid int o the dispe nser, being caref ul not to over fill .
2
Replace the cap by inserting it a ligned with " open" arrow and turning i t to t he closed (right) arrow.
3
Cl ean u p any r inse aid sp illed w hile du r ing f i lling wit h a n abs o r bent cl oth to avoid exc e ssive foaming
during the next wash.
Don't forget to replace t he cap before you close dishwasher door.
Adjusti ng R inse A id Dispense r
The rinse aid dispenser has six or f our settings. Always start with the d ispens er
set on " 4". If spots and p oor drying are a p roblem, increa se the amount of r inse
aid dispensed by removing the d ispe nser lid and rotating the d ial to "5". If the
dishes still are not d rying prope rly o r are show spots, adjust the dial to the n ext
higher lever until your dishes are spot-free. The recommended setting is "4".
(Factory value is "4".)
Increase the dose if there are drops of water or lime spots on the dishes after washing.
Reduce it if t here are stick y whitish stains on your dishes or a bl uish fil m on g lassw are or
knife blades.
Detergents with its chemic al ingredients ar e necessary to remove dirt, crush dirt and transport it out of the dishwasher.
Most of the commercial qu ality d eterge nts are suitable for this purpose.
Deterg ents
The r e a r e 3 s orts of d eter gent s
1.With phosphate and with chlorine
2.With phosphat e and wit hout chlorine
3.Without phosphate and without chlorine
Page 10

Normally new pu lverised dete rgent is without phosphate. T hus the water softener function of
phos pha te is not given. In this c a se w e r e c ommen d to fill sal t in t h e salt con t a i ne r even w hen
the h ardness of water is o nly 6 dH. If detergents without phosphate are used in the case of hard water
often white s pots appear on dishes and glasses. I n this case please add more detergent to r each
bett er results . De terg en t s wit h ou t chlorine do only bleach a lit t le. S tron g a nd c olour ed sp o t s will not
be re moved complete ly. In this case please choose a p rogram with a higher temperature.
Concentr ated Deterge nt
Based on their chemical composition, detergents can be split in two basic types:
conventional, alkaline detergents with caustic components
lo w al kali n e co nce nt rated deter ge n ts wit h n atur a l e n zymes
Detergent Tablets
Detergent tablets of different brands dissolve at d ifferent speeds. For this reason some
detergent tablets cannot dissolve and develop their full cleaning power during short
programs. Therefore please use long programs when using d etergent tablets, to
ensure the complete removal of detergent residuals.
Detergent Dispenser
The dispenser m ust be refilled before the start of each wash cycle following the instructions
provided in t he wash cycle table . Your dis hwasher uses less detergent and rinse aid t han
Conventional dishwasher. Generally, only one tablespoon of detergent is needed for
a normal wash load. More heavily soiled items need more detergent. Always add the
detergen t just be fore star ting the dish washer, otherwise it coul d get damp and will not
diss olve pro pe r ly.
Amount of Detergent to Use
If the lid is closed: press release button. The lid will sp ring open.
Always add the dete rgent just before starting each wash cycle.
Only use branded detergent aid for dishwasher.
Detergent powder
Detergent tablet
Dishwasher detergent is corrosive! Take care to kee p i t out of reach of c hildren.
Proper Use o f Detergent
Use only detergent s pecif ically made for the u se in dishwashers. Keep your detergent fresh and dry.
Don't put powdered detergent into the dispenser until you're ready to wash dishes.
Page 11

Fill in Detergent
Fill t he detergent dispenser with detergen t.
The m ar king indi c a tes the dos ing levels , a s
illus t rate d o n t he r igh t:
The place o f main wash cycle deterg ent placed.
A
The place o f pre-wash cycle detergent placed.
B
Please o bserve the manufacturer s dosing and sto rage
Recommendations as stated on the detergent packaging.
Close the lid and press until it locks in place.
If th e d i shes a re heavily so i l ed, pla ce a n additional
detergent dose i n the pre-wash detergent chamber. This detergent will take effect d uring the pre-wash phase.
You find information about the amount of detergent for the si ngle programme on the l ast page.
Please aware, that according to the level so iling and the specific hardness of wa ter differences are possible.
Please observe the manufacturer's rec ommendations on the detergent packaging.
Page 12

Consider buying utensils which are identified as dishwasher-proof.
Use a mild detergent that is described as 'kind to dishes'. If necessary, seek further
information from the detergent manufacturers.
For particular items, select a p rogram with as low a temp erature as p ossib le.
To prevent damage, do not take glass a nd c utlery out of the dishwashe r immediately
after the prog ramm e has ende d.
Are not s uitab le
Cutlery with wooden, horn china or
mother-of-pearl han dles
Plastic items that are n ot heat resistant
Older cutlery with glued parts t hat are not
temperature resistant
Bonded cutlery items or dishes
Pewter or cooper items
Crystal glass
Steel items subject to rusting
Wooden p latte rs
Items made from synthetic fibres
(For best performance of t he dishwasher, f ollow these loading guide lines.
Features and appearance of baskets and cutl ery baskets may vary from your mod el.)
Scrape off any large amount s of leftover food. Soften remnants of b urnt food in pans.
It is no t necessary to r inse the dishes under running water.
Place objects in the dishwasher in following way:
1.Items su ch as cups, glasses, pots /pans, etc. a re faced downwards.
2.Curved item s, or ones wi th recesses, should be loaded a slant so that water can run off.
3.All utens ils are stacked securely and can not ti p o ver.
4.All utens ils are placed in t he way that t he spray arms can rotate f reely during washin g.
Very small items should not be w ashed in the dishwasher as they c ould easily fall out o f the basket.
Are o f limited suitability
Some t ypes of glasses can become
dull after a large number of washes
Silver and alumi num par ts have a
tendency to discolour during washing
Glazed patterns may fade if machine
washed frequently
Load hollow it ems such as cups, glasses, pans etc. With the opening facing downward s s o that
wat e r can n o t c o llect in the containe r or a dee p base.
Dishes and items of cutlery must not lie inside one another, or cover each other.
To avoid damage to glasses, they must not touch.
Load large items which are most di fficult to clean into th e lower basket.
The upper basket is de signed to hold more d elicate and lighter dishware such as glasses, coffee
and tea cups
Long bladed knives stored in an upright position are a pot ential hazard!
Long and/or sharp items of cutlery such as carving knives must be positi oned
horizon tally in the upper b aske t.
Please do not overload your dishwashe r. This is i mportant for good results and for
reasonab le consumption of energy.
To prevent water dripping from the upper basket into t he lower basket, we recommend that you
empty the lower basket first an d then the upper basket.
Page 13

The Method Loading Normal Dishware
The Method Loading Normal Dishware
Loading the Upper Basket
The upper basket is designed to hold more delicate and lighter dishware such as glasses, coffee
and tea cups and saucers, as well as plates, small bowls and shallow pans (as long as they are
not too dirty).
Position the dishes and cookware so that they will not get moved by the spray of water.
1
Cups
IN
5
1
1
2
Saucers
3
Glasses
4
Small serving bowl
4
3
6
5
6
2
3
10
Large serving bowl
Gravy ladle
Medium serving bowl
Loading the Lower Basket
We suggest that you place large items and the most difficult to clean items are to be placed into the lower basket:
such as pots, pans, lids, serving dishes and bowls, as shown in the figure below.
It is preferable to place serving dishes and lids on the side of the racks in order to avoid blocking the rotation of the
top spray arm.
Please be reminded that:
Pots, serving bowls, etc, must always be placed top down.
Deep pots should be slanted to allow water to flow out.
The Bottom Basket features folding spikes so that larger or more pots and pans can be loaded.
IN
2
7
10
10
8
9
9
9
11
8
Oval platter
Dinner plates
Dessert dishes
10
7
8
10
Soup plates
Cutlery basket
11
9
Page 14

Adju sting the Upper Bask et
The height o f the upper b asket can be ad justed in order to create mor e space for l arge utensils
both f or the upper/lower basket. The height of the upper basket can be adjusted by placi ng the
wheels o n different height of the r ails. Long items, serving cutlery, salad servers and knives
should b e placed on the shelf so that they do not obstruct the rot ati on o f the spray a rms.
The shelf ca n be folded b ack or be re moved when not required for use .
Foldin g S pikes of Lower Basket
For better st acking of po ts and pans,
the spikes c an be fol ded down as
show in the p ict u re ri gh t.
Cutlery should be pla ced in the cutlery basket with t he handles at the bo ttom. If the rack has side bas kets , th e
spoons should be loa ded separately into the ap propriate slots , especially long utensils should be pl aced in the
horizontal position at the fr ont of the upper bask et as shown in the pictu re.
5
4
2
2
2
4
2
2
4
3
3
3
6
5
5
5
55
5
4
3
4
3
33
4
3
2
5
4
5
2
2
44
7
2
11
11
11
1
3
1
6
1
1
Forks
Soup spoons
2
Dessert spoon s
3
Teaspoons
4
5
Knives
Serving spoons
6
Servin g f ork s
7
Do not let any item e xtend through the bottom.
Always load sharp utensils with the s harp point down!
Page 15

()
Means: need to fill rinse into the Rinse-Aid Dispenser.
3in1
Intensive
Normal
ECO
(*EN 50242)
1Hour
For normally soiled loads,
use m ultif unction al detergen t
For hea viest soiled crockery,
andnormallysoiledpots
pans di shes etc w i th d ried
ʙ
on soiling
For normally soiled loads,
such as pots glasses and
lightly soile d pans.
This is standard programme, i t is
suit a ble to clea n norm ally soile d
tablewar e and it is the most
efficient program me in t erms of
its combined energy and water
consumption for that type of
tablewar e
For lightl y soil ed l oa d that
do no t need excellent drying
effic iency.
ʙ
.
ʙ
Pre-wash 50
Wash 55
˄ć˅
˄ć˅
Rinse
Rinse 65
˄ć˅
Drying
Pre-wash(50 )
Wash (6 5 )
ć
ć
Rinse
Rinse
Rinse (55 )
ć
Drying
Pre-wash(50 )
Wash (5 5 )
ć
ć
Rinse
Rinse (65 )
ć
Drying
Pre- wash
Wash (50 )
Rinse
(60 )ćć
Dryi ng
Wash(6 0 )
ć
Rinse
Rinse (50 )
ć
Drying
3in 1
4/23g
(or )3in1
4/23g
(or )3in1
4/23g
(or )3in1
27g
150
120
155
160
60
1.08
1.13
1.09
0.77
0.77
13.5
16.0
13.0
10.5
10.0
Rapid
A sh orter wa sh f or lightly
soiled l oa ds an d qu ick wash
Wash (40 )
Rinse
Rinse (40 )ćć
15g
30
*EN 50242 : This pr ogramme is the test cycle. The inf ormation for comparability test
in accordance with E N 50242, as follows:
Capacity: 9 setting
Position Upper basket: upper wheels on r ails
Ri ns e aid sett i ng: 6
The power consumption of off-mode i s 0W
left-on mode is 0.4W
Startin g a cycle wash
Draw out the lower an d upper basket, load the d ishes and p ush them back.
It is c ommended to load the lower basket f i rst, t hen the upper one (see the sectio n entitled
Loading the Dishwasher ).
Ŷŷ
Pour in the d eterg ent (see the section e ntit led Salt, D etergent and Rinse Ai d ).
Ŷŷ
Insert the plug into t he socket. The power s upply is 220-240 VAC /50 HZ, the specification
of the so cket is 10A 250VAC. Make sure that the w ater supply is turned on to full pres sure.
Close the door, pr ess the ON/OFF button, a nd the ON/OFF light will turn on.
Press the program button , the wash pr ogram will be ch ange d as follows direction :
3in1->Intensive->Normal-> >1 Hour->Rapid;
ECO-
If a prog ram is se lected, the response light will light. Th en press the Start/Reset button, t he
dishwasher begin s to start.
0.50
9.0
Page 16

When you press the Start/Reset button to pause during washing, the program light will
stop blinking and th e dishwasher will m ooing every minute unless you press the
Star t/ R e set button to sta r t .
Premise:
A cycle that is underway can only be modified if i t has only been running fo r a short time. Ot herwis e, the
1
detergent may have already be en released, and the appliance may have alre ady drained the wash water.
If this is t he case, the detergent dispenser mu st be r efil led (see the sectio n entitled " Loading the
Detergent " ).
Press the start/reset butto n , the m achine will be in standby state, then you can
2
change the program to the d esi red cycle setting (see the section entitled " Starting a wash cycle. . ." ).
3
The program lights show the state of t he dishwasher:
a) All p rogram lights off--------------------------------------------stand by
b) One of the pro gram lights on--------------------------------------pause
c) One of the program lights blinking-----------------------------------run
c) Some of the up three program lights bl inking fleetly------------error
more than 3 second s
If you open the door , the machine will pause. The program light will
during a wash cycle
stop blinking and the buzzer will mooing every minute unless you close the door . After
you close t he d oor ,t he machin e will keep on wor kin g afte r 10 sec onds.
A forgotten dish can be added any time before the detergent cup opens.
Press the start/reset button
1
Open the door a little to stop the washing.
2
After the spray arms stop working,you can ope n the door
3
completely.
When t h e wo rking cycle has fi nished, the b uzzer o f th e dishwash e r will s o u n d f o r 8 second s , the n s t op. Tu r n off
the appliance using the ON/OFF button, shut off th e water supply and op en the door of t he dishwashe r.
Wait for a few minutes before unloading the dishwashe r to avoi d handling the dishes and utensils while they
are still hot a nd more susceptible to breakage. They w ill also dry better.
Add forgotten dishes.
4
Close the door
5
Press the start/reset button, the dishwasher will run
6
after 10 seconds.
Switch Off the Dishwasher
The program light is off , only in this cas e the programme has ended.
1.Switch off the dishwasher by pressing the ON/OFF button.
2.Turn off the water tap!
Open the door carefully.
Hot dishes are sensi tive to knocks. The dis hes should therefore be a llowed to cool down around 15 minut es
before removing from the appliance.
Open t he dishwasher 's door, leave it ajar and wait a f ew minutes before removing the dishes. In this way they
will be cooler an d the drying will b e improved.
Unloading the dishwasher
It is norm al that the dishwasher is wet insid e.
Empty the l ower basket first and then the up per one. This w ill avoid water dripping from the upper Basket onto
the dishes in th e lower one.
It is dange ro u s to ope n the door w hen w as hi ng , bec aus e the hot wate r may scald you .
Page 17

The filter prevents larger remnants of food or o ther objects from getting inside the pum.
The residues may block the filter, in this case they must be removed.
The filter syst em consists of a coarse filter,a flat (Main filter)
An d a mic ro fi lter(Fi ne fi l ter ).
1
2
3
2
1
3
Main filter
Food and soil particles trapped in this filter are pulverized by a
special jet on the l ower spray arm and washed down to d rain.
Coarse filter
Larger ite ms, s uc h as pi e c es o f bon e s or gl a ss, tha t could block
the drain are trapped in the coarse filter. To remove the items
caught by the filter, gently squeeze the tap on the to p of this
filter and lift out.
Fine filter
This filter holds soil and food residues in the sump area and
prevents it from being redeposit on the dishes during wash cycle.
Filter assembly
The filter efficiently
For best performance and results, the filter must b e cleaned regularly. t his reason, it is a good ide a to
remove the larger food particles trapped in the filter after e ach wash cycle by rinsing the semicircular filter and
cup under running water. To remove the f ilter device , p ull the cup handle in t he upward direction.
removes food particles from the wa sh water, all owing it to be rec ycled during the cycle.
For
Th e dishw as h er must never b e used wi th out the fi lter s.
Improper replace ment of the f ilter may reduce the performance level of t he appliance
and damage dishes and utensils.
2
3
1
Step 1 Turn t he filter in anti-clockwise direction,
˖
then li ft it u p.
Step 2 lift the Main filter up˖
Step 3 lift the F ine filter up˖
When following th is procedure from step1 to step 3, the filter system will be removed;
when following it from Step 3 to Step 1, the f ilter system will be installed.
Page 18

Remarks:
- Ins pect the filters for blocking a fter ever y time th e dishwasher has been used.
- By uns crewing the coarse filter, you can remove the filter system. Remove any f oo d re mna nts and
clean the filters under running water.
The entire filter assembly should be cleaned once a week.
Cleaning the Filter
To cl e an the c o a r se filt er and the f in e f ilter , us e a c leaning b ru sh. R eassembl e t he fi lter p arts as s how n in the f igures
on t h e last page and reins ert t he entire ass emb ly in the dis hwasher, positio nin g it in its seat and pres sing dow nwa rds .
When cleaning the filters, don't k nock on them. Otherwise, the filters could be
contorted and the performance of the dishwasher could be decreased.
The control panel c an be cleaned by using a lightly dampen ed cloth.
After cl eaning, make sure to dry it tho roughly.
For t he e xterior, use a good app lianc e polish wax .
Never u se sharp objects, scouring pads or har sh cleaners on any part o f the di shwasher.
Cleaning The Door
To clean the e dge around the door, you should use only a sof t warm, damp cloth.
To avoid penetration o f water into the door lock and elect rical components, do not
use a spray cle aner of any ki nd.
Never u se a spray cleaner to cl ean the door panel as it may damage the door lock
and electrical components.
Abrasive agents o r some paper towels should not be use d because o f the r is k o f
scra t ching o r l eavin g spots on the stainl ess steel surface.
Protec t A gainst Freez ing
please take frost protection measures on t he dishwasher in winter. Every fter washing cycles,
please operate as follows
1.Cut off the electrical power to the dishwasher.
2.Turn off the water supply and d isconnec t the water i nlet pipe from the water valve.
3.Drain the water from the inlet pipe and water valve. (Use a pan to catch the water)
4.Reconnect the water i nlet pipe to the wa ter valve.
5.Remove t he filter at the bottom of the tub and use a sponge to soak up water in the sump.
˖
If your dishwasher cannot work because of the ice,
please contact professiona l service persons.
time a
Clea ning the Spray Arms
It is nece ssary to clean the spray a rms regularly for hard water chemicals will clog the spray arm je ts and b earings.
Remove the upp er spray arm
To remove the upper spray arm, screw off the nut clockwise then remove the arm.
6/4$3&8
16--065
VQQFS
MPXFS
Remove the lower spray arm
To remove the lower spray ar m, pull out .the spray arm upward
Was h the ar ms
Wash the arms in soapy and w arm water and use a soft brush to clean the jets.
Replace them after rinsing them thoroughly.
Page 19

After Every Wash
After every wash, turn off the water supply to the
appliance and leave the door s lightl y op en so that
moisture and odours are not t rapped inside .
Remove the Plug
Before cleaning or performing maintenance, always
remove the p lug from the socket.
No Solvent s or Abrasiv e Cleanin g
To clean the exterior and rubberparts of the dishwasher,
do not use solvents or abrasive cleaning products.
Only use a c lo th w ith warm soapy wate r.
To remov e spots or st ains from the surface of the
interior, u se a cloth dampened with wa ter a n a little
vinegar, o r a c leaning product made specifically for
dishwashers.
Position the appliance in the desired location. T he back should rest against the w all behind it, and the sides,
along the adjacent cabinets or walls. T he dishwasher is equipped with water supply and drain hoses th at can
be positioned either to the right or the left sides to facilitate proper install ation.
When not in Use for a LongTime
It is recommend that you run a wash cycle with the
dishwasher empty and the n remove the plug from t he
socket, turn o ff the water supply and le ave the door of
the applia n c e sli ghtly open. Thi s w ill help the door
seals to last longer and prevent odours from forming
within the appliance.
Moving the Ap plia nce
If the appliance must be move d, try t o keep it in the
vertical position. If absolutely necessary, it can be
positioned on its back.
Seals
Oneofthefactorsthatcauseodourstoforminthe
dishwasher is food th at remains trapped in the seals.
Periodic cleaning with a damp sponge will prevent this
fro m occu rrin g.
Once the appliance i s positioned for levelling, the height of the dishwasher
may be altered via adjustment of the screwing level of the fee t. In any case,
the appliance should not be inclin ed more t han 2 .
For personal safety:
DO NOT USE AN EXTENSION CORD OR AN ADAPTER PLUG WITH THIS APPLIANCE.
DO NOT, UNDE R ANY CIRCUMSTANCES, CUT O R REMOVE TH E EARTHING
CONNECTION FROM THE POWER CORD.
Please look at th e rating label to know the rating voltage and connect the dishwasher to the appropriate power supply.
Use the required fuse 1 0 amp, time delay fuse or c ircui t breaker recommended and provide separate circuit serving
only this appliance.
Ensure the voltage and fr equency of the p ower being corresponds t o
those on the rating plate . Only insert the p lug into an elec trical socket which is earthed
properly. If the electrical socket to which the a ppliance must be connected is not
appropriate for the plug , replace the socket, rather than using a adaptors or t he like as
they could cause overheating and burns.
This appliance must be ea rthed. In the event of a malfunction or breakdown, earthing wi ll reduce the risk of
electric shock by providing a path of least resistance for the electric current. This appliance is equipped with a
cord having an equipment-earthing conductor and an earthing plug. The plug must be plugged into an
appropriate outlet that is installed and earthed in accordance with all local standards and requirements.
Page 20

Improper connection of the equipment earthing conductor can result in the risk of an
electric shock.
Check with a qualified electrician or service representative if you are in doubt whether the
appliance is properly earthed.
Do not modify the plug provided with the appliance. If the plug does not fit properly to the
outlet, please have a qualified electrician to install a proper outlet.
for personal safety:
DO NOT USE AN EXTENSION CORD OR AN ADAPTER PLUG WITH THIS APPLIANCE.
DO NOT, UNDER ANY CIRCUMSTANCES, CUT OR REMOVE THE
CONNECTION
Connect the cold water supply hose to a thread ed 3/4(inch) connector and make sure
that it is f astened tightly in place.
If the water pipes are n ew or have n ot been used for an e xtended period of time, let the
water run to make sure th at the w ater is clear. This precaution is needed to avoid the
risk of the water inlet to be blocked and damage the appliance.
Please close the hydrant after usi ng.
FROM THE POWER CORD.
EARTHING
Insert the drain hose into a d rain p ipe with a minimum diameter of 4cm, or let it run into the s ink, making sure to
avoid bending or crimping it. Use the special plastic support that comes with the appliance . The top of the ho se
must be at a height between 40 and 100cm. The fr ee end o f the hose must n ot be immersed in water to avoid the
back flow of i t.
PLE A SE H AN G UP THE DRAI N HO SE EITHE R WAY OF A , B , C
Close the drain hose hook to the counter
Front
NOTE
A
Drain hose hook
Counter
Thetopofthehose
must be at a height
B
between
40 and 100cm.
The free end of the
hos e mus t not be
imm ersed in wa ter.
Drain pipe
C
40mm
Ĩ
Note: The drain h ose of this appliance must only be c onnecte d to a dirty wat er drain.
Water m ust not be
discharged into a fresh wa ter drain.
Āā
Āā
Page 21

How to Drain Excess Water From Hoses
If the s in k is 100 0 hig h er fr om the f l oo r, t he ex cess w a t er in ho ses cann ot be dr ained direc tl y
into the sink. It will be necessary to drain excess water from hoses into a bowl or suitable
container that is held out side and lower than t he sink.
Wat e r O u t l et
Connect t he water drain hose. Th e drain hose must be corr ectly fitted t o avoid water leaks.
Ensure that the w ater dra in h ose is not kinked or s q uashed.
Extension Hose
If you need a drain hose extension, make sure to use a similar drain hose.
It must be no longer than 4 metres; otherwise the c leani ng effect of the dishwasher coul d be reduced.
Syphon Conn ection
The waste connection must be at a height of between 40 cm (minimum) and 100 cm (maximum)
from the b ottom o f the dish . T h e w a t e r dra i n ho se sh ould b e fix e d b y a h ose clip. Th e fre e end of
the hose must not be immers ed in wat er.
The following things should be checked before starting the dishwasher.
1
The dishwasher is level and fixed properly
2
The inle t valve is open
3
There is a leakage at the connections of the conducts
4
The wires are tightly connected
5
The power is switched on
6
The inlet and drai n hoses are knotte d
7
All packing materials and printings should be taken out from the dishwasher
After installation, please make sure to keep this manual.
The content of this manual is very helpful to the users.
Page 22

Fuse blown, or the
circuit breaker acted
Replace fuse or reset circuit breaker. Remove any other
appliances shar ing the same circuit with the dishwasher
Power supply is not
turned on
Water pressure is low
Door of dishwasher
not pr operly closed.
Kink in drain hose
Filter clogged
Kitchen sink clogged
Improper detergent
Spilled rinse-aid
Make sure the dishwasher is turned on and the door is
closed securely.
Make sure the power cord is properly plugged into the
wall socket.
Check that the water supply is connected properly and
the water is turned on.
Make sure to close the door properly an d latch it.
Check drain hos e.
Check coarse the filter
(see section titled )" Cleaning The Filter "
Check the kitchen sink to make sure it is draining well.
If the problem is the kitchen sink not draining ,you may
need a plumber rather than a serviceman for dishwashers.
Use only the special dishwasher detergent to avoid
suds. If this occurs, open the dishwasher and let suds
evaporate. Add 1 gallon of cold water to the tub. Close
and latch the dishwasher, then Start any cycle to
wash
drain out the water . Repeat if necessary.
Always wipe up rinse-aid spills immediately.
Detergent with
colourant was used
Hard water minerals
The affected items are
not corrosion resistant.
A programme was not
run after dishwasher
salt was added.
Traces of salt have
gotten into the wash cycle.
The lid of the softer
is loose
r
Aspayarmis
knocking against
an item in a basket
Items of crockery
are loose in the
wash cabinet
This may be caused
by on-site installation
or the cross-section of
the piping.
Make sur e that the detergent is the one without
colourant.
To clean the interior, use a damp sponge with
dishwasher detergent and wear rubber gloves.
Never use any oth er cleaner than dishwasher
detergent for the risk of foaming or suds.
Always run the quick wash programme .
without any crockery in the dishwasher and
without selecting the Turbo fu nction (if present),
after adding dishwasher salt.
Check the lip .Ensure the fix is fine.
Interrupt the programme, and rearrange the items
which are obstructing the sp ay arm.r
Interrupt the programme,
and rearrange the items of croc kery.
This has no influence on the dishwasher function.
if in doubt, contact a suitably qualified plumber.
Page 23

The dishes were not
loaded correctly.
See notes in " Loading the Dishwasher Baskets ".
The programme was
not powerful enough.
Not enough detergent
was dispensed.
Item s are bl ocking
the path of sp ay arms.r
The filter combination
inthebaseofwash
cabinet is not clean or
is not correctly fitted.
This may cause
the sp ay ar m jets
r
to get blocked.
Combination of soft
water and too much
detergent.
Aluminum utensi ls
have rubbed against
dishes.
Dishes block
detergent cups.
Improper loading
Too little rins e-aid
Select a more intensive programme.
See" Wash Cycle Table ."
Use more detergent, or change your detergent.
Rearrange the items so that the sp ay can rotate freely.r
Clean and/or fit the filter combination correctly.
Clean the sp ay arm jets. See "Cleaning the Spray
Arms".
Use less detergent if you have soft water and select
a shortest cycle to wash the glassware and to get
them clean.
Use a mild abrasive cleaner to eliminate those marks.
Re-loadin g the dishes properly.
Load the dishwasher as suggested in the directions.
Increase the amount of rinse-aid/refill the rinse-aid
dispenser.
r
Dishes are removed
too soon
Wrong program
has been selected
Use o f cutlery with
a low-quality coating
Do not empty your dishwasher immedia tely after
washing. Open the door slightly so that the steam can
escape. Begin unloading the dishwasher only once t
he dishes are barely warm to the touch. Empty the low
basket first. This prevents water for m dropping of f
dishes in the upper basket.
In short program the washing temperature is lower.
This also lowers cleaning performance. Choose
a program with a long washing time.
Water drainage is more difficult with these items.
Cutlery or dishes of this type are not suitable for
washing in the dishwasher.
When some malfunctions come on, the appliance will display error codes to warn you:
Longer inlet time.
Overflow.
Faucets is not opened, or water intake is restricted,
or water pressure is too low.
Some element of dishwasher leaks .
If overflow occurs, turn off the main water supply before calling a service.
If there is water in the base pan because of an overfill or small leak,
the water should be removed before restarti ng the dishwasher.
Page 24

Height : 850mm
Width : 450mm
Dept h : 580mm
Water pressure: 0.04-1.0MPa
Power supply: see rating label
Capacity: 9 place settings
Page 25

Technical Data Sheet
Sheet of household dishwasher according to EU Directive 1059/2010:
Manufacturer
Type / Descrip tion
Standard place settings
En er g y e f f i ci ency class
Annual energy consumption
En ergy co ns u mpti o n o f t h e sta n dard cle anin g c y cle
Power consumptio n of off-mode
Power consumptio n of left-on mode
Annual water c onsumption
Dr yi n g effi ciency c lass
Standard clea ning cycle
Program durati on of t he standard cleani ng cycle
Noise level
Mounting
Could be built-in
WHI TE K NIGHT
DW0945WA
9
A+
222 kW h
0.7 7 kW h
0W
0.4 W
2940 litre
A
ECO 5 0
1min
49 dB(A) re 1 pW
Free standing
Yes
ć
60
Height
Width
De pth (with c onnec t o r s )
Powe r consumptio n
Rated voltage / frequency
Water pressure (flow pressure)
NOTE˖
A + + + (hi ghest efficiency) to D (lowest efficienc y)
Energy consumption 222 kWh per y ear, bas ed on 280 st andard cleaning cycles using cold water fill and
the consumption of the low power m odes. Act ual energy consumption will depend on how the appliance is used.
Water con sumption 2940 litres per year, bas ed on 28 0 standard cleaning cycles. Actual water consumption
will depend on how t he appliance is used.
A (highest efficiency) to G ( lowest efficiency)
This program is suitable for cl eaning soiled normally soiled tableware and that it is the
most efficient programme in t erms of its combined energy a nd water consumption for
th at type of t a blewa r e .
The device meets the E uropean standards and the directives in the current version at delivery:
- LVD 2006/95/EC
- EMC2004/108/EC
- EUP 2009/ 125/EC
Āā
Āā
85 cm
45 cm
58 cm
1760-2100 W
220-240 V~ 50 Hz
0.4-10 bar = 0.04-1 MPa
The above values have be en measured in accordance with standards under specified operating conditions .
Results may vary gr eatly according to quantity and pollution of the dishes, water hardness,
amount of detergent, etc.
The manual is based on th e European Union's standards and rules.
 Loading...