

3• Dispose of the crumbs, wipe out the remaining crumb from the removable Crumb Tray(11) back into the toaster.
4• Gently slide the Removable Crumb tray (11) back into its place.
Note :
Never operate the toaster without the removable Crumb Tray(11)
in place. Do not cover the removable Crumb Tray or any other part of
the toaster with foil. To avoid damage to the toaster heating elements,
never use any pointed or sharp utensils for cleaning the inside of the
toaster. Empty the Removable Crumb Tray (11) periodically.
W
arning :
Crumbs will accumulate in
the Removable Crumb Tray (11) and
could catch fire if not emptied periodically.
Fig.2
CARE AND MAINTENANCE
CARE AND MAINTENANCE
1• Unplug toaster from electrical outlet. Make sure that toaster is completely cool before cleaning.
2• Removable Crumb Tray (11) should be cleaned every 4-5 use (see
cleaning the Crumb Tray page 6).
3• Do not use harsh or abrasive cleaning agents. Outside surface may
wiped clean with a soft, damp cloth and dried thoroughly. If necessary,
a mild dish washing detergent may be applied to the cloth but not
directly to the toaster.
4• Do not immerse it in water or any other liquid.
5• Do not allow plastic wrappings to lay against the toaster is being
used. This will result in melting the plastic onto the inside surface of
your toaster.
CORD STORAGE
CORD STORAGE
1• Unplug the toaster from
the electrical outlet and let
the unit cool thoroughly.
2• Turn the toaster on its side
and wrap the cord around
the inside base for
storing.(fig.3).
Fig.3
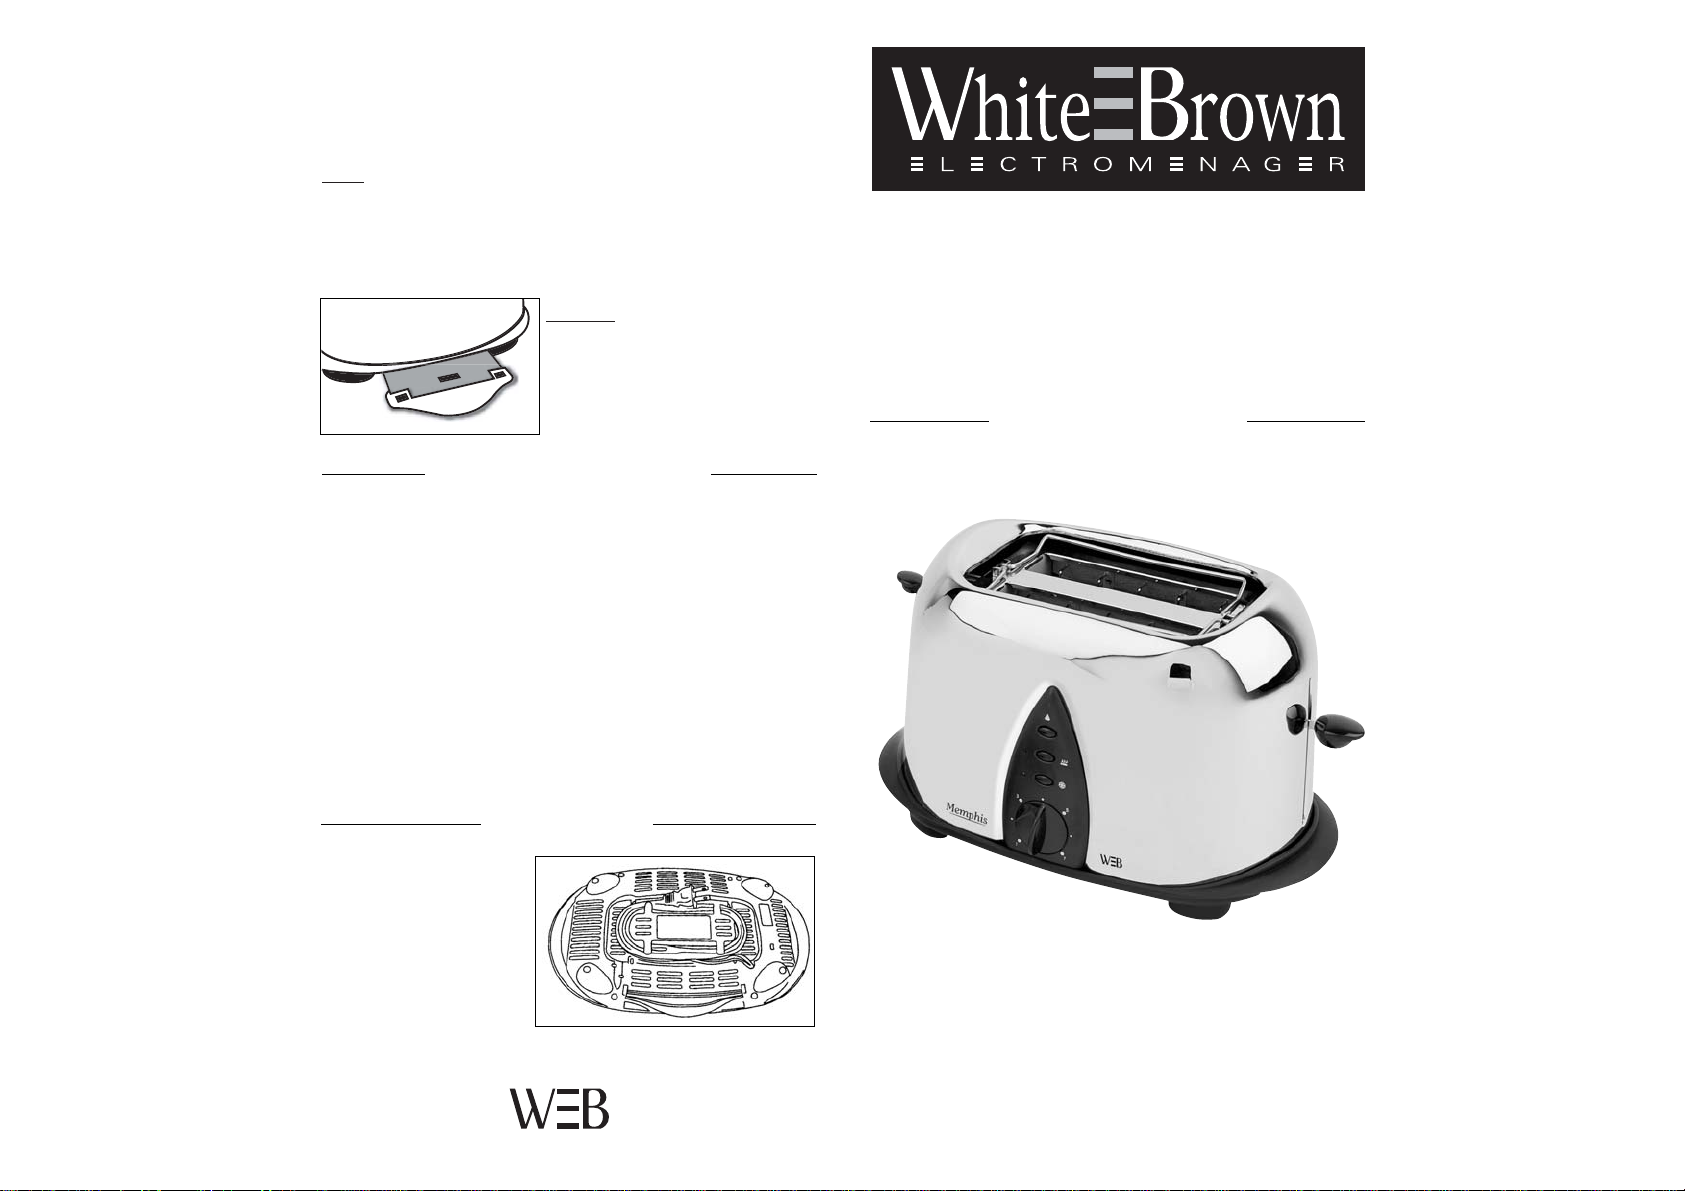
Grille-pain
Grille-pain
TToaster
oaster
TA 689 - MEMPHIS
MODE D’EMPLOI
MODE D’EMPLOI
USER MANUAL
USER MANUAL
07/05 - V3
IMPORTANT : Do not place food containers such as plates or foil pans
on top of the Bun Warmer Rack(12).
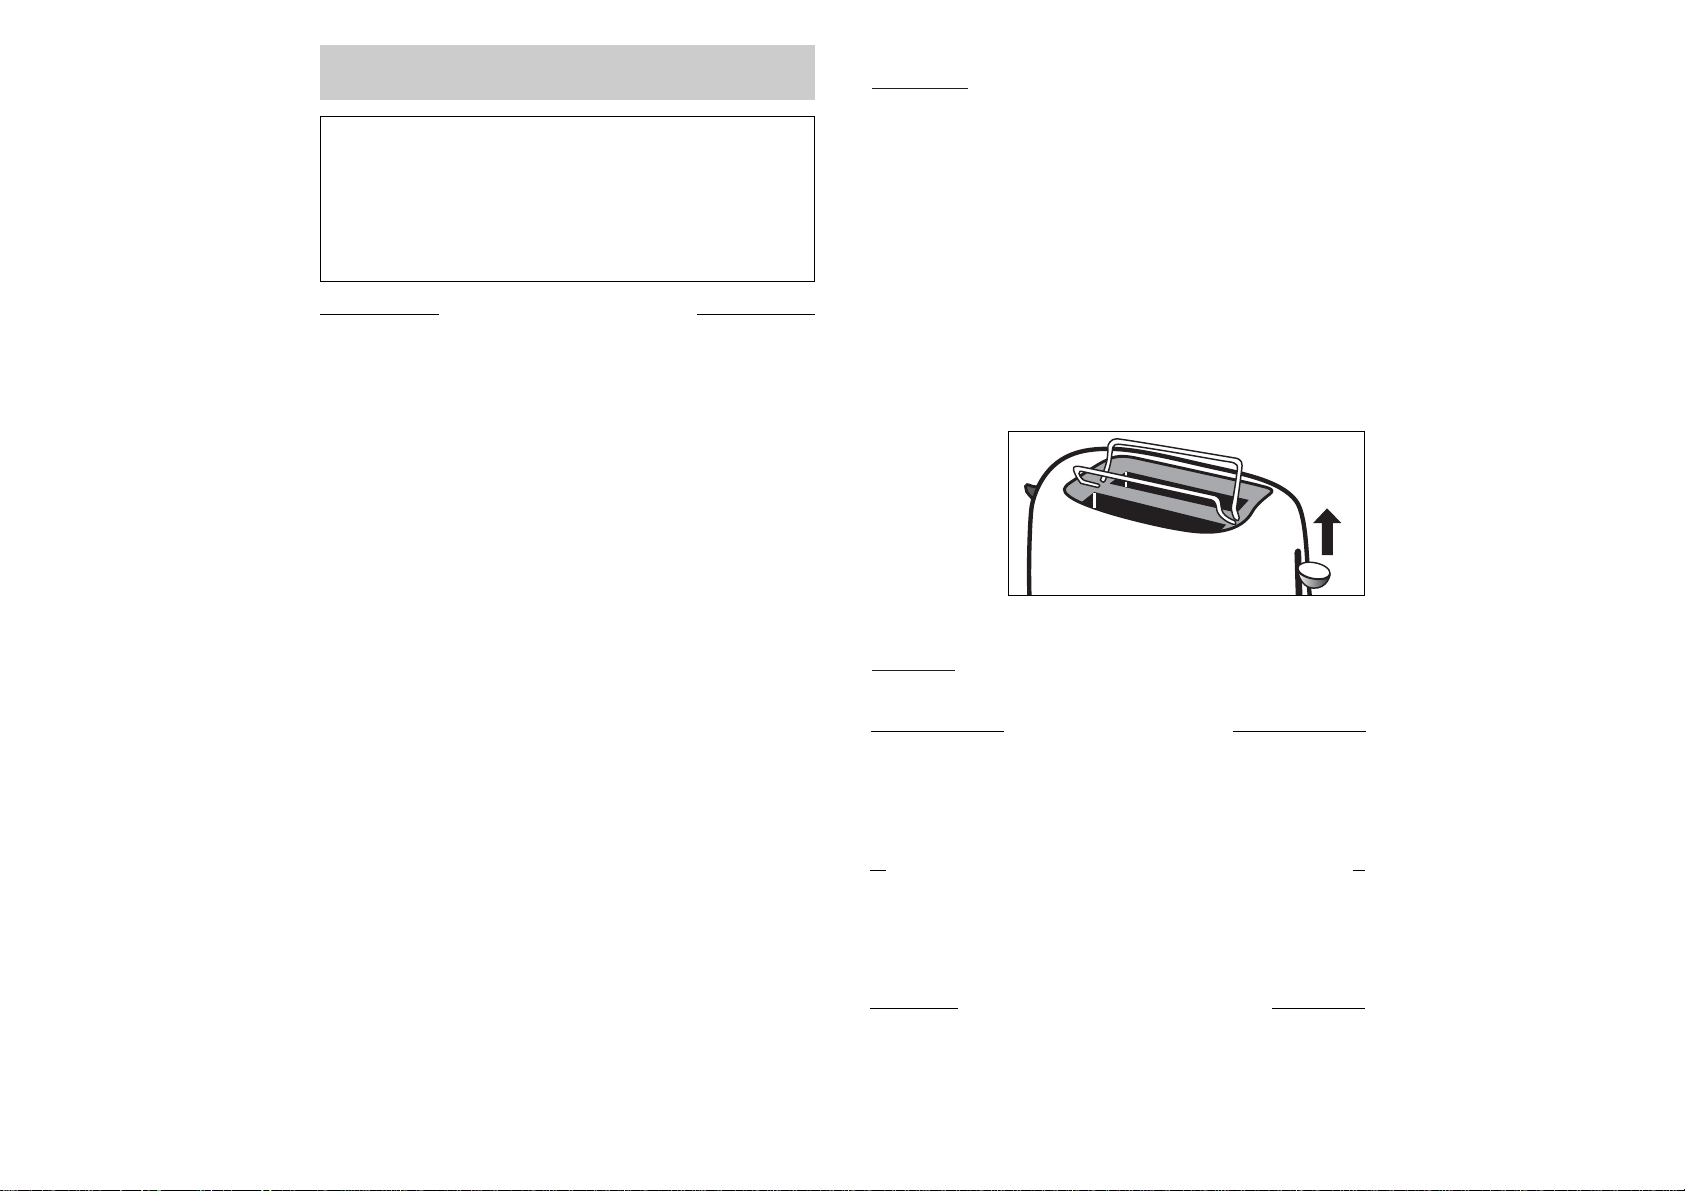
1• Lift Bun Warmer Lever(13).
2• Center the food on the Bun Warmer Rack(12).
3• Set the Browning Control Knob(2) to position 4-5 for crisping or lower for
warming.
4• Press down the Bread Carriage Lever(3). The Power On Light(9) will
come on.
5• When cycle is completed, carefully remove the crisp/warm food from
the Bun Warmer Rack(12).
6• Lower the Bun Warmer Rack(12) by pressing the Bun Warmer Lever(13)
down when finished using and during regular toasting. The Bun Warmer
Rack(13) should be at the rest position when toasting bread in the Bread
slots(1). Never put bread in the Bread Slots while heating buns on the Bun
Warmer Rack(12).
7• When finished
using the unit,
unplug the toaster
from the electrical
outlet and let cool
thoroughly before
cleaning and storing.
Fig.1
WARNING : Never put bread in the Bread Slots(1) while heating buns
on the Bun Warmer rack(12).
CANCELING A CYCLE
CANCELING A CYCLE
If at any time you wish to stop a cycle midway through the operation, press
the Cancel Button(8). This can be used during the Toasting, Defrosting,
reheating cycles as well as when using the Bun Warmer rack(12).
RESETTING THE BROWNING CONTROL KNOB(2)
RESETTING THE BROWNING CONTROL KNOB(2)
To change the setting on the Browning Control Knob(2), you must first
press the cancel Button(8), reset the Browning Control Knob(2) and
then proceed with the Toasting or defrosting cycles.
CLEANING THE CRUMB TRA
CLEANING THE CRUMB TRAYY
1• Unplug the toaster from the electrical outlet and allow to cool thoroughly.
2• Gently grip the Removable Crumb tray(11) and slide out from the
toaster.(fig.2)
LIFT
CONSEILS DE SECURITÉ
CONSEILS DE SECURITÉ
Lorsque vous utilisez des appareils électriques, des précautions de
base sont à prendre.
1• Lire attentivement toutes les instructions.
2• Ne touchez pas les surfaces chaudes, utilisez les poignées.
3• Ne pas mettre le cordon d’alimentation, la fiche, ou l’appareil dans
l’eau ou autre liquide.
4• Ne pas laisser l’appareil à la portée des enfants.
5• Débranchez l’appareil lorsque vous ne l’utilisez pas ou pour le
nettoyer. Attendez qu’il refroidisse avant toute opération d’entretien.
6• N’utilisez pas l’appareil si le cordon d’alimentation ou la prise sont
endommagés ou si l’appareil fonctionne mal ou s’il est tombé ou a été
endommagé. Retournez le au Service Après Vente pour examen ou
réparation. Voir le bon de garantie.
7• Toute utilisation d’accessoires non recommandés par le fabricant
peut provoquer des blessures.
8• Assurez-vous que le voltage indiqué sur la plaque signalétique de
l’appareil correspond à celui du lieu d’utilisation.
9• Ne pas utiliser l’appareil à l’extérieur.
10• Ne pas laisser le cordon pendre sur le coin de la table ou du plan de
travail, ni toucher des surfaces chaudes.
11• Ne pas mettre l’appareil sur ou près d’une gazinière ou de plaques
électriques, ni dans un four chaud.
12• N’introduisez pas d’aliments trop gros, ni de feuilles d’aluminium, ni
d’ustensiles dans l’appareil ; cela risquerait de provoquer un court-circuit ou un incendie.
13• N’introduisez pas de pain (ou autre aliment) beurré, ni de sandwich ;
cela pourrait provoquer un incendie.
14• N’introduisez pas des tranches de pain enroulées ou non parfaitement plates ; cela pourrait provoquer un blocage du système d’éjection.
15• Ne pas couvrir l’appareil, ne pas le poser près de rideaux ou de tissus pour ne pas provoquer d’incendie.
16• Débranchez toujours l’appareil avant d’essayer d’enlever des aliments qui seraient restés bloqués dans le grille-pain.
WHITE & BROWN vous félicite d’avoir choisi ce produit
et vous remercie de votre confiance.
Pour votre confort et votre sécurité, votre article a été vérifié à toutes les
étapes de sa fabrication et a passé avec succès tous nos tests de qualité.
Nos produits sont conçus pour vous plaire tant par leur design que par leur
facilité d’utilisation et dans l’objectif constant de vous apporter complète
satisfaction.
FRANÇAIS
FRANÇAIS
DEFROSTING
DEFROSTING
The Defrost Button (6) is designed to first defrost and then toast the
bread- this slightly extends the toasting cycle.
1• Plug toaster into electrical wall outlet.
2• Insert slices of bread into toaster.
3• Select the Browning control Knob(2) to desired setting.
- Setting 1-3 : refrigerated breads and thinner frozen items such as
pancakes.
- Setting 3-5 : toaster pastries, frozen waffles and refrigerated bagels
- Setting 5-7 : thicker frozen items (such as bagels), hand cut breads
and thick French toast.
4• Press the Bread Carriage Lever(3) until it locks into position and the
Power On Light(9) comes on.
5• Press the Defrost Button(6), Defrost Light(7) will come on. Bread will
defrost first, and then go right into toasting cycle.
6• When the defrost / toasting cycle is complete, the toaster will raise
the bread. If you wish to stop the cycle before it is finished, simply
press the Cancel Button(8) to interrupt.
7• After use, unplug the toaster from the electrical outlet and let cool
thoroughly before cleaning.
REHEA
REHEA
TING
TING
1• Plug toaster into wall electrical outlet.
2• Insert the bread into slots.
3• Press Reheat Button Carriage Lever(3) until it locks into the position
and Power On Light(9) comes on.
4• Press Reheat Button(4) once. Reheat Light(5) will come.
5• Bread will pop up after the Reheating cycle is complete.
6• After use, unplug the toaster from the electrical outlet and let cool
thoroughly before cleaning and storing.
Note :
You do not have to set the Browning Control Knob(2) for this
cycle.
W
ARNING : Never use metal utensils to remove bread from the toaster.
BUN W
BUN W
ARMER RACK(12)
ARMER RACK(12)
The Bun Warmer Rack can be used to crisp buns which have become
limp or to warm rols or croissants that are too large to fit inside the
toaster slots. For faster warming or to prevent over browning, cut the
bun/roll in half.
Note :
Foods being warmed or crisped should not completely cover the
toaster top, allow space for adequate air flow.
17• Ne pas couvrir le tiroir ramasse-miettes, ni le grille-pain avec une
feuille d’aluminium ; cela pourrait provoquer un incendie.
18• Ne pas utiliser d’autre prise et cordon d’alimentation que ceux fournis. Si nécessaire, faites les réparer par un technicien agréé.
19• Ne pas enrouler le cordon autour du grille-pain, utilisez les clips de
rangement du cordon sous l’appareil.
20• Cet appareil a été conçu pour un usage domestique uniquement.
21• Ne pas utiliser l’appareil à d’autres fins que celles décrites dans ce
mode d’emploi.
22• Conserver ce mode d’emploi.
RECOMMANDA
RECOMMANDA
TION P
TION PARAR
TICULIERE
TICULIERE
Cet appareil est équipé d’un cordon court afin d’éviter les étranglements et les chutes. Il est possible d’utiliser une rallonge si la puissance électrique de cette rallonge est égale ou supérieure à celle du
grille-pain. Utilisez uniquement une rallonge égale ou supérieure à 15
ampères. Faites en sorte que la rallonge ne pende pas sur le bord de la
table ou du plan de travail afin d’éviter que des enfants ne tirent dessus ou ne s’étranglent avec accidentellement.
PRINCIP
PRINCIP
AUX COMPOSANTS
AUX COMPOSANTS
1
10
11
3
12
13
8
5
7
6
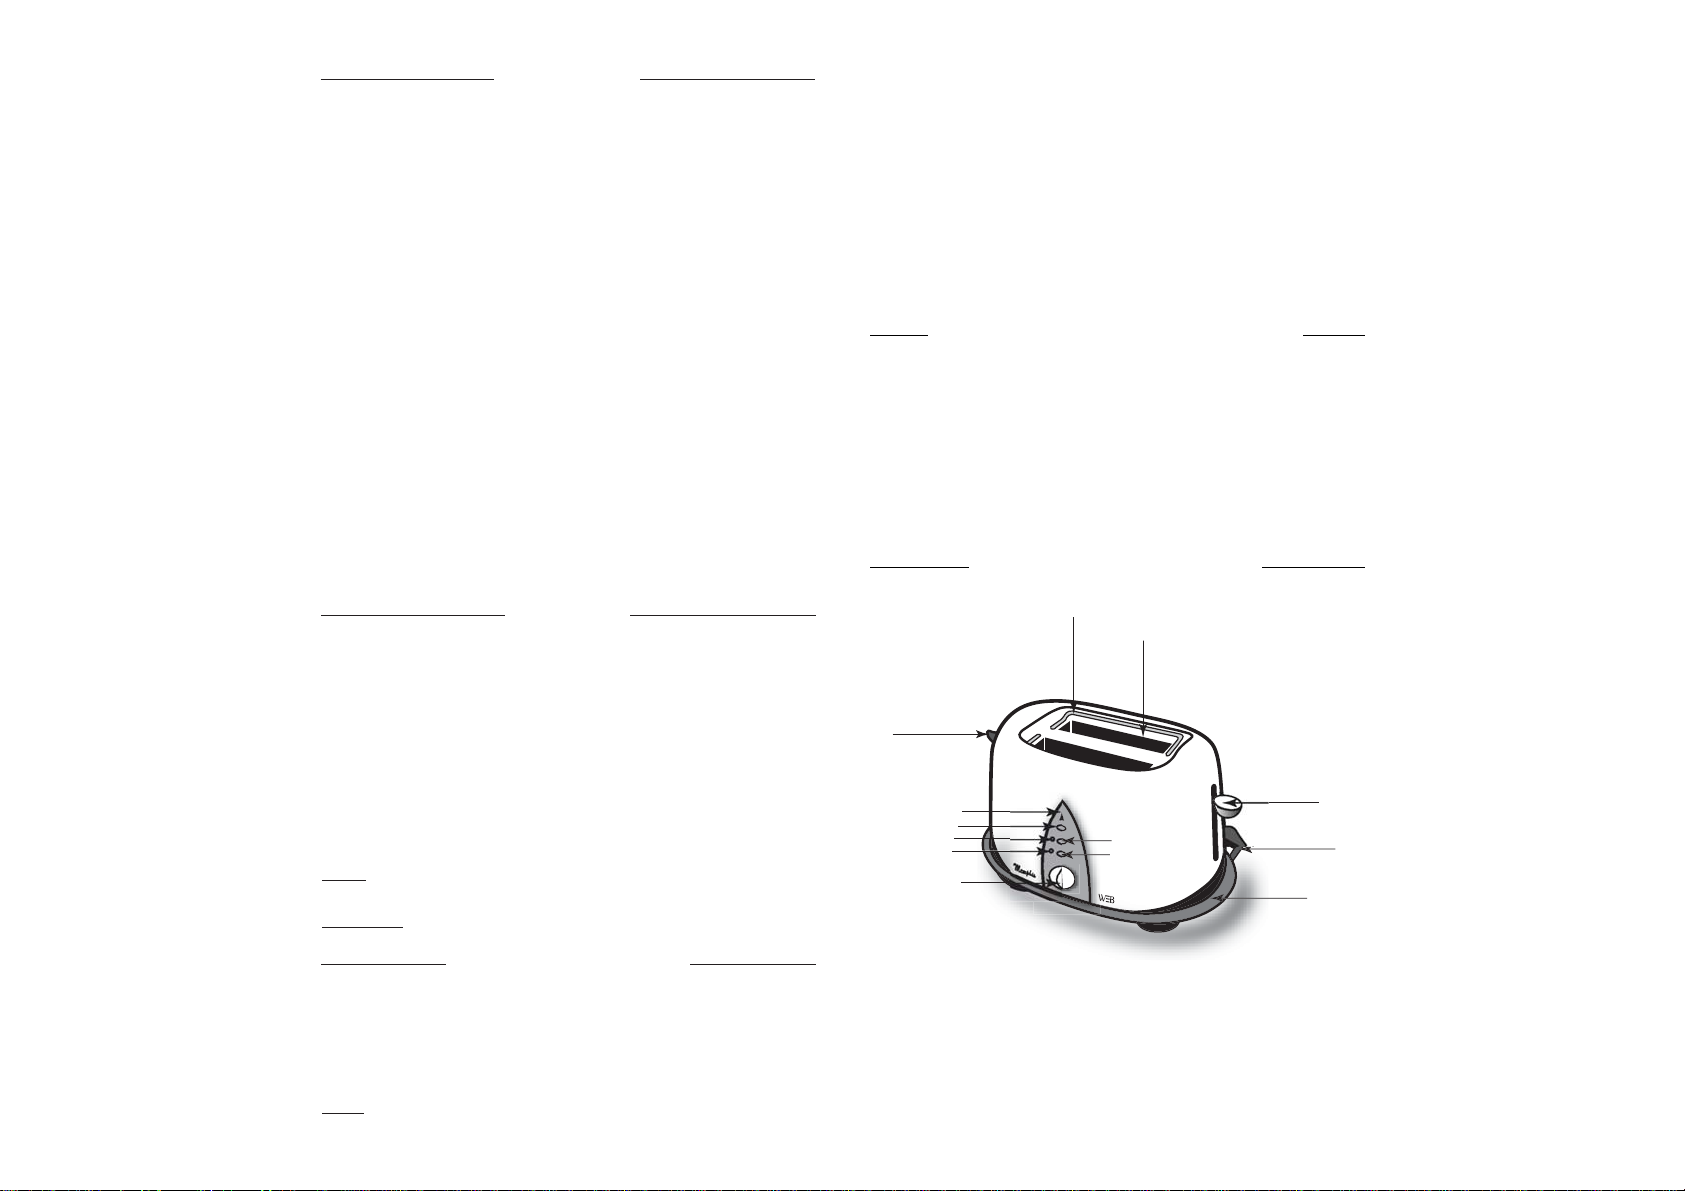
1. Fentes pour pain
2. Thermostat
3. Levier de descente du pain
4. Bouton de réchauffage
5. Témoin de réchauffage
6. Bouton de décongélation
7. Témoin de décongélation
8. Touche annulation
(éjection automatique)
9. Témoin de fonctionnement
10. Poignée
11. Tiroir ramasse-miettes amovible
12. Panier chauffe-croissant
13. Levier du chauffe-coissant

the Cancel Button(8) to interrupt.
9• After use, unplug the toaster from the electrical outlet and let it cool
thoroughly before cleaning.
Note :
The Bread carriage Lever(3) will not lock down unless the toas-
ter is connected to the electrical supply.
CAUTION :
1• relatively dry slices of bread that has already been toasted once,
will become brown much more quickly and may, under certain circumstances, catch fire.
2• Do not toast food products or toaster pastries with frosting or runny
fillings tha could drip into the toaster and cause possible damage or
result in the risk of fire.
Note :
Should a piece of bread be come trapped in the slot, the
automatic safety cutoff will turn the toaster " Off ", avoiding a fire
hazard. To remove the bread, unplug the toaster and let it cool thoroughly. Carefully remove the bread without touching the heating
elements.
CAUTION :
Never use metal utensils to remove bread from the toaster.
You may damage the heating elements.
SETTINGS ON BROWNING CONTROL KNOB(2)
SETTINGS ON BROWNING CONTROL KNOB(2)
Please note that when toasting different breads, the different moisture
levels from one type to another can result in varying toasting times.
• If bread is slightly dry, use a lower setting than you normally would.
• For very fresh bread or whole wheat bread, use a higher setting than
normal.
• Breads with uneven surfaces (such as Englich muffins) will require a
longer toasting time.
• When toasting raisin (or other fruit bread), remove any loose fruit
from the surface before placing into the toaster.
• Sweet bread products (tea cakes, raisin bread,…) brown much
quicker than regular bread, and should be toasted on the lighter
setttings.
• Thick slices of bread (1/2 “ to 1” in thickness) may require 2 cycles of
toasting.
• Do not use torn, curled up or misshapen slices of bread as these may
jam the ejection mechanism and could catch fire.
CARACTERISTIQUES
CARACTERISTIQUES
Ce grille-pain comporte de nombreux équipements afin d’assurer un fonctionnement optimum.
• Fentes extra-larges pour recevoir des gaufres, des tranches
de pain épaisses, etc…
• Thermostat électronique pour
obtenir des pains grillés et des
toasts à votre goût
• Arrêt automatique des résistances chauffantes si le chariot se bloque
• 3 boutons de contrôle électroniques :
- le bouton annulation (8) arrête automatiquement le grille-pain
- le bouton réchauffage (4) réchauffe vos toasts sans les re-griller
- le bouton décongélation (6) décongèle vos pains, toasts et gaufres
congelés.
• Support de réchauffage pour réchauffer vos croissants, petits pains, etc…
• Tiroir ramasse-miettes pour un nettoyage facile et rapide
• Enrouleur de cordon pour un rangement facile du cordon d’alimentation électrique.
AAVVANT LA PREMIERE UTILISA
ANT LA PREMIERE UTILISA
TION
TION
A• Assurez-vous que vous avez lu et compris toutes les consignes de
sécurité.
B• Déballez l’appareil, enlevez tous les papiers et plastiques. Vérifiez
qu’il ne reste pas de morceaux d’emballage ou de notices à l’intérieur
des fentes. Assurez-vous que le tiroir ramasse-miettes est bien positionné (reportez-vous à la rubrique “Enlever, nettoyer et replacer le
tiroir ramasse-miettes”.
C• Utilisez un chiffon doux pour essuyer l’extérieur du grille-pain.
D• Faites chauffer deux fois le grille-pain à la température la plus élevée pour enlever les éventuels résidus du process de fabrication (procéder à cette opération grille-pain vide).
E• Ne rien introduire dans les fentes avant de brancher le grille-pain.
Remar
que : Lorsque vous utilisez le grille-pain pour la première fois,
une légère fumée peut se produire. Elle est totalement inoffensive et
disparaîtra après quelques utilisations.
COMMENT UTILISER VOTRE GRILLE-P
COMMENT UTILISER VOTRE GRILLE-P
AIN
AIN
1• Posez le grille-pain sur une surface plane et stable, loin de toute
surface inflammable (rideaux par exemple, etc…)

BEFORE USING FOR THE FIRST TIME
BEFORE USING FOR THE FIRST TIME
A• Make sure that you have read and understand the important
safeguards section.
B• Remove alll packing paper and plastic unit. Check inside the bread
slots to make sure that no packaging materials or literature have fallen
inside. Make sure crumb tray is in correct position.(see " removing,
cleaning and replacong the crumb tray section " on page 6).
C• Using a soft cloth, gently wipe away all the dust particles from outside of toaster.
D• In order to remove any possible resisues from the manufacturing
process, the toaster should be heated twice at the highest temperature (with the toaster empty).
E• Toaster slots should be empty before you plug into wall outlet.
Note :
When using the toaster for the first time, a light smoke may
appear. This is completely harmless and will disappear after a few
uses.
HOW TO USE YOUR TOASTER
HOW TO USE YOUR TOASTER
1• Position the toaster on a firm, level surface, away from any
flammable surfaces (such as curtains,…).
2• Plug the toaster into electrical wall outlet.
3• Insert slices of bread in the slots(1) (maximun thickness 25mm/1
inch).
4• Select the desired degree of toasting using the Browning control
Knob(2)(#1= being the lightest and #7= the darkest). Should you find
that the setting that you have selected is too dark for your taste, press
the Cancel button(8) and reset the Browwning control knob(2).
5• Fully depress the Bread Carriage lever(3) until it engages and locks
into position. The Bread Carriage Lever(3) will not lock down unless the
toaster is plugged into the electrical supply. Power on light(9) will light
up.
6• When the toasting cycle is completed, the toast will automatically
pop up. For small items (such as English muffins, the Bread Carriage
Lever(3) may be raised to allow for these items to be removed after
toasting cycle is completed.
7• Should find that the Browning Control Kob(2) setting is too dark,
press the Cancel button(8), reset the Browning Control Knob(2) setting
and press the Bread Carriage Lever(3) down until it locks into position
and Power On light(9) comes on. You must press the Cancel Button(8)
when resetting the Browning Control Knob(2) at all times.
8• When the Toasting Cycle is complete, the toaster will raise the
bread. If you wish to stop the cycle before it is finished, simply press
2• Branchez le grille-pain
3• Insérez les tranches de pain dans les fentes (1) (épaisseur maximum =
25 mm).
4• Sélectionnez le degré de température souhaité avec le bouton de
commande (2) (Position 1 = légèrement grillé / Position 7 = extrêmement grillé). Appuyez sur la touche annulation (8) si vous pensez que
votre pain sera trop grillé et repositionnez le bouton de commande (2)
sur le nouveau degré souhaité.
5• Appuyez sur le levier (3) jusqu’à enclenchement. Le chariot ne s’enclenchera que si l’appareil est branché. Le témoin lumineux (9) s’allume.
6• Lorsque le temps de chauffe est terminé, le toast remonte automatiquement. Pour les petits aliments (muffins anglais par exemple), il est
possible , lorsque le cycle de chauffe est terminé, de remonter le levier
pour prendre les aliments.
7• Si vous pensez que le temps de chauffe sélectionné est trop long,
appuyez sur la touche annulation (8) et positionnez le bouton de
commande (2) sur la nouvelle position, puis abaissez le levier (3)
jusqu’à enclenchement. Le témoin lumineux (9) s’allume. Vous devez
appuyer sur la touche annulation (8) à chaque fois que vous
repositionnez le bouton de commande (2).
8• Lorsque le temps de chauffe est terminé, le toast remonte automatiquement. Si vous souhaitez arrêter l’appareil alors que le temps de
chauffe n’est pas terminé, appuyer sur la touche annulation (8).
9• Après utilisation, débranchez l’appareil et laissez le refroidir complètement avant de le nettoyer ou de le ranger.
Remar
que : Le chariot ne s’enclenchera que si l’appareil est branché.
A
TTENTION :
1. Des tranches de pain relativement sèches ou déjà grillées grilleront plus et plus vite et peuvent dans certaines circonstances s’enflammer.
2. N’introduisez pas dans le grille-pain des aliments contenant des
glaçages ou des aliments assez liquides qui pourraient tomber au
fond du grille-pain et l’endommager et s’enflammer.
Remar
que : Si un morceau de pain se bloque dans les fentes, l’arrêt auto-
matique arrêtera l’appareil et évitera un début d’incendie. Pour enlever le
pain, débranchez l’appareil et laissez le refroidir complètement. Retirer le
pain avec précaution sans toucher les résistances.
A
TTENTION : Ne jamais utiliser d’ustensiles métalliques pour retirer
du pain du grille-pain. Vous risqueriez d’endommager les résistances.

MAIN COMPONENTS
MAIN COMPONENTS
FEA
FEA
TURES
TURES
This toaster is equipped with
many safety features to give
you optimum performance.
• Extra wide slot to hold waffles,
thick slices of bread, bagels,…
• Electronic thermostat ensures
precise browning every time.
• Automatic safety cutoff turns
heating elements off it bread
carriage gets stuck in toaster.
• 3 Electronic Control Buttons :
- Cancel button (8) instantly stops toasting.
- Reheat button (4) warms toast without additionnal browning.
- Defrost button (6) defrosts & toasts bread, bagels, waffles...in one step.
• Warming rack to warm croissants, buns,…
• Crumb tray makes cleanup easy and quick
• Cord wrap for easy storage
1. bread slots
2. browning control knob
3. bread carriage lever
4. reheat button
5. reheat light
6. defrost button
7. defrost light
8. cancel button
9. power on light
10. poignée
11. removable crumb handle
12. bun warmer rack
13. bun warmer level
1
10
11
3
12
13
8
5
7
6
Sélection du bouton de commande (2) :
Veuillez noter que le résultat peut varier lorsque vous grillez des pains
différents avec des degrés d’humidité différents.
• Si le pain est plutôt sec, utilisez les positions de sélection les plus basses.
• Pour du pain frais ou du pain de mie, utilisez une sélection plus forte.
• Les pains avec des surfaces non planes (muffins par exemple) nécessiteront des temps de chauffe plus longs.
• Lorsque vous grillez des pains aux raisins (ou avec d’autres fruits), enlevez d’abord les fruits en surface qui pourraient tomber dans le grille-pain.
• Les pains sucrés (gâteaux à thé, pain aux raisins, etc…) grillent plus
vite. Ils devront être grillés avec les temps de chauffe les moins longs.
• Les tranches de pain épaisses (2 ou 2,5 cm) peuvent nécessiter deux
cycles de chauffe.
DECONGELA
DECONGELA
TION
TION
Le bouton décongélation (6) est prévu pour décongeler puis griller le
pain – il allonge légèrement le temps de chauffe.
1• Branchez l’appareil
2• Introduisez les tranches de pain dans le grille-pain
3• Sélectionner la position désirée avec le bouton de commande (2).
- Position 1 à 3 : Pain réfrigéré ou fines tranches congelées
- Position 3 à 5 : Viennoiseries, gaufres congelées ou baguette réfrigérée.
- Position 5 à 7 :Tranches épaisses congelées (baguette par exemple)
et tranches coupées manuellement.
4• Appuyez sur le levier (3) jusqu’à enclenchement, le témoin lumineux
(9) s’allume.
5• Appuyez sur le bouton décongélation (6). Le témoin de décongélation (7) s’allume. Le pain sera d’abord décongelé, puis grillé.
6• Lorsque le cycle de décongélation/grill est terminé, le pain remonte.
Si vous souhaitez arrêter le cycle avant la fin, appuyez sur la touche
annulation (8).
7• Après utilisation, débranchez l’appareil et laissez le refroidir complètement avant de le nettoyer ou de le ranger.
RECHAUFF
RECHAUFF
AGE
AGE
1• Branchez l’appareil
2• Introduire le pain dans la (les) fente(s)
3• Appuyez sur le levier (3) jusqu’à enclenchement. Le témoin lumineux
(9) s’allume.

5• Unplug from outlet when not in use and before cleaning. Allow to
cool before putting or taking off parts.
6• Do not operate any appliance with a damaged cord or plug, or after
the appliance malfunctions, has been dropped or damaged in any manner. Return the appliance to the manufacturer for examination or repair
or adjustment. Always call the manufacturer first if the appliance
needs servicings. See warranty.
7• The use of accessory attahcments not recommended by the appliance manufacturer may cause injuries.
8• Be sure that input voltage is appropriated to the use.
9• Do not use outdoors.
10• Do not let cord hang over the edge of the table, counter or touch
hot surfaces.
11• Do not place on or near a hot gas or electric burner, or in a heated
oven.
12• Oversize foods, metal foil packages or ustensils must not be inserted in a toaster as they may involve a risk of fire or electrical shock.
13• Do not toast buttered items or try to make toasted sandiwhes in the
toaster, as this will cause or result in a fire.
14• Do not use torn, curled up, or misshapen slices of bread in the toaster as these may jam the eject mechanism.
15• A fire may occur if toaster is covered or touching flammable material, including curtains, draperies, wallsand the like when in operation.
16• Always unplug toaster first before attempting to dislodge food that
is jammed in the toaster.
17• Do not cover crumb tray or any part of toaster with metal foil. This
will cause overheating and risk of fire.
18• Use only with plug and cord provided. If it is necessary to repair,
ask to an certificated technician.
19• Do not wrap the power supply cord around the toaster, use the cord
storage clips underneath the base.
20• This appliance is only for domestic use.
21• Only use it for toasting. Refer to the notice.
22• Save the notice.
SPECIAL SAFETY INSTRUCTIONS
SPECIAL SAFETY INSTRUCTIONS
This appliance has a short cord to reduce hazards of becoming
entangled or tripping over a longer cord. An extension cord may be
used if the electrical rating of the extension cord is equal to or greater
than the rating of the toaster. Use only an extension cord rated 15
amperes or greater. Care must be taken to arrange the extension cord
so that it will not drape over countertop or tabletop where it can be
pulled on by children or tripped over unintentionnally.
4• Appuyez sur la touche de réchauffage (4). Le témoin lumineux (5)
s’allume.
5• Le pain remonte automatiquement lorsque le cycle de réchauffage
est terminé. Le levier (3) peut être relevé pour prendre plus facilement
les petits morceaux de pain.
6• Après utilisation, débranchez l’appareil et laissez le refroidir complètement avant de le nettoyer ou de le ranger.
Remar
que :
vous n’avez pas besoin de sélectionner le bouton de com-
mande (2) pour la fonction réchauffage.
SUPPOR
SUPPOR
T CHAUFFE-CROISSANT (12)
T CHAUFFE-CROISSANT (12)
Le support chauffe-croissant peut être utilisé pour chauffer des croissants ou des petits pains trop gros pour pouvoir être introduits dans les
fentes. Pour un réchauffage plus rapide ou pour éviter qu’ils ne soient
trop grillés, coupez les petits pains en deux.
Remar
que :
les croissants (ou petits pains) ne doivent pas couvrir com-
plètement la surface du grille-pain pour permettre à l’air de circuler.
IMPOR
TANT : Ne posez pas d’assiettes, ni de feuille d’aluminium sur
le support chauffe-croissant (12).
1• Relevez le levier du chauffe-croissant (13).
2• Centrez le croissant sur le support (12).
3• Positionnez le bouton de commande (2) sur la position 4 ou 5 pour
obtenir un croissant croustillant ou sur une position inférieure pour
chauffer uniquement.
4• Abaissez le levier (3). Le témoin lumineux s’allume (9).
5• Lorsque le cycle est terminé, retirez le croissant du support.
6• Rabaissez le support chauffe-croissant (12) en appuyant dessus. Le
support chauffe-croissant doit rester en position basse lorsque vous
placez du pain dans les fentes (1). Ne jamais introduire de pain dans les
fentes (1) lorsque vous utilisez le chauffe-croissant (12).
7• Lorsque vous n’utilisez plus le chauffe-croissant, débranchez
l’appareil et laissez
le refroidir complètement avant de le
nettoyer ou de le
ranger.
Figure 1
LIFT
HAUT

complètement. Si nécessaire, il est possible d’appliquer du produit
vaisselle sur un chiffon, mais pas directement sur l’appareil.
4• Ne plongez jamais l’appareil dans l’eau ou tout autre liquide.
5• Veillez à ce qu’il n’y ait pas d’objets en plastique en contact avec le
grille-pain.
RANGEMENT DU CORDON D’ALIMENT
RANGEMENT DU CORDON D’ALIMENTAA
TION
TION
1. Débranchez l’appareil et laissez le refroidir complètement.
2. Retournez le grille-pain et enroulez le cordon (fig. 3).
Figure 3
IMPOR
IMPORTT
ANT SAFEGUARDS
ANT SAFEGUARDS
When using electrical appliances, basic safety precautions should
always be followed, including the following :
1• Read all instructions carefully.
2• Do not touch hot surfaces. Use handles or knobs.
3• Do not immerse cord, plug or the appliance into water or other liquid.
4• Close supervision is necessary when any appliance is used by or
near children.
ENGLISH
ENGLISH
Congratulations for having chosen this WHITE & BROWN product,
and thank you for trusting us. For your comfort and safety,
your appliance has been checked at every step of manufacturing and has
successfully gone through all our tests of quality.
WHITE & BROWN creates original products to please you,
as far as design and easiness to use are concerned
in order to give you complete satisfaction.
ATTENTION : Ne jamais rien introduire dans les fentes (1) lorsque
vous utilisez le chauffe-croissant.
ANNULER UN CYCLE
ANNULER UN CYCLE
A tout moment, vous pouvez annuler un cycle en appuyant sur la
touche annulation (8). Cette touche peut être utilisée pendant les
cycles grill, décongélation et réchauffage et lorsque vous utilisez le
chauffe-croissant.
MODIFIER LA POSITION DU BOUTON DE COMMANDE (2)
MODIFIER LA POSITION DU BOUTON DE COMMANDE (2)
Pour modifier la position du bouton de commande (2), vous devez
d’abord appuyer sur la touche annulation (8), puis procéder à la nouvelle sélection.
NETTOY
NETTOY
AGE DU TIROIR RAMASSE-MIETTES
AGE DU TIROIR RAMASSE-MIETTES
1• Débranchez l’appareil pour qu’il refroidisse.
2• Tirez légèrement sur le tiroir ramasse-miettes et retirez-le (fig. 2).
3• Enlevez les miettes, lavez le tiroir avec du liquide vaisselle, séchez-
le avant de le replacer.
4• Replacez le tiroir ramasse-miettes dans le grille-pain.
Remar
que : Ne faites jamais fonctionner le grille-pain sans le tiroir
ramasse-miettes. Ne couvrez pas le tiroir ramasse-miettes (11) ni toute
autre pièce du grille-pain. Pour éviter d’endommager les résistances
chauffantes, n’utilisez jamais d’ustensiles pointus pour le nettoyer.
Videz le tiroir ramasse-miettes régulièrement.
A
TTENTION : Trop de miettes
accumulées dans le tiroir
ramasse-miettes pourrait provoquer
un incendie. Videz-le régulièrement.
Figure 2
ENTRETIEN
ENTRETIEN
1• Débranchez l’appareil. Assurez-vous que le grille-pain est
totalement froid avant de le nettoyer.
2• Le tiroir ramasse-miettes doit être nettoyé toutes les 4 ou 5
utilisations (voir Nettoyage du tiroir ramasse-miettes).
3• N’utilisez pas de produits détergents abrasifs. Les surfaces
extérieures doivent être nettoyées avec un chiffon doux et séchées
 Loading...