

Whirlpool XHS1000XX Installation Guide
Adjustable Clothes Rack Installation Instructions
Porte-vêtements réglable – Instructions d’installation
Table of Contents
TOOLS AND PARTS .........................................................1
USE AND LOCATION REQUIREMENTS ...........................2
ASSEMBLY INSTRUCTIONS ................................................2
INSTALLATION INSTRUCTIONS .........................................5
WARRANTY..............................................................................6
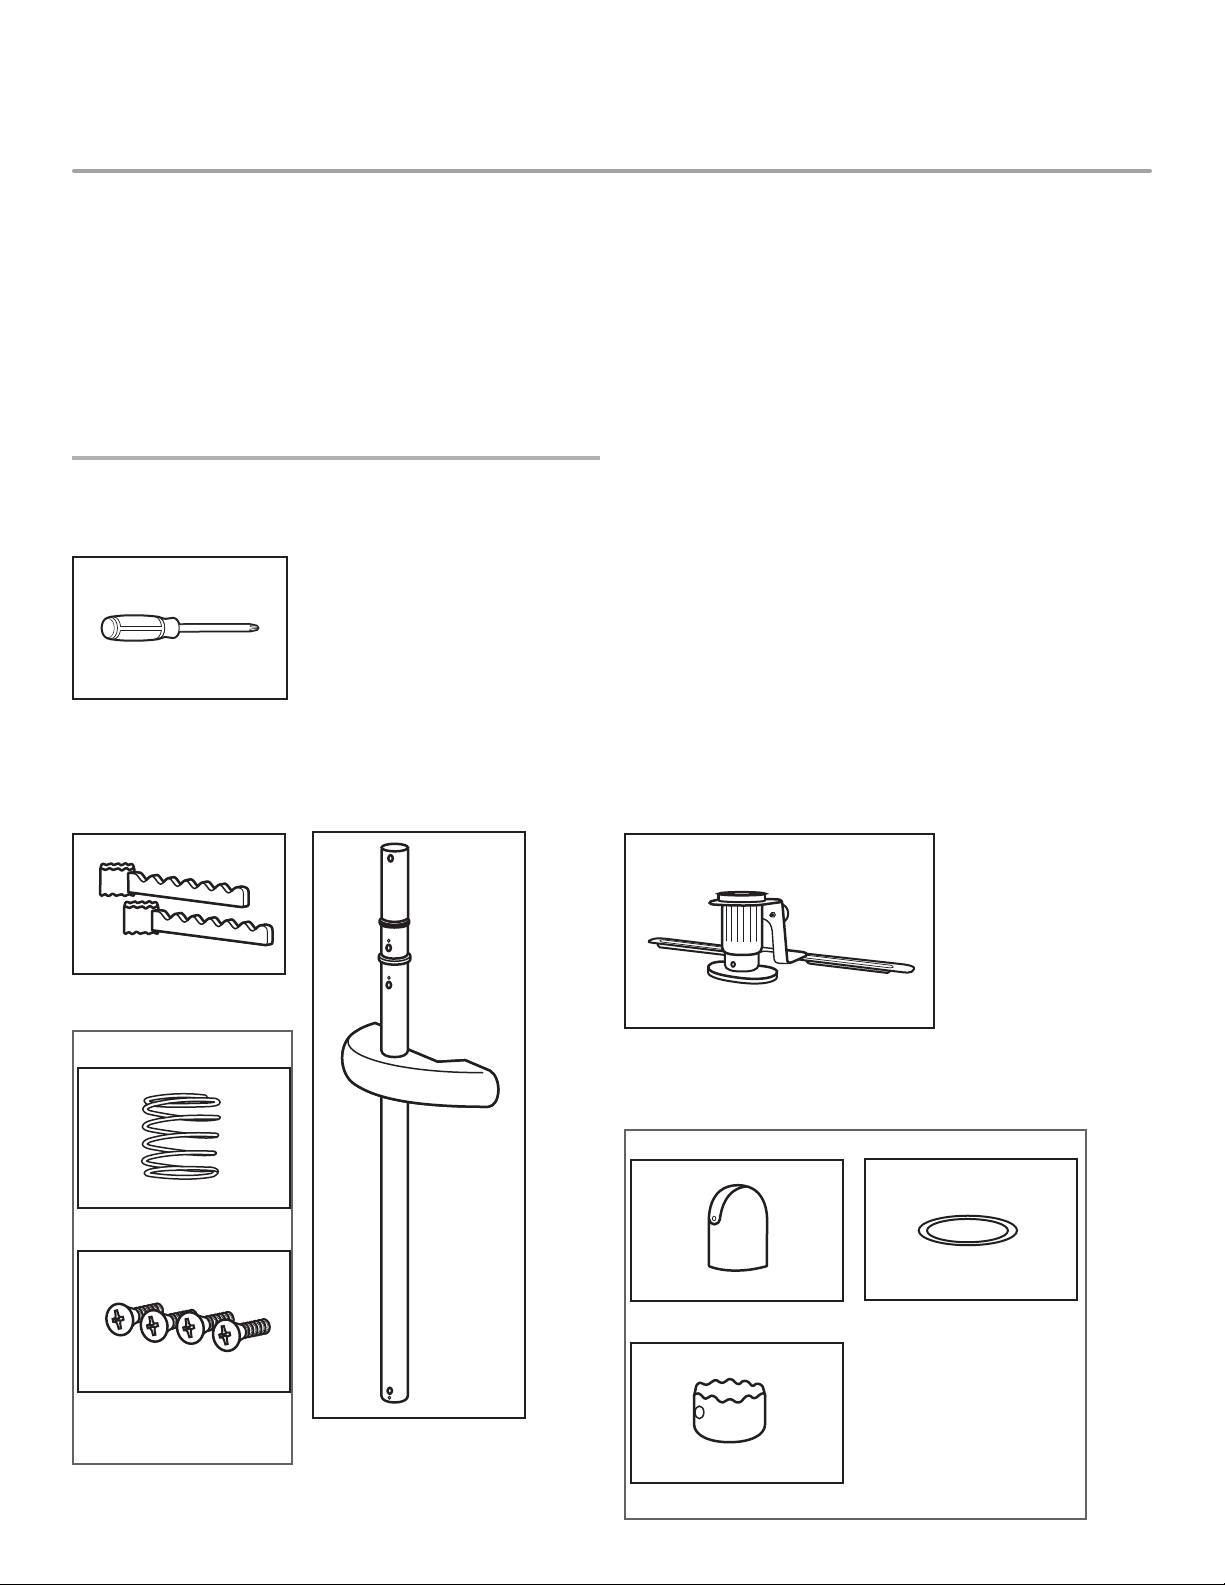
TOOLS AND PARTS
Gather the required tools and parts before starting installation.
Tools needed:
#2 Phillips screwdriver
Table des matières
OUTILLAGE ET PIÈCES ..................................................7
UTILISATION ET EMPLACEMENT
D’INSTALLATION – EXIGENCES À RESPECTER ...........8
INSTRUCTIONS D’ASSEMBLAGE .....................................8
INSTRUCTIONS D’INSTALLATION ...................................11
GARANTIE ..............................................................................12
Parts Included:
Hanger arms (2)
Bagged together
Top cap spring (1)
Adjustable Clothes Rack foot
assembly (1)
Bagged together
Top cap (1)
Top washer (1)
Screws (4*)
* 3 used for assembly
+ 1 spare
W10103459C
Adjustable Clothes Rack
main assembly (1)
Arm support collar (1)
USE AND LOCATION
39"
(991 mm)
12.5"
(318 mm)
79"
(2007 mm)
12.5"
(318 mm)
3"
(76 mm)
REQUIREMENTS
The Adjustable Clothes Rack can be installed onto most full
size front load or top load washers or dryers in the following
congurations:
KEY PARTS
Top cap
Spring
Top washer
Hanger arms
Arm support collar
Top pole
Typical top-load
installation
Typical front-load
with pedestal
installation
Spacing Requirements
Typical front-load
installation
Typical stacked
front-load installation
Mid pole
Magnetic arms
Base pole
Foot
assembly
Top pole
release button
Mid pole
release button
Height adjuster
Pressure plate
Foot
Select the side of the washer or dryer that you plan to install
the Adjustable Clothes Rack based on the spacing requirements
noted above.
IMPORTANT: The Adjustable Clothes Rack has a maximum
weight limit of 20 lbs (9.07 kg).
2
NOTE: The Adjustable Clothes Rack requires 3" (76 mm)
clearance side to side to enable it to t between the washer
and dryer or between the washer/dryer and the wall.
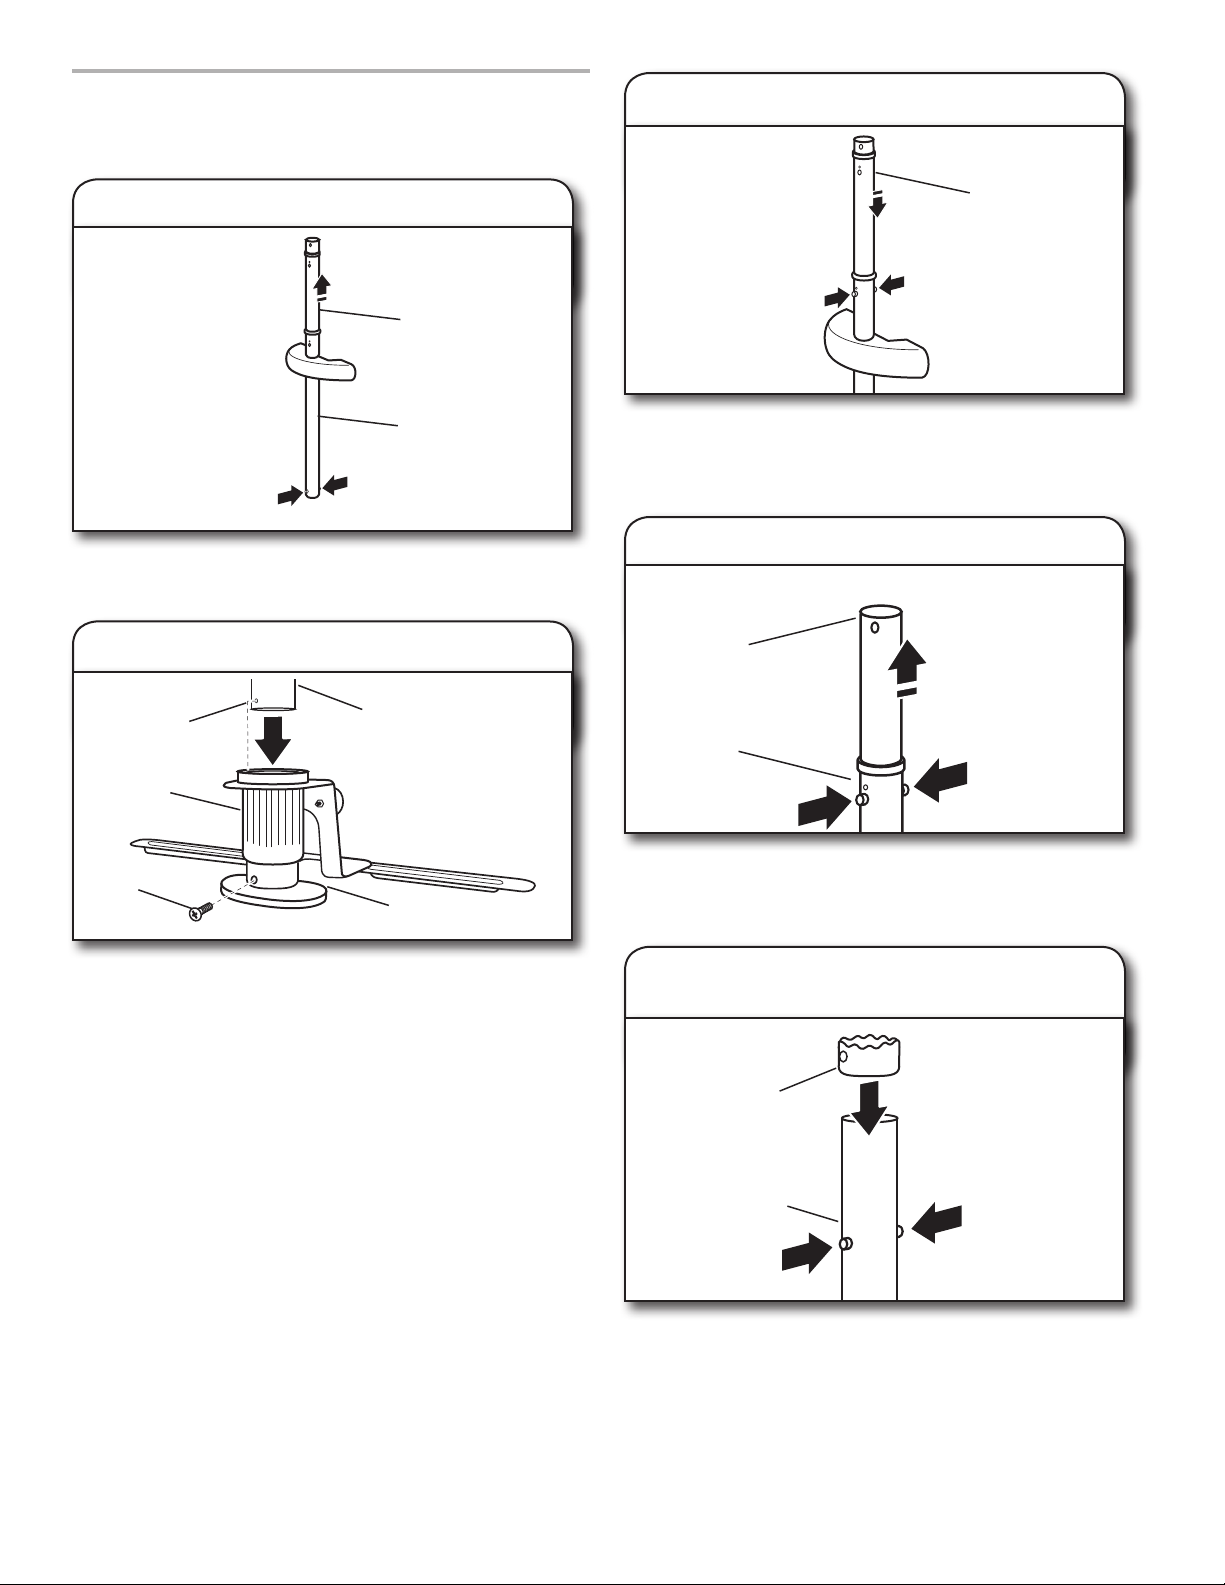
ASSEMBLY INSTRUCTIONS
1. Extend mid-pole
Mid pole
3. Lower mid-pole (optional)
Mid pole
Release
buttons
Base pole
Release
buttons
Press the release buttons at the bottom of the base pole,
and grasping the mid-pole, extend it upward until it locks
into place.
2. Attach foot assembly to base pole
Pilot hole
Height
adjuster
Screw
Insert the base pole into the foot assembly, as shown. Align the
hole in the foot with the pilot hole in the base pole and secure
with one of the included screws. If the hole in the foot is not
visible, turn the Height Adjuster counterclockwise until the hole
in the foot is visible.
NOTE: There may be some resistance when the screw starts
threading into the hole. This is normal.
Base pole
Foot
To simplify assembly of the hanger arms to the top pole, you
may want to lower the mid pole back into its lowered position.
Press the release buttons at the top of the base pole,
and slide the mid-pole into the base pole.
4. Release and extend top pole
Top pole
Mid pole
Release
buttons
Press the release buttons on the mid pole and extend top pole
until it locks into place.
5. Slide arm support collar onto
top pole
Arm support
collar
Top pole
Release
buttons
Slide the arm support collar onto the top pole, and down past
the release buttons on the top pole. Be sure the toothed end
is facing UP, as shown.
NOTE: To allow proper installation of the hanger arms, the
arm support collar must be below release buttons until the
rest of the hanger arm assembly is complete.
3
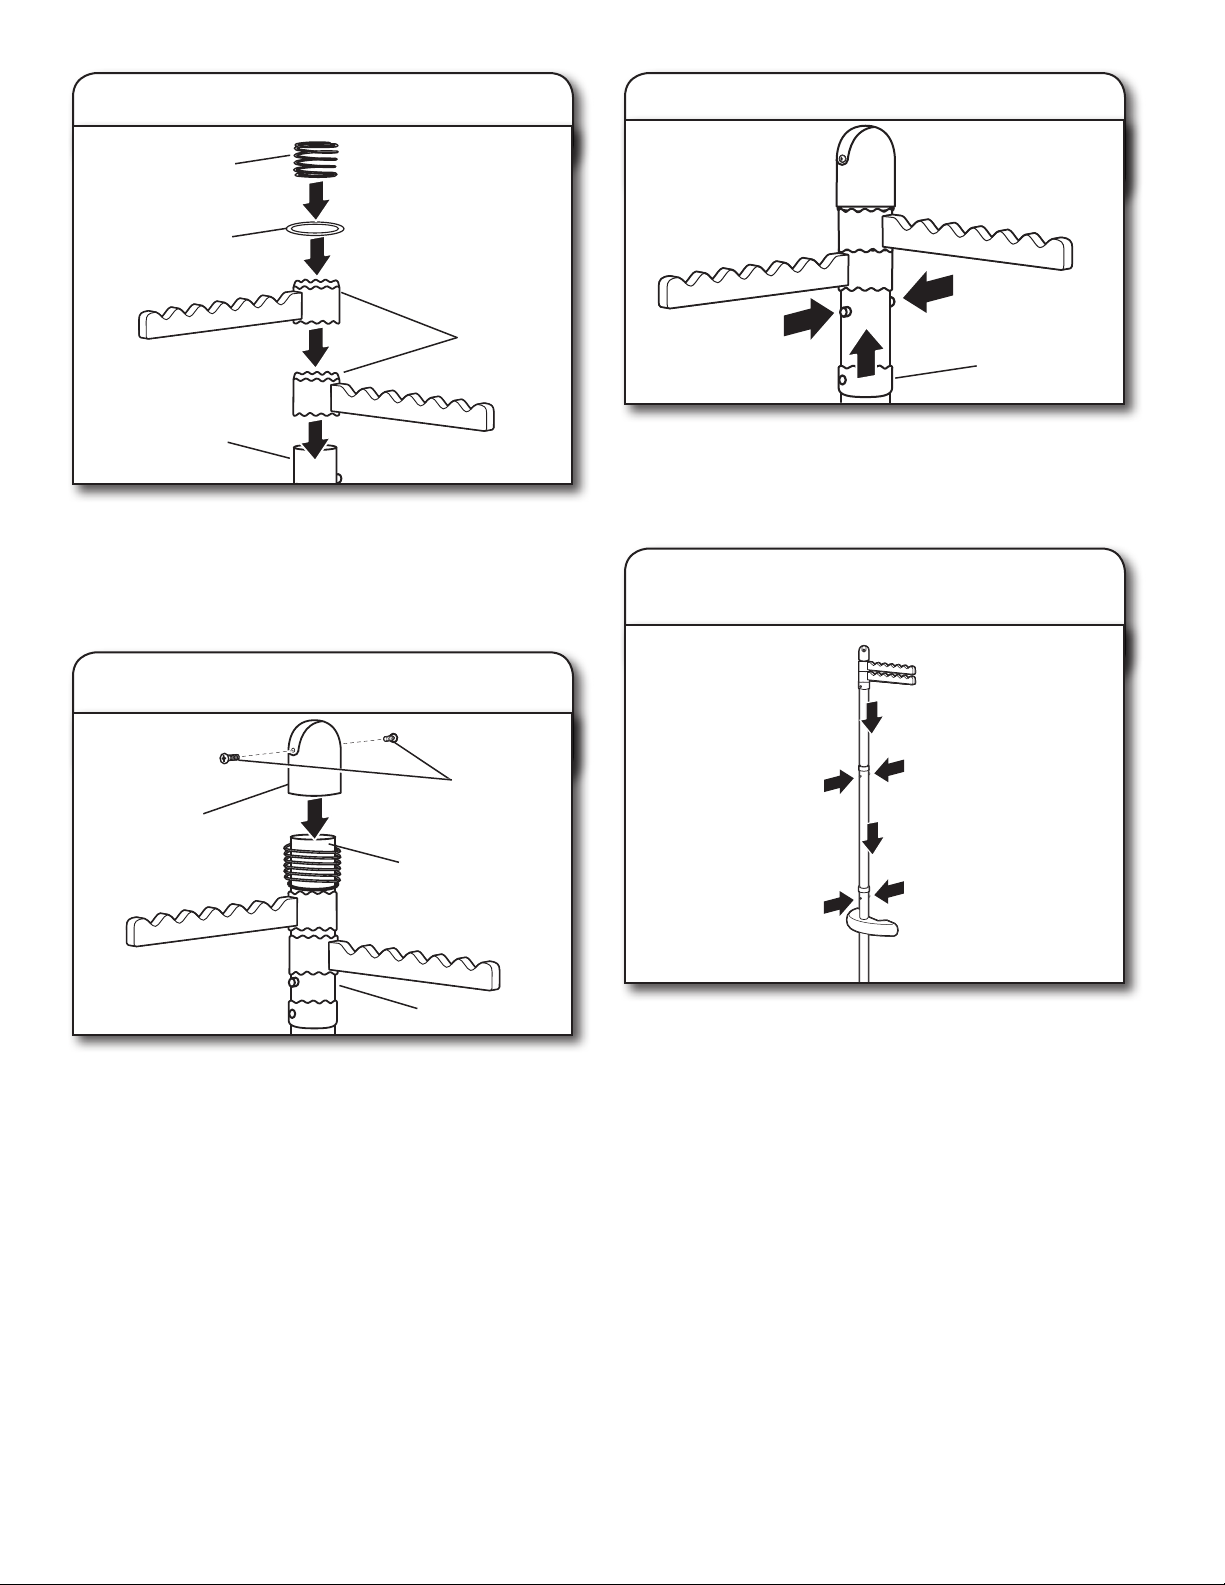
6. Slide hanger arms onto top pole
Spring
Top
washer
8. Lock arm support collar into place
Hanger
arms
Top pole
Slide both the hanger arms, toothed side facing up, onto the
top pole, allowing them to rest on the release buttons. Then,
slide the top washer and spring onto the top pole above the
hanger arms.
7. Install top cap
Screws
Top cap
Pilot holes
Release
buttons
Arm support
collar
Press the release buttons on the top pole and slide the arm
support collar over them to lock it into place. There will be
some resistance from the spring as you slide it into place.
9. Place Adjustable Clothes Rack
into storage mode
Release
buttons
Release
buttons
Top pole
Fit the top cap onto the end of the top pole. Pressing down on
the top cap, align the holes in the top cap with the pilot holes
in the top pole, and secure in place with two screws.
4
To simplify installation of the Adjustable Clothes Rack, place it
into storage mode by pressing the release buttons for the top
pole and mid pole (if extended) and sliding them down into
the base pole.
The Adjustable Clothes Rack is now ready to be installed onto
the washer or dryer.
 Loading...