

15.5" PEDESTAL INSTALLATION INSTRUCTIONS
For use only with front load washers and dryers
INSTRUCTIONS D’INSTALLATION DU PIÉDESTAL DE 15,5"
Pour utilisation avec les produits suivants seulement
laveuses et sécheuses à chargement par l’avant
Table of Contents Table des matières
PEDESTAL SAFETY ......................................................1
INSTALLATION REQUIREMENTS ................................2
Location Requirements .........................................2
Tools and Parts .......................................................2
UNPACKING THE PEDESTAL ......................................3
BEFORE INSTALLING THE PEDESTAL .......................3
INSTALLING THE PEDESTAL .......................................4
COMPLETE THE INSTALLATION. ................................7
INSTALLATION NOTES
Date of purchase: _________________________________
Date of installation: _______________________________
Installer: ________________________________________
Model number: ___________________________________
Serial number: ___________________________________
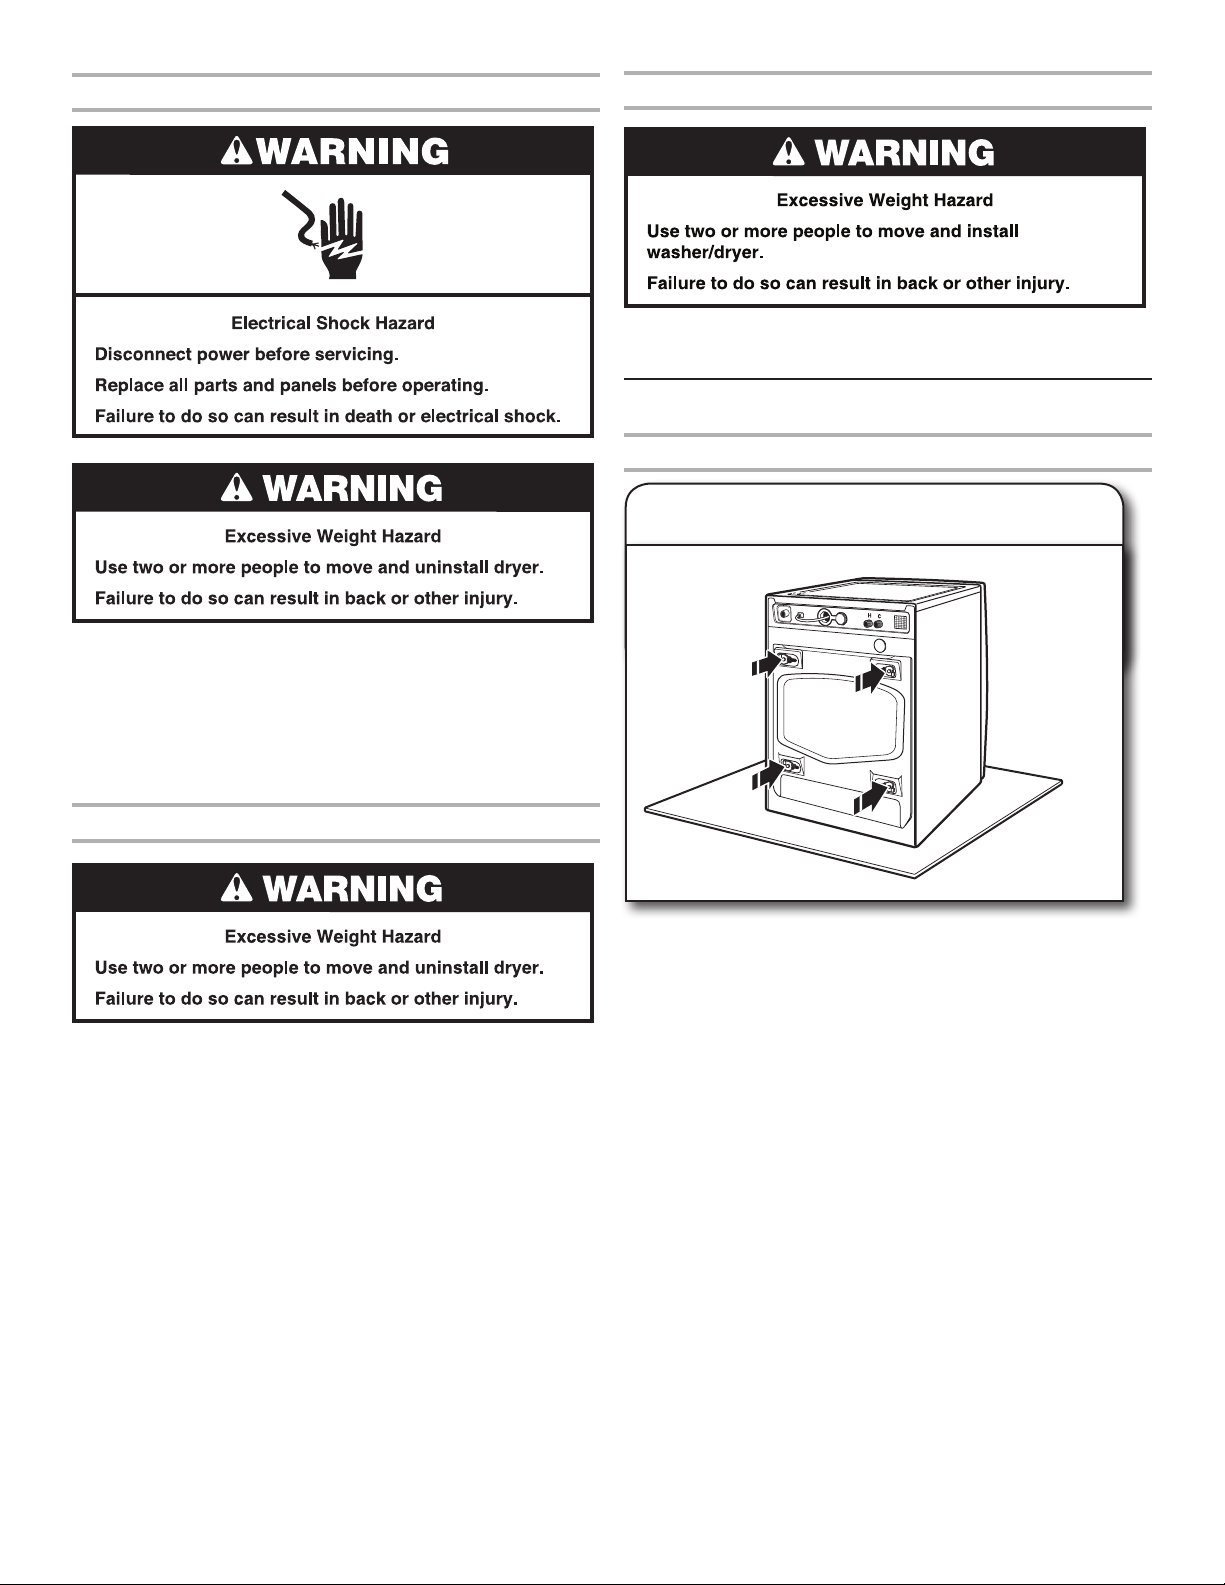
PEDESTAL SAFETY
SÉCURITÉ DU PIÉDESTAL ..........................................9
EXIGENCES D’INSTALLATION ....................................9
Exigences d’emplacement ....................................9
Outillage et pièces. ................................................9
INSTRUCTIONS D’INSTALLATION. ...........................10
AVANT L’INSTALLATION DU PIÉDESTAL.. ...............11
INSTALLATION DU PIÉDESTAL .................................12
ACHEVER L’INSTALLATION. ......................................15
NOTES CONCERNANT L’INSTALLATION
Date d’achat : _____________________________________
Date d’installation : ________________________________
Installateur : ______________________________________
Numéro de modèle : ________________________________
Numéro de série : __________________________________
W10347252A
W10348602A - SP

INSTALLATION REQUIREMENTS
LOCATION REQUIREMENTS
NOTE: If the washer/dryer and pedestal assembly are located in
a garage, 3" (76 mm) must be added under the pedestal so that
the washer/dryer is 18" (460 mm) above the garage oor.
TOOLS AND PARTS
Gather the required tools and parts before starting installation.
Tools Needed:
1/4" nut driver
or nut driver
5/16" hex-head ratchet
Additional Items Needed:
Towel
Sponge
Parts Supplied:
Four #12 x 5/8" hex-head Drawer divider
sheet metal screws
Utility knife 1/4" hex-head ratchet
or open-end wrench
Level 9/16" open-end wrench
Pliers or slip-joint pliers Bucket
Leveling feet (4)
2

UNPACKING THE PEDESTAL
Hex-head screw
Drawer slide
Spacer pads
Preparing the pedestal for installation
IMPORTANT: Set the pedestal box aside for use during
installation.
1. Empty pedestal drawer
3. Remove pedestal drawer
Using a 1/4" nut driver, remove the hex-head screws from both
drawer slides and save screws. Remove the drawer from the
slides and set aside. Push the slides back into the pedestal.
BEFORE INSTALLING PEDESTAL
IMPORTANT: If your washer and dryer are already installed,
they must be uninstalled.
Uninstalling your washer
To avoid possible damage to the washer, the transport bolts on
the back of the washer must be in place before installing the
pedestal. For more information on transport bolts see, “Remove
Transport System” in washer Use and Care Guide.
Open the pedestal drawer as far as possible and remove the
contents. The package contains four #12 x 5/8" hex-head
sheet metal screws, four leveling feet, and a drawer divider.
2. Locate spacer pads
The four spacer pads are installed on the top of the pedestal.
These pads reduce vibration between the pedestal and the
washer/dryer.
NOTE: If your washer/dryer has feet installed, remove them.
Do not install the feet that came with the new washer/dryer.
NOTE: If the washer is to be transported, call your local service
center. To avoid suspension and structural damage, your
washer must be properly set up for relocation by a certied
technician.
1. Turn off the hot and cold water faucets.
2. Unplug the power supply cord.
3. Slowly loosen the ll hoses at the faucets to relieve the water
pressure. Use a sponge or towel to absorb the released water.
4. Remove the “HOT” and “COLD” ll hoses from the back of
the washer. Drain the water from the hoses into a bucket.
5. Remove the drain hose from the standpipe or laundry tub and
drain any water remaining in the hose into a bucket.
6. Pull the washer away from the wall so that you will have
enough space for the installation.
3
Uninstalling your electric dryer
1. Unplug the power supply cord or disconnect wiring if dryer is
direct wired.
2. Pull the dryer away from the wall enough to loosen the vent
clamp. Loosen the clamp and gently remove the exhaust vent
from the dryer exhaust outlet.
3. Pull the dryer away from the wall so that you will have enough
space for the installation.
Installation of new washer/dryer
1. Unpack the washer/dryer and move close to the intended
installation location.
INSTALLING THE PEDESTAL
Installing the pedestal on the washer
Conrm transport bolts are in place
Uninstalling your gas dryer
1. Unplug the power supply cord.
2. Turn off the gas supply.
3. Pull the dryer away from the wall enough to loosen the vent
clamp. Loosen the clamp and gently remove the exhaust vent
from the dryer exhaust outlet.
4.
Disconnect the exible gas supply line from the dryer. Put a
piece of tape over the open ends of the gas line connection
ttings.
5. Pull the dryer away from the wall so that you will have enough
space for the installation.
Locate the transport bolts on rear of washer. Transport bolts
must remain in washer before pedestal can be installed. For
more information on transport bolts see, “Remove Transport
System” in washer Use and Care Guide.
4

1. Place washer on its side
1"
(25 mm)
1"
(25 mm)
3. Install pedestal feet
Drawer divider
Pedestal box
To avoid oor damage and ease installation and handling,
unfold the empty pedestal box at and place it next to the
washer. Position the drawer divider so that it will be near the
top of the washer, as shown. Gently tip the washer on its side
so the washer is resting on the drawer divider.
2. Prepare the washer
Washer
bottom
Locate the leveling feet in the package removed from the
pedestal drawer. Thread a jam nut onto each foot so that the
nut is 1" (25 mm) above the foot base. Thread the feet into the
threaded holes located at each corner of the pedestal, until
the jam nuts touch the bottom of the pedestal.
NOTE: Do not tighten the jam nuts at this time.
4. Attach pedestal to washer
Move the pedestal against the washer bottom. The front of
the pedestal cabinet should align with the washer cabinet
as shown below.
Slide the pedestal’s keyhole slots over the lower two partially
installed screws.
Partially install two of the #12 x 5/8"
hex-head sheet metal screws in the
indicated holes. Leave a space of
about 3/8" (10 mm) between the
screw head and the bottom of
the washer.
NOTE: If your washer has leveling feet installed, remove them.
Do not install the feet that came with the new washer.
Pedestal Washer
Front
View from above
5

5. Secure pedestal to washer
1"
(25 mm)
1"
(25 mm)
3. Install pedestal feet
Position the pedestal toward the front of the washer and
install the two remaining hex-head sheet metal screws.
Do not tighten completely. Now proceed to “Complete
the pedestal installation”.
Installing the pedestal on the dryer
1. Place dryer on its side
Drawer divider
Pedestal box
To avoid oor damage and ease installation and handling,
unfold the empty pedestal box at and place it next to the dryer.
Position the drawer divider so that it will be near the top of the
dryer, as shown. Gently tip the dryer on its side so the dryer is
resting on the drawer divider.
Locate the leveling feet in the package removed from the
pedestal drawer. Thread a jam nut onto each foot so that
the nut is 1" (25 mm) above the foot base. Thread the feet into
the threaded holes located at each corner of the pedestal,
until the jam nuts touch the bottom of the pedestal.
NOTE: Do not tighten the jam nuts at this time.
4. Attach pedestal to dryer
Move the pedestal against the dryer bottom. The front of
the pedestal cabinet should align with the dryer cabinet
as shown below.
Slide the pedestal’s keyhole slots over the lower two partially
installed screws.
2. Prepare the dryer
Dryer bottom
Partially install two of the #12 x 5/8" hex-head sheet metal
screws in the indicated holes. Leave a space of about 3/8"
(10 mm) between the screw head and the bottom of the dryer.
NOTE: If your dryer has leveling feet installed, remove them.
Do not install the feet that came with the new dryer.
6
Pedestal Dryer
Front
View from above

1"
(25 mm)
5. Secure pedestal to dryer
3. Stand the washer/dryer upright
Position the pedestal toward the front of the dryer and install
the two remaining hex-head sheet metal screws. Do not tighten
completely. Now proceed to “Complete the pedestal installation”.
COMPLETE THE INSTALLATION
1. Align sides of pedestal
Align the sides of the pedestal so that they are even with the
sides of the washer/dryer. Reach inside the pedestal opening
and securely tighten all four pedestal screws.
2. Prepare pedestal feet
Tip the washer/dryer back to its upright position. Remove
any remaining packaging material. Set the pedestal box aside
for use if installing another pedestal. Once both the washer
and dryer have been installed, dispose of/recycle all packaging
material.
Level the washer/dryer
1. Move close to nal location
Follow the installation instructions that came with your model
to nish installing or reinstalling your washer/dryer (i.e., hoses,
vents, etc.).
NOTE: Be sure to remove the transport bolts from the back
of the washer.
Using a 1/4" hex head ratchet or open-end wrench, lower the
feet approximately 1" (25 mm) away from the bottom of the
pedestal.
7

Hex-head screw
Drawer slide
2. Check levelness of washer/dryer
Place level here
4. Securely tighten jam nuts
Place a level on top edges of
washer/dryer, checking each side
and front. Rock washer/dryer back and forth to make sure all
four feet make solid contact with oor.
Not Level LEVEL Not Level
If not level, adjust pedestal feet up or down, repeating as
necessary.
3. Adjust pedestal feet
When the washer/dryer is level, use a 9/16" open-end wrench
to securely tighten all four jam nuts against the pedestal.
IMPORTANT: The jam nuts must be tightened to avoid
vibration.
Reinstall pedestal drawer
1. Reassemble pedestal drawer
Pull both drawer slides out and reassemble the drawer to
the drawer slides with the two hex-head screws.
Locate the 1/4" hex-head screws on the top of each pedestal
foot. Reach inside the pedestal and use a 1/4" hex-head
ratchet or open-end wrench to adjust the feet up or down
as needed, to level the washer/dryer.
NOTE: Make sure all four pedestal feet are in solid contact
with the oor.
8
2. Place drawer divider in drawer
Remove the shipping lm from the drawer.
Place the divider in the drawer at the desired
location. Close the drawer.
NOTE: Use of the divider is optional.

SÉCURITÉ DU PIÉDESTAL
EXIGENCES D’INSTALLATION
EXIGENCES D’EMPLACEMENT
REMARQUE : Si l’ensemble de laveuse/sécheuse et du
piédestal se trouve dans un garage, il faut ajouter 3" (76 mm)
en dessous du piédestal pour que l’ensemble de laveuse/
sécheuse soit à 18" (460 mm) au-dessus du plancher du garage.
OUTILLAGE ET PIÈCES
Rassembler les outlis et pièces nécessaires avant de
commencer l’installation.
Outillage nécessaire :
Niveau Clé plate 9/16"
Pince ou pince articulée Seau
Tourne-écrou de 1/4"
tête hexagonale de 5/16"
Cliquet ou tourne-écrou à
Autres articles nécessaires :
Couteau utilitaire Clé à cliquet à tête
hexagonale de 1/4"
ou clé plate
Serviette
Éponge
9

Pièces fournies :
Hex-head screw
Drawer slide
Spacer pads
Quatre vis de tôlerie n° Séparateur de tiroir
12 x 5/8" à tête hexagonale
Pieds de nivellement (4)
2. Identier les cales d’espacement
Cales d’espacement
Les quatre cales d’espacement sont installées sur le dessus
du piédestal. Les cales réduisent les vibrations entre le
piédestal et la laveuse/sécheuse.
REMARQUE : Si des pieds sont installés sur la laveuse/
sécheuse, les retirer. Ne pas installer les pieds livrés avec
la nouvelle laveuse/sécheuse.
DESEMBALLAGE DU PIÉDESTAL
Préparation du piédestal pour l’installation
IMPORTANT: Mettre la boîte du piédestal de côté pour pouvoir
l’utiliser pendant l’installation.
1. Vider le tiroir du piédestal
3. Retirer le tiroir du piédestal
Glissiére du tiroir
vis à tête
hexagonale
À l’aide d’un tourne-écrou de 1/4", retirer les vis à tête
hexagonale des deux glissières de tiroir et conserver les vis.
Retirer le tiroir des glissières et le mettre de côté. Réinsérer
les glissières dans le piédestal.
Ouvrir le tiroir du piédestal aussi loin que possible et vider son
contenu. L’emballage contient quatre vis de tôlerie à tête
hexagonale n° 12 x 5/8" quatre pieds de nivellement et un
sachet de cloison.
10

AVANT L’INSTALLATION
DU PIÉDESTA L
IMPORTANT: Si l’ensemble de laveuse et sécheuse est déjà
installé, on doit le désinstaller.
Désinstallation de la laveuse
An d’éviter d’endommager la laveuse, les boulons de transport
à l’arrière de l’appareil doivent être en place avant l’installation
du piédestal. Pour plus d'informations concernant les boulons de
transport, voir “Élimination des accessoires de transport” dans le
Guide d’utilisation et d’entretien de la laveuse.
REMARQUE : Si la laveuse doit être transportée, appeler le
centre de service local. An d’éviter tout endommagement de
la suspension et de la structure, votre laveuse doit d’abord être
correctement installé pour être ensuite réinstallé par un
technicien certié.
1. Fermer les robinets d’arrivée d’eau chaude et d’eau froide.
2. Débrancher le cordon d’alimentation électrique.
3. Desserrer doucement les tuyaux d’alimentation sur les
robinets pour libérer la pression de l’eau. Utiliser une éponge
ou une serviette pour absorber l’eau libérée.
4. Déconnecter les tuyaux d’arrivée d’eau chaude et d’eau froide
portant les mentions “HOT” (chaud) et “COLD” (froid) de
l’arrière de la laveuse. Laisser l’eau dans les tuyaux s’écouler
dans un seau.
5. Enlever le tuyau de vidange du tuyau de rejet à l’égout ou de
l’évier de buanderie et vidanger l’eau qui reste dans un seau.
6. Dégager la laveuse du mur pour avoir sufsamment d’espace
pour l’installation.
Désinstallation de la sécheuse électrique
1. Débrancher le cordon d’alimentation électrique ou
éconnecter le câblage si la sécheuse comporte un
raccordement direct.
2. Écarter la sécheuse du mur sufsamment pour pouvoir
desserrer la bride du conduit d’évacuation. Desserrer la bride
et retirer doucement le conduit d’évacuation de la bouche
de décharge de la sécheuse.
3. Dégager la sécheuse du mur pour avoir sufsamment
d’espace pour l’installation.
Désinstallation de la sécheuse à gaz
1. Débrancher le cordon d’alimentation électrique.
2. Fermer l’arrivée de gaz.
3. Écarter la sécheuse du mur sufsamment pour pouvoir
desserrer la bride du conduit d’évacuation. Desserrer la bride
et retirer doucement le conduit d’évacuation de la bouche de
décharge de la sécheuse.
4.
Déconnecter le conduit exible de la canalisation de gaz de
la sécheuse. Obturer avec du ruban adhésif l’ouverture de
chaque raccord de la canalisation de gaz.
5. Dégager la sécheuse du mur pour avoir sufsamment
d’espace pour l’installation.
11

Installation d’une laveuse/sécheuse nouveau
1. Déballer la laveuse/sécheuse et les placer à proximité de
l’emplacement d’installation prévu.
INSTALLATION DU PIÉDESTAL
1. Placer la laveuse sur le côté
Installation du piédestal sur la laveuse
Vérier que les boulons
de transport sont en place
Repérer les boulons de transport à l’arrière de la laveuse.
Les boulons de transport doivent rester sur la laveuse avant
que le piédestal puisse être installé. Pour plus d'informations
concernant les boulons de transport, voir “Élimination des
accessoires de transport” dans le Guide d’utilisation et
d’entretien de la laveuse.
Cloison de tiroir
Boîte du piédestal
Pour éviter d’endommager le plancher et pour faciliter
l’installation et la manipulation, déplier et aplatir la boîte
du piédestal et la placer à proximité de la laveuse.
Positionner la cloison de tiroir de façon à ce qu’elle se
trouve à proximité du dessus de la laveuse, tel qu’indiqué.
Mettre la laveuse sur le côté avec précaution de façon à
ce qu’elle repose sur la cloison de tiroir.
2. Préparation de la laveuse
Fond de
la laveuse
12
Installer partiellement deux vis
de tôlerie à tête hexagonale
n° 12 x 5/8" dans les trous indiqués.
Laisser un espace d’environ
3/8" (10 mm) entre la tête des vis
et le fond de la laveuse.
REMARQUE : Si des pieds de nivellement sont installés sur
la laveuse, les enlever. Ne pas installer les pieds livrés avec
la laveuse neuve.

1"
(25 mm)
3. Installation des pieds
1"
(25 mm)
du piédestal
Repérer les pieds de nivellement dans l'emballage du tiroir
du piédestal. Visser un contre-écrou sur chaque pied. Le
contre-écrou doit se trouver à 1" (25 mm) au-dessus de
la base du pied. Visser les pieds dans les trous letés à
chaque coin du piédestal jusqu’à ce que les contre-écrous
touchent le bas du piédestal.
REMARQUE : Ne pas serrer complètement les contre-écrous
à ce stade.
4. Fixation du piédestal à la laveuse
5. Fixation du piédestal à la laveuse
Positionner le piédestal vers l’avant de la laveuse et
installer les deux vis de tôlerie à tête hexagonale restantes.
Ne pas visser complètement. Passer maintenant à “Achever
l’installation du piédestal”.
Installation du piédestal sur la sécheuse
1. Placer la sécheuse sur le côté
Placer le piédestal contre le fond de la laveuse. L’avant de
la caisse du piédestal doit être aligné avec la caisse de la
laveuse, tel qu’illustré ci-dessous.
Faire glisser les trous en poire du piédestal sur les deux vis
inférieures partiellement vissées.
Piédestal Laveuse
Cloison de tiroir
Boîte du piédestal
Pour éviter d’endommager le plancher et pour faciliter
l’installation et la manipulation, déplier et aplatir la boîte du
piédestal et la placer à proximité de la sécheuse. Positionner
la cloison de tiroir de façon à ce qu’elle se trouve à proximité
du dessus de la sécheuse, tel qu’indiqué. Mettre la sécheuse
sur le côté avec précaution de façon à ce qu’elle repose sur
la cloison de tiroir.
Avant
Vue du dessus
13

2. Préparer la sécheuse
1"
(25 mm)
1"
(25 mm)
Fond de la
sécheuse
4. Fixation du piédestal à la sécheuse
Installer partiellement deux vis de tôlerie à tête hexagonale
n° 12 x 5/8" dans les trous indiqués. Laisser un espace
d’environ 3/8" (10 mm) entre la tête des vis et le fond de la
sécheuse.
REMARQUE : Si des pieds de nivellement sont installés sur
la sécheuse, les enlever. Ne pas installer les pieds livrés avec
la sécheuse neuve.
3. Installation des pieds
du piédestal
Repérer les pieds de nivellement dans l’emballage du tiroir
du piédestal. Visser un contre-écrou sur chaque pied. Le
contre-écrou doit se trouver à 1" (25 mm) au-dessus de la base
du pied. Visser les pieds dans les trous letés à chaque coin
du piédestal jusqu’à ce que les contre-écrous touchent le bas
du piédestal.
REMARQUE : Ne pas serrer complètement les contre-écrous
à ce stade.
Placer le piédestal contre le fond de la sécheuse. L’avant de
la caisse du piédestal doit être aligné avec la caisse de la
sécheuse, tel qu’illustré ci-dessous.
Faire glisser les trous en poire du piédestal sur les 2 vis
inférieures partiellement vissées.
Piédestal Sécheuse
Avant
Vue du dessus
5. Fixation du piédestal à la sécheuse
14
Positionner le piédestal vers l’avant de la sécheuse et installer
les deux vis de tôlerie à tête hexagonale restantes. Ne pas visser
complètement. Passer maintenant à “Achever l’installation du
piédestal”.

1"
(25 mm)
ACHEVER L’INSTALLATION
Nivellement de la laveuse/sécheuse
1. Aligner les côtés du piédestal
Aligner les côtés du piédestal pour qu’ils soient de niveau
avec les côtés de la laveuse/sécheuse. Atteindre l’intérieur de
l’ouverture du piédestal et serrer solidement les quatre vis du
piédestal.
2. Préparer les pieds du piédestal
1. Déplacer l’appareil près de son
emplacement dénitif
Suivre les Instructions d’installation fournies avec votre laveuse/
sécheuse pour terminer l’installation ou la réinstallation de la
laveuse/sécheuse (tuyaux, évacuation, etc.)
REMARQUE : Veiller à retirer les boulons de transport de l'arrière
de la laveuse.
2. Vérier l’aplomb de
la laveuse/sécheuse
À l’aide d’un cliquet à tête hexagonale de 1/4" ou d’une clé
plate, abaisser les pieds jusqu’à environ 1" (25 mm) du
bas du piédestal.
3. Ramener la laveuse/sécheuse
en position verticale
Placer le niveau à
cet endroit
Placer un niveau sur les bords supérieurs
de la laveuse/sécheuse en contrôlant chaque
côté et l’avant. Faire bouger la laveuse/sécheuse d’avant
en arrière pour s’assurer que les quatre pieds sont bien en
contact avec le plancher.
Pas d’aplomb D’aplomb Pas d’aplomb
Incliner la laveuse/sécheuse pour la ramener à sa position
verticale initiale. Retirer tous les matériaux d’emballage encore
présents. Mettre la boîte du piédestal de côté pour l’utiliser lors
de l’installation d'un autre piédestal. Une fois la laveuse
et la sécheuse installées, jeter/recycler tous les matériaux
d’emballage.
Si la laveuse/sécheuse n’est pas d’aplomb, relever ou abaisser
les pieds du piédestal, recommencer si nécessaire.
15

3. Ajuster les pieds du piédestal
Hex-head screw
Drawer slide
Insérer les vis de ¼” à tête hexagonale en haut de chaque
pied du piédestal. Atteindre l’intérieur du piédestal et utiliser
un cliquet de ¼” à tête hexagonale ou une clé plate pour
ajuster les pieds vers le haut ou vers le bas de façon à établir
l’aplomb de la laveuse ou de la sécheuse.
REMARQUE : S’assurer que les quatre pieds de piédestal sont
bien en contact avec le plancher.
4. Bien serrer les contre-écrous
Réinstallation du tiroir du piédestal
1. Réinstaller le tiroir de piédestal
Glissière de tiroir
Vis à tête hexagonale
Tirer sur les deux glissières de tiroir pour les extraire et
réinstaller le tiroir sur les glissières de tiroir à l’aide des
deux vis à tête hexagonale.
2. Placer la cloison du tiroir dans
le tiroir
Une fois la laveuse ou la sécheuse d’aplomb et les quatre
pieds sont bien en contact avec le plancher, utiliser une clé
plate de 9/16” pour xer solidement les quatre contre-écrous
contre le piédestal.
IMPORTANT : Les contre-écrous doivent être serrés pour
eviter les vibrations.
W10347252A
W10348602A - SP
©2010
Whirlpool Corporation.
All rights reserved.
Tous droits réservés.
WHIRLPOOL est une marque de commerce de Whirpool, U.S.A.
WHIRLPOOL is a trademark of Whirlpool, U.S.A.
Retirer la pellicule d’expédition du tiroir.
Placer la cloison dans le tiroir à
l’emplacement souhaité. Fermer le tiroir.
REMARQUE : L’utilisation de la cloison est facultative.
09/2010
Printed in U.S.A.
Imprimé aux É.-U.
 Loading...