


W11462868A
1
810F950001518
In order to receive a more complete assistance, please
register your product on www.whirlpool.com.

2
English
Italiano
Français
Svenska
Dansk
Norsk
Português
REFRIGERATOR USER INSTRUCTIONS ........................................... 3
ISTRUZIONI PER L’USO DEL FRIGORIFERO .................................. 43
INSTRUCTIONS D’UTILISATION DU RÉFRIGÉRATEUR .............. 85
BRUKSANVISNING FÖR KYLSKÅP ............................................... 127
BRUGERVEJLEDNING TIL KØLE-/FRYSESKABET ...................... 167
BRUKSANVISNING FOR KJØLESKAP ........................................... 208
INSTRUÇÕES DE UTILIZAÇÃO DO FRIGORÍFICO ....................... 248
Suomalainen
JÄÄKAAPIN KÄYTTÄJÄN OHJEET............................................ 291

FRENCH DOOR BOTTOM MOUNT REFRIGERATOR
3
USE AND CARE GUIDE
Table of Contents
REFRIGERATOR SAFETY ..............................................................4
Proper Disposal of Your Old Refrigerator ........................................8
P
ARTS AND FEATURES
WHAT’S NEW BEHIND THE DOORS? ........................................10
INSTALLATION INSTRUCTIONS .................................................11
Getting Started ...............................................................................11
Water Filter Installation ..................................................................11
Unpack the Refrigerator ................................................................11
Location Requirements ..................................................................12
Electrical Requirements .................................................................12
Remove and Replace Refrigerator Doors .....................................14
Remove and Replace Fr
Refrigerator Levelling .....................................................................17
Water Supply Requirements ..........................................................17
Connect the Water Supply .............................................................17
FILTERS AND ACCESSORIES ...................................................19
W
ater Filtration System
Accessories ....................................................................................20
Assistance or Service ....................................................................20
REFRIGERATOR CONNECTIVITY FEATURES .........................20
REFRIGERATOR USE ..................................................................21
Opening and Closing Doors...........................................................21
Using the Controls..........................................................................23
Touch Panel .....................................................................................23
Display .............................................................................................23
Demo Mode .....................................................................................23
Tools ................................................................................................24
More Modes ....................................................................................25
Lighting the Refrigerator .................................................................26
Icons ................................................................................................26
Water and Ice Dispensers ...............................................................27
Ice Maker and Storage Bin ............................................................28
S
HELVES, BINS, AND DRAWERS
Freezer Storage Compartments .....................................................30
REFRIGERATOR CARE.................................................................31
Cleaning ..........................................................................................31
Lights ..................................................
Holiday and Moving Care
TROUBLESHOOTING - CONNECTED MODELS .......................33
TROUBLESHOOTING ...................................................................34
PERFORMANCE DATA SHEET .. .................................................41
................................................................9
eezer/Flexi Freeze Door
..................................................................19
................................................29
............................
......................................................31
.........
..........................16
.................31
3

REFRIGERATOR SAFETY
4
Your safety and the safety of others are very important.
We have provided many important safety messages in this manual and on your appliance. Always read and obey all safety
messages.
This is the safety alert symbol.
This symbol alerts you to potential hazards that can kill or hurt you and others.
All safety messages will follow the safety alert symbol and either the word “DANGER” or “WARNING.”
These words mean:
You can be killed or seriously injured if you don't immediately
DANGER
WARNING
All safety messages will tell you what the potential hazard is, tell you how to reduce the chance of injury, and tell you what can
happen if the instructions are not followed.
follow instructions.
You
can be killed or seriously injured if you don't
instructions.
follow
4

SAFETY INSTRUCTIONS
5
IMPORTANT TO BE READ AND OBSERVED
Before using the appliance, read these safety
instructions. Keep them nearby for future
reference. These instructions and the appliance
itself provide important safety warnings, to be
observed at all times. The manufacturer declines
any liability for failure to observe these safety
instructions, for inappropriate use of the appliance
or incorrect setting of controls.
Very young children (0-3 years) should be kept
away from the appliance. Young children (3-8
years) should be kept away from the appliance
unless continuously supervised. Children from 8
years old and above and persons with reduced
physical, sensory or mental capabilities or lack of
experience and knowledge can use this appliance
only if they are supervised or have been given
instructions on safe use and understand the
hazards involved. Children must not play with the
appliance. Cleaning and user maintenance must
not be carried out by children without supervision
Children aged from 3 to 8 years are allowed to load
and unload refrigerating appliances.
PERMITTED USE
CAUTION: The appliance is not intended to
be operated by means of an external switching
device, such as a timer, or separate remote
controlled system.
This appliance is intended to be used in
household and similar applications such as: sta
kitchen areas in shops, oces and other working
environments; farm houses; by clients in hotels,
motels, bed & breakfast and other residential
environments.
This appliance is not for professional use. Do
not use the appliance outdoors.
The bulb used inside the appliance is specically
designed for domestic appliances and is not
suitable for general room lighting within the
home (EC Regulation 244/2009).
The appliance is designed for operation in
places where the ambient temperature comes
within the following ranges, according to the
climatic class given on the rating plate. The
appliance may not work properly if it is left for a
long time at a temperature outside the specied
range.
Climatic Class Amb. T. (°C)
SN: From 10 to 32 °C; N: From 16 to 32 °C
ST: From 16 to 38 °C; T: From 16 to 43 °C
This appliance does not contain CFCs. The
refrigerant circuit contains R600a (HC). Appliances
with Isobutane (R600a): isobutane is a natural gas
without environmental impact, but is ammable.
Therefore, make sure the refrigerant circuit pipes
are not damaged, especially when emptying the
refrigerant circuit.
.
WARNING: Do not damage the appliance
refrigerant circuit pipes.
WARNING: Keep ventilation openings, in
the appliance enclosure or in the
structure, clear of obstruction.
WARNING: Do not use mechanical, electric
or chemical means other than those recommended
by the Manufacturer to speed up the defrost
process.
WARNING: Do not use or place
electrical devices inside the appliance
compartments if they are not of the type
expressly authorized by the Manufacturer.
WARNING: Ice makers and/or water dispensers
not directly connected to the water supply must be
filled with potable water only.
WARNING: Automatic ice-makers and/or
water dispensers must be connected to a water
supply that delivers potable water only, with mains
water pressure between 0.14Mpa and 1.0Mpa (1.4 bar
and 10 bar).
WARNING: Use the new hose-sets supplied with
the appliance, and the old hose-sets should not be
reused.
Do not store explosive substances such
as aerosol cans with a flammable propellant in
this appliance.
Do not swallow the contents (non-toxic) of the
ice packs (provided with some models). Do not eat ice
cubes or ice lollies immediately after taking them
out of the freezer since they may cause cold
For products designed to use an air filter inside
an accessible fan cover, the filter must always
be in position when the refrigerator is in function.
Do not store glass containers with liquids in
the freezer compartment since they may break.
Do not obstruct the fan (if included) with food
items. After placing the food check that the
door of the compartments closes properly,
especially the freezer door.
Damaged gaskets must be replaced as soon as
possible.
Use the refrigerator compartment only for storing
fresh food and the freezer compartment only for
storing frozen food, freezing fresh food and making ice
cubes.
Avoid storing unwrapped food in direct contact
with internal surfaces of the fresh food or freezer
compartments. Appliances could have special
compartments(Fresh Food Compartment, Zero
Degree Box, etc.). Unless specified in the specific
booklet of product, they can be removed,
maintaining equivalent performances.
Avoid a direct contact between the fresh food and
the food that is already frozen. To optimize the freezing
speed, drawers can be removed and the food can
be placed directly on the bottom or top of the
compartment.
Warning: Risk of fire/flammable materials. The
most appropriate compartments of the
appliance where specific types of food are
stored, taking into account different temperature
distribution in different compartments in the
appliance, are as
- Refrigerator compartment: Store tropical fruit,
follows:
built-in
burns.
to be
5

cans, drinks, eggs, sauces, pickles, butter, jam,
6
cheese, milk, dairy food, yoghurt. You may also
store cold cuts, desserts, meat and sh,
cheesecake, fresh pasta, sour cream, pudding and
cream cheese.
Fruit & vegetable drawer at the bottom of the
refrigerator compartment: Store vegetables and
fruits (excluding tropical fruits).
Chiller compartment: Only store meat and sh in
the coldest drawer
- Freezer compartment:
is suitable for freezing foodstus from ambient
temperature and for storing frozen food as the
temperature is evenly distributed throughout
the entire compartment. Purchased frozen food
has the storage expiration date stated on the
packaging. This date takes into account the type of
food being stored and therefore this date should
be respected. Fresh food should be stored for the
following time periods: 1-3 months for cheese,
shellsh, ice cream, ham/sausage, milk, fresh
liquids; 4 months for steak or chops (beef, lamb,
pork); 6 months for butter or margarine, poultry
(chicken, turkey); 8-12 months for fruits (except
citrus), roast meat (beef, pork, lamb), vegetables.
Expiration dates on the packaging of foods must
be respected. Please store foodstuffs according to
above paragraphs for best preservation over the
longest period, to avoid food waste.
To avoid food contamination, please observe the
following:
– Opening the door for long periods can cause
a signicant increase of the temperature in the
compartments of the appliance.
– Regularly clean surfaces that may come into
contact with food and accessible drainage
systems.
– Clean water tanks if they have not been used for
48 h; ush the water system connected to a water
supply if water has not been drawn for 5 days.
– Store raw meat and sh in suitable containers
in the refrigerator, so that it does not come into
contact with or drip onto other food.
theIn Convertible Space
shouldstorage be as followed:
+10°C : store white wine
+4°C: store vegetables and fruits (excluding
tropical fruits)
0°C: only store meat and sh
All set points below zero: store frozen foodstu as
for freezer cavity
– Two-star frozen food compartments are suitable
for storing pre-frozen food, storing or making ice
cream and ice cubes.
– Do not freeze fresh food in one, two or threestar compartments.
– If the refrigerating appliance is left empty for
long periods, switch o, defrost, clean, dry, and
leave the door open to prevent mould developing
inside the appliance.
6
INSTALLATION
The appliance must be handled and installed by
two or more persons- risk of injury. Use protective
gloves to unpack and install- risk of cuts.
nstalla
I
tion, including water supply (if any)
and electrical connections, and repairs must
be carried out by a qualied technician. Do not
repair or replace any part of the appliance unless
specically stated in the user manual. Keep
children away from the installation site.
After unpacking the appliance, make sure that
it has not been damaged during transport. In
the event of problems, contact the dealer or
your nearest After-sales Service. Once installed,
packaging waste (plastic, styrofoam parts etc.)
must be stored out of reach of children - risk of
suocation. The appliance must be disconnected
from the power supply before any installation
operation - risk of electric shock. During
installation, make sure the appliance does not
damage the power cable - risk of re or electric
shock. Only activate the appliance when the
installation has been completed.
Be careful not to damage the oors (e.g.
parquet) when moving the appliance. Install the
appliance on a oor or support strong enough
to take its weight and in a place suitable for its
size and use. Make sure the appliance is not near
a heat source and that the four feet are stable and
resting on the oor, adjusting them as required,
and check that the appliance is perfectly level
using a spirit level. Wait at least two hours before
switching the appliance on, to ensure that the
refrigerant circuit is fully ecient.
WARNING: When positioning the appliance,
ensure the supply cord is not trapped or damaged.
WARNING: To avoid a hazard due to instability,
positioning or xing of the appliance must be done
in accordance with the manufacturer instructions.
It is forbidden to place the refrigerator in such
w
ay that the metal hose of gas stove, metal gas or
water pipes, or electrical wires are in contact with
the refrigerator back wall (condenser coil).
To guarantee adequate ventilation, leave a
space on both sides and above the appliance. The
distance between the rear of the appliance and
the wall behind the appliance should be 50mm,
to avoid access to hot surfaces. A reduction of this
space will increase the Energy consumption of
product.
If it is necessary to replace the doors, please
contact the Technical Assistance Center.
An 'Approved' single check valve or some other
no less eective backow prevention device
providing backow prevention protection to at
least uid category two shall be tted at the point
of connection(s) between the water supply and
the fitting or appliance.
FOR AUSTRALIA ONLY: A backflow device Water-
7
Mark approved (not included, responsibility of the
plumbing) is required to be installed upstream in
accordance with the WaterMark cer-tification and in
accordance to AS/NZS 3500.1.2 and complying with
AS/NZS 2845.1.
ELECTRICAL WARNINGS
It must be possible to disconnect the appliance from the power
supply by unplugging it if plug is accessible, or by a multipole switch installed upstream of the socket in accordance
with the wiring rules and the appliance must be earthed in
conformity with national electrical safety standards.
Do not use extension leads, multiple sockets or adapters.
The electrical components must not be accessible to the user
after installation. Do not use the appliance when you are wet or
barefoot. Do not operate this appliance if it has a damaged power
cable or plug, if it is not working properly, or if it has been
damaged or dropped.
If the supply cord is damaged, it must be replaced with
an identical one by the manufacturer, its service agent
or similarly qualified persons in order to avoid a hazardrisk of electric shock.
WARNING: Do not locate multiple portable socket-outlets
or portable power supplies at the rear of the appliance.
CLEANING AND MAINTENANCE
WARNING: Ensure that the appliance is
switched off and disconnected from the power supply
before performing any maintenance operation; never
use steam cleaning equipment- risk of electric shock.
Do not use abrasive or harsh cleaners such as window
sprays, scouring cleansers, flammable fluids, cleaning waxes,
concentrated detergents, bleaches or cleansers containing
petroleum products on plastic parts, interior and door liners or
gaskets. Do not use paper towels, scouring pads, or other
harsh cleaning tools.
DISPOSAL OF PACKAGING MATERIALS
The packaging material is 100% recyclable and is marked with the
recycle symbol .
The various parts of the packaging must therefore be disposed of
responsibly and in full compliance with local authority regulations
governing waste disposal.
DISPOSAL OF HOUSEHOLD APPLIANCES
This appliance is manufactured with recyclable or reusable
materials. Dispose of it in accordance with local waste disposal
regulations. For further information on the treatment, recovery
and recycling of household electrical appliances, contact your
local authority, the collection service for household waste or the store
where you purchased the appliance. This appliance is marked in
compliance with European Directive 2012/19/EU, Waste Electrical and
Electronic Equipment (WEEE). By ensuring this product is disposed of
correctly, you will help prevent negative consequences for the
environment and human health. The symbol on the product or
on the accompanying documentation indicates that it should not be
treated as domestic waste but must be taken to an appropriate
collection center for the recycling of electrical and electronic
equipment.
ENERGY SAVING TIPS
Install the appliance in a dry, well ventilated room far away from any heat
source (eg. radiator, cooker, etc.) and in a place not exposed directly to the
sun. If required, use an insulating plate. To guarantee adequate ventilation
follow installation instructions.
Insufficient ventilation at the back of the product increases energy
consumption and decreases cooling efficiency. Frequent door opening
might cause an increase in Energy Consumption. The internal
temperature of the appliance and the Energy Consumption may be
affected also by the ambient temperature, as well as location of the
appliance. Temperature setting should take into consideration these
factors.
Reduce door opening to a minimum.
When thawing frozen food, place in the refrigerator. The low temperature
of the frozen products cools the food in the refrigerator. Allow warm
food and drinks to cool down before placing in the appliance.
Positioning of the shelves in the refrigerator has no impact on the
efficient usage of energy. Food should be placed on the shelves in such
way to ensure proper air circulation (food should not touch each other
and distance between food and rear wall should be kept).
You can increase storage capacity of frozen food by removing baskets
and, if present, Stop Frost shelf.
Do not worry about noises coming from the compressor which are
described as normal noises in this product's Quick Guide.
FROZEN COMPARTMENT
Storage
Product
Butter or margarine 1 month 6 months 14 months
Fish 1 month 1-3 months >9 months
Fruits (except citrus) &
Vegetables 1 month 8-12 months >12 months
Meat- Ham- sausage
Roasts (beef-pork- lamb)
Steaks or chops
(beef-lamb-pork) 1 month
Milk, Fresh fluid, Cheese,
Ice cream or sherbet 1 month 1-3 months >24
Poultry (chicken-turkey) 1 month 5-7 month >24
Product
cans, drinks, eggs, sauces,
pickles, butter, jam 3-4 weeks 3-4 weeks 3-4 weeks
Tropical fruit
cheese, milk, dairy food, deli
food, yoghurt 2-5 days 2-5 days 2-5 days
Cold cuts, desserts, meat
and fish and home-cooked
food 3-5 days 1-2 days
Store vegetables and fruits
(excluding tropical fruits and
citrus) 15-18 days 10-15 days 4-7 days
period
(-12°C)
UNFROZEN COMPARTMENT
period (0-3°C)
recommended 2-4 weeks 3-4 weeks
Storage
Not
Recommended
Storage period
(-18°C)
2 months
8-12 months
4 months 15 months
Recommended
Storage period
(3-6°C)
Storage period
(-24°C)
Storage
period 6-8°C
Not
recommended
NOTE: Flexi freezer Please refer to applicable instruction of "FROZEN
COMPARTMENT" and "UNFROZEN COMPARTMENT". This table is only
suitable for European Union countries.
The model information can be retrieved using the QR Code indicated
on the energy label. The label also includes the model identifier that
can be used to consult the https://eprel.ec.europa.eu database portal.
7
Proper Disposal of Your Old
8
Refrigerator
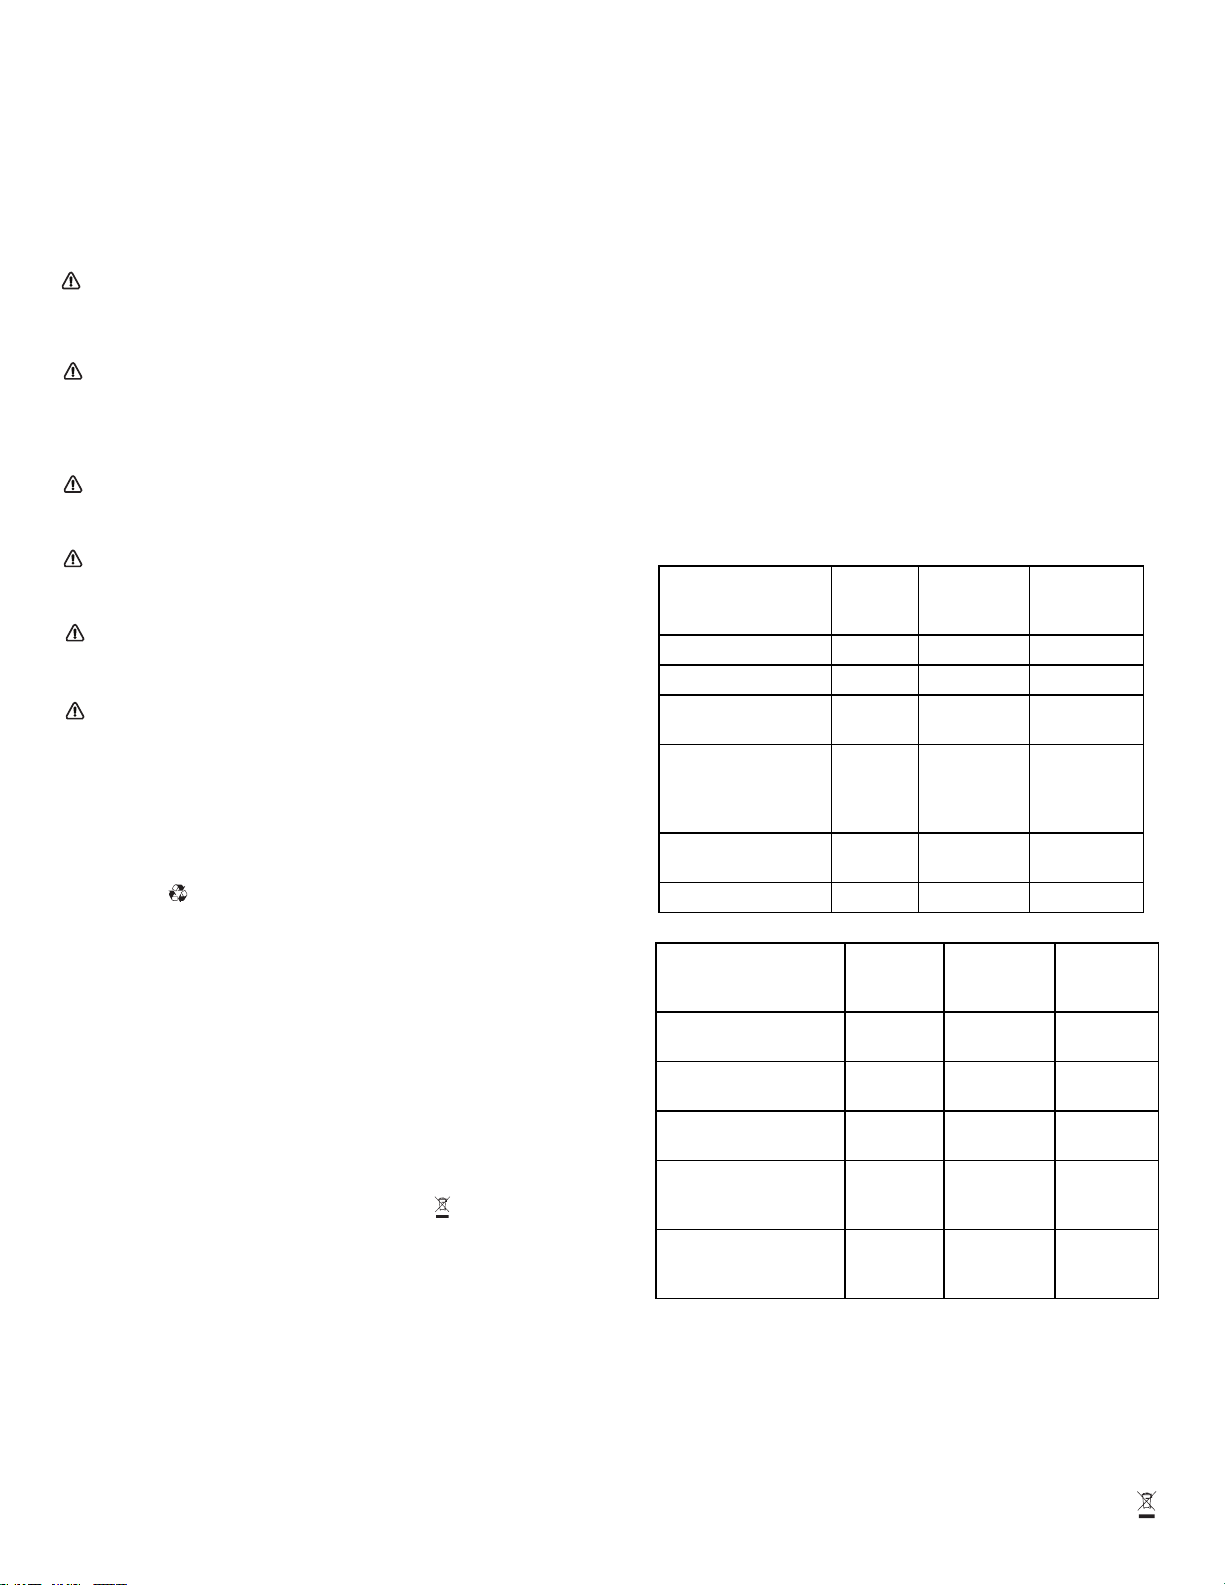
DANGER : Risk of child entrapment. Before you throw away
your old refrigerator or freezer:
■ Take off the doors.
■ Leave the shelves in place so that children cannot easily climb
inside.
WARNING
Suffocation Hazard
Remove doors from your old refrigerator.
Failure to do so can result in death or
brain damage.
IMPORTANT: Child entrapment and suffocation are not problems
of the past. Scrapped or abandoned refrigerators are still
dangerous—even if they will sit for “just a few days.” If you are
getting rid of your old refrigerator, please follow these instructions
to help avoid accidents.
Important information to know about disposal of
refrigerants:
Dispose of refrigerator in accordance with Federal and Local
regulations. Refrigerants must be evacuated by a licensed,
EPA certified refrigerant technician in accordance with
established procedures.
8

2 top Light Strips
9
In-door Ice Maker
and Ice Bucket
Pure Control
6th sense
Precision Control
PARTS AND FEATURES
Door in door
Adjustable Shelf
2 side Light Strips
Adjustable Shelf
A
Pull Out Platter
Fresh Box
Water Filter Delicates Pantry Drawer
Easy Access Tray
Fast Freeze Drawers
B C
Fresh Box
A. Refrigerator
B. Freezer
C. Flexi Freeze
Storage Capacity:
Please check the rating label in the back of the product.
NOTE:
The drawers, baskets and shelves shall remain in the position like the above picture.
This is the best condition for energy consumption. This refrigerating appliance is not
intended to be used as a built-in appliance.
User Interface
Ice and Water
Dispense Paddles
Pull out
Dripping Tray
When you first install your refrigerator, make sure that the controls are still set to the
recommended set points. The factory recommended set points are 3°C for the
refrigerator and -18°C for the freezer. All the LED lights in this product are energy
efficiency class G. Load limits are determined by baskets, flaps, drawers, shelves
etc. Make sure that these components can still close easily after loading.
9

WHAT’S NEW BEHIND THE DOORS?
10
Your Whirlpool® Door-within-Door French Door Refrigerator comes equipped with various
innovative storage and energy-efficient features.
Door-within-Door
Featuring a designated cool area for drinks, this feature lets you
have instant access to your favorite foods and drinks without
having to open the entire refrigerator. Use the hidden latch to
open the door-within-door and get instant access to the gallon
door bin and your cold beverages.
In-Door-Ice® Storage Bin
The ice maker and ice storage bin are located in the door for easy
access to ltered ice while freeing up valuable shelf space inside
and adding additional door bins for more usable space.
Freeze Shield
This feature minimizes moisture migration in the frozen food and
reduces the freezer burn occurrence.
Pull out Platter
This full-width side-out shelf tucked between the crispers and the
lowest shelf is perfect for leftover family-sized casserole dishes,
pizza boxes, and large party platters.
Delicates Pantry Drawers
To store things like meat, deli items, and drinks to keep in their
ideal cooling environment.
Water Dispenser with Measured Fill
The Measured Fill feature allows you to dispense a desired
amount of filtered water in handy increments of liters, cups or
ounces.
Panoramic LED lighting
Multiple strips of LED lights inside the refrigerator compartment,
freezer compartment, and interior drawers minimize shadows and
evenly distribute light throughout the refrigerator.
Convertible Space
Switch from freezer to fridge in one touch by selecting among the
6+ preset temperatures and create the space you want according
to your evolving needs.
Pure control
Hygiene, with innovative device releasing ozone to reduce odours
and prevent the proliferation of bacteria inside the cabinet,
improving the air quality for a better environment.
LCD
The high definition displays with touchscreen provide
personalized recommendations and allow to interact with the
fridge quickly and effortlessly.
10

INSTALLATION CHECKLIST
11
Electrical Power
INSTALLATION INSTRUCTIONS
Getting Started
WARNING
NOTE: If the lter is not installed correctly, water may dispense at
a lower ow rate and there will be slower ice production. Improper
lter installation may also cause the water lter housing to leak.
Unpack the Refrigerator
Electrical Shock Hazard
Plug into a grounded 3 prong outlet.
Do not remove ground prong.
Do not use an adapter.
Do not use an extension cord.
Failure to follow these instructions can result in death,
fire, or electrical shock.
■ Plug refrigerator into a earthed socket.
Doors
■ If doors need to be removed during installation, see the
“Remove and Replace Refrigerator Doors” and “Remove and
Replace Freezer Door Fronts” sections.
■ Doors seal completely.
■ Refrigerator is level. Adjust leveling feet so they are snug
against the oor.
■ Doors are even across the top. (Use door alignment feature if
necessary).
Final Checks
■ Remove all shipping material.
■ Set temperature controls to the recommended setting.
■ Save instructions and other literature.
■ In order to receive a more complete assistance, please
register your product on www.whirlpool.com.
Water Filter Installation
n Locate the water lter compartment in the lower left-hand side
of the refrigerator compartment. Push on the right side of the
lter door to open.
n Align the arrow on the water lter cap with the cutout notch in
the lter housing and insert lter.
n Once the lter is inserted, turn the lter clockwise 90° (1/4
turn) until it locks into the housing.
n Push water lter door closed to latch.
n Flush 3 gallons (11.4 L) of water through the water system to
clear air from the water line and to keep the dispenser from
dripping and/or avoiding decreased dispenser ow.
n Reset the lter counter via user interface. See the procedure
to reset the lter in the User Controls section.
WARNING
Excessive Weight Hazard
Use two or more people to move and install
refrigerator.
Failure to do so can result in back or other injury.
Refrigerator Delivery
A minimum door opening of 838 mm (33") is required. If door
opening is 914 mm (36") or less, then removal of doors, drawer
and hinges is required.
Cart the refrigerator from the side for all door openings.
When Moving Your Refrigerator:
Your refrigerator is heavy. When moving the refrigerator for
cleaning or service, be sure to cover the oor with
cardboard or hardboard to avoid oor damage. Always pull
the refrigerator straight out when moving it. Do not wiggle or
“walk” the refrigerator when trying to move it, as oor
damage could occur.
Remove the Packaging
■ Remove tape and glue residues from surfaces before
turning on the refrigerator. Rub a small amount of liquid dish
detergent over the adhesive with your ngers. Wipe with warm
water and dry.
■ Do not use sharp instruments, rubbing alcohol, ammable
uids, or abrasive cleaners to remove tape or glue. These
products can damage the surface of your refrigerator.
■ Dispose of/recycle all packaging materials.
Clean Before Using
After you remove all of the packaging materials, clean inside of
your refrigerator before using it. See cleaning instructions in the
“Refrigerator Care” section.
Important information to know about glass shelves
and covers:
Do not clean glass shelves or covers with warm water when
they are cold. Shelves and covers may break if exposed to
sudden temperature changes or impact, such as bumping.
Tempered glass is designed to shatter into many small,
pebble-size pieces. This is normal. Glass shelves and covers
are heavy. Use both hands when removing them to avoid
dropping.
11
Location Requirements
12
Electrical Requirements
WARNING
Explosion Hazard
Keep flammable materials and vapors, such as
gasoline, away from refrigerator.
Failure to do so can result in death, explosion, or fire.
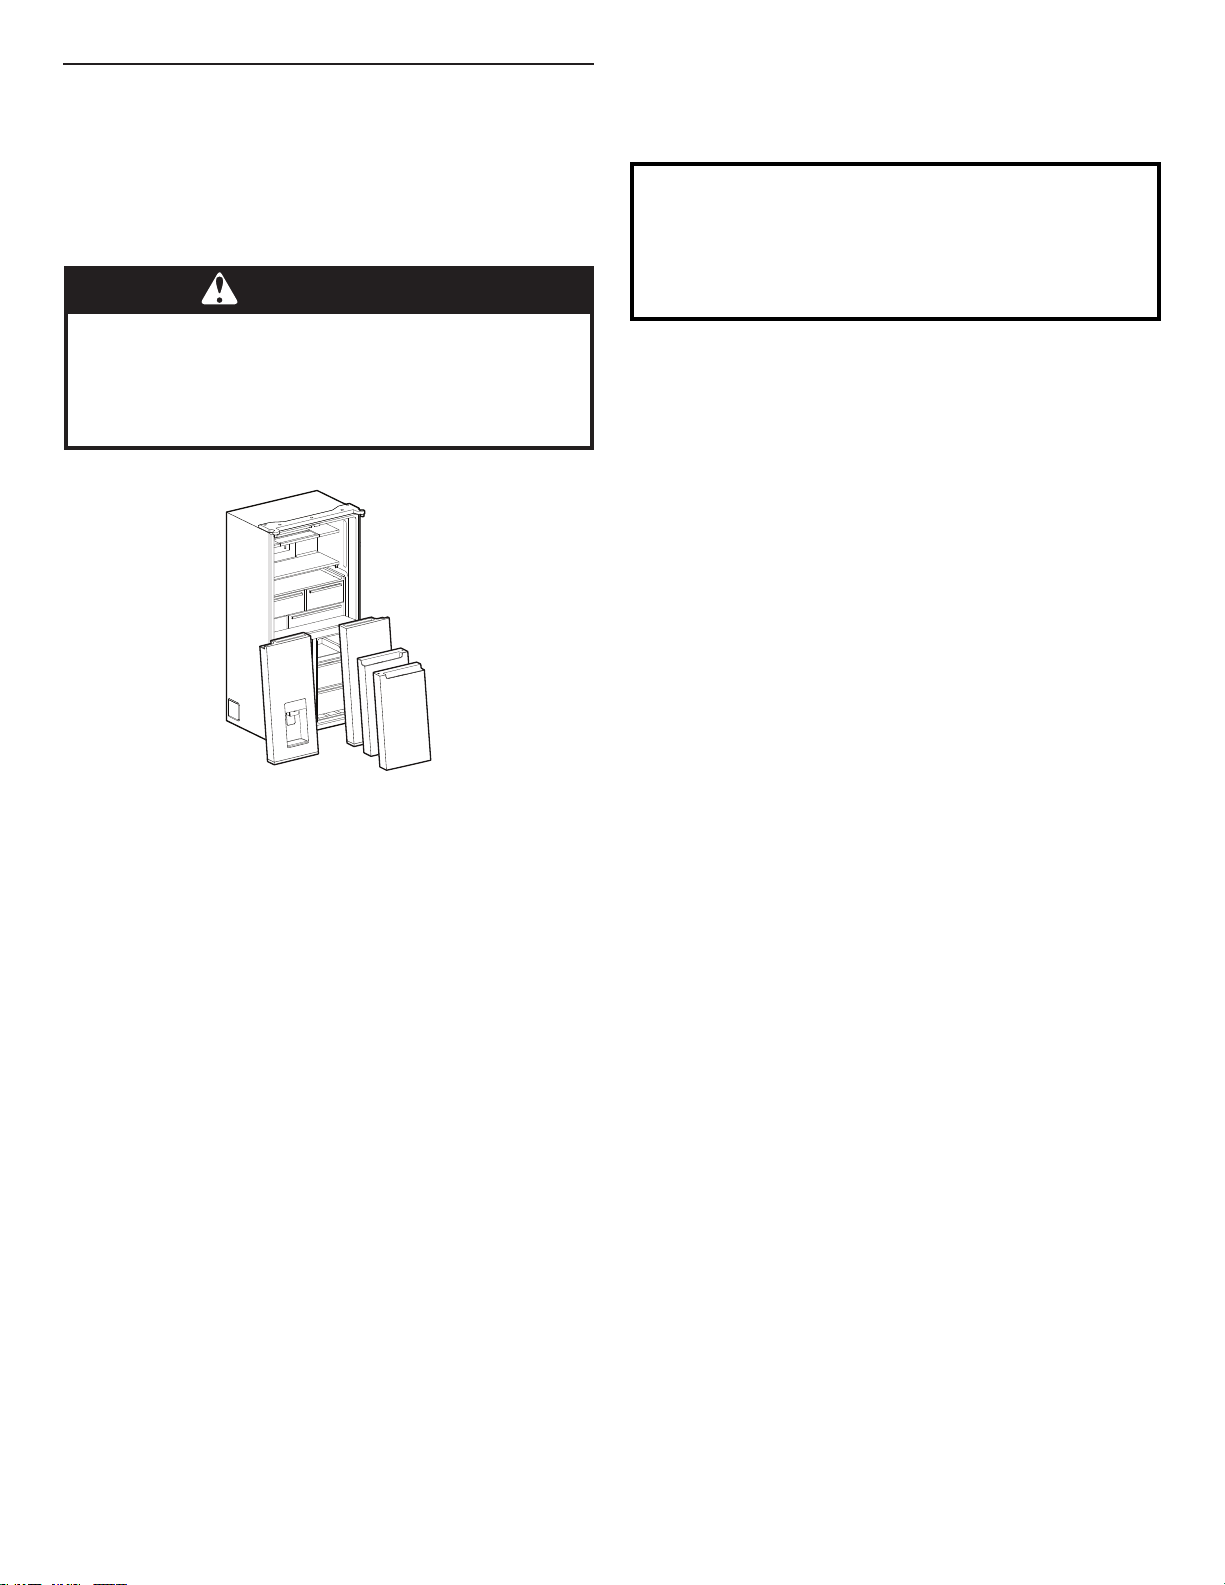
To ensure proper ventilation for your refrigerator, allow for a
1.25 cm space on each side and at the top. Allow for a 1.25 cm
space behind the refrigerator. If your refrigerator has an ice
maker, allow extra space at the back for the water line
connections. When installing your refrigerator next to a fixed wall,
leave a 9.5 cm minimum space between the refrigerator and wall
to allow the door to swing open.
NOTE: This refrigerator is intended for use in a location where
the temperatur
of 43°C. The preferred room temperature range for optimum
performance, which reduces electricity usage and provides
superior cooling, is between 15°C and 32°C. It is recommended
that you do not install the refrigerator near a heat source, such as
an oven or radiator.
e ranges from a minimum of 10°C to a maximum
1.25 cm
WARNING
Electrical Shock Hazard
Plug into a grounded 3 prong outlet.
Do not remove ground prong.
Do not use an adapter.
Do not use an extension cord.
Failure to follow these instructions can result in death,
fire, or electrical shock.
IMPORTANT: Installation and electrical connection must
be carried out by a qualied technician according to the
manufacturer’s instructions and in compliance with the local
safety regulations.
■ The refrigerator is designed to operate on a separate
220-240 V, 10 A, 50-60 Hz circuit.
■ Make sure the voltage specied on the rating plate
corresponds to that of your home.
■ It must be possible to disconnect the appliance from the
power supply by unplugging it or by means of a main two pole
switch installed upstream of the socket.
■ If the supply cord is damaged, it must be replaced by the
manufacturer, its service agent or similarly qualied persons in
order to avoid a hazard.
Before you move your refrigerator into its nal location, it is
important to make sure you have the proper electrical connection:
Recommended Earthing Method
220-240 V 50 Hz, 220 V 60 Hz, or 230/240 V 50 Hz AC only 10 A
fused and earthed electrical supply is required.
12
9.5 cm
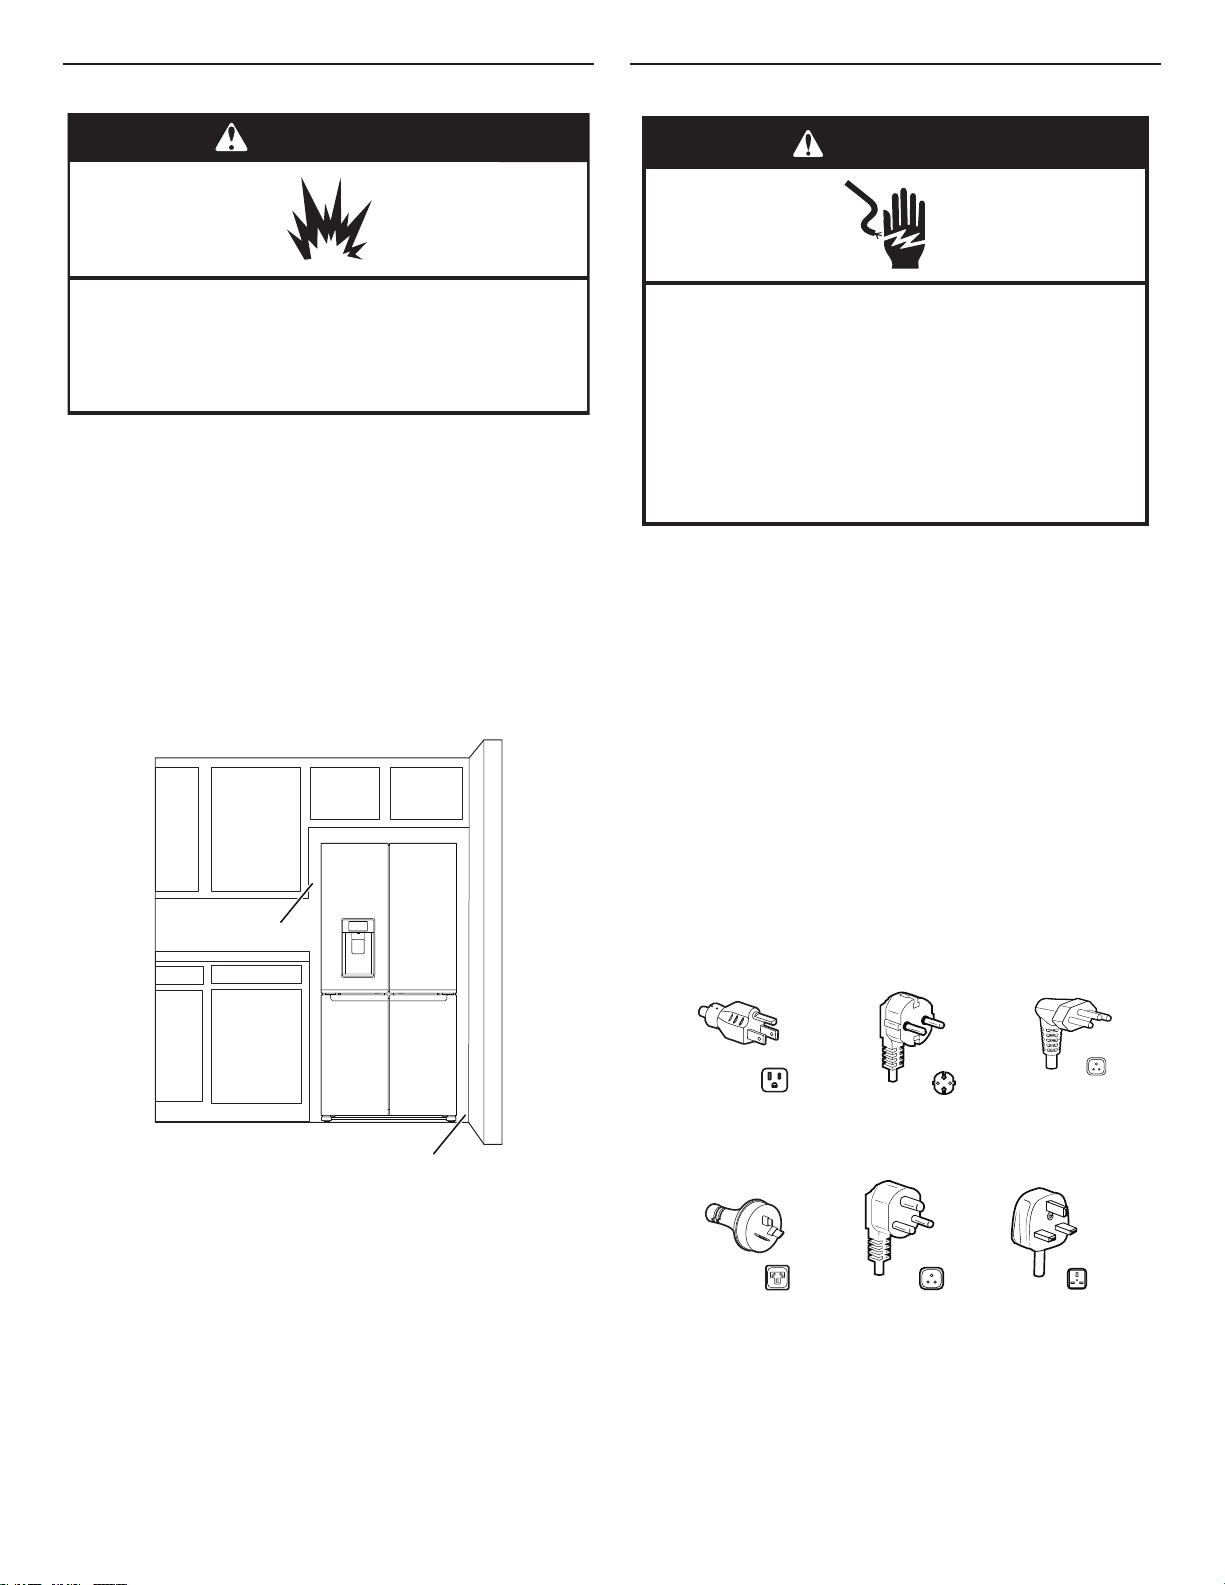
Type B
Type I
For Australia and New Zealand:
Your new appliance has been especially manufactured to meet all
Australian Standards and Conditions.
Some notations in the installation instructions may refer to
electrical requirements in other countries, so we draw your
particular attention to these specic notes.
Your appliance needs to be plugged into a 230/240 V 50 Hz AC
only 10 A earthed socket.
Type E and F
Type M
Type N
Type G

Electrical Requirements (Great Britain and Ireland only)
13
Temperature
IMPORTANT: This refrigerator must be earthed.
Fuse Replacement
If the main lead of this refrigerator is tted with a BS1363A,
13 A fused plug, to replace a fuse in this type plug use an A.S.T.A.
approved fuse to BS 1362 type and proceed as follows:
1. Remove the fuse cover (A) and fuse (B).
2. Fit replacement 13 A fuse into the fuse cover.
3. Reinsert both the fuse and its cover into the plug.
IMPORTANT: The fuse cover must be retted when changing a
fuse. If fuse cover is lost, the plug must not be used until a correct
replacement cover is tted. A correct replacement is identied by
the colour insert or colour “word” embossed on the base of the
plug. Replacement fuse covers are available at your local
electrical shop.
A
B
A. Fuse cover
B. Fuse
This refrigerator is designed for operation in places where the
temperature comes within the following ranges, according to
climatic class shown on the rating plate. The refrigerator may not
work properly if it is left for a long time at a temperature outside
the specied range.
NOTE: It is recommended that you do not install the refrigerator
near a heat source, such as an oven or radiator.
Climatic Class Amb. T. (°C) Amb. T. (°F)
SN From 10 to 32 From 50 to 90
N From 16 to 32 From 61 to 90
ST From 16 to 38 From 61 to 100
T From 16 to 43 From 61 to 110
For the Republic of Ireland (only):
The information given in respect of Great Britain will frequently
apply, but a third type of plug and socket is also used, the 2-pin,
side earth type.
Socket/Plug (valid for both countries):
If the tted plug is not suitable for your socket, please contact
After-sales Service for further instruction. Please do not
attempt to change the plug yourself. This procedure needs
to be carried out by a qualied technician in compliance with
the manufacturer’s instructions and current standard safety
regulations.
13

Remove and Replace Refrigerator Doors
14
NOTE: Measure the width of your door opening to see whether or not you need to remove refrigerator doors to move refrigerator into
your home. If door removal is necessary, see the following instructions.
IMPORTANT: If refrigerator was previously installed and you are moving it out of the home, turn refrigerator control off before you begin
removing the doors. Unplug refrigerator or disconnect power. Remove food and adjustable door or utility bins from doors.
Gather required tools and read all instructions before removing doors.
TOOLS NEEDED: 6 mm socket wrench, 5 mm socket wrench and #2 Phillips screwdriver.
WARNING
Electrical Shock Hazard
Disconnect power before removing doors.
Failure to do so can result in death or electrical shock.
Water Dispenser
Tubing Connection
A
A. Outer ring
Wiring Plug
Top Left Hinge
A
Top Left Hinge Cover
A
B
A. Top Hinge Cover screws
B. Top Hinge Cover
Top Right Hinge Cover
A
B
A. Top Hinge Cover screws
B. Top Hinge Cover
Top Right Hinge
A
A. 5 mm socket screws
14
A. 5 mm socket screws
Middle Left Hinge
A
A. Hinge
Middle Right Hinge
A
A. Hinge

WARNING
15
Excessive Weight Hazard
Use two or more people to lift the refrigerator door.
Failure to do so can result in back or other injury.
Remove Left-Hand Door
IMPORTANT: The wiring for UI run through left-hand door hinge,
so they must be disconnected before removing the door.
1. Using a Phillips screwdriver, remove cover from top hinge.
Remove Refrigerator Doors
WARNING
Electrical Shock Hazard
Disconnect power before removing doors.
Failure to do so can result in death or electrical shock.
Remove Right-Hand Door
1. Unplug refrigerator or disconnect power.
2. Keep refrigerator doors closed until you are ready to lift them
free from the cabinet.
NOTE: Provide additional support for refrigerator door while the
hinges are being removed. Do not depend on the door gasket
magnets to hold the door in place while you are working.
3. Using a Phillips screwdriver, remove cover from top hinge.
4. Using 5 mm socket wrench, remove four screws from top
hinge and set aside.
A
B
A. Top hinge cover screw
B. Top hinge cover
2. Disconnect two wiring plugs located on top of the door hinge.
■ Grasp each side of wiring plugs. With your left thumb,
press down to release the catch and pull the sections of
the plugs apart.
A
A
B
C
D
A. Top hinge cover screw
B. Top hinge cover
C. 5 mm socket screws
D. Top hinge
5. Lift refrigerator door from the middle hinge pin. The top hinge
will come away with the door.
B
A. Wiring Plug
B. Ground (earth) connector
3. Disconnect the water dispenser tubing located on top of the
door hinge. Firmly pull up on the clasp. Then, pull the tubing
out of the fitting.
NOTE: The water dispenser tubing remains attached to the
left-hand refrigerator door.
15

4. Using 5 mm socket wrench, remove four internal screws from
16
top hinge and set aside.
A
B
A. 5 mm socket screws
B. Top Hinge
NOTE: Provide additional support for refrigerator door while
hinges are being removed. Do not depend on the door gasket
magnets to hold the door in place while you are working.
5. Lift refrigerator door from bottom hinge pin. The top hinge will
come away with door.
NOTE: It may not be necessary to remove bottom hinges and
brake feet assemblies to move the refrigerator through a doorway.
■ Only if necessary, use 6 mm socket wrench and #2 Phillips
screwdriver to remove middle hinge.
Replace Right-Hand Refrigerator Door
1. Set right-hand door onto middle hinge pin.
2. Insert top hinge pin into open hole in top of refrigerator door.
3. Using four 5 mm socket screws, fasten hinge to cabinet. Do
not tighten screws completely.
Remove and Replace Freezer/Flexi
Freeze Door
1. Keep freezer doors closed until you are ready to lift them free
from cabinet.
NOTE: Provide additional support for freezer door while hinges
are being removed. Do not depend on door gasket magnets to
hold door in place while you are working.
■ Using a #2 Phillips screwdriver and 6 mm socket wrench to
remove middle hinge from cabinet.
A
A. Middle hinge
■ Lift freezer door from the bottom hinge pin.
Replace Left-Hand Refrigerator Door
1. Set left-hand door onto middle hinge pin.
2. Using four 5 mm socket screws, fasten hinge to cabinet. Do
not tighten screws completely.
3. Reconnect electrical wiring.
■ Push together two sections of wiring plug.
■ Reconnect earth wire to hinge screw.
Final Steps
1. Completely tighten eight 5 mm socket screws.
2. Replace top hinge covers.
A
A. Bottom hinge
16

Final Steps
17
WARNING
Electrical Shock Hazard
Plug into a grounded 3 prong outlet.
Do not remove ground prong.
Do not use an adapter.
Do not use an extension cord.
Failure to follow these instructions can result in death,
fire, or electrical shock.
1. Plug into an grounded (earthed) socket.
2. Return all removable parts and food to the drawers.
Refrigerator Levelling
1. Move refrigerator to its nal location.
2. Using hand, rotate the brake feet. Turn them counterclockwise
until the rollers are off the oor and both brake feet are snug
against the oor. This keeps refrigerator from rolling forward
when opening the doors.
Water Supply Requirements
A cold water supply with water pressure between 20 psi and
145 psi (138 kPa and 1000 kPa) is required to operate the water
dispenser and ice maker. If you have questions about your water
pressure, call a licensed, qualied plumber.
NOTE: If the water pressure is less than what is required, the ow
of water from the water dispenser could decrease or ice cubes
could be hollow or irregular shaped.
Reverse Osmosis Water Supply
IMPORTANT: The pressure of the water supply coming out
of a reverse osmosis system and supplying the water inlet valve
of the refrigerator needs to be between 20 psi and 145 psi
(138 kPa and 1000 kPa).
If a reverse osmosis water ltration system is connected to
your home cold water supply, the water pressure to the reverse
osmosis system needs to be a minimum of 40 to 60 psi (276 to
414 kPa).
■ Check to see whether the sediment lter in the reverse
osmosis system is blocked. Replace the lter if necessary.
■ Allow the storage tank on the reverse osmosis system to rell
after heavy use. The tank capacity could be too small to keep
up with the requirements of the refrigerator.
NOTE: Faucet-mounted reverse osmosis systems are not
recommended.
■ If your refrigerator has a water lter, it may further reduce
the water pressure when used in conjunction with a reverse
osmosis system. Remove the water lter. See the “Water
Filtration System” section.
If you have questions about your water pressure, call a licensed,
qualied plumber.
Connect the Water Supply
Read all directions before you begin.
IMPORTANT:
■ Connect to potable water supply only.
A. Brake feet
A
IMPORTANT: If you need to make further adjustments
involving brake feet, you must turn both brake feet same
amount to keep the refrigerator level.
3. Use a level to make sure refrigerator is level from side to side
and front to back.
Do not use with water that is microbiologically unsafe or
of unknown quality without adequate disinfection before
or after the system. Systems certified for cyst reduction
may be used on disinfected waters that may contain
filterable cysts.
■ Plumbing must be installed in accordance with the
International Plumbing Code and any local codes and
ordinances.
■ Copper and PEX tubing connections from the household
water line to the refrigerator are acceptable and will help
avoid off-taste or odor in your ice or water. Check for leaks.
If PEX tubing is used instead of copper, we recommend the
following: 7 ft (2.14 m) jacketed PEX, 5 ft (1.52 m) PEX, or
25 ft (7.62 m) PEX.
■ Install tubing only in areas where temperatures will remain
above freezing.
Tools Needed:
Gather the required tools and parts before starting installation.
■ Flat-blade screwdriver
■ 7/16" and 1/2" open-end wrenches or 2 adjustable wrenches
■ 1/4" nut driver
NOTE: Do not use a piercing-type or 3/16" (4.76 mm) saddle
valve, which reduces water ow and clogs easier.
17

Connect to Water Line
18
Connect to Refrigerator
IMPORTANT: If you have turned the refrigerator on before the
water was connected, turn off the ice maker.
1. Unplug refrigerator or disconnect power.
2. Turn off main water supply. Turn on nearest faucet long
enough to reduce water pressure in the water line.
3. Use a 3/4-14" shut-off valve or equivalent. The refrigerator is
provided with a household supply line with the installation kit
that connects to the shut-off valve and to the refrigerator.
NOTE: Appliance is equipped with a water installation kit. To
assure proper connection to your water supply, use proper sealing
material in the connection. Check if connection is sealed properly
after some hours of operation.
A
B
C
D
A. Sleeve
B. Nut
C. Copper tubing (to refrigerator)
D. Household supply line
Follow the connection instructions specic to your model.
1. Remove plastic cap from water valve inlet port. Attach the
copper tubing to the valve inlet using a compression nut
and sleeve as shown. Tighten the compression nut. Do not
overtighten. Conrm copper tubing is secure by pulling on
copper tubing.
2. Create a service loop with the copper tubing. Avoid kinks
when coiling the copper tubing. Secure copper tubing to
refrigerator cabinet with a “P” clamp.
A
B
C
D
4. Now you are ready to connect the copper tubing to the
shut-off valve. Use 1/4" (6.35 mm) O.D. (outside diameter)
soft copper tubing to connect the shut-off valve and the
refrigerator.
■ Ensure that you have the proper length needed for the job.
Be sure both ends of the copper tubing are cut square.
■ Slip compression sleeve and compression nut onto copper
tubing as shown. Insert end of tubing into outlet end squarely
as far as it will go. Screw compression nut onto outlet end
with adjustable wrench. Do not overtighten.
A
B
C
A. Compression sleeve
B. Compression nut
C. Copper tubing
5. Place the free end of the tubing into a container or sink and
turn on main water supply to ush out tubing until water is
clear. Turn off shut-off valve on the water pipe.
NOTE: Always drain the water line before making the nal
connection to the inlet of the water valve to avoid possible
water valve malfunction.
6. Bend the copper tubing to meet the water line inlet, located
on the back of the refrigerator cabinet as shown. Leave a coil
of copper tubing to allow the refrigerator to be pulled out of
the cabinet or away from the wall for service.
A. Copper tubing
B. “P” clamp
C. Compression nut
D. Compression sleeve
3. Turn on water supply to refrigerator and check for leaks.
Correct any leaks.
4. If ice is desired, turn on the ice maker.
Note: Allow 24 hours to produce the rst batch of ice. Discard
the rst three batches of ice produced. Allow three days to
completely ll the ice storage bin.
18

FILTERS AND ACCESSORIES
19
Water Filtration System
Do not use with water that is microbiologically unsafe or
of unknown quality without adequate disinfection before
or after the system. Systems certified for cyst reduction
may be used on disinfected waters that may contain
filterable cysts.
Replace and Install the Water Filter
The water lter should be replaced every 6 months based on
a ow rate of 0.50 gpm-0.60 gpm (1.89 lpm-2.27 lpm) that lters
200 gallons (757 L) of water.
To order a replacement lter, contact us. See the “Accessories”
section in the Use and Care Guide for information on ordering.
1. Push the water lter door to open, located bottom left of
refrigerator compartment.
4. Install the water lter cap onto the new lter. Be sure to align
the arrows so the groves in lter align with ribs in lter cap.
5. Insert the lter into the housing.
2. Twist the water lter and turn 90° counterclockwise to unlock.
3. Pull the lter out of the housing.
6. Twist the water lter and turn 90° clockwise until it locks into
place and the arrows are aligned.
7. Push the water lter door closed.
8. Reset the lter counter via user interface. See the procedure
to reset the lter in the User Control section.
Remove the water lter cap from the water lter being replaced.
19

The Water Filter Status
20
The Water Filter status icon will help you know when to change
your water filter.
n LOW FILTER - The icon on the Clock screen shall alert the
user when the Water Filter life is less than 10% remaining.
n REPLACE FILTER - The icon on the Clock screen shall alert
the user when the Water Filter life is less than 0% remaining.
NOTE: “REPLACE FILTER” will remain illuminated if the
filter is not reset on the user interface (UI).
n RESET FILTER - Reset the filter by navigating to the "Water
Filter" section under Settings.
Replace and Install the Pure Control
It is recommended to replace the Pure Control every 3 years as
the ozone generate degrades over time, reducing its impact on
food preservation. At the beginning of life, it generates an average
of 0.06 ppm.
To order and replace the Pure Control, please contact us. See the
“Accessories” section for information on ordering.
Accessories
To order accessories, contact the dealer from whom you
purchased your refrigerator.
Assistance or Service
Before calling for assistance or service, please check the
"Troubleshooting" section. It may save you the cost of a service
call. If you still need help, follow the instructions below.
If you need replacement parts
To locate factory-specied replacement parts in your area,
contact the dealer from whom you purchased your refrigerator.
Warranty
Contact the dealer from whom you purchased refrigerator for
warranty information.
Keep this book and your sales slip together for future
reference. You must provide proof of purchase or installation
date for in-warranty service.
Write down the following information about your appliance to help
you obtain assistance or service if you ever need it. You will need
to know your complete model number and serial number. You
can nd this information on the model and serial number label,
located on the inside wall of the fresh food compartment.
Dealer name
Serial number
Address
Phone number
Model number
Purchase date
Refer to whirlpool.eu to contact.
REFRIGERATOR CONNECTIVITY FEATURES
(on some models)
Wi-Fi connectivity allows your Smart Refrigerator to connect to the Internet and interact with the Whirlpool® app from your smartphone
or mobile device. This connection opens up several Smart options to you — options intended to save you valuable time and energy.
NOTE: Requires Wi-Fi and account creation. App features and functionality subject to change. Subject to Terms of Service available
at: www.whirlpool.com/connect. Data rates may apply.
Water Filter Status
What it does: Gives you a look at the life remaining for your
water filter before replacement is needed. This allows you to reset
the filter.
What it does for you: Helps you be more efficient in planning
for ordering and replacing filters.
Auto Reorder App
SMART FEATURES
Smart Features help make your everyday a little more efficient
by letting you remotely monitor, manage, and maintain your
refrigerator.
Remote Temperature Control
What it does: Allows you to control your refrigerator remotely
from your mobile device via the Whirlpool
What it does for you: Lets you control temperatures in
your refrigerator, freezer, and temperature-controlled pantry
remotely—not just when you are standing in front of it.
®
app.
What it does: Allows you to order replacement filters,
consumables, and accessories via the Whirlpool
delivery directly to your home.
What it does for you:
filters—no trips to the store searching for the correct filters.
Simplifies ordering correct water and air
Door Ajar Alert
What it does: Sends you a notification when one of the doors of
the refrigerator has been left open.
What it does for you: Alerts you to door-open status so you
can close the door(s) or call home to ask someone else to close
door(s) before over-temperature situation arises.
®
app for
20

REFRIGERATOR USE
21
Opening and Closing Doors
There are two fresh food compartment doors. The doors can
be opened and closed either separately or together. There is a
vertically hinged seal on left refrigerator door.
■ When left-side door is opened, hinged seal automatically folds
inward so that it is out of the way.
■ When both doors are closed, the hinged seal automatically
forms a seal between two doors.
NOTE: When closing the door, the hinged seal should be in
correct position (be bent inside). Otherwise it will hit the right door
or the xing shaft.
A
A. Hinged seal
The fresh food compartment door switch is located in top left and
right hinge cover.
■ For Freezer and Convertible Space, door switch is located in
the bottom mullion.
■ The door switch uses magnet to sense door opening/closing.
■ Ensure there are no magnet or electronic devices (Speaker,
Coolvox
NOTE: The light will not turn on if door opening is not detected.
®
etc.) within 7.62 cm of the hinge cap.
A
Shelf Height Adjustment
Shelf height can be adjusted by changing its location from bottom
support to upper support and vice versa.
■ Open right side door and left side door till 135º.
135° 135°
The Ice Dispenser
IMPORTANT:
n If the ice cubes are hollow or have an irregular shape, it could
be because of low water pressure. See the “Water Supply
Requirements” section.
n Ice travels from the ice storage bin through the dispenser
chute to the dispenser. To turn off the ice maker, see the
“Ice Maker and Storage Bin” section.
n The dispenser may continue to make noise and ice may
continue to dispense for several seconds after releasing
the dispenser button or paddle.
To Clean the Ice Dispenser Chute:
Humidity causes ice to naturally clump together. Ice particles can
build up until the ice dispenser chute becomes blocked.
If ice is not dispensed regularly, it may be necessary to empty the
ice storage bin and clean the ice delivery chute, the ice storage
bin, and the area beneath the storage bin every 2 weeks.
n If necessary, remove the ice clogging the storage bin and
delivery chute using a plastic utensil.
n Clean the ice delivery chute and the bottom of the ice storage
bin using a warm, damp cloth, and then dry thoroughly.
To Dispense Ice - Paddle Dispensing
1. Select the desired type of ice by pressing CUBED ICE or
CRUSHED ICE.
WARNING
Cut Hazard
Use a sturdy glass when dispensing ice.
Failure to do so can result in cuts.
A. Hinge cover
2. Press a sturdy glass against the dispenser paddle. Hold the
glass close to the dispenser opening, so ice does not fall
outside of the glass.
IMPORTANT: You do not need to apply a lot of pressure to
the paddle to activate the ice dispenser. Pressing hard will not
make the ice dispense faster or in greater quantities.
21

3. Remove the glass to stop dispensing.
22
NOTE: Ice may continue to dispense for several seconds after
removing the glass from the dispenser paddle. The dispenser may
continue to make noise for a few seconds after dispensing.
The Dispenser Drip Tray
The drip tray can be removed for cleaning. Start the following
steps from the pulled in position.
n Lift up on the front edge of the tray and pull forward to
remove.
n Pull the tray out angled to the top front direction.
To install it back follow the two steps below.
n Position the tray horizontally on the rails with some space at
the rear part.
n Push downward and pull towards you to engage to the rail.
The drip tray can be pulled out to accommodate larger containers
for measured ll.
The Dispenser Light
1. When you use the dispenser, the light will automatically
turn on.
22

Using the Controls
23
This manual covers several models. Your model may have some or all of the items listed.
Keypad Feature Instructions
Tools Refrigerator
Use Functions
Enables you to personalize the audible tones and refrigeration operation to suit your needs.
See the “Tools” and “More Modes” sections.
Home Home Screen
Favorites Favorites
Ice Ice Function
Note: The user may notice brighter areas of the LCD backlight toward the bottom of the LCD User Interface. This is normal, and shall only be visible during the first 30 seconds of the product start up.
Touch Panel
The touch panel houses the control menu and function controls.
The touch keypads are very sensitive and require only a light
touch to activate. Scroll up, down, left, or right to explore the
different options and features.
For more information about the individual controls, see their
respective sections in this manual.
Display
The display is for both the menu and refrigerator function
controls. The touchscreen allows you to scroll through the
refrigerator menus. The display is very sensitive and requires
only a light touch to activate and control.
After approximately 2 minutes of inactivity, the display will go
into sleep mode and the display will dim. When the refrigerator
is in operation, the display will remain bright.
During use, the display will show menus and the appropriate
selections for the options being chosen.
If pressed once, it enables the user to return to the Home screen. The Home screen
will time out after 2 minutes and display the Clock.
The Favorites key allows the user to save the water amount that they use on a frequent
basis. The user can also access the their Favorites saved based on time of day.
Toggle between crushed ice and cubed ice.
Demo Mode
To Enter Demo Mode, go to the Info section under Settings and
select Demo. The user will be asked to confirm entry into Demo
Mode. Once in Demo, the HMI will start to display marketing
videos.
WARNING: While in Demo Mode, the product will not cool.
To Exit Demo Mode, touch the Screen to stop the video playing.
The user will then be given the option to Try the Product or
Watch the Video.
The User shall then Select Try the Product, after which the
screen shall navigate to the Home Screen. The user should then
navigate the the Info section under Settings and select Demo.
The user will be asked to confirm exit from Demo Mode. The
User Interface shall then navigate back to the Home Screen.
23

Tools
24
The Tools keypad allows you access to functions and
customization options for your refrigerator. These tools allow you
to set the clock, change the temperature between Fahrenheit and
Celsius, turn the audible signals and prompts on and off, change
the language, and more.
Select the Tools keypad to view the Tools features:
■ Kitchen Timer
■ Water Filter
■ Pure Control
■ Control Lock
■ Mute
■ Light
See the “More Modes” section for more information.
Tool Notes
Kitchen Timer Set a kitchen timer by manually entering the
Water Filter
Pure Control
Control Lock
Mute
Light
Preferences
Times and Dates
Set time and date preferences.
NOTE: If user is connected to Wi-Fi, time and date will be set
automatically.
Sound Volume
Set sound volume preferences.
■ Timers and Alerts
■ Buttons and Effects
Display Settings
desired time into the keypad.
1. Select KITCHEN TIMER.
2. Manually input the time to the desired
timer length.
3. Select START.
4. Select CANCEL to end the Kitchen Timer.
Displays the status of the filter.
NOTE: The filter status lights on the external
controls will let you know when to change
your filter.
To change the filter, go to Tools > Filter.
To Reset Filter:
1. Select INSTALL NEW, and follow
instructions on screen to reset.
2. Follow instructions in the “Filters and
Accessories” section to purchase filter.
The Control Lock shuts down the control panel
keypads to avoid unintended use of the
refrigerator. The Control Lock will remain set
after a power failure. When the control is
locked, the user shall be unable to use any
buttons or dispenser paddles.
To Lock or Unlock Control:
To Lock the user interface, navigate to Control
Lock section under the Settings.
To Unlock, follow the instructions on the screen
by "Scrolling up to unlock."
Select MUTE to mute or unmute the
refrigerator sounds.
Select LIGHT to turn the dispenser light on and
off.
■ Display Brightness
The user shall have the option to set the screen brightness.
■ Eco Mode:
The user shall also have the option to set their preferred display
mode option while the user interface is in standby mode. The
user can set the display mode under the Eco Mode section in
Display Settings.
NOTE: If Eco Mode is selected, the display screen shall turn off
completely. The screen can be woken up by touching any location
on the display, or pressing the water or ice paddle.
Favorites
The Favorites feature stores your favorite amounts of water
dispensed.
Regional
Set regional preferences.
■ Language: The user shall have the option between 21 languages.
■ Temperature Units: Fahrenheit and Celsius.
Wi-Fi
■ Connect to Network: Download the Whirlpool
®
App from the
app store on your mobile phone. See the Connectivity Setup
sheet for more detailed instructions.
■ Disable Wi-Fi:
1. Select the Tools keypad.
2. Select Wi-Fi
3. Select WiFi to toggle between turning WiFi on or off.
■ Software Update: Notifies when there is a software update
available.
■ SAID Code: The SAID code is used to sync a smart device
with your appliance.
■ MAC Address: MAC Address is displayed for the Wi-Fi
module.
To connect to Wi-Fi:
1. Select the Tools keypad.
2. Select Wi-Fi
3. Select CONNECT TO NETWORK, and follow instructions on
the screen.
Info
■
Service and Support: Displays model number, Customer
Support contact info, and Diagnostics.
Demo Mode: Select Store Demo Mode to toggle Demo
■
mode off and on.
See the “Using the Controls” section for more information.
Viewing and Adjusting Temperature Set Points
For your convenience, your refrigerator and freezer controls are
preset at the factory.
When you first install your refrigerator, make sure that the controls
are still set to the recommended set points. The factory
recommended set points are 37°F (3°C) for the refrigerator and 0°
F (-18°C) for the freezer as well as 0°F (-18°C) for the convertible
compartment.
IMPORTANT:
24

■ Wait 24 hours before you put food into the refrigerator. If you
25
add food before the refrigerator has cooled completely, your
food may spoil.
NOTE: Adjusting the set points to a colder-thanrecommended setting will not cool the compartments
any faster.
■ If the temperature is too warm or too cold in the refrigerator
or freezer, rst check the air vents to be sure they are not
blocked before adjusting the controls.
■ The recommended settings should be correct for normal
household use. The controls are set correctly when milk or
juice is as cold as you like and when ice cream is rm.
NOTE: Areas such as a garage, basement, or porch may have
higher humidity or extreme temperatures. You may need to
adjust the temperature away from the recommended settings
to accommodate for these conditions.
■ Wait at least 24 hours between adjustments. Recheck the
temperatures before other adjustments are made.
View and Change Temperature Set Points
1. Temperature adjustment is available under Special Functions
>Temperatures.
2. You will be able to view or adjust: Refrigerator, Freezer, and
convertible compartment.
Recommended Refrigerator Temperature
Recommended Freezer Temperature
Adjust Temperature Set Points
Refrigerator set point range: 35°F to 46°F (2°C to 8°C)
Freezer set point range: -6°F to 5°F (-22°C to -15°C)
When adjusting temperature set points,
use the following chart as a guide:
CONDITION: TEMPERATURE ADJUSTMENT:
Refrigerator too cold Refrigerator setting 1° higher
Refrigerator too warm Refrigerator setting 1° lower
Freezer too cold Freezer setting 1° higher
Freezer too warm/
Freezer setting 1° lower
Too little ice
Pure Control
To enable Pure Control navigate to the Pure Control section under
Special Functions.
When enabled, the device releases ozone to reduce odors
and prevent the proliferation of bacteria inside the cabinet, thus
improving the air quality for a better environment.
To disable Pure Control navigate to the Pure Control section
under Special Functions.
More Modes
Fast Freeze
The Fast Freeze feature increases the cooling for approximately 50
hours. The duration varies for different models. When turning on
the Fast Freeze, the freezer compartment temperature will cool
down faster than normal settings.
To enable Fast Freeze, navigate to the Fast Freeze section under
Special Functions.
When enabled, the Fast Freeze icon shall be displayed on the clock
screen, and shall show how much time is remaining before Fast
Freeze is disabled. Pressing the icon shall navigate to the Fast
Freeze screen where you can disable the feature.
To disable Fast Freeze, navigate to the Fast Freeze section under
Special Functions. Adjusting the Freezer temperature shall
automatically turn off the Fast Freeze feature.
NOTE: Setting the freezer to a colder temperature may make some
foods, such as ice cream, harder.
Fast Cool
The Fast Cool feature assists with periods of high refrigerator use,
full grocery loads, or temporarily warm room temperatures. This
feature will be enabled for approximately 2 hours. The duration
varies for different models. When turning on the Fast cool, the
refrigerator compartment temperature will cool down faster than
normal settings.
■ To enable Fast Cool navigate to the Fast Cool section under
Special Functions.
■ When enabled, the Fast Cool icon shall be displayed on the
clock screen, and shall show how much time is remaining
before Fast Freeze is disabled.
■ Pressing the icon shall navigate to the Fast Cool screen where
you can disable the feature.
■ To disable Fast Cool, navigate to the Fast Cool section under
Special Functions. Adjusting the Refrigerator temperature
shall automatically turn off the Fast Cool feature.
NOTE: Setting the refrigerator to a colder temperature may
make some foods, such as ice cream, harder.
Water Filter Reset
Displays the status of the water filter.
NOTE: During dispensing, the user interface shall let the user know
when it is time to change the water filter.
To change the filter, go to Tools > Water Filter.
To Reset Filter:
1. Select INSTALL NEW, and follow instructions on screen to
reset.
2. Follow instructions in the “Filters and Accessories” section to
purchase lter.
No Freezer Burn Feature
This feature minimizes moisture migration from frozen food. This
feature will sub-cool the freezer compartment prior to defrost in
order to reduce temperature variation. This feature will be enabled
for a maximum of 2 hours prior to defrost.
25

Holiday Mode
26
While in Holiday mode, the Refrigerator compartment will run
more efficiently in order to save energy while you are away.
Adjusting the Refrigerator temperature shall automatically turn
off the Holiday Mode feature. By selecting this function the
temperature of the fresh food compartment will automatically
be set to a colder temperature. This feature is not applicable
to the Freezer and variable temperature compartments.
A door ajar alert shall automatically turn off the Holiday Mode
feature.
IMPORTANT: When Holiday Mode is enabled, water and ice
dispensing are disabled.
NOTE: The user can choose to turn off cooling by putting the
refrigerator in Demo mode.
See the “Using the Controls” section for more information.
Door Ajar Alarm
The Door Ajar Alarm feature sounds an alarm when the
refrigerator door(s) or freezer drawer is open for 5 minutes and
cooling is turned on. The alarm will repeat every two minutes.
Close all doors to turn it off.
Special Occasions
Will temporarily turn on Fast Cool to lower your refrigerators
temperature and quickly chill new food.
Having a Party
Will temporarily turn on Fast Freeze and Fast Cool to help lower
your refrigerators during frequent door openings.
Marinating Some Meat
Allows the user to start a timer to track the meat marinating.
User will be able to select timer based on recommendation given
on screen.
Chilling Beverage In Freezer
Set a timer of 25 minutes so that user does not forget beverage
in the freezer.
Clean Inside the Fridge
Temporarily turns off Cooling and Door Ajar for 30 minutes to
allow the user to clean their fridge.
Lighting the Refrigerator
The refrigerator has an interior light that comes on any time the
door is opened.
NOTE: The light is an LED which cannot be replaced. If the LED
does not illuminate when the door is opened, call Service to
replace the light. See “Assistance or Service” in the “Warranty”
section for contact information.
Icons
Clock screen also displays status icons. Touching these icons
also navigates to respective setting.
To adjust the Display Mode, the user shall navigate to the Display
Settings section under Preferences.
Display Mode: Eco Mode
Display Mode: Clock Screen
Control Lock
Door Open Mute
Fast Cool Enabled
Fast Ice Enabled Water Filter Overdue
Wi-Fi Not
Connected
Refrigerator
compartment
Freezer
compartment
6th Sense
Crushed Ice/Cubed Ice
Pure Control Overdue
Convertible
compartment
26

Water and Ice Dispensers
27
IMPORTANT:
■ Allow 3 hours for the refrigerator to cool down and chill water.
■ Allow 24 hours to produce the rst batch of ice. Discard the
rst three batches of ice produced.
■ The dispensing system will not operate if the left-hand
refrigerator door is open.
A
B
Dispensing Calibration
Household water pressure may affect the accuracy of the
Measured Fill feature. So, for optimum performance of your
water dispenser, you must rst calibrate Measured Fill.
IMPORTANT:
■ Flush the water system before calibrating Measured Fill.
■ For best results, calibration should be performed when water
is not being used in the house.
1. Place a sturdy measuring cup (1 cup [237 mL] size) on the
dispenser tray centered in front of the ice/water dispenser
paddle.
NOTE: Depending on your model, a measuring cup may be
provided.
A
B
A. Water dispenser paddle
B. Ice dispenser paddle
Flush the Water System
Air in the water dispensing system can cause the water dispenser
to drip. After connecting the refrigerator to a water source or
replacing the water lter, ush the water system.
Flushing the water dispensing system forces air from the water
line and lter and prepares the water lter for use. Additional
ushing may be required in some households.
NOTE: As air is cleared from the system, water may spurt out of
the dispenser.
1. Using a sturdy container, depress and hold the water
dispenser paddle for 5 seconds.
2. Release the dispenser paddle for 5 seconds. Repeat steps
1 and 2 until water begins to ow.
3. Once water begins to ow, continue depressing and releasing
the dispenser pad (5 seconds on, 5 seconds off) until a total
of 3 gal. (12 L) has been dispensed.
C
A. Water dispenser paddle
B. Ice dispenser paddle
C. Measuring cup (1 cup)
Ensure that you do not have any Measured Fill preset
selected.
2. To Calibrate your water, navigate to the Dispensing
Calibration section under Tools/Setup. Calibration can
also be accessed by the user during the unboxing
sequence when the product is first powered on.
3. Press and hold the water dispenser paddle, as needed, to
dispense water to the 1 cup fill line in the measuring cup.
NOTE: If overfilling or spilling occurs, discard the water and
restart the calibration process.
4. When 1 cup of water has been correctly dispensed into the
measuring cup, touch OK to confirm the calibration.
27

Dispensing
28
Touch the Ice keypad for your ice selection.
NOTES:
■ For crushed ice, cubes are crushed before being
dispensed. This may cause a slight delay when
dispensing crushed ice. Noise from the ice crusher is
normal and pieces of ice may vary in size.
■ When changing from crushed to cubed, a few ounces of
crushed ice will be dispensed along with the rst cubes.
Dispensing Water
IMPORTANT:
■ Dispense at least 1 qt (1 L) of water every week to maintain
a fresh supply.
■ If the ow of water from the dispenser decreases, it could
be caused by low water pressure.
■ With the water lter removed, dispense 1 cup (237 mL)
of water. If 1 cup (237 mL) of water is dispensed in
8 seconds or less, the water pressure to the refrigerator
meets the minimum requirement.
■ If it takes longer than 8 seconds to dispense 1 cup
(237 mL) of water, the water pressure to the refrigerator
is lower than recommended. See the “Water Supply
Requirements” and “Troubleshooting” sections for
suggestions.
To Dispense Water: Standard:
1.
Press a sturdy glass against the water dispenser paddle.
2. Remove the glass to stop dispensing.
To Dispense Water - Measured Fill:
Measured Fill allows you to dispense a specied amount
of water with the touch of a few buttons.
1. Put a sturdy glass under water spout. Select the amount of
water and unit to dispense.
NOTE: The amount of water you select will be dispensed.
Make sure the container can hold the entire volume. If ice
is in the container, you may need to adjust your selection.
2. Touch DISPENSE or press paddle and the selected amount of
water will be dispensed.
NOTE: Most coffee cups (commonly 4 to 6 oz [118 to 177 mL]
per cup) are not the same size as a measuring cup (8 oz
[237 mL]). You may need to recalibrate Measured Fill to underll
or to avoid unintentionally overlling coffee cups.
3. Dispense water.
NOTE: While dispensing water, the ow of water will
automatically stop once the desired volume has been
dispensed.
■ Press a sturdy glass against the dispenser paddle below
the water spout.
OR
■ Place the glass below the water spout and touch
DISPENSE for hands-free dispensing.
4. To pause dispensing before the selected volume has been
dispensed, press pause button on screen
NOTE: If you stop dispensing before the desired volume has
been dispensed, the display will turn off after 1 minute. If you
have not resumed by then, it will reset back to the original
amount.
Ice Maker and Storage Bin
IMPORTANT: To avoid low ice production and poor quality ice,
ush the water system before turning on the ice maker. See the
“Water Dispenser” section.
n Following installation, allow 24 hours to produce the rst
batch of ice. Discard the rst 3 batches of ice produced.
Allow 2 to 3 days to ll the ice storage bin.
n The quality of your ice will be only as good as the quality of
the water supplied to your ice maker. Avoid connecting the ice
maker to a softened water supply. Water softener chemicals
(such as salt) can damage parts of the ice maker lead to poor
quality ice. If a softened water supply cannot be avoided,
make sure the water softener is operating properly and is wellmaintained.
n If the ice in the storage bin clumps together, break up ice
using a plastic utensil and discard. Do not use anything sharp
to break up the ice. This can cause damage to the ice bin and
the dispenser mechanism.
n Do not store anything in the ice storage bin.
Style 1 - Ice Maker in the Refrigerator
The ice maker is located on the left door behind the bins. Ice
cubes are ejected into the ice storage bin located on the left-hand
refrigerator door.
Remove and Replace the Ice Storage Bin
To open the Ice Maker box, pull the ice maker door lever until the
door releases.
n Remove the ice storage bin by inserting your ngers into the
hole at the base of the bin and pulling the latch to release the
bin from the compartment. Lift the storage bin up and pull it
straight out.
n Replace the storage bin inside the ice compartment and push
down to make sure it is rmly in place.
Ice Production Rate
n Your ice maker should produce approximately 3.5 lbs (1.6 kg)
of ice per day under normal operation.
Turn the Ice Maker On/Off
n To Turn on your Ice Maker, navigate to the Ice maker section
under Tools/Setup.
n To Turn off your Ice Maker, navigate to the Ice maker section
under Tools/Setup.
NOTES:
n Your ice maker has an automatic shutoff. The sensor will
automatically stop ice production if the storage bin is full or
the door is open. The control will remain in the On position.
28

SHELVES, BINS, AND DRAWERS
29
Shelves and Shelf Frames
The shelves in your refrigerator are adjustable to meet your
individual storage needs.
Storing similar food items together in your refrigerator and
adjusting the shelves to fit different heights of items will
make finding the exact item you want easier. It will also
reduce the amount of time the refrigerator door is open and
save energy.
Shelf Height Adjustment
Shelf height can be adjusted by changing the adjustable shelf
mounts between their vertical and horizontal positions.
1. Carefully lift the shelf off the shelf mounts and turn the ipper
to the desired orientation.
2. Repeat for remaining shelf mounts.
3. Apply pressure to the top of the shelf to ensure the shelf is
properly seated on the shelf mounts.
3. Push the clip up from the bottom with your nger.
4. After both clips have been disengaged, carefully remove
the pull-out platter toward the front of the refrigerator.
Crisper Drawers
To remove and replace the drawers:
1. Grasp the handle at the bottom of the drawer and slide the
drawer straight out to the stop. Lift the drawer off the bottom
guide.
2. Replace the drawer by placing it on the bottom drawer guide
and pushing it past the drawer stop into position.
NOTES:
n You will need to remove middle shelf rst before removing
top shelf.
4. Remove the bottom shelf by lifting it up and out of the
shelf supports. Then pull the shelf forward and tilt up to a
vertical position. Turn the shelf at an angle and pull out of
the refrigerator.
5. Replace the bottom shelf by putting the shelf in the
refrigerator at an angle with the shelf up. Lift the front of the
shelf down and in until rear shelf drops into the shelf supports.
Lower the front of the shelf and make sure that
the shelf is in position.
Pull out platter Removal
To remove and replace pull-out platter:
NOTE: Refrigerator doors will need to be removed to remove Pull
out platter. See the “Remove and Replace Refrigerator Doors”
section for more information.
1. Pull the pull-out platter to the fully open position or when
it stops.
2. Locate the pull-out platter retention clips on both sides.
These are in the side under the pull-out platter.
Refrigerator Door Bins
The bins on your refrigerator door are adjustable to meet your
individual storage needs. The bins make it easy to customize door
storage to hold gallon containers.
Door Bin Divider (on some models)
This divider ts in the door bin to divide the bin and elevate
smaller items at the back of the bin.
29

Freezer Storage Compartments
30
Easy Access Tray
Easy Access Tray
Easy Access tray is useful to easily access frequently used
products, freeze or simply store leftovers or small items.
Freezer Drawers
The bins on your freezer door are removable to meet your
individual storage needs.
Fast Freeze compartment
■ Use this drawers to freeze a bigger amount of fresh or cooked
food (in the best or in the fastest way).
■ Fast Freeze option allows you to store all your frozen food
safely and transparently.
NOTE: Freezer temperature might be cooled down to be same as
Flexible Freezer Compartment temperature, when Freezer set to
warmer than Flexible Freezer compartment.
Convertible Space
n Use this drawers to freeze a bigger amount of fresh or cooked
food (in the best or in the fastest way)
n Use Convertible Space to store all kinds of food in the ideal
preservation environment. Adjusting the settings it can be
used to store wine (10°C), fruits and veggies (4°C), Meat
and sh (0°C), weekly meals (-7°C), ice cream and desserts
(-12°C) and hard freeze food (-16°C or less).
Fast Freeze
Drawers
Convertible space
For maximum freezer capacity, you may remove the freezer
drawer to expose the freezer shelf.
To remove the upper drawer:
1. Grasp handle of the drawer and slide drawer straight out to
the stop. Lift drawer off the bottom guide.
2. Replace/putting back drawer stop into position.
Drawers
30

REFRIGERATOR CARE
31
Cleaning
WARNING
Explosion Hazard
Use nonflammable cleaner.
Failure to do so can result in death, explosion, or fire.
All of the Refrigerator, Freezer and Convertible Space sections
defrost automatically. However, clean all the sections about once
a month to avoid build-up of odours. Wipe up spills immediately.
Exterior Cleaning
Please see the exterior cleaning information specic to your
model.
Fingerprint-Resistant Stainless
IMPORTANT:
■ Avoid exposing stainless steel appliances to caustic or
corrosive elements such as high-salt, high-moisture, or highhumidity environments. Damage due to exposure to these
elements is not covered under the warranty.
DO USE DO NOT USE
Soft, clean cloth
Warm, soapy water with
a mild detergent
NOTES:
■ If unintentional contact does occur, clean plastic part with a
sponge and mild detergent in warm water. Dry thoroughly with
a soft cloth.
■ Just because a cleaner is a liquid does not mean it is non-
abrasive. Many liquid cleansers formulated to be gentle on tile
and smooth surfaces still damage stainless steel.
■ Citric acid permanently discolours stainless steel.
■ To avoid damaging the nish of your stainless steel
refrigerator:
Do not allow these substances to remain on the nish:
Mustard Citrus-based sauces
Tomato juice Citrus-based products
Marinara sauce
Abrasive cloths
Paper towels or newsprint
Steel-wool pads
Abrasive powders or liquids
Window sprays
Ammonia
Acidic or vinegar-based cleaners
Oven cleaners
Flammable uids
Interior Cleaning
IMPORTANT: Refrigerator shelves with under-shelf, LED lighting
are not dishwasher safe.
1. Unplug refrigerator or disconnect power.
2. Hand wash, rinse, and dry removable parts and interior
surfaces thoroughly. Use a clean sponge or soft cloth and a
mild detergent in warm water.
NOTE: Do not use abrasive or harsh cleaners such as window
sprays, scouring cleansers, ammable uids, cleaning waxes,
concentrated detergents, bleaches, or cleansers containing
petroleum products on plastic parts, interior and door liners,
or gaskets.
3. Plug in refrigerator or reconnect power.
Condenser
This refrigerator has skin condenser on both sides of refrigerator.
It is normal to feel warm on the sides.
Lights
The lights in both the fresh food and freezer compartments are
LEDs which do not need to be replaced. If the lights do not
illuminate when the door is opened, contact the dealer from
whom you purchased your refrigerator.
Holiday and Moving Care
Holidays
If You Choose to Leave the Refrigerator On While You’re
Away:
1. Use up any perishables and freeze other items.
2. If your refrigerator has an automatic ice maker and is connected to
the household water supply, turn off the water supply to the
refrigerator. Property damage can occur if the water supply is not
turned off.
3. If you have an automatic ice maker, turn off the ice maker.
■ Press the switch to Off (O) for the door ice maker.
4. Empty the ice bin.
If You Choose to Turn Off the Refrigerator Before You Leave:
NOTE: Put refrigerator in Demo mode while on vacation.
See the “Using the Controls” section for more information.
1. Remove all food from the refrigerator.
2. If your refrigerator has an automatic ice maker:
■ Turn off water supply to the ice maker at least 1 day ahead
of time.
■ When last load of ice drops, press the switch to Off
(O) for display to be unlit on the top inside of the
refrigerator, depending on your model.
3. Empty ice bin.
4. Clean refrigerator, wipe it and dry well.
5. Tape rubber or wood blocks to the tops of both doors to prop
them open far enough for air to get in. This stops odours and
mould from building up.
31

Moving
32
When you are moving your refrigerator to a new home, follow
these steps to prepare it for the move.
1. If your refrigerator has an automatic ice maker:
■ Turn off water supply to the ice maker at least 1 day ahead
of time.
■ Disconnect water line from the back of the refrigerator.
■ When last load of ice drops, press the switch to Off (O)
either on the ice maker or the control, depending on your
model.
2. Remove all food from refrigerator and pack all frozen food in
dry ice.
3. Empty ice bin.
4. Unplug refrigerator.
5. Clean, wipe and dry thoroughly.
6. Take out all removable parts, wrap them well and tape them
together so they don’t shift and rattle during the move.
7. Depending on the model, raise the front of the refrigerator so
it rolls more easily or raise the levelling screws so they do not
scrape the oor. See the “Adjust the Doors” or “Refrigerator
Levelling and Door Closing” sections.
8. Tape doors closed and tape the power cable to the back of
the refrigerator.
When you get to your new home, put everything back and refer to
the “Installation Instructions” section for preparation instructions.
Also, if your refrigerator has an automatic ice maker, remember to
reconnect the water supply to the refrigerator.
32

TROUBLESHOOTING - CONNECTED MODELS
33
First try the solutions suggested here
If you experience Possible Causes Solution
Refrigerator is not connected to home
outer
Wi-Fi r
Refrigerator is connected to home Wi-Fi
router, but Whirlpool
. (Wi-Fi icon is OFF
®
app does not work.
.)
The refrigerator has never been
connected to the home Wi-Fi router.
Lost connection to home Wi-Fi router . Check whether the router is ON and working
Weak signal strength or signal
interference between the refrigerator and
router.
The refrigerator is already connected to
another WiFi Router.
Connection to the Whirlpool® app may
be unavailable.
User account has not been properly
set up or the refrigerator has not been
registered in an account.
Router is not connected to Internet. Check other devices connected to Internet
See the “Connectivity Setup” section.
with other computers or devices in the home
(able to access the Internet).
Try to place the wireless router closer to the
refrigerator. It may be necessary to install a
Wi-Fi range extender.
See the “Connectivity Setup” section to
disconnect the Refrigerator from the Wi
router and try reconnecting again.
Check Internet.
See the “Connectivity Setup” section or the
Whirlpool
refrigerator registration instructions.
Verify that the refrigerator is paired with your
account in the app.
Verify correct email address, mobile number,
and notication preferences.
through same router.
®
app directly for account setup and
33

TROUBLESHOOTING
34
First try the solutions suggested here to possibly avoid a service call.
WARNING
Electrical Shock Hazard
Plug into a grounded 3 prong outlet.
Do not remove ground prong.
Do not use an adapter.
Do not use an extension cord.
Failure to follow these instructions can result in death,
fire, or electrical shock.
If you experience Possible Causes Solution
Refrigerator Operation
The refrigerator will not
operate.
The motor seems to run
too much.
Check electrical supply. Plug the power cable into an earthed socket.
Do not use an extension cable.
Make sure there is power to the socket. Plug in a lamp to see if
the socket is working.
Reset a tripped circuit breaker. Replace any blown fuses.
NOTE: If problems continue, contact an electrician.
Check controls. Make sure the controls are turned on. See the “Using the
New installation. Allow 24 hours following installation for refrigerator to cool
Refrigerator control is in Demo mode
(on some models).
High-efciency compressor and fans. Larger, more efcient refrigerators run longer at lower, more
The room or outdoor temperature is
hot.
A large amount of warm food has
been recently added.
The door(s) are opened too frequently
or for too long.
The refrigerator door or freezer drawer
is open.
The refrigerator control is set too cold. Adjust refrigerator control to a less-cold setting until the
The door or drawer gasket is dirty,
worn, or cracked.
Controls” section.
completely.
NOTE: Adjusting the temperature controls to the coldest setting
will not cool either compartment more quickly.
If refrigerator is in Demo mode, cooling is turned off and
“Demo” will be illuminated on the control panel. See the “Using
the Controls” section for more information.
energy efcient speeds.
It is normal for refrigerator to work longer under these
conditions. For optimum performance, place refrigerator in an
indoor, temperature-controlled environment. See the “Location
Requirements” section.
Warm food will cause refrigerator to run longer until the air cools
to the desired temperature.
Warm air entering refrigerator causes it to run more. Open the
door less often.
Make sure refrigerator is level. See the “Refrigerator Levelling
and Door Closing” section. Keep food and containers from
blocking the door.
refrigerator temperature is as desired.
Clean or change the gasket. Leaks in the door seal will
cause refrigerator to run longer in order to maintain desired
temperatures.
34

TROUBLESHOOTING
35
First try the solutions suggested here to possibly avoid a service call.
If you experience Possible Causes Solution
The lights do not work. Your refrigerator is equipped with
The Temperature Control UI does
not turn on.
Unable to adjust setting on The
Temperature Control UI.
Unusual Noise
To listen to normal refrigerator sounds, go to the Product Help/FAQ section of the brand website and search for “normal sounds.”
Below are listed some normal sounds with explanations.
The refrigerator seems noisy. The compressor in your new
Sound of the compressor running
longer than expected.
Pulsating/Whirring Fans/compressor adjusting to
Popping Contraction/expansion of inside
Hissing/Dripping Flow of refrigerant or ow of oil in
Vibration The refrigerator may not be steady. Adjust the levelling screws and lower the levelling foot rmly
Sizzling Water dripping on the heater during
Water running/Gurgling May be heard when ice melts
LED lighting which does not need
to be replaced.
Doors have been open longer than
10 minutes.
The door switch is not sensing the
door opening.
The Temperature Control UI
went to sleep or in Eco Mode.
The Temperature Control UI
buttons are not working well.
The Temperature Control UI is not
receiving power.
Door is open and Door ajar alarm is
activated.
refrigerator regulates temperature
more efciently while using less
energy and operates quietly.
High-efciency compressor and
fans.
optimize performance during
normal compressor operation.
walls, especially during initial cool
down.
the compressor.
Defrost cycle.
during the Defrost cycle and water
runs into the drain pan.
If there is power to the refrigerator and the lights do not
illuminate when a door or drawer is opened, call for service
or assistance.
Close the doors and drawer to reset and open to resume
lighted task.
Ensure there are no magnets or electronic devices within 7.6
cm (3") of the hinge cover.
Press any button on the UI to wake up the The Temperature
Control UI.
Try cycling power on the refrigerator to make the buttons
reset. If problem continuous, call for service or assistance.
Check the wiring harness at the door hinge.
Close the door.
Due to this reduction in operating noise, you may notice
unfamiliar noises that are normal.
Larger, more-efcient refrigerators run longer at lower, more
energy efcient speeds.
This is normal.
This is normal.
This is normal.
against the oor. See the “Refrigerator Levelling and Door
Closing” section.
This is normal.
This is normal.
35

TROUBLESHOOTING
36
First try the solutions suggested here to possibly avoid a service call.
If you experience Possible Causes Solution
Temperature and Moisture
Temperature is too warm. The refrigerator has just been
Temperature is too cold in the
refrigerator/crisper.
Temperature is too cold in the
temperature controlled drawer.
There is interior moisture buildup.
NOTE: Some moisture build-up
is normal.
There is frost/ice build-up in the
freezer compartment.
installed.
The controls are not set
correctly for the surrounding
conditions.
The door(s) are opened often
or not closed completely.
Allows warm air to enter
refrigerator.
A large load of food was
recently added.
Demo mode is on. Turn off the Demo mode. See the "Using the Control" section.
Holiday mode is on. Turn off the Holiday mode. See the "Using the Control" section.
The refrigerator air vent(s)
are blocked.
The controls are not set
correctly for the surrounding
conditions.
The control is not set
correctly for the items stored
in drawer.
The room is humid. A humid environment contributes to moisture build-up.
The door(s) are opened often
or not closed completely.
Allows humid air to enter the
refrigerator.
The door(s) are blocked
open.
A bin or shelf is in the way. Push bin or shelf back into the correct position.
Storing liquid in open
containers.
The door is opened often or
left open.
The door has poor door seal. Ensure door seals are making full contact with the refrigerator
Temperature controls are not
set correctly.
Allow 24 hours following installation for refrigerator to cool
completely.
Adjust the controls a setting colder. Check the temperature in 24
hours. See the “Using the Controls” section.
Minimize door openings and keep doors fully closed.
Allow several hours for refrigerator to return to normal temperature.
If the air vent located in the middle rear of the fresh food
compartment is blocked by items placed directly in front of it, the
refrigerator will get too cold. Move items away from the air vent.
Adjust the controls a setting warmer. Check the temperature in 24
hours. See the “Using the Controls” section.
Adjust the temperature setting. See the “Using the Controls” in the
“Refrigerator Use” section.
Minimize door openings and close doors completely.
Move food packages away from door.
This adds humidity to refrigerator interior. Keep all containers tightly
covered.
Minimize door openings and close drawer completely after use.
cabinet to allow for an adequate seal.
See the “Using the Controls” section for recommended
temperature settings.
36

TROUBLESHOOTING
37
First try the solutions suggested here to possibly avoid a service call.
If you experience Possible Causes Solution
Ice and Water
The ice maker is not producing ice or is not
producing enough ice.
The ice cubes are hollow or small.
NOTE: This is an indication of low water
pressure.
Off-taste, odor, or gray color in the ice or
water
The refrigerator is not connected to a water
supply or the water supply shut-off valve is
not turned on.
There is a kink in the water source line. A kink in the line can reduce water ow.
The ice maker is not turned on. Make sure the ice maker is ON. See the
The refrigerator has just been installed. Wait 24 hours after ice maker installation
The refrigerator door is not closed
completely.
A large amount of ice was recently
removed.
The water shut-off valve is not fully open. Turn the water shut-off valve fully open.
There is a kink in the water source line. A kink in the line can reduce water ow.
A water lter is installed on the refrigerator. Remove lter and operate ice maker. If ice
A reverse osmosis water ltration system is
connected to the cold water supply.
Questions remain regarding water pressure. Call a licensed, qualied plumber.
Newly installed refrigerator requires ush of
water system.
Recently installed or replaced plumbing
connections. New plumbing connections
can cause discolored or off-avored ice
and water.
Using a water supply connection type other
than recommended
The ice has been stored too long. Discard ice and wash ice storage bin. Allow
The water has been stored too long. Dispense at least 1 qt (1 L) of water per
Odor from stored food has transferred to
the ice.
There are minerals (such as sulfur)
in the water.
There is a water lter installed on the
refrigerator.
The water lter needs to be replaced. Replace the disposable water lter at least
Connect refrigerator to water supply and
turn water shut-off valve to fully open.
Straighten the water source line.
“Ice Maker and Storage Bin” section.
for ice production to begin. Wait 3 days for
full ice production.
Close the door rmly. If it does not close
completely, see “The doors will not close
completely” in this table.
Allow sufcient time for ice maker to
produce more ice. See the “Ice Maker and
Storage Bin” section for ice production
rates.
Straighten the water source line.
quality improves, then the lter may be
clogged or incorrectly installed. Replace
lter or reinstall it correctly.
This can decrease water pressure. See the
“Water Supply Requirements” section.
Flush the water system. See the “Water
and Ice Dispensers” section for water
system ushing instructions.
Discard ice and wash the ice storage bin.
Flush the water system with 3 gal. (12 L)
of water. Allow 24 hours for the ice maker
to make new ice and discard the rst 3
batches of ice produced.
It is recommended to use copper tubing
or Whirlpool
8212547RP. See the “Connect the Water
Supply” section.
24 hours for ice maker to make new ice.
week to maintain a fresh supply.
Use airtight, moisture-proof packaging to
store food.
A water lter may need to be installed to
remove the minerals.
Gray or dark discoloration in ice may
indicate that the water ltration system
needs additional ushing. Flush the water
system after installing and before using a
new water lter. See the “Water and Ice
Dispensers” section for water lter ushing
instructions.
every 6 months or when indicated. See the
“Water Filtration System” section.
®
supply line, Part Number
37

TROUBLESHOOTING
38
First try the solutions suggested here to possibly avoid a service call.
If you experience Possible Causes Solution
Ice and Water (cont.)
The water and ice dispenser will not
operate properly.
The water and ice dispenser will not
operate properly. (cont.)
Ice bin is difcult to remove from door. Ice level in bin may be high and
The ice dispenser
jams while dispensing crushed ice.
Water is leaking or dripping from the
dispenser system.
NOTE: A few drops of water after
dispensing
is normal.
Ice continues to ow from the
dispenser.
NOTE: A few cubes dispensed after
releasing the dispenser lever is normal.
The refrigerator is not connected to a
water supply or the water supply shutoff valve is not turned on.
There is a kink in the water source line. A kink in the water line can reduce water ow
The refrigerator has just been installed. Flush and ll the water system. See the “Water
The water pressure to the house is not
at or above 35 psi (241 kPa).
A reverse osmosis water ltration
system is connected to the cold water
supply.
The water lter may be clogged. Remove the water lter and operate dispenser.
The water lter is installed incorrectly. Remove the water lter and reinstall. See the
The refrigerator door or freezer drawer
is not closed completely.
The refrigerator doors were recently
removed.
Ice is clogged in the ice storage bin or
ice is blocking the ice delivery chute.
uneven from normal ice production and
augering of ice during dispensing.
Crushed ice is blocking the ice delivery
chute.
The glass was not held under the
dispenser long enough.
The glass was not held under the
dispenser long enough.
Connect the refrigerator to the water supply, and
turn the water shut-off valve to fully open.
from the water dispenser and result in hollow or
irregular shaped ice. Straighten the water source
line.
and Ice Dispensers” section.
The water pressure to the house determines the
ow from the dispenser. See the “Water Supply
Requirements” section.
A reverse osmosis water ltration system can
decrease water pressure. See the “Water Supply
Requirements” section.
If water ow increases, your lter is clogged and
needs to be replaced.
See the “Water Filtration System” section.
“Water Filtration System” section.
Close the door or drawer rmly. If it does not
close completely, see “The doors will not close
completely.”
Make sure the water dispenser wire/tube assembly
has been properly reconnected at the top of the
refrigerator door. See the “Remove and Replace
Refrigerator Doors” section.
Remove the ice clogging the storage bin and
delivery chute, using a plastic utensil if necessary.
Clean the ice delivery chute and the bottom of the
ice storage bin using a warm, damp cloth, then
dry both thoroughly. To avoid clogging and to
maintain a fresh supply of ice, empty the storage
bin and clean both the storage bin and delivery
chute every 2 weeks.
Dispense 2-3 glasses of ice, then try removing the
ice bin.
Switch from crushed ice to cubed ice to clear the
ice dispenser. Then switch back to crushed ice.
Hold the glass under the dispenser 2 to 3 seconds
after releasing the dispenser lever.
Hold the glass under the dispenser 2 to 3 seconds
after releasing the dispenser lever.
38

TROUBLESHOOTING
39
First try the solutions suggested here to possibly avoid a service call.
If you experience Possible Causes Solution
Ice and Water (cont.)
Water continues to drip from the
dispenser beyond the rst few drops.
Water is leaking from the back of the
refrigerator.
Crushed or cubed ice misses the glass
when dispensing ice.
Water from the dispenser is warm. Water from the dispenser is chilled to
The refrigerator has just been installed. Flushing the water system removes the air from
The water lter was recently installed or
replaced.
There may be a loose water
connection.
The water line connections were not
fully tightened.
Recently removed the doors and did
not fully tighten water line connection.
The glass is not held close enough to
where the ice exits the chute.
50°F (10°C).
The refrigerator has just been installed. Allow 24 hours after installation for the water
A large amount of water was recently
dispensed.
Water has not been recently dispensed. The rst glass of water may not be cool. Discard
The refrigerator is not connected to
a cold water pipe.
the lines which causes the water dispenser to
drip. Flush the water system.
See the “Water and Ice Dispensers” section.
Flushing the water system removes the air from
the lines which causes the water dispenser to
drip. Flush the water system.
See the “Water and Ice Dispensers” section
Check for water in bottom of refrigerator
compartment, hinge area, or by household
connection in back of product.
See the “Connecting the Water” section.
See the “Remove and Replace Refrigerator
Doors” section.
Hold the glass close to where the ice exits the
chute.
This is normal.
supply to cool completely.
Allow 3 hours for the water supply to cool
completely.
the rst glass
of water dispensed.
Make sure the refrigerator is connected to a cold
water pipe.
See the “Water Supply Requirements” section.
39

TROUBLESHOOTING
40
First try the solutions suggested here to possibly avoid a service call.
WARNING
Explosion Hazard
Use nonflammable cleaner.
Failure to do so can result in death, explosion, or fire.
To view an animation showing how to adjust and align the doors, refer to the Product Help/FAQ section of the brand website and
search for “Door Closing and Door Alignment.”
If you experience Possible Causes Solution
Doors
The doors will not close
completely.
The doors are difcult to
open.
The doors appear to be
uneven.
The refrigerator is unsteady
or it rolls forward when
opening and closing doors.
The door is blocked open. Move food packages away from door.
A bin or shelf is in the way. Push bin or shelf back into the correct position.
Recently installed Remove all packaging materials.
The door gaskets are dirty or sticky. Clean gaskets and contact surfaces with mild soap and warm
The doors need to be aligned or the
refrigerator needs to be levelled.
The refrigerator brake feet are not
snug against the oor.
water. Rinse and dry with soft cloth.
If you need to align door please call for service.
Turn both brake feet (one on each side) counterclockwise, the
same amount, until they are snug against the oor. See the
“Refrigerator Levelling and Door Closing” section.
40

PERFORMANCE DATA SHEET
41
Water Filtration System
Model P9WB2L/P9RFWB2L/EDR2RXD1 Capacity 200 Gallons (757 Liters)
System tested and certied by NSF International against
NSF/ANSI Standard 42, Standard 53, Standard 401, and
CSA B483.1 for the reduction of contaminants specied on
the Performance Data Sheet.
This system has been tested according to NSF/ANSI Standards 42, 53, 401, and CSA B483.1 for the reduction of the substances listed below. The
concentration of the indicated substances in water entering the system was reduced to a concentration less than or equal to the permissible limit for
water leaving the system, as specied in NSF/ANSI Standards 42, 53, 401, and CSA B483.1. This system has been tested according to Ministerial Decree
No 174, article 9 of legislative decree n 31 of 2001, Regulations (EC) no 1935/2004, WRAS BS6920 and ACS Circulaire 2002/571.
Substance Reduction Aesthetic Effects Inuent Challenge Concentration Maximum Permissible
Chlorine Taste/Odor Particulate Class I* 2.0 mg/L ± 10% At least 10,000
Contaminant Reduction Inuent Challenge Concentration Maximum Permissible Product Water
Lead: @ pH 6.5/ @ pH 8.5 0.15 mg/L ± 10% 0.010 mg/L >99.3% / 98.6%
Benzene 0.015 mg/L ± 10% 0.005 mg/L 96.0%
p - Dichlorobenzene 0.225 mg/L ± 10% 0.075 mg/L >99.8%
Carbofuran 0.08 mg/L ± 10% 0.040 mg/L 91.9%
Toxaphene 0.015 ± 10% 0.003 mg/L 93.3%
Atrazine 0.009 mg/L ± 10% 0.003 mg/L 92.4%
Asbestos 10
Asbestos 50,000/L min. 99.95% >99.99%
Live Cyst
Lindane 0.002 ± 10% 0.0002 mg/L 98.9%
Tetrachloroethylene 0.015 mg/L ± 10% 0.005 mg/L >96.6%
O-Dichlorobenzene 1.8 mg/L ± 10% 0.60 mg/L >99.9%
Ethylbenzene 2.1 mg/L ± 10% 0.70 mg/L 99.4%
1,2,4-Trichlorobenzene 0.210 mg/L ± 10% 0.07 mg/L >99.8%
2,4 - D 0.210 mg/L ± 10% 0.07 mg/L 93.8%
Styrene 2.0 mg/L ± 10% 0.1 mg/L 99.8%
Toluene 3.0 mg/L ± 10% 1.0 mg/L 87.9%
Endrin 0.006 mg/L ± 10% 0.002 mg/L >96.6%
Atenolol 200 ± 20% 30 ng/L >95.9%
Trimethoprim 140 ± 20% 20 ng/L >96.9%
Linuron 140 ± 20% 20 ng/L >96.4%
Estrone 140 ± 20% 20 ng/L >97.0%
Nonylphenol 1400 ± 20% 200 ng/L >97.4%
Carbamazepine 1400 ± 20% 200 ng/L >97.9%
Phenytoin 200 ± 20% 30 ng/L 93.8%
Naproxen 140 ± 20% 20 ng/L 96.1%
Bisphenol A 2000 ± 20% 300 ng/L >99.2%
†
particles/mL
7
to 108 bers/L
11 NTU ± 10% 0.5 NTU 99.0%
††
Product Water Concentration
50% reduction 85% reduction 97.2% 99.5%
Concentration
99% >99%
Test Parameters: pH = 7.5 ± 0.5 unless otherwise noted. Flow = 0.6 gpm (2.27 Lpm). Pressure = 60 psig (413.7 kPa). Temp. = 68°F to 71.6°F (20°C to
22°C). Rated service capacity = 200 gallons (757 liters).
The compounds certied under NSF 401 have been deemed as “emerging compounds/incidental contaminants.” Emerging compounds/incidental
contaminants are those compounds that have been detected in drinking water supplies at trace levels. While occurring at only trace levels, these
compounds can affect the public acceptance/perception of drinking water quality.
n It is essential that operational, maintenance, and lter replacement
requirements be carried out for the product to perform as advertised.
Property damage can occur if all instructions are not followed.
n The disposable cartridge must be changed at least every 6 months.
n Use replacement lter P9RFWB2L, part #EDR2RXD1/EDR2RXD1B.
2015 suggested retail price of $49.99 U.S.A./$49.99 Canada. Prices
are subject to change without notice.
n The lter monitor system measures the amount of water that passes
through the lter and alerts you when it is time to replace the lter.
Refer to the “Using the Controls” or “Water Filtration System” section
(in the User Instructions or User Guide) to learn how to check the
water lter status.
n After changing the water lter, ush the water system. See “Water and
Ice Dispensers” or “Water Dispenser” in the User Instructions or User
Guide.
Average% Reduction
Average%Reduction
41

n These contaminants are not necessarily in your water supply. While
42
testing was performed under standard laboratory conditions, actual
performance may vary.
n The product is for cold water use only.
n The water system must be installed in compliance with state and
local laws and regulations.
n Do not use with water that is microbiologically unsafe or of unknown
quality without adequate disinfection before or after the system.
Systems certied for cyst reduction may be used on disinfected
waters that may contain lterable cysts.
EPA Est. No. 082047-TWN-001
n Refer to the “Warranty” section (in the User Instructions or User
Guide) for the Manufacturer’s limited warranty, name and telephone
number.
n The refrigerator when dispensing water acts as drinking water
treatment equipment.
n This equipment requires regular periodic maintenance in order
to guarantee the drinking water treatment requirements and the
maintenance of the improvements every 6 months.
Application Guidelines/Water Supply Parameters
Water Supply Potable City or Well
Water Pressure 30 - 120 psi (207 - 827 kPa)
Water Temperature 33° - 100°F (0.6° - 37.8°C)
Service Flow Rate 0.6 GPM (2.27 L/min.) @ 60 psi
(413.7 kPa)
n Your water ltration system will withstand up to 120 pounds
per square inch (psi) water pressure. If your water supply is
higher than 80 psi, install a pressure reducing valve before
installing the water ltration system.
42
©2020 All rights reserved.
W11462868A
810F950001518
 Loading...