

Whirlpool WOS52EM4AS User Manual

BUILT-IN ELECTRIC
CONVECTION OVEN
Use & Care Guide
For assistance, installation or service, call: 1-800-807-6777 or
visit our website at
www.whirlpool.ca
FOUR ÉLECTRIQUE
ENCASTRÉ À
CONVECTION
Guide d'utilisation et d'entretien
Au Canada, pour assistance, installation ou service, composez
le 1-800-807-6777 ou visitez notre site Web à
www.whirlpool.ca
Table of Contents/Table des matières.................. 2
501931001359A
Model/Modèle
WOS52EM4AS

TABLE OF CONTENTS
TABLE DES MATIÈRES
OVEN SAFETY ................................................................................3
PARTS AND FEATURES................................................................4
ELECTRONIC OVEN CONTROL................................................... 5
Control Knobs ..............................................................................5
Electronic Oven Display...............................................................5
Oven Control Lock .......................................................................6
Timer.............................................................................................6
Settings ........................................................................................6
OVEN USE.......................................................................................7
Aluminum Foil...............................................................................7
Inserting Oven Racks and Other Accessories.............................7
Positioning Racks and Bakeware ................................................7
Bakeware......................................................................................8
Meat Thermometer.......................................................................8
Oven Vent.....................................................................................8
Conventional ................................................................................8
Grilling...........................................................................................9
Convection Cooking.....................................................................9
Convection Bake........................................................................10
Forced Air...................................................................................10
Maxi Cooking .............................................................................11
Turbo Grill...................................................................................11
Special Functions.......................................................................12
Bread/Pizza ................................................................................13
Browning ....................................................................................13
Delay Start..................................................................................13
RECOMMENDED USE AND TIPS...............................................14
Cooking Chart ............................................................................14
OVEN CARE..................................................................................17
General Cleaning........................................................................17
Rack Guides...............................................................................18
Oven Light ..................................................................................18
TROUBLESHOOTING ..................................................................19
ASSISTANCE OR SERVICE.........................................................19
In Canada ...................................................................................19
WARRANTY ..................................................................................20
SÉCURITÉ DU FOUR ...................................................................21
PIÈCES ET CARACTÉRISTIQUES ..............................................22
COMMANDE ÉLECTRONIQUE DU FOUR.................................23
Boutons de commande..............................................................23
Affichage électronique du four...................................................23
Verrouillage des commandes du four........................................24
Minuterie.....................................................................................24
Réglages.....................................................................................24
UTILISATION DU FOUR...............................................................25
Papier d'aluminium.....................................................................25
Insertion de grilles de four et autres accessoires......................25
Positionnement des grilles et des ustensiles de
cuisson au four...........................................................................26
Ustensiles de cuisson au four....................................................26
Thermomètre à viande ...............................................................26
Évent du four ..............................................................................27
Cuisson traditionnelle.................................................................27
Cuisson au gril............................................................................27
Cuisson par convection .............................................................28
Cuisson au four par convection.................................................28
Air pulsé......................................................................................29
Cuisson Maxi..............................................................................29
Cuisson au gril Turbo .................................................................30
Fonctions spéciales....................................................................30
Pain/Pizza...................................................................................31
Brunissage..................................................................................32
Mise en marche différée.............................................................32
UTILISATION RECOMMANDÉE ET ASTUCES..........................33
Tableau de cuisson ....................................................................33
ENTRETIEN DU FOUR.................................................................37
Nettoyage général ......................................................................37
Guides de grilles.........................................................................37
Lampe du four............................................................................38
DÉPANNAGE.................................................................................38
ASSISTANCE OU SERVICE.........................................................39
Au Canada..................................................................................39
GARANTIE.....................................................................................39
2
OVEN SAFETY
Your safety and the safety of others are very important.
We have provided many important safety messages in this manual and on your appliance. Always read and obey all safety
messages.
This is the safety alert symbol.
This symbol alerts you to potential hazards that can kill or hurt you and others.
All safety messages will follow the safety alert symbol and either the word “DANGER” or “WARNING.”
These words mean:
You can be killed or seriously injured if you don't immediately
DANGER
WARNING
All safety messages will tell you what the potential hazard is, tell you how to reduce the chance of injury, and tell you what can
happen if the instructions are not followed.
IMPORTANT SAFETY INSTRUCTIONS
WARNING: To reduce the risk of fire, electrical shock,
injury to persons, or damage when using the oven, follow
basic precautions, including the following:
■ WARNING: The appliance and its accessible parts
become hot during use. Care should be taken to avoid
touching heating elements. Children less than 8 years of
age shall be kept away unless continuously supervised.
■ This appliance can be used by children aged from 8 years
and above and persons with reduced physical, sensory or
mental capabilities or lack of experience and knowledge if
they have been given supervision or instruction concerning
use of the appliance in a safe way and understand the
hazards involved. Children shall not play with the
appliance. Cleaning and user maintenance shall not be
made by children without supervision.
■ Never use steam cleaning equipment.
■ Only use the temperature probe recommended for this
oven
■ Do not use harsh abrasive cleaners or sharp metal
scrapers to clean the oven door glass since they can
scratch the surface, which may result in shattering of the
glass.
■ WARNING: Ensure that the appliance is switched off
before replacing the lamp to avoid possibility of electric
shock.
■ Power cable replacement must be carried out by qualified
electrician. Contact an authorized service center.
■ Proper Installation – Be sure the oven is properly installed
and grounded by a qualified technician.
■ Never Use the Oven for Warming or Heating the Room.
■ Do Not Leave Children Alone – Children should not be left
alone or unattended in area where oven is in use. They
should never be allowed to sit or stand on any part of the
oven.
follow instructions.
can be killed or seriously injured if you don't
You
instructions.
■ Wear Proper Apparel – Loose-fitting or hanging garments
should never be worn while using the oven.
■ User Servicing – Do not repair or replace any part of the
oven unless specifically recommended in the manual. All
other servicing should be referred to a qualified technician.
■ Storage in Oven – Flammable materials should not be
stored in an oven.
■ Do Not Use Water on Grease Fires – Smother fire or flame
or use dry chemical or foam-type extinguisher.
■ Use Only Dry Potholders – Moist or damp potholders on
hot surfaces may result in burns from steam. Do not let
potholder touch hot heating elements. Do not use a towel
or other bulky cloth.
■ Use Care When Opening Door – Let hot air or steam
escape before removing or replacing food.
■ Do Not Heat Unopened Food Containers – Build-up of
pressure may cause container to burst and result in injury.
■ Keep Oven Vent Ducts Unobstructed.
■ Placement of Oven Racks – Always place oven racks in
desired location while oven is cool. If rack must be moved
while oven is hot, do not let potholder contact hot heating
element in oven.
■ DO NOT TOUCH HEATING ELEMENTS OR INTERIOR
SURFACES OF OVEN – Heating elements may be hot
even though they are dark in color. Interior surfaces of an
oven become hot enough to cause burns. During and after
use, do not touch, or let clothing or other flammable
materials contact heating elements or interior surfaces of
oven until they have had sufficient time to cool. Other
surfaces of the oven may become hot enough to cause
burns – among these surfaces are oven vent openings and
surfaces near these openings, oven doors, and windows of
oven doors.
follow
SAVE THESE INSTRUCTIONS
3
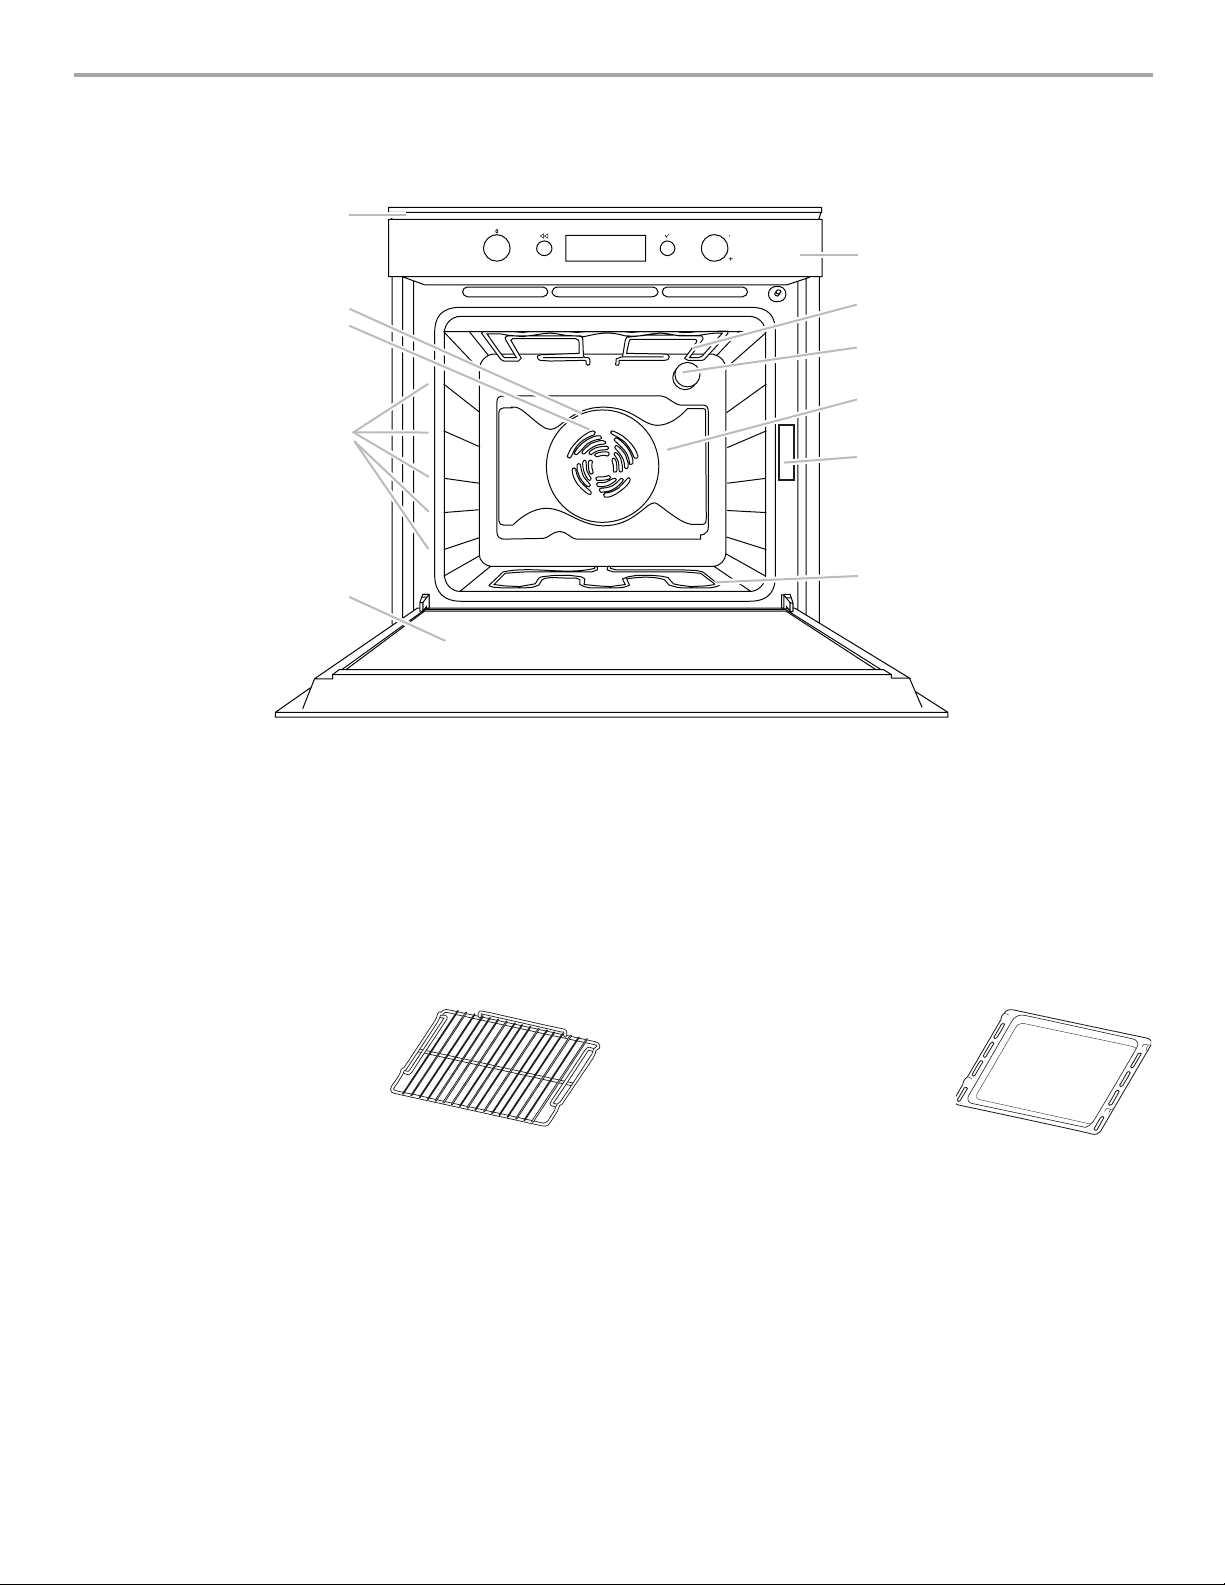
PARTS AND FEATURES
This manual covers several models. The oven you have purchased may have some or all of the items listed. The locations and
appearances of the features shown here may not match those of your model.
E
F
D
G
C
H
I
B
J
K
A
A. Oven door
B. Position of shelves (number of shelves
is indicated on the front of the oven)
C. Fan
D. Circular heating element (not visible)
E. Cooling fan (not visible)
F. Control panel
G. Upper heating element/grill
H. Oven light
I. Convection fan cover
J. Model/serial rating plate (do not remove)
K. Lower heating element (not visible)
NOTES:
■ During cooking, the cooling fan may turn on at intervals to minimize energy consumption.
■ After cooking is complete and the oven has been turned off, the cooling fan may continue to run for a short time.
■ During cooking, if the oven door is opened, the heating elements will turn off.
Accessories supplied
Oven rack: The oven rack can be
used to grill food or as a support
for pans, cake tins, and other
ovenproof cooking receptacles.
Drip tray: The drip tray is designed to
be positioned under the oven rack in
order to collect fat or as an oven tray
for cooking meat, fish, vegetables,
focaccia, etc.
Accessories not supplied
Additional accessories can be purchased separately. Refer to the “Assistance or Service” section.
4
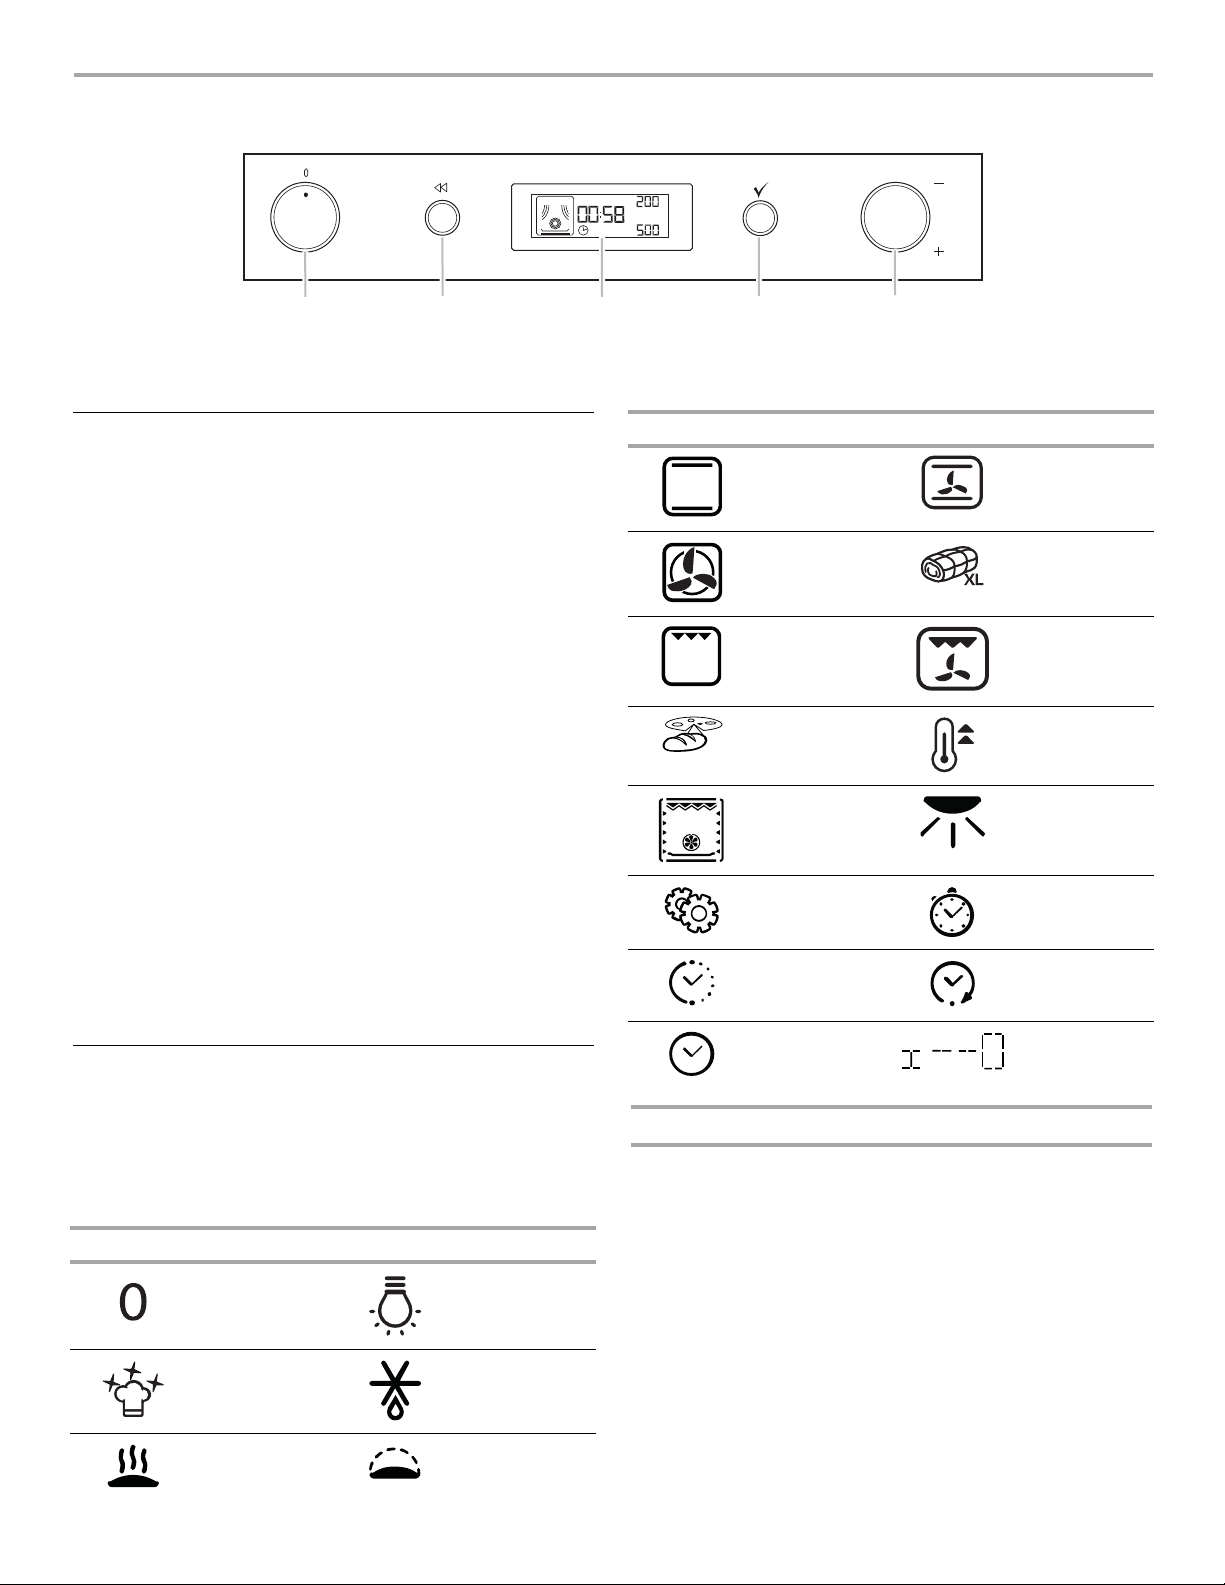
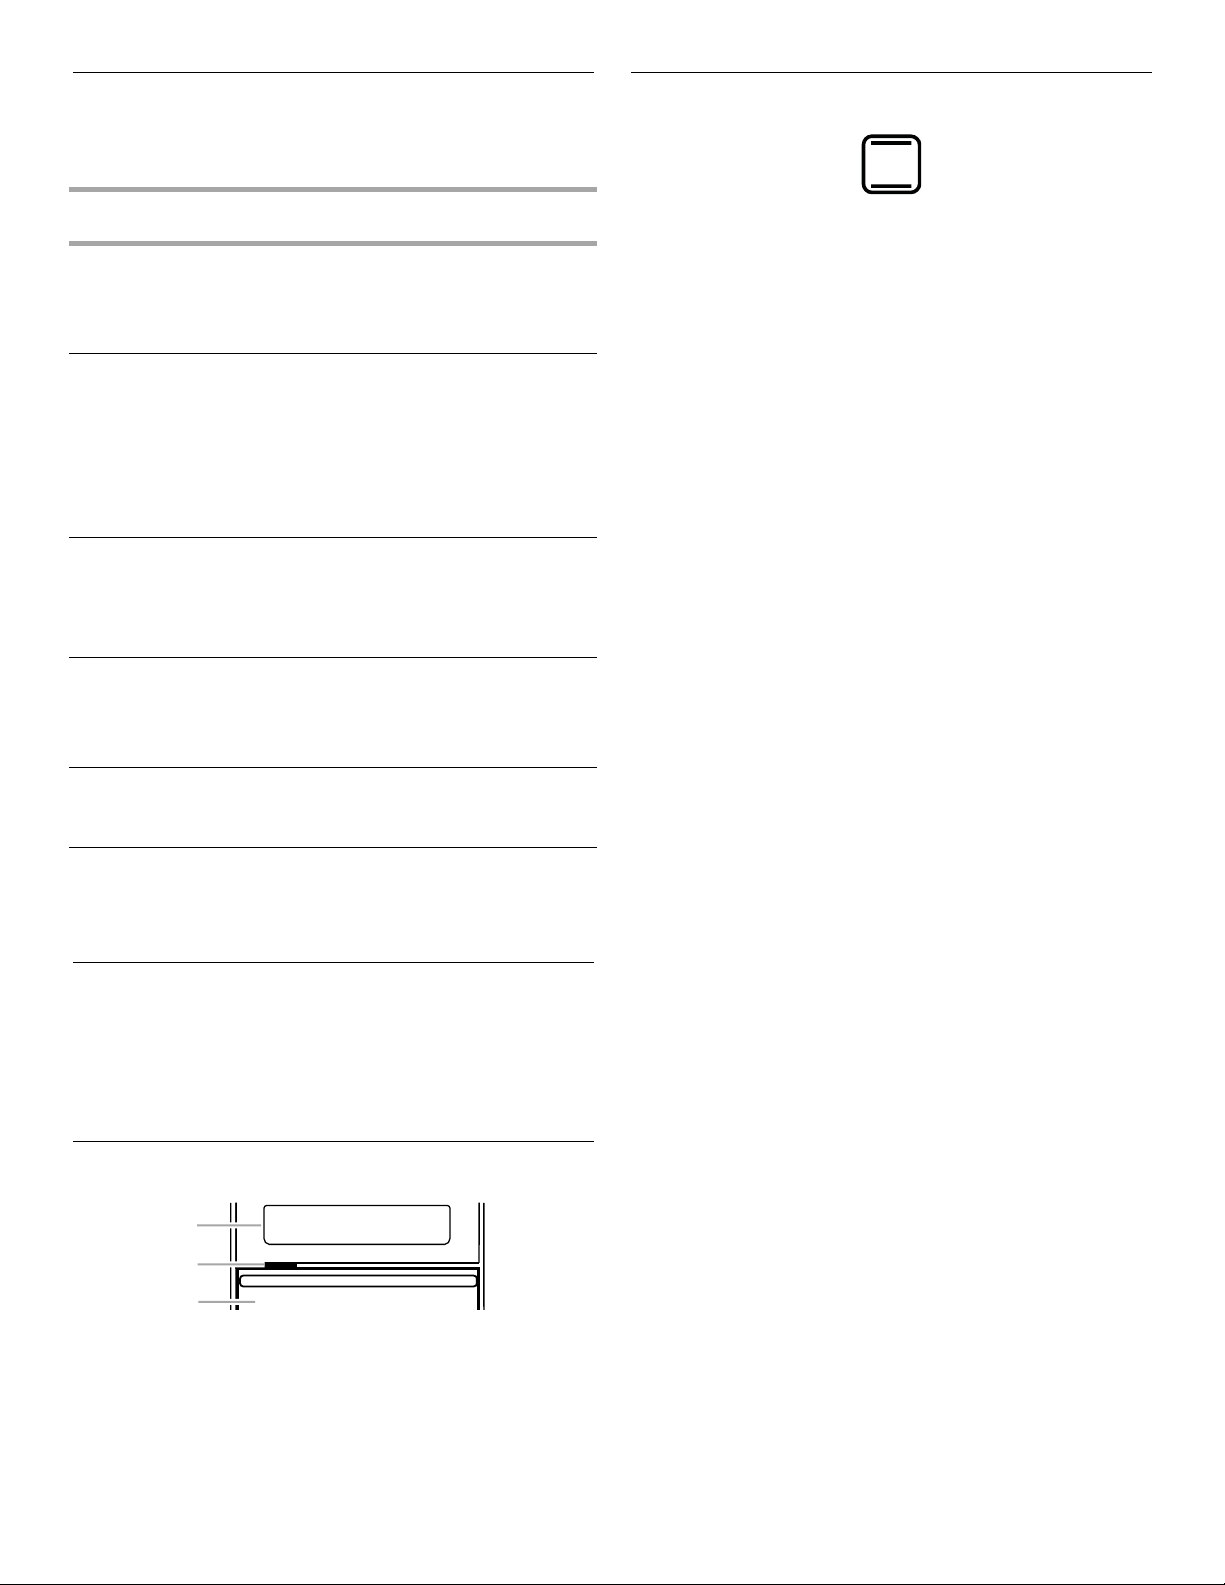
ELECTRONIC OVEN CONTROL
AA
A. Oven control knob - on/off and function selector knob
B. Back button - to return to the previous screen
C. Electronic oven display
B
Control Knobs
NOTE: The Oven Control knob and the Browse knob are
retractable. Press the center of the knobs and they pop up.
All cooking functions are set with the control knobs.
Once a cycle is complete, turn the Oven Control knob to the “Off”
position to select a new function.
All temperature adjustments are set with the Browse knob.
Temperatures can be set from 125°F (50°C) to 475°F (250°C).
To set or cancel a cooking function:
NOTE: Press the Back button at any time to return to the
previous screen.
1. Turn the Oven Control knob to the symbol for the desired
oven function (for example: bread/pizza).
2. Turn the Browse knob to the desired sub-function (for
example: pizza) then press the Confirmation button to select.
3. Turn the Browse knob to the desired oven temperature then
press the Confirmation button to select.
4. Turn the Browse knob to the desired cook time then press the
Confirmation button to select and start cooking.
■ To change the temperature, turn the Browse knob to select
the desired temperature.
■ To cancel any selection, turn the Oven Control knob to “Off”
or
Press the Confirmation button to turn off the oven, while
maintaining the previously selected functions on control
knobs the next time the oven is used.
Electronic Oven Display
When power is first supplied to the appliance, the 2 “hour” digits
will flash on the display, and the time must be set. If the 2 “hour”
digits flash at any other time, a power failure has occurred. To set
the time on the clock, follow the clock setting instructions in
“Clock” in the “Settings” section.
Electronic Oven Display Symbols
Symbol Function Symbol Function
Off Lamp
C
D. Confirmation button - to select and confirm settings
E. Browse knob - for browsing the menu and adjusting
preset values
Symbol Function Symbol Function
DE
Conventional Convection
Forced air Maxi cooking
Grill Turbo Grill
Bread/pizza Fast
Heating
elements
display
Settings Timer
Cook time End cook time
Time of day Oven control
bake
preheating
Browning
lock
Hot Oven Indicator
At the end of cooking, or when the oven is switched off, if the
temperature inside the oven is over 125°F (50°C), the display
shows “HOT” and the current temperature. When the oven
temperature reaches 125°F (50°C), the display shows the current
time again.
Special
functions
Keep warm Rising
Defrosting
5
Oven Control Lock
The Oven Control Lock can be used to avoid unintended use of
the oven. When the oven is locked out, the oven cannot be
turned on by the control knobs or buttons.
To Activate:
1. Press and hold the Back button and the Confirmation button
at the same time for at least 3 seconds.
2. When the oven is locked, the oven cannot be turned on, the
functions associated with the buttons are locked, and the
display will show the Oven Control Lock symbol.
3. To deactivate the Oven Control Lock, repeat Step 1.
NOTE: Oven control lock can be activated during cooking by
completing Step 1. The oven can be turned off by turning the
Oven Control knob to the “Off” symbol. The previously-selected
function will have to be set again.
Timer
The Timer function can be used only with the oven switched off.
It is useful, for example, for monitoring the cooking time of pasta.
The time length cannot exceed 23 hours and 59 minutes.
Setting the Timer
1. With the Oven Control knob in the “Off” position, turn the
Browse knob until the desired time is displayed.
2. Press the Confirmation button to start the countdown. When
the set time has elapsed, the display will show “00:00:00,”
and a signal will sound. To mute the acoustic signal, press the
Confirmation button. The time of day will appear on the
display.
Language
The language must be set on the clock after power is supplied to
the oven.
Setting the Time
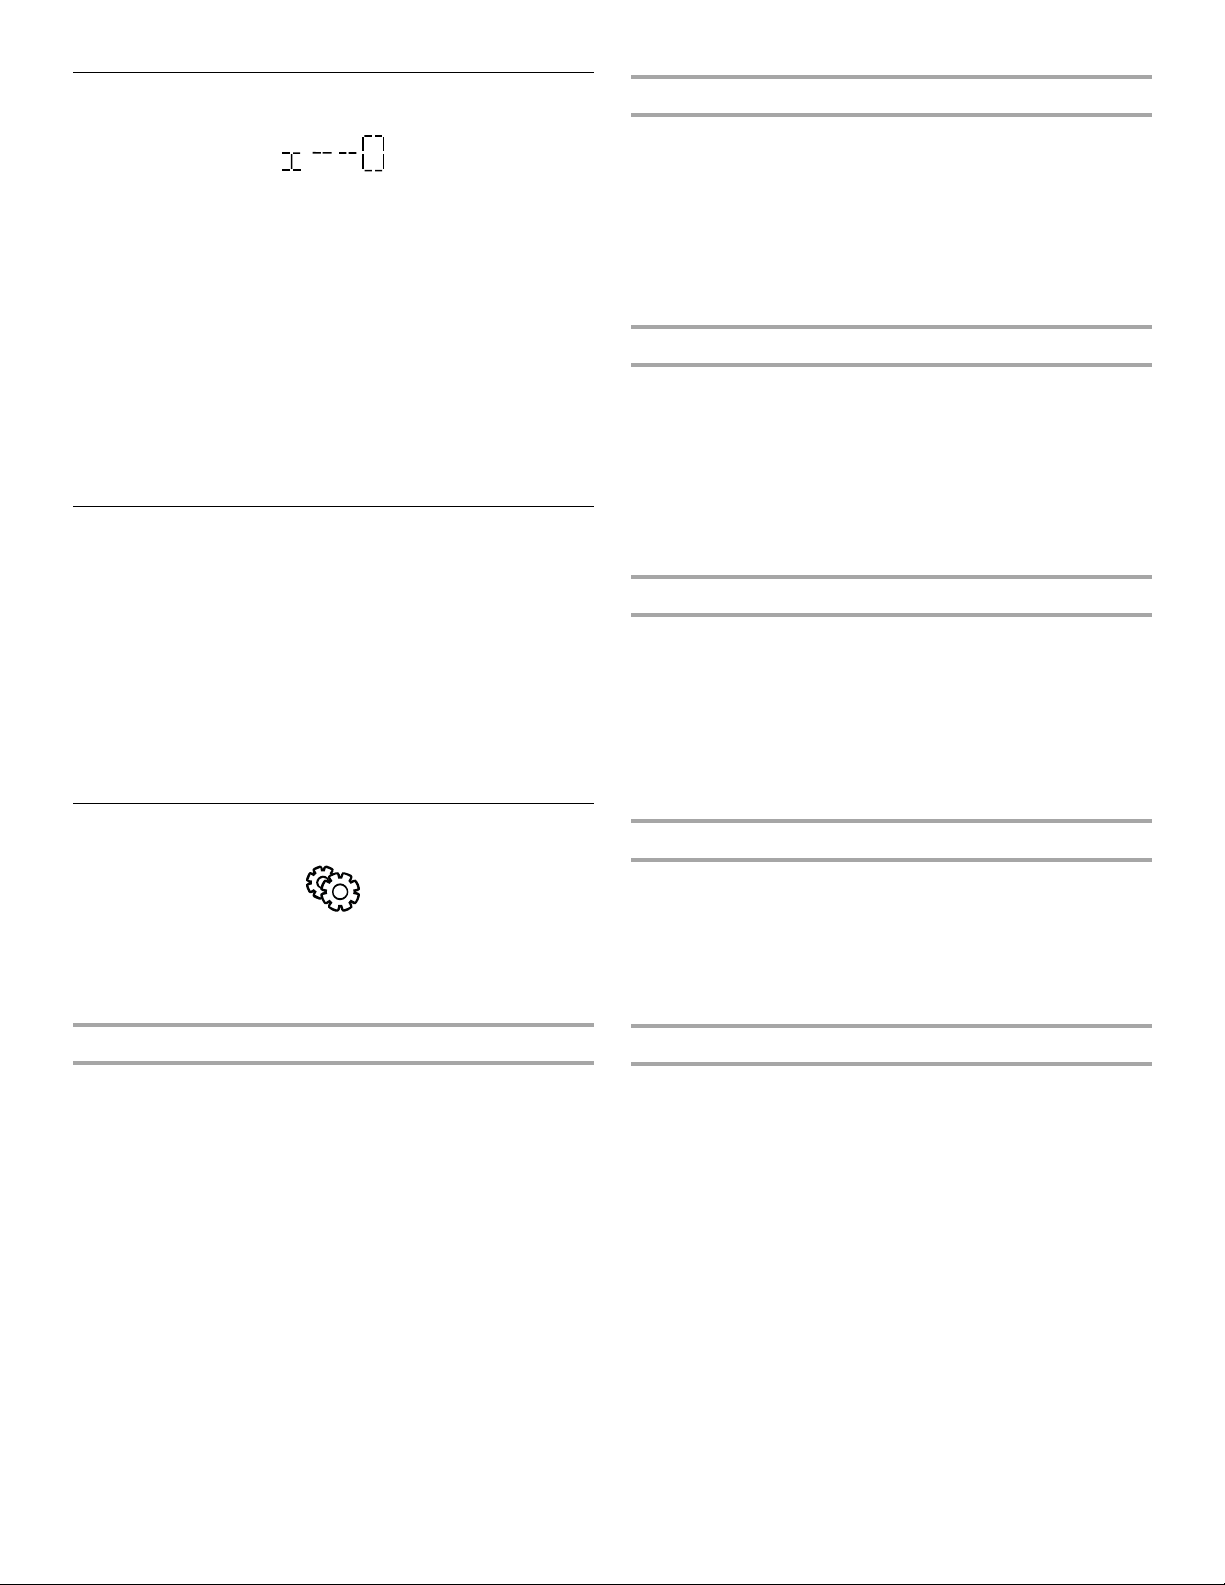
1. Turn the Oven Control knob to the Settings symbol.
2. Turn the Browse knob until “LANGUAGE” appears on the
display then press the Confirmation button to select.
3. Turn the Browse knob until the desired language is displayed
then press the Confirmation button to select.
Temperature Units
The temperature unit can be set to Fahrenheit (°F) or Celsius (°C).
Setting the Temperature
1. Turn the Oven Control knob to the Settings symbol.
2. Turn the Browse knob until “UNIT” appears on the display
then press the Confirmation button to select.
3. Turn the Browse knob until the desired temperature unit
(Fahrenheit or Celsius) is displayed then press the
Confirmation button to select.
Eco Mode
During Eco Mode, the display switches off when the oven is on
standby, or 5 minutes after the end of cooking. To view
information on the display, press a button or turn a knob.
1. Turn the Oven Control knob to the Settings symbol.
2. Turn the Browse knob until “ECO” appears on the display
then press the Confirmation button to select.
3. Turn the Browse knob to select the desired setting (On or Off)
then press the Confirmation button.
Settings
You can control several settings through the Settings Menu:
clock, Eco Mode, oven sounds and display brightness.
To access the Settings Menu, turn the Oven Control knob to the
Settings symbol.
Clock
The time must be set on the clock after power is supplied to the
oven.
Setting the Time
1. To change the time, turn the Oven Control knob to the
Settings symbol. “CLOCK” will appear on the display.
NOTE: If power has just been supplied to the oven and the
2 “hour” digits are flashing on the display, skip to Step 2.
2. Turn the Browse knob until the correct hour is displayed then
press the Confirmation button to select.
3. Turn the Browse knob until the correct minutes are displayed
then press the Confirmation button to select.
Oven Sounds
The oven sounds are preset to On, but can be turned Off.
1. Turn the Oven Control knob to the Settings symbol.
2. Turn the Browse knob until “SOUND” appears on the display
then press the Confirmation button to select.
3. Turn the Browse knob to select the desired setting (On or Off)
then press the Confirmation button.
Display Brightness
The brightness of the oven control display can be changed.
1. Turn the Oven Control knob to the Settings symbol.
2. Turn the Browse knob until “BRIGHTNESS” appears on the
display then press the Confirmation button to select.
“1” will appear on the display.
3. Turn the Browse knob until the desired brightness is reached
then press the Confirmation button.
6
OVEN USE
Odors and smoke are normal when the oven is used the first few
times, or when it is heavily soiled.
During oven use, the heating elements will not remain on, but will
cycle on and off throughout oven operation.
IMPORTANT: The health of some birds is extremely sensitive to
the fumes given off. Exposure to the fumes may result in death to
certain birds. Always move birds to another closed and wellventilated room.
Aluminum Foil
IMPORTANT: To avoid permanent damage to the oven bottom
finish, do not line the oven bottom with any type of foil or liner.
■ For best cooking results, do not cover entire rack with foil
because air must be able to move freely.
■ To catch spills, use the drip tray provided with your oven.
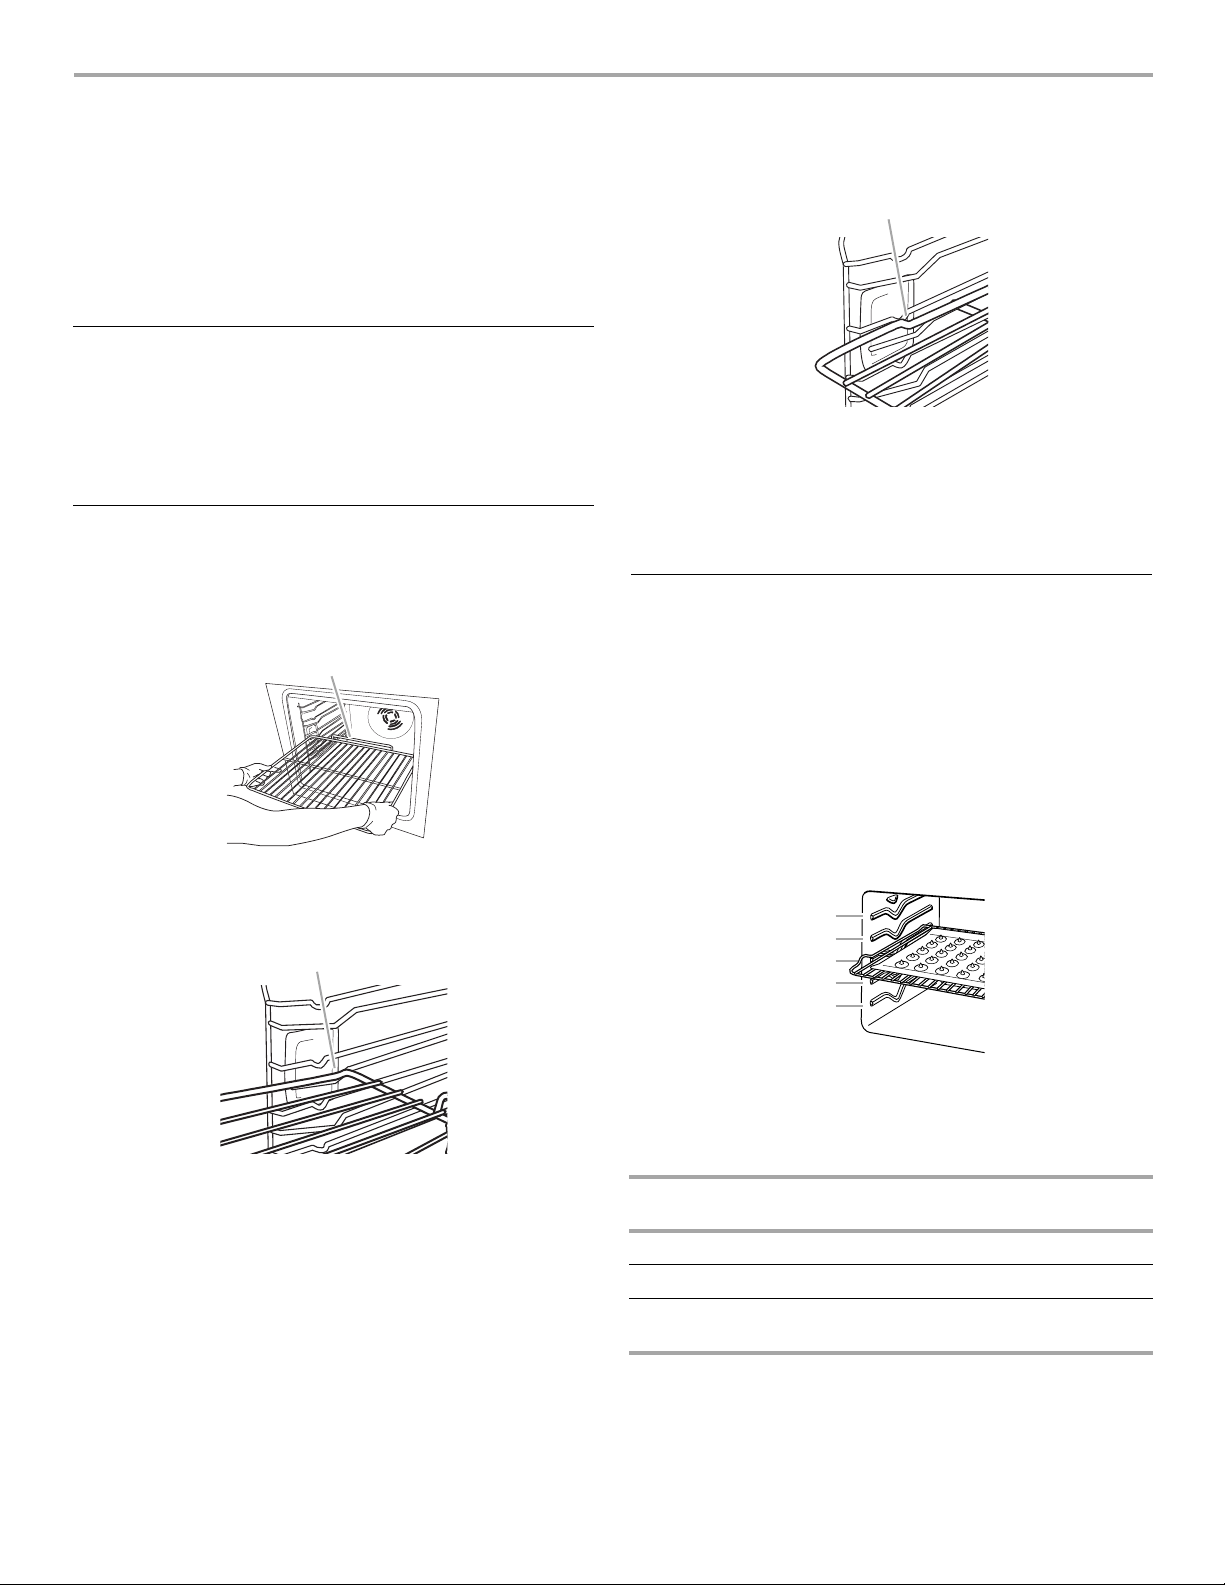
Inserting Oven Racks and Other Accessories
NOTE: The oven rack and other accessories are provided with a
locking mechanism to avoid their unintentional removal.
1. Insert the oven rack horizontally, with the raised rail facing
upward as shown.
A
3. Return the oven rack to the horizontal position and push it in
to its final position as shown.
A
A. Final position
4. To remove the oven rack, perform the above steps in reverse
order.
NOTE: The drip tray is inserted in the same manner. The locking
mechanism on the flat surface enables the accessories to lock in
place.
Positioning Racks and Bakeware
IMPORTANT: To avoid permanent damage to the porcelain
finish, do not place food or bakeware directly on the oven door or
bottom.
A. Raised rail
2. Angle the oven rack slightly upward when it reaches the
locking position as shown.
A
A. Locking position
RACKS
■ Position racks before turning on the oven.
■ Do not position racks with bakeware on them.
■ Make sure racks are level.
To move a rack, pull it out to the stop position, raise the front
edge, and then lift out. Use the following illustration and charts as
a guide.
5
4
3
2
1
BAKEWARE
To cook food evenly, hot air must be able to circulate. Allow
2" (5 cm) of space around bakeware and oven walls. Use the
following chart as a guide.
NUMBER
OF PAN(S)
1 Center of rack.
2 Side by side or slightly staggered.
POSITION ON RACK
3 or 4 Opposite corners on each rack. Make sure that
no bakeware piece is directly over another.
7
Bakeware
The bakeware material affects cooking results. Follow
manufacturer’s recommendations and use the bakeware size
recommended in the recipe. Use the following chart as a guide.
Conventional
BAKEWARE/
RECOMMENDATIONS
RESULTS
Light colored
aluminum
■ Light golden crusts
■ Even browning
Dark aluminum and
other bakeware with
dark, dull and/or
nonstick finish
■ Brown, crisp crusts
■ Use temperature and time
recommended in recipe.
■ May need to reduce baking
temperatures slightly.
■ Use suggested baking time.
■ For pies, breads and casseroles,
use temperature recommended in
recipe.
■ Place rack in center of oven.
Insulated cookie
sheets or baking
pans
■ Little or no bottom
■ Place in the bottom third of oven.
■ May need to increase baking time.
browning
Stainless steel
■ Light, golden
■ May need to increase baking time.
crusts
■ Uneven browning
Stoneware/Baking
■ Follow manufacturer’s instructions.
stone
■ Crisp crusts
Ovenproof
glassware, ceramic
■ May need to reduce baking
temperatures slightly.
glass or ceramic
■ Brown, crisp crusts
Meat Thermometer
A meat thermometer is not supplied with this appliance. Follow
manufacturer's directions for using a meat thermometer. On
models without a temperature probe, use a meat thermometer to
determine whether meat, poultry and fish are cooked to the
desired degree of doneness. The internal temperature, not
appearance, should be used to determine doneness.
Conventional symbol
The Conventional function is ideal for baking, roasting or heating
casseroles on a single oven rack.
During baking or roasting, the bake and broil elements will cycle
on and off in intervals to maintain oven temperature.
To Conventional Cook:
Before baking and roasting, position racks according to the
“Positioning Racks and Bakeware” and “Cooking Chart”
sections. It is necessary to wait for the oven to preheat before
putting food in, unless preheating is not recommended in the
recipe.
NOTE: At any time, set values can be changed by pressing the
Back button, turning the knob until the desired setting appears
on the display, then pressing the Confirmation button to select.
1. Turn the Oven Control knob to the Conventional symbol.
2. Turn the Browse knob until desired temperature appears on
the display then press the Confirmation button to select.
The Cook Time symbol will flash.
3. (Optional) If a cooking length is desired, turn the Browse knob
until desired cook time appears on the display then press the
Confirmation button to select.
The End of Cooking Time symbol and the end of cooking time
will appear on the display.
4. (Optional) To set a delayed start, turn the Browse knob until
the desired end of cooking time appears on the display then
press the Confirmation button to select.
The colon in the end of cooking time will flash. The oven will
automatically delay the start of cooking to finish cooking at
the set time.
See the “Delay Start” section for additional information.
5. Place food in oven when preheat signal sounds. The screen
will also prompt you when to insert food. If a Delay Start is
programmed, place food in oven when setting the mode.
NOTE: Do not use Delay Start for items that require a
preheated oven, such as cakes, cookies and breads. If food
is in the oven during preheat, it may become overcooked.
6. Turn the Oven Control knob to the “Off” symbol when finished
cooking.
Oven Vent
A
B
C
A. Control panel
B. Oven vent
C. Oven door
The oven vent should not be blocked or covered since it allows
the release of hot air and moisture from the oven. Blocking or
covering vents will cause poor air circulation, affecting cooking.
Do not set plastics, paper or other items that could melt or burn
near the oven vent.
8

Fast Preheating
Fast Preheating can be used to shorten the preheating time. The
preheating cycle should be completed before placing food in the
oven and should be used only for one-rack baking. When the
Fast Preheating cycle is complete, the oven starts a normal
Conventional cycle.
To Use Fast Preheating:
1. Turn the Oven Control knob to the Fast Preheating symbol
then press the Confirmation button to select.
The current settings will appear on the display.
2. Turn the Browse knob until desired temperature appears on
the display then press the Confirmation button to select.
OR
The oven will automatically confirm your selection
10 seconds after the previous operation.
3. “PRE” will appear on the display. When the selected
temperature is reached, the temperature will appear on the
display and a signal will sound.
4. Place food in the oven when preheat symbol sounds.
5. At the end of preheating, the oven automatically selects the
Conventional function.
To select a different cooking function, turn the Oven Control
knob until the symbol of the desired cooking function
appears and press the Confirmation button to select.
Grilling
Grill symbol
Grilling uses direct radiant heat to cook food. Changing the
temperature when grilling allows more precise control when
cooking. The lower the temperature, the slower the cooking.
Thicker cuts and unevenly shaped pieces of meat, fish and
poultry may cook better at lower grilling temperatures.
■ Use only the drip tray provided with the oven. It is designed
to drain juices and help avoid spatter and smoke.
■ Use the high grilling function to cook larger quantities of
meat.
■ When grilling meat, add a little water to the drip tray to help
avoid spatter and smoke.
■ Trim excess fat to reduce spattering. Slit the remaining fat on
the edges to avoid curling.
■ For proper draining, do not cover the oven rack with foil. The
bottom of the pan may be lined with aluminum foil for easier
cleaning.
■ Pull out oven rack to stop position before turning or removing
food. Use tongs to turn food to avoid the loss of juices. Very
thin cuts of fish, poultry or meat may not need to be turned.
■ After grilling, remove the pan from the oven when removing
the food. Drippings will bake on the pan if left in the heated
oven, making cleaning more difficult.
Before grilling, position rack according to the “Cooking Chart”
section. It is not necessary to preheat the oven before putting
food in unless recommended in the recipe. Position food in the
drip tray, then place it in the center of the oven rack.
During cooking, the oven door must remain closed.
NOTE: At any time, set values can be changed by pressing the
Back button, turning the knob until the desired setting appears
on the display, then pressing the Confirmation button to select.
To Grill:
1. Place food in oven. Preheating the oven is not necessary.
2. Turn the Oven Control knob to the Grill symbol.
3. Turn the Browse knob until the Grill symbol appears on the
display then press the Confirmation button to select.
4. Turn the Browse knob until the desired temperature setting
(1-5) appears on the display then press the Confirmation
button to select.
The Cook Time symbol will flash.
5. (Optional) If a cooking length is desired, turn the Browse knob
until desired cook time appears on the display then press the
Confirmation button to select.
The End of Cooking Time symbol and the end of cooking time
will appear on the display.
6. (Optional) To set a delayed start, turn the Browse knob until
the desired end of cooking time appears on the display then
press the Confirmation button to select.
The colon in the end of cooking time will flash. The oven will
automatically delay the start of cooking to finish cooking at
the set time.
See the “Delay Start” section for additional information.
7. Turn the Oven Control knob to the “Off” symbol when finished
cooking.
Convection Cooking
In a convection oven, the fan-circulated hot air continually
distributes heat more evenly than the natural movement of air in a
standard thermal oven. This movement of hot air helps maintain a
consistent temperature throughout the oven, cooking foods more
evenly, crisping surfaces while sealing in moisture and yielding
crustier breads.
■ It is important not to cover foods with lids or aluminum foil so
that surface areas remain exposed to the circulating air,
allowing browning and crisping.
■ Keep heat loss to a minimum by opening the oven door only
when necessary.
■ Choose cookie sheets without sides and roasting pans with
lower sides to allow air to move freely around the food.
■ Test baked goods for doneness a few minutes before the
minimum cooking time with an alternative method such as
using a toothpick.
■ Use a meat thermometer or the temperature probe to
determine the doneness of meats and poultry. Check the
temperature of pork and poultry in 2 or 3 places
9

Convection Bake
Forced Air
Convection bake symbol
Convection baking and roasting can be used for roasting meats
and poultry, or for baking yeast breads and loaf cakes using a
single rack.
During Convection Bake, the bake and broil elements cycle on
and off in intervals to maintain the oven temperature, while the
fan constantly circulates the hot air.
Reduce recipe temperature by turning the temperature control
knob down 1 temperature setting. The cook time may need to be
reduced also.
To Convection Bake and Roast:
Before convection baking and roasting, position the racks
according to the “Positioning Racks and Bakeware” or “Cooking
Chart” sections.
When convection roasting, use the drip tray under the oven rack.
It is not necessary to wait for the oven to preheat before putting
in food, unless it is recommended in the recipe.
Drip tray
NOTE: At any time, set values can be changed by pressing the
Back button, turning the knob until the desired setting appears
on the display, then pressing the Confirmation button to select.
1. Turn the Oven Control knob to the Convection Bake symbol.
2. Turn the Browse knob until desired temperature appears on
the display then press the Confirmation button to select.
The Cook Time symbol will flash.
3. (Optional) If a cooking length is desired, turn the Browse knob
until desired cook time appears on the display then press the
Confirmation button to select.
The End of Cooking Time symbol and the end of cooking time
will appear on the display.
4. (Optional) To set a delayed start, turn the Browse knob until
the desired end of cooking time appears on the display then
press the Confirmation button to select.
The colon in the end of cooking time will flash. The oven will
automatically delay the start of cooking to finish cooking at
the set time.
See the “Delay Start” section for additional information.
5. Place food in oven when preheat signal sounds. The screen
will also prompt you when to insert food. If a Delay Start is
programmed, place food in oven when setting the mode.
NOTE: Do not use Delay Start for items that require a
preheated oven, such as cakes, cookies and breads. If food
is in the oven during preheat, it may become overcooked.
6. Turn the Oven Control knob to the “Off” symbol when finished
cooking.
Forced Air symbol
Forced Air can be used for baking delicate cakes and pastries, as
well as foods on multiple racks. This function can be used to
cook different foods without odors being transferred from one
food to another.
It is helpful to stagger items on the racks to allow a more even
flow of heat. If the oven is full, extra cooking time may be needed.
During Forced Air, the convection ring element cycles on and off
in intervals to maintain the oven temperature, while the fan
constantly circulates the hot air.
Reduce recipe temperature by turning the temperature control
knob down 1 temperature setting. The cook time may need to be
reduced also.
Before using the Forced Air function, see the “Convection Bake”
section for general convection bake guidelines.
NOTE: At any time, set values can be changed by pressing the
Back button, turning the knob until the desired setting appears
on the display, then pressing the Confirmation button to select.
To Use :
Before using the Forced Air function, position the racks
according to the “Positioning Racks and Bakeware” section.
1. Turn the Oven Control knob to the Forced Air symbol.
2. Turn the Browse knob until desired temperature appears on
the display then press the Confirmation button to select.
The Cook Time symbol will flash.
3. (Optional) If a cooking length is desired, turn the Browse knob
until desired cook time appears on the display then press the
Confirmation button to select.
The End of Cooking Time symbol and the end of cooking time
will appear on the display.
4. (Optional) To set a delayed start, turn the Browse knob until
the desired end of cooking time appears on the display then
press the Confirmation button to select.
The colon in the end of cooking time will flash. The oven will
automatically delay the start of cooking to finish cooking at
the set time.
See the “Delay Start” section for additional information.
5. Place food in oven when preheat signal sounds. The screen
will also prompt you when to insert food. If a Delay Start is
programmed, place food in oven when setting the mode.
NOTE: Do not use Delay Start for items that require a
preheated oven, such as cakes, cookies and breads. If food
is in the oven during preheat, it may become overcooked.
6. Turn the Oven Control knob to the “Off” symbol when finished
cooking.
10

Maxi Cooking
Maxi cooking symbol
Maxi Cooking can be used for cooking large pieces of meat
(above 5.5 lb [2.5 kg]).
During Maxi Cooking, the bake and broil elements cycle on and
off in intervals to maintain the oven temperature, while the fan
constantly circulates the hot air.
Reduce recipe temperature by turning the temperature control
knob down 1 temperature setting. The cook time may need to be
reduced also.
Turn over the meat during cooking for more even browning.
Periodically baste the meat to keep it from drying out.
Before using the Maxi Cooking function, see the “Convection
Bake” section for general convection bake guidelines.
To Use :
Before using the Maxi Cooking function, position the racks
according to the “Positioning Racks and Bakeware” section.
NOTE: At any time, set values can be changed by pressing the
Back button, turning the knob until the desired setting appears
on the display, then pressing the Confirmation button to select.
1. Turn the Oven Control knob to the Maxi Cooking symbol.
2. Turn the Browse knob until desired temperature appears on
the display then press the Confirmation button to select.
The Cook Time symbol will flash.
3. (Optional) If a cooking length is desired, turn the Browse knob
until desired cook time appears on the display then press the
Confirmation button to select.
The End of Cooking Time symbol and the end of cooking time
will appear on the display.
4. (Optional) To set a delayed start, turn the Browse knob until
the desired end of cooking time appears on the display then
press the Confirmation button to select.
The colon in the end of cooking time will flash. The oven will
automatically delay the start of cooking to finish cooking at
the set time.
See the “Delay Start” section for additional information.
5. Place food in oven when preheat signal sounds. The screen
will also prompt you when to insert food. If a Delay Start is
programmed, place food in oven when setting the mode.
NOTE: Do not use Delay Start for items that require a
preheated oven, such as cakes, cookies and breads. If food
is in the oven during preheat, it may become overcooked.
6. Turn the Oven Control knob to the “Off” symbol when finished
cooking.
Turbo Grill
Grill symbol Turbo grill symbol
Turbo Grill is useful for roasting large pieces of meat (legs, roast
beef, chickens). When broiling meat, add about ½ qt (½ L) of
water to the pan.
During Turbo Grilling, the broil elements will cycle on and off in
intervals to maintain oven temperature, while the fan constantly
circulates the hot air.
Cooking times will vary depending on the rack position and
temperature and may need to be adjusted.
The oven door must be kept closed during the cooking cycle.
Before Turbo Grilling, see the “Grilling” section for general
broiling guidelines and rack positioning.
NOTE: At any time, set values can be changed by pressing the
Back button, turning the knob until the desired setting appears
on the display, then pressing the Confirmation button to select.
To Turbo Grill:
1. Place food in oven. Preheating the oven is not necessary.
2. Turn the Oven Control knob to the Grill symbol.
3. Turn the Browse knob until the Turbo Grill symbol appears on
the display then press the Confirmation button to select.
4. Turn the Browse knob until the desired temperature setting
(1-5) appears on the display then press the Confirmation
button to select.
The Cook Time symbol will flash.
5. (Optional) If a cooking length is desired, turn the Browse knob
until desired cook time appears on the display then press the
Confirmation button to select.
The End of Cooking Time symbol and the end of cooking time
will appear on the display.
6. (Optional) To set a delayed start, turn the Browse knob until
the desired end of cooking time appears on the display then
press the Confirmation button to select.
The colon in the end of cooking time will flash. The oven will
automatically delay the start of cooking to finish cooking at
the set time.
See the “Delay Start” section for additional information.
7. Turn the Oven Control knob to the “Off” symbol when finished
cooking.
11
Special Functions
Special functions symbol
Special functions available are: Defrosting, Keep Warm, Rising.
Defrost
WARNING
Keep Warm
WARNING
Food Poisoning Hazard
Do not let food sit in oven more than one hour before
or after cooking.
Doing so can result in food poisoning or sickness.
Food Poisoning Hazard
Do not let food sit in oven more than one hour before
or after cooking.
Doing so can result in food poisoning or sickness.
The Defrost function can be used to defrost frozen foods. This
function uses the fan only, without heat.
Defrost symbol
■ Leave food in its packaging to keep it from drying out on the
outside.
■ Place food on the middle shelf.
■ Shallow packages will defrost more quickly than deep blocks.
■ Separate food pieces as soon as possible during or at the
end of cycle for more even defrosting.
■ Use small pieces of aluminum foil to shield parts of food such
as chicken wings, leg tips and fish tails.
The automatic defrost function should not be used for food left
outside the freezer for more than 20 minutes and frozen readymade food.
To Use :
1. Turn the Oven Control knob to the Special Functions symbol.
2. Turn the Browse knob until “DEFROST” appears on the
display then press the Confirmation button to select.
3. Turn the Oven Control knob to the “Off” symbol when
finished.
IMPORTANT: The Keep Warm function keeps just-cooked foods
hot and crisp before serving.
Keep warm symbol
The Keep Warm function maintains a constant temperature of
150°F (65°C) in the oven. Place food on the middle shelf.
NOTE: The Keep Warm function will not activate if the oven
temperature is above 150°F (65°C).
To Use :
1. Turn the Oven Control knob to the Special Functions symbol.
2. Turn the Browse knob until “WARM KEEPING” appears on
the display then press the Confirmation button to select.
3. Turn the Oven Control knob to the “Off” symbol when
finished.
Rising
Rising symbol
The Rising function is optimal for the rising of sweet or savory
dough. Dough proving time with this function is reduced by
approximately one-third compared to proving at room
temperature (68-77°F [20-25°C]).
During the Rising cycle, the oven is 100°F (40°C).
■ It is best to cover the dough with a damp cloth before placing
it in the oven.
■ Proving time for a 2.2 lb (1 kg) batch of pizza dough is around
one hour.
■ Place dough on the 2nd shelf.
■ The oven does not have to be preheated.
NOTE: The Rising function will not activate if the oven
temperature is above 100°F (40°C).
To Use :
1. Turn the Oven Control knob to the Special Functions symbol.
2. Turn the Browse knob until “RISING” appears on the display
then press the Confirmation button to select.
3. Turn the Oven Control knob to the “Off” symbol when
finished.
12
 Loading...