

Page 1
MICROWAVE OVEN
HOOD COMBINATION
USER INSTRUCTIONS
THANK YOU for purchasing this high-quality product. Register your microwave oven at www.whirlpool.com.
For future reference, please make a note of your product model and serial numbers. These can be found on the label located on the
microwave oven frame behind the top right side of the microwave oven door.
Model Number __________________________________________ Serial Number _________________________________________
Para una versión de estas instrucciones en español, visite www.whirlpool.com.
Deberá tener a mano el número de modelo y de serie, que están ubicados en el marco del horno, detrás del lado derecho superior
de la puerta del horno.
Table of Contents
MICROWAVE OVEN SAFETY ........................................................2
Electrical Requirements ...............................................................4
CONNECTED APPLIANCE REGULATORY NOTICES (GEN4) ...5
PARTS AND FEATURES ................................................................6
Feature Guide ...............................................................................6
Vent Fan......................................................................................11
Standby Mode ............................................................................11
Additional Features ....................................................................11
Options .......................................................................................12
Kosher Consumer Friendly (KCF) Mode ....................................13
Turntable .....................................................................................14
Round Convection Rack ............................................................14
Rectangular Cooking Rack ........................................................14
Steamer Vessel ...........................................................................14
Control Lock ...............................................................................15
Connectivity Features ................................................................15
Get the App and Get Connected ...............................................16
MICROWAVE OVEN USE .............................................................17
Food Characteristics ..................................................................17
Cooking Guidelines ....................................................................17
Cookware and Dinnerware.........................................................18
Aluminum Foil and Metal ...........................................................18
Microwave Cooking Power ........................................................19
Doneness ...................................................................................19
Sensor Cook...............................................................................19
Manual Cooking/Stage Cooking ................................................19
Reheat ........................................................................................20
Auto Cook ..................................................................................20
Kids Menu ..................................................................................20
Potato .........................................................................................21
Vegetable ....................................................................................21
Defrost ........................................................................................21
Auto Steam Cooking ..................................................................21
Simmer Cooking ........................................................................22
Steam Clean ...............................................................................22
AccuPop .....................................................................................22
Warm Hold .................................................................................22
Soften/Melt .................................................................................22
Convect ......................................................................................22
MICROWAVE OVEN CARE ..........................................................23
General Cleaning ........................................................................23
TROUBLESHOOTING ..................................................................24
OPEN SOURCE LICENSE USAGE ..............................................25
ACCESSORIES .............................................................................26
WARRANTY ..................................................................................27
W11037870A
Page 2

MICROWAVE OVEN SAFETY
IMPORTANT SAFETY INSTRUCTIONS
When using electrical appliances basic safety precautions should be followed, including the following:
WARNING: To reduce the risk of burns, electric shock, fire,
injury to persons, or exposure to excessive microwave energy:
■
Read all instructions before using the microwave oven.
■ Read and follow the specific “PRECAUTIONS TO AVOID
POSSIBLE EXPOSURE TO EXCESSIVE MICROWAVE
ENERGY” found in this section.
■ The microwave oven must be grounded. Connect only to
properly grounded outlet. See “GROUNDING INSTRUCTIONS”
found in this section and in the provided Installation Instructions.
■ Install or locate the microwave oven only in
accordance with the provided Installation Instructions.
■ Some products such as whole eggs in the shell and
sealed containers - for example, closed glass jars are able to explode and should not be heated in the
microwave oven.
SAVE THESE INSTRUCTIONS
2
Page 3
IMPORTANT SAFETY INSTRUCTIONS
■ Use the microwave oven only for its intended use as
described in the manual. Do not use corrosive chemicals or
vapors in the microwave oven. This type of oven is
specifically designed to heat, cook, or dry food. It is not
designed for industrial or laboratory use.
■ As with any appliance, close supervision is necessary when
used by children.
■ Do not operate the microwave oven if it has a damaged cord
or plug, if it is not working properly, or if it has been damaged
or dropped.
■ The microwave oven should be serviced only by qualified
service personnel. Call an authorized service company for
examination, repair, or adjustment.
■ Do not cover or block any openings on the microwave oven.
■ Do not store this microwave oven outdoors. Do not use the
microwave oven near water - for example, near a kitchen
sink, in a wet basement, near a swimming pool, or similar
locations.
■ Do not immerse cord or plug in water.
■ Keep cord away from heated surfaces.
■ Do not let cord hang over edge of table or counter.
■ See door surface cleaning instructions in the “Microwave
Oven Care” section.
■ To reduce the risk of fire in the oven cavity:
– Do not overcook food. Carefully attend the microwave oven
when paper, plastic, or other combustible materials are
placed inside the oven to facilitate cooking.
– Remove wire twist-ties from paper or plastic bags before
placing bags in oven.
– If materials inside the oven ignite, keep oven door closed,
turn oven off, and disconnect the power cord, or shut off
power at the fuse or circuit breaker panel.
– Do not use the cavity for storage purposes. Do not leave
paper products, cooking utensils, or food in the cavity when
not in use.
■ Liquids, such as water, coffee, or tea are able to be
overheated beyond the boiling point without appearing to
be boiling. Visible bubbling or boiling when the container
is removed from the microwave oven is not always
present. THIS COULD RESULT IN VERY HOT LIQUIDS
SUDDENLY BOILING OVER WHEN THE CONTAINER
IS DISTURBED OR A SPOON OR OTHER UTENSIL IS
INSERTED INTO THE LIQUID.
To reduce the risk of injury to persons:
– Do not overheat the liquid.
– Stir the liquid both before and halfway through heating it.
– Do not use straight-sided containers with narrow necks.
– After heating, allow the container to stand in the
microwave oven for a short time before removing the
container.
– Use extreme care when inserting a spoon or other
utensil into the container.
■ Do not mount over a sink.
■ Do not store anything directly on top of the microwave
oven when the microwave oven is in operation.
■ Clean Ventilating Hoods Frequently - Grease should not
be allowed to accumulate on hood or filter.
■ When flambéing foods under the hood, turn the fan on.
■ Suitable for use above both gas and electric cooking
equipment.
■ Intended to be used above ranges with maximum width of
36" (91.44 cm).
■ Use care when cleaning the vent-hood filter. Corrosive
cleaning agents, such as lye-based oven cleaners, may
damage the filter.
SAVE THESE INSTRUCTIONS
PRECAUTIONS TO AVOID POSSIBLE EXPOSURE TO
EXCESSIVE MICROWAVE ENERGY
(a) Do not attempt to operate this oven with the door open
since open-door operation can result in harmful exposure
to microwave energy. It is important not to defeat or
tamper with the safety interlocks.
(b) Do not place any object between the oven front face and
the door or allow soil or cleaner residue to accumulate on
sealing surfaces.
State of California Proposition 65 Warnings:
WARNING: This product contains one or more chemicals known to the State of California to cause cancer.
WARNING: This product contains one or more chemicals known to the State of California to cause birth defects or other
reproductive harm.
(c) Do not operate the oven if it is damaged. It is particularly
important that the oven door close properly and that there
is no damage to the:
(1) Door (bent),
(2) Hinges and latches (broken or loosened),
(3) Door seals and sealing surfaces.
(d) The oven should not be adjusted or repaired by anyone
except properly qualified service personnel.
3
Page 4
Electrical Requirements
WARNING
Electrical Shock Hazard
Plug into a grounded 3 prong outlet.
Do not remove ground prong.
Do not use an adapter.
Do not use an extension cord.
Failure to follow these instructions can result in death,
fire, or electrical shock.
Observe all governing codes and ordinances.
Required:
■ A 120-volt, 60 Hz, AC-only, 15- or 20-amp electrical supply
with a fuse or circuit breaker
Recommended:
■ A time-delay fuse or time-delay circuit breaker
■ A separate circuit serving only this microwave oven
GROUNDING INSTRUCTIONS
■
For all cord connected appliances:
The microwave oven must be grounded. In the event of
an electrical short circuit, grounding reduces the risk of
electric shock by providing an escape wire for the electric
current. The microwave oven is equipped with a cord
having a grounding wire with a grounding plug. The plug
must be plugged into an outlet that is properly installed
and grounded.
WARNING: Improper use of the grounding plug can
result in a risk of electric shock. Consult a qualified
electrician or serviceman if the grounding instructions are
not completely understood, or if doubt exists as to whether
the microwave oven is properly grounded.
Do not use an extension cord. If the power supply cord is
too short, have a qualified electrician or serviceman install
an outlet near the microwave oven.
SAVE THESE INSTRUCTIONS
This device complies with Part 18 of the FCC Rules.
4
Page 5
CONNECTED APPLIANCE REGULATORY NOTICES (GEN4)
Federal Communications Commission (FCC)
Compliance Notice
This equipment has been tested and found to comply with the
limits for a Class B digital device, pursuant to Part 15 of the
FCC Rules. These limits are designed to provide reasonable
protection against harmful interference in a residential installation.
This equipment generates, uses, and can radiate radio
frequency energy and, if not installed and used in accordance
with the instructions, may cause harmful interference to radio
communications. However, there is no guarantee that interference
will not occur in a particular installation. If this equipment does
cause harmful interference to radio or television reception, which
can be determined by turning the equipment off and on, the user
is encouraged to try to correct the interference by one of the
following measures:
– Reorient or relocate the receiving antenna.
– Increase the separation between the equipment and receiver.
– Connect the equipment into an outlet on a circuit different from
that to which the receiver is connected.
– Consult the dealer or an experienced radio/TV technician for
help.
This device complies with Part 15 of the FCC Rules. Operation is
subject to the following two conditions:
1. This device may not cause harmful interference, and
2. This device must accept any interference received, including
interference that may cause undesired operation.
Changes or modifications not expressly approved by the party
responsible for compliance could void the user’s authority to
operate the equipment.
RF Exposure Information
To comply with FCC/IC RF exposure requirements for mobile
transmitting devices, this transmitter should only be used or
installed at locations where there is at least 20 cm separation
distance between the antenna and all persons.
To comply with FCC/IC RF exposure limits for general population/
uncontrolled exposure, the antenna(s) used for this transmitter
must be installed to provide a separation distance of at least
20 cm from all persons and must not be co-located or operating
in conjunction with any other antenna or transmitter.
Industry Canada (IC) Compliance Notice
This Device complies with Industry Canada License-exempt RSS
standard(s). Operation is subject to the following two conditions:
1. This device may not cause interference,
2. This device must accept any interference, including
interference that maycause undesired operation of the device.
Under Industry Canada regulations, this radio transmitter may
only operate using an antenna of a type and maximum (or lesser)
gain approved for the transmitter by Industry Canada. To reduce
potential radio interference to other users, the antenna type and its
gain should be so chosen that the equivalent isotropically radiated
power (e.i.r.p.) is not more than that necessary for successful
communication.
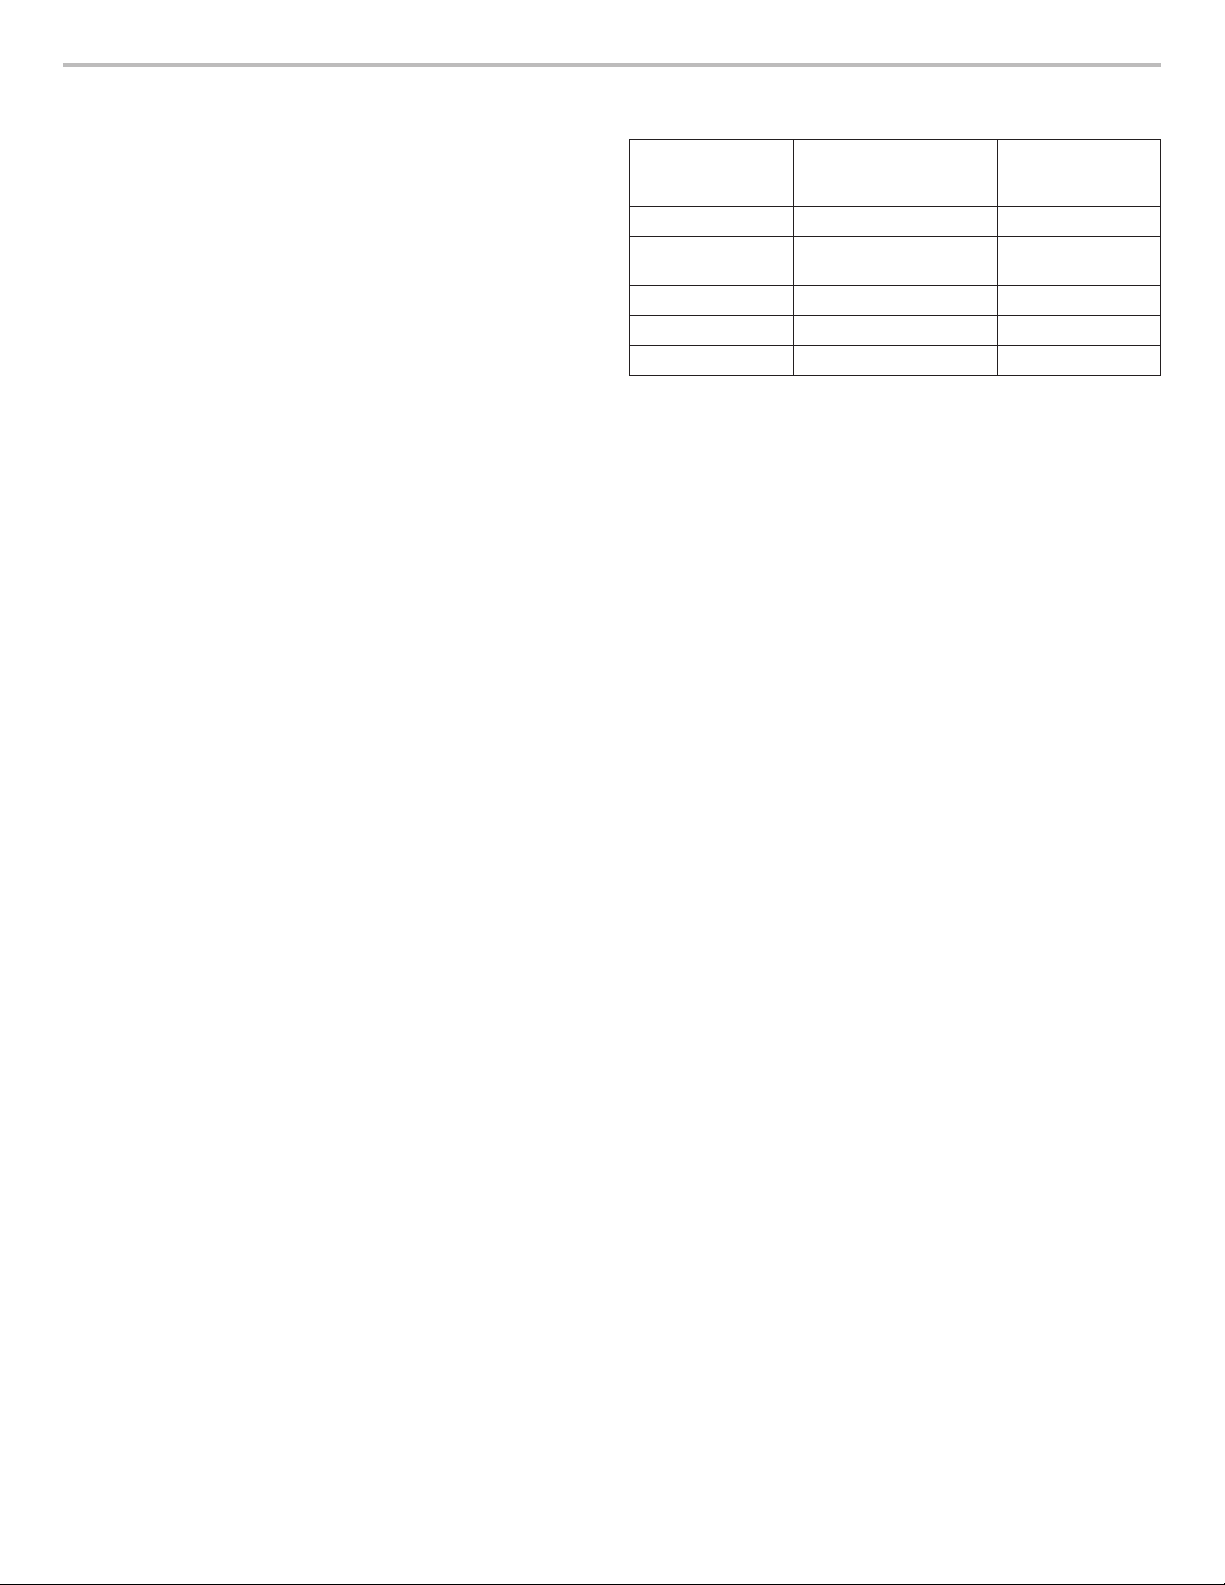
The radio transmitters IC: 10248A-WICHAM01 and
10248A-FLDAAM01 have been approved by Industry Canada to
operate with the antenna types listed below with the maximum
permissible gain and required antenna impedance for each
antenna type indicated. Antenna types not included in this list,
having a gain greater than the maximum gain indicated for that
type, are strictly prohibited for use with this device.
Antenna Type
Slot 1.2 50
Monopole
(WICHAM01 only)
Dipole 3.0 50
F 1.60 50
Planar F 4.2 50
To comply with FCC and Industry Canada RF radiation exposure
limits for general population, the antenna(s) used for this
transmitter must be installed such that a minimum separation
distance of 20 cm is maintained between the radiator (antenna)
and all persons at all times and must not be co-located or
operating in conjunction with any other antenna or transmitter.
Maximum Permissible
Antenna Gain (dBi)
0.5 50
Required
Impedance
(OHM)
OEM Responsibilities to comply with FCC and Industry
Canada Regulations
The WICHAM01/FLDAAM01 Modules have been certified for
integration into products only by OEM integrators under the
following conditions:
1. The antenna(s) must be installed such that a minimum
separationdistance of 20 cm is maintained between the
radiator (antenna) and allpersons at all times.
2. The transmitter module must not be co-located or operating
inconjunction with any other antenna or transmitter.
As long as the two conditions above are met, further transmitter
testing will not be required. However, the OEM integrator is
still responsible for testing their end-product for any additional
compliance requirements required with this module installed
(for example, digital device emissions, PC peripheral
requirements, etc.).
IMPORTANT NOTE: In the event that these conditions cannot
be met (for certain configurations or co-location with another
transmitter), then the FCC and Industry Canada authorizations
are no longer considered valid and the FCC ID and IC
Certification Number cannot be used on the final product. In
these circumstances, the OEM integrator will be responsible
for re-evaluating the end product (including the transmitter) and
obtaining a separate FCC and Industry Canada authorization.
5
Page 6
WARNING
End Product Labeling
The WICHAM01/FLDAAM01 Modules are labeled with FCC ID and
IC Certification Number. If the FCC ID and IC Certification Number
are not visible when the module is installed inside another device,
then the outside of the device into which the module is installed
must also display a label referring to the enclosed module. In that
case, the final end product must be labeled in a visible area or
display the following:
“Contains FCC ID: A5UWICHAM01”
“Contains IC: 10248A-WICHAM01”
or
“Contains FCC ID: A5UFLDAAM01”
“Contains IC: 10248A-FLDAAM01”
The OEM of the WICHAM01/FLDAAM01 Module must only use
the approved antenna(s), which have been certified with this
module. The OEM integrator has to be aware not to provide
information to the end user regarding how to install or remove this
RF module or change RF related parameters in the user manual of
the end product.
The user manual for the end product must include the
following information in a prominent location:
“To comply with FCC and Industry Canada RF radiation exposure
limits for general population, the antenna(s) used for this
transmitter must be installed such that a minimum separation
distance of 20 cm is maintained between the radiator (antenna)
and all persons at all times and must not be co-located or
operating in conjunction with any other antenna or transmitter.”
PARTS AND FEATURES
Feature Guide
This manual covers several models. Your model may have some or all of the items listed. Refer to this manual or the Product Help
section of our website at www.whirlpool.com for more detailed instructions.
Food Poisoning Hazard
Do not let food sit in oven more than one hour before
or after cooking.
Doing so can result in food poisoning or sickness.
6
Page 7
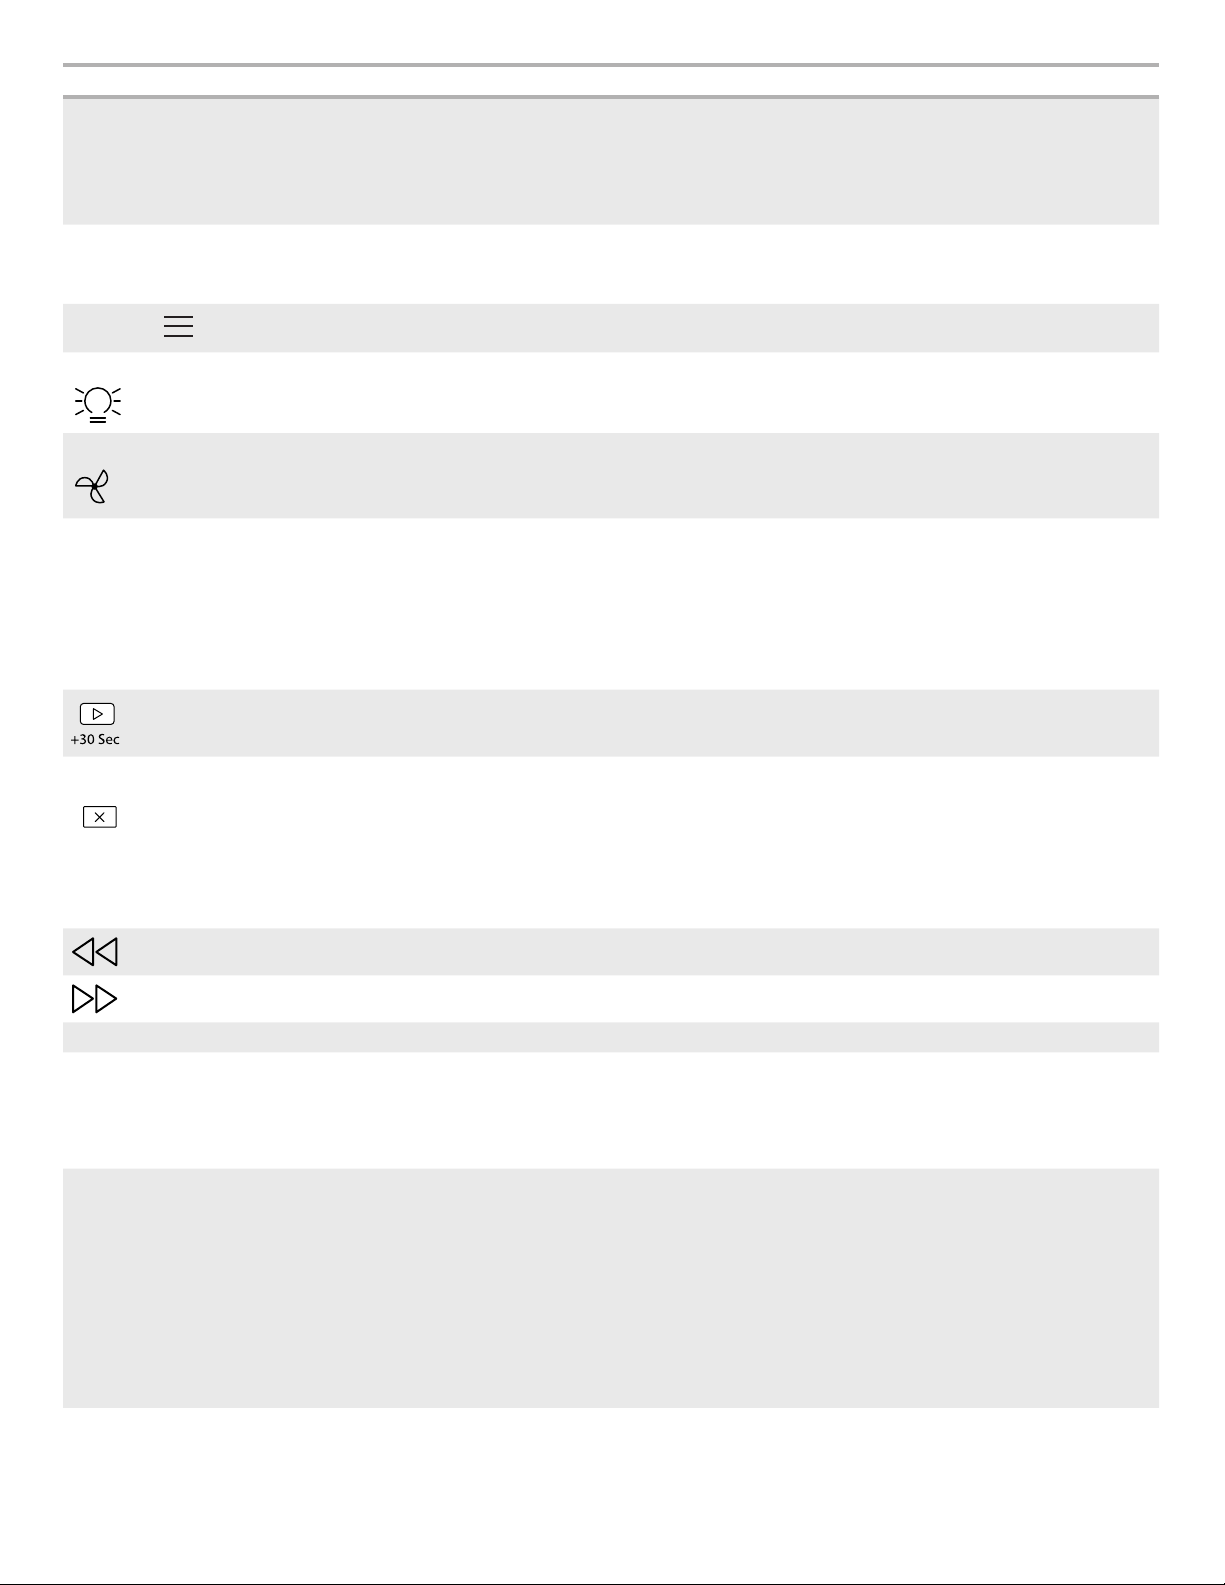
Keypad Feature Instructions
CLOCK/OPTIONS Set the Clock
CLOCK/OPTIONS Reach Options
Menu
MENU Turn On Backlit
Buttons
LIGHT Turn On Light
1. To set the clock, for example, to 2:25 PM, touch the Menu keypad.
2. Touch CLOCK/OPTIONS.
3. Use the number keypads to enter “2:25.”
4. Touch SELECT.
5. Touch “2” to display PM.
1. Touch CLOCK/OPTIONS.
2. Use the arrow keypads to scroll through options.
3. Touch SELECT to select desired option and follow the prompts.
Press the Menu keypad to light up the back-lit buttons.
Press the Light keypad to turn the light beneath the hood on or off.
FAN Turn On Fan
TIMER (SET/OFF) Kitchen Timer
Start/Add 30 Sec
CANCEL Microwave Oven
Cancel
Navigate Menu
Left Arrow
Navigate Menu
Right Arrow
SELECT Select Options
COOK TIME/POWER Manual Cooking
CONVECT Auto Convect
Cooking
Press the Fan keypad to turn the Fan on or off. Press the fan keypad repeatedly to
change from low to high.
1. Touch TIMER SET/OFF.
2. Touch the number keypads to set the length of time.
3. For example, to set 12 minutes length time, touch TIME SET/OFF.
4. Use the number keypads to enter “12:00.”
5. Touch START.
6. If the Cancel keypad is touched, the microwave oven will turn off; however, the Timer
can only be turned off using the Timer Set/Off keypad.
Touching the Start/Add 30 Sec keypad when the microwave oven is off will start 30
seconds of cook time at 100% power. If cooking is interrupted by opening the door,
touching Start/Add 30 Sec after the door is closed again will resume the preset cycle.
The Cancel keypad stops any microwave oven function except for the Clock, Timer,
and Control Lock.
The microwave oven will also turn off when the door is opened. When the door is
opened, the element(s) and fan will turn off, but the microwave oven light will remain on.
Close the door and touch the Start keypad to resume the preset cycle.
The microwave oven cooling fan may continue to operate even after a microwave
oven function has been canceled or completed, depending on the microwave oven
temperature.
Press the Left Arrow keypad to move through the menu.
Press the Right Arrow keypad to move through the menu.
Touch SELECT to select options.
1. Touch COOK TIME/POWER and then number keypads to set a length of time to
cook. For example, to set the time to 2:30, touch COOK TIME/POWER, then use
the number keypads to enter “2:30.”
2. Touch COOK TIME/POWER and enter cook power (e.g., press 8 for 80%).
3. Press START.
1. Position convection rack on turntable in microwave oven,close the door.
2. Touch Convect keypad, use arrow keypad to enter CONVECTION COOK RECIPES,
then press Select keypad.
3. Use arrow keypad to select food item, Press Select keypad again, touch START to
begin preheat. After preheat, place baking dish with food on convection rack, then
touch START to begin cycle.
4. For example, to select the Beef Roast setting, touch CONVECT once, press Select
keypad to enter convection cook recipes, then use arrow keypad to select
Beef Roast.
NOTE: Microwave oven cavity, inside of the door, convection rack, and baking dish will
be hot. Use oven mitts to remove the dish and to handle the hot convection rack.
7
Page 8

Keypad Feature Instructions
CONVECT Manual
Convection Bake
CONVECT Manual
Convection
Roast
DEFROST Automatic
Defrost
SOFTEN/MELT Soften
1. Use for foods such as cookies, pies, cakes, and breads. Use same time as recipe. Allow
microwave oven to preheat.
2. Place the convection rack on the turntable. Default temperature is 325°F (163°C). Touch
CONVECT twice to select the MANUAL CONVECTION BAKE, Use number keypads to
enter a different temperature, 250°F (121°C) to 450°F (232°C).
3. Touch COOK TIME/POWER, and enter time in hours and minutes, up to 4 hours. Default
time is 4 hours.
4. Touch START to begin preheat. Preheat may be skipped by touching Start again.
5. After preheat, place baking dish with food on the convection rack, then touch START to
begin baking.
NOTE: Microwave oven cavity, inside of the door, convection rack and baking dish will be
hot. Use oven mitts to remove the dish and to handle the hot convection rack.
1. Use for foods such as beef and pork roasts, whole chicken and meat loaf. Decrease
time by 10%-20%. Use 30% microwave power for large meats and casseroles. Use
10%-20% microwave power for thin cuts of meat.
2. Place the convection rack on the turntable. Default temperature is 325°F (163°C). Touch
CONVECT three times to select the MANUAL CONVECTION ROAST, Use number
keypads to enter a different temperature, 250°F (121°C) to 450°F (232°C).
3. Touch COOK TIME/POWER, and enter time in hours and minutes, up to 4hours. Default
time is 4 hours.
4. Touch COOK TIME/POWER, and enter power level, from 10% to 30%. Default power is
30%.
5. Touch START to begin preheat. Preheat may be skipped by touching Start again.
6. After preheat, place baking dish with rack and food on the turntable, then touch START
to begin roasting.
NOTE: Microwave oven cavity, inside of the door, convection rack and baking dish will be
hot. Use oven mitts to remove the dish and to handle the hot convection rack.
1. Touch DEFROST.
2. Touch DEFROST repeatedly to scroll through foods, or use the arrow keypads to select
food from the Defrost Chart. For example, to select the Poultry setting, DEFROST must
be touched twice.
3. Touch number keypads to enter the weight. For example, to enter 1.5 lbs, use the
number keypads to enter “1.5.”
4. Touch the Start keypad.
The display will count down the defrost time. For better results, a preset standing time
is included in the defrosting time. This may make the defrosting time seem longer than
expected.
When the stop time is reached, the microwave oven will shut off automatically.
If enabled, end-of-cycle tones will sound, and then reminder tones will sound every
minute.
5. Touch the Cancel keypad or open the door to clear the display and/or stop reminder
tones.
1. Touch SOFTEN/MELT.
2. Touch SOFTEN/MELT repeatedly to scroll through foods, or use the arrow keypads to
select food type from the Soften Chart. Touch SELECT to select the desired setting.
3. Touch number keypads to enter quantity (weight or sticks).
4. Touch the Start keypad.
The display will count down the soften time.
When the stop time is reached, the microwave oven will shut off automatically and END
will appear in the display.
If enabled, end-of-cycle tones will sound, and then reminder tones will sound every
minute.
5. Touch the Cancel keypad or open the door to clear the display and/or stop reminder
tones.
8
Page 9

Keypad Feature Instructions
SOFTEN/MELT Melt
STEAM/
SIMMER
STEAM/
SIMMER
STEAM/
SIMMER
STEAM/
SIMMER
WARM HOLD Keep Food
Auto Steam
Cook
Manual
Steam Cook
Auto
Simmer
Cook
Manual
Simmer
Cook
Warm
1. Touch SOFTEN/MELT.
2. Touch SOFTEN/MELT repeatedly to scroll through foods, or use the arrow keypads to select food
type from the Melt Chart. Touch SELECT to select the desired setting.
3. Touch number keypads to enter quantity.
4. Touch the Start keypad.
The display will count down the melt time.
When the stop time is reached, the microwave oven will shut off automatically and END will
appear in the display.
If enabled, end-of-cycle tones will sound, and then reminder tones will sound every minute.
5. Touch the Cancel keypad or open the door to clear the display and/or stop reminder tones.
1. Touch STEAM/SIMMER.
2. Use the arrow keypads to scroll to Steam Recipes. Touch SELECT to select the desired setting.
3. Use the arrow keypads to scan and select food type, then follow the prompts.
4. Touch the Start keypad. The display will count down the steam time once the sensor identifies
the cooking duration.
When the steam time has ended, the microwave oven will shut off automatically.
If enabled, end-of-cycle tones will sound, and then reminder tones will sound every minute.
5. Touch the Cancel keypad or open the door to clear the display and/or stop reminder tones.
1. Touch STEAM/SIMMER.
2. Touch STEAM/SIMMER repeatedly to scan and select the Manual Steam setting, or use the arrow
keypads. Touch SELECT to select the desired setting.
3. Touch the number keypads to set a length of time to steam. Time can be set up to 99 minutes and
59 seconds.
4. Touch START.
Once the boiling point is reached, the display will start to count down the steam time.
When the stop time is reached, the microwave oven will shut off automatically.
If enabled, end-of-cycle tones will sound, and then reminder tones will sound every minute.
5. Touch the Cancel keypad or open the door to clear the display and/or stop reminder tones.
1. Touch STEAM/SIMMER.
2. Use the arrow keypads to scroll to Simmer Recipes.
3. Use the arrow keypads to scan and select food type, then follow the prompts.
4. Touch the Start keypad. The display will count down the simmer time once the sensor identifies
the cooking duration.
When the simmer time has ended, the microwave oven will shut off automatically.
If enabled, end-of-cycle tones will sound, and then reminder tones will sound every minute.
5. Touch the Cancel keypad or open the door to clear the display and/or stop reminder tones.
1. Touch STEAM/SIMMER.
2. Touch STEAM/SIMMER repeatedly to scan and select the Manual Simmer setting, or use the
arrow keypads.
3. Touch the number keypads to set a length of time to simmer. Time can be set up to 99 minutes
and 95 seconds.
4. Touch START.
Once the boiling point is reached, the microwave oven display will start to count down the simmer
time.
When the stop time is reached, the microwave oven will shut off automatically.
If enabled, end-of-cycle tones will sound, and then reminder tones will sound every minute.
5. Touch the Cancel keypad or open the door to clear the display and/or stop reminder tones.
1. Touch WARM HOLD and then number keypads to set a length of time to warm.
2. Touch START.
The display will count down the warming time.
When the stop time is reached, the microwave oven will shut off automatically and END will
appear in the display.
If enabled, end-of-cycle tones will sound, and then reminder tones will sound every minute.
3. Touch the Cancel keypad or open the door to clear the display and/or stop the reminder tones.
9
Page 10

Keypad Feature Instructions
ACCUPOP Popcorn
(Sensor)
POTATO Potato
(Sensor)
VEGETABLE Vegetable
REHEAT Automatic
Reheat
AUTO COOK Auto Cook
1. Touch ACCUPOP.
2. Touch START.
When the stop time is reached, the microwave oven will shut off automatically.
If enabled, end-of-cycle tones will sound, and then reminder tones will sound every
minute.
3. Touch the Cancel keypad or open the door to clear the display and/or stop reminder
tones.
1. Touch POTATO.
2. Touch START.
When the stop time is reached, the microwave oven will shut off automatically.
If enabled, end-of-cycle tones will sound, and then reminder tones will sound every
minute.
3. Touch the Cancel keypad or open the door to clear the display and/or stop reminder
tones.
1. Touch VEGETABLE.
2. Touch VEGETABLE repeatedly to scroll through foods, or use the arrow keypads to select
food type from the Vegetable Chart. To select a setting, touch SELECT.
3. Touch number keypads to enter quantity.
4. Touch START.
When the stop time is reached, the microwave oven will shut off automatically.
If enabled, end-of-cycle tones will sound, and then reminder tones will sound every
minute.
5. Touch the Cancel keypad or open the door to clear the display and/or stop reminder
tones.
1. Touch REHEAT.
2. Touch REHEAT repeatedly to scroll through foods, or use the arrow keypads to select
food type from the Reheat Chart. For example, to select the Casserole setting, REHEAT
must be touched twice.
3. Touch number keypads to enter quantity.
4. Touch START.
When the stop time is reached, the microwave oven will shut off automatically.
If enabled, end-of-cycle tones will sound, and then reminder tones will sound every
minute.
5. Touch the Cancel keypad or open the door to clear the display and/or stop reminder
tones.
1. Touch AUTO COOK.
2. Touch AUTO COOK repeatedly to scroll through foods, or use the arrow keypads to
select food type from the Auto Cook Chart. To select a setting, touch SELECT.
3. Touch number keypads to enter quantity.
4. Touch START.
When the stop time is reached, the microwave oven will shut off automatically and END
will appear on the microwave oven display.
If enabled, end-of-cycle tones will sound, and then reminder tones will sound every
minute.
5. Touch the Cancel keypad or open the door to clear the display and/or stop reminder
tones.
10
Page 11
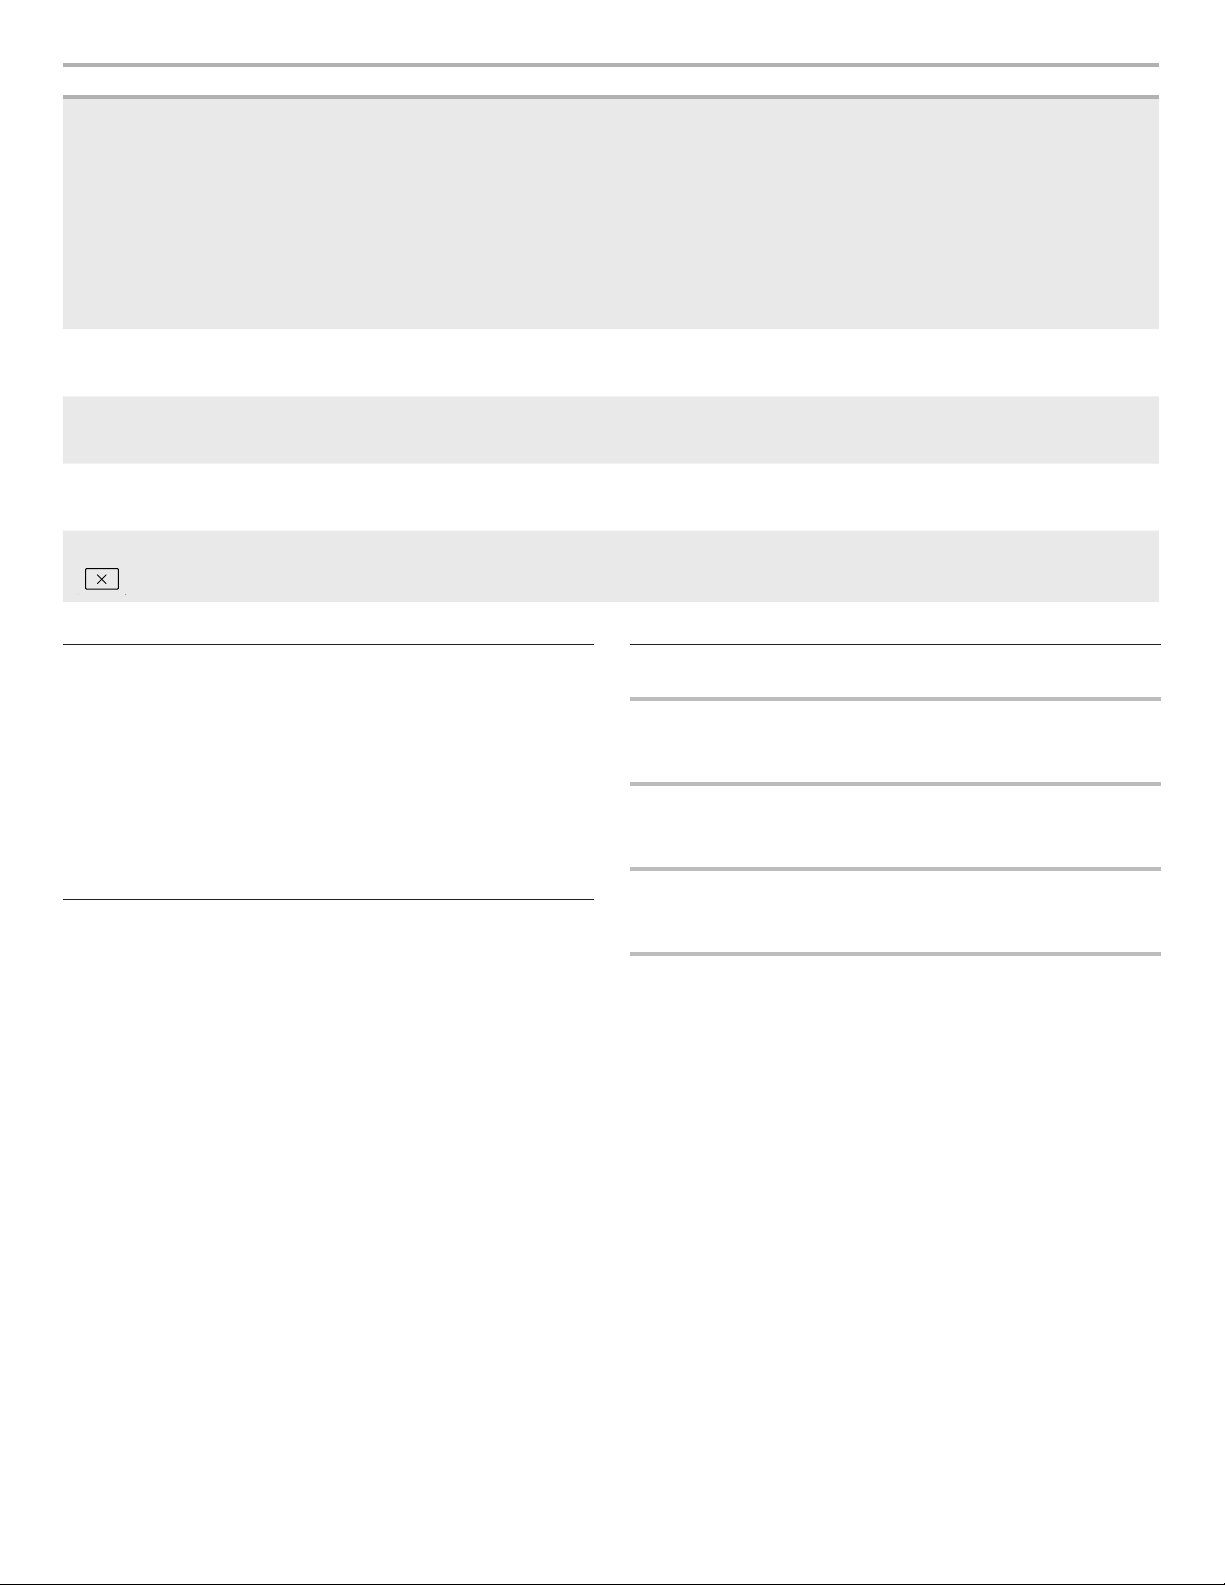
Keypad Feature Instructions
KIDS MENU Kids Menu
TURNTABLE Turntable On/Off
REMOTE ENABLE Enable Remote
App Control
CONNECT Connect to Wi-Fi
CANCEL Activate Control
Lock
1. Touch KIDS MENU.
2. Touch KIDS MENU repeatedly to scroll through foods, or use the arrow keypads to
select food type from the Kids Menu Chart. To select a setting, touch SELECT.
3. Touch number keypads to enter quantity.
4. Touch START.
When the stop time is reached, the microwave oven will shut off automatically.
If enabled, end-of-cycle tones will sound, and then reminder tones will sound every
minute.
5. Touch the Cancel keypad or open the door to clear the display and/or stop reminder
tones.
By touching the Turntable On/Off keypad, it is possible to switch the turntable on and off
during some microwave cycles. The turntable can be turned on or off only during Manual
cooking cycles.
Remote Enable allows you to start Convection Bake cooking cycle using your mobile
phone when you are away from home. Press REMOTE ENABLE to enable the ability to
utilize the Whirlpool® app.
Press and hold CONNECT while your router’s WPS indicator light is blinking to connect
your range to your Wi-Fi network. See the “Connectivity Features” section for more
detailed instructions.
Activate to avoid unintended start. Touch and hold the Cancel keypad for about
3 seconds until two tones sound and the Padlock icon appears in the display. Repeat
to unlock control.
CANCEL Cancel
Touch the Cancel keypad to cancel cooking function.
Vent Fan
Various speeds, ranging from High, Med-High, Med, Low and Off.
30-Minute Fan Timer: Set vent fan to run for exactly 30 minutes
or to run for only 30 minutes more (off after 30 minutes). The vent
fan may be turned off at any time using the Vent Fan control.
Auto Vent Fan (on some models): To keep the microwave oven
from overheating, the auto vent fan will automatically turn on at
high speed if the temperature from the range or cooktop below
the microwave oven gets too hot. When this occurs, the vent fan
cannot be turned off. “FAN ON for heat circulation” appears in the
display.
Standby Mode
When no functions are working (12-hour clock is displayed or if the
clock has not been set), microwave oven will switch to Standby
Power mode and dim the LCD brightness after 5 minutes. Touch
any keypad or open/close the door, and the display will return to
the normal brightness.
Additional Features
CleanRelease® Cavity Coating (on some models)
The durable, nonstick coating resists soil buildup by making
cleaning easier. See the “Microwave Oven Care” section.
6th Sense™ System
A sensor in the microwave oven detects moisture released from
food as it heats and adjusts the cooking time accordingly.
Convection Element and Fan
The convection element and fan are embedded in the wall of the
microwave oven cavity, behind the metal screen.
Back-Lighting
Some of the keypads will be darkened after about 30 seconds of
inactivity. Press the Menu keypad to light up the back-lit buttons.
Opening the door will light up the back lighting.
11
Page 12

Options
Clock/Options allows access to the microwave settings.
To Use:
1. Touch CLOCK/OPTIONS. The microwave oven display will
scroll through the various options.
You can also touch CLOCK/OPTIONS repeatedly to manually
scroll through the list of options.
2. Touch the number keypad for the specific option to toggle the
function setup.
Tones
Tones are audible signals, indicating the following:
One beep
■ Valid keypad touch
■ Function has been entered
Light Timer
Set the cooktop light to turn on and off at certain times. Touch
CLOCK/OPTIONS to reach the Light Timer submenu, and follow
the prompts to set the light on time and light off time in hours and
minutes or to cancel Light Timer.
NOTE: Light Timer uses 12-hour clock only.
Filter Alert
Reset the filter status after replacing and/or cleaning the filters.
Touch CLOCK/OPTIONS to reach the Filter Alert submenu, and
activate reset.
Sound (Tones)
Programming tones may be turned off or all tones (including endof-function signals) may be turned off. Touch CLOCK/OPTIONS to
reach the Sound submenu, and then follow the prompts to turn off
or on the programming tones or all tones.
NOTE: The Timer is not affected by reminder tones.
Three chimes
■ Preheat cycle has been completed
Three beeps
■ Invalid keypad touch
Four chimes
■ End of a cooking cycle
Four beeps
■ When timer reaches zero
Includes using the Timer for functions other than cooking.
Clock
The clock is a 12-hour (12:00-11:59) or 24-hour (0:00-23:59) clock.
Touch CLOCK/OPTIONS to reach Clock submenu and follow the
prompts to set the clock. Clock format (12 hours with AM and PM,
12 hours without AM and PM, or 24 hours) may also be set in the
Clock submenu.
Scroll Speed
Scroll speed of the text may be adjusted. Touch CLOCK/OPTIONS
to reach the Scroll Speed submenu and follow the prompts to set
speed.
Demo Mode
Activate to practice using the control without actually turning on
the magnetron. Touch CLOCK/OPTIONS to reach the Demo mode
submenu, then follow the prompts to activate. The Demo icon will
light up in the display. Repeat to deactivate.
Energy Save
To conserve energy, the Clock will automatically turn off when
the microwave oven goes into Standby mode. Touch CLOCK/
OPTIONS to reach the Clock and Energy Save submenu, and
follow the prompts to turn on Clock.
Language (Canada models)
Language of the display text may be changed. Touch CLOCK/
OPTIONS to reach the Language submenu and follow the prompts
to set language to English or French.
Temp Calibration
The actual convection cooking temperature may be calibrated
higher or lower than the displayed temperature. For example,
if you want the microwave oven to be a bit hotter, you may try
setting the calibration to +10°. Touch CLOCK/OPTIONS to reach
the Calibration submenu. The current setting will appear in the
display with a checkmark next to it. Use number keypads to select
temperature variations in degrees Fahrenheit: 1 = ±0° (reset to
default), 2 = +5° (+2.8°C), 3 = +10° (+5.6°C), 4 = +15° (+8.3°C),
5 = +20° (+11.1°C), 6 = -5° (-2.8°C), 7 = -10° (-5.6°C), -8 = -15°
(-8.3°C), and 9 = -20° (-11.1°C).
NOTE: The microwave oven will remember the setting after a
power failure.
12
Page 13

Factory Reset
User may set microwave oven back to default state.
Remote Enable
Remote Enable allows you to start Convection Bake cooking cycle
using your mobile phone when you are away from home.
Connect
This button connects your appliance to home router. See details in
later section.
Appliance Registration
Go to www.mysmartappliances.com on your home computer and
input the SAID (Smart Appliance ID) which can be found on the
label located on the microwave oven frame behind the top right
side of the microwave oven door.
Kosher Consumer-Friendly (KCF) Mode
For guidance on usage and a complete list of models with KCF
mode, visit www.star-k.org.
The KCF mode for this microwave oven is similar to the Sabbath
Mode available on other appliances such as ovens, but with
several important differences. KCF mode can be considered as
a less-featured version of Sabbath mode. For example, in KCF
mode, if the microwave oven is in cooking mode, then you should
not open the microwave oven door as this will turn off the heating
source.
Using KCF mode is a two-step process. First, you need to
“Enable” KCF mode. Second, you need to “Activate” KCF mode.
Enabling KCF mode means that the microwave oven is ready to go
into KCF mode in the future. Activating KCF mode means that the
microwave oven is currently in KCF mode.
When the KCF mode is activated, opening the microwave oven
door will not turn on the microwave oven cavity light. All keypad
presses will be ignored (except the Cancel keypad) and the display
will remain static. When the microwave oven door is opened or
closed, the microwave oven light will not turn on or off, but the
heating elements will turn off immediately. You should wait until the
cooking cycle is finished in KCF mode to open the door.
To Enable KCF Mode Capability (One Time Only):
1. Press Clock/Options keypad.
2. Press Right Arrow keypad 9 times until “KCF mode” is
displayed on the screen.
3. Press the Select keypad. The scrolling display will say “Press
1-OFF; Press 2-ON.” A checkmark symbol will appear beside
OFF indicating the current state of OFF (i.e., disabled).
4. Press “2” to enable KCF mode.
5. Press Select keypad to select the choice made above.
6. The microwave oven is now KCF Enabled (i.e., it is ready for
you to activate KCF mode later).
To Disable KCF Mode Capability:
To disable the KCF mode, repeat above steps (except choose
1 for off). Once disabled, you will not be able to activate KCF
mode.
To Activate KCF Mode (Sabbath or Holidays):
1. (Optional) Press the Light keypad once for High setting (or
twice for Low setting) of cooktop light.
NOTE: Choose this step only if you want cooktop light to be
on during KCF mode.
2. (Optional) Press the Fan keypad once for High speed setting.
You may press this keypad repeatedly and choose a different
speed. There are four available speeds (High, Med-High, Med,
and Low). Choose the speed you want.
NOTE: Choose this step only if you want ventilation fan to be
on. Ventilation fan will automatically turn off after 4 hours.
3. Open the microwave oven door and place food in microwave
oven. Close the microwave oven door. You will see a set of
menu buttons at the left side.
NOTE: You can also press the Menu keypad to have the
back-lit buttons light up. Press the Convect keypad, press the
Right Arrow keypad two times until you see Manual Convect
Bake, then press the Select keypad. Default temperature
setting is 325 F. Enter a different temperature if desired. Press
COOK TIME/POWER and enter cook time (e.g., 1:30 if you
want 1 hour and 30 minutes).
4. Press the Start keypad. Press the Start keypad again to start
cook time count-down immediately without preheat.
NOTE: If you press the Start keypad once, then the microwave
oven will start countdown after it reaches preheat temperature.
5. The microwave oven is now cooking with cooktop light and
ventilation fan in chosen setting.
6. Press and hold CLOCK/OPTIONS for 3 seconds. The
microwave oven is now in active KCF mode and the display
will show “KCF mode”.
7. While the microwave oven is cooking in KCF mode, do not
open the microwave oven door, as this will shut off heat source
immediately. When cooking cycle ends, there will be no beeps
and the oven light will stay off when you open the door to
remove the food.
NOTES:
■ Do not open the microwave oven door while the
microwave oven is cooking as this will cancel the cooking
cycle.
■ Do not use Kitchen Timer in KCF mode.
■ If a power failure happens while KCF mode is running, the
microwave oven will show that KCF mode is on, but the
cooking cycle will not be on.
■ While in KCF mode, neither time nor temperature
can be adjusted.
To Deactivate KCF Mode:
Press and hold the Clock/Options keypad for 3 seconds until you
see “KCF mode” disappear from the display.
NOTES:
■ If you press the Cancel keypad, this will cancel any cooking
cycle. If you press the Cancel keypad again, this will
de-activate KCF mode.
■ After KCF mode is deactivated, you must activate KCF mode
by completing steps 1 through 6 under the “To Activate KCF
mode” section.
NOTE: Use mobile app to enable or disable KCF mode only.
NOTE: If smart-phone is on, then notification will be displayed on
your mobile device (if you opted in).
13
Page 14
Turntable
A
C
C
B
■ The cooking rack will become hot. Always use oven mitts or
pot holders when handling.
■ Do not allow the rack to touch the inside cavity walls, ceiling,
or floor.
■ To avoid damage to the microwave oven, do not store rack in
microwave oven.
■ The rack is designed specifically for this microwave oven. For
best cooking results, do not attempt to use any other rack in
this microwave oven.
■ Remove rack before using Popcorn function.
■ See the “Accessories” section to reorder.
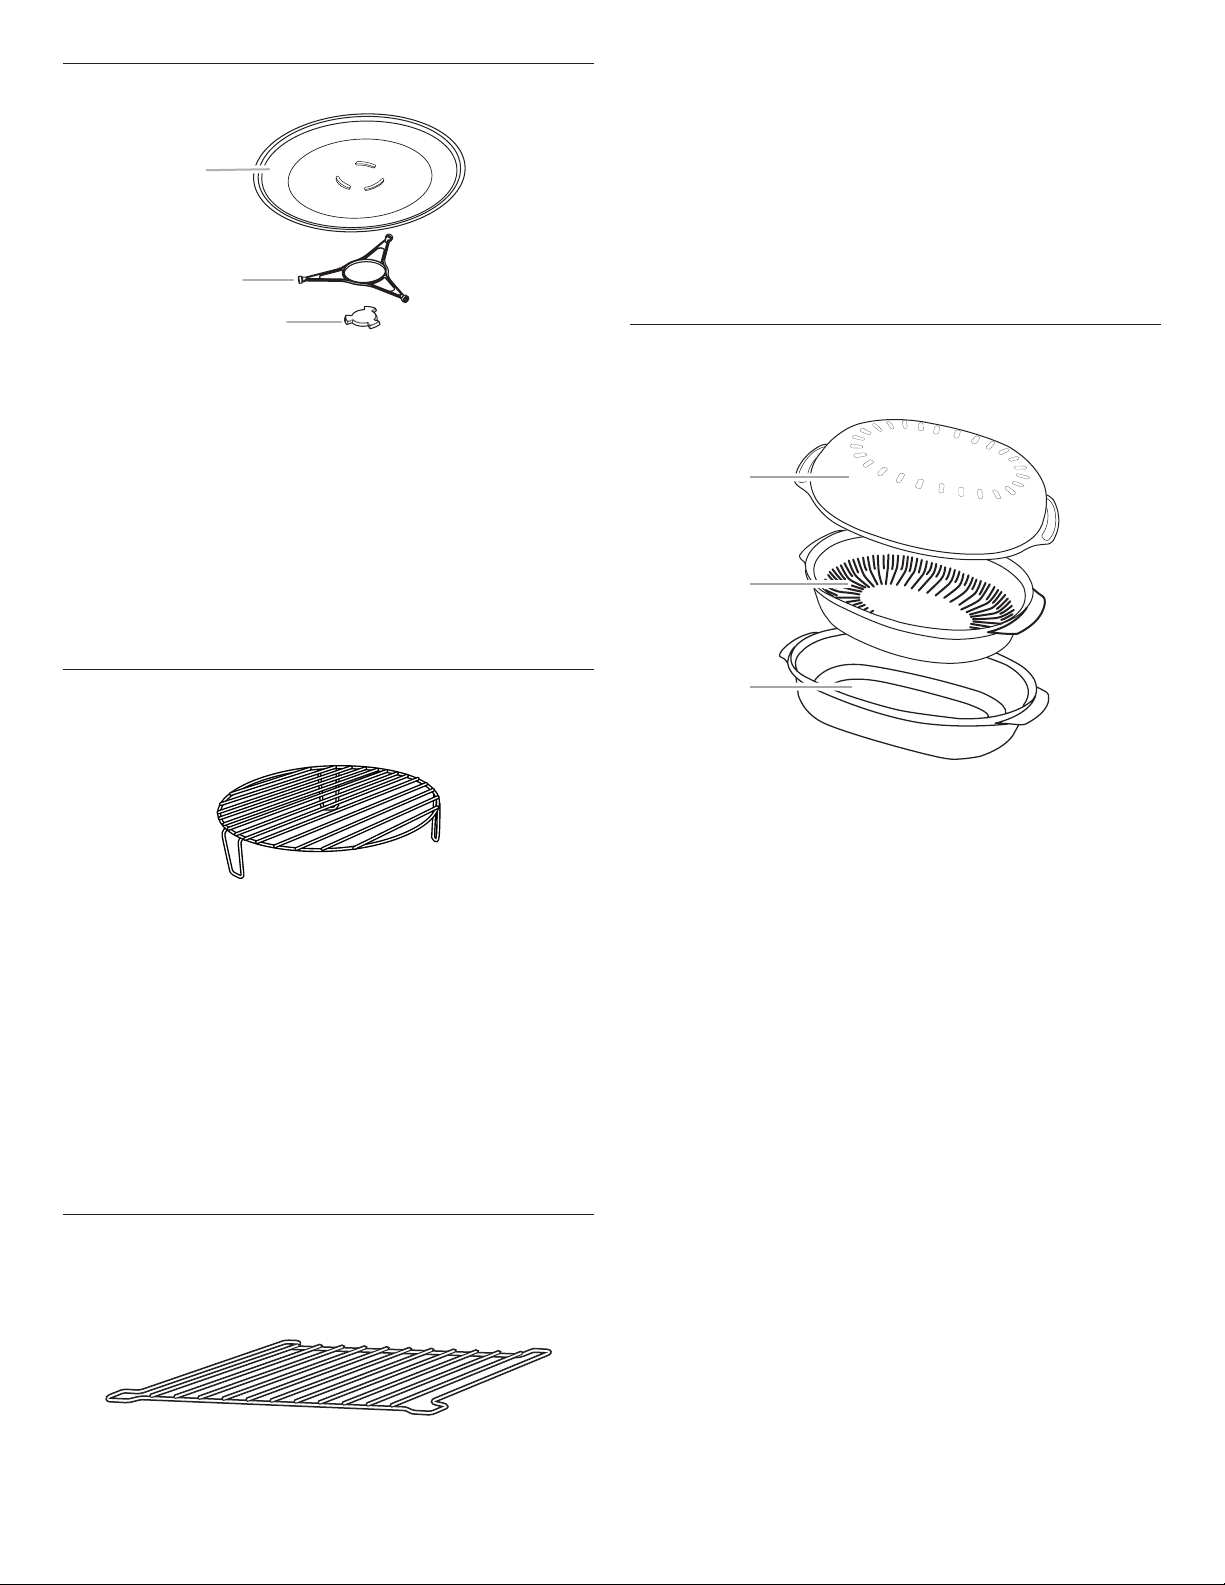
A. Turntable
B. Support and rollers
C. Hub
Use the Steamer Vessel with the Steam Cook feature to steam
foods.
Steamer Vessel
NOTE: By touching the Turntable keypad, it is possible to switch
the turntable on and off during manual cooking cycles. This is
helpful when cooking with plates that are bigger than the turntable
or when cooking with plates side by side.
A
The turntable rotates in both directions to help cook food more
evenly. Do not operate the microwave oven without having the
turntable in place. See the “Accessories” section to reorder any
of the parts.
The raised, curved lines in the center of the turntable bottom fit
B
between the three spokes of the hub. The hub turns the turntable
during microwave oven use. The rollers on the support should fit
inside the turntable bottom ridge.
Round Convection Rack
The round convection rack provides optimal heat circulation for
convection cooking.
A. Lid
B. Insert
C. Base
■ The steamer vessel will become hot. Always use oven mitts
or pot holders when handling.
■ The rack will become hot. Always use oven mitts or pot
holders when handling.
■ To avoid damage to the microwave oven, do not allow the rack
to touch the inside cavity walls, ceiling, or floor.
■ Always use the turntable.
■ To avoid damage to the microwave oven, do not store the rack
in the microwave oven.
■ Two-level cooking is not recommended.
■ For best results, do not place popcorn bags on the rack.
■ The rack is designed specifically for this microwave oven. For
best cooking results, do not attempt to use any other rack in
this microwave oven.
■ See the “Accessories” section to reorder.
Rectangular Cooking Rack
The rectangular cooking rack is ideal for two-level cooking. Insert
the rack securely into the rack supports on the side walls of the
oven.
■ The steamer vessel is designed to be used only in the
microwave oven. To avoid damaging steamer vessel, do not
use in a convectional- or combination-type oven, with any
other Convection or Crisp function, or on electric or
gas burners.
■ Do not use plastic wrap or aluminum foil when covering
the food.
■ Always place the steamer vessel on the glass turntable.
Check that the turntable turns freely before starting the
microwave oven.
■ Do not remove lid while the base is inside the microwave oven,
as the rush of steam will disrupt the sensor settings.
■ To avoid scratching, use plastic utensils.
■ Do not overfill with water. See the steam chart in the
“Auto Steam Cooking” section for the amount of water
recommended.
Lid: Always use the lid when steaming. Place directly over the
insert and base or just the base.
Insert: Use when steam cooking to keep foods, such as fish and
vegetables, out of the water. Place insert with food directly over
the base. Do not use when simmering.
Base: For steam cooking, place water in base. For simmering
foods, such as rice, potatoes, pasta and vegetables, place food
and water/liquid in base.
See the “Accessories” section to order replacements. See the
“General Cleaning” section for instructions on cleaning.
14
Page 15
Control Lock
The Control Lock shuts down the control panel keypads to avoid
unintended use of the microwave oven. The Control Lock will
remain set after a power failure, if set before the power failure
occurs.
When the control is locked, only the fan and light will function.
The Control Lock is preset unlocked, but can be locked.
To Lock Control: Touch CANCEL for approximately 3 seconds,
until two tones sound and a lock icon appears in the display.
To Unlock Control: Repeat to unlock. Two tones will sound and
the lock icon will be removed.
Connectivity Features
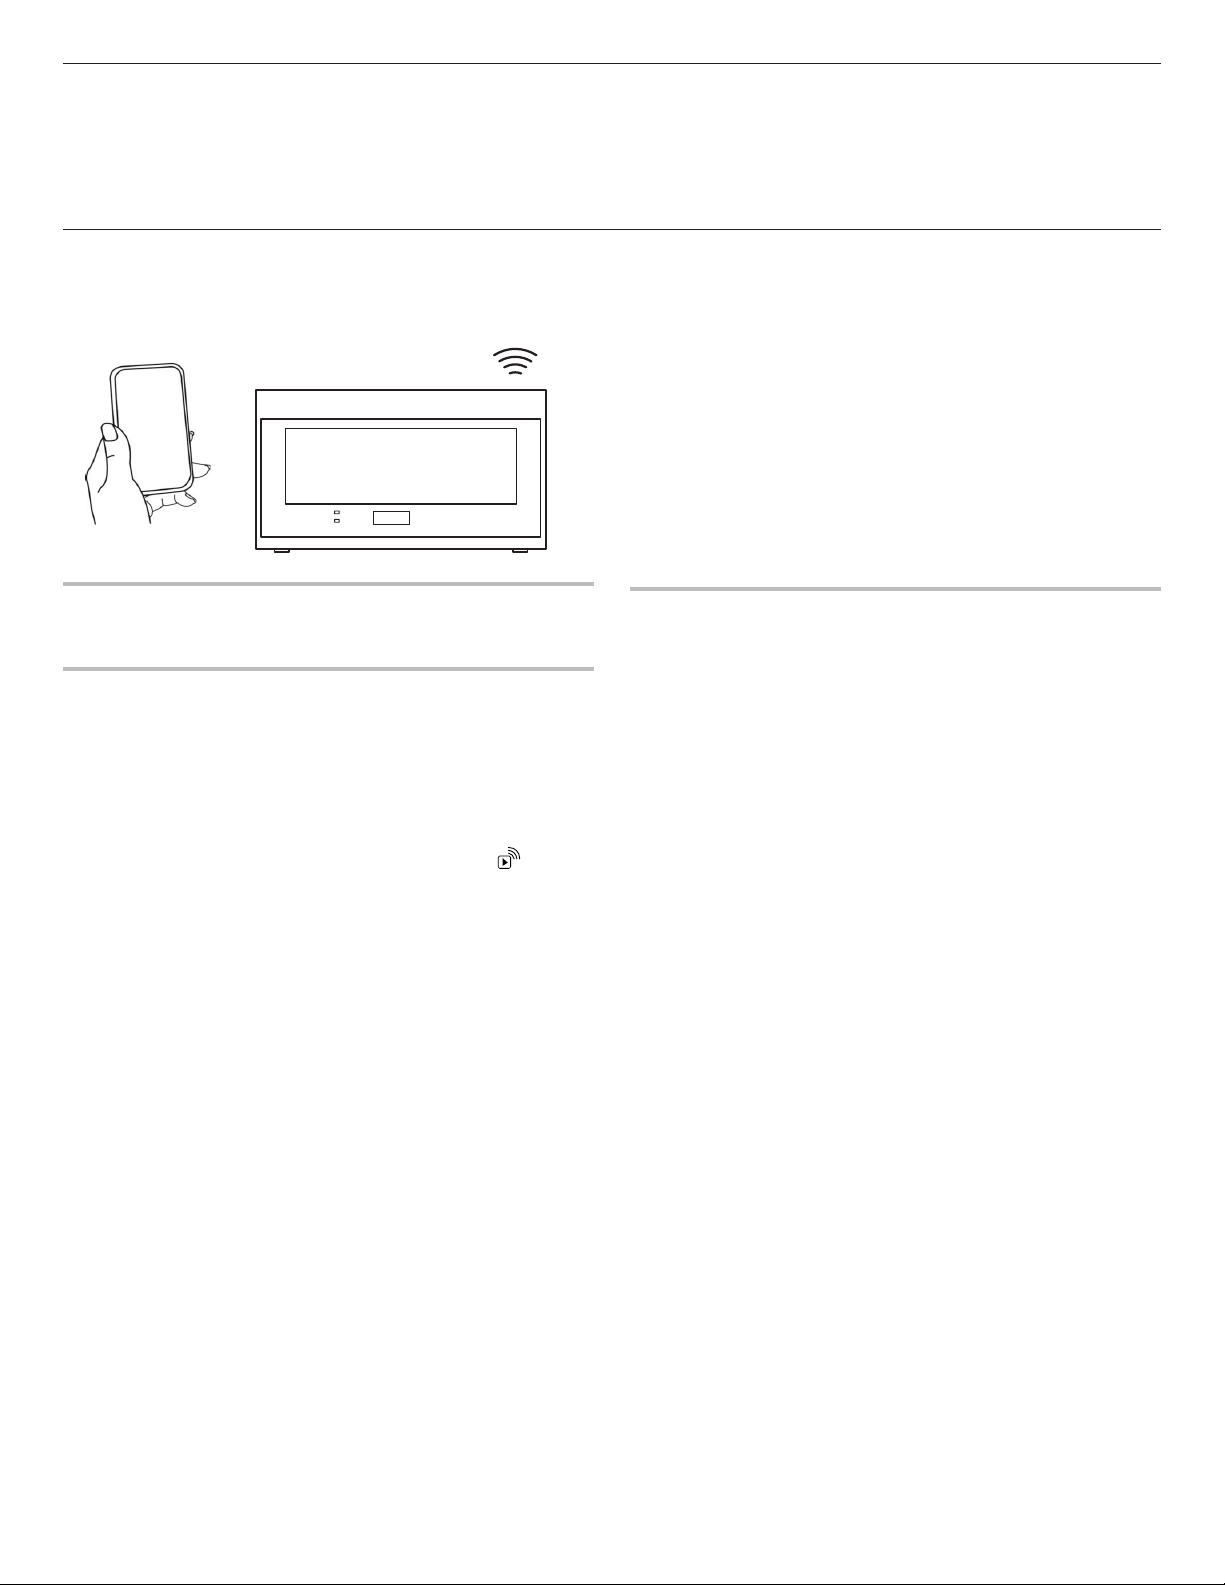
Wi-Fi connectivity allows your Smart appliance to connect to the Internet and interact with the Whirlpool® app from your smartphone
or mobile device. This connection opens up several Smart options to you: options intended to save you valuable time and energy.
Cycle Progress
What it does: Gives you an up-to-the-minute look at your cooking
cycle progress.
What it does for you: Lets you know the remaining cook time
from anywhere.
Cook Notification (Opt-In)
What it does: Your appliance will send you a push notification
when its current cooking cycle is complete.
What it does for you: Alerts you precisely when the cooking cycle
is done, so you can move on to other things.
Smart Features
Smart Features help make your every day more efficient by letting
you remotely monitor, manage, and maintain your appliance.
How to Use Remote Enable
This feature allows you to turn on the appliance (in Convection
Bake mode) when you are away from home using your mobile
device. The following steps provide a possible scenario on how to
use this feature:
1. Open the microwave oven door and place food in the
microwave oven (if desired).
2. Close the microwave oven door.
3. Press REMOTE ENABLE. You should see an icon ( ) light
up in the display to let you know that the appliance can be
turned on using your mobile device.
4. Use your mobile device to turn on a cooking cycle (e.g.,
Convection Bake 350 F).
NOTES:
a. Only Convection Bake cycle can be remotely activated
(i.e., no features using microwave or convection roast may
be remotely activated).
b. While the microwave oven is set up and waiting for remote
activation, the microwave oven door must not be opened.
If the microwave oven door is opened while it is in “waiting
mode”, then Remote Enable will be canceled and the remote
enable icon will be turned off.
Get Started
Refer to the “Get the App and Get Connected” section in this User
Guide and follow the instructions to get connected.
Check the Whirlpool® app frequently for additional information and
features.
15
Page 16
Get the App and Get Connected
With your mobile device, get the app, connectivity setup instructions, terms of use, and privacy policy at:
www.whirlpool.com/connect
IMPORTANT: Proper installation of your appliance prior to use is your responsibility. Be sure to read and follow the Installation Instructions
that came with your appliance.
Connectivity requires internet access and account creation. App features and functionality are subject to change. Data rates may apply.
If you have any problems or questions, call Whirlpool Corporation Connected Appliances at 1-866-333-4591.
You Will Need:
SET UP
Once installed, launch the app. You will be guided through the steps to set up a user account and to connect your appliance. If you have
any problems or questions, call Whirlpool Corporation Connected Appliances at 1-866-333-4591.
■ A home wireless router supporting Wi-Fi, 2.4 GHz preferably with WPA2 security. If you are unsure
of your router’s capablilities, refer to the router manufacturer’s instructions.
■ The router to be on and have a live internet connection.
■ The 10-character SAID code for your appliance. The SAID code is either printed on a label on the
appliance or can be found on the LCD screen. Refer to the appliance User Guide for the location.
16
Page 17

MICROWAVE OVEN USE
A magnetron in the microwave oven produces microwaves which
reflect off the metal floor, walls, and ceiling and pass through the
turntable and appropriate cookware to the food. Microwaves are
attracted to and absorbed by fat, sugar, and water molecules in
the food, causing them to move, producing friction and heat which
cooks the food.
■ To avoid damage to the microwave oven, do not lean on or
allow children to swing on the microwave oven door.
■ To avoid damage to the microwave oven, do not operate
microwave oven when it is empty.
■ The turntable must be in place and correct side up when
microwave oven is in use. Do not use if turntable is chipped
or broken. See the “Accessories” section to reorder.
■ Baby bottles and baby food jars should not be heated in
microwave oven.
■ Clothes, flowers, fruit, herbs, wood, gourds, and paper,
including brown paper bags and newspaper, should not
be dried in microwave oven.
■ Paraffin wax will not melt in the microwave oven because
it does not absorb microwaves.
■ Use oven mitts or pot holders when removing containers from
microwave oven.
■ Do not overcook potatoes. At the end of the recommended
cook time, potatoes should be slightly firm. Let potatoes stand
for 5 minutes. They will finish cooking while standing.
■ Do not cook or reheat whole eggs inside the shell. Steam
buildup in whole eggs may cause them to burst. Cover
poached eggs and allow a standing time.
Starting Temperature
Room temperature foods will heat faster than refrigerated foods,
and refrigerated foods will heat faster than frozen foods.
Composition and Density
Foods high in fat and sugar will reach a higher temperature and
will heat faster than other foods. Heavy, dense foods, such as
meat and potatoes, require a longer cook time than the same size
of a light, porous food, such as cake.
Cooking Guidelines
Covering
Covering food helps retain moisture, shorten cook time, and
reduce spattering. Use the lid supplied with cookware. If a lid is
not available, wax paper, paper towels, or plastic wrap approved
for microwave ovens may be used. Plastic wrap should be
turned back at one corner to provide an opening to vent steam.
Condensation on the door and cavity surfaces is normal during
heavy cooking.
Stirring and Turning
Stirring and turning redistributes heat evenly to avoid overcooking
the outer edges of food. Stir from outside to center. If possible,
turn food over from bottom to top.
Arranging
If heating irregularly shaped or different-sized foods, arrange the
thinner parts and smaller-sized items toward the center. If cooking
several items of the same size and shape, place them in a ring
pattern, leaving the center of the ring empty.
Food Characteristics
When microwave cooking, the amount, size and shape, starting
temperature, composition, and density of the food affect cooking
results.
Amount of Food
The more food heated at once, the longer the cook time
needed. Check for doneness and add small increments
of time if necessary.
Size and Shape
Smaller pieces of food will cook more quickly than larger pieces,
and uniformly shaped foods cook more evenly than irregularly
shaped food.
Piercing
Before heating, use a fork or small knife to pierce or prick foods
that have a skin or membrane, such as potatoes, egg yolks,
chicken livers, hot dogs, and sausage. Prick in several places
to allow steam to vent.
Shielding
Use small, flat pieces of aluminum foil to shield the thin pieces of
irregularly shaped foods, bones, and foods such as chicken wings,
leg tips, and fish tails. See the “Aluminum Foil and Metal” section
first.
Standing Time
Food will continue to cook by the natural conduction of heat, even
after the microwave cooking cycle ends. The length of standing
time depends on the volume and density of the food.
17
Page 18
Cookware and Dinnerware
Cookware and dinnerware must fit on the turntable. Always
use oven mitts or pot holders when handling because any dish
may become hot from heat transferred from the food. Do not
use cookware and dinnerware with gold or silver trim. Use the
following chart as a guide, then test before using.
To Test Cookware or Dinnerware for Microwave Use:
1. Place cookware or dinnerware in microwave oven with 1 cup
(250 mL) of water beside it.
2. Cook at 100% cooking power for 1 minute.
Do not use cookware or dinnerware if it becomes hot and the
water stays cool.
Material Recommendations
Aluminum Foil,
Metal
Browning Dish Bottom must be at least 3/16" (5 mm)
Ceramic Glass,
Glass
China,
Earthenware
Melamine Follow manufacturer’s recommendations.
Paper: Towels,
Dinnerware,
Napkins
Plastic: Wraps,
Bags, Covers,
Dinnerware,
Containers
Pottery and Clay Follow manufacturer’s recommendations.
Silicone Bakeware Follow manufacturer’s recommendations.
Straw, Wicker,
Wooden
Containers
Styrofoam
Wax Paper Acceptable for use.
®†
See the “Aluminum Foil and Metal” section.
above the turntable. Follow manufacturer’s
recommendations.
Acceptable for use.
Follow manufacturer’s recommendations.
Use non-recycled and those approved by
the manufacturer for microwave oven use.
Use those approved by the manufacturer
for microwave oven use.
Do not use in microwave oven.
Do not use in microwave oven.
Aluminum Foil and Metal
Always use oven mitts or pot holders when removing dishes from
the microwave oven.
Aluminum foil and some metal can be used in the microwave
oven. If not used properly, arcing (a blue flash of light) can occur
and cause damage to the microwave oven.
OK for Use
Racks and bakeware supplied with the microwave oven (on
some models), aluminum foil for shielding, and approved meat
thermometers may be used with the following guidelines:
■ To avoid damage to the microwave oven, do not allow
aluminum foil or metal to touch the inside cavity walls,
ceiling, or floor.
■ Always use the turntable.
■ To avoid damage to the microwave oven, do not allow contact
with another metal object during microwave cooking.
Do Not Use
Metal cookware and bakeware, gold, silver, pewter, non-approved
meat thermometers, skewers, twist ties, foil liners, such as
sandwich wrappers, staples, and objects with gold or silver trim or
a metallic glaze, should not be used in the microwave oven.
Metal bakeware may be used only during convection (bake)
cycles. Use ovenproof, microwave-safe cookware for all other
convection and combination.
Styrofoam®† is a registered trademark of The Dow Chemical Company.
18
Page 19
Microwave Cooking Power
Many recipes for microwave cooking specify which cooking
power to use by percent, name, or number. For example,
70%=Medium-High=7.
Use the following chart as a general guide for the suggested
cooking power of specific foods.
MICROWAVE COOKING POWER CHART
Percent/
Name
100%, High
(default
setting)
90% 9 Cooking small, tender pieces
80% 8 Heating rice, pasta, or casseroles.
70%, MediumHigh
60% 6 Cooking sensitive foods such as
50%, Medium 5 Cooking ham, whole poultry, and
40% 4 Melting chocolate.
30%, MediumLow, Defrost
20% 2 Softening butter, cheese,
10%, Low 1 Taking chill out of fruit.
Number Use
10 Quick heating convenience
foods and foods with high
water content, such as soups,
beverages, and most vegetables.
of meat, ground meat, poultry
pieces, and fish fillets.
Heating cream soups.
Cooking and heating foods that
need a cook power lower than
high, for example, whole fish and
meat loaf.
7 Reheating a single serving
of food.
cheese and egg dishes, pudding,
and custards.
Cooking non-stirrable casseroles,
such as lasagna.
pot roasts.
Simmering stews.
Heating bread, rolls, and pastries.
3 Defrosting bread, fish, meats,
poultry, and precooked foods.
and ice cream.
Doneness
Doneness is a function used for adjusting the cook time. This
feature can be used on automatic functions. Doneness cannot
be adjusted for Defrost functions.
Doneness can be changed within the first 20 seconds of starting
the cook cycle.
To Change Doneness Setting:
After starting the cooking cycle, press the Menu keypad. Touch
COOK TIME/POWER repeatedly to scroll through MORE, LESS,
or NORMAL.
Sensor Cook
A sensor in the microwave oven detects moisture released from
food as it heats and adjusts the cooking time accordingly.
Use microwave-safe dish with loose-fitting lid or cover microwavesafe dish with plastic wrap and vent.
For best cooking performance:
Before using a Sensor Cook function, make sure power has been
supplied to the microwave oven for at least 2 minutes, the room
temperature is not above 95°F (35°C), and the outside of the
cooking container and the microwave oven cavity are dry. For
optimal performance, wait at least 30 minutes after convection
cooking before sensor cooking.
Manual Cooking/Stage Cooking
Touch COOK TIME/POWER and touch the number keypads to
enter time. If using a cooking power other than 100%, touch
COOK TIME/POWER again, then enter desired cooking power.
Touch START.
If programming additional stages (up to three), touch CLOCK/
OPTIONS to enter programming for the next stage. Enter the cook
time and cook power of each, then touch START.
19
Page 20
Reheat
Times and cooking powers have been preset for reheating
a number of food types.
Use the following chart as a guide.
REHEAT CHART
Food Quantity
Dinner Plate
Place food on plate. Cover
with plastic wrap and vent.
Let stand 2-3 minutes
after reheating.
Casserole
Place in microwave-safe
container. Cover with plastic
wrap and vent. Stir and
let stand 2-3 minutes
after reheating.
Beverage
Do not cover.
Pizza
Place on a paper towel-lined
microwave-safe plate.
Soup
Place in microwave-safe
container. Cover with plastic
wrap and vent. Stir and
let stand 2-3 minutes
after reheating.
Sauce
Place in microwave-safe
container. Cover with plastic
wrap and vent. Stir and
let stand 2-3 minutes
after reheating.
Baked Goods
Place on paper towel.
8-16 oz (227-454 g)
Senses 1 plate, about 8-16 oz
(227-454 g)
1-4 cups (250 mL-1 L)
1-2 cups (250 mL-500 mL)
1-3 slices (4 oz [113 g] each)
1-4 cups (250 mL-1 L)
Senses 1-4 cups (250 mL-1 L):
1-6 pieces, 2 oz (57g) each
Two small rolls may be counted
as 1 piece.
Auto Cook
Food Quantity
Frozen Entree
Remove from package.
Loosen cover on 3 sides. If
entrée is not in microwave-safe
container, place on plate, cover
with plastic wrap, and vent.
Bacon*
Average thickness: Follow
directions on package. For
best results, place bacon on
microwave-safe bacon rack.
Fish Fillet
Place in microwave-safe
container and add 2-4 tbs of
liquid. Cover with plastic wrap.
Let stand 2-3 minutes
after cooking.
Shrimp
Place in microwave-safe
container and add 2-4 tbs of
liquid. Cover with plastic wrap.
Let stand 2-3 minutes
after cooking.
French Toast
Follow directions on package.
Cereal
Follow directions on package.
Use microwave-safe bowl with
high sides.
Rice
Follow measurements on
package for ingredient
amounts. Place rice and liquid
in microwave-safe dish. Cover
with loose fitting lid. Let stand
5 minutes after cooking, or
until liquid is absorbed. Stir.
10 or 20 oz (283 or 567 g)
(sensor), 40 or 60 oz
(1134 or 1701 g) (non-sensor)
NOTE: 40 oz (1134 g) and
60 oz (1701 g) Frozen Entrée
functions use convection
and microwaves.
1-4 slices
0.5, 1.0, 1.5 lb
(227, 454 or 680 g)
0.5, 1.0, 1.5 lb
(227, 454 or 680 g)
1, 2, 3 or 4 pieces.
1-4 servings
Senses 0.5-2.0 cups
(125-500 mL)
(dry, white long grain)
20
Kids Menu
Food Quantity
Canned Pasta
Follow directions on package.
Frozen Pizza
Follow directions on package.
Frozen Meal
Follow directions on package.
Oatmeal
Follow directions on package.
Use microwave-safe bowls
with high sides.
Chicken Nuggets
Place in a single layer on paper
towel-lined microwave-safe
plate.
Hot Dog
Pierce with fork. Place on
microwave-safe plate.
1-4 servings
1 pizza, about 6 oz (170 g)
8, 9 or 10 oz
(227, 255 or 283 g)
1, 2 servings
1-2 servings (about 5-6 pieces
each)
1-4 pieces
Page 21
Potato
Use the following chart as a guide.
DEFROST CHART
Food Quantity
Potato
Pierce each potato several
times with a fork. Place on
paper towel, around turntable
edges, at least 1" (2.5 cm)
apart. Place single potato to
the side of the turntable. Let
stand 5 minutes after cooking.
Senses 1-4 potatoes,
10-13 oz (283-369 g) each,
similar in size
Vegetable
Food Quantity
Fresh Vegetable
Place in microwave-safe
container and add 2-4 tbs
water. Cover with plastic wrap
and vent. Stir and let stand
2-3 minutes after cooking.
Frozen Vegetable
Remove from package. Place
in microwave-safe container.
Add 2-4 tbs (30-60 mL) water.
Cover with plastic wrap,
and vent. Stir and let stand
2-3 minutes after cooking.
Canned Vegetables
Place in microwave-safe
container. Cover with plastic
wrap, and vent. Stir and
let stand 2-3 minutes after
cooking.
Senses 1-4 cups (250 mL-1 L)
Senses 1-4 cups (250 mL-1 L)
1, 2, 3 or 4 cups
(250, 500, 750 mL or 1 L)
Food Weight
Meats* 0.2 to 6.6 lbs (90 g to 3 kg)
Poultry* 0.2 to 6.6 lbs (90 g to 3 kg)
Fish* 0.2 to 4.4 lbs (90 g to 2 kg)
Quick 1.0 lb only
* See the Defrost Preparation Chart at end of the “Defrost” section
for cuts, sizes, and instructions.
Use the following chart as a guide when defrosting meat, poultry,
or fish.
DEFROST PREPARATION CHART
MEAT
Beef: ground, steaks,
roast, stew
Lamb: stew and chops
Pork: chops, ribs,
roasts, sausage
POULTRY
Chicken: whole and
cut up
Cornish hens
Turkey: breast
FISH
Fillets, Steaks,
Whole, Shellfish
The narrow or fatty areas of irregularshaped cuts should be shielded with
foil before defrosting.
Do not defrost less than 1/4 lb (113 g)
or two 4 oz (113 g) patties.
Place all meats in a microwave-safe
baking dish.
Place in a microwave-safe baking dish,
chicken breast-side up.
Remove giblets from whole chicken.
Place in a microwave-safe baking dish.
Defrost
■ For optimal results, food should be 0°F (-18°C) or colder
when defrosting.
■ Unwrap foods and remove lids (from fruit juice) before
defrosting.
■ Shallow packages will defrost more quickly than deep blocks.
■ Separate food pieces as soon as possible during or at the end
of the cycle for more even defrosting.
■ Foods left outside the freezer for more than 20 minutes or
frozen ready-made food should not be defrosted using the
Defrost feature but should be defrosted manually.
■ Use small pieces of aluminum foil to shield parts of food such
as chicken wings, leg tips, and fish tails. See the “Aluminum
Foil and Metal” section first.
■ Times and cooking powers have been preset for defrosting a
number of food types.
Auto Steam Cooking
Steam Cook is a Sensor Cooking function that uses microwaves
to steam food. Always use steamer vessel. Use Steam Cook for
foods such as vegetables, fish, and potatoes.
■ Times and cooking powers have been preset for steaming a
number of food types.
■ Manual Steam Cook requires that a cook time be entered.
■ It is recommended to add 1/2 cup (125 mL) of water to
steamer vessel before steaming.
Use the following chart as a guide.
STEAM RECIPES CHART
Food Quantity
Fresh Vegetables
Frozen Vegetables
Potato
Boneless Chicken
1-4 cups (250 mL-1 L)
1-4 cups (250 mL-1 L)
1-4 cups (250 mL-1 L)
0.5-1.5 lb (142-680 g)
21
Page 22
Simmer Cooking
Simmer Cook is a sensor cooking function that uses microwaves
to simmer food. Always use the steamer vessel. Use Simmer
Cook for foods such as rice, pasta, potatoes, soups, and other
liquid foods. Add water to steamer base, cover with lid, place in
microwave oven, and start the cycle. When the water begins to
boil, the microwave oven will stop and prompt for the pasta to
be added. Using oven mitts, gently remove steamer vessel from
microwave oven, add pasta, re-cover, return steamer vessel to
microwave oven, and resume the cycle.
SIMMER RECIPES CHART
Food Quantity
Dry Fettucini
Dry Macaroni
Dry Penne
Dry Spaghetti
Follow recommended water and food amounts that appear
on the display.
For best cooking, do not use plastic wrap as a cover.
Do not remove the lid while the dish is still in the microwave oven
as the rush of steam will disrupt the sensor readings.
2-8 oz (57-227 g)
1/5-2 cups (125-500 mL)
1/5-2 cups (125-500 mL)
2-8 oz (57-227 g)
Steam Clean
The Steam Clean cycle will loosen soils in the microwave oven
cavity. Place 1 cup water in a microwave-safe container on the
turntable. Keep door closed until cycle ends, then wipe cavity with
sponge or paper towel.
AccuPop
Senses 2.7- 3.5 oz bags.
■ Do not use regular paper bags or glassware.
■ Pop only one package of popcorn at a time.
■ Follow manufacturer’s instructions when using a microwave
popcorn popper.
■ Listen for popping to slow to one pop every 1 or 2 seconds,
and then stop the cycle. Do not repop unpopped kernels.
■ For best results, use fresh bags of popcorn.
■ Cooking results may vary by brand and fat content.
NOTE: Follow the instructions provided by the microwave
popcorn manufacturer.
Warm Hold
WARNING
Food Poisoning Hazard
Do not let food sit in oven more than one hour before
or after cooking.
Doing so can result in food poisoning or sickness.
Hot cooked food can be kept warm in the microwave oven.
■ Cover plates of food.
■ Cover foods that were covered while being cooked.
■ Do not cover baked goods such as pastries, pies,
turnovers, etc.
Soften/Melt
Soften and Melt functions may be used to soften or melt your
food. Times and cooking powers have been preset for a number
of food types. Use the following chart as a guide.
SOFTEN CHART
Food Quantity Preparation
Butter 1/2-2 sticks Unwrap and place
Frozen juice 12, 16 oz (340 or
454 g)
Ice cream 16, 32, or 64 oz
(473, 946 or
1893 mL)
Cream cheese 3 or 8 oz
(85 g or 227 g)
MELT CHART
Food Quantity Preparation
Butter 1/2-2 sticks Unwrap and place
Chocolate 4, 6, 8 or 12 oz
(113, 170, 227 or
340 g)
Cheese 8 or 16 oz
(227 or 454 g)
Marshmallows 5 or 10 oz
(142 or 283 g)
in microwave-safe
container.
Remove lid.
Place ice cream
container on
turntable.
Unwrap and place
in microwave-safe
container.
in microwave-safe
container.
Cut squares into
small pieces or
use chips. Place
in microwave-safe
container.
Cut into small
pieces and place
in microwave-safe
container.
Place in microwavesafe container.
Convect
Convection cooking uses the convection element and the fan. Hot
air is circulated throughout the microwave oven cavity by the fan.
The constantly moving air surrounds the food to heat the outer
portion quickly.
■ The convect function may be used to cook small amounts of
food on a single rack.
■ Always use the convection rack placed on turntable.
■ Always use the turntable On option when convection cooking
with the convection rack (default setting).
■ Do not cover turntable or convection rack or baking tray with
aluminum foil.
■ Do not use light plastic containers, plastic wrap, or paper
products.
■ Use convection cooking for items such as souffles, breads,
cookies, angel food cakes, pizza, and most meats and fish.
■ Metal bakeware may be used only during convection (bake)
cycles. Use ovenproof, microwave-safe cookware for all other
convection and combination cycles.
To Use:
1. Touch WARM HOLD.
2. Touch number keypads to set a length of time to warm.
22
Page 23
MICROWAVE OVEN CARE
General Cleaning
IMPORTANT: Before cleaning, make sure all controls are off and
the microwave oven is cool. Always follow label instructions on
cleaning products.
Soap, water, and a soft cloth or sponge are suggested first, unless
otherwise noted.
STAINLESS STEEL (on some models)
NOTE: To avoid damage to stainless steel surfaces, do not use
soap-filled scouring pads, abrasive cleaners, cooktop polishing
creme, steel-wool pads, gritty washcloths, or abrasive paper
towels. Damage may occur to stainless steel surfaces, even
with one-time or limited use.
Rub in direction of grain to avoid damaging.
Cleaning Method:
■ affresh
®
Stainless Steel Cleaner Part Number W10355016
(not included):
See the “Accessories” section to order.
■ Vinegar for hard water spots
MICROWAVE OVEN DOOR EXTERIOR
Cleaning Method:
■ Glass cleaner and a soft cloth or sponge:
Apply glass cleaner to soft cloth or sponge, not directly
on panel.
■ affresh
®
Kitchen Appliance Cleaner Part Number W10355010
(not included):
See the “Accessories” section to order.
RACK
■ Mild soap, water, and washcloth
■ Dishwasher cleaning is not recommended
GREASE FILTERS
■ Mild soap, water, and dishwasher
COOKING RACK
■ Mild soap, water, and washcloth
■ Dishwasher cleaning is not recommended
STEAMER VESSEL
■ Dishwasher
TURNTABLE SUPPORT AND ROLLERS, HUB
■ Mild soap and water or dishwasher
NONSTICK CAVITY COATING (on some models)
To avoid damage to the microwave oven cavity, do not use metal
or sharp utensils or scrapers or any type of abrasive cleanser
or scrubbers.
CAVITY: STEAM CLEAN FUNCTION (on some models)
See Steam Clean section.
MICROWAVE OVEN CAVITY
To avoid damage to microwave oven cavity, do not use soapfilled scouring pads, abrasive cleaners, steel-wool pads, gritty
washcloths, or some paper towels.
On stainless steel models, rub in direction of grain
to avoid damaging.
The area where the microwave oven door and frame touch when
closed should be kept clean.
Cleaning Method:
Average soil
■ Mild, nonabrasive soaps and detergents:
Rinse with clean water and dry with soft, lint-free cloth.
Heavy soil
■ Mild, nonabrasive soaps and detergents:
Heat 1 cup (250 mL) of water for 2 to 5 minutes in microwave
oven. Steam will soften soil. Rinse with clean water and dry
with soft, lint-free cloth.
Odors
■ Lemon juice or vinegar:
Heat 1 cup (250 mL) of water with 1 tbs (15 mL) of either
lemon juice or vinegar for 2 to 5 minutes in microwave oven.
TURNTABLE
Replace turntable immediately after cleaning. Do not operate the
microwave oven without the turntable in place.
Cleaning Method:
■ Mild soap and water
■ Dishwasher
INSTALLING/REPLACING FILTERS AND LIGHT BULBS
NOTE: A Filter Status indicator (on some models) appears in the
display when it is time to replace the charcoal filter and clean or
replace the grease filters. See the “Settings” section to reset
filter status.
Grease filters: Grease filters are on the underside of microwave
oven. Clean monthly or as prompted by Filter Status indicator.
Slide the filter away from the tab area and drop out the filter. To
reinstall, place end of the filter into the opening opposite the tab
area, swing up the other end, and slide it toward the tab area.
Charcoal filter: The charcoal filter is behind the vent grille at
the top front of the microwave oven. The charcoal filter cannot
be cleaned and should be replaced about every 6 months or as
prompted by Filter Status indicator. Remove two screws on the
vent grille, tilt the grille forward, lift it out, and remove filter. To
reinstall, place the filter into its slotted area—wire mesh-side up—
replace vent grille, and secure with screws.
Cooktop light: The cooktop light is located on the underside of
the microwave oven and is replaceable. Remove bulb cover screw,
and open the bulb cover. Replace bulb, close bulb cover, and
secure with screw.
Cavity light: The cavity light bulb is located behind the vent grille
at the top front of the microwave oven, under the bulb cover, and
is replaceable. Open door. Remove two screws on the vent grille,
tilt the grille forward, and lift it out. Remove right side charcoal
filter. Open bulb cover and replace bulb. Close bulb cover, replace
charcoal filter, replace vent grille, and secure with screws.
23
Page 24
TROUBLESHOOTING
First try the solutions suggested here. If you need further assistance or more recommendations that may help you
avoid a service call, refer to the warranty page in this manual and scan the code there with your mobile device,
or visit http://www.whirlpool.com/product_help.
Contact us by mail with any questions or concerns at the address below:
In the U.S.A.:
Whirlpool Brand Home Appliances
Customer eXperience Center
553 Benson Road
Benton Harbor, MI 49022-2692
Please include a daytime phone number in your correspondence.
If you experience
Microwave oven will
not operate
Arcing in the
microwave oven
Turntable alternates
rotation directions
Display shows
messages
Fan running during
cooktop usage
Radio, TV, or cordless
phone interference
Cannot connect
to router
Appliance not
connected
Remote app isn’t
working and/or is
not receiving push
notifications
Recommended Solutions
Check the following:
■ Household fuse or circuit breaker: If a household fuse has blown or a circuit breaker has tripped, replace
the fuse or reset the circuit breaker. If the problem continues, call an electrician.
■ Magnetron: Try to heat 1 cup (250 mL) of cold water for 2 minutes at 100% cooking power. If water does
not heat, try the steps in the bullets below. If microwave oven still does not operate, call for service.
■ Door: Firmly close door. On some models, if a packaging spacer is attached to inside of the door, remove
it, then firmly close door.
If a message about the door appears in the display, the door has been closed for 5 minutes or more
without the microwave oven being started. This occurs to avoid unintended starting of the microwave
oven. Open and close the door, then start the cycle.
■ Control: Make sure control is set properly. Make sure Control Lock is off. Make sure Demo mode (on
some models) is off.
Check the following:
■ Soil buildup: Soil buildup on cavity walls, microwave inlet cover, cooking rack supports, and area where
the door touches the frame can cause arcing. See “General Cleaning” in the “Microwave Oven Care”
section.
■ This is normal and depends on motor rotation at the beginning of the cycle.
■ “Enter clock” with flashing digits means there has been a power failure. Reset the clock.
■ A letter followed by a number is an error indicator. Call for assistance.
■ This is normal. The microwave oven’s cooling fan, which is separate from the vent fan, automatically
comes on during microwave oven operation to cool the microwave oven. It may also automatically come
on and cycle on and off to cool the microwave oven’s controls while the cooktop below is being used.
Check the following:
■ Proximity: Move the receiver away from the microwave oven, or adjust the radio or TV antenna.
■ Soil: Make sure the microwave oven door and sealing surfaces are clean.
■ Frequency: Some 2.4 GHz-based cordless phones and home wireless networks may experience static
or noise while microwave oven is on. Use a corded phone, a different frequency cordless phone, or avoid
using these items during microwave oven operation.
New router installed: Erase the old router information by pressing and holding Connect for approximately 15
seconds. Repeat the steps from the “Get the App and Get Connected” section for the new router.
Wi-Fi signal strength low: Reposition router closer to the appliance. Call the connected customer service
center to confirm signal strength. See the “Warranty” section for contact information.
Loss of power to router: Restore power to router.
Router not working: Ensure router is connected to the internet and the Wi-Fi indicator is on.
Push notifications are disabled: Ensure that push notifications are enabled on your remote app.
User account not set up: Set up a user account and register the appliance on the remote app.
24
Page 25

OPEN SOURCE LICENSE USAGE
The following statements refer to the portions of this software
based in part on FreeRTOS v7.0.2, http://www.freertos.org.
The use of this software is governed by the terms of GNU General
Public License v. 2, which is available at:
http://www.gnu.org/licenses/gpl-2.0.html. A copy of the source
code may be obtained by written request for the software by name
to [email protected], along with the address for delivery.
The following statements refer to those portions of the software
copyrighted by Eclipse Foundation, Inc. Copyright © 2007,
Eclipse Foundation, Inc. and its licensors. All rights reserved.
Redistribution and use in source and binary forms, with or without
modification, are permitted provided that the following conditions
are met:
■ Redistributions of source code must retain the above copyright
notice, this list of conditions, and the following disclaimer.
■ Redistributions in binary form must reproduce the above
copyright notice, this list of conditions, and the following
disclaimer in the documentation and/or other materials
provided with the distribution.
■ Neither the name of the Eclipse Foundation, Inc. nor the
names of its contributors may be used to endorse or promote
products derived from this software without specific prior
written permission.
THIS SOFTWARE IS PROVIDED BY THE COPYRIGHT HOLDERS
AND CONTRIBUTORS “AS IS” AND ANY EXPRESS OR IMPLIED
WARRANTIES, INCLUDING, BUT NOT LIMITED TO, THE IMPLIED
WARRANTIES OF MERCHANTABILITY AND FITNESS FOR A
PARTICULAR PURPOSE ARE DISCLAIMED. IN NO EVENT SHALL
THE COPYRIGHT OWNER OR CONTRIBUTORS BE LIABLE FOR
ANY DIRECT, INDIRECT, INCIDENTAL, SPECIAL, EXEMPLARY,
OR CONSEQUENTIAL DAMAGES (INCLUDING, BUT NOT
LIMITED TO, PROCUREMENT OF SUBSTITUTE GOODS OR
SERVICES; LOSS OF USE, DATA, OR PROFITS; OR BUSINESS
INTERRUPTION) HOWEVER CAUSED AND ON ANY THEORY
OF LIABILITY, WHETHER IN CONTRACT, STRICT LIABILITY, OR
TORT (INCLUDING NEGLIGENCE OR OTHERWISE) ARISING
IN ANY WAY OUT OF THE USE OF THIS SOFTWARE, EVEN IF
ADVISED OF THE POSSIBILITY OF SUCH DAMAGE.
Portions of this software are copyright © Sawtooth Consulting Ltd.
2006-2015 All rights reserved.
Portions of this software are copyright © Arrayent, Inc. 2015 All
rights reserved.
The following statements refer to those portions of the software
copyrighted by Swedish Institute of Computer Science.
Copyright © 2001-2004 Swedish Institute of Computer Science.
All rights reserved.
Redistribution and use in source and binary forms, with or without
modification, are permitted provided that the following conditions
are met:
1. Redistributions of source code must retain the above copyright
notice, this list of conditions, and the following disclaimer.
2. Redistributions in binary form must reproduce the above
copyright notice, this list of conditions, and the following
disclaimer in the documentation and/or other materials
provided with the distribution.
3. The name of the author may not be used to endorse or
promote products derived from this software without specific
prior written permission.
THIS SOFTWARE IS PROVIDED BY THE AUTHOR “AS IS”
AND ANY EXPRESS OR IMPLIED WARRANTIES, INCLUDING,
BUT NOT LIMITED TO, THE IMPLIED WARRANTIES OF
MERCHANTABILITY AND FITNESS FOR A PARTICULAR
PURPOSE ARE DISCLAIMED. IN NO EVENT SHALL THE
AUTHOR BE LIABLE FOR ANY DIRECT, INDIRECT, INCIDENTAL,
SPECIAL, EXEMPLARY, OR CONSEQUENTIAL DAMAGES
(INCLUDING, BUT NOT LIMITED TO, PROCUREMENT OF
SUBSTITUTE GOODS OR SERVICES; LOSS OF USE, DATA, OR
PROFITS; OR BUSINESS INTERRUPTION) HOWEVER CAUSED
AND ON ANY THEORY OF LIABILITY, WHETHER IN CONTRACT,
STRICT LIABILITY, OR TORT (INCLUDING NEGLIGENCE OR
OTHERWISE) ARISING IN ANY WAY OUT OF THE USE OF THIS
SOFTWARE, EVEN IF ADVISED OF THE POSSIBILITY OF
SUCH DAMAGE.
The following statements refer to those portions of the software
copyrighted by Marvell International Ltd. Copyright © Marvell
International Ltd. All rights reserved.
DISCLAIMER. THIS SOFTWARE IS PROVIDED BY THE
COPYRIGHT HOLDERS AND CONTRIBUTORS “AS IS” AND ANY
EXPRESS OR IMPLIED WARRANTIES, INCLUDING, BUT NOT
LIMITED TO, THE IMPLIED WARRANTIES OF MERCHANTABILITY
AND FITNESS FOR A PARTICULAR PURPOSE ARE
DISCLAIMED. IN NO EVENT SHALL THE COPYRIGHT OWNER
OR CONTRIBUTORS BE LIABLE FOR ANY DIRECT, INDIRECT,
INCIDENTAL, SPECIAL, EXEMPLARY, OR CONSEQUENTIAL
DAMAGES (INCLUDING, BUT NOT LIMITED TO, PROCUREMENT
OF SUBSTITUTE GOODS OR SERVICES; LOSS OF USE, DATA,
OR PROFITS; OR BUSINESS INTERRUPTION) HOWEVER
CAUSED AND ON ANY THEORY OF LIABILITY, WHETHER
IN CONTRACT, STRICT LIABILITY, OR TORT (INCLUDING
NEGLIGENCE OR OTHERWISE) ARISING IN ANY WAY OUT
OF THE USE OF THIS SOFTWARE, EVEN IF ADVISED OF THE
POSSIBILITY OF SUCH DAMAGE.
25
Page 26

For accessories in the U.S.A., you can visit our website at www.whirlpool.com or call us at 1-800-253-1301.
Replacement Parts
■ Turntable
■ Turntable support and rollers
■ Turntable hub
■ Cooking rack
■ Grease filter
■ Charcoal filter
■ Cooktop light bulb
■ Cavity light bulb
ACCESSORIES
Provided Accessories
■ Convection rack
■ Rectangular rack
■ Steamer vessel
Cleaning Supplies
■ Heavy-duty Degreaser
■ affresh
■ affresh
■ affresh
®
Kitchen Appliance Cleaner
®
Stainless Steel Cleaner
®
Stainless Steel Wipes
26
Page 27
ATTACH YOUR RECEIPT HERE. PROOF OF PURCHASE IS REQUIRED
TO OBTAIN WARRANTY SERVICE.
WHIRLPOOL®
MAJOR APPLIANCE
LIMITED WARRANTY
Please have the following information available when you call the
Customer eXperience Center:
■ Name, address and telephone number
■ Model number and serial number
■ A clear, detailed description of the problem
■ Proof of purchase including dealer or retailer name and address
IF YOU NEED SERVICE:
1. Before contacting us to arrange service, please determine whether your product requires repair. Some
questions can be addressed without service. Please take a few minutes to review the Troubleshooting or
Problem Solver section of the Use and Care Guide, scan the QR code on the right to access additional
resources, or visit www.whirlpool.com/product_help.
2. All warranty service is provided exclusively by our authorized Whirlpool Service Providers. In the U.S. and
Canada, direct all requests for warranty service to:
Whirlpool Customer eXperience Center
In the U.S.A., call 1-800-253-1301. In Canada, call 1-800-807-6777.
If outside the 50 United States or Canada, contact your authorized Whirlpool dealer to determine whether another warranty applies.
www.whirlpool.com/product_help
ONE YEAR LIMITED WARRANTY
WHAT IS COVERED WHAT IS NOT COVERED
For one year from the date of purchase,
when this major appliance is installed,
operated and maintained according to
instructions attached to or furnished
with the product, Whirlpool Corporation
or Whirlpool Canada LP (hereafter
“Whirlpool”) will pay for Factory
Specified Replacement Parts and repair
labor to correct defects in materials or
workmanship that existed when this
major appliance was purchased, or at
its sole discretion replace the product.
In the event of product replacement,
your appliance will be warranted for
the remaining term of the original unit’s
warranty period.
YOUR SOLE AND EXCLUSIVE
REMEDY UNDER THIS LIMITED
WARRANTY SHALL BE PRODUCT
REPAIR AS PROVIDED HEREIN.
Service must be provided by a
Whirlpool designated service company.
This limited warranty is valid only in
the United States or Canada and
applies only when the major appliance
is used in the country in which it was
purchased. This limited warranty is
effective from the date of original
consumer purchase. Proof of original
purchase date is required to obtain
service under this limited warranty.
IMPLIED WARRANTIES, INCLUDING ANY IMPLIED WARRANTY OF MERCHANTABILITY OR IMPLIED WARRANTY OF FITNESS FOR A
PARTICULAR PURPOSE, ARE LIMITED TO ONE YEAR OR THE SHORTEST PERIOD ALLOWED BY LAW. Some states and provinces do not allow
limitations on the duration of implied warranties of merchantability or fitness, so this limitation may not apply to you. This warranty gives you specific
legal rights, and you also may have other rights that vary from state to state or province to province.
Whirlpool makes no representations about the quality, durability, or need for service or repair of this major appliance other than the representations
contained in this warranty. If you want a longer or more comprehensive warranty than the limited warranty that comes with this major appliance, you
should ask Whirlpool or your retailer about buying an extended warranty.
LIMITATION OF REMEDIES; EXCLUSION OF INCIDENTAL AND CONSEQUENTIAL DAMAGES
YOUR SOLE AND EXCLUSIVE REMEDY UNDER THIS LIMITED WARRANTY SHALL BE PRODUCT REPAIR AS PROVIDED HEREIN. WHIRLPOOL
SHALL NOT BE LIABLE FOR INCIDENTAL OR CONSEQUENTIAL DAMAGES. Some states and provinces do not allow the exclusion or limitation of
incidental or consequential damages, so these limitations and exclusions may not apply to you. This warranty gives you specific legal rights, and you
also may have other rights that vary from state to state or province to province.
1. Commercial, non-residential, multiple-family use, or use inconsistent with published user, operator or
installation instructions.
2. In-home instruction on how to use your product.
3. Service to correct improper product maintenance or installation, installation not in accordance with
electrical or plumbing codes or correction of household electrical or plumbing (i.e. house wiring, fuses
or water inlet hoses).
4. Consumable parts (i.e. light bulbs, batteries, air or water filters, preservation solutions, etc.).
5. Defects or damage caused by the use of non-genuine Whirlpool parts or accessories.
6. Conversion of products from natural gas or L.P. gas.
7. Damage from accident, misuse, abuse, fire, floods, acts of God or use with products not approved by
Whirlpool.
8. Repairs to parts or systems to correct product damage or defects caused by unauthorized service,
alteration or modification of the appliance.
9. Cosmetic damage including scratches, dents, chips, and other damage to the appliance finishes
unless such damage results from defects in materials and workmanship and is reported to Whirlpool
within 30 days.
10. Discoloration, rust or oxidation of surfaces resulting from caustic or corrosive environments including
but not limited to high salt concentrations, high moisture or humidity or exposure to chemicals.
11. Food or medicine loss due to product failure.
12. Pick-up or delivery. This product is intended for in-home repair.
13. Travel or transportation expenses for service in remote locations where an authorized Whirlpool
servicer is not available.
14. Removal or reinstallation of inaccessible appliances or built-in fixtures (i.e. trim, decorative panels,
flooring, cabinetry, islands, countertops, drywall, etc.) that interfere with servicing, removal or
replacement of the product.
15. Service or parts for appliances with original model/serial numbers removed, altered or not easily
determined.
The cost of repair or replacement under these excluded circumstances shall be borne by
the customer.
DISCLAIMER OF IMPLIED WARRANTIES
DISCLAIMER OF REPRESENTATIONS OUTSIDE OF WARRANTY
11/14
27
Page 28

W11037870A
®
/™ ©2017 Whirlpool. All rights reserved.
03/17
 Loading...