

Whirlpool WME1664 A DFCXAQUA INSTRUCTION FOR USE
6
UTILISATION AND MAINTENANCE OF THE
WATER DISPENSER AND FILTER
Water dispenser
First use
The first time you use the water dispenser or after a long period left not used wash the tank and the filter
with water.
The water dispenser provides fresh, filtered water, without the need of opening the refrigerator door. This
will reduce the number of times the door is opened, thus also reducing energy consumption of the
product.
Fitting and replacing the active carbon filter
The water filter should be removed from the foil bag (found in the crisper drawer. Follow the instructions
provided with the filter.
Important: If the filter is left dry for an extended period of time, its performance may be reduced.
Immerse the filter in water for a few seconds to reinstate optimum performance.
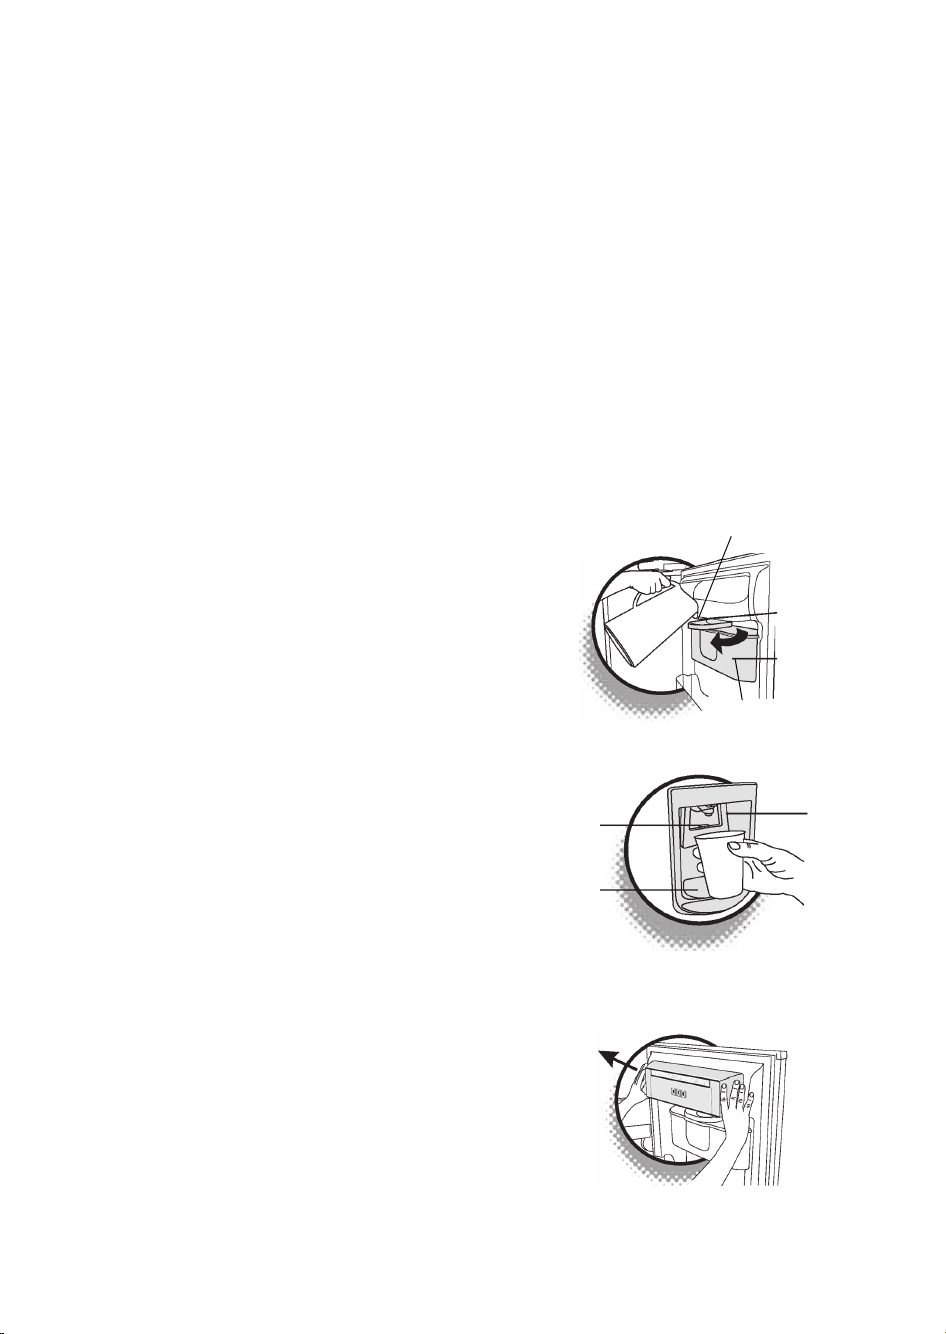
Water tank (fig. 1)
The water tank is made of antibacterial material. This prevents
and reduces the proliferation of bacteria.
An internal container, with an active carbon filtered ensures
water filtration.
To fill the tank: rotate the water inlet towards you and fill with
water, using a jug or other suitable container. Once the tank is
full, close the water inlet by moving it back to its original
position.
Always use drinking water only: any other liquid may
impair product performance.
Obtaining filtered water (fig. 2)
After filling the tank, the water may not be immediately
available. This is because the filtering process may require a
few minutes (depending on the amount of water in the tank).
To dispense water: with the refrigerator door closed, press the
water dispenser tab with the glass.
If for safety reason water delivery must be prevented, simply
press the stop at the back of the tab. To release water delivery
move the stop back to its original position.It is recommended
to drink the supplied water from the dispenser in 6 hours.
Cleaning the water tank (fig. 3-4-5-6-7-8-9)
Periodically clean the water tank with running water. Twice a
year it is recommended to keep healthy the unit using specific
products based on diluted chlorine that not modify the material
properties and rinse with current water.
To clean the tank, proceed as follows:
- (fig. 3) release and remove the top door tray
To fill the tank, rotate the cap in the
direction of the arrow
Ta nk
Fig. 1
Stop
Activation
device
Fig. 2
Wat er
drip tray
Fig. 3

7
- (fig. 4) release and remove the water tank by lifting it and
pulling towards you. Place the tank on a flat surface, remove
and wash the top cover.
Note: the tank must be refitted in its position as soon
as possible, to prevent the refrigerator from
overheating.
- (fig. 5a -5b) remove the internal container and the filter, and
wash them separately. When washing the filter, only use
clean water (no detergent or sharp tools). To clean the disk
filter, first remove it from the container.
- fig. 6) for a more thorough cleaning, remove the valve cap
(the fitting connecting the tank to the refrigerator) by rotating
it anticlockwise. Clean the cap. Important: do not pull on the
valve body (fig. 7).
- (fig. 8) replace the valve cap by rotating clockwise.
- (fig. 9) fit the tank back in place by placing it between the
lateral guides of the door and pushing it in position, ensuring
that the valve is back in its original seat. Check that the there
are no gaps between the rubber seal of the tank and the door.
Suggested exchange of filter for a standard consumption
usage of:
3,0 l/day 4 months
4,5 l/day 3 months
6,0 l/day 2 months
Filter replacement is not covered by product warranty. To order more water filter cartridges, please
contact your after-sales service.
Fig. 4
Fig. 5
Fig. 6
Fig. 7
Fig. 8
Fig. 9
 Loading...