

Whirlpool WGD9550W User Manual
TimeSmart’”
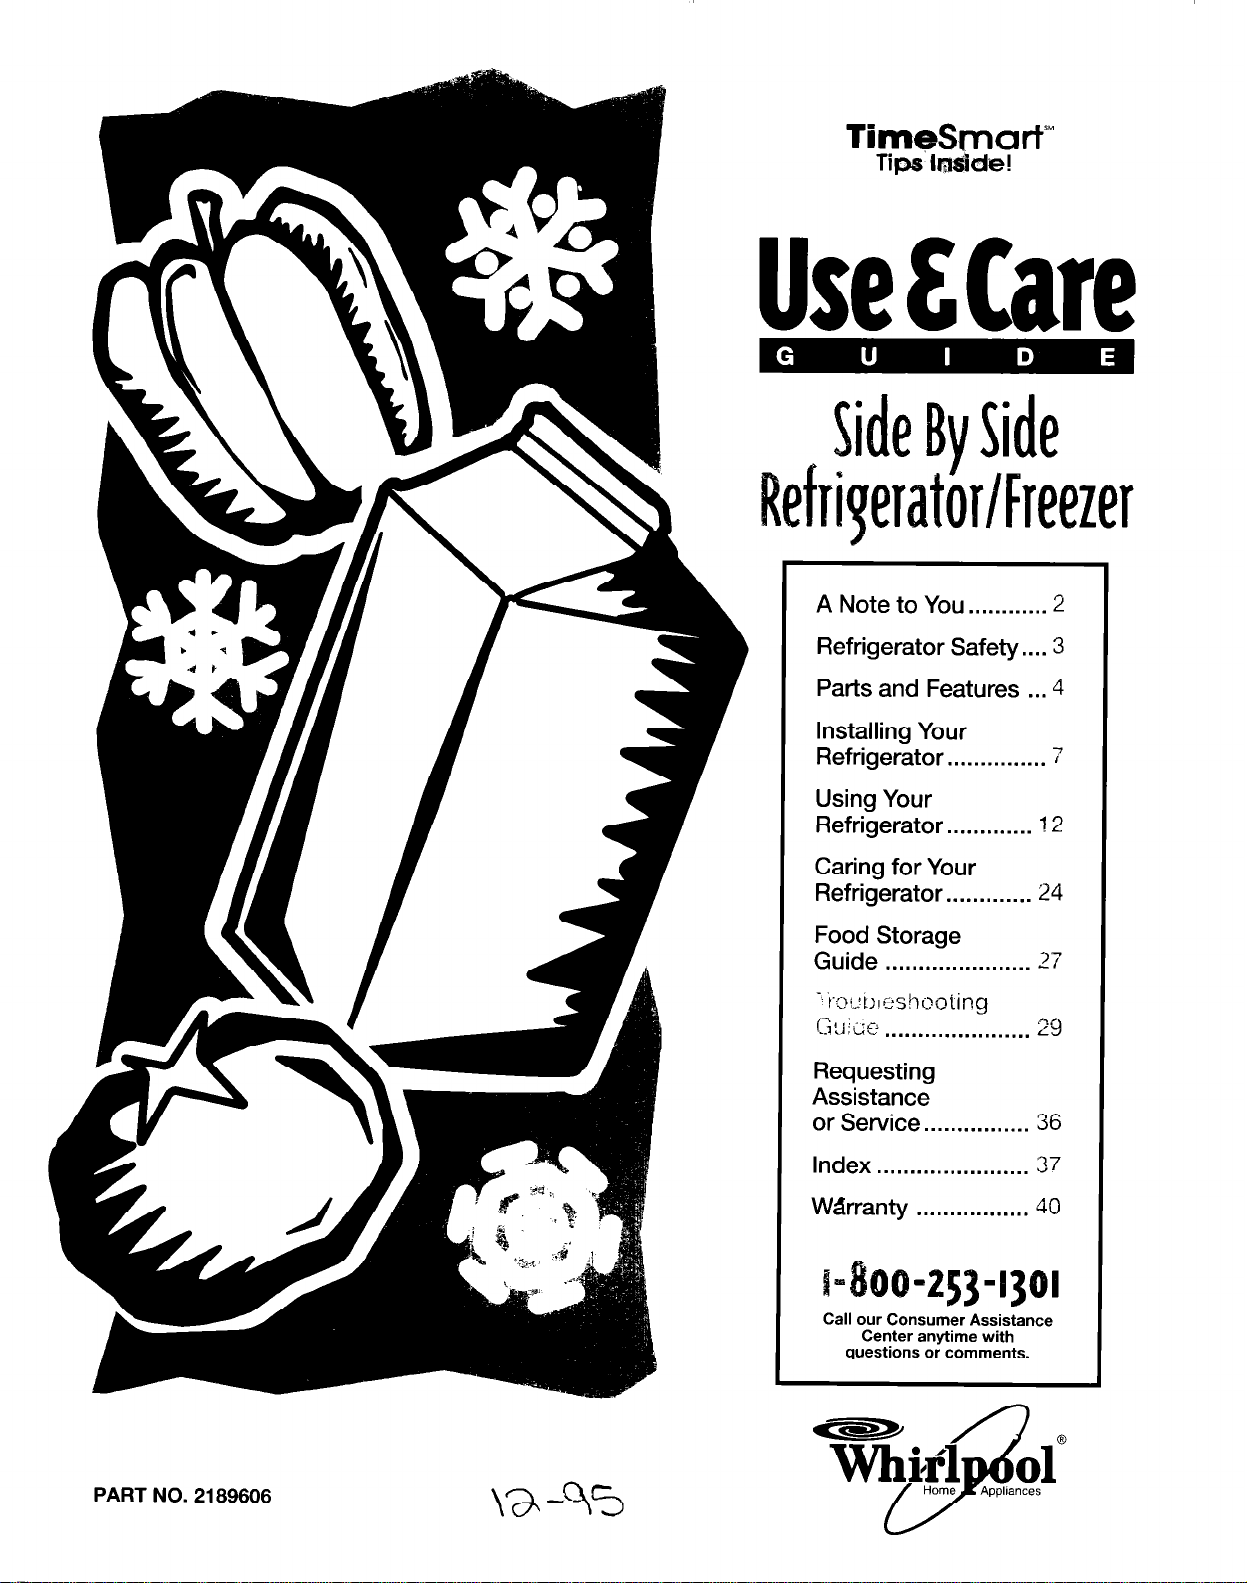
Use&Care
Tips‘ I
A Note to You . . . . . . . . . . . . 2
Refrigerator Safety.... 3
de!
Parts and Features . . .
Installing Your
Refrigerator . . . . . . . . . . . . . . . 7
Using Your
Refrigerator . . . . . . . . . . . . . 12
Caring for Your
Refrigerator . . . . . . . . . . . . . 24
Food Storage
Guide . . . . . . . . . . . . . . . . . . . . . . 27
4
‘-tof,;t;~~shoo[ing
C-T, 4!J I il; p
Requesting
Assistance
or Service . . . . . . . . . . . . . . . . 36
Index . . . . . . . . . . . . . . . . . . . . . . .
W&ranty . . . . . . . . . . . . . . . . . 40
. . . . . . . . . . . . . . . . . . . . . .
RT
id
37
PART NO. 2189606
\a45
I=
Call our Consumer Assistance
questions or comments.
-2534301
Center anytime with
ANOIETOYOU
Thank you for buying a
Because your life is getting busier and more complicated, WHIRLPOOL refrigerators are easy to use, save
time, and help you manage your home better. To
ensure that you enjoy years of trouble-free operation,
we developed this Use and Care Guide. It is full of
valuable information about how to operate and
maintain your appliance properly and safely. Please
read it carefully.
Also, please complete and mall the Product
Registration Card provided with your appliance.
The card helps us notify you about any new
information for your appliance.
WHlRiPOOt ~~ applkme.
record your model’s information
Write down the following information about your refrigerator to better help you obtain assistance or service if
you ever need it. You will need to know your complete model number and serial number. You can find this
information on the model and serial number plate.
Dealer name Model number
Address Serial number
Purchase date
Phone number
(See “Parts and Features” on pages 4-6 for model and serial number label location.)
Call us toll-free anytime with txmments trr questions
at our Consumer Assistance
I
Center:
Your safety is important to us.
This guide contains safety statements under a
warning symbol. This symbol alerts you
to such dangers as fire, electrical shock,
burns, and personal injury. Please pay
special attention to this symbol and
follow any instructions given.
IMPORTANTSAFETY INSTRUCTIONS
0 Read all instructions before using the refrigerator.
0 Child entrapment and suffocation are not
problems of the past. Junked or abandoned
refrigerators are still dangerous . . . even if they The fumes can create a fire hazard or explosion.
will “just sit in the garage a few days.”
If you are getting rid of your old refrigerator, do
it safely. Please read the enclosed safety booklet
from the Association of Home Appliance Manufacturers. Help prevent accidents.
0 Never allow children to operate, play with, or crawl
inside the refrigerator.
0 Never clean refrigerator parts with flammable fluids.
0 FOR YOUR SAFE-W 0
DO NOT STORE OR USE GASOLINE OR OTHER
FLAMMABLE VAPORS AND LIQUIDS IN THE
VICINITY OF THIS OR ANY OTHER APPLIANCE.
THE FUMES CAN CREATE A FIRE HAZARD OR
EXPLOSION.
- SAVE THESE INSTRUCTIONS -
Help us help you
Please:
0 Install and level the refrigerator on a floor that will
hold the weight and in an area suitable for its size
and use.
0 Do not install the refrigerator near an oven, radiator,
or other heat source.
0 Do not use the refrigerator in an area where the
temperature will fall below 55°F (13°C).
0 Keep the refrigerator out of the weather.
0 Connect the refrigerator only to the proper kind of
outlet, with the correct electrical supply and grounding. (See “Electrical Requirements” on page 7 or
refer to the Electrical Requirements and Grounding
Instructions Sheet in your Literature Package.)
0 Do not load the refrigerator with food before it has
time to get properly cool. (See “Setting the controls”
on page 12.)
0 Use the refrigerator only for the uses described in
this manual.
0 Properly maintain the refrigerator.
0 Be sure the refrigerator is not used by anyone unable
to operate it properly.
3

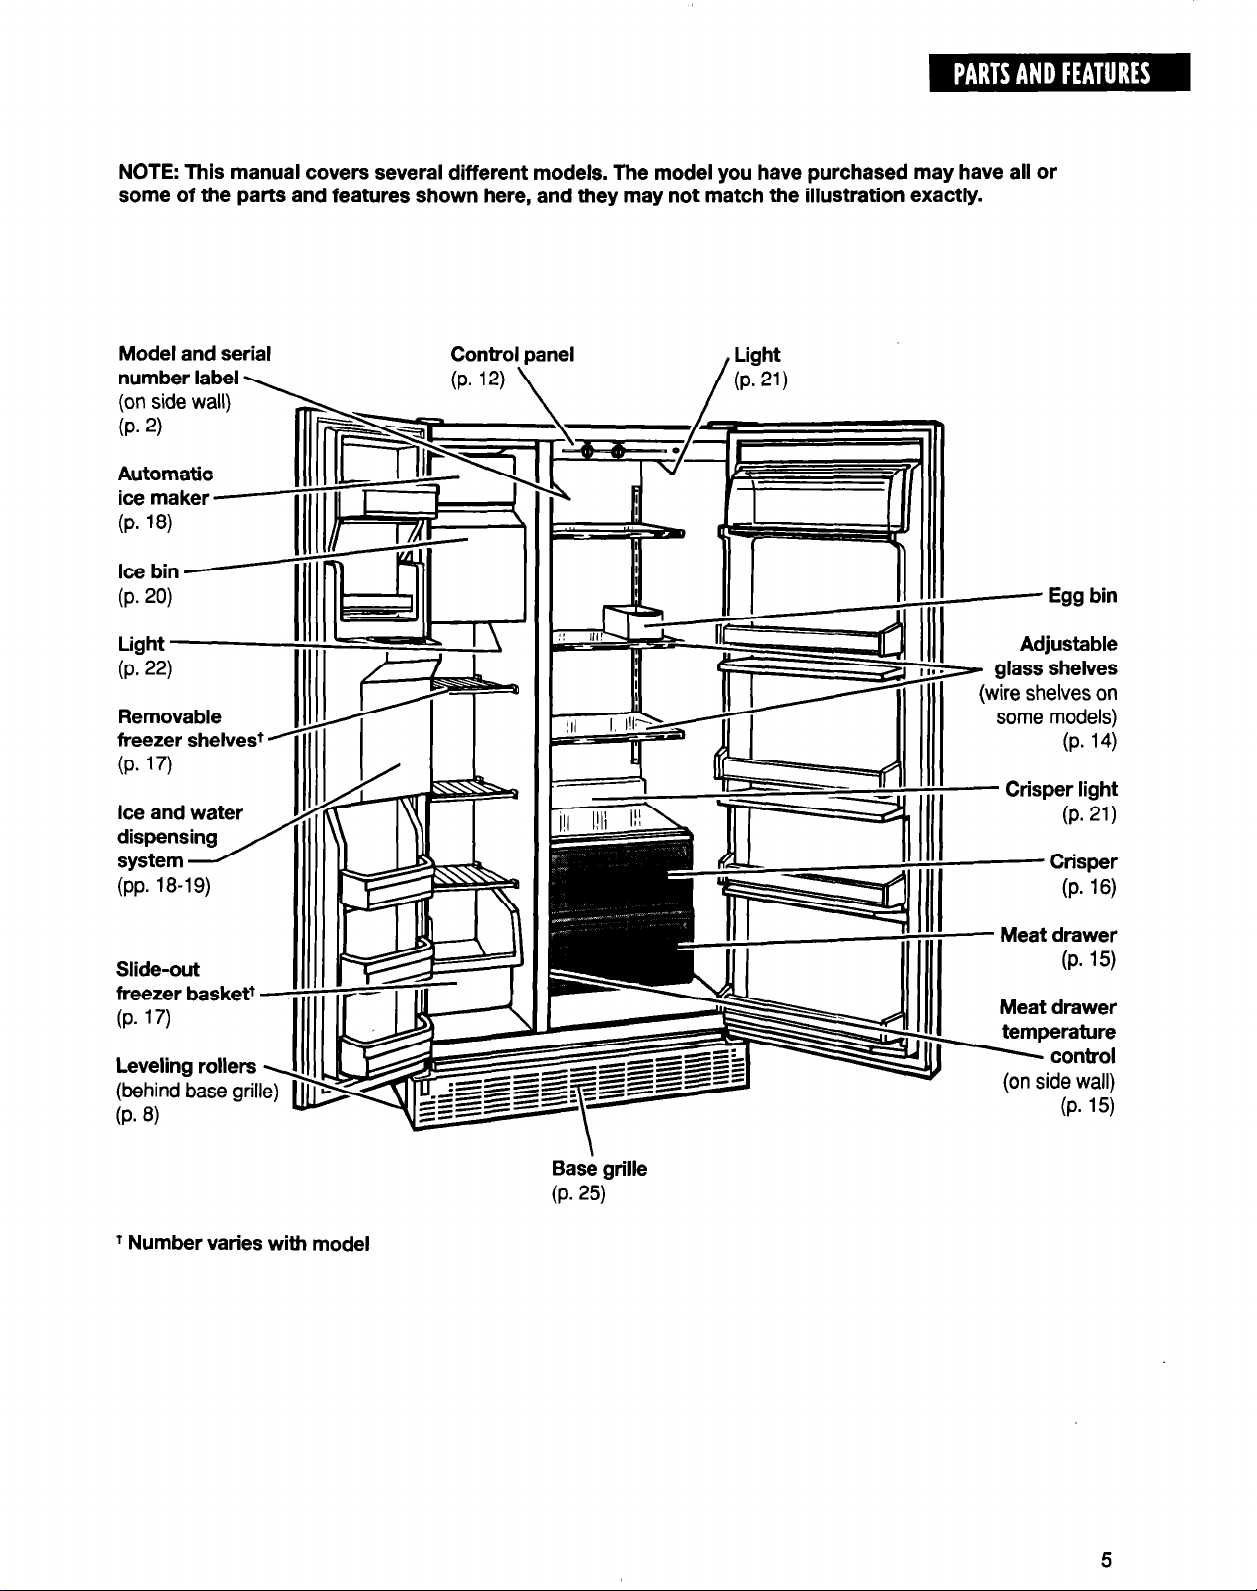
This section contains illustrations of your refrigerator. Use them to become familiar with the
location of all the parts and features. Page references are included for your convenience.
NOTE: This manual covers several different models. The model you have purchased may have all or
some of the parts and features shown here, and they may not match the illustration exactly.
Model and !
number labc
(on side wall,
(P. 2)
Freezer ligh
(P. 22)
Ice cube tra
Adjustable
freezer she1
(P. 17)
Freezer bin
(P. 17)
serial
E!lJ
1
Control panel
(P- 12)
\
Yr- II
Light
(P. 21)
I
in
Utility
Leveling rol
(behind base
(P. 8)
Base grille
(P. 25)
WITH QUESTIONS OR COMMENTS
NOTE: This manual covers several different models. The model you have purchased may have all or
some of the parts and features shown here, and they may not match the illustration exactly.
Model and serial
Removable
freezer shelves+
Ice and water
Control panel
freezer basket?
. . ,
Leveling rollers
.altE
;;l$d base gnlle) b
t Number varies with model
(P- 15)
Meat drawer
Base grille
(P. 25)
5
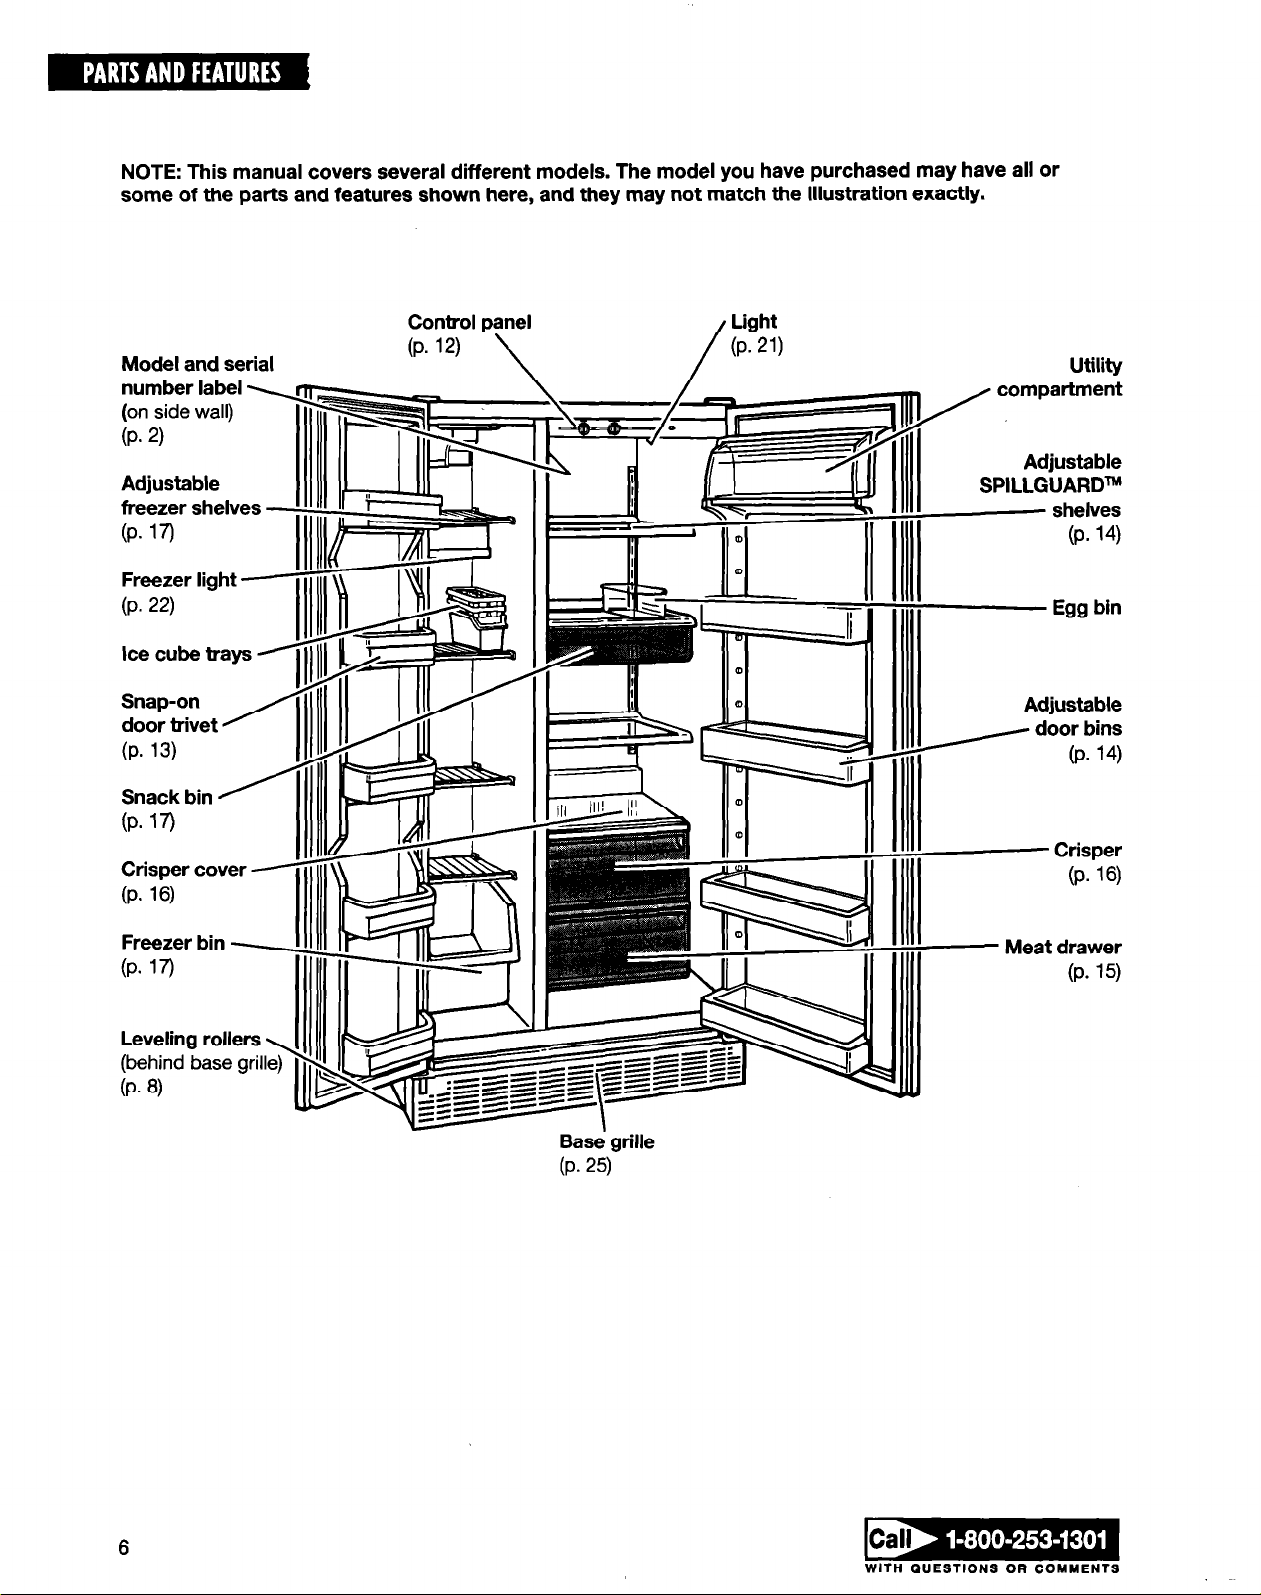
NOTE: This manual covers several different models. The model you have purchased may have all or
some of the parts and features shown here, and they may not match the illustration exactly.
Model and serial
number label
(on side wall)
(Pa 2)
Adjustable
freezer shelw
(Pm 17)
Freezer light -
(P. 22)
Ice cube tray!
Snap-on
door trivet ’
(Pa 13)
Snack bin 0
(Pa 17)
Crisper cover
(P- 16)
Control panel
(P. 12)
\ /
Light
(P. 21)
Utility
Adjustable
Freezer bin -
(Pa 17)
Leveling roller
(behind base g
(P. 6)
Base grille
(P. 25)
6
WITH QUESTIONS OR COMMENTS
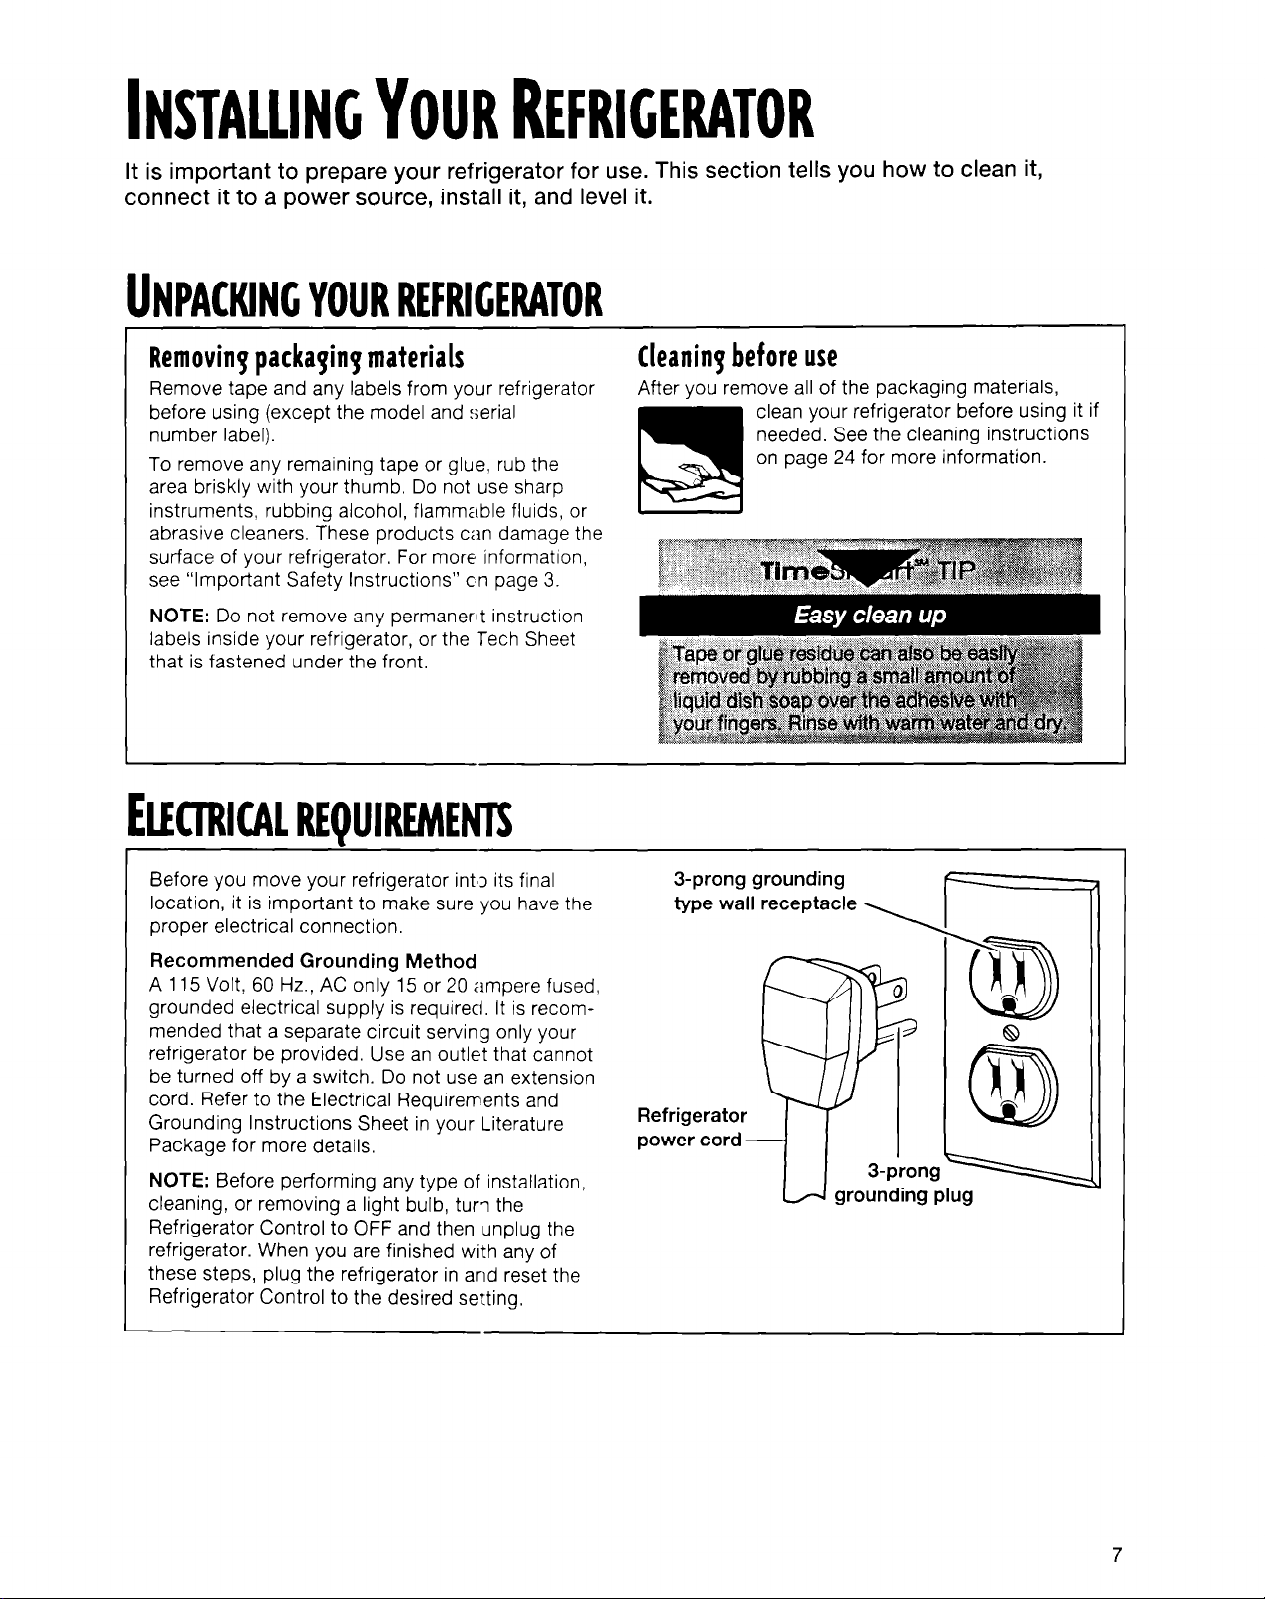
INSTALLING YOUR REFRIGERATOR
It is important to prepare your refrigerator for use. This section tells you how to clean it,
connect it to a power source, install it, and level it.
UNPACKING
YOUR REFRIGERATOR
Removing packaging materials
Remove tape and any labels from your refrigerator
before using (except the model and serial
number label).
To remove any remaining tape or glue, rub the
area briskly with your thumb. Do not use sharp
instruments, rubbinq alcohol, flammable fluids, or
abrasive cleaners. These products can damage the
surface of your refrigerator. For more information,
see “Important Safety Instructions” cn page 3.
NOTE: Do not remove any permanerit instruction
labels inside your refrigerator, or the Tech Sheet
that is tastened under the front.
EIHTRKA~
Before you move your refrigerator int#I its final
location, it is important to make sure you have the
proper electrical connection.
REQUIREMENTS
cleaning before use
After you remove all of the packaging materials,
clean your refrigerator before using it if
needed. See the cleaning instructions
on page 24 for more information.
3-prong grounding
type wall receptacle
Recommended Grounding Method
A 115 Volt, 60 Hz., AC only 15 or 20 ampere fused,
grounded electrical supply is required. It is recommended that a separate circuit serving only your
refrigerator be provided. Use an outlet that cannot
be turned off by a switch. Do not use an extension
cord. Refer to the Electrical Requirements and
Grounding Instructions Sheet in your Literature
Package for more details.
NOTE: Before performing any type of installation,
cleaning, or removing a light bulb, turi the
Refrigerator Control to OFF and then unplug the
refrigerator. When you are finished with any of
these steps, plug the refrigerator in and reset the
Refrigerator Control to the desired se:ting.
7
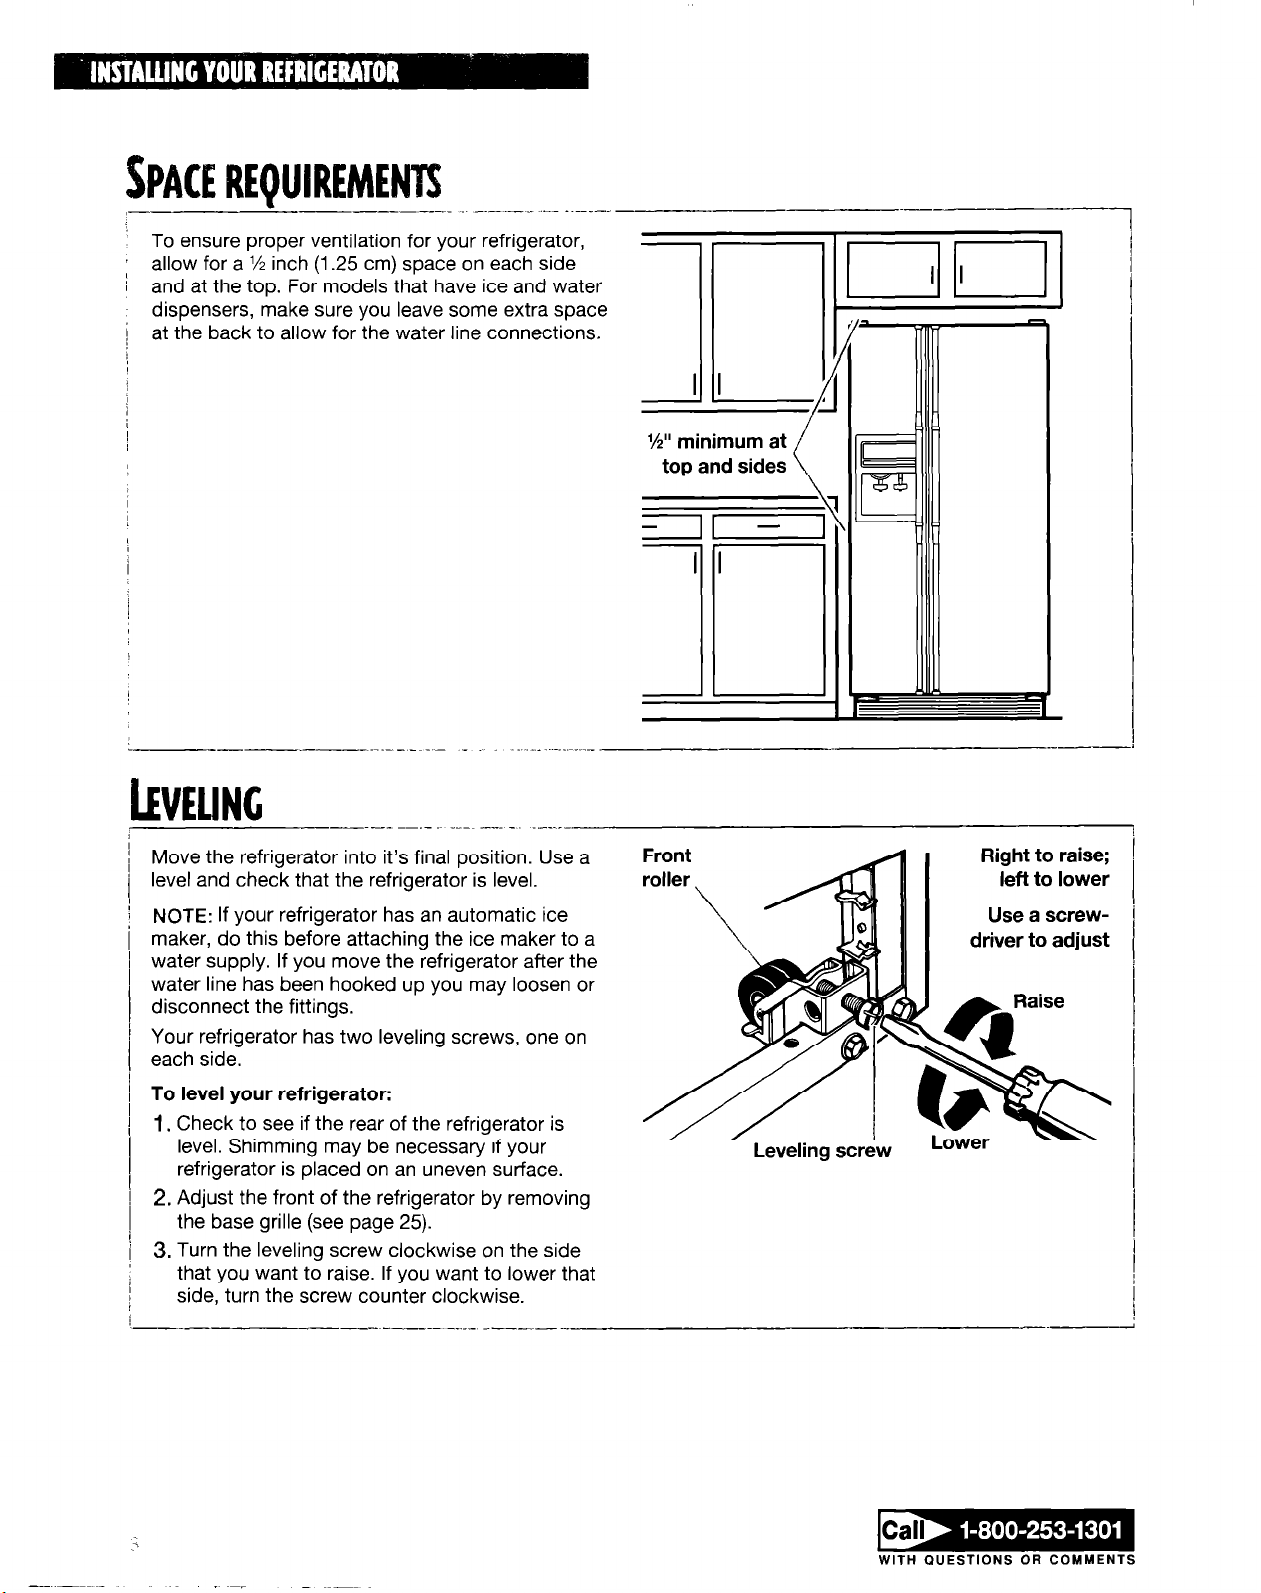
SPACE REQUIREMENTS
To ensure proper ventilation for your refrigerator,
’ I allow for a M inch (1.25 cm) space on each side
; and at the top. For models that have ice and water
dispensers, make sure you leave some extra space
) at the back to allow for the water line connections.
I
--__
_._.__ .^._ ..--_-.
Y2” minimum at
1
/
_-____ I ___. -.-_ _--
LEVELING
Move the refrigerator into it’s final position. Use a
level and check that the refrigerator is level.
NOTE: If your refrigerator has an automatic ice
maker, do this before attaching the ice maker to a
water supply. If you move the refrigerator after the
water line has been hooked up you may loosen or
disconnect the fittings.
Your refrigerator has two leveling screws, one on
each side.
To level your refrigerator:
1.
Check to see if the rear of the refrigerator is
level. Shimming may be necessary if your
refrigerator is placed on an uneven surface.
2. Adjust the front of the refrigerator by removing
the base grille (see page 25).
3.
Turn the leveling screw clockwise on the side
that you want to raise. If you want to lower that
,
side, turn the screw counter clockwise.
I-
--.-
--_.-^ -_-. _--~ _--. -. .,__.._ -.__
--_I ----- -_._- ----...
_ _....... _._
-
g
I
-
I
-
I
_
Leveling screw
~-
---
left to lower
Use a screw-
driver to adjust
_/
WITH QUESTIONS OR COMMENTS
hlNC (CONT.1
4. Make sure that the doors are even. If the freezer
door is lower than the fresh food door, turn the
leveling screw on the freezer side clockwise. If
the fresh food door is lower, turn the leveling
screw on that side clockwise.
5. Replace the base grille.
- ---
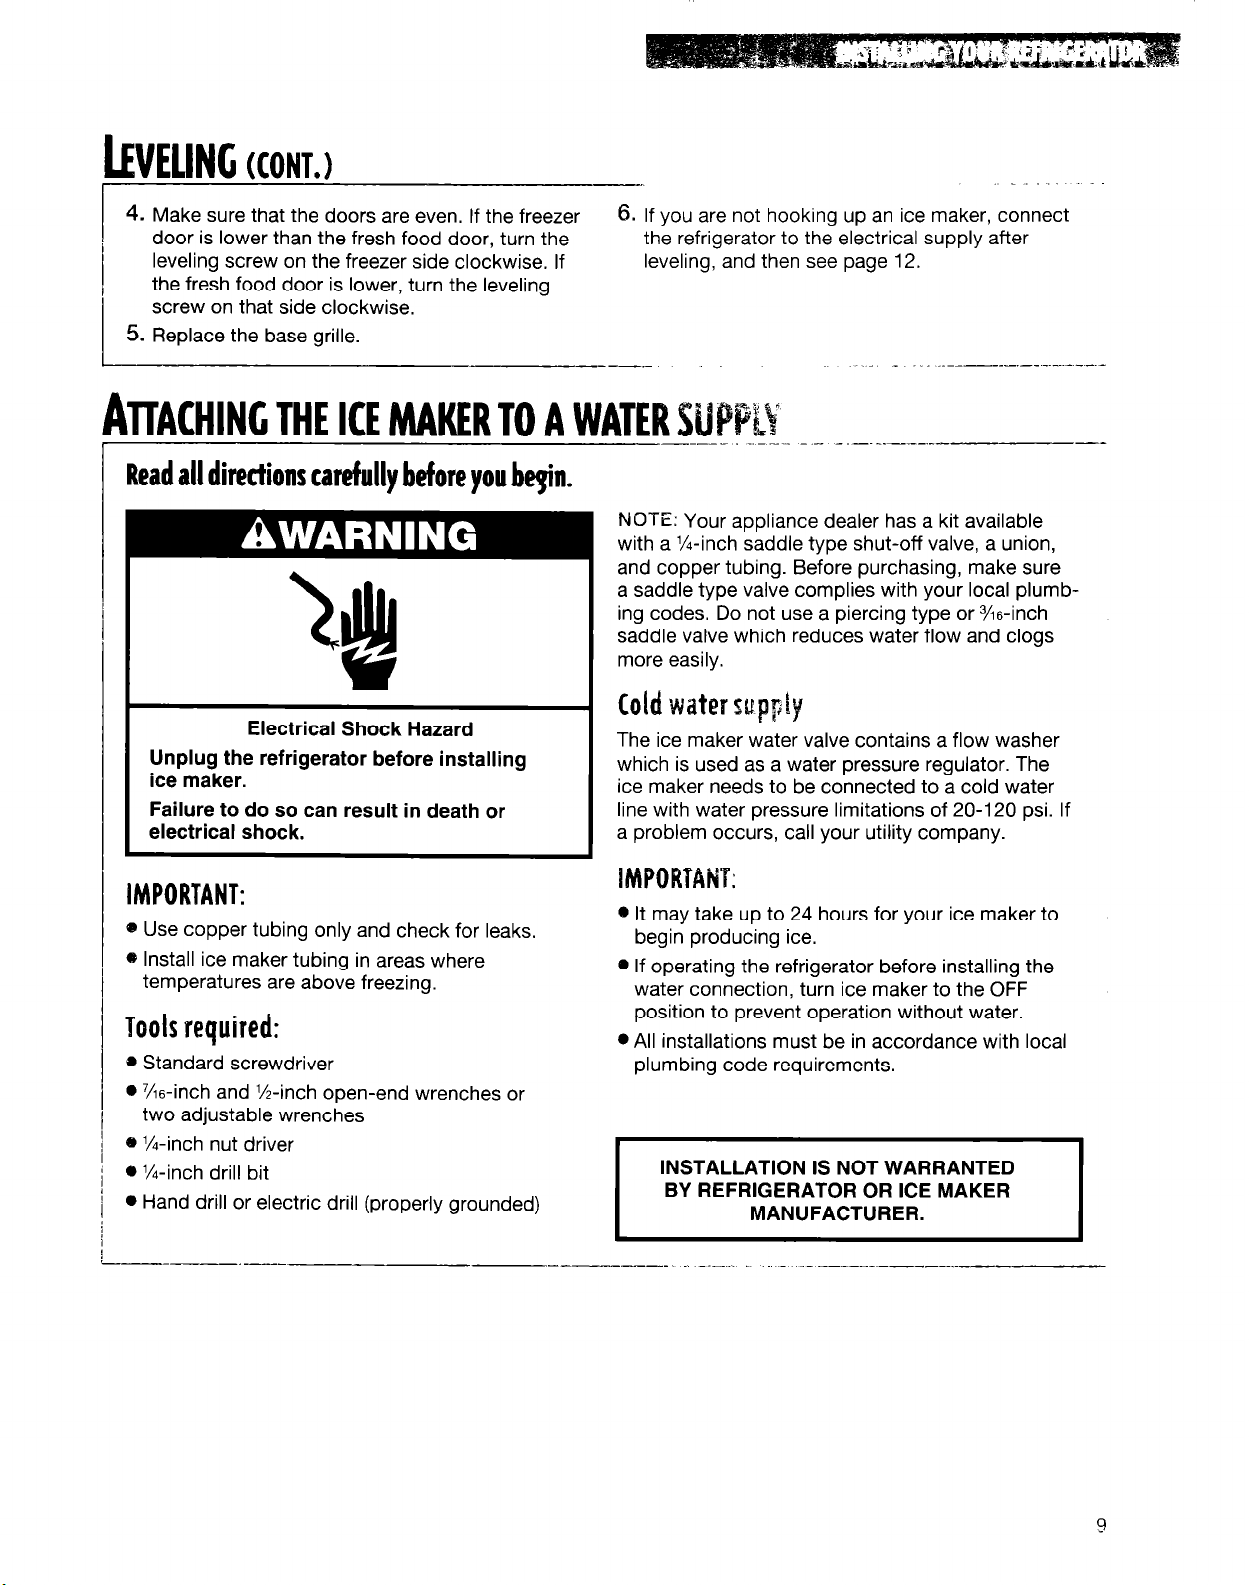
ATTACHING
THE ICE MAKER TO A WATER
Read all directions carefully before you be@.
Electrical Shock Hazard
Unplug the refrigerator before installing
ice maker.
Failure to do so can result in death or
electrical shock.
6. If you are not hooking up an ice maker, connect
the refrigerator to the electrical supply after
leveling, and then see page 12.
NOTE: Your appliance dealer has a kit available
with a %-inch saddle type shut-off valve, a union,
and copper tubing. Before purchasing, make sure
a saddle type valve complies with your local plumbing codes. Do not use a piercing type or G-inch
saddle valve which reduces water flow and clogs
more easily.
Cold water supply
The ice maker water valve contains a flow washer
which is used as a water pressure regulator. The
ice maker needs to be connected to a cold water
line with water pressure limitations of 20-120 psi. If
a problem occurs, call your utility company.
IMPORTANT:
e Use copper tubing only and check for leaks.
@ Install ice maker tubing in areas where
temperatures are above freezing.
Tools required:
0 Standard screwdriver
0 7/16-inch and M-inch open-end wrenches or
two adjustable wrenches
8 X-inch nut driver
l
N-inch drill bit
l
Hand drill or electric drill (properly grounded)
1MPORTANT:
* It may take up to 24 hours for your ice maker to
begin producing ice.
@ If operating the refrigerator before installing the
water connection, turn ice maker to the OFF
position to prevent operation without water.
l
All installations must be in accordance with local
plumbing code requirements.
INSTALLATION IS NOT WARRANTED
BY REFRIGERATOR OR ICE MAKER
MANUFACTURER.

ATCACHING
ME ICE MAKERTO A WAITR SUPPLY
Connecting to water line
1.
Find a M-inch to 1 %-inch vertical COLD water
pipe near the refrigerator.
NOTE: Horizontal pipe will work, but the following precaution must be taken: Drill on the top
side of the pipe, not the bottom. This will help
keep water away from the drill. This also keeps
normal sediment from collecting in the valve.
2. Measure from connection on rear of refrigerator
to water pipe. Add 7 feet (2.1 m) to allow for
moving refrigerator for cleaning. This is the
length of %-inch O.D. copper tubing you will
need for the job (length from connection to
water pipe PLUS 7 feet [2.1 ml). Be sure both
ends of copper tubing are cut square.
3. Turn OFF main water supply. Turn ON nearest
faucet long enough to clear line of water.
4. Using a grounded drill, drill a %-inch hole on the
cold water pipe you have selected.
5. Fasten shut-off valve to cold water pipe with pipe
clamp. Be sure outlet end is solidly in the X-inch
drilled hole in the water pipe and that washer is
under the pipe clamp. Tighten packing nut.
Tighten the pipe clamp screws carefully and
evenly so washer makes a watertight seal. Do not
over-tighten or you may crush the copper tubing,
especially if soft (coiled) copper tubing is used.
Now you are ready to connect the copper tubing.
6.
Slip compression sleeve and compression nut on
copper tubing as shown in diagram. Insert end of
tubing into outlet end squarely as far as it will go.
Screw compression nut onto outlet end with
adjustable wrench. Do not overtighten. Turn ON
main water supply and flush out tubing until water
is clear. Turn OFF shut-off valve on the water
pipe. Coil copper tubing.
(CONT.)
Vertical cold
water pipe
X-inch O.D.
n
sion sleeve nut
TO REFRIGERATOR +
* Controls water supply
10
WITH OUESTIONS OR COMMENTS
ATTACHING
--~~~~--~~~- B-w- WR -s------ - -
ME ICE MAKER TO A WATER SUPPLY
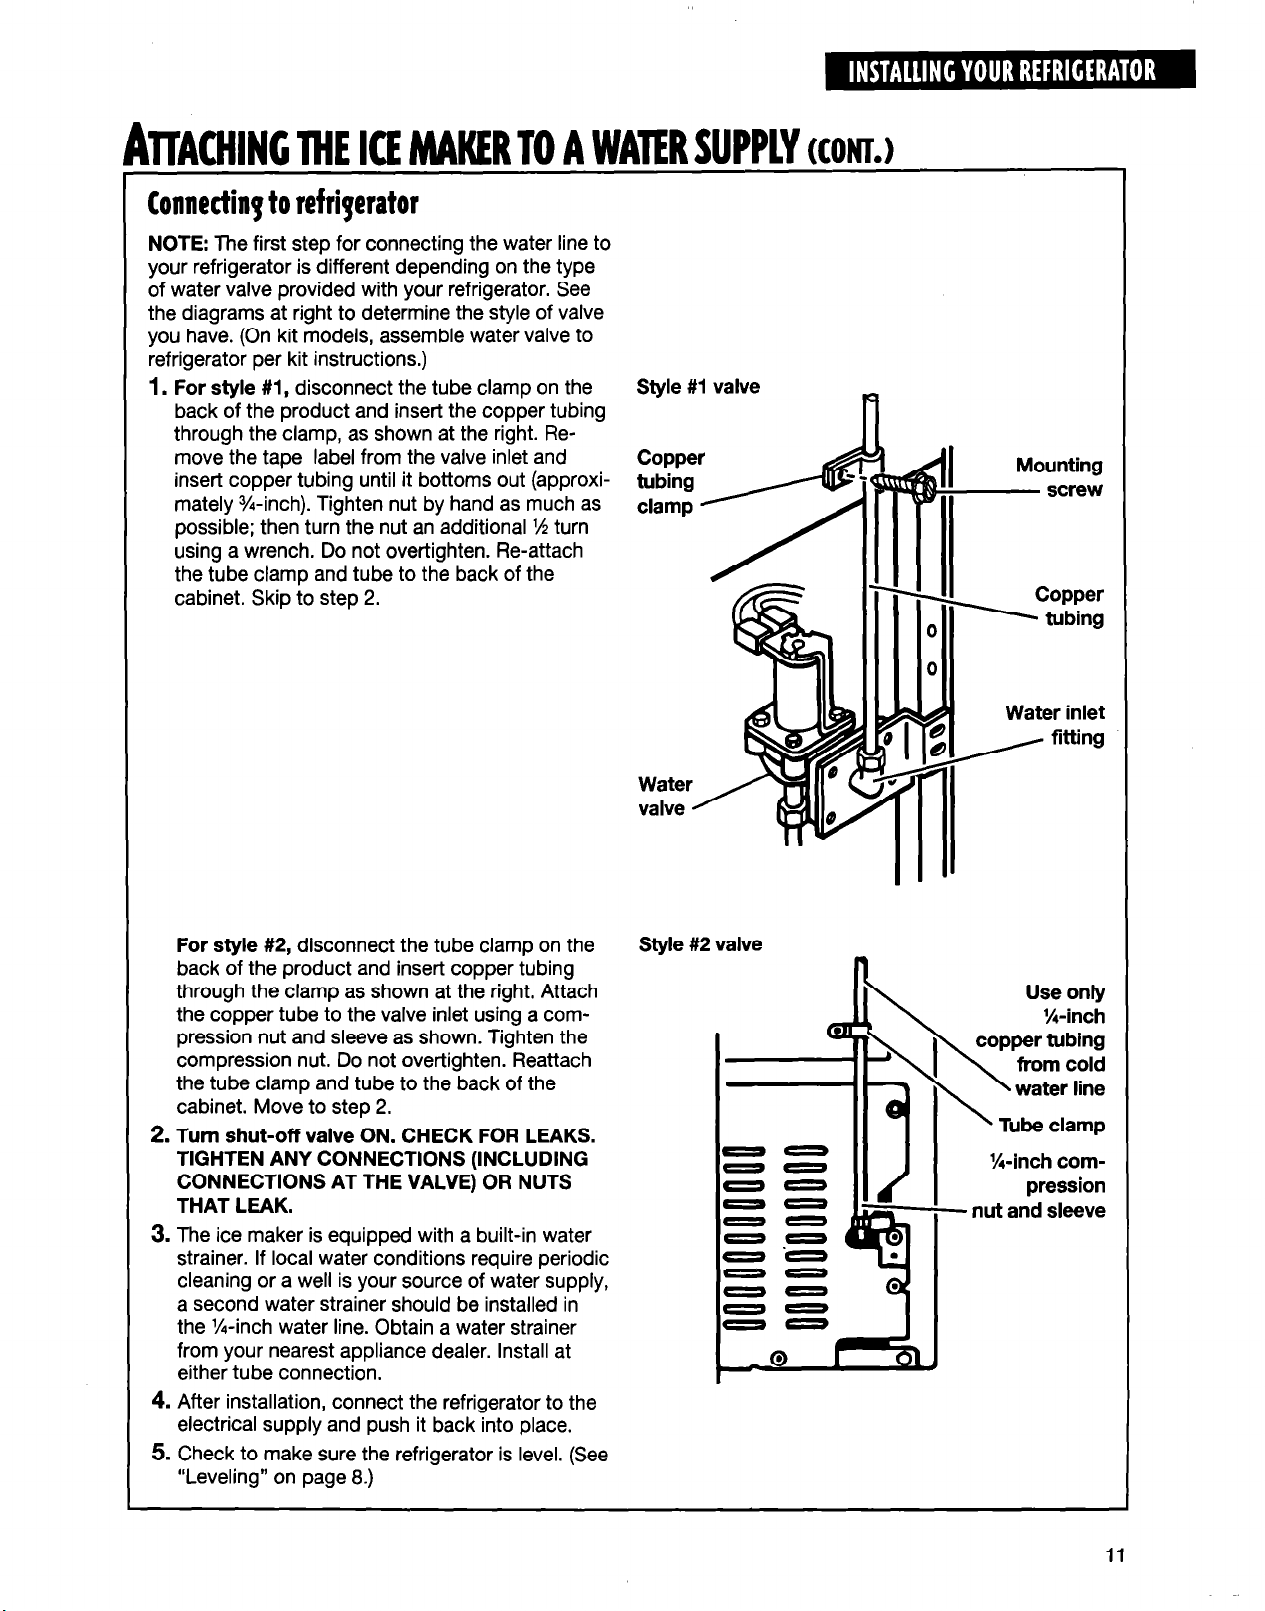
Connecting to refrigerator
NOTE: The first step for connecting the water line to
your refrigerator is different depending on the type
of water valve provided with your refrigerator. See
the diagrams at right to determine the style of valve
you have. (On kit models, assemble water valve to
refrigerator per kit instructions.)
1.
For style #l, disconnect the tube clamp on the
back of the product and insert the copper tubing
through the clamp, as shown at the right. Remove the tape label from the valve inlet and
insert copper tubing until it bottoms out (approximately %-inch). Tighten nut by hand as much as
possible; then turn the nut an additional l/i turn
using a wrench. Do not overtighten. Re-attach
the tube clamp and tube to the back of the
cabinet. Skip to step 2.
__ --- ---- - --- - -- __- -.---
Style #I valve
KONL)
Water inlet
For style #2, disconnect the tube clamp on the
back of the product and insert copper tubing
through the clamp as shown at the right. Attach
the copper tube to the valve inlet using a compression nut and sleeve as shown. Tighten the
compression nut. Do not overtighten. Reattach
the tube clamp and tube to the back of the
cabinet. Move to step 2.
2. Turn shut-off valve ON. CHECK FOR LEAKS.
TIGHTEN ANY CONNECTIONS (INCLUDING
CONNECTIONS AT THE VALVE) OR NUTS
THAT LEAK.
3. The ice maker is equipped with a built-in water
strainer. If local water conditions require periodic
cleaning or a well is your source of water supply,
a second water strainer should be installed in
the %-inch water line. Obtain a water strainer
from your nearest appliance dealer. Install at
either tube connection.
4. After installation, connect the refrigerator to the
electrical supply and push it back into place.
5. Check to make sure the refrigerator is level. (See
“Leveling” on page 8.)
Style #2 valve
00
00
00
00
00
00
-0
00
00
00
Use only
X-inch
copper tubing
from cold
\
\
- nut and sleeve
water line
Tube clamp
X-inch com-
pression
USING YOUR REFRICERAT~R
To obtain the best possible results from your refrigerator, it is iImportant that you operate it
properly. This section tells you how to set the controls, remove and adjust the features in your
refrigerator, and how to save energy.
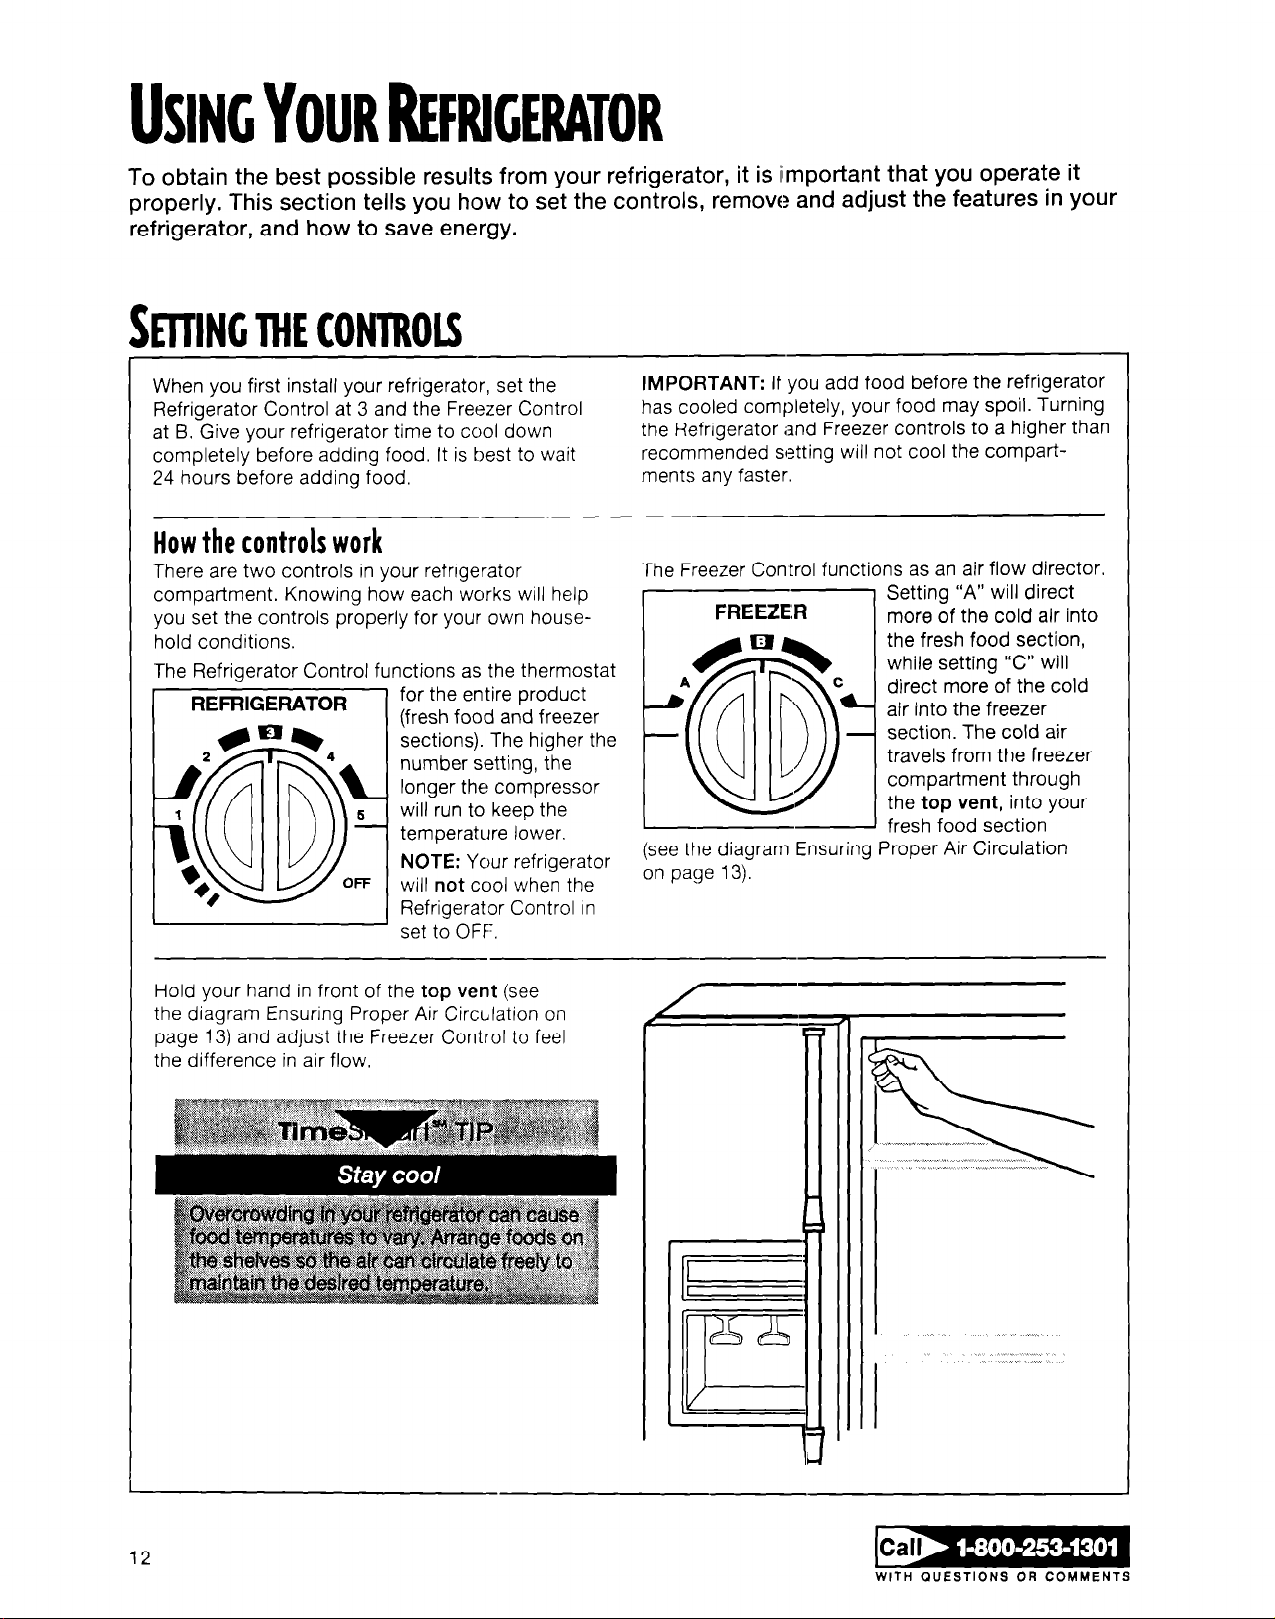
SEITING THE CONTROLS
When you first install your refrigerator, set the
Refrigerator Control at 3 and the Freezer Control
at B. Give your refrigerator time to cool down
completely before adding food. It is best to wait
24 hours before adding food.
How the controls work
There are two controls in your refngerator
compartment. Knowing how each works will help
you set the controls properly for your own household conditions.
The Refrigerator Control functions as the thermostat
REFRIGERATOR
for the entire product
(fresh food and freezer
sections). The higher the
number setting, the
longer the compressor
will run to keep the
temperature lower.
NOTE: Your refrigerator
will
not
cool when the
Refrigerator Control In
set to OFF.
IMPORTANT: If you add food before the refrigerator
has cooled completely, your food may spoil. Turning
the Refrigerator and Freezer controls to a higher than
recommended setting will not cool the compartments any faster.
The Freezer Control functions as an air flow director
Setting “A” will direct
more
of the cold
the fresh food section,
while setting “C” will
direct more of the cold
air into the freezer
section. The cold air
travels from the freezer
compartment through
the
top vent,
fresh food section
(see the diagram Ensuring Proper Air Circulation
on pacge 13).
air into
into your
Hold your hand in front of the
the diagram Ensuring Proper Air Circulation on
page 13) and adjust the Freezer Control to feel
the difference in air flow.
12
top vent (see
a
t-
II___
“”
r]
I-4
WITH QUESTIONS OR COMMENTS
 Loading...